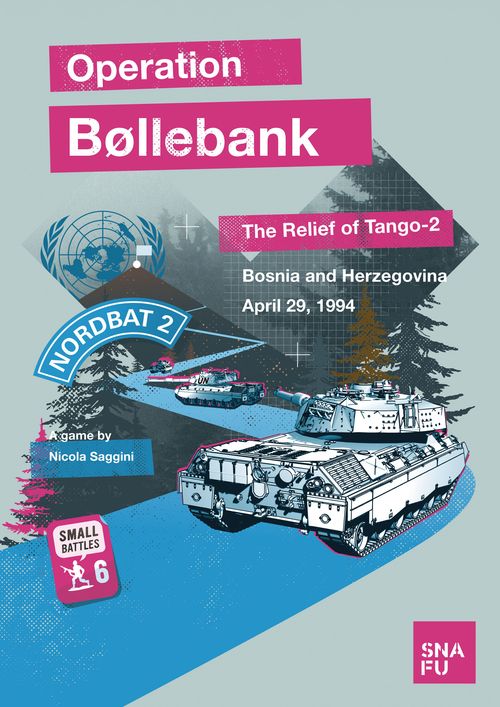
Operation Bøllebank
Operation Bøllebank Rulebook
Table of Contents
Table of Contents
1 Introduction
Space and time scale
The notion of "game turn" equivalent to real time is somewhat abstracted. The entire episode took less than a couple of hours, with the heaviest part of the engagement lasting 30 minutes or so. Two tanks reached Tango 2 after an hour from the start of the fighting. It therefore can be concluded that each game turn represents between 3 to 5 minutes.
The map depicts the area east of the Tuzla airbase in Bosnia, approximately 10 by 7 kilometers. Being a point to point map, distance between the different points varies.
Unit scale
UN units in the game represent the individual vehicles that took part in the mission. Bosnian Serb forces are abstracted in terms of their effective firepower divided by different weapon types. No Bosnian Serb units will be put on map but several tracks will give a measure of the increasing pressure on the UN forces. Sources indicate that at least a battalion-sized force was on the hill of Vis that night.
Game overview
The game uses a number of novel concepts in order to represent the fog and friction of war in an ambush situation.
At the beginning of each turn, the player determines the available orders for their units by drawing two chits from a pool and pairing them on a matrix: the intersection of the row and column yields the result. The player then decides whether or not to issue the order and to which unit(s) and whether to draw a new pair of chits. Regardless of this decision, the drawn chits are systematically assigned to the respective enemy weapons tracks, in a cycle where the more orders are needed the stronger the enemy becomes.
After this first phase, friendly units will carry out movement and/or fire according to the orders received in this or in previous turns, with an eye to the damage on the vehicles and the status of the Rules of Engagement.
Lastly, based on the strength of each enemy weapon track and according to the reciprocal fields of fire of each position on the map, the enemy has a chance to inflict damage on the player's vehicles. This will in turn affect the Rules of Engagement status.
Victory can take various forms, depending on the tactical situation and the player's choices.
2 Components
A complete game of Operation Bøllebank includes:
- A mapboard (A2)
- A sheet of 20 counters 26x13 mm
- A sheet of 80 counters 13x13 mm
- An Order Matrix sheet (A4)
- 3 Player Aid sheets (A4)
- These rules
The players will need at least one six-sided die (three would be ideal), as well as four opaque containers (or cloth bags) from which to draw the game chits.
2.1 The board
The map represents the area in Bosnia between Tuzla and the border with Serbia, with the main road between Saraci and Kalesija as the main axis of movement, and the mountain of Vis (dubbed Sukkertoppen, "sugar loaf", by the Danish troops due to its shape) as the stronghold of Bosnian Serb forces. The map board also contains various tracks and tables.
2.1.1 The map
The map is a topographic rendering of the area and of the various locations where the night action between the Bosnian Serb Army (BSA) and UN forces took place. The main part of the map shows the road from Saraci to Kalesija, then the mountain road from Kalesija to Tango 2. There is a small road to the observation post called OP N that starts from the Saraci-Kalesija road.
The UN positions are the points along those roads used to regulate fire and movement of the UN forces. All UN vehicles move from one position to an adjacent position toward their destination (see 6.2). One position is adjacent to another if they are directly linked by a light blue road.
On top of (or pointing to) UN positions, orange symbols and lozenges represent BSA fields of fire and indicate, together with corresponding icons, the type of attack that the Bosnian Serb forces can initiate against UN forces; an orange striped background around the position indicates a BSA indirect fire zone.
UN positions
UN vehicles are moved and stacked at different UN positions. These positions are represented in the map by light blue symbols. These can be of three types:
- Contact Point: In land warfare, a point on the terrain, easily identifiable, where two or more units are required to make contact. In the game, contact points (CP) are the destination of "Move" orders and they have an unlimited stacking capacity. Noted by a letter in a light blue box, there are 4 contact point positions: Saraci, Kalesija, OP N, and Tango 2.
- Checkpoint position: A predetermined point on the surface used as means of controlling movement, a registration target for fire adjustment, or a reference for location. In the game, checkpoints (CKP) are in-route intermediate positions used to regulate UN Vehicles movement. They have a stacking limited to one vehicle, except SK-1 and SK-2 on the road between Saraci and Kalesija, which have a stacking limit of three vehicles. Checkpoint positions are noted by a letter/number code indicating the road and a number indicating the position.
- Overwatch position: An overwatch position (OW) is a prepared position from which UN vehicles can fire at BSA forces. OWs can be the destination of "Move" orders and stacking is limited to one vehicle. OWs are noted by a letter/number code indicating the town and a number indicating the position. Each town has three overwatch positions; they are considered adjacent to their town CP as well as adjacent between them.
(Map illustration caption: UN Positions - 1. Saraci contact point; 2. SK-4 checkpoint (exposed); 3. S-2 overwatch with line of sight to Center.)
UN vehicles will always occupy one of these positions; place the counters in any convenient manner for you.
Some positions allow the UN tanks to fire at BSA weapons. A small array of symbols, either printed on the map or in the associated enemy action marker, determine the possible targets, if any, for UN units firing from these positions. A solid background symbol allows direct fire (automatic hit) while a hollow background symbol means indirect fire (misses on a 6). See 6.3.
In addition to that, OW positions may have an additional restriction on the line of sight as noted by a letter L, C or R. See also 6.3.
BSA fields of fire
BSA fields of fire are an abstract representation of the BSA direct fire capability against UN positions. These positions are called "exposed positions", denoted by an orange cross. For example, SK-2 is an exposed CKP, while SK-1 is not. UN vehicles in exposed positions can be fired upon by BSA weapons according to the BSA fields of fire pointing to them. BSA fields of fire are depicted by an orange lozenge with an arrow pointing the UN exposed position they threaten.
Example: A Q tank is in K-1 OW position. It can fire at enemy HMG, ATGM, Tanks (with an R on the counter) or Artillery. BSA field of fire shows that the UN tank will be the target of HMG (green), ATGM (white) and Tanks (black) if no other UN Vehicle occupies a position with a FP lower than 6.
UN vehicles in these UN exposed positions may be targeted by BSA weapons matching the color-coded symbols in the BSA field of fire lozenge.
Each field of fire has a "firing priority" (FP) number that determines enemy attack priority when multiple exposed positions are occupied by UN vehicles.
The three exposed UN positions before Kalesija (SK-2, SK-3 and SK-4), and the three after Kalesija (T2-1, T2-2 and T2-3) do not have predetermined fields of fire; enemy action markers will be instead drawn for them and placed on the lozenge at the moment the first UN vehicle enters them.
BSA indirect fire zone
All contact points except OP N can be targeted by Bosnian Serb indirect fire (artillery). A letter on the artillery counter indicates the target. Orange striped areas on the map are just a reminder of possible CPs that may be artillery targets.
It is worth remarking that if artillery targets Kalesija or Saraci, this includes their respective OW positions; all four positions (Saraci and its three OW or Kalesija and its three OW) are considered together as a single target regarding artillery targeting.
Vis / Sukkertoppen
This is the stronghold of the Bosnian Serb forces and cannot be reached by the UN vehicles. It is divided into three areas (Left, Center, and Right) corresponding to the OW positions in Saraci and Kalesija and an artillery position. These features are just for geographical interest, as the Bosnian Serb forces are not handled on the map, and are instead represented in a more abstract manner through the various enemy weapons tracks.
2.1.2 Enemy weapons tracks
There are four enemy weapons tracks on the map: tanks, HMG, ATGM, and artillery. The position of the last counter placed on each track marks the hit probability that the Bosnian Serb forces will have when engaging the player's UN units.
Each track represents one type of weapon, differentiated by color and symbol. They are further classified in direct-fire weapons and indirect-fire weapons.
Direct Fire Weapons
- Heavy machine guns, HMG (culminating in a 40 mm anti-aircraft gun): color-coded in green and with the triangle symbol.
- Anti-tank guided missiles, ATGM (AT-3 Sagger and AT-4 Spigot): color-coded in white and with the star symbol.
- Tanks (T-55): color-coded in black and with the circle symbol.
In each direct-fire weapon track the hit probability of the attacks carried out during the Enemy Reaction Phase is shown (see 7.0).
Indirect Fire Weapons
- Artillery (a variety of tubes up to 155 mm): color coded in orange. The letter indicates the target area (7.2).
Chits drawn during the Orders Phase (see 5.3) will use the same background color codes and symbols and will be placed on the corresponding tracks.
(Map illustration caption: Enemy weapons track: 1. Enemy tanks; 2. Enemy ATGM and HMG; 3. Enemy Artillery. Enemy weapons markers are placed here after orders are issued. The last marker placed in each track indicates the firing capabilities (To-Hit, and line of sight for direct fire weapons and target for artillery).)
2.1.3 Turn track
It is used to keep track of the passage of time during the game and to mark the deadline for the relief of Tango 2.
2.1.4 RoE track
The Rules of Engagement (RoE) track represents the perceived escalation of the risk to the UN troops after the attack by the BSA forces starts (see 5.2).
The track is divided into three sections, with an indication of the type of fire action allowed to the player:
- Hold fire (RoE from 1 to 7): UN fire is not possible.
- Til helvede med det ("To hell with that", RoE from 8 to 17): The player has the possibility of issuing "Fire" orders, but with a penalty to the victory conditions.
- Unrestricted fire (RoE from 18 to 24): The player can engage enemy forces without any penalty to the victory conditions, and can execute air strikes as well.
Some assets and capabilities are also received according to the current position of the marker in the RoE track. For example, when the RoE reaches 8, the player receives an extra action for vehicle VL2.
The RoE track will track current RoE level and record the RoE level when the first "Fire" order is given.
2.2 Counters
There are two types of counters: units (also referred to as vehicles), representing the vehicles of the UN Task Force, and markers, for tracking or displaying other important game information, like the strength of the Bosnian Serb opposition (see the counter key in page 25).
2.2.1 Units
Units are tanks (Leopard 1 A5DK) and armored personnel carriers or APCs (PBV 302). Tanks are organized in two platoons and one squadron commander tank, plus the two APCs with callsigns QL3 and VL2.
Tanks have two sides: the plain side indicates the vehicle in a "Hold Fire" status; in this status it can have a "Move" or "Tow" order or just be halted. The other side, with a dashed band, shows the vehicle when a "Fire" order has been issued to it.
APCs show two sides but they are not significant, as they have no firing capability at the ranges involved. Their position on the map can give the player some advantages (see 5.5).
All vehicles show their callsign, their platoon (if needed, and also identified by the letter colors) and L, 1, or 2 for the platoon leader and tanks 1 and 2, respectively. Only the callsign and the platoon adscription are used in game terms.
2.2.2 Markers
There are the following kind of markers:
- "Move/Tow" order markers to be issued to the UN units. There is a marker for each vehicle, identified by its callsign and matching the vehicle colors. Note that the "Fire" order has no marker, as it is recorded by flipping the tank to its "Fire" side.
- Enemy weapon markers that represent the strength of the Bosnian Serb opposition. Each marker is characterized by its background color and symbol that matches those on the respective tracks on the mapboard. Direct fire weapons have a letter code (L, C, R) which identifies the area on Vis visible from the respective OW positions in Saraci and Kalesija (left, center, right). Artillery markers have a letter indicating the targeted area plus information about possible effects of fire. These markers are also used on the Order Matrix to determine available orders (see 5.3).
- Random unit damage markers to be added to the enemy weapon pool to assess the damage caused by artillery fire on UN units.
- Turn and Tango-2 deadline markers, which are placed on the turn track and will help tracking the current turn and the deadline turn that precludes one of the victory conditions.
- "RoE" and fire status ("Hold Fire"/"Fire at Will") markers are placed on the RoE track and record the current level of engagement, the current fire status and the turn the fire status changed.
- Damage markers to track light (yellow) and heavy (black) damage to UN vehicles, plus tank commander casualties. The number of damage counters is not a limit on the game; if you run out of counters, just use any other way of marking damage.
- Six enemy action markers for the random fields of fire which are drawn as soon as a UN vehicle enters one of the six exposed positions on the map that do not have predetermined fields of fire.
- Three battalion HQ special ability markers, double-sided.
- A tank status marker which shows the readiness to fire of the Bosnian Serb tanks (T-55). One side shows an "H" (hot barrel) and the other side has a diagonal blue band and a "C" (cold barrel).
- A special artillery weapon marker that is placed on the artillery track during setup.
- A civilian vehicle event marker, showing a VW logo and representing a Volkswagen Golf of the 90's.
2.3 Player aids
There are four player aids, which contain useful information to play the game.
-
PAS1, also known as the Order Matrix, which is used by the player to:
- Determine which order becomes available with each chit draw.
- Track which "Move/Tow" orders have been assigned and which are still available.
This sheet contains also a table with the summary of effects and restrictions for each order.
-
PAS2 contains the sequence of play, a summary of the RoE effects, and a guide for the victory conditions.
-
PAS3 contains the terrain chart and the radio networks effects summary.
-
Lastly, PAS4 contains all the information pertaining to the damage allocation process.
3 Prepare for play
Lay the map in front of you and set the Order Matrix sheet and player aids sheets next to the map. Now:
- Prepare four opaque containers. Place the civilian vehicle event marker and all enemy weapon markers in one of them (four tanks, fourteen ATGMs, fourteen HMGs and six artillery markers), this is the "enemy weapon pool". Put the three enemy action markers with FP 1, 2 and 3 in the second container, and enemy action markers with FP 7, 8 and 9 in the third. These are the "enemy actions 1-2-3 pool" (and "7-8-9"). Leave one container empty for now, it will be the "artillery pool".
- Place all "Move" order markers on their corresponding placeholders of the Order Matrix sheet.
- Place the three Battalion HQ special abilities to be used in the game and the Airstrike marker on their corresponding boxes in the RoE Track.
- Set the Light and Heavy Damage, Stun and the Random Unit markers within reach, ideally divided by type.
- Place all nine UN units in Saraci with their "Hold Fire" side up.
- Place the "Saraci" special artillery marker (the orange "long" one) on the first space "Setup" of the corresponding track, "Saraci" side up.
- Place the tank status marker in its corresponding box beside the "Enemy tanks" track, with the "C" (cold) side up.
- Place the "RoE" marker and the fire status marker, "Hold Fire" side up, in the first space on the RoE track.
- Place the game turn marker in the first space on the turn track and the "T2 deadline" marker on the turn 18 space.
You are now ready to play.
(Setup illustration containers: Enemy weapon pool; Enemy actions FP 1,2,3; Enemy actions FP 7,8,9; Artillery pool (empty). The setup illustrations show the Saraci artillery marker printed "+1 ROE, + Random Unit", and the Tank Status box on the map printed "Hot / Cold ... 2. If status = Hot: Roll 2d6, Hit on 7".)
4 Sequence of play
Each turn of Operation Bøllebank is composed of these phases:
- Orders phase (chapter 5)
- Execution phase (chapter 6)
- Enemy reaction phase (chapter 7)
- End phase (chapter 8)
At the end of each turn, the victory conditions are evaluated. If they are met, the player may choose to end the game and declare victory or continue playing to achieve better conditions. If no victory is achieved by the end of turn 20, the game ends without a clear result. The player has the option to keep playing until turn 40 to achieve victory or suffer defeat.
The game consists of up to twenty identical turns. Some game effects may reduce the number of available turns for some victory conditions. Each turn is composed of the following phases:
- Orders Phase, in which the available player's orders for the turn are determined. a. Draw two chits from the enemy weapons pool and pair them on the Order Matrix. b. Determine the available order. c. Issue that order, if desired. d. Transfer the two chits to the enemy weapons tracks. e. Return to step a, if desired and allowed.
- Execution Phase, in which the player's orders issued in the Orders Phase or in previous turns are carried out in the following order. a. Execute Airstrike order b. Execute Move orders c. Execute Fire orders d. Remove Stun markers
- Enemy Reaction Phase, in which enemy forces react according to their weapons and readiness status and in the following order. a. Determine tank status b. Execute tank fire c. Execute ATGM fire d. Execute HMG fire e. Execute artillery fire
- End Phase, in which the board is prepared for the next turn and victory is assessed. a. Victory Assessment b. Flip Hull damage markers. c. Advance turn marker and check for new capabilities and fire status.
Once the End Phase is completed, the turn ends and the next turn begins.
The game ends immediately if a vehicle is destroyed, which is the only way the player can lose.
The game can also end during any Victory Assessment step if either an Operational or a Tactical victory can be declared. If the conditions for one type of victory are met, the player can either stop play and assess the type of diplomatic victory or continue playing to achieve another victory type or both. If no victory is secured by the end of turn 20, the game concludes without a clear result. For a comprehensive overview of the different victory types and their conditions, refer to Chapter 8.
In the following chapters, each game phase is explained in full detail.
5 Orders
In this phase, each available order is determined by drawing two chits from the Enemy Weapon pool and pairing them up on the Order Matrix. At that point, the order can be issued to the UN units if desired, and/or a new available order determined. This process is carried out as many times as desired, after which the phase is over.
It may also happen that among the chits pulled, there are Random Unit markers. In this case, each such marker will assign light damage to a UN vehicle (see 7.2).
VL2 is the vehicle of NORDBAT2's second-in-command and represents the player. There is no need to issue any orders for it to do anything. The player is free to decide what to do with this particular unit. Any other vehicle will act only on orders issued by VL2 and, as in any military organization, orders have to follow the chain of command via a healthy radio link.
In the Orders Phase, the available orders are determined by drawing chits from the Enemy Weapon pool and according to the Order Matrix on the Player Aid Sheet. The orders can then be issued to the UN units if desired and in accordance with the current Rules of Engagement. Barring certain conditions, this process can be repeated as many times as the player desires, before moving on to the Execution Phase.
5.1 Radio network and chain of command
The chain of command and the radio network for the mission are represented in the diagram (Radio Networks Diagram: the NORDBAT HQ Net comprises VL2, QL3 and QL1; Platoon 1 is AQ (leader), EA, FA; Platoon 2 is BQ (leader), FB, GB; VL2 links to QL3 and QL1, which link to the platoon vehicles) and works as follows:
- In order to give an order to a vehicle non stacked with VL2, a radio link must be established.
- A radio link always originates at VL2, links to QL1 or QL3 (for reception or relay), and then links to any other vehicle (for reception).
- a. If no vehicle in the radio link has radio damage, the order is automatically received. b. If one vehicle in the radio link has radio damage, the order is received only on a die roll result of 1-3 (modified by -1 if at least one vehicle without radio damage is at the same position of the vehicle with radio damage; and by an additional -1 if QL3 is at OP N CP without radio damage). c. If two or more vehicles in the radio link have radio damage, the order is only received on an unmodified die roll of 1-2.
In case of a platoon order, check the radio link individually for all vehicles in the platoon.
5.2 Rules of Engagement
The UN mandate for the forces deployed under its flag was updated in July 1993. In article 4 of "Force Commanders Policy Directive No. 13", it was stated that "the commander of the UN unit was authorized to order the opening of fire in direct response to shelling against his units."
At the same time, the training of DANSQN2 back home before deployment followed the previous version of the Directive, which stressed a much more detached attitude and did not consider how much the situation on the ground had deteriorated.
To represent this conundrum, the Rules of Engagement (RoE) track has three distinct sectors.
- The "Hold Fire" sector (RoE 1 to 7) negates any type of fire by the player's units: opening fire at this stage is simply not allowed, representing a clear violation of the RoE with huge repercussions in the UN General Assembly as well as in the Danish government. This violation may very well have led to the retreat of that nation's contingent (and trouble for the overall Nordbat commander - a Swede - as well).
- The "Til helvede med det" sector (RoE 8 to 17) is where the player is allowed to fire with their units, but things are not so clear-cut as to univocally determine that there has been no violation of the RoE (as it happened historically).
- The "Unrestricted" sector (RoE at 18 or more) allows the player to freely engage the Bosnian Serb forces and allows the player to attain a strategic victory. It is also a necessary condition to call an airstrike if no tanks have been damaged (see 5.3 and 6.1).
Key to the game is the moment in which the player will issue his first "Fire" order. Once the first order to fire has been given, place the fire status marker with the "Fire at Will" side up at the same point as the RoE when the first "Fire" order is given. From that point on, do not move the fire status marker anymore, but continue tracking RoE changes. The position of both markers has relevance to victory determination. See Section 8 and PAS 2 to see what events affect the RoE level and how.
5.3 Available orders
To determine the order that can be issued, the player sequentially draws two chits from the Enemy Weapons pool and allocates the first one to the corresponding box in the "First Chit" row of the Order Matrix and the second one to the corresponding box in the "Second Chit" row of the Order Matrix. Note that the order is important when both chits are of the same weapon type, because it will determine which one goes first on the corresponding weapon track.
By intersecting the lines on the Order Matrix corresponding to the drawn chits, the available order is determined. At this point, the player decides whether to assign that order to their units or not. Then, the player decides whether to draw two new chits for a new order or stop the process and move on to the next phase.
Important: If two chits of the same weapon type are drawn, the process stops for this turn after determining the available order and deciding whether to issue it or not. This also allows the player to refresh one of the spent Battalion HQ Special Abilities (see 5.5). Note that unless two chits of the same type are drawn, the player can continue drawing pairs of chits and issuing orders.
Regardless of the player's decision, after each pair of chits is drawn and the order is determined, the chits are immediately placed on the corresponding weapon track on the game board.
If a random unit damage chit is drawn from the Enemy Weapons pool (these chits may have been added due to artillery fire in previous turns), refer to 7.2.1 to determine the light damage inflicted on that unit. Leave the random unit damage marker aside for later use in future Artillery attacks. Continue drawing chits until you have two enemy weapon chits to use on the Order Matrix or one enemy weapon chit and the civilian vehicle event.
If the civilian vehicle event chit is drawn as one of the two chits, retire it from play, place the other enemy weapon marker on its track without issuing any order, and then redraw two chits.
Important: At least two chits (or 4 if one of the first two is the civilian vehicle event) must be drawn each turn, even if the player does not need or want to issue new orders for that turn.
Design note: At some point along the road between Saraci and Kalesija, one of the tanks reported colliding with a civilian car traveling in the opposite direction, further compounding the already chaotic situation.
Example: In the first turn of the game, the player draws first an ATGM chit and then an HMG chit, placing them in the corresponding "First chit" and "Second chit" rows. This means a "Fire" order for a platoon or a single vehicle can be issued, but as the RoE is still at 0, no "Fire" orders can be issued. Then, the player transfers the chits to the corresponding weapons tracks and decides to draw two chits again. Now she draws two artillery chits, which allow issuing a "Fire" or "Move" order to a single vehicle or a platoon. The player decides to issue a "Move" order to Platoon 1 with destination Kalesija, placing in the K CP the three selected "Move" order counters (one for AQ, one for EA, and one for FA). After that, the player transfers the chits to the weapons tracks, but now cannot choose to keep drawing chits, as the last two ones were of the same type, and is thus forced to end the Orders Phase.
5.4 Orders
The following paragraphs detail each order's effects and restrictions. Any order can be revoked and superseded by a new order, provided that the radio network is functional or within the limitations set forth in 5.1.
5.4.1 Move
The "Move" order is either assigned to a single vehicle or to a platoon, according to the Order Matrix. If it is a platoon order, assign it to each tank in the platoon for the same destination (do count all three OW positions of the same town as "same" destination in this regard).
It is possible to avoid assigning the "Move" order to one vehicle from the platoon, which will stand still if it has no orders, or continue to act on its previous order, if it was acting under one.
The order counters for the moving vehicles are placed on the destination and kept there until the vehicle arrives or is immobilized by damage. In both cases, return the order counter(s) to the corresponding placeholder(s) on the Order Matrix in PAS1.
A valid destination for a "Move" order is any contact point or OW position, with three restrictions:
- Tango 2 can only be assigned as a destination to vehicles that are in Kalesija or already on the Kalesija-Tango 2 road (that is, it is not possible to order a platoon or vehicle to reach Tango 2 directly from Saraci, OP N, any OW, nor the road between Saraci and Kalesija).
- Only Kalesija or Tango 2 can be assigned as a destination to vehicles at Tango 2 or already on the Kalesija-Tango 2 road.
- An OW position can only be assigned as a destination to vehicles in the corresponding town or already in an OW of the same town (that is, you can move directly between two OW of same town).
The order can be changed while underway by issuing a new "Move" order to a new valid destination.
If the order is given to a platoon, as soon as a single tank reaches the destination, that tank can receive a new order; that is, it is not necessary to wait for the whole platoon to reach the destination, before issuing new orders to tanks that have reached the destination.
Important: The presence of a vehicle in any of the OW positions either in Saraci or Kalesija gives a beneficial die-roll modifier for enemy ATGM attacks (see 7.1.1).
Design note: Use the order marker for VL2 as a reminder of its destination, but remember that VL2 does not need to be issued orders (it's you, the player!).
5.4.2 Fire
The "Fire" order can be issued to a platoon or single tank either on the move or halted. To represent that the vehicle has been assigned a "Fire" order, flip it to its "firing" side. Note that the "Fire" order has no marker associated, it is shown flipping the vehicle counter. If you give the "Fire" order to a platoon, assign the individual "Fire" order to each unit in the Platoon, by flipping their counters.
The two PBV 302 had no effective weapons at the ranges involved and cannot fire on BSA forces. Hence a "Fire" order cannot be issued to them.
Important: In order to assign a "Fire" order for the first time in the game, the RoE marker on the RoE track must be in a position that allows the UN forces to fire, that is, "Til helvede med det" or "Unrestricted". When this happens, place the fire status marker, "Fire at Will" side up, in that position. From that point onwards, you can issue "Fire" orders without restrictions (see 5.2).
5.4.3 Emergency tow
This is a special, emergency order that is issued in place of any other order available in the Order Matrix.
The pre-requisite for issuing this order is that at least one of the three battalion HQ vehicles (QL1, QL3, or VL2) must be within three positions of the tank receiving the order. Within this restriction, the order is given to any tank able to move that will be therefore tasked with towing another tank that has sustained a tracks heavy damage (7.1.3). Note that APCs cannot tow a tank, thus the tow order cannot be given to VL2 nor QL3.
Place the "Tow" marker on the damaged tank (as a destination). From this turn, the rescuing tank will move toward the damaged tank until it enters the same position: put the rescuing tank on top of the damaged tank. (A tank in tow is ignored for stacking purposes.)
In the Move step, when both tanks are stacked together, transfer the "Tow" marker to the nearest contact point (player's choice in case more than one available). From the following turn, move the rescuing tank and the damaged tank together, one position per turn (pending traffic) toward the intended destination.
It's possible to issue a "Tow" order to tow an immobilized tank already in a contact point other than Saraci. Ignore actual contact point in assigning destination (i.e. a tank in Kalesija can be towed to Saraci). It's not possible to tow a tank already at Saraci.
An immobilized tank and a tank under a "Tow" order that has yet to reach the damaged Tank can still receive and execute "Fire" orders. A tank actively towing another tank (i.e. stacked with it) and a tank being towed can receive "Fire" orders but cannot fire (skip execute fire step for both tanks).
(Sidebar caption: The Leopard 1A5 DK based at Tuzla in 1994 mounted the same Halogen searchlight that equipped the M41. This equipment was later removed and replaced by thermal imagery.)
5.4.4 Call for airstrike
This does not represent an order given to any of the UN units, but rather a special type of "Fire" order carried out by coalition aircraft "on call" for these types of situations. The RoE marker must be in the "Unrestricted" area of the RoE track, or at least one tank must have suffered heavy damage (7.1.3).
Move the Airstrike marker from its holding box to the map to indicate that in next "Fire" phase, NATO Air Force is gonna strike on Vis.
Note that this specific order does not cause the fire status to become "Fire At Will".
Design note: NORDBAT2 lacked artillery capability and thus had no counter-battery fire mission available. The plan for Bøllebank relied on airpower to neutralize any enemy artillery that had been active throughout April. According to the official report filed after the action, Møller requested an airstrike soon after the Bosnian Serbs began firing on Tango 2, but the request was denied.
5.5 Battalion HQ special abilities
Battalion HQ special abilities represent the different commanders' initiative. These abilities become available or unavailable depending on the RoE marker's position. When the RoE marker reaches the special ability level, the player immediately moves the special ability marker to one of the two appropriate boxes for that vehicle, with the chosen ability side facing up. If, for any reason, the RoE level drops below the special ability level, the special ability marker is immediately placed back on the RoE track.
Special abilities can be used if the command vehicle is damaged, but not if commander is killed.
If available, each special ability can be used any time in the turn phase corresponding to the description. Once used, the special ability counter is moved to the "Spent abilities" box.
During the Order Determination phase of subsequent turns, whenever two chits of the same enemy weapon type are drawn, the player can choose one of the spent special abilities and move it back to an appropriate box in the HQ special abilities diagram on the mapboard (see 5.3). The player can choose any of the two option for a given counter at this point.
The six possible special abilities are as follows:
For VL2 (available at RoE level 8):
- Draw their fire!: VL2 must be in Kalesija CP. Apply a -1 DRM to all direct fire (tank, ATGM and HMG) directed at any vehicle at Kalesija OW, SK-4 CKP or T2-1 CKP this turn.
- Extra order: VL2 must be in OP N CP. You can assign the same type of order just determined to another platoon or single vehicle.
For QL3 (available at RoE level 11):
- Direct their fire!: QL3 must be in OP N CP. Indirect fire from Saraci OW positions is automatically successful this turn. If three tanks fire, still roll the dice to see if the player gets three 1's (6.3).
- Extra turn: QL3 must be in Kalesija CP. Move the "T2 deadline" marker one box toward turn 20.
For QL1 (available at RoE level 14):
- Extra move: QL1, or any one friendly vehicle of your choice within one position of QL1 can make an extra move toward its destination this turn. This ability can be used after or before any "Move" order. This does not apply to tanks towing another tank (6.2), stunned tanks nor tanks with tracks heavy damage. Roll to move if tank has Night vision periscope light damage. Note that a tank with Hull heavy damage can move under this action regardless of which side of the Hull marker is up.
- Extra fire: QL1 or any one friendly tank of your choice within one position of QL1 can make an extra attack. This does not apply to tanks unable to fire due to lack of orders, to position or to damage/stun.
Example: QL3 special ability becomes available as RoE level increases to 11. At this point the player can choose to place the special order marker in one of its boxes on the map. Since the player wants to be able to fire from Saraci OW without having to roll, he chooses to place it with its side "Direct their Fire!" in the appropriate box. Note that in this situation, VL2 cannot use its special ability, as the player chose the "Draw their Fire!" when the order became available (at RoE level 8) and for that ability VL2 has to be at Kalesija CP.
In the Execution phase, the player uses the ability and fires with the tanks in Saraci OWs. He can do so because Fire Status is "Fire at Will" and tanks in the OWs have already received the "Fire" order. The ability allows the player to directly remove one Enemy weapon marker for each tank firing. All normal restrictions of fire as line of sight and damage apply! The ability marker is then placed in the "Spent abilities" box, and cannot be used again unless refreshed.
Later in the game, two Enemy weapon chits of the same type are drawn in the Orders phase, so the player can refresh QL3 ability. Worried because T2 deadline is falling short, he decides to refresh it by its "Extra Turn" side, even knowing that he would need to move QL3 to Kalesija to use it. Note that he could have left QL3 ability in the spent box and swap VL2 ability to its Extra Order side and box!
(Sidebar to 5.5: The Danish tank gunners had received extensive training in indirect fire - essentially utilizing tank guns as artillery with angled shots to reach longer distances - in the months leading up to their deployment to Bosnia. On the night of the engagement, the Danish soldiers reported witnessing a catastrophic explosion on Vis, after which most of the BSA fire fell silent. The BSA has consistently denied that any catastrophic event ever occurred.)
Mapboard annotations (example illustrations)
The map's printed example illustrations carry the following captions.
- Enemy weapons tracks: 1. Tanks, currently "cold barrel", will not fire. 2. With five ATGM markers in the track, the to-hit for this threat in the Enemy Reaction is 10 or more. 3. HMG will hit only on a 12 but will attack 2 targets! 4. Artillery will fire on T2, where there are no vehicles, but "T2 deadline" will drop 1 box to 16!
- T2 contact point. The goal of the mission is to bring here at least two tanks.
- Enemy Tanks track: Enemy Tank chits are placed starting from the top then downwards on the track. Tank status is determined by the chit on the lowest space on the track. 1. Roll 1d6 to determine status: Hot / Cold. 2. If status = Hot, roll 2d6, hit on 7 and more. Track spaces are labelled 6/H, 5-6/H, 4-6/H, 2-6/H.
- Enemy ATGM, HMG track: Roll 2d6 for each track (ATGM, HMG) to determine if any hit has occurred. If a UN vehicle occupies an OW position matching the location (L, C, R) of the last ATGM marker placed on the track: -1 drm to ATGM attacks.
- Enemy Artillery track: Artillery Target on the map is determined by the chit on the lowest position on the track. Adjust RoE and T2 Deadline. Roll 2d6 and check PAS 4 for effects. Artillery spaces: Saraci (+1 ROE, + Random Unit), K (+1 ROE, + RU), S (+1 ROE, + RU), T2 (Deadline -1 Turn).
- UN vehicles moving. Each turn vehicles will advance 1 position towards their destination. QL1 and Platoon 1 are heading to Kalesija, while VL2 is heading to OP N. VL2 "Move" order to OP N contact point.
- BSA field of fire pointing to SK-3 CKP. BSA ATGM and HMG can fire at UN vehicles in SK-3 (as indicated by colored-lozenges), while tanks with a "Fire" order in SK-3 will be able to fire at ATGM and HMG (as indicated by corresponding symbols).
- GB is in S3 OW but without fire orders the tank cannot fire. It will provide a bonus against ATGM firing from L area.
- Saraci is the starting position. In this example, BQ, FB and QL3 have not moved yet!
- HQ Battalion Special Abilities box: VL2 "Draw their Fire!" - apply a -1 drm to all direct fire (tank, ATGM and HMG) directed at any vehicle at Kalesija OW, SK-4 CKP or T2-1 CKP this turn. VL2 "Extra Order" - assign a second, similar order to the one just given to another PLT/Vehicle. QL3 "Direct their Fire!" - Indirect fire from Saraci OW positions is automatically successful this turn; AMMO DEPOT effect (see 6.3) still applies. QL3 "Extra Turn" - move the T2 Deadline marker one turn up. QL1 "Extra Fire" - QL1 or eligible tank can make an extra attack; see 5.5 for restrictions. QL1 "Extra Move" - QL1 or eligible tank can make an extra move toward its destination this turn; can be used after or before any "Move" order; see 5.5 for restrictions. (QL1: one friendly vehicle within ONE position of QL1.) A "Spent abilities" box is also printed on the map.
6 Execution
In the Execution Phase, standing orders assigned to each platoon/vehicle are carried out, except for those vehicles with a Stun marker, which cannot carry out any action.
Orders are carried out according to the following priority:
- Airstrike
- Move/Tow
- Fire
Then, at the end of the Execution Phase, remove any Stun markers on vehicles.
6.1 Airstrike
The execution of this order implies an immediate and indiscriminate reduction of the enemy fire effectiveness.
Reduce all enemy weapons tracks by half, rounded down. Return all removed enemy weapon markers to the enemy weapon pool.
6.2 Move/Tow
A vehicle with a "Move" or "Tow" order advances, if able, one position toward its destination; that is, toward the position where the "Move" or "Tow" order marker is placed.
Whenever a unit reaches its destination, retrieve the "Move" or "Tow" order marker from the board and place it back on the order roster if a "Move" order or on the rescuing destination if a "Tow" order (see 5.4).
Vehicles in two adjacent positions with opposite movement destinations can swap places in order not to violate stacking, but a unit will not move if in doing so the stacking limits will be violated at the end of all moves.
The first time that a UN vehicle enters each of the three exposed UN positions before Kalesija (SK-2, SK-3 and SK-4), the player draws an enemy action marker from the enemy actions 7-8-9 pool and puts it in the position's field of fire with the first side that comes up (that is: without looking at the counter side before putting it in place).
The first time that a UN vehicle enters each of the three exposed positions after Kalesija (T2-1, T2-2 and T2-3), the player draws an enemy action marker from the enemy actions 1-2-3 pool and puts it in the position's field of fire (both sides are equal, facing does not matter here).
A unit with a Hull heavy damage will only move if the Hull marker is on its green side.
To move a unit with "Night Vision" light damage, the player must roll a die, on a modified result of 4 or more, the unit will not move. Apply a -1 drm for each adjacent UN position occupied by an undamaged vehicle.
Optional rule: After a tank has reached Kalesija CP, the APCs can move a second position if the first one entered is any SK CKP.
6.3 Fire
A vehicle with a "Fire" order in an exposed position that allows to fire on enemy forces can actually fire to reduce the number of weapon markers on the weapons track.
Remove the last enemy weapon marker on one of the weapons tracks matching one blue icon on that position. Return it to the enemy weapons pool.
When firing from an OW position, the firing UN tank can only remove an enemy weapon marker if it has the same area location (R, L, or C) as the corresponding overwatch position. This does not apply to artillery enemy weapon markers.
(Illustration: A full solid symbol means direct fire; UN tanks score automatically a hit (in the example, on ATGM). A hollow symbol means indirect fire; UN tanks score a hit only on a 1-5 die roll (in the example, on ATGM).)
When firing against the first marker on the enemy artillery track (placed during setup, see 3.0), flip it to its "No Artillery" side instead of removing it. That counter will remain this side up for the remainder of the game. Further fire against it will have no effect.
The OW positions in the outskirts of Saraci were too far from enemy positions on Vis mountain to engage in direct fire. Fire from these OW positions is indirect fire, as denoted by the hollow symbol on the map. This type of attack is not possible if the tank has a "Gunner Sights Misalignment" damage counter assigned (7.2.1).
Also, this is the only type of fire from undamaged UN units that requires a die-roll: for each tank firing, the player rolls a die and on any result other than a 6, it is possible to remove the chosen Enemy Weapon marker. Note that one of QL3 Battalion HQ Special Abilities modifies this result (see 5.5).
If three fires are performed from OW positions in Saraci and they all roll a 1 for the attack, the Bosnian Serb forces ammunition depot on Vis has been hit. This produces a catastrophic explosion that automatically reduces one of the enemy weapons track to zero (player's choice); return all markers to the Enemy Weapon pool or, in case of artillery, return all markers and flip the Setup marker to its "No Artillery" side.
Example (continuing the example of page 9): the chits placed on the enemy weapons tracks are as shown in the image on top. During the Execution Phase, the player executes the "Move" order issued during the Orders Phase: she issued a "Move" order to Platoon 1 with destination Kalesija, so she placed the three "Move" markers of the platoon vehicles in Kalesija. Now, she moves the tanks one space toward Kalesija. As Zone 1 has a maximum stacking of three vehicles, she moves the three tanks there.
7 Enemy reaction
(Sidebar: The direct-fire enemy weapons tracks (tanks, anti-tank guided missiles and heavy machineguns) represent the intensity and accuracy of fire, not merely the actual unit strength of the Bosnian Serbs, which remains unknown to this day. The indirect-fire enemy weapon track (artillery) represents the different targets chosen by the artillery deployed on Vis.)
During this phase, the Bosnian Serb forces will fire against the player's units, depending on relative fields of fire and strength of the respective weapons tracks. The order in which enemy reactions are handled is as follows:
a. Determine tank status b. Execute tank fire c. Execute ATGM fire d. Execute HMG fire e. Execute artillery fire
7.1 Direct-fire attacks
First of all, if there are Enemy Tank Weapon markers on the corresponding track, the player determines the status of the tanks ("cold barrel" or "hot barrel") by rolling a die and comparing it with the value shown beside the last marker on the track. If the result falls in the range shown, the tank status marker is flipped to its "H" side and enemy tanks will fire in this turn; otherwise it stays or reverts back to its "C" side and enemy tanks will not fire this turn. This check is performed every turn as long as there are markers on the track.
Then, each Enemy Weapon Type (tanks, ATGM, HMG) will fire to available targets. If a weapon has more than one available target, then follow this priority order:
- Vehicle with a heavy damage counter; if no damaged vehicle or more than one, then,
- To the lowest firing priority numbered exposed position.
If there is more than one vehicle fulfilling the same priority order, then, determine target at random.
Each weapon type may end up attacking the same target in a turn.
Some enemy weapons markers can fire at two targets in same turn, as indicated by a symbol on the marker. Perform each attack separately, with the second against the next priority target. Ignore the second attack if there is only one target. The two attacks must target different vehicles.
7.1.1 Firepower
Each Weapon Type basic firepower is made up of two dice added together.
Depending on the position of the last Enemy Weapon marker on its respective track, a specific result is needed to achieve a hit, as marked on the track.
UN vehicles in OW positions had line of sight to ATGM launchers, helping other tanks avoiding the missiles. Apply a -1 to the die roll of any ATGM attack if a UN vehicle occupies an OW position matching the area location shown in the last ATGM marker.
Enemy tanks can only fire if the tank status marker shows its "H" side (representing a hot barrel, ready to fire).
Example: if the last ATGM Enemy Weapon marker is in the 6th space of its track, the attack hits on a result equal or greater than 10.
7.1.2 Attack resolution
For each Enemy Weapon Type and target, roll the dice and check for impact. If the fire status is "Hold Fire", increase the RoE Track by 1 (regardless of whether or not the attack hits).
When resolving HMG attack, if the vehicle commander is considered unbuttoned (i.e. the vehicle has a "Night Vision" or a "Turret" damage marker already assigned), roll 1d6 (regardless of whether or not the HMG attack hit): on a 6 the vehicle commander is killed.
If the vehicle commander of VL2 is killed, Game Over.
7.1.3 Damage allocation
ATGM, HMG and tank hit results
Determine hit location by rolling a die and checking the result on the Enemy Direct Fire diagram on PAS 4, according to the weapon that fired.
Any location hit on a PBV 302 destroys it, Game Over.
If the target is a tank, place the corresponding heavy damage marker on the affected tank. Hull damage is placed green side up. If damage is to Hull or Turret, place also a Stun marker on the tank.
The second hit at the same location of a tank destroys it, GAME Over.
Damage Effects on Tanks
- Tracks: Heavy damage. The vehicle is immobilized. Cannot carry out "Move" orders.
- Hull: Heavy damage. The vehicle can only move every other turn (that is, when damage counter shows its green side).
- Turret: Heavy damage. The vehicle cannot carry out "Fire" orders. The tank commander is considered unbuttoned (see HMG direct fire additional effects).
- Stun: The vehicle cannot perform any action next turn. It's not a damage marker per se, but only a reminder marker which is placed whenever a Turret or Hull heavy damage is received and is removed at the end of the Execution phase of the next turn.
The moment any heavy damage is inflicted, the RoE level will change. If the fire status marker is on its "Hold Fire" side, the RoE marker increases by 5 levels; if the fire status marker is on its "Fire at Will" side, the RoE marker decreases by 2 levels.
HMG direct fire additional effects
If a vehicle commander other than VL2 is killed, add a TC KIA marker to the vehicle. If the fire status marker is on its "Hold Fire" side, the RoE marker increases by 5 levels; if the fire status marker is on its "Fire at Will" side, the RoE marker decreases by 5 levels.
A vehicle with a commander killed will roll a 1d6 before each execution phase. On a 1-4, the vehicle executes its order(s) normally, on a 5-6 it skips any action in the turn.
If the vehicle is providing Overwatch position bonus (per 7.1.1), it will cease to provide those advantages.
Ignore any further TC KIA marker on the same vehicle.
7.2 Indirect fire attacks
Artillery fires at the location indicated by the marker in the last position on the artillery weapon track (if any).
If there are any friendly vehicles in the location affected (including the respective OW positions if artillery fires at Saraci or Kalesija), roll 2d6 and check artillery result:
On a 2: apply only further effects (see below).
On any other result, apply further effects, then put all available random unit damage markers corresponding to the vehicles present in that location in the Artillery pool and draw one at random. If the die-roll was a 12: that vehicle receives a heavy damage (roll for location: 1-2 Tracks, 3-4 Hull, 5-6 Turret). On a result between 3 and 11 transfer the marker to the Enemy Weapon pool. Empty the Artillery pool and set the remaining counters aside for later use in future Artillery attacks.
From the following turn it will be possible that the random unit damage marker will be drawn as part of the Orders Phase (see 5.3 and 7.2.1).
Possible further effects of the Indirect Fire Attack depend on the specific last marker on the track:
- S or K: Fire on Saraci or Kalesija increases the RoE marker position by one (each time it fires).
- T2: Fire on Tango 2, decreases the deadline one Turn (each time it fires).
- No art.: No location is affected (artillery fire has stopped, Vis is silent). RoE marker decreases by one level for the regular artillery marker. No effect for the special artillery marker.
7.2.1 Artillery damage allocation
Whenever a random unit damage marker is drawn as part of the Available Orders Determination (5.3), stop play, roll a die and check the Enemy Indirect Fire diagram on PAS 4 to determine the light damage inflicted on the vehicle. Re-roll in case the result is a damage already sustained. If the specific vehicle already has all three types of light damage allocated, no further effects are inflicted.
- Radio (die roll 1, 2): Light damage. A vehicle with radio damage cannot issue, relay or receive orders normally. A die roll is required, as explained in rule 5.1.
- Night Vision periscope (die roll 3, 4): Light damage. To move a unit with "Night Vision" light damage, the player must roll a die, and on a modified result of 4 or more, the unit cannot move. Apply a -1 drm for each adjacent UN position occupied by an undamaged vehicle. The commander is considered unbuttoned (see HMG direct fire damage, 7.1.3).
- Gunner sights misalignment (die roll 5, 6): Light damage. The tank cannot fire from Saraci OW positions, and when firing from other positions, an enemy weapons marker is removed on a 1-2 on 1d6 only (instead of automatically as per 6.3). This damage has no effect on PBV-302, but the APC can still receive it.
The random unit damage marker is then set aside for later re-use (in case of a new Artillery attack that involves that vehicle).
Light damage does not change the RoE status.
Design note: EA's night vision periscope was most likely damaged during the initial shelling in Saraci. It is also speculated that QL1 main radio antenna was damaged in this initial shelling and may explain why QL1 failed to relay the "fire at will" order to 2nd Platoon in Saraci. This mechanics, while it may be perceived at first as counter-intuitive, intend to model the effects of these minor damages, discovered only later when damaged equipment was really needed.
8 How to win
(Sidebar: The primary objective of the mission launched that night was to reach the Tango 2 observation post with a "significant" presence to deter the Bosnian Serb forces from further shelling the post. Historically, this required two tanks to reach Tango 2 within an hour. According to several sources, the "implicit" objective was to provoke the Bosnian Serb forces to create a casus belli, allowing the DANSQN to attack and eliminate a threat that had been manifesting in various forms over the preceding weeks. This objective is supported by the fact that a general plan had been devised days before the specific shelling incident. Although not executed to its fullest extent, this plan formed the basis of the UN forces' actions that night.)
In order to complete the main mission and reach an operational victory, the player must achieve these two conditions:
- At least two tanks (i.e. Leopard 1) must reach Tango 2 in the turn where the Tango 2 deadline marker is or before.
- Artillery on Vis is silent. This means a "No Artillery" enemy weapon marker is the lowest one on the artillery track by game's end.
Following NORDBAT2 overall strategy for wrestling control of the area from the hands of the Bosnian Serbs the player can win a tactical victory, by achieving these two victory conditions before the end of turn 20:
- All heavy damaged UN units, if any, are in Saraci. Having tanks in Tango 2 is not mandatory in this case.
- All three direct fire enemy weapons tracks are empty (HMG, ATGM, and Tanks) and artillery on Vis is silent (i.e. "No Artillery").
In addition to achieving operational and/or tactical victory, the player must assess their level of victory in the diplomatic sphere.
The player achieves a strategic victory if fire from the UN forces has not started (fire status marker has the "Hold Fire" side up) or has started in the "Unrestricted" range of the Rules of Engagement track (RoE = 18 or more). This implies that the player's actions have received the approval of the UN General Assembly.
The player achieves a political victory if the fire status marker is at the same or lower box than the RoE marker at game's end. This implies that the player's actions have received the approval of the Danish Government.
The game can end during any Victory Assessment step if either an Operational or a Tactical victory can be declared. If the conditions for one type of victory are met, the player can either stop play and assess the type of diplomatic victory or continue playing to achieve another victory type or both. So, it is possible to achieve all four levels of victory, a tactical, operational, strategic and a political victory, at the same time. In this case, the player's performance is deemed just perfect. Congratulations!
If, at any time, a player's unit is destroyed by Bosnian Serb forces, the game immediately ends with a defeat for the player. The political cost of Danish casualties in such a complex scenario would likely lead to the withdrawal of Danish forces, with possible repercussions at the UN level.
Any other result is just another day in Bosnia, with neither side gaining a decisive military advantage in the area. As an optional rule, you can flip the turn marker and extend play beyond turn 20. Consider the result a defeat if you don't win by turn 40.
9 Design notes
(Sidebar: Taken later that very same night, a dramatic picture of Jakob Hansen in front of his tank (1st Tank of 2nd Platoon) holding an APFSDS round during reloading. Hansen is one of the five UN tankers involved in the fighting that later suffered from chronic PTSD (Post Traumatic Stress Disorder). He sadly succumbed to it in December 2020.)
I have been interested in exploring this topic ever since reading about it. The long war in Yugoslavia was literally next door to me when I was an adolescent in Italy. It was a multi-faceted event where the sides were often murky, and the distinction between good and bad was largely determined by the political maneuvers in the UN General Assembly.
Reading about NORDBAT2 interpretation of the RoEs was interesting, especially in comparison with other, much darker chapters of the same history (such as the role of the UN peacekeeping force in the massacre at Srebrenica). Operation Bøllebank epitomizes this spirit very well.
The choice toward a solitaire game was mainly driven by the dearth of resources that provide an account from the other side, making it almost impossible to know the true objectives of the Bosnian Serb forces that night and thus offering a credible model in the game that would provide the potential player of that side with an interesting experience.
Over the years, various narratives have emerged from the different Danish protagonists. While I don't have the information to support one side over the other, the primary goal of the game is to model the breakdown of command and control during an unexpected, high-intensity engagement, such as an ambush. Despite this chaos, the game aims to show how the situation can still be recovered through proper planning, training, discipline, and individual initiative. The Order Matrix and Enemy Weapon Effectiveness Tracks mechanics were specifically developed to represent these dynamics.
I realize that these mechanics introduce a significant degree of randomness, and some games may take a disastrous turn right from the start, leading to an unrecoverable situation. However, after reading accounts of this episode, I'm convinced that what was witnessed is just one of many possible outcomes and not necessarily the most probable one.
The setup times and game flow should encourage repeated plays. This way, players won't necessarily shelve the game after a single, sour experience but will be motivated to correct mistakes and improve their strategy, while still being subject to the inevitable randomness of the chit-draw.
I also recommend that, even in the case of a successful mission, players should try to exfiltrate the remaining vehicles (including damaged ones) back to Saraci, except for those that made it to Tango 2, for a full experience. Survival is always a worthwhile goal.
Historical note: even with two tanks reaching Tango 2, the rest of the force was still split between Kalesija and Saraci, well within the range of the forces on Vis, and the Bosnian Serbs resumed firing on the UN vehicles as soon as they left Kalesija to fall back to Saraci. 2nd Platoon was therefore forced to provide cover in the process. It was not until all the vehicles had left Saraci toward Tuzla and the Danish camp that the mission was truly over. Over the course of the engagement, it is reported that 2nd Platoon tanks fired a total of 72 rounds: 44 HEAT, 19 APFSDS, 9 White Phosphorous, almost emptying their magazines. Back at the Danish camp the tankers were instructed to immediately fill back up their magazines in case it was necessary to rescue the two tanks that made it to Tango 2.
10 References
These are some of the sources consulted during the design process of this game.
- Clemmesen, M. H., "Bøllebank: FN-Kampvognseskadronerne i Bosnien i 1994 genbesøgt", OLFI, 25, 26, 27 December 2020, www.olfi.dk. This is possibly the best reference for the battle since it is the only work which has tackled the engagement from a rigorous military history point of view. Its biggest drawback is that it was completed only in 2020, almost 30 years after the events.
- Korsrud, H., "RoE: Maktens regler", Stratagem, 9 December 2019, www.stratagem.no. Originally published in Veteran, February 2019. An article exploring the general conundrum of RoEs, using Operation Bøllebank as an example of how RoE's were formally not broken, but provocation was sought after.
- Dahl, A., Den danske kampvogneskadron i Bosnien 1993-1995, Syddansk Universitet, 2009. A broad overview of the entire Danish deployment in Bosnia and its political ramifications.
- Petersen, R., "Danske sneleoparder i Bosnien", Militært tidsskrift, 139, 1, 2010, p. 4-23. A short summary of the employment of Danish tanks in Bosnia in 1994-1995.
- Ingesson, T., "Trigger Happy, Autonomous, and Disobedient: NORDBAT2 and Mission Command in Bosnia", The Strategy Bridge, 20 September 2017, www.TheStrategyBridge.org. A provocative piece that analyzes the approach adopted by NORDBAT2 in the interpretation of the UN peace-keeping mandate. Useful to put Operation Bøllebank within the overall strategy adopted and the results obtained.
- "Operation Bøllebank - Danish Leopards in Bosnia", YouTube, uploaded by Danish Defence Documentaries, 18 December 2020. An important video with interviews to the actual tankers that took part in the events depicted in the game, recorded just a few years after the episode.
- Findlay, T., The use of force in UN peace operations, Stockholm International Peace Research Institute/Oxford University Press, Oxford, 2002.
- US Department of Defense, "Department of Defense Interface Standard. Joint Military Symbology", 10 June 2014.
11 Example of play
Excerpt from the report of Klaus J. Andresen ("Little Andres"), commander of tank EA in 1st Platoon (Friday, April 29th 1994, approximately 23:30): "AQ - this QL1 - Continue to Tango 2." "This is AQ - Copy that - underway." "This is FA - moving forward." "This is EA - moving forward." I negotiate my way past VL2, but I cannot see AQ in front of me, I have to drive faster. "Andresen! The LYFA is out!" The driver calls me to let me know our night-vision periscope does not work... "AQ - This is FA - our LYFA is out and I cannot see you." We have to slow down and unbutton to negotiate the narrow road in front of us. The time is now 23:55. "We are being fired at..." I cannot understand who is reporting, but from the voice it is AQ. "They are shooting at us - we have to fall back" "EA/FA - this is AQ - move backwards now!" I look behind and see QL1 and VL2 behind me, we cannot move back any further. [...] "Hell! They are shooting at us, we have to get out of here" "They are shooting at us, this is not a drill!"
In this section, we provide a detailed example of gameplay spanning two full turns. The strategies employed in this example are not necessarily optimal but are designed to showcase the various mechanics and situations that can occur during the game.
Turn 4
At the start of turn 4, the situation is depicted in the central fold (pages 14-15) of this rulebook.
Orders Phase
During the Orders Phase, the player draws ATGM (R) and Tank (R) chits and pairs them on the Order Matrix. This allows the player to issue either a "Fire" or "Move" order to a single vehicle. Due to the Rules of Engagement (RoE) being at 6, the player opts to give BQ a "Move" order, as issuing a "Fire" order is not allowed.
Seeking more "Move" orders, the player draws two additional chits: this time they are HMG (C) and Minor Damage to VL2. The sequence of play is interrupted to determine where VL2 receives damage. A die roll of 2 indicates the radio is damaged, and the corresponding marker is placed on VL2.
Resuming the sequence of play, the second chit drawn is HMG (L). Pairing HMG (C) and HMG (L) on the Order Matrix allows for a "Move" order to be issued to an entire platoon. The player decides to issue the "Move" order solely to QL3 (even if allowed to issue orders to an entire platoon, the player can opt to issue the order to any individual vehicle, even QL3 that is not a platoon member), with the destination being OP N CP.
Due to the radio damage to VL2, communication links are limited and must be checked to receive the order. The player rolls one die, and as the result is 2, no drm are applicable, but the check is successful and the order is received. QL3 "Move" marker is placed at his destination, OP N CP. On a result of 4, 5 or 6, the order would have been forfeited.
Since two chits of the same type have been drawn, the Orders Phase ends.
Execution Phase
During the Execution Phase, FA moves to SK-4 CKP. Since this is the first time a vehicle enters this space, an Enemy Action marker is drawn (the last one remaining, having fire priority 7) and placed in the corresponding BSA Field of Fire lozenge, with its side up determined randomly. AQ then moves to SK-3 CKP (QL1 and EA cannot move to SK-3 due to the stacking limit). VL2 advances to OP N-1 CKP, QL3 moves to SK-1 CKP, and BQ moves to S-1 OW, returning the "Move" marker to its placeholder in PAS 1.
Since no "Fire" orders were issued, the fire segment is skipped.
Enemy Reaction Phase
Now, moving on to the Enemy Reaction Phase, the tank status is determined first. With two tank markers, a die roll of 5 or 6 would make them hot. However, a roll of 3 keeps them cold.
Tank fire: no fire possible, as they are cold.
ATGM fire: they shoot at FA as it is in a space of priority value 7. The ATGM to-hit value is 10, but as we have a tank in an "R" OW position, the ATGM die roll is modified by -1. The die roll is a 10, modified by -1 = 9. A miss! RoE is increased to 7.
HMG fire: they shoot at FA as well, according to the priority. The to-hit value is 12, without modifiers. The die roll is a 6, a miss. RoE is increased to 8.
Now, as RoE has reached 8, the VL2 capability becomes available. As VL2 is heading to OP N CP, the player decides to place this capability on its "Extra order" side in the corresponding box.
Artillery: artillery fires at T2, according to the last artillery marker in the track and the "T2 deadline" goes down to turn 6. A turn less to reach the objective of the mission!
End Phase
During the End Phase no victory condition is fulfilled, so, the turn marker is advanced to turn 5.
Turn 5
Orders Phase
Turn 5 begins with the Orders Phase. The player draws two chits: the civilian "VW Golf" marker and an ATGM (C). The civilian car is removed and the ATGM marker is placed on its track. The player, then, must draw two more chits: they are an ATGM (L) and an Artillery (S). Pairing the markers on the Order Matrix, the available order is platoon fire. As RoE level is already at 8, "Fire" orders can be issued, so the player decides to issue a "Fire" order to platoon 1. As VL2 has radio damage, the radio link must be checked. The player rolls a die and gets a 3, no modifiers apply. That is a success, so the order reaches the platoon. The counters for its vehicles, AQ, FA, and EA, are flipped to their "Fire" face. The fire status marker is placed in box 8 of the RoE track, with the "Fire at Will" side up.
The player decides to keep drawing, and pulls two more chits. A Tank (L) and a HMG (L) are drawn: this allows the player to give a "Fire" order to one vehicle: he chooses GB, checks the radio link successfully and flips it to its "Fire" side.
Note that if VL2 was already at OP N CP, the player could have spent the "Extra order" to duplicate this "Fire" order and flip one of the tanks not yet on his fire side, rolling again for radio contact.
As there are already three enemy tank counters on the track, drawing a fourth one seems too risky, so the player stops drawing chits.
Execution Phase
Now it's the Execution Phase. The Airstrike is not available, so the "Move" orders are executed now.
FA moves to K CP, returning the "Move" marker to its placeholder in PAS 1.
The player decides to move QL1 to SK-3 CKP, leaving EA in SK-2 CKP, then AQ moves to SK-4 CKP and VL2 reaches OP N CP, also returning the "Move" marker to its placeholder in PAS 1.
Finally, QL3 moves to OP N 1 CKP.
Note that stacking is enforced at the end of move, QL1 move is only legal because AQ can move out of SK-3.
Once all moves are executed, the player proceeds to execute the "Fire" orders in any order desired. He decides to start with EA firing from SK-2. EA can target enemy ATGM or enemy tanks; he fires at the tank, simply returning last tank counter to the enemy weapons pool.
AQ at SK-4 removes the last HMG on track. Line of sight restriction does not apply from this position!
GB at S-3 OW may target the ATGM because the last counter is a "L" coded marker. Unfortunately, for indirect fire, a die roll is required: the player rolls a 6, missing his shot!
Enemy Reaction Phase
The player first determines tank status: he rolls a 5, tanks are hot barrel, so they will fire!
Tank fire: the only UN exposed position targetable by the BSA tanks is SK-2, so EA will be the target; the to-hit value is 7 or more, but luckily the player rolls a 6 and the tank fails to hit. The RoE marker is no longer affected by weapons firing because a "Fire" order has already been issued, so it stays at 8.
ATGM fire is directed at the vehicle in SK-4, AQ, that has the lowest fire priority. It will hit on a 10 or higher, and as the last counter on the ATGM track fires from C area, no die-roll modifier is applied because no friendly vehicle occupies an OW "C". The player rolls an 8, so the ATGM also misses its target.
HMG also fires at AQ at SK-4, with a to-hit value of 12... The player rolls a 12; the vehicle is hit! In order to determine the hit location, the player rolls on the HMG impact table, located in the PAS 4. The result is 4, so the tank receives a hit in its hull. A Stun marker and a Hull damage marker, green side up, are placed on top of AQ. The RoE drops by 2 levels, to 6. As the tank was not unbuttoned, no further effects are rolled. The "Extra order" HQ special ability must be returned to the RoE track, as it has been lowered below 8.
Finally artillery is firing at Saraci. The player checks effects by rolling two dice, rolling an 11. So he builds the Artillery Pool putting in it the random unit damage markers for all units in Saraci CP or Saraci OW, that is, all units of the second platoon (BQ, GB and FB). He draws one marker and places it in the Enemy Weapons pool, without looking at it (this is not enforced, as next artillery fire will discover which one is missing, but it's advised to do your best to keep it "secret"). As a further effect, RoE increases by one, so the RoE level is now 7, not enough to have VL2 special ability available again!
End Phase
Neither victory nor defeat is achieved, so the game goes on. The Hull damage marker is flipped to its red side.
The game goes on...
...to turn 6, AQ is Stun and will block the road, pinning QL1 and EA in their positions; only FA is available to proceed to Tango 2.
The player has many options: place all the second platoon in support, give all remaining "Fire" orders, manage to have two running tanks at Kalesija in order to head toward Tango 2... but the Tango 2 deadline is now short two full turns so maybe QL3 will have to move to Kalesija to extend the deadline...
The situation has become interesting. An operational victory is possible, but the political or strategic victories now seem very difficult.
12 Historical context
The Bosnian Quagmire
After a political standoff and escalating tensions, Yugoslavia disintegrated in 1991, igniting a conflict among various ethnic groups. By 1992, the war had spread to the territory of Bosnia and Herzegovina as the nation pursued independence. The three principal forces, each representing one of Bosnia's constituent nations - Croats, Serbs, and Bosniaks (Bosnian Muslims) - engaged in a fierce conflict, often changing sides and allies. As the war intensified and with civilians becoming the victims, the international community entrusted the United Nations to deploy the UN Protection Force (UNPROFOR) to Bosnia with an aim to alleviate the growing humanitarian crisis, and lay the groundwork for potential peace agreement. However, the UN peacekeepers were limited by their mandate, which prevented their engagement with hostile forces.
In 1993, the UN Security Council designated six "safe areas" in Bosnia, where UN forces could guarantee military security to civilians caught in the crossfire. These areas were the Bosniak enclaves of Bihac, Sarajevo, Srebrenica, Zepa, Gorazde and Tuzla. At the same time, the UNPROFOR mission was expanded to protect those safe areas. The defense of Tuzla area was assigned to "The Nordic Battalion" (NORDBAT 2). This was a relatively small unit, comprising of around 1,000 Swedish soldiers, 10 Danish tanks with corresponding personnel, and a Norwegian helicopter detachment. All three Nordic countries had one thing in common. They had been perceived as untested warriors with little combat experience. Yet, they would prove to be one of the most bellicose UN units in the Bosnian war.
NORDBAT 2 to the aid
The Swedes arrived to Tuzla first, with the Danish tanks delayed for several months, as both the Bosnians Serbs, and the rest of Yugoslavia (at that point comprising Serbia and Montenegro), tried all within their power to prevent the UN from bringing armor into the area. The official reason given was that the NORDBAT 2 was a peacekeeping force, and thus did not need tanks. The real explanation, however, was that ten Danish tanks under a UN flag would break the Bosnian Serb monopoly on heavy weapons in Bosnia and Herzegovina. The Serbs were not the only ones complaining. The Bosnian Croats, too, tried to prevent an increase in UN firepower, in an attempt to maintain superiority over the Bosniak forces.
Despite all attempts to prevent the arrival of NORDBAT 2 armor, ten Danish Leopard-1 tanks reached Bosnia in early 1994. By that time, the situation in the area was deadlocked. The Bosnian Serbs were unable to take the crucial key point of Tuzla, the area that sheltered over 370,000 people, but they could, and did cut off relief convoys, threatening to starve the civilians. Thus, the Nordic battalion had a paramount task - to ensure that vital convoys reach the Tuzla area. At the end of March 1994, the UN extended NORDBAT 2 mission to keep airport in Tuzla open, allowing emergency aid by air.
Shootbat
Meanwhile, the already dire situation worsened after Bosniak units from the Safe zone near the town of Gorazde, around 150 km (95 miles) south of Tuzla, conducted a successful offensive, burning down several Bosnian Serb villages west of the Drina River. The situation was de-escalated with the UN help, but only after NATO, at the UN request, had attacked Bosnian Serb targets. Retaliation followed, with a downed English fighter, and 150 UNPROFOR soldiers taken as hostages. This further restricted UN military activity in the area, putting additional restraints on NORDBAT 2 mandate.
However, the Nordic battalion, led by a Swedish commander and his second in command, Danish Lieutenant Colonel Lars Møller, weren't ready to play by the rules. Already in December 1993, the Swedes had their first serious hostile encounter with a Bosnian Croat battalion-sized force after relieving a Canadian company at a remote hospital compound. Outnumbered and outgunned, and under mortar fire, the Swedes held their positions. At the end, the Nords prevailed, forcing the Croats to withdraw from the area. The aggressive posture earned the Nordic battalion a nickname - Shootbat. The name that will be upheld by the Danish Jydske Dragonregiment in a military action, which became known throughout the world as "Operation Bøllebank" (Hooligan bashing).
Tanks to the rescue
The arrival of the Danish tanks in the Tuzla safe zone shifted the balance of power to the UN's side. Now, the Nordic battalion could finally open the supply route into Tuzla from the southwest part of Bosnia and Herzegovina, without risking losses. With their technological advantage, the snow-white Leopards-1 were a clear and present warning to the Bosnian Serbs, who did not dare to pit their older T-55s into the maw of the mighty cats. While formidable in the daylight, the Danish tanks and their experienced crews could be vulnerable in the darkness. Or so, did the enemy think.
As the night fell, on April 29, 1994, the Swedish observation post, Tango 2, came under fire. Fearing for his comrades, Møller ordered (1) two Danish tank platoons (seven tanks), to drive out towards the village of Kalesija, where the beleaguered Tango 2 observation outpost was located. However, as they neared the village of Saraci, the Danish tanks fell into an ambush by the Bosnian Serb Sekovici brigade, who apparently saw an opportunity to eliminate the Leopards. But, the Danes were an unorthodox opponent.
(1) Editor's note: some sources indicate that the plan put in action was devised a few days earlier to cope with this situation.
Hooligan Bashing
With both sides in complete darkness, the Danes were clearly at disadvantage: the Leopards blind to the attack coming from the nearby hill of Vis, where the enemy had stationed its artillery. For every minute that the Danish tanks and Swedish soldiers were under the hostile fire, the probability of casualties grew. To make things more complicated, restrictive rules of engagement prevented the Danes from returning fire, even though it was painfully obvious that the Bosnian Serbs had deliberately attacked the Nordic forces. After 20 minutes and in the face of increasing enemy activity, Danish tanks received the order to return fire.
The Leopard tanks sprang into action, engaging enemy anti-tank positions with accurate cannon fire. In less than an hour, the seven Danish Leopards fired over 80 shells, inflicting major casualties to the Bosnian Serb forces, and losing not a single tank or soldier. The Bosnian Serbs later admitted at least nine dead and some material. However, other estimates put the number of casualties as high as 150.
The UN conducted an investigation, to determine if the Nordic battalion had broken the rules of engagement. Despite the controversy, Operation Bøllebank was a success, with Bosnian Serbs in disarray, and the Danes becoming one of the rare UN units in Bosnia that engaged in tank combat. Victory was even sweeter, as the enemy failed to get his revenge. It is not that the Bosnian Serbs did not try. A number of soldiers from the Nordic battalion were wounded in later engagements, but not a single soldier was killed.
Peacekeeping by force
After the small battle of Tuzla, Møller and Rasmussen stated that in their opinion a trap had been set up, in fact not without humor Møller said "it must have been an ambush, Tango 2 was the cheese and we were the mouse. Only this time the mouse ate the cat!". According to him: "the psychology of the ongoing war was just a continuous tug of war between those who bowed their heads and were crushed and those who instead held firm and showed themselves to be strong." The episode, the only one of its kind by the UNPROFOR forces, has been analyzed as a case study in the use of force in peacekeeping operations, that is, a self-defense intervention deemed necessary, but without causing an escalation of the ongoing conflict. The study highlights some relevant points:
- the use of force only as 'self-defense': the Danes gave clear warnings, precisely by lighting up the tanks and only after being targeted again, they decided to respond in a targeted manner on the Serbian positions from which the shots came, acting with extreme precision and without receiving the NATO 'close air support';
- proof of impartiality was provided: before the clash they gave proof of impartiality by providing both humanitarian aid to the Muslims and at the same time providing protection to the Serbs;
- there was clarity in communicating the cause of the clash: immediately after the clash the Danish commander contacted the Serbian command justifying the reaction of the tanks with the breaking of the commitment not to attack the blue helmets. The Serbian command accepted the motivation despite the fact that the strong Danish reaction had caused victims among the Bosnian Serbs. The clash had no further consequences and the Serbs did not even seek 'revenge'.
Therefore, the use of force in peacekeeping operations can be considered a possible instrument of 'de-escalation' of difficult situations, within the options for self-defense and in compliance with a behavior that is impartial as far as possible.
But in conclusion, in the general military weakness and political rigidity of the rules of engagement during the operations of the blue helmets in the Balkans, it can be said that the Danes were 'tough nuts' for General Mladic's men. In fact, in October of the same year, in Gradacac, the Leopards destroyed a piece of artillery and damaged a T-55.
13 Glossary
- APC: Armored Personnel Carrier, lightly armored vehicle used for transport and command.
- ATGM: Anti-Tank Guided Missile (see 2.1.2).
- Battalion HQ special ability: Each command vehicle in the UN task force has two particular abilities (see 5.5).
- BSA: Bosnian Serb Army, was the military of the Republika Srpska.
- BPC: BSA initials in Serbian (and in Serbian Cyrillic alphabet).
- C: Enemy weapon marker that fires from the center of the Vis mountain. Tanks firing from a "L" or "R" OW cannot target it (see 2.1.1 and 6.3).
- CKP: Checkpoint position. A position along the road (see 2.1.1).
- CP: Contact Point position. A place to go and possible destination of a move or tow order (see 2.1.1).
- Direct fire: Firing a projectile directly at a target within the line of sight of the firer. In game terms, BSA direct fire refers to tanks, ATGM and HMG (see 7.1), for UN tanks it refers to fire from exposed CKPs and K OWs (see 6.2).
- Enough is enough: "When we were attacked by anti-tank missiles I thought: 'Enough is enough', and ordered the tanks to return fire at the missile position" declared in an interview Squadron commander Carsten Rasmussen. The back of RoE marker has no practical use in game.
- Exposed position: CKP or OW position subject to BSA direct fire (see 2.1.1).
Counter key
The counter key (page 27) shows: Units - Platoon, Tank (Leopard 1A5DK), Fire order received (flipped side), APC (PBV 302). Markers - Battalion HQ special ability (e.g. "Draw their Fire!", "Extra Order"), BSA tank status (Hot/Cold), UN tanks allowed targets, Enemy action marker (BSA weapons firing at position), Special artillery marker (artillery target; further effects), Move order / Tow order (for tank EA), Damage and stun markers (light damage; tank is unbuttoned; Tracks / Turret heavy damage; Hull heavy damage - can move / cannot move; TC killed; Stun), Enemy weapons markers (fires at 2 targets; line of sight, which affects only UN fire), Enemy weapons pool's RU and event markers, Civilian car event chit, Turn and RoE track markers (Turn, RoE level, Airstrike, T2 Deadline, Fire Status).
Editor's note: the Order Matrix (PAS 1) and the PAS 4 damage tables (Enemy Direct Fire and Enemy Indirect Fire diagrams) referred to in the rules are separate player-aid sheets and are not printed in the rulebook PDF. The Enemy Indirect Fire results are summarised in 7.2.1.