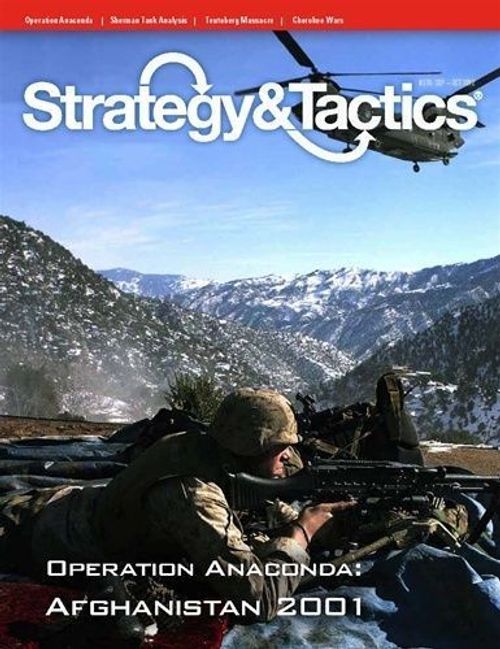
Operation Anaconda: Battle in Afghanistan, March 2002
Operation Anaconda: Battle in Afghanistan, March 2002 Rulebook
Table of Contents
Table of Contents
- 1.0 Introduction
- 2.0 Components
- 2.1 Map
- 2.2 Playing Pieces
- 2.3 How to Read Ground Units
- 2.4 How to Read Air & Helicopter Units
- 2.5 Unit Types & Sizes
- 2.6 Unit Designations, Nationalities & Sides
- 2.7 Backprinting
- 2.8 Abbreviations
- 2.9 Others
- 2.10 Command Markers
- 2.11 Other Markers
- 2.12 Player Displays
- 2.13 Pools
- 2.14 Do or Die
- 2.15 Old Hands Note
- 3.0 Set Up
- 4.0 Sequence of Play
- 5.0 Sub-Commands & Activations
- 6.0 Panic! & Jihad!
- 7.0 Reinforcements
- 8.0 Movement
- 9.0 Stacking
- 10.0 Combat (General)
- 11.0 Offensive Fire
- 12.0 Defensive Fire
- 12.1 Defensive Fire Parameters
- 12.2 Procedures & Strictures
- 12.3 Defensive Fire
- 12.4 Running the Gauntlet
- 12.5 Combined Defensive Fire Mandatory
- 12.6 Terrain
- 12.7 Reinforcements Immunity to Defensive Fire
- 12.8 Command Control Restrictions
- 12.9 Ineligible Units
- 12.10 Indirect Defensive Fire
- 12.11 No Close assault or Advance After Combat
- 13.0 Indirect Fire
- 14.0 Air Support
- 15.0 Helicopters
- 16.0 Airmobile Transport
- 17.0 Anti-Aircraft Fire
- 18.0 Fog O' War
- 19.0 ISR
- 20.0 Special Units
- 21.0 Off-Map Bases
- 22.0 End of Game
- 23.0 Victory Conditions
- Optional Rules
- 24.0 Leaders
- 25.0 Osama Bin Laden
- 26.0 Casualties
- 27.0 Attacker Impetus
- 28.0 Fire Support Restrictions
- 29.0 Body Armor
- 30.0 Rubble
- 31.0 Scenario Variant: More Coalition Forces
1.0 Introduction
Boots on the Ground ("Boots" for short) is a wargame system that simulates modern battles on the quasi-tactical level. This particular rules set is for Operation Anaconda, the battle fought between Coalition forces and Al Qaeda in eastern Afghanistan in March of 2002. This battle was a combined US-Afghan-Coalition attempt to surround and destroy Al Qaeda forces, but the operation fell apart owing to poor command control. While technically a Coalition victory, the battle demonstrated the strengths and weaknesses of both sides.
The game uses the "Boots" system, which makes command-control the central feature of the design. Each player commands a combat force composed of one or more sub-commands. Those sub-commands are maneuvered by picking Command chits at random; When a Command chit is picked, that sub-command is then activated. Since players do not know the order in which those Command chits are picked, battles become chaotic fights as players strive to create and exploit opportunities.
This is a two-player game, with one player commanding Coalition forces, and the other Al Qaeda. Combat in the game is quasi-tactical in that units fire at enemy targets at range. Additionally, the Coalition player has access to various types of fire support, such as Airstrikes. However, owing to the chaotic nature of the battle, fire support, as well as various reinforcements appear at random. The Al Qaeda player has the advantage of his units being deployed face down so that the Coalition player must use ISR (Intelligence-Surveillance-Reconnaissance) to reveal them. Game play becomes a tense contest between asymmetrical forces in the mountains of Afghanistan.
2.0 Components
2.1 Map
The map shows the Shahi-Kot Valley in eastern Afghanistan, as well as the surrounding mountains. A hexagonal grid has been superimposed over the terrain features on the map to regularize the movement and positioning of the playing pieces. The hexagons are called "hexes" in the rules.
- Coalition Base Gardez: this is off the west map edge.
- Coalition Base Khowst: this is off the east map edge.
- Al Qaeda Sanctuary: this is off the east map edge.
2.2 Playing Pieces
- Air units. Airstrikes, UAVs, AC-130s, and Satellites.
- Combat unit. Any unit with a firepower of one or more.
- Ground units. All units other than air and helicopters.
- Helicopter units. gunships, transports and SOAR aviation.
- Markers. Various informational pieces.
- Mobile units. Any unit with a movement factor of "1" or more.
- Vehicular units. tanks, gun trucks, artillery.
2.3 How to Read Ground Units
- Firepower Factor (first number): this is the unit's basic combat strength when attacking or a defending. See rule 10.0.
- Range Factor (second number): this is the basic number of hexes through which a unit can apply its firepower.
- Movement factor (third number): this is the basic number of hexes through which a unit can move in a turn. See rule 7.0.
- Unit identification: (explained below)
- Unit type: [See 2.5]
- Unit size: (explained below)
- ISR symbol: the unit has special Intelligence-Surveillance-Reconnaissance abilities (represented by an eye symbol).
Special Symbols:
- A unit with "+" (plus sign) after its firepower may utilize "close assault". (For example: infantry.)
- A unit with "+" (plus sign) after its range may utilize indirect fire. All other units may only attack as direct fire. (For example: heavy weapons units.)
2.4 How to Read Air & Helicopter Units
- Firepower Factor: All Air and Helicopter units that can attack do so in the hex in which they are placed.
- ISR symbol: This unit has a special Intelligence-Surveillance-Reconnaissance ability (represented by an eye symbol).
2.5 Unit Types & Sizes
Unit sizes:
- | = Company or Battery
- ** = Section, Squad or Team
- *** = Platoon
2.6 Unit Designations, Nationalities & Sides
Units may be identified by a title, a number, or by a multi-part designation.
Coalition: The term "Coalition" includes all US, NATO and Afghan Military Force (AMF) units.
- AMF: All units marked AMF.
- NATO: Canadian (PPCLI), UK, Australian, New Zealand, German, Danish, Norwegian.
- US: All other units.
Al Qaeda: The term "Al Qaeda" includes all Al Qaeda units (including all possible Taliban formations).
2.7 Backprinting
The reverse side of the counter has special information:
- Coalition Deployment Indicator
- Optional: Unit enters play only if using the Optional rules.
- Start: Units starts the game deployed.
- Reinforcement: Unit starts play in the Reinforcement Pool.
- Special Reinforcement: Unit enters play under specific situations as described in the Reinforcement rule.
2.8 Abbreviations
Coalition:
- AMF = Afghan Military Forces
- CA JTF-2 = Canadian Joint Task Force Two
- CAG = Combat Applications Group (Delta Force)
- CIA = Central Intelligence Agency
- DN = Denmark (various SOF units)
- Eng = Engineer (elite Afghan infantry, not an engineer unit per se)
- GF = Grey Foxes (US Army SOF/intelligence unit)
- GH = Gul Haidar (Afghan warlord)
- KK = Kamel Khan (Afghan warlord)
- GE KSK = German Kommando Spezialkrafte
- Mako = Mako (US Navy SEALs)
- NW = Norway (various SOF units)
- NZ = New Zealand
- ODA = Operational Detachment A
- QRF = Quick Reaction Force (US Army Rangers)
- PPCLI = Princess Patricia's Canadian Light Infantry
- PSYOP = Psychological Operations (plus Military Intelligence Detachment)
- SAS = Special Air Service
- TF = Task Force
- TFR = Task Force Rakkasan
- TFC = Task Force Commando
- TFD = Task Force Dagger
- UK SBS = United Kingdom Special Boat Service
- Zia = Zia Lodin (Afghan warlord)
- ZK = Zakim Kham (Afghan warlord)
Al Qaeda:
- A, B, C = sub-commands
General:
- DRM = Die Roll Modifier
- ISR = Intelligence, Surveillance, Reconnaissance
- SOF = Special Operations Forces
- UAV = Unmanned Aerial Vehicle (drone aircraft)
2.9 Others
- Airstrikes: These have a firepower value on them. They may attack only into hexes they occupy.
- Helicopter Gunships. These have a firepower value on them. They may attack only into hexes they occupy.
- Helicopter Transport. These can transport ground units.
- UAV. These can conduct ISR.
- Satellite. These can conduct ISR.
- Friendly Fire. These have "1 DR" printed on them; this is explained under the Friendly Fire rule.
- Jihad!. This may trigger Al Qaeda reinforcements.
- Panic!. This may trigger Panic among Coalition AMF forces.
2.10 Command Markers
These are used to activate various sub-commands. They have the names of Sub-Commands on them, corresponding to units in the game, and may also be identified by the same colored band on the marker.
Example: The US Task Force Rakkasan sub-command marker has the same color band as do all units of Task Force Rakkasan.
2.11 Other Markers
- Casualty. Location of KIA/WIA or downed helicopters. Only the Coalition has these.
- Pinned. A unit which has been suppressed by fire.
- Turn. Current game turn
2.12 Player Displays
Each player has a set of boxes for various units that are held off-map.
2.13 Pools
Several game functions require "Pools"; These are large mouth opaque containers in which counters may be placed for the purposes of random draws.
2.14 Do or Die
Players will need one six-sided die to play the game.
2.14.1 Die Roll modifier (DRM)
A DRM is a number added to a die roll result.
Example: If a game function calls for a DRM of +1, the final adjusted outcome would be 4 if the player rolled a 3.
2.15 Old Hands Note
There are no supply rules, or zone of control rules, in Anaconda.
3.0 Set Up
3.1 Set Up Instructions
The players will need a large-mouth opaque container, such as a coffee mug. Throughout the course of a game, players will draw Command markers at random from this Pool.
3.2 Command Pool
Place the starting command markers from both sides into the "Command Pool."
3.2.1 Command Markers
Place in the Pool at start:
- Al Qaeda A, B and C commands.
- Coalition: TF Rakkasan, TF Dagger, TF 11, TF 64.
- Panic! marker.
- Jihad! marker.
3.3 Command Marker Reinforcements
The TF Commando marker is held aside initially. It is placed in the Command Pool on turn 11 if using the Scenario Extension (rule 22.4).
3.4 Al Qaeda Set Up
Set-up the game pieces at start:
-
Place the Osama bin Laden counter aside; He is used only in the optional rules.
-
The Al Qaeda player places all of his units face down and mixes them up. He then picks 48 of those units at random. After picking them, he examines each counter and places them anywhere on the map, face down. He may place up to three units in each single hex. He may not place units adjacent to a map edge.
Example: When the Al Qaeda player places his units, he may examine them first. They are then placed face down so the Coalition player has no idea what is being deployed.
-
The Al Qaeda player then places all of his unpicked mobile units (those units with a movement of "1" or more) in the Al Qaeda Reinforcement Pool (another large mouth opaque container). Those units may enter if a Jihad! occurs (rule 6.4). The remaining (unpicked non-mobile) units are placed aside, face down. These latter units are not used in this scenario.
3.5 Coalition Set Up
Check the back of the Coalition units for their deployment code:
- Task Force 64: place the two "Start Map" units anywhere on the map; they may not be placed in or adjacent to hexes containing Al Qaeda units.
- The following are placed in the Gardez and/or Khowst Bases:
- Task Force 64: All remaining "Start" units.
- Task Force Dagger: All "Start" units.
- Task Force Rakkasan: All "Start" units.
- Helicopters: All "Start" units.
- The following units are placed in the Coalition Reinforcement Pool: all Coalition Ground "Reinforcement" and all Coalition "Air Reinforcement" units. The Friendly Fire marker.
- The following units are placed in the Coalition Special Reinforcement box: Task Force Commando: all units. These are received as reinforcements if playing the Extended Scenario (rule 22.4).
- The following units are not used in the Standard rules; place them aside: all "Optional Reinforcement" units.
3.6 Place the Various Markers to one Side
They will be used as the game progresses.
3.7 First Player
The Coalition is the "first player." This is the player who draws first from the Command Pool each game turn. The Al Qaeda player is the "second player."
3.8 Begin Play
Play proceeds according to the sequence given in section 4.0 for the number of game turns specified in the scenario rules.
3.9 Ending the Game
See rule 22.0.
4.0 Sequence of Play
4.1 Phases & Sub-phases
Anaconda is played in sequential "game turns," each of which is composed of interactive "Phases" and "sub-phases." During each Operations Phase, the players alternate picking command markers; each such pick thereby indicating which sub-command will be "activated" for movement and combat at that time (rule 5.0). The player controlling a selected sub-command then receives reinforcements for it, if any are available that game turn, and then moves and conducts combat with the units of that sub-command. The player who is currently conducting an Operations Phase is called the "phasing player"; the other player is the "non-phasing player."
4.2 Sequence of Play
Each game turn consists of the following sequence, which players must follow in the order specified.
I. OPERATIONS PHASES
A. First Operations Phase (5.0)
The first player must draw a sub-command marker from the Command Pool. That sub-command, named on the drawn chit, is thereby "activated." In general, the player who controls that sub-command (no matter who actually drew the counter) then executes the following steps with those units. Panic! and Jihad! markers may also be played (see 6.0).
After a chit is pulled, it is set off to the side of the map, to be returned to the pool at the end of the game turn.
- A.1 Reinforcement Sub-Phase (7.0): The player picks at random a number of Reinforcement units from his Pool as indicated by the Reinforcement rule.
- A.2. ISR Sub-Phase (19.0): The Phasing player conducts ISR with any qualified units.
- A.3. Movement Sub-Phase (8.0): The phasing player moves all, some, or none of the units of his activated sub-command, as he chooses. The enemy player may conduct Defensive Fire as per the Defensive Fire rule (12.0).
- A.4. Combat Sub-Phase (11.0): The phasing player uses units of his activated sub-command to fire at enemy units.
B. Second Operations Phase
The second player draws a new sub-command chit as in "A" above, and the player owning that activated sub-command works through steps one through three, again, as described above.
C., D., etc. Subsequent Operations Phases
Continue alternating between the first and second players drawing chits to activate sub-commands until all of the command markers have been picked from the pool, or until both players have passed consecutively.
Example: If there are five sub-command markers in the Command Pool, there could be up to five Operations Phases in a single game turn.
II. RETURN PHASE
Return all of the Command Activation and the unplayed Panic! and Jihad! markers to the Command Pool.
Return all air, UAV, satellite, and friendly fire markers from on the map and replace them in the Coalition Reinforcement Pool.
Remove all Pin markers from all units.
III. GAME TURN INTER-PHASE
- A. End of Game? Check to see if the conditions exist for the game to be ended. If not:
- B. Game Turn Advance: Move the game turn marker to the next box on the Game Turn Record Track printed on the mapsheet.
5.0 Sub-Commands & Activations
5.1 Sub-Commands
The armies in Anaconda are divided into "sub-commands," each of which operates as a semi-autonomous force within its overall army. Sub-commands are defined by abbreviations and by colors on the unit-counters. A particular sub-command is said to be "activated" for an Operations Phase when its marker is picked during Step II of the game sequence outline given above in rule 4.2. Command markers become available according to the initial deployment instructions and reinforcement rules. Once available, they generally remain available for the rest of the game, except as stated in the reinforcement schedule.
Note: The affiliated game charts for the Command Activation Chart spells out which units are activated by each command marker.
5.2 Operations Phase
If a player picks the marker of a sub-command that's part of his army, he must at that time execute the movement and combat sub-phases for that sub-command. In general, if a player picks the marker of a sub-command that is part of the opposing player's army, the player who drew that marker gives it to his opponent, and the player receiving that marker must therefore execute the reinforcement, movement and combat sub-phases for that sub-command.
5.3 In General
A sub-command may be activated (and thereby be reinforced, move and fight) only during an Operations Phase in which its own marker has been picked. Upon the completion of that Operations Phase that sub-command is no longer activated.
5.4 Commands with No Units
A sub-command may have no units on the map (owing to units not yet entering play or perhaps all of its forces being wiped out). Nonetheless, the command marker for it remains in the pool and is drawn normally.
Note: In some cases that command may generate reinforcements and get units back into play.
5.5 Air Support
Generally, Coalition air support has no command, and may be used with any sub-command.
Example: When picking and then playing the Task Force Rakkasan marker, the Coalition player could activate all units with the "Task Force Rakkasan" designation, plus pick Air Support markers from the pool.
5.6 Multiple Activation
Certain Command markers activate more than one Command.
Example: See the Jihad! rule (see 6.0).
5.7 Multiple Activations
A player can, by picking the appropriate command markers, cause an individual command to activate more than once per turn.
Example: Again, see the Jihad! rule (see 6.0).
5.8 Sub-Command Ownership
A playermay never carry out any action for units that are part of the enemy army, even if a player is the player who actually picked its sub-command marker. In such cases, a player generally hand the picked enemy sub-command marker to your opponent, who then must use it to conduct an Operations Phase of his own.
Note: This means a player may potentially conduct more than one Operations Phase before the opposing player is allowed to react with an Operations Phase of his own.
5.9 Disposition of Command Markers
After a command marker is picked, it is placed aside. It is returned to the Command Pool during the Planning Phase of the subsequent turn as per rule 5.2.
5.10 Passing
Players may pass on the option of picking a command marker. If both players pass consecutively, the Operations Phases for that turn end, and play moves to the Air Return Phase.
5.11 Stacking
Units from different sub-commands may stack together.
5.12 Attacking
Since only activated units may attack, units from different sub-commands which may be stacked together in the same hex may not generally participate in the same attacks, unless each of their sub-commands is simultaneously activated by a command marker.
5.13 Defending
Units will always defend normally, regardless of which sub-command, friendly or enemy, happens to be activated at that moment. Units from different sub-commands may be called on to defend together.
5.14 Actions
A unit that is activated may perform all actions during its Operations Phase.
Example: A unit could be placed as a reinforcement, conduct ISR, move, and then fire on a target.
5.15 Air Units
Air units are not part of specific commands. A player may use any number of available air units with any command.
Example: The Coalition player activates "Task Force Rakkasan"; he also has four air units available. He could play some, none or all of those four air units with Task Force Rakkasan.
5.16 Land Unit Reinforcements
A player may end up picking a particular ground unit from the Reinforcement Pool that is part of a different sub-command than the command that was just activated. The unit is still received. For the Coalition, place it in an off-map base. It actually moves and fights in the first activation of its own sub-command. For Al Qaeda, simply place it on the map as per the reinforcement rule.
Example: "Task Force Rakkasan" is activated; during the reinforcement pick, the Coalition player picks the Ranger QRF unit, which is part of a different command. Place the QRF in an off-map base, and when its own sub-command is activated, then a player can move it onto the map, etc.
6.0 Panic! & Jihad!
6.1 Panic! and Jihad!
The "Panic!" and "Jihad!" markers are placed in the Command Pool at the start of play.
6.2 Coalition AMF Panic
If the Coalition player draws the Panic! marker, he rolls one die immediately: if the number rolled is less than or equal to the quantity of Coalition AMF units that are pinned on the map, and the number of Coalition AMF units presently in the deadpile, Panic goes into effect.
Note: If the Al Qaeda player picks the Panic! marker, it has no effect. Return it to the Command Pool.
6.2.2 Units Affected by Panic
All AMF infantry, AMF heavy weapons and AMF tank units on the map are subject to Panic, regardless of their location on the map, unless currently stacked with any US unit.
6.2.3 Panic Effects
First remove all panicking units from the map; Then roll one die for each unit, implementing the results as follows:
- 1-3 = Unit is eliminated.
- 4-6 = The unit returns to play in the Gardez or in the Khowst box (Coalition player's choice.) Place the unit on the reinforcement track that number of turns later. This automatically unpins any pinned unit, in such a case.
6.2.4 Leadership
A panicking AMF unit in the same hex as a US SOF unit of the AMF sub-command does not panic. It remains in play.
6.2.5 Panic
Panic only ever occurs once per scenario. If a panic was triggered, remove the Panic! marker from the game. Otherwise, return it to the pool.
6.3 Al Qaeda & Jihad
If the Al Qaeda player draws the Jihad! marker, he immediately rolls two dice and totals the amount:
- Jihad: If the total number rolled is less than or equal to the total number of Al Qaeda units that are pinned and/or in the deadpile, Jihad goes into effect for that turn. The Al Qaeda player rolls two more dice and totals the result; This is the number of mobile units he selects from among the units that were not initially picked for deployment; These are immediately placed as reinforcements on the east map edge. The Al Qaeda player then takes an Operations Phase in which all Al Qaeda units are in command. At the end of that Phase, remove the Jihad! marker from play permanently.
- No Jihad: If the total number rolled is greater than the number of Al Qaeda units that are pinned and/or in the deadpile, there is no effect. The marker is returned to the Command Pool during the Return Phase.
6.3.1 Limited Jihad
There can only be one Jihad per scenario.
Note: The more casualties that the Al Qaeda player has taken, the greater the chance of having a Jihad.
7.0 Reinforcements
7.1 Reinforcements
Players may receive additional units and command markers over the course of a game. Such units are called reinforcements. All reinforcements are initially placed in the players' respective Reinforcement Pool.
7.2 Coalition Reinforcement Pool
During each Operations Phase in which a Coalition command is activated, the Coalition player picks at random one or more reinforcement units from this pool. The number depends upon the sub-command, see the Command Activation Table.
7.3 Coalition Placement and Utilization
The Coalition player places all his reinforcements in the designated location, as follows:
Note: Reinforcements operate normally during the turn of arrival.
- Air Units: Air units are placed in the Air Available Display. They must be used in the Operations Phase in which they were picked, at which point they are placed back into the Reinforcement Pool (they may be picked later). They may not be saved from turn to turn. At the end of the Operations Phase, any unused air units are placed in the Coalition Utilized Air Units box.
- Helicopters Units: Helicopter units are placed in either the Coalition Gardez or Khowst Base boxes (Coalition player choice). From there, they may fly onto the map to perform helicopter missions (see 15.0). Unlike air units, helicopters, once picked, remain in play for the remainder of the game (or until destroyed or damaged).
- Ground Units: Ground units are placed in either the Coalition Gardez or Khowst Base boxes (Coalition player choice). From there they may move onto the map either via ground movement or via airmobile insertion.
- Task Force Commando: The Coalition player receives the units marked "Special Reinforcements" only if the scenario is extended (see 22.4). If so, the units of Task Force Commando are placed in Khowst and/or Gardez. They are not placed in the Reinforcement Pool.
- Optional Reinforcements. These are received only if playing with the optional rules.
7.4 Al Qaeda
If a Jihad is activated (rule 6.4), the Al Qaeda player rolls two dice, totals the dice results, and picks at random that number of units from his Reinforcement Pool. He examines the picked units, then places them face down on any hex(es) on the west edge of the map. They cannot be placed in the same hex as Coalition units.
7.5 No Delay of Reinforcements
Reinforcements must be deployed on the map as soon as they are received.
8.0 Movement
8.1 Movement Allowance
During each movement sub-Phase, the phasing player may move as many or as few of the mobile units of his activated sub-command(s) as he chooses. Eligible units may be moved in any direction or combination of directions to the limits of their own movement factors. If more than one command is activated, the player may move units of those commands in any order.
8.2 Movement Factor
Each unit has a movement factor printed upon it. Units are moved tracing a path of contiguous hexes through the hex grid, until all movement points are expended or the player decides to cease moving the unit, whichever comes first. As each unit enters a hex, it pays one or more movement points from its movement allowance. Consult the Terrain Effects Chart printed on the map for further details.
8.3 Vehicular Unit Movement
Units which are listed as "Vehicular" must use the Vehicular movement costs and prohibitions listed on the TEC.
Note: The optional US artillery is vehicular, as it would require trucks to haul the guns and ammo.
8.4 Zero Movement Factor Units
Units with printed movement factors of zero (0) never move once placed on the map.
8.5 Restrictions
A player's units may be moved only during a movement sub-Phase in which one of his sub-commands has been activated. Once a unit has been moved and the player's hand removed from it, it may not be moved again. A unit may expend all, some, or none of its movement points in any one movement sub-Phase of its sub-command. Unused movement points may not be accumulated from turn to turn or Phase to Phase or sub-Phase to sub-Phase, nor may they be in any way transferred from one unit to another.
8.6 Minimum Movement
All of the units with a movement of "1" or more are generally guaranteed the ability to move at least one hex per movement sub-Phase of their sub-command. However, units may never enter an enemy occupied hex, nor enter prohibited hexes.
8.7 Defensive Fire
Moving units may be attacked by non-phasing enemy units via defensive fire (see rule 12.0).
8.8 Panic Movement
Panic isn't considered part of regular movement and as such doesn't use movement points (11.0, 12.0).
8.9 Terrain
To enter any particular hex, a unit must expend the number of movement points designated by the Terrain Effects Chart (TEC) for the kind of terrain in it. When the TEC calls for a movement point expenditure to cross a hexside (such as a stream), that cost is in addition to the terrain cost for entering the hex.
8.10 Multiple Terrain
If there is more than one type of terrain in an entered hex, use the highest single movement cost from among all of the terrain types therein.
8.11 Special Moves
These special moves are allowed as follows:
- If there is a road, track or bridge, use the road, track, or bridge movement rate regardless of any other terrain in that hex, as described below; and
- Units using airmobile movement ignore terrain through which they move.
8.12 Roads
A unit that moves from one road hex directly into an adjacent road hex through a hexside traversed by that road expends one half (0.50) movement point per hex entered. (Effectively, movement along a road is at twice a unit's clear terrain movement allowance).
8.13 Tracks
A unit that moves from one track hex directly into an adjacent track hex through a hexside traversed by that track or that railroad expends one half (0.5) movement point per hex entered.
8.14 Truck Movement
Coalition ground units that enter the map as reinforcements via ground movement are using truck movement for the first Movement Phase they appear. As such, all movement from one road and/or track hex to any other connected road and/or track hex costs one half (0.50) movement point per hex.
8.15 Hexsides
Units must pay the movement cost to cross a stream hexside in addition to the terrain cost on the other side. Bridges negate the cost for the hexside.
8.16 Bridge Movement
A bridge negates the effects of stream hexsides on movement for units crossing the hexside. There must actually be a bridge symbol for this bonus to be operative; a road or trail that crosses a stream without a bridge symbol present on the map doesn't count as a bridge, and crossing movement points must be paid in such cases.
8.17 Exiting the Map
Coalition units may leave the map to enter an off-map base (see rule 21.0).
Al Qaeda units may leave the map via the east map edge to escape. Place them in the Sanctuary box. Once they have left the map, however, they may not return.
8.18 Leaving the Map
To leave the map, move the unit to a map edge and then pay a number of movement points equal to the terrain cost of the hex from which the unit was leaving. A player may use road/track movement to do so.
Note: Airmobile units can be flown off the map at no movement cost (see rule 16.0.)
8.19 Vehicular Movement
Vehicular units pay different movement costs for certain types of terrain. See the TEC.
8.20 TF Dagger Vehicles
TF Dagger infantry, heavy weapons and SOF units that enter on turn one are assumed to have a movement factor of "10" (ten). Starting on turn two, they revert to their printed movement.
9.0 Stacking
9.1 Stacking Terminology
Having more than one friendly unit in a hex at the same time is called "stacking."
9.2 Stacking Limits
There is no stacking limit. A player may have an unlimited number of units in any hex.
Note: Since fire affects all units in a hex, this can create some extremely dangerous situations.
9.3 Sub-Command Stacking
Friendly units of different sub-commands may stack together. Friendly units may move through hexes occupied by other friendly units, even if they belong to different friendly sub-commands, at no extra cost. There is no limit on the number of friendly units that may pass through a single hex or cross a single hexside in one sub-Phase, Phase or turn.
9.4 Stacking Exceptions
Friendly units may generally never enter any hex containing enemy units.
Exception: Air and helicopter units may be placed in the same hex as enemy units for fire or ISR.
9.5 Off-map Displays
An unlimited number of units may be present in any off-map display
9.6 Stack Movement
Units are generally not moved as stacks. Move each unit of an activated sub-command one at a time, no matter if they began a movement sub-Phase stacked together in the same hex.
9.7 Stacking Order
Generally, players are free to arrange their stacked units, from top to bottom, in any order that they choose, when the command is activated. The exception is any stack containing a fortified marker; Once revealed, that marker must always be kept as the top unit in that stack.
10.0 Combat (General)
10.1 Combat
Combat is executed by units utilizing their firepower factor to fire at target hexes. A player may have units fire at two times during the game turn:
- As Offensive Fire during the Offensive Fire Phase of an activated sub-command.
- As Defensive Fire, during an enemy Movement Phase. This does not require units to be activated, but there are restrictions.
Note: Defensive fire may also be used to fire Anti-Aircraft (AA).
10.2 Procedure
- Designate the firing units.
- Designate a target hex. This hex must be within range (and for direct fire weapons, in Line of Sight).
- Total the fire strengths of all units firing at the target. Find that net total within the appropriate column-heading on the Combat Results Table (CRT) printed on the mapsheet.
- Roll one die, applying all applicable DRM.
- This will give the combat result.
10.3 General Combat Rules
A firing unit is considered to be the "attacker," and a unit or stack being fired on is considered to be the "defender," regardless of the overall strategic posture of either side, or if a given combat is offensive or defensive fire.
10.4 Attack Limit
Each unit may attack no more than once per Phase.
10.5 Discretionary Combat
No unit is ever forced to fire offensively or defensively.
A player may choose to fire with some, none, or all of his eligible units during each of your own offensive fire Phases throughout the game. The attacker need not declare all his fires at the beginning of his own offensive fire Phase; he announces and executes them one at a time in any order he desires. The resolution of one offensive fire must be completed before that of the next is begun.
10.6 Combining Attacks
Units in different hexes may combine fire at the same target hex. Fire support markers may also be combined with ground fires, or they may attack by themselves. All fire against a hex is combined into one combined fire strength.
10.7 Mnemonic
If you need a memory aid to help you recall if a particular unit has already fired during an offensive fire Phase, maintain a common facing among all your units and rotate each one 180 degrees when it fires.
10.8 Creating Rubble
A targeted hex does not need to contain an enemy unit to eligible direct fire into that hex. A player may want to do so in order to rubble the hex or for bridge demolition (see 10.19, 10.20 & 10.21).
10.9 Target Singularity
No offensive fire may ever have as its target more than a single targeted hex.
10.10 Hex Targets
For Offensive Fire, fire is to be directed against the target hex, not individual units. All units in that hex may be potentially affected. Defensive Fire is directed against individual moving units. See the separate rules sections.
10.11 Defense
The targeted units have no defense value, per se. That is to say, the defender's combat strength does not detract from the attacker's fire value. However, the following exceptions are noted as follows:
- Armor: Units with the armor symbol (e.g., tanks) may gain a DRM under certain circumstances. See below.
- Helicopters: This is explained under AA fire.
10.12 Multi-Unit Firing
In general, units may fire by themselves or in groups, as long as the single target hex is within the range of all firing units. If attacking in groups, use the combined total fire strength.
10.13 Overkill
A given hex may never be attacked more than once during a single offensive fire Phase.
10.14 Range
Each unit has a printed range factor (see rule 2.5), which is expressed as a number of hexagons. Units may fire only at enemy occupied hexes within their ranges. Count the target hex but not the firing unit's hex when determining range.
Example: A unit in hex 2202 firing at hex 2206 would be firing at a range of four hexes. A unit may fire out to, but never beyond, its range.
10.15 Line of Fire (LOF) & Blocking Terrain
A unit may always fire into a hex immediately adjacent to it (a range of one). If the range is more than one hexagon, however, first trace a line of fire (LOF) to the target. LOF are visualized straight lines running from any point in the firing unit's hex (chosen and demonstrated by the firing player) to any imaginary point within the targeted unit's hex (chosen and demonstrated by the targeted player). If any such LOF runs through any "blocking terrain," the firing unit may not fire at the blocked target. Terrain in a firing or targeted hex never blocks LOF. That is, a unit can always fire out of or into a hex; LOF is blocked for the purposes of firing through hexes.
10.16 Line of Fire Checks
If firing at an odd angle across the hex grid, use a straight edge (such as a ruler), running it from the point in the firing unit's hex to the point in the targeted unit's hex to determine if an LOF is blocked.
10.17 Blocking Terrain
The Terrain Effects Chart describes blocking terrain. Basically, a LOF must terminate in a blocking terrain hex.
10.18 Elevation
There are several elevations in the game, with zero (0) being the lowest and elevating higher from there. If a unit is on a higher elevation than its target, the LOF is not blocked, unless there is any intervening hex that is higher than the firing unit's hex.
10.19 Observation Points
These are considered higher than all other terrain, except a hex with another observation point.
10.20 Range Extension
Any unit firing from a higher level elevation into a lower level elevation hex has its range increased by one hex.
10.21 Roads and Tracks
A unit may trace a LOF through otherwise blocking terrain if the direction of the LOF is the same direction as any road or track running through that hex (from hexside to hexside), even if the road or track depiction itself doesn't exactly follow along the LOF.
10.22 Die Roll Modifiers (DRM)
The attacker modifies his fire die rolls by certain conditions, most of which are cumulative, using all that apply.
Example: A unit with a fire strength of one receives a DRM of plus-two (+2). It fires on the "1" column of the CRT. If the die roll is a two, that fire's final, modified, die roll result is four (i.e., no effect).
10.23 Cumulative DRM for Offensive & Defensive Fire
In the list below, those DRMs shown entirely in bold are to be used only for offensive fires; those in plaintext are to be used for both offensive and defensive fires.
- -1: Close assault.
-
- #: For the defender's terrain (see TEC).
- +1: Defender is fortified.
- +1: If firing at a face down (Fog of War) Al Qaeda unit.
- +1: If targeted unit is armored, unless one or more firing units have anti-armor capability.
(The bold formatting that marks offensive-only DRMs is not preserved in the source text used for this transcription.)
10.24 Close assault
See rule 11.3
10.25 Engineers
See rule 11.4
10.26 Anti-Armor-Capable Units
If a targeted hex contains any armored units (see 2.10), the attacker must add a plus-two (+2) DRM, unless one or more attacking units have anti-armor capability (see below). If one or more involved firing units have anti-armor capability, don't add this DRM, but still apply all other applicable modifiers normally.
Anti-Armor units are defined as follows:
- All units printed with the antitank symbol
- All heavy weapons units
- All tank units
10.27 Stack Defense
If there is more than one defending unit in any hex receiving offensive fire, individually roll on the CRT for each unit. Use the full attack strength for all attacks. If some DRM would apply to one of the units in the targeted hex, but not to another, use only those for the unit being attacked.
10.28 Combat Results
- E. Elimination. The targeted unit is placed in the deadpile.
- P. Pin. Place a PIN marker on the targeted unit.
- "-" No Effect. The target unit is not affected.
10.29 Pin Result
A pinned unit is affected as follows:
- It may not move. This includes airmobile movement.
- It may not fire.
- Additional pin results have no effect (but see P/E results, below.)
10.30 P/E Result
If the unit was already pinned, eliminate it. Otherwise, place a Pin marker upon it.
10.31 Duration of Pinning
Pin markers remain on a unit until:
- The unit panics, at which point it is removed.
- The Return Phase at the end of the turn, at which point all Pin markers are removed from all units.
11.0 Offensive Fire
11.1 Offensive Fire Parameters
Offensive Fire takes place only in the Offensive Fire Phase of an activated command. All Offensive Fire is conducted as per rule section 10.0, with the following special cases:
11.2 Targeted Hexes
The total fire strength of all units firing on the hex are applied to each and every unit within that hex. Starting with the top unit, execute an attack against each unit.
Example: 10 firepower factors are directed against a targeted hex with three enemy units. Three separate attacks are conducted with ten factors, one against each enemy unit in the hex. Each result is applied individually to a unit. So, for example, one unit might be eliminated, another pinned, and a third would have no effect.
11.3 Close assault & Advance After Combat
A close assault occurs whenever one or more "close assault capable" (CAC) units are making an Offensive Fire against a hex to which those units are adjacent, per the following procedure:
- DRM: if any unit in the attacking force is CAC, subtract "1" (one) from the die roll, cumulative with other DRMs.
- Advance After Combat: if as a result of that combat, all enemy units are cleared from the hex (via "E" results) then any and all CAC capable units may advance after combat into the defender's vacated hex, known as an "advance after combat." Advance after combat is at the attacker's option. Also note such advances don't in any way use up normal Movement Phase movement allowances. Advance after combat also never triggers enemy defensive fire.
Note: Non-CAC may never advance after combat. If both CAC and non-CAC units are involved in the same attack, then only the CAC units may advance.
11.4 Engineers
If an Engineer unit is conducting a close assault offensive fire, defensive modifiers for urban, town, cave and/or fortification defenses are negated.
12.0 Defensive Fire
12.1 Defensive Fire Parameters
Defensive fire is conducted by a player during his opponent's Movement Phases, only. The opportunity to conduct defensive fire is triggered anew each time any moving enemy unit enters a hex within two hexes of different defensive-fire-capable (DFC) units. Follow the normal offensive fire procedures (see section 10.0), but with the following changes:
12.2 Procedures & Strictures
The non-moving player is eligible to declare "defensive fire" each time a moving enemy unit enters a hex within two hexes of each friendly defensive-fire-capable (DFC) unit. When a declaration is made, the moving player must momentarily pause his moving unit's movement to allow the defensive fire to be resolved against it. Each friendly DFC unit may potentially conduct a defensive fire against a target of opportunity a maximum of once per each enemy movement.
12.3 Defensive Fire
Defensive fire may be declared only against moving enemy units, and the fire is resolved within the hex that the moving enemy unit is entering. If there is any non-moving enemy unit(s) in the hex receiving defensive fire, the non-moving unit(s) are not affected by the defensive fire's outcome.
12.4 Running the Gauntlet
A moving unit is subject to new enemy defensive fire each time it enters a hex within two hexes of a DFC enemy unit, as long as no single enemy unit defensively fires more than once per movement.
12.5 Combined Defensive Fire Mandatory
When a moving enemy unit enters a hex in which it will be subject to defensive fire, all the firing DFC enemy units must combine their fire into one effort, whether the DFC units are stacked together in just one hex, or are located in several hexes.
Exception: See rule 12.3.
12.6 Terrain
Defensive fire uses normal terrain die roll modifiers.
12.7 Reinforcements Immunity to Defensive Fire
Defensive fire may be directed against panicking units, but it may not be directed against Al Qaeda units being placed on the map as reinforcements.
Note: Rotate DFC units 90 degrees to indicate they have conducted defensive fire, or place a blank marker on them, or a penny or some other mnemonic to indicate which units have fired.
12.8 Command Control Restrictions
Units of different commands may never be combined to form a single defensive fire.
Note: There is no requirement for any unit to be activated to fire defensive fire.
12.9 Ineligible Units
Airstrike units never conduct defensive fire, though Helicopter gunships which are available may indeed be used for Defensive Fire. Helicopter units may be attacked by anti-aircraft fire, which is a form of Defensive Fire; this is explained below (see rule 17.0).
12.10 Indirect Defensive Fire
Units must generally be able to trace a LOF into a hex where they conduct defensive fire. However, US heavy weapons units or (optionally) artillery units may fire defensive fire up to the limits of their range, direct or indirect, if another un-pinned US unit (of the same sub-command) can demonstrate a LOF within two hexes of the target hex. That other US unit does not have to actually fire at the hex.
Designer's Note: This exception represents vastly superior US fire control procedures.
12.11 No Close assault or Advance After Combat
Defensive Fire cannot be launched as close assault. Defensive fire never results in an advance after combat.
12.12 No Defensive Fire against an Advance After Combat
Defensive fire only occurs during an enemy Movement Phase, or against panicking units. Consequently, it may not be conducted against any units that advance after combat
12.13 No Defensive Fire against Reinforcement Placement
Defensive fire may not be conducted against reinforcements being placed on the map.
13.0 Indirect Fire
13.1 Indirect Fire Capable Units
Units printed with the indirect-fire-capable (IFC) symbol ("+") may conduct indirect fire, allowing them to ignore the normal LOF restrictions concerning blocking terrain.
13.2 Indirect Fire
Indirect fire is conducted in the same manner as normal offensive fire, but such units' LOF aren't affected by blocking terrain of any kinds. Indirect fire may be combined with direct fire in the same offensive fire combat.
13.3 Range
Indirect-fire-capable units fire anywhere up to their range.
13.4 Spotting
There is no need for other units to "spot" for indirect fire in Anaconda. The US had extensive ISR assets over the battlefield, while Al Qaeda had pre-registered weapons all over the valley prior to the battle's beginning. Therefore, units may fire at any enemy units in range.
14.0 Air Support
14.1 Air Support Definition
"Air Support" is a general term for several types of support that the Coalition player can employ. These include:
- Airstrikes
- UAVs
- Satellite
- AC-130s
14.2 General
Airstrikes are assigned by a scenario, or may enter play as reinforcements. When the player has access to Airstrikes, place them in the Air Available box. The player can then use them at designated points in the turn.
14.3 Command
Air units are not part of any command. They may be used with any Coalition command.
14.4 Return
During the Return Phase, all Airstrikes, utilized or not, are returned to the Reinforcement Pool. If picked again, they may be used again.
Example: A player might pick an Airstrike in one Operations Phase, and could use it in that same Phase, or in a subsequent Phase later that turn. But if not used by the end of that turn, it goes back to the Pool.
14.5 Airstrikes
Airstrikes have a firepower factor. Place them in the hex to be attacked. They apply their firepower normally.
14.6 AC-130s
AC-130s have both a firepower factor and a recon ability. The player can use a given AC-130 for either combat or recon, but not both, during a turn. If used for combat, use their factor as per an Airstrike. If used for recon, see the recon rule (19.0).
14.7 UAVs
UAVs have both a firepower factor and a Recon ability. The player can use a given UAV for either combat or recon, but not both, during a turn. If used for combat, use their factor as per an Airstrike. If used for recon, see the Recon rule (below).
14.8 Satellites
Satellites can only ever be used for Recon. See the Recon rule (see 19.0).
14.9 Friendly Fire
If the Coalition player picks any Friendly Fire marker from the Pool, then following this procedure:
- This must be announced to the Al Qaeda player.
- The Al Qaeda player designates any one hex on the map containing Coalition units.
- Roll one die to get a number from 1 to 6.
- The Al Qaeda player makes one attack against that hex using the number rolled. This is done as normal fire, with all units in the hex being attacked.
14.10 Airpower Characteristics
Each such air unit may be used during one friendly offensive fire per game turn, per the following parameters:
- Airstrikes may never be used for defensive fire.
- Airstrikes can be placed on any hex on the map.
- There is no limit to the number and the type of Airstrikes that may be used against a hex in an Operations Phase, beyond the number available.
14.11 AA Irrelevancy
The above listed Airstrikes are never subject to any kind of enemy fire.
15.0 Helicopters
15.1 Helicopter Units
Helicopters are a modified form of air unit.
15.2 Helicopter Gunships
Helicopter gunships are simply a modified form of Airstrike. They function in the same manner as Airstrikes, except as follows:
- Helicopter gunships are subject to AA Fire (see below).
- Helicopter gunships may be used for defensive fire. To do so, the Coalition player simply places the gunship unit on any enemy occupied hex into which an Al Qaeda unit had moved at any time during the Al Qaeda player turn.
15.3 Helicopter Transports
Helicopter transports may conduct special airmobile transport of Coalition ground units (see rule 16.0).
15.4 Helicopter Recon
The SOAR helicopter may either perform Transport or Recon missions, but not both during the same Operations Phase.
15.5 Helicopter Sorties
Each helicopter unit can perform one mission per turn. After performing a mission (assuming that it had not been shot down or damaged), place it in the Air Utilized box. During the Return Phase, place utilized helicopters in a Coalition off-map base.
16.0 Airmobile Transport
16.1 Helicopter Transport
Helicopter transport may transport Coalition ground units via airmobile movement. An airmobile move may be either:
- From an off-map base in which both the helicopter and ground unit are located to any hex on the map; or
- From any hex on the map (where the ground unit is present) back to an off-map base in which the helicopter was based; or
- From an off-map base in which both the helicopter and ground unit are located directly to another off-map base.
16.2 Airmobile Transport
Airmobile transport takes place during the Movement Phase of an activated command.
16.3 Procedure
Airmobile movement is conducted via the following procedures:
- The helicopter picks up the ground unit and then moves it to a hex on the map. The enemy may then conduct defensive AA fire against that hex. If the units survive, then place the ground unit in the hex and return the helicopter to any off-map base.
- The helicopter moves from the off-map base to any hex on the map that contains any Coalition ground unit. The enemy then can conduct defensive AA fire against that hex. If the units survive, then the helicopter extracts the ground unit, and they both move to any off-map base.
- The helicopter picks up the unit and moves to the other off-map base. There is no defensive fire.
16.4 Defensive (AA) Fire
This is conducted only in the hex in which the helicopter drops off or picks up the unit. Roll for the helicopter and transported unit, as a single fire is applied to both units:
- If the result is "E", the helicopter and transported unit are both eliminated.
- If the result is "P" or "P/E", the helicopter is damaged (and returned to the Reinforcement Pool). If this is 16.3 (1), the ground unit is placed in the drop off hex with a Pin marker. If this is 16.3 (2), the transported unit is placed in the off-map base (without being pinned).
16.5 Qualifications
Only ground units may be airmobile transported, but tank units may not be airmobile transported. Each helicopter unit can transport a maximum of one ground unit per Movement Phase.
17.0 Anti-Aircraft Fire
17.1 AA Fire vs. Helicopter Units
Al Qaeda ground units may fire at enemy helicopter units via Anti-Aircraft (AA) Fire. Al Qaeda units qualified as AA units are as follows:
- Heavy weapons units may fire at helicopters up to their range.
- Other ground units may fire at helicopters only in their own or adjacent hexes.
17.2 Anti-Aircraft Immunity
Only helicopters may ever be the target of anti-aircraft. Aircraft, AC-130s, Satellites and UAVs cannot be targeted.
17.3 Anti-Aircraft Procedure
AA fire is executed in the same manner as defensive fire, except as follows:
- The fire is directed at a helicopter unit the instant that it is placed in a hex. No more than one helicopter can be the target of a single AA fire at one time, however.
- Ignore blocking terrain between the firing unit and helicopter.
- Helicopters can be the target of AA fire only in the hex in which they conduct a mission. They cannot be attacked along their flight path.
- Each helicopter unit is attacked individually, and each ground unit may fire at only one helicopter (as it is placed on the map).
- Ground units (not aboard the helicopter) in the same hex are not affected by AA.
17.4 AA Combat Results
These combat results differ somewhat for AA fire:
- E: Eliminate the helicopter unit. It does not complete the mission it was trying to accomplish. The helicopter unit is removed from play permanently.
- P: Damage the helicopter unit. Complete the helicopter's mission, and then remove it from the map and place it in the Reinforcement Pool (it may be picked again).
- P/E: Same as P, above.
- "-": No effect.
Note: Do not place Pin markers on damaged helicopter units.
18.0 Fog O' War
18.1 Face Up/Face Down
All Coalition units are always deployed face up. The Al Qaeda player can always examine all Coalition units on the map, including off-map bases.
18.2 Fog of War Status
Al Qaeda units begin the game deployed face down. This is their Fog of War status. However, Al Qaeda units are flipped face up the instant that:
- The Al Qaeda unit fires.
- As a result of ISR (see rule 19.0).
18.3 Revealed
Once a unit is flipped face up, it remains so for the remainder of the game. Players can always examine face up enemy units, even if under the top unit in a stack.
18.4 Fog of War Target Penalty
The Coalition player may fire on face down Al Qaeda units, but a +1 DRM penalty applies. If the unit receives a combat result, apply it without showing the Coalition player the unit. A face down unit is affected by pins normally. An eliminated unit would be placed in the deadpile, but face down and revealed only at the end of the game.
18.5 Intelligence
A player may examine enemy face up units in an off-map base. A player may never examine units in the enemy Reinforcement Pool.
19.0 ISR
19.1 Intelligence, Surveillance, Reconnaissance
During the ISR Phase, an activated Coalition unit may "recon" (reconnoiter) certain hexes.
19.2 Normal ISR Procedure
Any ground unit may perform ISR by simply designate that unit performing the recon, then designating any one adjacent hex, and flipping all enemy units in that one hex face up.
Each unit may only recon one hex per ISR Phase. If there is more than one friendly unit in a hex, then each may recon a separate hex.
19.3 Special Recon
Ground units with the SOF or the Recon/Sniper symbol may declare a special recon. Designate one hex to which the unit could normally trace a LOF. The player then can flip face up all enemy units in that hex. Also, if the recon unit is in terrain which would allow it to extend its LOF, it is also extended for special recon purposes. The recon unit may otherwise conduct operations normally in the course of the turn.
19.4 Placement
The Coalition player can place Air/helicopter/UAV units printed with the ISR indicator on any hex on the map. Flip face up all enemy units in that hex.
19.5 Satellites
Satellites function the same as Air unit recon, except they flip face up all units in the designated hex, plus all adjacent hexes.
Note: Simply placing an air unit in a hex to conduct an attack is not enough to reveal enemy units in the hex.
19.6 AA Fire
If the reconnoitering Air unit is a type which is susceptible to AA fire, then the AA fire is resolved prior to the recon attempt (see rule17.0).
19.7 Off-Map Base Immunity
Neither player may recon enemy off-map bases (21.0).
Note: In Anaconda, all Coalition units are face up, so there is no Al Qaeda reconnaissance.
20.0 Special Units
20.1 PSYOP
If any PSYOP unit is adjacent to an enemy unit eliminated by close assault, then the friendly player receives twice the number of Victory Points (VP) for that elimination (see rule 23.0).
20.2 Civilians
Civilians are non-mobile units. If revealed, they are immediately removed from play. If a player eliminates a civilian unit via combat, then the other player gains VP.
20.3 Deception Markers
Deception markers are mobile units, but have no combat value. If revealed, they are immediately removed from play. When face down, they may be eliminated by combat, or pinned, with the normal results.
20.4 Fortification Markers
Fortification markers are non-mobile units. They have no combat value, per se. But, if any Al Qaeda unit is defending in the same hex as a fort, then add +1 to the Coalition combat die roll. Forts are revealed the instant that a Coalition unit fires on them (to get the bonus). They remain face up for the remainder of the game. Coalition units may enter Al Qaeda fortifications, at which point the marker is removed from play. They are not otherwise affected by combat.
20.5 High Value Targets
High Value Targets are treated as mobile combat units. They also act as Leaders in the optional rules.
20.6 IEDs (Improvised Explosive Devices)
IEDs are non-mobile units. As of the instant that any IED is revealed, all Coalition ground units in or adjacent to the hex (if any) are attacked on the "1" column of the CRT. No DRMs are used. The IED marker is then removed from the map.
20.7 Compounds
Compounds are non-mobile units. They otherwise function as do all other normal combat units. Units defending in their hex gain the +1 fortification benefit. A fortification marker may never be placed in the same hex as a compound.
20.8 Engineers
Engineer type units, if making a close assault against a hex, negate defender terrain and fortification DRMs.
20.9 IED Removal
If an engineer is adjacent to a hex which contains a revealed IED (as per above), then remove the IED marker without it going in to effect.
21.0 Off-Map Bases
21.1 Placement
A player may place units in off-map bases.
21.2 Coalition Bases
There are two Coalition bases: Gardez (off the north and west map edges) and Khowst (off the east and south map edge).
21.3 Al Qaeda Bases
There is one Al Qaeda base: the Sanctuary (off the east map edges).
21.4 Entering/Exiting Off-Map Bases
Units may enter and leave off-map bases by land and airmobile movement. Units must enter via the indicated map edges. Units are considered to be poised one hex off the map; They pay normal terrain costs for entering the map, although units are free to use road/track movement for entry, if entering via a road or track.
21.5 Movement Cost
Units may exit the map into a friendly off-map base. The unit must be moved to an indicated map edge and then pay an extra number of movement points equal to that of the map edge to be eligible to exit the hex field of the map. The unit is then placed in the off-map base.
21.6 Entrance/Exit Restriction
A unit may not both enter an off-map base and then renter the map in the same turn Movement Phase (movement stops when a unit enters an off-map base.)
21.7 Airmobile Movement
Coalition helicopters, and the units they transport, may move in and out of an off-map base at no movement cost (because helicopter movement is unlimited). Also, any helicopter unit can move directly from one off-map base to another.
21.8 Stacking
There is no stacking limit in any off-map box.
21.9 Restrictions
When moving, the following strictures are enforced:
-
Enemy Off-Map Base: a player may never have his units of any type enter an enemy off-map base.
-
Combat: players may never attack enemy units in any off-map base, nor may ground units attack out of them.
Note: Coalition helicopters based in off-map bases may fly combat missions onto the map.
-
Coalition: coalition units may enter and exit any off-map base any number of times during a game, subject to the other rules of this section.
-
Al Qaeda: Al Qaeda units, once moved off of the map and into the Sanctuary, may never return to the map.
22.0 End of Game
22.1 End Game Effects
During each End of Game Phase, check to see if any of the following conditions are in effect:
- It is the last turn of the scenario.
- One side has no units remaining on the map. Units in Sanctuaries do not count as units on the map.
- One player concedes.
22.2 Determining the Winner
If any of the above conditions are in effect, the scenario ends. Check to see who wins (23.0).
22.3 Scenario Length & Game Extension
The standard game length is nine turns (2-10 March). At the end of 10 March, the Coalition player may declare an extension to the operation. If so, the Al Qaeda player receives additional VP, as indicated on the VP Chart. The Coalition player may declare an extension on each and every turn up until the end of 18 March, thus potentially extending the game an additional nine turns. The VP paid is on a turn by turn basis.
22.4 Task Force Commando Reinforcement
If the Coalition player extends the game, Task Force Commando reinforcements arrive in play:
- All units of TF Commando marked "Special Reinforcements" are received as a reinforcement on the 11 March turn.
- Add the TF Commando C2 chit to the Command Pool.
23.0 Victory Conditions
23.1 Victory Conditions
Victory in Anaconda is in terms of victory points (VP). Players gain VP for destroying enemy units and other designated game functions. VP are totaled at the end of the game. At that time, all face down Al Qaeda units are revealed, whether on the map or in the deadpile, in order to make the VP count. Each player totals his VP. By this methodology, it is entirely possible for each player to claim a victory.
23.2 Victory Points Schedule
See the game charts.
23.2.1 Friendly Fire VP
Any Coalition units eliminated by friendly fire count as VP for the Al Qaeda player. Units removed because of panic do not count as VP, however.
23.3 Levels of Victory
Coalition:
| VP | Result |
|---|---|
| 0-14 VP | Defeat |
| 15-29 VP | Stalemate |
| 30-44 VP | Tactical Victory |
| 45-59 VP | Operational Victory |
| 60+ VP | Strategic Victory |
Al Qaeda:
| VP | Result |
|---|---|
| 0-10 VP | Defeat |
| 11-19 VP | Stalemate |
| 20-29 VP | Tactical Victory |
| 30-39 VP | Operational Victory |
| 40+ VP | Strategic Victory |
Optional Rules
24.0 Leaders
24.1 Leaders
Leaders represent extraordinary officers that take command in difficult circumstances.
24.2 Coalition Leaders
The Coalition places his Leader units into the Reinforcement Pool at the start of play. When a Leader is picked, the counter is placed in any hex containing a unit from the same sub-command. If no unit of that sub-command is on the map, the leader is returned to the pool.
24.3 Al Qaeda Leaders
All high value targets have the same capabilities as Coalition leaders, except they are not placed in the pool. They are received as per normal Al Qaeda deployment. They must be deployed face up to provide their bonus.
24.4 Leaders & Fire
If a leader is stacked with ground units conducting any kind of fire, subtract "1" from the die roll, cumulative with other die roll modifiers. Only one leader per combat may do so.
24.5 Rally
A Leader may remove one Pin marker from one activated unit that he is stacked with. This is only done at the start of the Movement Phase. The leader may not then move for the remainder of that Movement Phase. The rallied unit performs normally thereafter.
24.6 Transport
Any Coalition leader may be transported by a helicopter unit (airmobile) at no capacity cost to the helicopter.
24.7 Other
Leaders are otherwise treated as combat units.
25.0 Osama Bin Laden
Osama bin Laden is a special Al Qaeda high value target. He is added to the initial pool of Al Qaeda picks. He functions in all manners as a high value target, with the following additional rules:
25.1 Command
Osama Bin Laden may be activated by any of the Al Qaeda commands. This means that he may move more than once per turn (though this would be a giveaway if face down).
25.2 Defense
If Osama Bin Laden is in a hex face up, add +1 to all Coalition fires against that hex (cumulative with other modifiers).
25.3 Victory Points
The Coalition player receives 25 VP if he eliminates Osama Bin Laden. If the elimination was a result of a close assault, the Coalition gains 50 VP instead (for identifying the body or capturing Osama).
26.0 Casualties
26.1 Coalition Casualties
Each time certain Coalition units are eliminated, a Casualty marker is to be placed on the map in the hex in which they were eliminated. This includes all Coalition ground and helicopter units.
26.2 Medevac
The Coalition player may remove Casualty markers from the map to any off-map base via "medevac". This is done in the same manner as airmobile movement. The Coalition player must move a helicopter to the hex with the Casualty marker. If the helicopter survives any defensive fire, the Coalition player must pick up any and all Casualty markers in the hex and then moves them back to an off-map base. The Casualty markers remain there for the remainder of the game.
If there are any Al Qaeda units in the hex with the Casualty marker, then the marker may not be medevac'd.
26.2.1 Helicopter
If the helicopter is damaged, there is a pickup but then place the helicopter in the Reinforcement Pool. If the helicopter is shot down, then there is no pickup and place another casualty marker in the hex.
26.3 Al Qaeda Prohibition
No Al Qaeda units may ever pick up or transport any casualty markers.
26.4 Victory
At the end of the game, the Coalition player gains 1 VP for each Coalition Casualty marker that is evacuated to a friendly off-map base. At the end of the game, the Al Qaeda player gains 2 VP for each Coalition Casualty marker still on the map.
26.5 Command
Casualty marker chits do not belong to any specific command. The Coalition player is free to medevac during any sub-command's Movement Phase.
26.6 Casualty Markers
Casualty markers have no other effects on play. They are not affected by combat. Multiple Casualty markers may accumulate in a hex if more than one unit is eliminated there.
27.0 Attacker Impetus
27.1 Multiple Assaults
Under certain circumstances, units making close assaults may attack more than once per combat Phase.
27.2 Pre-conditions
If the final modified die roll of units making a close assault is "0" (zero) or less, and all defending units are cleared from the hex, and one or more of the attacking units advances after combat, then a situation of "attacker impetus" exists.
27.3 Procedure
The attacking units, after advancing after combat, may then immediately make another close assault against a single adjacent enemy hex. This is resolved as a normal close assault. If it results in the pre-conditions for another attacker impetus situation, then follow this procedure again, potentially indefinitely.
27.4 Restrictions
Attacker impetus is entirely at the attacking player's option. He may engage in attacker impetus attacks with some or all of his qualified units, or he may choose to not conduct this kind of attack at all. The decision to do so is made after each qualifying close assault. Once the decision has been made to not make an attacker impetus close assault, those units may not have that option again in that combat Phase.
27.5 Advance After Combat Requisite
Only units which engage in an advance after combat may engage in an attacker impetus close assault. Furthermore, only one enemy occupied hex may be the target of this close assault. A force may not be split up to make separate attacks.
27.6 Target Requirement
There must actually be enemy units in an adjacent hex to make this kind of attack...A playermay not assault empty hexes.
28.0 Fire Support Restrictions
28.1 Close Support Protocol
Generally, Airstrikes may not be employed in hexes adjacent to Coalition units to conduct attacks. However, AC-130 units and Helicopter units may be employed in hexes adjacent to Coalition units.
Note: This rule does not affect ISR and helicopter transport.
29.0 Body Armor
29.1 Body Armor Units
All TF Rakkasan and TF Commando units receive a +1 die roll penalty when being fired upon, cumulative with other normal die roll modifiers.
30.0 Rubble
This rule is not used in Anaconda, but it is included for upcoming games in the series.
30.1 Rubble Creation & Effects
Place a Rubble marker if any of the following circumstances apply:
- Whenever any kind of fire is made against an urban or town hex.
- At least one firing unit is an air, helicopter, artillery or heavy weapons unit.
- The die roll (before any modifications) is a "1".
30.2 Rubble Effects
Rubble has the following effects:
- Units defending in a hex with rubble receive an additional +1 DRM from all kinds of fire.
- It costs one additional movement point to enter any hex with rubble.
- Rubble does not otherwise block movement, LOF, or other game functions.
30.3 Duration
A rubble marker, once it is placed, remains in its current hex for the remainder of the game. No hex may ever receive more than one rubble marker, however, no matter how much and what kinds of combat take place in it over the course of a game.
31.0 Scenario Variant: More Coalition Forces
31.1 Premise
This optional rule assumes that the Coalition committed more forces to the operation.
31.2 Coalition Additional Units
Prior to start of play, the Coalition player may add the following units to his initial set up by paying the indicated number of VP. These VP are deducted from the Coalition VP as of the end of the game. The VP are paid for each unit of the formation indicated. A player may choose some, none, or all of a formation, per the following VP cost.
- 3 VP: PPCLI. PPCLI units are part of TF Rakkasan for C2 purposes on the 2-10 March turn. If the game goes into extension, these units revert to TF Commando on 11 March (22.4).
- 10 VP: 3-120 Artillery Battalion. These units are part of Task Force Rakkassan.
- 5 VP: Helicopters. Up to four gunships and two of the transports that start in the Reinforcement Pool in the standard scenario are instead placed in any Coalition off-map base.