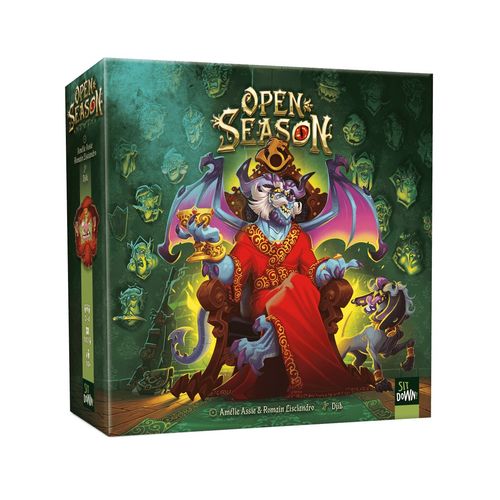
Open Season
Open Season Rulebook
Table of Contents
Table of Contents
Contents
- 180 People cards: 30 gnomes, 30 elves, 30 barbarians, 30 mages, 30 dwarves, 30 sorcerers.
- 6 People cards × 5 different attributes for each of the six peoples (crown, tattoo, dagger, earrings, and eyepatch).
- 4 player boards. Each player board has two sides: the Horn side (see page 3) and the Shield side (see page 9).
- 1 scorepad.
- 24 Trophy tokens.
- 4 Wild tokens.
- 4 Penalty tiles.
- 4 Attribute Series tiles.
- 7 Personal Bonus tiles per player (Expert mode, see the Expert Tiles section). Front and back are different.
Overview & Goal of the Game
Each turn, you complete your wall by placing one card on it, and placing another one in your stock. If the second card matches a card on your wall, one of the following occurs:
- You score or lose victory points.
- You trigger an action.
- Nothing happens.
You win the game if you have accumulated the most victory points.
Setup
Each player: Place a player board in front of you, Horn side up (the horn icon in the lower-left corner).
Shuffle the cards to form a face-down deck in the middle of the table.
Reveal 5 cards to form the inn.
Form a general supply of all the tiles and tokens (except the Bonus tiles, which are for Expert mode).
Randomly determine the first player.
Each player's area consists of:
- Your wall — the player board itself, where cards are placed face up permanently.
- Your stock — where you place the one card per turn that is not put on your wall. Kept face up; you can peek but cannot reorganize it.
- Your accolades — where cards from your stock move to at the start of your next turn. Kept face down; you can peek at and reorganize your own accolades at will.
- Your personal supply — where tiles and tokens you earn are kept.
Playing the Game
Take turns in clockwise order for 11 rounds, at which point you each will have completed your wall.
On your turn, you must perform the following 6 steps:
- Complete the Inn
- Move Your Stock into Your Accolades
- Choose 2 Cards from the Inn
- Place 1 Card on Your Wall
- Place 1 Card in Your Stock
- Trigger One or More Actions (if possible)
1. Complete the Inn
Fill the inn back to 5 face-up cards from the deck.
2. Move Your Stock into Your Accolades
Move all the cards from your stock to your accolades.
Keep all cards in your accolades face down. You are welcome to peek at them and organize them however you like.
You cannot peek at other players' stocks or accolades. Only the topmost card of their stock is visible.
3. Choose 2 Cards from the Inn
Take 2 cards from the inn into your hand.
4. Place 1 Card on Your Wall
Place 1 card from your hand face up on any empty space of your wall, where it will stay for the rest of the game.
Each wall location may have a placement rule and/or one or more effects associated with it.
Important:
- You must place only one card per turn on your wall. No more, no fewer.
- Your stock is not part of your wall.
Placement Rule
All spaces underlined by the same green frieze must be occupied by different peoples… or by cards placed face down.
There are only two cases you will encounter:
- At least one of the two cards in your hand can be placed somewhere on your wall while respecting the placement rule: in this case, you must place a card face up in a legal space, even if you would prefer otherwise.
- Neither of the two cards in your hand can be placed on your wall without breaking the placement rule: in this case, you must place one of them face down on the space of your choice.
Note: Cards placed face down are not considered to be any type of people, and have no attributes.
Example: It's the 10th round, and you have chosen an elf and a mage. You must now place one of these two on your wall, but there are no valid options, because all of the cards of the top row must be different. So you must place one of these two cards face down at one of the two remaining top-row spaces.
Effect of the Space
If the space on which you placed your card depicts an effect, see if it triggers. The effect will trigger if you placed the card on its space during the indicated rounds.
- A space marked "1-4" with a trophy icon: if you place a card on this space during one of the first 4 rounds, immediately take an Attribute Series tile, and place it on your board to cover and replace the cartouche to the left of your stock.
- A space marked "1-2" with 2 Trophy tokens: if you place a card on this space during your 1st or 2nd turn, immediately take 2 Trophy tokens (see Trophy Tokens below) from the general supply. Keep them in your personal supply.
- A space marked "3-4" with a Wild token: if you place a card on this space during your 3rd or 4th turn, immediately take 1 Wild token (see Wild Token below) from the general supply. Keep it in your personal supply.
- A space marked "5-6" with a Trophy token: if you place a card on this space during your 5th or 6th turn, immediately take 1 Trophy token (see Trophy Tokens below) from the general supply. Keep it in your personal supply.
- A space marked "3-6" with 4 Trophy tokens and a Penalty token: if you complete this row of three cards by the 6th round (you can't complete it before the 3rd because it requires 3 cards), immediately take 4 Trophy tokens and 1 Penalty token from the general supply. Keep them in your personal supply.
Note: It's easy to see which round it is: because you must place exactly one card each round, simply count the number of cards on your wall!
5. Place 1 Card in Your Stock
Place the card remaining in your hand atop your stock.
Keep all cards of your stock face up. You can peek at them, but you cannot reorganize them!
6. Trigger One or More Actions (if possible)
If the people represented on the card that you have just placed on your stock corresponds to the people represented on one of the cards in the first row of your wall, then the corresponding action must be triggered and carried out entirely (only by you). Any resulting action must also be carried out as a whole.
Important: You can only trigger any given action once during your turn, but you may trigger several different actions.
The possible actions are:
- Take the top card of any one opponent's stock — if their stock is empty, you must take a random card from their accolades. In either case, the targeted player may then immediately take a card from the inn or — blindly — take the top card of the deck; this player adds the card to their stock without triggering an action. Place the stolen card in your stock; it can trigger a new action, as long as it hasn't been triggered already during your turn.
- Secretly peek at the first two cards of the deck. Place one (your choice) atop your stock; return the other face down atop the deck. The card you added to your stock can trigger a new action, as long as it hasn't been triggered already during your turn.
- Take any card from the inn and keep it for your next turn, leaving it face up in your personal supply (it is not part of your accolades!). On your next turn, when you normally would take two cards from the inn, take only one from the inn and the one from your supply.
- Move a Trophy token (see Trophy Tokens below) from any card on your wall to a card on the bottom row of your wall.
Trophy Tokens
Keep your Trophy tokens in your personal supply.
On your turn, after having resolved all the actions triggered by the cards placed in your stock, you can place one and only one Trophy token on a card in the 1st or 3rd row of your wall. This token may have been obtained during the current round.
If you place this Trophy token on a card of the top row: Choose an action that has not already been triggered during your current turn; trigger it immediately.
If you place this Trophy token on a card of the bottom row: During endgame scoring, this token will count as an additional card in your accolades, of the same people as the card the token is on.
The same card on your wall can have multiple Trophy tokens on it.
Example: You place your 2nd card, an elf, atop your stock, which triggers the 3rd action: you draw 2 cards and choose to keep a gnome, which you place atop your stock. This triggers the 1st action: you take a random card (a mage) from an opponent's accolades (their stock is empty) and place it atop your stock. Thus you trigger the 4th action: you take a card from the inn and keep it for your next turn. Your turn is finally complete. You managed to add 3 cards to your stock in a single turn!
End of the Game
The game ends after 11 rounds. Each player's wall will be full. Move all cards remaining in your stock into your accolades.
If you kept a card on your final turn, move it into your accolades, as well.
Reveal the cards of your accolades and sort them by people. Only these cards will allow you to score.
Jot the victory points each player scores on the green side of a scoresheet (for the Horn side of the player boards).
Wild Token: If you have a Wild token, place it on any card on your wall or in your accolades. It permanently modifies the attribute of the card beneath it for both scorings related to attributes. Simply announce the new attribute it represents.
Endgame Scoring (Horn side)
Only the 2nd and 3rd rows of the scoresheet (matching the 2nd and 3rd rows of your wall) allow you to score, one scoring per row of your wall:
- Each card of your accolades matching the card on your wall scores −2 or −3 victory points (per the icon shown).
- Each card of your accolades matching the card on your wall scores 1 or 2 victory points (per the icon shown). Each Trophy token on one of these cards also scores 1 or 2 victory points.
- Compare the quantity of cards of this people that each player has in their accolades; if you have the single most, score 10 victory points; otherwise (including tied for most), nobody scores. Remember: Each Trophy token on the matching card on your wall counts as an additional card of this type in your accolades.
- Each face-down card on your wall scores −5 victory points.
- Each card of your accolades sporting the same attribute as the card on your wall scores 2 victory points. For this, the people types don't matter.
- For each series of 5 different attributes (regardless of the people types) in your accolades, score 4 victory points. If you replaced this cartouche with an Attribute Series tile, score 7 victory points instead.
- If the three cards in these spaces are of the same people, score 5 victory points.
- −1 victory point per attribute of the least present type in your accolades (an absent attribute counts as being the least present).
The player with the most victory points wins the game. In the event of a tie, the tied player with the fewest cards in their accolades wins. If there is still a tie, the tied players share the victory.
Complete Scoring Example
At the end of the game, here are the cards in your accolades, sorted by people (barbarians, elves, gnomes, mages, dwarves, sorcerers) and by attribute row (crown, tattoo, dagger, earrings, eyepatch):
- The sole sorcerer in your accolades scores you −2. Subtotal: −2.
- The 2 elves in your accolades earn you 2 × 1, and your 4 barbarians + the Trophy token earn you 5 × 2. Subtotal: 12.
- You have 3 mages in your accolades + 1 mage for the Trophy token. No one has more than you, but another player also has 4 mages. As a result, you miss out on the 10 points. You would have been wiser to place the other Trophy token here… Subtotal: 0.
- The face-down card earns you −5. Subtotal: −5.
- The character on this card is wearing a crown. So, the 6 cards in your accolades with a crown earn you 6 × 2. Subtotal: 12.
- You have 2 series of 5 different attributes in your accolades, thanks to the Wild token turning the dwarf's crown into an eyepatch. Because you covered the cartouche beside your stock with an Attribute Series tile, you earn 2 × 7. Subtotal: 14.
- The cards along the yellowish frieze (middle row, cards 2–4) are not all three of the same people (the face-down card does not count as a dwarf), so you miss out on the 5 points. Subtotal: 0.
- Because you completed the bottom row by the end of Round 6, you got 4 Trophy tokens (3 on your wall, and 1 you didn't use), and a Penalty token. You have only 2 tattoos, earrings, and daggers in your accolades, so whichever you choose (as long as it's not crowns) gets you 2 × −1. Subtotal: −2.
In total, you score 29 victory points.
The Shield Side of the Player Boards
The other side of the player boards (the Shield side) offers a different gaming experience, a little shorter. For variety, feel free to play with either side, but it must be the same side for all players.
All rules thus far still apply, with the modifications indicated below.
Playing the Game (Shield side)
Step 4 — Place 1 Card on Your Wall, Effect of the Space:
Important: This side of the player board modifies how you use Trophy tokens!
If you place a card on such a space during rounds 6–9, take a Trophy token, and at the end of your turn, place it beside the endgame scoring of your choice.
There are 4 endgame scorings (described below), and only the ones activated by a Trophy token will earn you victory points.
Step 6 — Trigger One or More Actions:
An additional action is available on this side: take one card of your choice from the inn, and immediately place it atop your stock. This could also trigger an action, as long as it hasn't been triggered already during your turn.
End of the Game (Shield side)
The game ends after just 9 rounds.
Use the orange Shield side of a scoresheet.
The Wild token applies to all three scorings related to attributes.
Endgame Scoring (Shield side)
Only the four scorings activated by a Trophy token (placed during Step 4) earn victory points:
- Score 7 victory points if your accolades total at least 18 cards.
- Score 7 victory points if your accolades contain a series of 5 different attributes within the same people.
- Score 7 victory points if your wall contains 5 cards with identical attributes.
- Score 1 victory point per card of your accolades bearing the attribute of your choice.
Expert Tiles
All rules thus far still apply, with the modifications indicated below.
Expert tiles are compatible with both sides of the player boards (there are just two faces with the Horn icon that can only be used with the Horn side).
Setup (Expert)
Each player: Take all 7 Bonus tiles of a single color. Secretly choose the 4 faces you wish to use this game. Place one at the top of each of the 4 columns on your wall, then return the other 3 Bonus tiles to the box.
Playing the Game (Expert)
Step 7 — Trigger One or More Bonus Tiles
Attention: This seventh step is in addition to the six usual steps!
A Bonus tile activates if you complete its column (each space in it has a card) and the attribute of each card is visible and identical.
Note: If the column has only a single space (see the Shield side of the board), you merely need to place one face-up card there to activate the Bonus tile.
- The Bonus tiles bearing a lightning-bolt symbol activate at the end of your turn, and are then discarded.
- The Bonus tile bearing an infinity symbol activates at the end of your turn, and remains active until the end of the game.
- The Bonus tiles bearing an arrow-into-bar symbol activate during scoring.
This step allows you to use the Wild token in a new way. Place the Wild token during the game, at any point during your turn, on a card on your wall to permanently modify its attribute. Doing this may activate the Bonus tile at the top of its column. You cannot move the Wild token once you have placed it.
Scoring: This space, which appears on both sides of the scoresheet, refers to the "activation during scoring" Bonus tiles that let you score at the end of the game.
Bonus Tile Effects — Activation at the End of Your Turn (discarded after use)
- Each opponent must discard the top card of their stock face up in the middle of the table; if their stock is empty, they must take a random card from their accolades to discard (a player with zero cards simply does nothing). Choose one card discarded this way and place it atop your stock. Remove the rest of the discarded cards from the game. The card you added to your stock can trigger a new action, as long as it hasn't been triggered already during your turn.
- Draw 4 cards and keep 2 of them; place the other 2 atop the deck in whichever order you prefer. Then place the 2 you kept atop your stock in whichever order you prefer. Each card you add to your stock can trigger a new action, as long as it hasn't been triggered already during your turn. Fully resolve the first card's action before adding the second.
- Draw 1 card per player, look at them, then give one of them to each player (including yourself). Each player places their card atop their stock, but only yours triggers an action, provided it hasn't been triggered already during your turn.
- Choose a card from your stock or your accolades and place it face down on the deck. Then choose a card from the deck and place it atop your stock. Shuffle the deck. The card you added to your stock can trigger a new action, as long as it hasn't been triggered already during your turn.
- Choose a card from your stock or your accolades and use it to replace any card on your wall (Trophy and Wild tokens stay there). Then place the replaced card atop your stock. The card you added to your stock can trigger a new action, as long as it hasn't been triggered already during your turn.
- Steal 1 Trophy token from each player. Take it from their personal supply; if it has none, take it from their wall. A player with none is unaffected by this action.
Bonus Tile Effects — Activation During Scoring
- Spaces on your wall that score 1 victory point now score 2 victory points.
- The two spaces on your wall that cause you to lose victory points now only give you −1 victory point.
- Score 5 victory points for each column of at least 2 cards where the attributes are all different.
- Score 8 victory points, then −1 victory point per attribute of the type least present in your accolades (an absent attribute counts as the least present). If it's a tie, consider only one type of attribute.
- Score 3 victory points for each column of at least 2 cards where the attributes are all identical. Attribute types can vary from column to column.
- Add 2 to your card total when seeing who has the most.
- Score 12 victory points if each people is represented no more than twice on your wall.
Bonus Tile Effect — Activation Each Turn (remains active until end of game)
From now on, all Bonus tiles placed above your columns with three spaces activate as soon as only two cards of their column have the same attribute. All spaces of the column must still be filled. When this Bonus tile is triggered, a previously filled column with only two identical attributes triggers now. If several Bonus tiles are activated during this turn, you choose the order in which you resolve them.
All of the Icons at a Glance
Attributes
- Earrings attribute
- Dagger attribute
- Tattoo attribute
- Identical attributes
- Eyepatch attribute
- Different attributes
- Crown attribute
- Attribute of your choice
Elements
- A player board
- Majority
- The spaces of the wall
- People
- A column of wall spaces
- An opponent
- Trophy tokens
- Any player
- Attributes for the same people
Cards
- Stock (if empty: Accolades)
- The inn
- Stock and/or accolades
- The deck
Actions
- Give
- Keep
- Swap
- Take
- Activation at the end of your turn
- No activation
- Activation during scoring
- Game turn
- Activation each turn
- Check
- Victory points gained
- Victory points lost