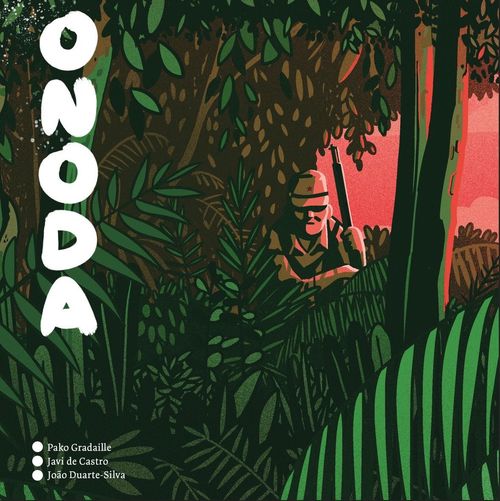
Onoda
Onoda Rulebook
Table of Contents
Table of Contents
Note From Designer Pako Gradaille
I'm sure at some point we've all heard the stories of Japanese soldiers emerging from the jungle many years after the end of World War II believing it wasn't over yet. Strange stories, perhaps somewhat macabre, probably regarded as comical anecdotes. Onoda is none of that. My first contact with the life of Hiroo Onoda was from Werner Herzog's book The Twilight World. This poetic narration of the life of the Japanese guerrilla fighter on the island of Lubang caught my imagination. I liked it and I found it interesting, but I felt something was missing. That spark of curiosity lit up when I read Onoda's autobiography No Surrender: My Thirty-Year War. The essence of the character and the experiences he had had on the island were really captured in the book.
The key to it all was a Japanese word, Shouganai, which means something similar to "what can you do?" and shows a philosophy of life based on accepting the manifestations of destiny as something over which we cannot control. That does not mean to adopt a passive attitude, however; quite the opposite. Who we are is defined by how we react to such events and how much we strive to overcome them.
Onoda's life on the island adhered to this and so this is what the game tries to do: place the player in the shoes of Hiroo and see if they are able to react to the obstacles placed on him by the goddess Fortuna with the same cool intelligence, all while trying to fulfill his duty as an imperial soldier.
One of my first testers was my friend Víctor. A guy with cerebral palsy that perfectly represents the philosophy that encompasses the game. He always faces the problems of life with a smile and strives to get the best out of himself and others to overcome adversity. He didn't manage to win his first game, but immediately said: "I want to play another."
This is Shouganai. This is Víctor, and this is Onoda.
— Pako Gradaille
Historical Note
In 1944 the Japanese army sent a young man with little military experience to mount a guerrilla-based resistance on Lubang Island in the Philippines. Hiroo Onoda, 23, had been trained as an intelligence officer at the Futamata school and this was his first posting.
A couple of months later, the Americans would invade Lubang, Onoda would hide in the jungle, and thus would begin an adventure that would last 30 years. During that time, Onoda had the help of several companions: Kozuka, Shimada and Akatsu, although after 1972, and the death of Kozuka, he was completely alone.
Onoda had precise orders: never give up, never surrender, continue with the war at all costs. And so he did.
There were many attempts, including by his own family, to get him to give up, but Onoda believed that they were all schemes to deceive him. He did not accept the end of the war until a college student, Suzuki, arrived on the island in search of the legendary Japanese guerrilla (he would later go on to search for other mythical creatures: the yeti and the giant panda). He managed to bring Onoda's former commander back from his retirement and it was he who finally ordered him to surrender.
Thirty years of adventures, danger, comical situations and tragic moments, life and death and, above all, a demonstration of the resilience of human beings in adverse conditions.
Objective of the Game
Onoda recreates the experiences of soldier Hiroo Onoda during his 30 years as a guerrilla fighter on Lubang Island. During 6 rounds of variable duration, you have to obtain a number of resources (represented by rice) that will allow you to finish the round without suffering penalties.
In each round, you will also undertake a mission, earning honor points for it. During your adventures you will experience some of the events that the real-life Onoda had during his stay in Lubang.
If you manage to overcome the 6 rounds without going insane due to paranoia or dying due to ill-health, it will be time to see if you will be recognized a hero or fade into oblivion. Onoda will get different results depending on the amount of honor you have accumulated solving missions, keeping your companions alive or your squad in good shape.
Components
- 12 Mission cards. Each card shows: the region where you undertake the mission, the requirements needed for the mission, the bonus for success, the penalties for failure, the mission name and background information, and the mission number.
- 52 Event cards. Each card shows: the event type (Round, Immediate, Reserve), the event name, the card number, the event effect, discard requirements (only in Round events), and background information.
- 1 Game board, showing: the main track, the camp, Lubang Island (divided into 7 regions), a plate for resource / resolution tokens, and the round track.
- 1 Onoda marker and 1 Mission marker.
- 6 Object markers (5 objects and 1 null).
- 42 Alarm tokens.
- 1 Health marker, 1 Paranoia marker, 1 Honor marker.
- 12 Resolution / Resource tokens, double-sided (resolution side / resource side).
- 3 Companion tokens, double-sided (activated side / deactivated side).
- 1 Round marker.
- 6 Object tokens, double-sided (activated side / deactivated side).
Game Preparation
- Place the board in the center of the table.
- Take the Event cards deck and remove cards number 5 and 43. Place them in the game box for now: they will come into play through other events.
- Shuffle the Event cards deck and place it face down next to the board.
- Shuffle the Mission cards deck and place it face down next to the board.
- Take the 12 Resource/Resolution tokens and put them in the action bag.
- Take the Alarm tokens and place them next to the board.
- Place the Kozuka and Shimada tokens in their corresponding Camp space illustrated on the board. Leave Akatsu's token near the playing area for the moment as his appearance depends on the event cards.
- Place the Round marker in the first space of the Round track.
- Place the Honor marker in box 0 of the main track.
- Place the Health marker in box 10 of the main track and the Paranoia marker in box 0.
- Randomly place an Object marker face down in each of the different regions of the island (board). When all regions except Kyanpu have a token, turn them face up.
- Place all Object tokens (those with activated and deactivated sides) with their activated face up on the Backpack, except for the Radio token, which starts with the deactivated face up.
- Place the Onoda marker in the Kyanpu region and the Mission marker in the Camp that appears in the top corner of the board.
To play the historical variant where Missions and Events come out in a specific order, see Historical Variant.
Key Concepts
Health: represents Onoda's state of health. It starts with a maximum of 10 and can reach as far as 0.
Paranoia: represents Onoda's mental state. It starts with a minimum of 0 and can reach up to 10.
Health and Paranoia share the same track on the board.
Activated/Deactivated: an item and a companion can be activated or deactivated in Onoda's Backpack. They can change from one state to another due to the effects of certain events or when they are used for a Check, Event card, or Mission.
Note: Activate/Deactivate. The concept of activating or deactivating an object is a representation of when Onoda used his military equipment excessively or put it at risk. Weapons, clothing and other items would suffer excessive wear and tear and Onoda would have to make an effort to repair them or they would remain unusable.
The idea is similar in the case of his companions. They represent those moments when one of them would take too much of a risk or put himself in danger and that would cause him to be injured or get sick. In this situation, companions would become more of a complication than a help, represented in the game by adding 1 point to the resources needed at the end of the round.
Resource/Resolution tokens: these tokens have two sides. One side is used when carrying out Checks (number side) and the other is used to mark the resources that Onoda and his group have stored (rice dish side).
Check: when you have to perform a check you must take a Resource/Resolution token from the bag and check its number side against the relevant level of Alarm or Paranoia. These Checks are successfully passed when the token's number is higher than the Alarm or Paranoia level. This covers both the Alarm check and the Paranoia test — see How to Play for the full explanation.
Alarm level: represents the level of tension that Onoda's activities are causing on the island. The security forces or the army will be more alert if Onoda is taking action in different regions. The number of Alarm markers present in a region signifies the Alarm level. When the Alarm level in a region reaches 6, Paranoia goes up 1 point. Level 6 is the maximum possible Alarm level in any region. If you have to place an Alarm token in a region that's already at 6, you gain 1 Paranoia point instead.
Region: area delimited by white lines on the map of Lubang Island. Adjacent regions are those that share a border line between them.
How to Play
A game of Onoda is played in 6 rounds, unless you lose your health or your mind and the game ends sooner (see End of the Game).
You will carry out different actions in each round and you finish it when you decide.
Your main goal is to accomplish the assigned mission and get rice (resources). You do not have to accomplish the mission in each round to be able to continue playing, however, you should try to complete the mission and gather the necessary resources to feed Onoda and his companions before finishing it. That said, events often arise that disrupt the best laid plans...
Each round consists of the following sequence that you must perform in order:
- Mission cards
- Actions
- Move
- Raid, and then resolve Event card
- Repair, and then resolve Event card
- Accomplish mission, and then resolve Event card
- End of round
1. Mission Cards
Missions are the main source of victory points in the game. If you manage to perform as many missions as possible (6 in total) it is very likely that Onoda will end up being remembered as a hero. If you do not perform any, he will be considered one more guerrilla fighter and forgotten by history. You can check the score and victory conditions under End of the Game.
At the beginning of the round, draw the first Mission card from the mission deck and place it on top of the previous Mission card (in the first mission, place the card in your play area). Then put the Mission marker in the region indicated on the card. This is your objective in this round.
Example: Take the first card from the Mission deck and place it in your play area. You have drawn "Farmers". Place the Mission marker on Lubang.
2. Actions
In Onoda you have no limit on actions. You can perform and repeat as many actions as you like in the order you want. But keep in mind that every time you perform an action you must add an Alarm token.
In addition, each time you perform an action (with the exception of moving) you must draw an Event card.
The actions you perform are always carried out in whichever region the Onoda marker is.
Important: once you perform 1 of the 4 actions and after playing the Event card if applicable, you must always place an Alarm token in the region where you completed the action.
When the Alarm level in a region reaches 6, Paranoia rises a point. 6 is the highest possible level of Alarm in a region. Each time it rises above 6, Paranoia also goes up a point.
Before explaining the 4 possible actions you can perform (Move, Raid, Repair and Accomplish Mission), we will explain the alarm check and the paranoia test.
Example: Onoda moves to Tilik. After a Move action, you must place an Alarm token, but since there are already 6 Alarm tokens in Tilik, you don't place any.
Alarm Check
Every time you want to perform a Raid, Repair or Mission action, you must pass an Alarm check. The Alarm level is equal to the number of Alarm tokens in a region. To be able to overcome an Alarm check you must exceed the number of tokens.
To achieve this, you will need to extract a Resource/Resolution token from the bag and check the resolution side (number value). If the value that appears is higher than the Alarm level of the region where the Onoda marker is, you have passed the check.
Otherwise, you will have failed and lose a Health Point or gain a Paranoia Point, depending on what is indicated for the round in play.
Physical Health is lost in the first 3 rounds, as a symbol of what was most difficult for Onoda at the beginning: taking care of his health. After 15 years he had become an expert in survival on the island, so Mental Health was the main risk from then on. The Mental Health of Onoda and his companions deteriorates in the last 3 rounds, and this is why Paranoia is gained.
You then place the Resource/Resolution token that you have taken out on the illustrated Plate on the board.
Example: you are with Onoda in Tilik and would like to complete the Raid action to activate the Rifle. To achieve this you must perform an Alarm check. You take a Resource/Resolution token with value of 3 out of the bag, exceeding the Alarm Level 2 in Tilik. You must then place the token on the Plate on the board.
Paranoia Test
Some Event cards will ask you to take a Paranoia test. The Paranoia test works the same as the Alarm check with some key differences: you perform the test against your current Paranoia level (instead of against the region's Alarm level) and, in case of success or failure, you must only perform the effects indicated in the Event card.
Another difference from the Paranoia test is that you can spend Health Points to improve the test result. Each Health Point spent improves the test result by one. This spending of points does not trigger a new Paranoia test.
Important: if at any time the Health level moves to a box that is below the level of Paranoia or the level of Paranoia moves to a box in the indicator that is above the level of Health, you must perform a Paranoia test. In case of failure, Onoda loses his head and decides to end his life, and you automatically lose the game.
Example: after failing an Alarm check, Onoda loses a Health Point, moving to box 3 and therefore below the level of Paranoia. This means you have to perform a Paranoia test, and the whole game is in play. Since the Paranoia level is at 4, you will need to draw a Resource/Resolution token of 5 or 6 to succeed.
You take out a token and the result is 3, which means you automatically lose. However, because it is a Paranoia test, you decide to spend 2 Health Points (taking Health down to box 1 on the track) to improve your test result, and so you succeed in passing the test. You have managed to survive. Remember that a new Paranoia test is not triggered by this spending of extra Health Points.
2.1 Move
With this action you can move the Onoda marker to an adjacent region. No Event card is drawn at the end of this action, but you are required to add an Alarm token to the region you have moved to. Finally, if you had to perform any check or test (due to Round Event cards in play), return the drawn tokens on the Plate to the bag.
Example: You move to Tilik and you place 1 Alarm token. You don't draw an Event card.
2.2 Raid
The Raid action is performed to get rice, your main sustenance for surviving on the island. To perform a raid, you will need to perform an Alarm check (see Alarm Check).
If you pass the check, you must draw a new Resource/Resolution token and place it with its resource side up in your camp.
In case of failure, the Alarm Check fail applies. That is, you lose a Health Point or gain a Paranoia Point, according to whatever is indicated for that round.
Important: after performing the action, you must draw an Event card and play its effect or keep it in your hand if it is a Reserve card.
After playing the Event card you will need to add an Alarm token in the region where you have performed the raid. Finally, return every Resource/Resolution token on the Plate to the bag.
Example: You decide to raid Tilik and take a Resource/Resolution token with a value of 2 from the bag. You have passed the check. You then place the token on the Plate and draw another Resource/Resolution token. You get 1 rice resource and put it in your Camp. Then you must draw an Event card and play its effect. Following that, add an Alarm level in Tilik which increases it to level 2. Finally, return every Resource/Resolution token on the Plate to the bag.
2.3 Repair
You can perform the Repair action to activate an object.
To do this, the Onoda marker must be in the same region as the corresponding object marker.
You must do an Alarm check before the Repair action. In case of passing the check, you have to turn the object token on the Backpack active side up. If you fail, the Alarm Check fail applies. That is, you lose a Health Point, or you earn a Paranoia Point according to what is marked for that round.
Important: after performing the action, you must draw an Event card and play its effect or keep it in your hand if it is a Reserve card.
After playing the Event card, you will need to add an Alarm token in the region where you have performed the Repair action. Finally, return every Resource/Resolution token on the Plate to the bag.
Example: Your uniform is deactivated, so you want to perform a Repair action in Lubang to activate it back. You take a Resource/Resolution token from the bag and the result is 2. Success! You place the token on the plate and turn the uniform token you have in your camp active side up. In case of failure, the uniform token would not be turned over, and since you are in round 2, you would lose a Health Point. Then you draw an Event card and play out its effect. Finally, you raise the Alarm level in Lubang up to 2, and return the Resource/Resolution tokens on the Plate to the bag.
2.4 Accomplish Mission Action
If Onoda is in a region with a Mission marker, you can try to perform the Accomplish Mission action. To achieve this, you must pass an Alarm check. In case of passing the Alarm check, the benefits marked in the Mission card are gained.
Important: If you fail the check, the usual Alarm check failure effects DO NOT apply, but the effects indicated in the Mission card are applied.
You must then draw an Event card and play out its effect or keep it in your hand if it is a Reserve Card.
After playing the Event card, you will need to add an Alarm token in the region where you have performed the Accomplish Mission action. Finally, return every Resource/Resolution token on the Plate to the bag.
Example: Hiroo's marker is in Looc, along with the Mission marker. To perform an Accomplish Mission action in Looc, you must deactivate a companion and pass an Alarm Check. They are not optional; you must do both. Even if the check fails, the companion has to be deactivated.
First the player deactivates Kozuka by turning over his token and then pulls a Resource/Resolution disc from the bag. The result is 6 so the Resource/Resolution token is placed on the Plate and the benefits marked on the Mission card are gained.
You gain 1 Honor Point, a Resource/Resolution token is taken from the bag, placed in the Backpack and a companion is turned over to his active side (this may be Kozuka or any other soldier).
An Event card is then drawn, and its effect is played out. After playing the effect, an Alarm level is added in Looc, raising it to 3. Finally, all the tokens on the Plate are returned to the bag.
Resolving Event Cards
There are three types of Event: Immediate, Round and Reserve.
Immediate Events
Immediate events have to be resolved immediately. The text of the Event card will indicate the process. In the case of a Paranoia test, the effect indicated on the card is applied.
Once the effect is resolved, the card is placed face up on the discard pile of the Event cards.
Example: The Blues and Tango card forces you to choose between turning off the radio or performing a Paranoia test. If the test is successful, you lower Paranoia Points by 1. If you fail the test, you must add 1 Paranoia Point.
Round Events
These events remain active during the rest of the Round. They can be placed next to the board. These events can force you to perform an Alarm check or a Paranoia test. Apply the Alarm check rule in case of success or failure, and the effect indicated on the card in case of a Paranoia test.
These events can be cancelled by adding 1 Paranoia Point or fulfilling the condition that marks the event (usually deactivating some object).
Once cancelled, or when the round is over, place the card face up on the discard pile.
Example: With the Surrender of Fujita card, every time you succeed in an Alarm check for a Raid, you can either steal an additional Resource/Resolution token to use as a resource or you can turn a companion's token active side up. This effect can be applied throughout the round. Once the round is finished, it is discarded. You can choose to add 1 Paranoia Point to discard it without waiting for the end of the round.
Reserve Events
The player can keep in Reserve as many cards of this type as number of active companions they have + 1.
Example: With Shimada deactivated and Kozuka active, the player can retain 2 Reserve Event Cards. If both companions are deactivated, they can only keep 1, and with two active companions, they can keep 3 Reserve cards.
Important: these cards can be used at any time (except when drawing another Reserve card) to activate the effect that appears on the card or instead to repeat a check.
To repeat the check, the previously used Resource/Resolution token is kept on the Plate and a new token is taken out in its place.
Each Event card spent allows you to repeat a check once. In case of consecutive failures, a player can continue to spend cards to repeat the check.
Example: Futamata School can be played at any moment to repeat a check, or a test, or to move the Onoda marker to any region on the map. Once used, it is discarded.
In the case of drawing a Reserve card when you already have the maximum Reserve cards in hand, this card is discarded without effect.
Once used, you must discard it face up on the discard pile.
3. End of the Round
The round ends when you decide. The only requirement is that the Onoda marker is in Kyanpu. You do not have to accomplish the mission to move on to the next round, however, you will not gain Honor Points. You are also not obliged to have the necessary resources, but you will suffer a penalty if you do not manage to feed your team.
Finishing the round is not an action, so you don't need to play an Event card or increase an Alarm level.
Example: Move the Onoda token to Kyanpu and add an Alarm level. You may then decide to finish the Round and continue with the End of Round process but you do not add Alarm levels or play Event cards.
You will then need to perform the following steps:
- Reduce the Alarm level in each region by 1.
- Check the amount of resources you have gained. You need 2 Resources for Onoda and 2 Resources for each active companion, or 3 Resources if they're deactivated.
- For each extra Resource you have, you can reduce the Alarm level of a region by 1, with a maximum of 1 level per region.
- For every Resource you lack, you lose 1 Health Point. This may trigger a Paranoia test if Health drops below Paranoia.
- Verify if this means an Automatic Defeat (see End of the Game).
Note: Automatic Defeat is not checked for each lost Health Point. It is only checked after applying the total loss of points.
- Finally, the Hiroo marker is placed in the Camp area and all Resource/Resolution discs are returned to the bag (those in the Camp and those in the Plate). Then, advance the Round marker 1 space.
End of the Game
When Onoda dies or completes the end of Round 6 alive, you have reached the end of the game. It is now time to see what Onoda has achieved during his years of endurance and what kind of fame he has garnered.
Automatic Defeat
The player must be attentive at all times to the Health and Paranoia levels of Onoda.
- If the Health level reaches 0, Onoda dies and the game ends immediately.
- If the Paranoia level reaches 10, Onoda loses his head and the game ends immediately.
- If the level of Health falls below the level of Paranoia, or if Paranoia rises above the level of Health, a Paranoia test must be done. In case of failure, Onoda loses his head, and the game is immediately over.
To calculate your score, the Victory Points obtained are added as follows:
- 10 VP for each Honor Point.
- 10 VP for each active companion.
- 5 VP for each active object.
- 10 VP for each Health Point.
- -10 VP for each Paranoia Point.
Note: the intention of calling it "honor points" is not to condone Onoda's real-life actions, but to convey his distorted and highly militarized perspective of a world he believed was still at war.
Depending on the total VP obtained, check your result below.
Final Score
0-30 Victory points. Hiroo Onoda ends up being one of the many victims of the madness of World War II, forgotten by history. All that is left are rumors in the bars of Lubang about the crazy Japanese guerrilla. There they tell tourists the story of the sad, lonely ghost of Hiroo that roams through the jungles of the island.
31-60 Victory points. Hiroo Onoda becomes part of Asia's list of most dangerous guerrillas and fighters. For years he sows terror in Lubang and is regarded as public enemy no. 1 in the Philippines. The island is semi-abandoned because of his actions and the Japanese strip him of citizenship after he is posthumously dishonorably discharged from the army.
61-90 Victory points. A Japanese author ends up writing a book about Hiroo that generates an interesting debate among historians. Was Hiroo a hero or a crazy man? Were his actions justified or were they the result of pathological paranoia after an education in an extremely militarized culture? Hiroo's figure is full of light and darkness. A dedicated warrior for some, a war criminal for others. The truth is never fully known.
91-130 Victory points. Historic result. Hiroo is a hero to the Japanese and is forgiven for all his crimes by the Philippines government. He returns to Japan and becomes a public figure but has difficulty adapting to modern times. He follows in the footsteps of his older brother, Tadao, and goes to Brazil where he works in livestock. Finally, he decides to return to Japan where he sets up camps to teach young people traditional Japanese values. He dies happily and peacefully at age 91.
Over 130 Victory points. Hiroo becomes a legendary figure worldwide. Multiple films, books and television series are made. He is even immortalized in a board game and has his own Funko. During his travels around the world explaining his story, he regains his fondness for dancing and ends up setting up an academy in Brazil. He dedicates the last years of his life to collaborating in the economic and social development of Lubang, trying to make up for his guerilla actions.
FAQ
Deactivating a companion. Sometimes an Event or Mission card will ask you to deactivate a companion. The player can choose which companion to deactivate from among those that are active. In the case that all companions are deactivated, one of the deactivated companions (at the player's choosing) is removed from the game. After removing their token, increase your Paranoia points by 2.
Using resources to lower the level of alarm. You cannot use more than 1 Resource to lower the Alarm level of a region. This option only allows you to lower a maximum of 1 point per region.
Object markers on the map. The Object marker on the map marks the region where that object can be repaired. This type of marker is not removed from the map, nor is it turned over during the game. The tokens that have active and deactivated sides are those in the Backpack.
Moving. Moving is an action. Moving to a region places an Alarm level in that location, but no Event card is played.
Increasing the level of alarm. An extra Alarm level is placed after completing all the effects of an action. This includes all the effects of a drawn Event card. If this card requests an Alarm check, it will be done before adding an extra level.
Accomplishing the Mission/Round Duration. The player is not required to accomplish the missions or to have a minimum of resources to finish the round. The only requirement is that the Onoda marker is in the Kyanpu region. Of course, if Onoda does not accomplish the mission, he will not gain Honor Points and if he is short of Resources he will lose Health Points.
Drawing a Reserve Card when you already have the maximum. If you already have the maximum number of Reserve cards, if you draw another it is automatically discarded, and you do not draw a new Event card. You cannot play the effects of the cards that you have at that time.
When are the Resource/Resolution tokens returned to the bag? When all the steps of an action (including the Event card) are finished and just before the Alarm level is added, all the Resource/Resolution tokens on the Plate are returned to the bag. The tokens that are in the Camp (with the rice resource side up) are not returned until the end of the round.
Remember that the tokens that have been played as a resolution of a check or test are placed on the Plate, and those that have been obtained as a resource are placed in the Camp.
Historical Variant
The game preparation is equal to normal mode with the following changes:
- Place the Akatsu token, activated side up, next to the board.
- Arrange the Event cards in order from 1 to 30 face down. The first card to be drawn will be Event card 1. The rest of the cards return to the game box. Occasionally an Event card will indicate adding or drawing cards from the deck. That text must be ignored, it has no effect on the game.
- Place the Uniform token in Looc, the Rifle token in Tilik, the Camouflage token in Kyanpu, the Binoculars token in Ago and the Medicine token in Lubang. They must all be face up.
- For a historical game with a more military focus, order the Mission cards from 1 to 6 in order, leaving card 1 on top. Place them face up in the indicated space on the board and leave the rest of the Mission cards in the game box.
- For a historical game with more focus on Hiroo's survival, order the Mission cards from 7 to 12 in order, leaving card 7 on top. Place them face up in the indicated space of the board and leave the rest of the Mission cards in the game box.
Gameplay Example
First, you draw a Mission card. You draw "Looc", so you place the Mission marker in Looc and Hiroo in Kyanpu.
Now you may perform actions. Onoda's first action is to move to Looc. After the move, one Alarm level is added to Looc. The region is now at Alarm level 1.
Onoda's next action is to try to accomplish the Mission. According to the text of the Mission card, you have to deactivate a companion and run an Alarm check. Flip Kozuka's token deactivated side up and take a Resource/Resolution token from the bag. The result is 2, which is higher than the alarm level in Looc (1 Alarm token). Therefore, you succeed and accomplish the Mission.
Getting the benefits of the Mission: 1 Honor Point, 1 Resource token (3 resources) and turn over a deactivated companion (Kozuka). Then, place the first Resource/Resolution token with its number side up on the Plate, and the Mission marker and the second Resource/Resolution token on your Camp.
Then, draw an Event card: it is Plantains, a Reserve card. The Event can be activated immediately (+2 Resource or -2 Paranoia Points) or saved for later use. Because it is the beginning of the game and there is no real trouble yet, Onoda chooses the second option. You can place your Reserve cards next to your Backpack, so that you don't forget you have them available to use.
When the action is completed (Mission + Event card), the Alarm level is raised in Looc, which will now have an Alarm level of 2. The tokens on the Plate (NOT those on the Camp) are returned to the bag.
Hiroo moves to Tilik. The Alarm is raised in Tilik.
As a new action, Hiroo attempts a Raid in Tilik. He must now exceed Alarm level 1. A Resource/Resolution token is now taken out of the bag, which turns out to be a 1. He has failed.
For a moment, he thinks about using the Event card he has in reserve to repeat the check but prefers not to. So, being in round 1, he loses 1 Health Point. Leave the Resource/Resolution token on the Plate and draw an Event card.
It is a Round Event card, so it will have an effect for the rest of the round. Ants invade the squad's food, so any food in excess of the minimum they need will result in the loss of 1 Health Point.
This effect can be eliminated by raising a Paranoia Point, but Hiroo declines to do so. He will adjust the Resource level.
Once the action is finished, the Alarm level is raised in Tilik (now level 2), and the Resource/Resolution action tokens are returned to the bag.
Hiroo moves to Lubang and raises the Alarm level there. Hiroo attempts another Raid. He pulls out a Resource/Resolution token (5) and succeeds, so they take a Resource token (2 Resources) from the bag. They place the first on the Plate and the second on the Camp.
Then they draw an Event card. Seeing some children playing with swords, Hiroo remembers his old days at Kendo's school and gets nostalgic. The player chooses whether to lose a Health Point or gain a Paranoia Point. They choose to lose a Health Point.
At the end of the action, the level of Alarm is raised in Lubang (now level 2), and the Resource/Resolution token is returned to the bag.
Hiroo moves to Binacas, and the Alarm is raised a level there. He attempts another Raid, with success (2), and gains a Resource token with a value of 3. Place the Resource/Resolution token on the Plate and the Resource token in the Camp. Then an Event card is drawn.
It is another Round Event card, "Tadao and Chie". This card talks about when Hiroo's brother and sister visited the island and tried to convince him that the war was over, travelling all over Lubang in a truck with megaphones. This triggers Hiroo's paranoia, meaning that each time an Alarm check fails, a Paranoia test must be done, leading to another Paranoia Point if he fails.
This card has little effect at this time, it is unlikely that a Paranoia test will have to be done and Hiroo still retains a Reserve card that would allow him to repeat the check. So the player leaves the effect active.
The other card is "Ants in the Food". Now Hiroo has 8 Resources, so according to this effect he would lose 2 Health Points. Onoda prefers to spend 1 Paranoia Point to discard the effect of the Round Event card and does so.
Finally, raise the Alarm level in Binacas.
Hiroo decides it is time to end the round. He moves to Kyanpu, places an Alarm level there, and ends the round.
First, one Alarm level is removed from each region. Next, he spends the 6 resources he needs to feed them (2 for each companion and 2 for himself). As he has 2 Resources left over, he decides to spend them to reduce the Alarm level by 1 in Lubang and 1 in Tilik. If he does not spend them, they are lost. Finally, the Round Event card is discarded and all the tokens that are still on the Plate and in the Camp are collected.
Round 1 ends and round 2 begins. Round 2 would begin by moving the Round marker to 2, drawing a new Mission card (placing the Mission marker in the correct place) and Hiroo's marker in Kyanpu.