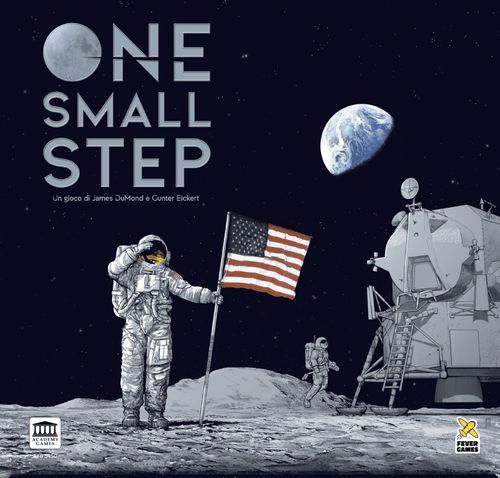
One Small Step
One Small Step Rulebook
Table of Contents
Table of Contents
Game Overview
Collect nine different Resources split into three groups:
- Agency Resources: Funding, Material, Personnel.
- Satellite Resources: Boosters, Navigation, Sensors.
- Crew Resources: Capsules, Landing, Life Support.
Use Agency Resources gained from placing workers to purchase cards you have drafted. Purchasing cards will most often gain you Satellite and Crew Resources.
Use Satellite Resources to launch Satellite Missions into Earth's orbit to increase your Agency's knowledge and upgrade your game engine.
Launch Crew Missions with Crew Resources to advance along the Moon Path for Victory Points and greater rewards.
The first Team to reach the end of the Moon Path lands on the Moon and triggers the end of the game. The Team with the most VP represents the nation that did the most to progress humanity's knowledge for the future.
Earth Spaces have different worker placement effects that depend on which type of worker you place.
Card Spaces require the placement of a specific type of worker that grants an immediate bonus and drafts the card into your hand for future development.
How to Use the Rulebook
You will only need to read the rules up to the Advanced Features section to play the beginner game. You should wait to read the rest of the rules until after you have played your first game. Some rules differ between the beginner and advanced games.
New Staff: Beginner rules are shown in a gray box.
Veteran Staff: Advanced rules are shown in a white box and replace the beginner rules after your first game.
Key Terms — Most rules begin with a bold key term to make it easier to reference the rules while you play.
Setup
- Board.
- New Staff: Place the Board and then place the Beginner Overlay over the Earth and its Action Spaces.
- Veteran Staff: Place the Board without the Beginner Overlay.
- Upgrade Markers.
- New Staff: Place the Crew Markers in a pile next to the Board. Satellite Markers are not used in the beginner game.
- Veteran Staff: Place Satellite Markers, either side up, on the ten Satellite Action Upgrades in the top left and bottom left of the five Earth Spaces. Place Crew Markers, either side up, on the ten Crew Action Upgrades in the top right and bottom right of the five Earth Spaces. Place any remaining Upgrade Markers in a pile next to the Board.
- Satellite and Media Bonus Tiles. Separately shuffle the brown Satellite Bonus Tiles and the blue Media Bonus Tiles and place them in face down stacks onto the Board spaces with matching symbols.
- Crew Bonus Tiles. Place the 7 VP Crew Bonus Tile on the last space of the Moon Path. Shuffle the rest of the Crew Bonus Tiles and place one face down on each of the five remaining Moon Path Spaces. Stack the remaining Crew Bonus Tiles next to the Board.
- Event Deck. Shuffle the Event Cards into three separate Era decks based on the Era Number shown on the back of the cards. Place the Era 2 Cards on top of the Era 3 Cards and the Era 1 Cards on top of the Era 2 Cards to form the Event Deck. Place the Event Deck on its space on the Board. Draw 4 Event Cards and place them on the four Card Draft Spaces.
- Hazard Deck. Shuffle and place the Hazard Deck on its space on the Board.
- Advancement Deck.
- New Staff: Do not use these cards and ignore all reference to them during the beginner game.
- Veteran Staff: Shuffle the Advancement Deck and place it on its space on the Board. Draw 4 Advancement Cards and place them on the four Available Advancement Spaces. Place the Advancement Tokens next to the Board.
- Satellite Mission Deck. Remove the 4 Starting Satellite Mission Cards and then shuffle and place the Satellite Mission Deck on its space on the Board.
- Agency Boards and Team Pieces. Each Team chooses a nation to play, red USSR or blue USA, and takes the following:
- Nation's Agency Board.
- 2 Engineer and 2 Administrator Workers. If a Team has 2 players, choose one to play as the Engineer Department and one to play as the Administrator Department. You will play as both the Engineer and Administrator Departments if you are the only one on your Team.
Teams & Departments
Teams — Play as the US Team or the USSR Team.
Department — Each Team consists of two Departments – Engineer Department and Administrator Department.
Workers — The Engineer Department controls two Engineer Workers; Administrator Department controls two Administrator Workers.
Players — A Team can be made of one or two players:
- Two Players — Each player on the Team controls one Department and its two Workers.
- One Player — A single player controls both Departments and all four Workers.
Team Disagreement — If there is ever a disagreement between teammates on what course of action to take, the opposing Team chooses for them.
Initiative
Media Initiative — The Team with the highest value on the Media Track has Initiative.
Gaining Media — The Gain Media symbol moves your Team's Media cube up one space on the Media Track. If a number is shown before the Media symbol, gain that number of Media. More information about gaining Media can be found on page 17.
Tied Media — The Team moving their Media cube should place it on top of the other Team's cube if they will occupy the same space. The cube on top will have Initiative.
Phase Initiative — Check to see which Team has Initiative at the beginning of each Phase. That Team goes first in that Phase.
Initiative can change from Phase to Phase in a Round, but does not change within a Phase when the Teams' Media values change.
Timing Disputes — If there is ever a dispute about the order in which something happens (e.g., who draws from a deck first), the Team with Initiative decides the order.
Media Initiative Example: The USSR starts the Phase with more Media and so has Initiative. During the Phase, the US gains a Media score equal to the USSR, so they place their Media cube on top of the USSR Media cube. The USSR still has Initiative for the rest of the Phase. At the start of the next Phase, the US gains Initiative.
Agency Boards
Agency Board — Each Team has one Agency Board shared by both Departments.
Storage — All Workers, tokens, tiles, and cards are stored on or near your Team's Agency Board as shown in the example below.
Storage Limit — There is no limit to how many components you can store except that you may only have three Personnel Cards in play at one time.
Team Discard Area — Each Team has its own Discard Area for its cards and tiles.
Game Discard Area — Cards and tiles will sometimes be discarded out of the game into the Game Discard Area in the game box.
Sequence of Play
Rounds — One Small Step is played over a number of Rounds.
Phases — Each Round is made up of 7 Phases that are summarized on your Agency Board.
Turns — In a Phase, each Team will take a Turn, in Initiative order, to complete the Phase before moving on to the next Phase.
Alternating Turns — Some Phases will require the Teams to alternate multiple Turns until both Teams are finished with the Phase. The Team with Initiative goes first.
Game End — The game ends at the end of the Round during which at least one Team lands a man on the Moon.
Phase 1: Countdown
Mission Cards — Mission Cards represent experiments or ventures that are either categorized as unmanned Satellite Missions or manned Crewed Missions.
Launch Queue — Each Agency Board has a Launch Queue at the bottom of the Board made up of three Stages: T-Minus 2, T-Minus 1, and Launch.
Placing Missions — When you draw a Mission, immediately place it on either the T-Minus 2 or T-Minus 1 Stage.
T-Minus 2 Bonus — When you place a Mission on the T-Minus 2 Stage, you may immediately roll the red Satellite Die and gain the resulting Resource. This is shown by the red die symbol next to the T-Minus 2 title.
Unlimited Missions — There is no limit to how many Missions can be placed on each Stage.
Advance Missions — Move each Mission on your Agency Board one Stage to the right in the following order:
- T-Minus 1 Missions move to the Launch Stage.
- T-Minus 2 Missions move to the T-Minus 1 Stage.
Phase 2: Replenish
Resource Tokens — There are nine different Resources in the game that are represented by tokens.
Resource Groups — Each Resource is part of one of three different groups: Agency Resources (Funding, Material, Personnel), Satellite Resources (Boosters, Navigation, Sensors), Crew Resources (Capsules, Landing, Life Support).
Token Types — There are two types of tokens for each Resource.
- Temporary Resources — These white circular tokens are discarded back to the supply when they are spent.
- Permanent Resources — The square tokens remain on your Team's Agency Board when they are spent. They are flipped from their black Fresh side to their gray Spent side when they are spent.
Gaining Resources — When you gain a Temporary or Permanent Resource Token, store it at the top of your Agency Board in the area reserved for that Resource's group.
Place Permanent Resources so that their black Fresh side is face up. They can be used right away.
Resource Dice — Each group of Resources has a corresponding Resource Die: the Agency Die, the Satellite Die, and the Crew Die. Actions will often allow you to roll a die to gain Temporary or Permanent Resources.
Rolling Dice — Roll a die when an Action pictures it and gain the resulting Resources. The Action will indicate whether these should be Temporary or Permanent Resources. The Agency Die has 2 Resources on each face. Gain both Agency Resources shown when rolling the Agency Die, unless otherwise noted.
- A red-die Action Symbol indicates that you roll a red die to gain a Temporary Resource.
- A brown-die Action Symbol indicates that you roll a brown die to gain a Permanent Resource.
Upgrading Resources — The Upgrade symbol allows you to spend a Temporary Resource to gain a matching Permanent Resource.
Upgrade Limit — You cannot Upgrade a Temporary Resource in the same Turn in which it was gained. You can upgrade it in a future Turn within the same Phase.
Resource Die Example: The US player rolls the gray Agency Resource Die. The result shows the Funding and the Personnel symbol. He gains one Temporary Funding Resource and one Temporary Personnel Resource, since the die points to a Temporary Token. The USSR player rolls the brown Crew Resource Die. The result shows the Landing symbol. She gains one Permanent Landing Resource since the die points to a Permanent Token.
Resource Upgrade Example: The US player is taking their Turn and performs an Action that gains him a Temporary Funding Resource and allows him to Upgrade a Temporary Resource to a Permanent Resource. He cannot Upgrade the Funding Resource since he gained it that Turn, so he Upgrades a Booster Resource that he gained in a previous Turn. He spends the Temporary Booster Resource and gains a Permanent Booster Resource. The Booster Resource starts on its black Fresh side and can be used right away.
Replenish Event Cards — Draw four Event Cards from the Event Card Deck and place them face up on the four Card Draft Spaces.
Refresh Resources — Flip all of your square Permanent Resources from their gray Spent side to their black Fresh side.
First Round — Event Cards were placed on the Draft Spaces during Setup, so no new Event Cards are drawn during this Phase on the first round.
Phase 3: Draw Cards
Draw Cards — Each Department on your Team draws one card. Either Department can draw first and the Team can look at the card before the other Department draws.
Simultaneous Draw — Teams do not take turns drawing cards but complete this phase simultaneously. Any disputes are resolved by the Initiative Team though.
Administrator Department Draw — Draw one of the following cards:
- Satellite Mission Card from the shared Satellite Mission Deck.
- Crewed Mission Card from your Team's Crewed Mission Deck.
Engineer Department Draw — Draw one of the following cards:
- Satellite Mission Card from the shared Satellite Mission Deck.
- Crewed Mission Card from your Team's Crewed Mission Deck.
- Event Card from the shared Event Deck.
Card Draw Example: The US Administrator Department chooses to draw a Satellite Mission Card from the shared deck which he immediately places face up in the T-1 Stage of the US Agency Board. At the same time, the USSR Engineer Department chooses to draw a Crew Mission Card from the USSR's deck which she immediately places face up in the T-1 Stage of the USSR Agency Board. The US Engineer Department then chooses to draw an Event Card and places it in her Team's hand. The USSR Administrator Department chooses to draw a Satellite Mission Card from the shared deck which he immediately places face up in the T-2 Stage of the USSR Agency Board. This allows him to roll the red Satellite Die and gain the resulting temporary Satellite Resource Token.
Event Cards are events, experiments, technologies, buildings, and people that your Agency can utilize.
Event Card Types — There are two types of Event Cards:
- Development Cards — Have a green front and a telescope symbol in the top left corner.
- Personnel Cards — Have a blue front and an astronaut helmet symbol in the top left corner.
Team Hand — Place a Development Card into your Team's hand when you gain it. Both Departments share the same hand.
Unlimited Hand — You may hold any number of Development Cards in your hand.
Gaining Personnel Cards — Place Personnel Cards face up to the right of your Agency Board next to the Personnel symbol.
Personnel Limit — You can only have three face up Personnel Cards next to your Agency Board. If you gain a fourth, you choose which three to keep. Place the remaining card in your Team's Discard Area.
Phase 4: Placing Workers
Turns — Teams alternate taking Turns placing a Worker until all Workers have been placed.
Choosing Worker — When it is your Turn, your Team must decide which Department will place one of their Workers.
Placing Worker — Place one of your Workers from your Agency Board on either an Earth Space or a Card Space. Only a Card Space on a Card Draft Space of the Board may have a Worker placed on them.
Retrieve Workers — After all Workers have been placed, retrieve all Workers and place them back on your Agency Board.
Draft Cards — Gain the Event or Personnel Card when you retrieve a Worker that was placed on the card.
Undraft Cards — Cards that did not have a Worker placed on them are shuffled and placed face down on the bottom of the Event Deck at the end of the Phase.
Workers — Administrator and Engineer Workers each have a Unique graphic on their face. They also each have a matching symbol that is used to identify their use on the board and cards.
Earth Spaces (yellow outline) — Each Earth Space has two Worker Actions:
- Top Engineer Action — Use the top Engineer Worker Action if an Engineer Worker is placed on the Space.
- Bottom Administrator Action — Use the bottom Administrator Worker Action if an Administrator Worker is placed on the Space.
Earth Upgrades (black outlines) — Each Earth Worker Action has two Upgrades. Upgrades are introduced in the Upgrade Section and are not included on the Beginner Overlay.
Card Spaces — Only a Worker that matches the Card Space's worker symbol may be placed on the Space and use the Space's Worker Action.
Worker Limit — A Worker may not be placed on an Earth or Card Space if it is occupied by another Worker.
Unlimited Space — An Earth Space with an infinity sign can have an unlimited number of Workers placed on it. It has the same effect for Engineers and Administrators.
Worker Action Effect — Gain the effects of a Worker Action immediately when the Worker is placed. The effects of most Worker Actions are shown by symbols that are explained on the back cover.
Action Cost — Some Worker Actions have a cost shown before a colon (:) or an arrow that must be paid before the Action's effects shown following the colon (:) or arrow can be used.
Summary Sheet — Each Team has a summary sheet that explains each Earth Action's symbols for the beginner game on one side and the advanced game on the other. The advanced side also explains each Action's two Upgrades. Use your summary sheet to plan your Team's Worker placement in secret.
Worker Placement Example: This example uses the Beginner Overlay and four cards. It is the first Round of the game and the USSR has Initiative this Phase, so they take the first Turn placing a Worker.
- Turn 1 — USSR places an Administrator on an Earth Space. The Worker uses the Space's Administrator Action on the bottom. The USSR chooses to roll the red Satellite Resource Die and gain a Temporary Navigation Resource Token. Note that the Earth Space's Action would be different if an Engineer had been placed.
- Turn 2 — US places an Administrator on Event Card "John Glenn." The "John Glenn" Event Card allows an Administrator Worker to increase their Team's Media value by 1 and to roll the gray Agency Resource Die. The US gains 1 Temporary Funding Resource and 1 Temporary Materials Resource from the die. Note that only an Administrator Worker can be placed on this card.
- Turn 3 — USSR places an Engineer on Event Card "Booster Testing." The "Booster Testing" Event Card allows an Engineer Worker to roll the red Satellite Resource Die. The USSR gains a Temporary Booster Resource Token from the die. Note that the Worker could not be placed on Earth Space 1 or the "John Glenn" Event Card since they already have Workers on them.
- Turn 4 — US places an Engineer on an Earth Space. The Worker uses the Space's Engineer Action at the top. The US spends 1 Temporary Funding Resource and 1 Temporary Materials Resource to choose to gain 2 Temporary Booster Resources.
- Turn 5 — USSR places an Administrator on an Earth Space. The Worker uses the Space's Administrator Action at the bottom. The USSR discards an Event Card from their hand to gain a Temporary Resource Token of their choice. They choose to gain a Temporary Life Support Resource Token.
- Turn 6 — US places an Engineer on an Earth Space. The Worker uses the Space's Engineer Action at the top. The US discards 2 Temporary Booster Resources to gain 1 Permanent Booster Resource. Note that the Permanent Resource starts on its black Fresh side.
- Turn 7 — USSR places an Engineer on an Earth Space. The Worker uses the Space to gain 1 Temporary Agency Resource of their choice. They choose to gain a Temporary Funding Resource. Note that the Action is the same for both Engineers and Administrators.
- Turn 8 — US places an Administrator on an Earth Space. The Worker uses the Space to gain 1 Temporary Agency Resource of their choice. They choose to gain a Temporary Personnel Resource. Note that the Worker can be placed on this Unlimited Space, even though a Worker is already on it.
- End of Phase — Both Teams retrieve their Workers. The USSR places the "Booster Testing" card into their hand and the US places the "John Glenn" card face up to the right of their Agency Board. The "Alan Shepard" and "Sensor Testing" cards are shuffled and placed face down on the bottom of the Event Deck.
Phase 5: Personnel
Use Personnel — Teams take Turns using one of the Personnel Cards beside their boards.
Each Personnel Card can be used once each Round.
Optional Use — You do not have to use a Personnel Card in a Round.
Reusable Personnel — Personnel Cards remain after their Personnel Action is used and can be used again in future Rounds.
Personnel Cost — Spend the pictured Resource cost to use the card's Personnel Action.
Personnel Action Effects — The Personnel Action's effects are shown directly to the right of the cost and are carried out immediately when the cost is paid.
A Personnel Card's Worker Action cannot be used and has no effect after the card is drafted — only its Personnel Action is used once it is beside your Agency Board.
Personnel Card Example:
- Turn 1 — US uses "John Glenn." The US has Initiative this Phase. They spend 1 Permanent Personnel Resource and choose to gain 1 Temporary Capsule Resource. The Permanent Personnel Resource is flipped to its gray Spent side.
- Turn 2 — USSR uses "Alan Shepard." The USSR spends 1 Temporary Personnel Resource and chooses to draw an Event Card into their Team's hand.
- Turn 3 — US uses "Yuri Gagarin." The US spends 1 Temporary Personnel Resource and chooses to increase their Media value by 1.
- End of Phase — The USSR has no more Personnel Resources to spend, so they do not get to use "Ed White" this Round. The US has no more unused Personnel Cards, so the Phase ends.
Phase 6: Play Cards
Purchase Developments — Each Department may choose any one Development Card to play from the Team's hand.
Development Cost — Spend the pictured Resource cost to play the Development Card. Development Cards usually cost between one and three Funding and/or Material Resources.
Development Action — The effects of playing a Development Card are carried out immediately when the card's cost is paid.
Discard Developments — Discard a Development Card to your Team Discard after it is played.
Development and Personnel Cards both have two uses: the Worker Action that is gained during Phase 4 when a Worker is placed on the card, and the Personnel and Development Actions that are used in Phases 5 and 6.
Play Card Example:
- US Engineer plays "PR Tour." The Engineer spends 1 Temporary Funding Resource Development Cost to gain a Temporary Sensor Resource. Note that they could have chosen to gain a Navigation Resource instead. The US also gains 1 Victory Point.
- USSR Engineer plays "Satellite Testing." The Engineer spends 1 Temporary Funding Resource Development Cost to gain a Temporary Navigation Resource. The USSR also gains 1 Victory Point.
- US Administrator plays "Booster Testing." The Administrator spends 1 Permanent Materials Resource Development Cost to gain a Temporary Booster Resource. The US also gains 1 Victory Point.
- USSR Administrator plays no card. The Administrator chooses not to play a card.
Phase 7: Launch Missions
Launching Turns — Teams alternate taking Turns launching one Mission from the Launch Stage until all Missions at the Launch Stage have been launched.
Launching Order — Launch your Missions at the Launch Stage in any order you wish.
Launch Sequence — Perform the following steps to launch a Mission:
-
Attempt Minor Success — Pay all of the Resources of the Minor Success Cost if you can.
Mission Failure — The Mission fails if you do not have all of the Resources necessary to spend for a Minor Success. Any Resources you do have for a failed Minor Success are not spent, but you do lose the Media and/or Victory Points as indicated by the Failure Penalty. The launch ends and you skip steps 2 and 3.
-
Attempt Major Success — You may choose to spend all of the Resources of the Major Success Cost to achieve a Major Success. There is no penalty for not achieving a Major Success.
-
Mission Rewards — Gain the Minor Success Rewards. Also gain the Major Success Rewards if you also paid the Major Success Cost. You may gain the rewards in any order that you choose. Reward symbols are described on the back page.
-
Discard Mission — If the Mission did not fail, discard it into your Team Discard Area. If the Mission failed, discard it into the Game Discard Area.
Hazard Cards add unknown risks to a Mission and make it more difficult.
Gaining Hazards — If you gain a Hazard Card, place it on any one of your Missions without looking at it.
Giving Hazards — If you place a Hazard Card on the other Team, you may look at it first and place it face down on any one of their Missions.
Revealing Hazards — When you launch a Mission, reveal all Hazard Cards on the Mission.
Satellite Hazard — Add the additional Resource cost pictured to the right of the Satellite symbol to the Satellite Mission's Minor Success Cost.
Crew Hazard — Add the additional Resource cost pictured to the right of the Crew symbol to the Crew Mission's Minor Success Cost.
Unlimited Hazards — A Mission can have any number of Hazard Cards.
Hazard Reward — Receive the 1 VP shown on the Hazard if the Mission achieves at least a Minor Success.
Unique Hazards — Some Hazard Cards have unique effects. These are summarized on the back cover.
Satellite Hazards add one of the three Satellite Resources to the cost of a Satellite Mission. Crew Hazards add either one of the Satellite Resources or one of the three Crew Resources to the cost of a Crew Mission.
Moon Path — The Moon Path consists of 6 Path Spaces.
Path Space — Each Path Space has an area for a Crew Bonus Tile, and a red square and a blue square to track the USSR's and US's progress along the Moon Path.
Path Advancement — Successful Crew Missions will grant you one or two Moon Path Advancement rewards.
- One Advancement — Place a Crew Marker, with your Team's side face up, one Path Space closer to the Moon than the last Crew Marker you placed.
- Two Advancement — Place a Crew Marker, with your Team's side face up, two Path Spaces closer to the Moon than the last Crew Marker you placed. This will leave a Path Space without one of your nation's Crew Markers on it.
First Advancement — Your Team's first Path Advancement starts on the Path Space closest to the Earth and farthest from the Moon.
Game End — The game will end at the end of the Round during which a Team places their Crew Marker on the last Path Space, on the Moon.
Launch Example: The US and USSR each have two Missions at the Launch Stage. The US has Initiative and launches a Mission first.
- Turn 1 — US launches "Ranger 7" Satellite Mission. Attempt Minor Success: the US spends a Temporary Booster Resource and a Permanent Booster Resource to achieve the Minor Success. Attempt Major Success: the US does not have a Navigation Resource, so they can not achieve a Major Success nor gain its rewards. Mission Rewards: the US gains the Minor Success rewards — increase Media Score by 1; discard a Temporary Capsule Resource and upgrade it to a Permanent Capsule Resource; draw a Satellite Bonus Tile and gain its rewards; and an Advanced Games symbol not used in the beginner game. Discard Mission: since the Mission was successful, the Mission Card is placed in the US Team Discard Area.
- Turn 2 — USSR launches "EVA" Crew Mission. Attempt Minor Success: the USSR spends a Temporary Booster Resource, 2 Temporary Capsule Resources, and a Permanent Life Support Resource to achieve the Minor Success. Attempt Major Success: the USSR spends a Temporary Landing Resource, a Permanent Sensor Resource, and a Temporary Life Support Resource to achieve the Major Success. Mission Rewards for the Minor and Major Success: the USSR gains 9 Victory Points in total; gains 5 Media in total; advances 2 Spaces on the Moon Path, placing a new Crew Marker, USSR side up, 2 Spaces further down the Moon Path than their last Marker; and an Advanced Games symbol not used in the beginner game. Discard Mission: since the Mission was successful, the Mission Card is placed in the USSR Team Discard Area.
- Turn 3 — US launches "Lunokhod 1" Satellite Mission. Attempt Minor Success: the US has a Temporary Booster Resource but does not have a Navigation Resource. The Mission fails and the US does not have to spend any resources. Mission Failure: the US takes the failure penalty at the bottom of the Mission, losing 2 Media. Steps 2 and 3 are skipped. Discard Mission: since the Mission was a failure, the Mission Card is placed in the Game Discard Area, not the Team Discard Area.
- Turn 4 — USSR launches "Animal Flight" Crew Mission. The Mission has one face down Hazard Card on it. The USSR flips it and adds the Crew Hazard to the Minor Success requirements of the Mission. Attempt Minor Success: the USSR spends 2 Temporary Booster Resources and 2 Temporary Capsule Resources (1 for the Mission Card and 1 for the Hazard Card) to achieve the Minor Success. Attempt Major Success: the USSR does not have any of the required Resources, so they can not achieve a Major Success nor gain its rewards. Mission Rewards: the USSR gains the rewards for achieving a Minor Success and overcoming the Hazard — 1 Media in total from the Minor Success Rewards; 2 Victory Points in total, 1 from the Minor Success and 1 from the Hazard Card; advances 1 Space on the Moon Path, placing a new Crew Marker, USSR side up, 1 Space further down the Moon Path than their last Marker placed in Turn 2; and an Advanced Games symbol not used in the Beginner Game. Discard Mission: since the Mission was successful, the Mission Card and the Hazard Card are placed in the USSR Team Discard Area.
Bonus Tiles
Bonus Symbols — Symbols on Bonus Tiles are described on the back cover.
Bonus Tile Limit — When a type of Bonus Tile runs out, no more Bonus Tiles of that type may be gained.
Media Bonus Tiles
Gaining Media Bonus — If your Media value is 5 or more, you may reduce your Media value by 5 to gain a Media Bonus at any time during one of your Team's Turns in any Phase.
Loop Media Track — If your Media value is at 8 and you are to gain Media, you must reduce your Media value by 5 and gain a Media Bonus. After reducing your Media, you continue gaining Media as normal.
Mandatory Gain — You must increase your Media value when you gain Media.
One Time Use — You do not have to use a Media Bonus right away. You can play it at any time during one of your Team's Turns or when the Media Bonus dictates. All bonuses on a Media Bonus Tile are gained when it is used and not before.
Saving Bonuses — Place unused Media Bonuses face up beside your Agency Board.
Used Bonuses — Place Media Bonuses you have used face down in your Team Discard Area.
Gaining Media Bonus Examples: On the US Turn, the US Team decided to reduce their Media from 6 to 1 and draw a Media Bonus Tile. The USSR gain 3 Media. They first increase their Media from 7 to 8. Before gaining the second Media, they first reduce their Media by 5 down to 3 and gain a Media Bonus Tile. They then gain the remaining 2 Media which places them on 5.
Satellite Bonus Tiles
Gaining Satellite Bonus — Gain Satellite Bonus Tiles from a Satellite Mission's Minor Success Rewards or from some Worker Actions.
Immediate Use — Gain the effects of a Satellite Bonus Tile immediately and place it face down in your Team Discard Area.
Crew Bonus Tiles
Gaining Crew Bonus — After you advance along the Moon Path, gain the Crew Bonus Tile on the Moon Path space, if available.
One Per Space — If the Space's Bonus Tile has already been claimed, you gain nothing.
Skipping Bonuses — If you advance twice along the Moon Path from one Crew Mission, you do not gain a Crew Bonus Tile from the first Space you move over.
Immediate Use — Gain the listed VP immediately and place the Bonus Tile face down in your Team Discard Area.
Hazard — Gain a Hazard Card when you receive a Crew Bonus Tile from the Moon Path. Place it face down on one of your Missions without looking at it.
Advancement Token.
- New Staff: Ignore Advancement Tokens on the Crew Bonus Tiles.
- Veteran Staff: Gain an Advancement Token when you gain a Crew Bonus Tile from the Moon Path.
Extra Bonus Tiles — Do not gain a Hazard Card or Advancement Token when you use a Worker Action that gains you a Crew Bonus Tile from the extra Crew Bonus Tiles beside the board. You only get the VP.
Final Bonus Tile — The Bonus Tile on the Moon is face up and does not give a Hazard Card or Advancement Token. The game ends at the end of the Round that this Bonus Tile is Taken.
Bonus Tile and Hazard Card Clarifications
Media Bonus Clarifications:
- A Media Bonus Tile pictured with a die and a magnifying glass — Use to gain one Funding, and choose the result of one of your die rolls.
- A Media Bonus Tile pictured with two workers — Use to gain one Funding, and place two of your Team's Workers instead of just one on your Turn. They are placed one after the other.
- A Media Bonus Tile pictured with two figures and an arrow between them — Use to gain one Personnel, and place an Administrator as an Engineer, or an Engineer as an Administrator.
- A Media Bonus Tile pictured with a figure and a cube — Use to gain one Personnel, and place your opponent's Media cube under your Media cube. They can not gain a Media Bonus from this.
Satellite Bonus Clarifications:
- A Satellite Bonus Tile pictured with a heart and two stars — Gain one Life Support, and draw two Event Cards. Discard an Event Card from your hand to the bottom of the Event Deck.
- A Satellite Bonus Tile pictured with an upgrade arrow and a warning symbol — Upgrade one Temporary Resource Token to a Permanent Resource Token, and draw a Hazard Card and place it on one of your Missions without looking at it.
Hazard Card Clarifications:
- A Hazard Card pictured with a Permanent Resource and an equals sign — The other Team gains (from the supply) a Temporary Resource that matches a Permanent Resource you spent to succeed at the Mission. They do not gain anything if you fail the Mission or do not use any Permanent Resources.
- A Hazard Card pictured with the Satellite Die and a -3 — Roll the red Satellite Resource Die and spend the Resource you roll -or- Move your Media cube directly to -3.
- A Hazard Card pictured with a Satellite/Crew choice equal to a set of reward symbols and a -1 — If the Mission succeeds, you must choose 1 reward to not receive.
- A Hazard Card pictured with a Satellite/Crew choice equal to 0 Media — You gain no Media rewards from Minor or Major Rewards.
- A Hazard Card pictured with a Failure X equal to 2x Media — If this Mission Fails, lose twice the Media indicated.
Advanced Features
Upgrading Earth Actions
Upgrades — Each Earth Worker Action has two Upgrades:
- Satellite Upgrade — Upgraded by a successful Satellite Mission reward.
- Crew Upgrade — Upgraded by a successful Crew Mission reward.
Covered Upgrades — All ten Satellite Upgrades start covered by Satellite Markers and all ten Crew Upgrades start covered by Crew Markers. Either side of the Markers can be face up. Covered Upgrades have no effect on their Worker Action.
Upgrade Reward — The Earth Upgrade Reward symbol lets you remove a Satellite or Crew Marker from an Upgrade.
Satellite Upgrades — When the Earth Upgrade Reward symbol is on a Satellite Mission, remove any Satellite Marker from an Upgrade Space and place it into Earth's orbit (the line around the Earth on the board) with your Team's side face up.
Crew Upgrades — When the Earth Upgrade Reward symbol is on a Crew Mission, remove any Crew Marker from an Upgrade Space. This will be the Crew Marker that you place onto the Moon Path as a result of the Crew Mission's Moon Path Advancement reward.
Active Upgrades — Once an Upgrade is uncovered, it enhances the Action for both Teams.
Upgrade Effects — Upgrades enhance an action in one of three ways, as indicated by the symbol in the top left corner of the Upgrade:
- Additional Effect — Add the Upgrade to the Action's normal effects.
- Reduced Cost — Reduce the cost of the Action (shown left of the colon (:) or arrow) by the amount shown by the Upgrade.
- Alternative Effect — You may use the Upgrade's effects instead of the Action's effects.
Non-Upgradeable Upgrades — Upgrade Actions are never affected by other Upgrades.
Separate Costs — Additional Effect Upgrades are still gained even if the normal Worker Action's cost is not paid.
If an Upgrade has a cost, it must be paid in order to use the Upgrade's effect. This cost is separate from any cost that must be paid for the Worker Action.
Satellite Upgrading Example: The US has just successfully launched a Satellite Mission. They gain an Earth Action Upgrade as one of their rewards. They chose 1 Satellite Marker from any of the 10 Satellite Upgrades and move it into orbit around the Earth, with the US side of the Marker face up. The uncovered Upgrade is now Active, reducing the cost of the Worker Action. The Action now costs no Resource Token to use.
Crew Upgrading Example: The USSR has just successfully launched a Crew Mission. They gain an Earth Action Upgrade as one of their rewards. They chose 1 Crew Marker from any of the 10 Crew Upgrades and remove it. The Crew Mission also awarded the USSR one Moon Path advancement. The USSR already has a Crew Marker on the Moon Path, so they place the Crew Marker they removed from the Upgrade onto the next Path Space closer to the Moon with its USSR side face up. The Path Space has a Crew Bonus Tile on it, so the USSR gains it. The Crew Bonus Tile provides them with VP, forces them to place a Hazard Card on one of their Missions, and gains them an Advancement Token.
Using an Upgraded Action Example: All Earth Actions have been fully Upgraded. The USSR places an Administrator to use the bottom Worker Action. The "/" icon on both upgrades allows the Worker to use either Upgrade effect instead of the Worker Action's effect. They choose to use the Crew Upgrade to roll a brown Crew Die for a Temporary Resource. The US places an Engineer to use the top Worker Action. The "-" icon on the Satellite Upgrade reduces the Worker Action's cost by 1 Temporary Resource. This allows the US to spend 1 Temporary Resource to gain a matching Permanent Resource. The Crew Upgrade allows the player to spend an additional 2 matching Temporary Resources to gain a matching Permanent Resource. Note that the Satellite Upgrade does not reduce the cost of the Crew Upgrade.
Advancement
Between Phases — Each Team may purchase any of the four face up Advancement Cards between any two Phases. The Teams purchase the cards in Initiative order and may purchase multiple cards.
Place Advancement Cards to the right of your Agency Board next to the Advancement symbol.
Advancement Cost — Spend an Advancement Token and the Agency Resources pictured at the top of the card.
Replace Immediately — Replace a face up Advancement Card when it is purchased.
Phase Usable — The number at the bottom of the card indicates during which Phase its effect is usable. Some may be used in Any Phase.
Permanent — Once purchased, you can use an Advancement Card for the rest of the game.
Advancement Card Clarification
Overtime — Purchase Cost: 1 Advancement Token, 1 Funding Resource, 1 Personnel Resource. During Phase 5: Personnel, you may use one of your Personnel Cards twice. The Personnel Action's Cost must be paid each time the Personnel Action is used.
Flexible — Purchase Cost: 1 Advancement Token, 2 Personnel Resources. During Phase 4: Worker Placement, you may use one circular Temporary Personnel Resource as an Administrator or an Engineer Worker on an Earth Action or a Card Action. This takes up your Turn placing a Worker. The Personnel Resource blocks the placement of other Workers on the Action Space. This Advancement Card allows you to effectively place a total of 5 Workers. The Personnel Resource is discarded at the end of the Phase.
Event Card Clarifications
Aerospace Industry — When purchased from your hand: Gain 1 VP for every 2 Permanent Resources your Team has, and roll the brown Crew Resource die and gain the Temporary Resource rolled, and roll the red Crew Resource die and gain the Temporary Resource rolled, and gain 1 VP.
Ed White — Personnel Action: Gain 1 Media, -or- draw a Satellite Mission Card and immediately attempt to Launch it. If a Major Success is achieved, gain an additional 2 VP.
Astronaut Training — When purchased from your hand: Gain 2 VP for every Personnel Card that you have in play and in your Team Discard, and gain a temporary Life Support Resource, and gain 1 VP.
GPS — When purchased from your hand: Gain 1 VP for every Satellite Bonus Tile your Team has in your Team Discard, and gain a temporary Booster Resource, and gain a temporary Navigation Resource, and gain 1 VP.
Heroic Action — When purchased from your hand: Gain 2 VP for every Hazard Card your Team has in your Team Discard, and gain a temporary Life Support Resource, and gain 1 VP. When Worker Action used: Gain a temporary Personnel Resource, and gain a temporary Resource of your choice.
Research Facility — When purchased from your hand: Gain 1 VP for every two Development Cards in your Team Discard, and gain a temporary Navigation, Sensor, or Booster Resource, and gain 1 VP.
National Pride — When purchased from your hand: Gain 1 VP for every Media Bonus Tile your Team has in play and your Team Discard, and gain 5 Media (after you gain the VP for Media Bonus Tiles), and gain 1 VP.
Secret Technology — When purchased from your hand: Gain 3 VP for each unspent Advancement Token you have, and gain a temporary Capsule Resource, and gain 1 VP.
Pushing the Limits — When purchased from your hand: Choose any Crew Mission Bonus Tile in your Team Discard and score VP for it again, and gain 2 temporary Booster Resources, and gain 1 VP. When Worker Action used: Draw a Crew Mission Card from your Team's Crew Deck and immediately attempt to Launch it.
Technology Transfer — When purchased from your hand: Gain 1 VP for every 3 Temporary Agency Resource Tokens that you have (in any combination), and gain a temporary Landing Resource, and gain 1 VP. When Worker Action used: Gain an Advancement Card at no cost.
Symbol Reference
Roll the gray Agency Die and gain both of the Resources rolled.
Roll the gray Agency Die and choose to gain one of the Resources rolled.
Advance one Space on the Moon Path.
Move opponent's Media cube to your marker's space and place it beneath your marker.
Roll the red Satellite Die and gain the Resource rolled.
Spend a matching Temporary or Permanent Resource when paying to play a Development Card.
Spend 1 less resource when paying to play a Development Card. This can make the card free.
Roll the brown Crew Die and gain the Resource rolled.
Draw a Crew Bonus Tile from the stack of Tiles next to the Board. Do not gain a Hazard Card or Advancement Token.
Draw a Satellite Bonus Tile.
Draw a Satellite or Crew Mission Card.
Draw a Satellite Mission, Crew Mission, or Event Card.
Only keep one of the drawn cards. Put the other cards back on top of the decks they were drawn from.
Move your Team's Media cube up one Space on the Media Track or gain the number of Media shown before the Media symbol.
Gain 1 VP or gain the number of VP shown before the VP symbol.
Launch a Mission you just drew immediately. If the Action did not just draw a Mission, choose any of your Missions to Launch immediately.
Before rolling a die, choose the result of a die roll instead of rolling. This symbol does not allow you to roll a die, just to choose the result of a roll gained by another symbol.
Draw a Hazard Card. Place it on one of your own Missions without looking at the card unless you are instructed to place it on an opponent's Mission.
Place a drawn Hazard Card onto a Mission of the other Team. You may look at the Hazard Card first.
Place max one of the drawn Hazards on an opponent's Mission. You may look at all the Hazards first. Unplaced Hazards are put on the bottom Hazard Deck.
Look at a Hazard Card on one of your Team's Missions.
Gain an Advancement Token.
Draw and gain an Event Card.
Discard a Development Card from your Team's Hand to the bottom of the Event Deck.
Play an Event Card from your Team's Hand. You must pay for the Development to play it.
Draw 2 Event Cards and discard 1 card from your hand to the bottom of the Event Deck.
Upgrade a Temporary Resource to a matching Permanent Resource. You cannot Upgrade a Resource you gained in the same Turn.
Draw a Media Bonus Tile.
Upgrade an Earth Action by removing either a Satellite or Crew Marker from an Action Upgrade.
Immediately use the Administrator or Engineer Action of any Earth Space, even if it already has a Worker on it.
Place two Workers in one Turn, one after the other.
Use an Administrator Worker as an Engineer Worker or an Engineer Worker as an Administrator Worker.
Go directly to the indicated numbered space on the Media Track. No Media Bonus is gained from this.
Spend any one Temporary Resource.
Spend any one Permanent Resource.
Spend any one Temporary or Permanent Resource.
Gain any one Temporary Resource.
Gain any one Permanent Resource.
Spent and/or gained Resources must be the same type of Resource.
Gain one of the pictured Resource tokens.