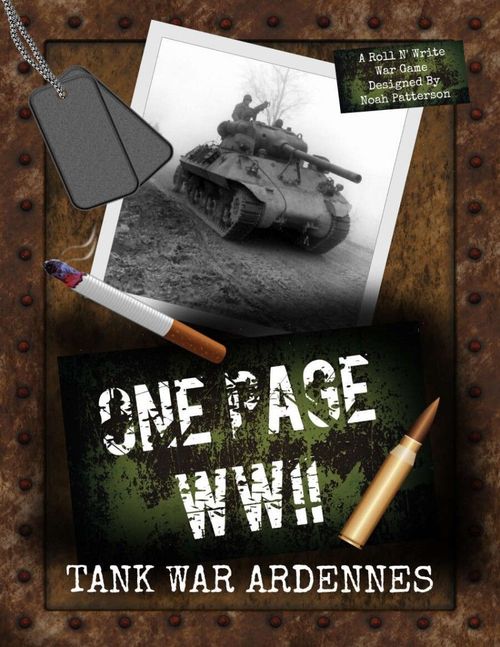
One Page WWII: Tank War Ardennes
One Page WWII: Tank War Ardennes Rulebook
Table of Contents
Table of Contents
- 1.0: Welcome to the Ardennes
- 2.0: Gameplay
- 2.1: Weather
- 2.2: Terrain
- 2.3: Enemies
- 3.0: Combat
- 3.1: Initiative
- 3.2: Bombardment
- 3.3: Regular Combat
- 3.4: Defending
- 3.5: Using Grit
- 3.6: Zero Dice
- 4.0: Towns
- 5.0: Building Roads
- 5.1: Backtracking
- 6.0: Game End
- 6.1: Victory Points
- 6.2: Victory Determination
- Easier Game
1.0: Welcome to the Ardennes
1.1: Components
DICE: 4 Green American Dice, 1 Red Grit Dice, 1 Blue Weather Dice, 1 Brown Terrain Dice, 1 Black & 1 Grey German Dice.
GAMEPAD: 80 Copies of the Game Sheet on 40 Pages.
TANK MINIATURE: To help you track where your tank is on the map, we've included a green Tank Miniature.
PENCIL and ERASER: You will need a pencil with a good eraser to play this game.
1.2: Set-up
TANK STATS: You will be assigned a tank and a crew before play begins. However, not all crews are battle hardened, and not all tanks are in top notch condition. You will now roll to randomly determine your TANK STATS.
ROLL: Determine your Stats by rolling D3 for each of the 4 TANK STATS (D3 meaning a 3-sided dice. To get a result of 1-3 roll a six-sided die and divide the result by 2 rounded up). Each stat is as follows (Note the bold abbreviation for each. This is used on the game sheet):
- GUNS (GU): The mounted weaponry/cannon on your tank.
- CREW (CR): The ability of your Tank Crew in close quarters combat.
- ARMOR (AR): Your Defense Value when defending against german attacks.
- GRIT (GR): Your ability as a commander to lead your men in dire situations.
2.0: Gameplay
Your tank begins the game in the bottom right corner area of the Grid Map. From there, you will move from area to area fighting enemies and liberating towns. A single turn of the game is played as follows:
ONE: Weather: Roll The Blue Dice on the Weather chart to see what kind of weather you currently encounter.
TWO: Choose Road: Choose a road leading off your current area.
THREE: Generate Area: Roll a Dice on the Areas chart pictured on the game sheet to determine what the next area will be. Draw that area onto the map. Areas 5 and 6 are towns. The area layout you rolled may be rotated in any direction so long as as many roads as possible line up with pre existing roads. Any roads that run into trees or a map edge are considered dead ends.
FOUR: Roll for Terrain: Roll The Brown Dice on the Terrain chart to see which kind of Terrain you encounter.
FIVE: Roll for Enemy Spotting: Roll The Black Dice on the Enemy chart to spot any enemies in the region. Roll The Grey Dice and divide it by 2 rounded up to see how many of that enemy rolled are present.
SIX: Combat: Enter into combat and kill or drive back the enemy in your area.
SEVEN: Roll for Supplies: Finally, once the area is cleared of enemies, IF (and only if) you are in a TOWN roll D6 on the Town chart to search for supplies.
2.1: Weather
The weather in the Ardennes can change quickly and drastically. During the weather step you will roll the BLUE DICE) and check the result against the weather chart. The chart can affect your stats as follows:
- SUNNY: This ADDS one green dice to your Crew and Grit rolls for the turn.
- CLEAR: Has no effect.
- COLD: This REMOVES one green dice from your Crew rolls for the turn.
- FOG: This REMOVES one green dice from your Gun rolls for the turn.
- SNOW: This REMOVES one green dice from your Armor rolls for the turn.
- STORM: This REMOVES one green dice from ALL your rolls for the turn.
Place the blue weather dice on the weather chart to remind you of what the weather conditions are for the turn.
2.2: Terrain
The terrain in your current area will also impact your rolls in combat. Roll the Brown dice and compare it to the Terrain Chart. The terrains are as follows:
- TRENCH: This REMOVES one green dice from your Armor rolls for the turn.
- RIVER: This REMOVES one green dice from your Crew rolls for the turn.
- FOREST: This REMOVES one green dice from your Gun rolls for the turn.
- BLOCKED: This REMOVES two green dice from your Armor rolls for the turn.
- ICE: This REMOVES one green dice from your Grit rolls for the turn.
- CLEAR: This area is clear and has no effect on combat.
Place the brown terrain dice on the terrain chart to remind you of what the terrain conditions are for the turn. Also, write the number corresponding to the terrain result on the space to remind you if you return to this area.
2.3: Enemies
All enemies in an area must be killed or driven back before you can move on. Each enemy on the chart has two stats. These are:
DESIGNATION: Each enemy will have either a SHELLS symbol (a single long shell) or an AMMO symbol (two crossed guns). The Shell means the enemy is a TANK unit and attacks in the bombardment step of combat. The crossed guns means the enemy is a REGULAR unit and they attack in regular combat.
DIFFICULTY LEVEL: This is the Enemy's Level and the number appears beneath the designation symbol. This number changes the number of dice you roll in combat. For instance, if you have 4 combat dice to roll and the enemy DL is -1, you remove 1 combat die. You now only have 3 combat dice to roll.
When you roll for the enemies, place the two German dice on the table to remind you which enemy unit type is here (the black dice result) and how many of them there are (the grey dice).
3.0: Combat
The instant enemies appear, combat begins. Combat takes place over FOUR steps:
ONE: Initiative: You will make a roll using your GRIT stat to see who acts first in each round of combat.
TWO: Bombardment Combat: All TANK units (including you) get a chance to attack (in initiative order).
THREE: Regular Combat: All REGULAR units (Including your Crew) get a chance to attack (in initiative order).
FOUR: Victory: If no one has won, repeat the combat process.
3.1: Initiative
Initiative is determined by your skill as a leader using your GRIT stat. The more Grit you have in battle the better the chance you have of foreseeing your enemy's movements. To do this:
ONE: Count up the number of STARS underneath your GRIT stat that are NOT MARKED. Take that many GREEN dice for your starting dice pool.
TWO: Apply modifiers from:
- Enemy DL: Check the enemy's DL (for ONLY the enemy TYPE in the area. Not for every enemy in the area) and subtract that many dice from your dice pool.
- Terrain: Check the current TERRAIN. If it is -1 GR remove 1 die from your dice pool.
- Weather: Check the current WEATHER conditions. If it is +1 GR add 1 die from your dice pool.
THREE: Roll all the dice in your pool. You are trying to roll equal or lower than your GRIT stat on ONE of the dice in your pool. If one dice shows the desired result, you get to act first in both bombardment and regular combat steps. If not, you must act second.
3.2: Bombardment
You may only attack in the bombardment step if you have at least ONE Shell (one unfilled circle on the Shells track) remaining. When it is your turn to attack you will do the following.
ONE: Count up the number of UNMARKED HEARTS underneath your GUNS stat. Take that many green dice for your starting dice pool.
TWO: Apply modifiers from:
- Enemy DL: Check the enemy's DL (for ONLY the enemy TYPE in the area. Not for every enemy in the area) and subtract that many dice from your dice pool.
- Terrain: Check the current TERRAIN. If it is -1 GU remove 1 die from your dice pool.
- Weather: Check the current WEATHER conditions. If it is -1 GU remove 1 die from your dice pool.
THREE: Roll all the dice in your pool. You are trying to roll equal or lower than the GUNS stat on AS MANY DICE in your pool as possible.
FOUR: Every die in your pool that shows the desired result inflicts ONE casualty on the enemies. So each dice showing the proper result kills 1 enemy. If NO dice show the desired result, you miss your attack.
SHELLS: When you fail a bombardment roll, or are unsatisfied with the results, you may use one SHELL to reroll some or all of your dice. Fill in one dot next to the SHELLS on your TANK STATS. Reroll as many dice in the pool as you wish. If you still aren't happy with the results, you may spend again to reroll. However, once your shells are depleted you won't be able to bombard again until you locate an ammo cache.
3.3: Regular Combat
You may only attack in the regular combat step if you have at least ONE ammo case (one unfilled circle on the Ammo track) remaining. When it is your turn to attack you will do the following.
ONE: Count up the number of UNMARKED HEARTS underneath your CREW stat. Take that many Green dice for your starting dice pool.
TWO: Apply modifiers from:
- Enemy DL: Check the enemy's DL (for ONLY the enemy TYPE in the area. Not for every enemy in the area) and subtract that many dice from your dice pool.
- Terrain: Check the current TERRAIN. If it is -1 CR remove 1 die from your dice pool.
- Weather: Check the current WEATHER conditions. If it is -1 CR remove 1 die from your dice pool. If it is +1 CR add one die to your dice pool.
THREE: Roll all the dice in your pool. You are trying to roll equal or lower than the CREW stat on AS MANY DICE in your pool as possible.
FOUR: Every die in your pool that shows the desired result inflicts ONE casualty on the enemies. So each dice showing the proper result kills 1 enemy. If NO dice show the desired result, you miss your attack.
AMMO: When you fail a regular combat roll, or are unsatisfied with the results, you may use one AMMO case to reroll some or all of your dice. Fill in one dot next to the AMMO on your TANK STATS. Reroll as many dice in the pool as you wish. If you still aren't happy with the results, you may spend again to reroll. However, once your ammo cases are depleted you won't be able to fight in regular combat until you locate an ammo cache.
SURRENDER: If you can't attack in EITHER type of combat (because you used up all your shells and ammo), you are forced to surrender and the game ends (See the section on Ending the Game to see how many victory points you earned.)
3.4: Defending
When it is the enemy's turn to attack (on either bombardment or regular combat steps) you MUST make a defensive armor roll using the steps outlined below.
ONE: Count up the number of UNMARKED HEARTS underneath your ARMOR stat. Take that many Green dice for your starting dice pool.
TWO: Apply modifiers from:
- Enemy DL: Check the enemy's DL (for ONLY the enemy TYPE in the area. Not for every enemy in the area) and subtract that many dice from your dice pool.
- Terrain: Check the current TERRAIN. If it is -1 AR remove 1 die from your dice pool. If -2 remove 2 dice.
- Weather: Check the current WEATHER conditions. If it is -1 AR remove 1 die from your dice pool.
THREE: Roll all the dice in your pool. You are trying to roll equal or lower than the ARMOR stat on ONE DICE in your pool.
FOUR: If ONE dice shows the desired results, you block or dodge the attack. If NO dice show the desired result you take one damage for EACH ENEMY in the area. You MUST shade in a heart beneath one of your stats (GUNS, CREW, or ARMOR--player's choice) per damage, thus decreasing your future dice pools for that stat. If ALL of your hearts are shaded in, you are dead. GAME OVER.
TREAD: When you fail a defense roll, you may use your TREAD to reroll some or all of your dice (This indicates making an evasive maneuver to escape the hit). This works in the same manner as weapons, spending shells or ammo points to reroll attacks. However, once your tread is depleted, it means your tank is partly broken down and moves slowly. Right after combat ends in an area, you must make an ARMOR roll to see if you break down. If you get NO SUCCESSES on your armor roll, make a BACKTRACKING check to see if more enemies appear. (See the section on Backtracking for more information Backtracking rolls). If no enemies appear, move onward. If enemies appear, enter combat again.
3.5: Using Grit
BEFORE any attack or defense roll is made, you can choose to use your natural instincts and leadership skills to get a leg up in the battle. To do this, spend 1 GRIT by marking off one of the stars on your sheet. Take out the RED GRIT DICE and roll it with the rest. With the grit dice, you are trying to roll equal or lower than your GRIT stat to pass the test. In attack rolls, a success on a grit dice inflicts 2 hits. You can also choose to use Grit if you have NO shells in a bombardment or NO ammo in regular combat. You find an innovative way to make the attack work. You may also spend 1 GRIT to skip any BACKTRACKING check. Additionally, when the weather grants you a +1 to a roll and you end up with a dice pool of 5 dice, treat the final die as a grit dice (but without having to spend the grit).
3.6: Zero Dice
If for any reason you are reduced to 0 dice on a die roll (from any combination of modifiers or loss of hearts/stars) you will still roll 1 die. This is called the LUCK ROLL. To succeed on such a roll you MUST roll a 1 on the dice.
4.0: Towns
After a battle is won, all enemies are killed, AND IF you are in a town you will then be able to search the town for supplies--either an official supply drop or left over items from the Germans. All supplies help you in one way or another.
SUPPLIES: will grant you some helpful boost as indicated by the symbols listed.
- Heart: Heal 1 heart in the stat indicated (Crew, Gun, Armor, or Grit).
- Ammo Cache: Recover 1 Shell and 1 Ammo.
You can't gain more hearts, grit stars, or shells/ammo than are listed on your sheet. If you don't have immediate need of the supplies found, you may bring them along with you to use later. Write it in next to the SUPPLY slot. You may only have one type of supply at a time.
ENGINEER TOOLS: In general heal 1 heart of armor. However, you can instead spend it to gain 1 tread. Additionally, you may spend engineer tools to automatically build a road (see 5.0 below for more information on building roads).
DESTROYED TOWNS: Some towns will have already been destroyed. When this happens, blacken the town slightly to show that it is gone. It can't award you victory points at the end of the game.
5.0: Building Roads
Sometimes, you might hit a dead end in the trees. When you do this, you can use GRIT to attempt to build a new road out of the area (after an area is clear). Make a Grit roll. If you pass, you or a team of engineers manage to build a new road. You may move into any adjacent area. If it is a new area, generate it as normal. If you fail the GRIT roll, you lose 1 grit (shade in one of your stars to show this) and don't move. You may use Engineer Tools to automatically build a road without rolling.
5.1: Backtracking
If you need to backtrack, you may turn around and move through areas you previously visited. When you do this, roll a D6. On a roll of 5-6, new enemies appear. Roll on the enemy chart as normal and enter combat. Do this for each area you revisit except the Starting Space.
SURROUNDED: If you get walled into an area with no way out and you have no Grit to attempt new road builds, you are captured.
6.0: Game End
The game can end in a few different ways. Whenever ONE of any of these conditions are met, the game immediately ends. The game ending conditions are:
COMPLETE: When you have filled out ALL the spaces on the grid and cleared the final area of enemies.
CASUALTY: When you run out of all your hearts.
SURRENDER: You are captured. Either because you have no way out of your current area OR you ran out of ammo and shells in combat.
NO ROADS: There are no more possible roads to take out of previously explored areas and you have NO GRIT to build new ones.
6.1: Victory Points
You will earn victory points in the following ways.
MEDALS: Each time you manage to kill any single enemy unit (1 hit in combat) you will fill in a bubble on the "Kills" track (starting at the top and working down). Every 9 kills earns you a medal in the following order:
- 9 Kills: Bronze Star
- 18 Kills: Silver Star
- 27 Kills: Distinguished Service Cross
- 36 Kills: Medal of Honor
Each medal awards you 1 VICTORY POINT (Except the Medal of Honor which awards you 2). Additionally, if you were killed/seriously wounded in combat (lost all of your hearts), mark the bubble over the Purple Heart medal. You earn 1 point for this medal as well.
AREAS CLEARED: Each area on the map you cleared of enemies is worth 1 Victory Point. (The starting area doesn't count toward your VP totals).
TOWNS LIBERATED: Each town area you cleared (liberated) is worth 1 Victory Point. Destroyed towns do not count toward VP totals.
SURRENDER: If you were forced to surrender, you lose 1 Victory Point.
6.2: Victory Determination
The number of final Victory Points you managed to earn determines your victory status at the end of the game:
- 5 or less: No Victory
- 6-10: Minor Victory.
- 11-15: Victory.
- 16-20: Major Victory.
- 21+: Divisive Victory.
Easier Game
To make the game easier add in these rule mods:
HIGHER STATS: during set up roll D6 instead of D3 for stats.
ENEMIES: Only ONE enemy unit appears PER AREA instead of D3. This makes scoring higher victories difficult.