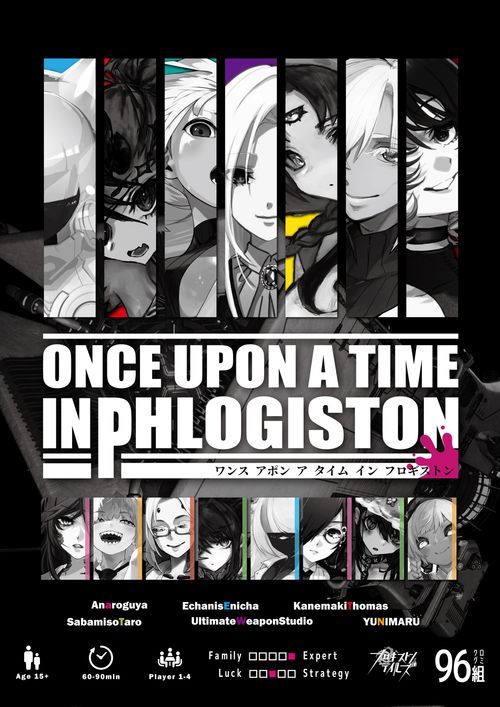
Once Upon a Time in Phlogiston
Once Upon a Time in Phlogiston Rulebook
Table of Contents
Table of Contents
- Components
- Component Details
- Game Setup
- Reading the Cards
- Shinogi and Payment Cards
- Game Flow
- Action Phases 1 to 4
- Reading Action Board Effects
- Family, Shinogi and Movement
- Setup Phase (rounds 2 and 3)
- Phase Management
- End of the Game
- Two-Player Game (Supervisor)
- Effects and Rewards
- Basic Rules for Effects and Rewards
- Icon Notation Rules
- Other Rules
- Territory Bonus
- Handling Failed Actions
- Solo Play
- Aim of the Game
- Q&A
Components
Contents list as printed on page 2 of the manual.
Main boards (2)
- Astrogation board (210×594mm), 1
- Action board (210×594mm), 1
Player boards (15)
- Top officer board (105×148mm), 7
- Spaceship board (105×148mm), 4
- Action slot (26×148mm), 4
Sub-boards (2)
- Score board (148×210mm), 1
- Progress board (148×105mm), 1
Tokens and workers (145)
- Power markers (wooden disc, φ15mm), 24
- Power tokens (acrylic cube, 10×10×10mm), 88
- Medicine markers (wooden disc, φ10mm), 20
- General-purpose markers (acrylic cube, 8×8×8mm), 13
Regular-size cards (63×88mm), 147
- Action cards, 28
- Family cards, 43
- Supervisor card, 1
- Summary cards, 8
- Shinogi cards (standard), 24
- Shinogi cards (drug sales), 18
- Shinogi cards (investment), 18
- Top officer randomizer cards, 7
Half-size cards (44×63mm), 57
- Action cards (supervisor), 9
- Payment cards, 48
Separator-size cards (72×92mm), 15
- Divider boards, 14
- Discard place card, 1
Note: "Shinogi" is the name printed on these cards and on the astrogation board; it is kept untranslated here.
Top officers (7, one of each): Alice Bylfort, Alicia Corleone, Crescent Hambergite, Hex, Nakira Uebayashi, Liu Xinyu, Livio Villa Secretariat.
Top officer randomizer (7): one card for each top officer above, with a card back reading "Randomize."
Spaceship boards (4, Eurynome-class): Durezza (2nd ship), Vivace (3rd ship), Dinita (4th ship), Erede (5th ship). Apart from colour, they make no difference to play.
Payment cards (48): four kinds, 12 of each, all named "Payment."
Shinogi cards, standard (24), by rank:
- Rank 1: Illegal Casino Operation, Whorehouse, Poaching, Rip-Off, Manufacturing and Trafficking of Weapons, Cabaret Management, Smuggling in, Extortion.
- Rank 2: Corporate Espionage, Call Girl Operation, Job Placement, Land Shark, Illegal Chemical Plant Setup, Adult Video Production and Distribution, Smuggling, KETSUMOCHI.
- Rank 3: Land Grabbing, Live events, Human Trafficking, Fight Club Operation, Racing Events, High-End Escort, Hazardous Materials Transport, Assassination.
Shinogi cards, Drug Trafficking (18) and Lean Sharking (18): the two kinds that can be upgraded (see "Shinogi upgrade" below). The reverse of Drug Trafficking is "Control of the Drug Market," and the reverse of Lean Sharking is "Hostile Takeover."
Action cards (28, four sets of seven): 1. Day off, 2. Arena, 3. Plant, 4. Downtown area, 5. Laboratory, 6. Sakazuki, 7. Astrogation. The back colour shows which spaceship set each card belongs to.
Action cards, supervisor (9): used only in the two-player game (see "Two-Player Game (Supervisor)").
Family cards (43): one each of 43 named characters. "Subaru Hoshigaoka" is the only Family card with a persistent effect in the base set.
Summary cards (8): two kinds, four of each. They reproduce the game flow and are useful to keep at hand while checking the rules.
Component Details
The manual's component-detail page (page 3) shows the following.
- Action board: a Mental track (+4 to -4), numbered action areas 1 to 8 (1. Day of, 2. Arena, 3. Plant, 4. Downtown area, 5. Laboratory, 6. Sakazuki, 7. Astrogation, 8. Failed Action), a Family deck area, and six family slots.
- Astrogation board: a hexagonal space map with planet spaces, four Shinogi slots at the corners, and a "K = ROUND" marker.
- Score board: the Honor score track, with columns for scoring values, and a 0 to 250 scale.
- Progress board: three player rows, each with a Setup Phase and an Agari Phase section.
- Medicine markers (20), general-purpose markers (13), and the discard place card (1).
Game Setup
1. Common area setup
- Boards. Place the two main boards (the Astrogation board and the Action board), the two sub-boards (the Score board and the Progress board), and one discard place card in the centre of the table. The side used of each main board depends on the number of players or games played.
- Action board back: the side used depends on the number of players. Use the illustration at the top left of the board to choose the side. Use the side marked "players 2, 3" for a 2- or 3-player game, and the side marked "players 1, 4" for a 1- or 4-player game.
- Map board back: until you are used to the game, play with the "Standard Map." Once you are used to it, try the "Extra Map." The map type is printed at the lower right of the map board.
- Family deck. Gather all Family cards face down, shuffle them well, and place them face down on top of the Action board, as shown in the diagram.
- Progress board. Place one general-purpose token in the leftmost area of the progress board, the SETUP PHASE area on the top row.
- Payment cards. Group the Payment cards by type, and place them face up within reach of all players. There are four types of Payment card.
- Medicine markers. Place all medicine markers within reach of all players, if possible.
- Shinogi deck (Rank 2 and Rank 3). From the standard Shinogi cards, use the markings and colour on the back to sort out the Rank 2 and Rank 3 cards. Group them by rank, shuffle each group well, and place them face down on the Astrogation board, as shown in the diagram.
- Shinogi deck (Drug Trafficking and Lean Sharking). Group the Drug Trafficking Shinogi cards and the Lean Sharking Shinogi cards separately. Place each group face up on the Astrogation board, as shown in the diagram.
Note on board placement. When placing the boards at the start of step 1, adjust their positions to suit the size and shape of the table. As long as the positional relationships of the cards and tokens on the boards, of the Astrogation board, and of the standard (Rank) Shinogi cards do not change, the game can proceed normally. Ideally, all players can reach all boards; if that is difficult, players should cooperate to move cards, markers and tokens during play.
2. Choosing top officers
Each player chooses the top officer who will act as their own alter ego, by any suitable method (for example, the player who wins a game of rock-paper-scissors chooses first, then the others choose one at a time in turn).
If the players have no preference, the top officer randomizer cards may be used instead: shuffle all of them face down, then deal one to each player.
3. Player setup
1. Receiving components
Each player receives components as shown in the diagram. The colours of the top officer board, spaceship board, markers and tokens differ from player to player.
- Top officer board, 1: the same as the top officer chosen in "2. Choosing top officers."
- Spaceship board, 1: apart from colour, the spaceship boards make no difference to play. Take any one.
- Action slot, 1.
- Power markers, 6: take the ones matching the colour on the left side of your spaceship board.
- Power tokens, 22: take the ones matching the colour on the left side of your spaceship board.
- Summary cards, 1 each of the 2 kinds.
- Action cards, 1 each of the 7 kinds: take the cards whose right-hand back colour matches the colour on the left side of your spaceship board. Keep the action cards you receive as your hand, managed face down in front of you from then on.
- General-purpose markers, 3.
2. Placing personal boards
Each player places the personal boards received in "1. Receiving components" (top officer board, spaceship board and action slot) in front of them, as shown in the diagram on the right.
- Leave a gap of at least one card's length between the action slot and the top officer board.
- The position of the action slot may be adjusted to suit the table.
3. Placing power markers on the main and sub-boards, and power tokens
Each player places the power markers and power tokens received in step 1 on the main and sub-boards as follows. Each player's initial number of power markers and power tokens on the main boards is 3 power markers and 1 power token.
- Astrogation board: place 1 power marker in the mothership area of the Astrogation board.
- Score board:
- In the "0" box at the bottom of the score board, in the box of the same colour as your power tokens and markers, place 1 power token.
- In the "00" box at the top of the score board, place 2 power markers.
4. Acquiring starting resources
Each player gains the resources shown by the "SETUP" strip printed on their top officer board, as shown in the diagram. The five kinds of starting resource are Mental, the three basic resources (crossed swords, gears and heart), and medicine (syringe). The starting amounts differ between top officer boards.
- Mental: on the Mental track of the Action board, place 1 power token on the leftmost space of the line with the same value as the Mental value on your top officer board.
- Basic resources (crossed swords / gears / heart): on your spaceship board, in each of the recesses corresponding to a basic resource, place 1 general-purpose marker in the recess with the same value as the crossed-swords, gears or heart value on your top officer board.
- Medicine: take from the common area a number of medicine markers equal to the syringe value on your top officer board, and keep them in front of you.
Note: the printed page gives the "SETUP" strip's position as the bottom right of the top officer board in step 3.4 and the bottom left in the box beside the diagram. The text above does not depend on which corner is meant.
4. Starting layout
The manual shows each player's area at the start of the game: the top officer board, the spaceship board, the action slot, the hand of action cards, and the power markers and tokens on the boards. Each player's top officer type and spaceship type, the starting resource amounts (and whether they have medicine markers), and the colours of the power markers, power tokens and action card backs differ between players.
Each player's faction (派閥) consists of their top officer board, their spaceship board, and the cards placed next to them. The manual calls this collection of cards and boards a player's faction. Expanding this faction lets a player play more efficiently.
4. Supervisor setup (2-player game only)
- Take 3 power markers in a colour that no player is using, and place them where all players can see them. These markers are called the supervisor's markers.
- Place the supervisor card face up (the side with a card frame at the bottom of the card) where all players can see it.
- Gather all of the supervisor's action cards (the 9 "Action (supervisor)" half-size cards), shuffle them well face down, and place them next to the supervisor card. During play this pile is called the supervisor's action selection deck.
Setup is now complete. For the special setup for a solo game, see "Solo Play" (page 31 of the manual).
Reading the Cards
The manual's guide to the cards most often used.
Action cards
Action cards decide your action in each phase.
- Action: an action you may choose with this card.
- Obtainable resource: a resource that may be gained through the action chosen with this card. You are not guaranteed to get it.
- Placement restriction (Sakazuki): indicates that this card cannot be placed in the rightmost position of a slot. Printed only on the Sakazuki cards.
Family cards
Family cards are members who can be invited into your faction during the game. They help the player as subordinates of their top officer.
- Flavour: a quote that symbolizes the character. Not used in play.
- Name: the character's name, printed in both alphabet and Japanese. Used to identify the card.
- Tag: shows the character's trait. The left and right tags vary by character; they are referred to when you acquire the card.
- Effect: the character's effect. How to read the effect types, and how they are processed, is explained later in the manual (page 27).
- Setting: the character's background. Not used in play.
- Illustrator: the name of the illustrator. Not used in play.
Example: the card "Irio Blossom" has the effect "When you acquire this card, gain 4 crossed swords."
Shinogi and Payment Cards
Shinogi cards
Shinogi cards are the job cards your faction can acquire during the game. They are the central cards for earning fame points (名声点), the points for winning the game.
- Name: the job's name, printed in both alphabet and Japanese. Used to identify the card.
- Cost (経費): the cost needed to acquire the job. Some jobs offer a choice between two patterns. Referred to when you acquire the card.
- Tag: the job's traits. The left and right tag combination differs by job. Referred to when you acquire the card.
- Reward (報酬): the reward gained when you acquire the job. The types of reward and how they are processed are explained later (page 27).
- Rank (ランク): the round in which the job is revealed, shown as rank 1 to 3. Referred to at setup and when moving to a new round.
- Attribute (属性): the job's attribute. Sometimes referred to by card effects.
- Shinogi upgrade: the two Shinogi card types, Drug Trafficking and Lean Sharking (investment), have a special process when three of them are placed in a row in succession. This is explained in "Shinogi Upgrade" (page 30).
Payment cards
Payment cards are obtained by paying a specific cost when attending the periodic executive meeting (幹部会). Collecting cards with the same tag gives more fame points.
- Name: the card's name. The name is common to all Payment cards.
- Cost: the cost needed to acquire the card. Common to all Payment cards. Referred to when you acquire the card.
- Tag: the card's traits. The tag combinations are common to each card type. Referred to when you acquire the card.
- Reward: the reward gained when you acquire the card. Explained later in the manual.
Game Flow
Overview
This game consists of the following six phases, making up one round. The round is repeated three times. At the end of the third round, the player with the most fame points wins the game.
Round (repeated three times): SETUP PHASE → ACTION PHASE 1 → ACTION PHASE 2 → ACTION PHASE 3 → ACTION PHASE 4 → AGARI PHASE
- Setup Phase: prepares the round.
- Action Phases 1 to 4: phases for gaining resources, allies and jobs.
- Agari Phase: the phase in which rewards are gained according to the work done in that round.
Note: the overall flow of the game is also printed on the two summary cards given to each player. Keeping the summary cards to hand while checking the rules makes the rules easier to follow.
Fame points
Fame points (名声点) show how much each player's top officer has contributed to the organization. Besides increasing jobs (Shinogi cards), fame points can be gained from the number of territories (シマ) you hold at the end of a round, and by paying Payment (上納金) cards.
- Fame points are managed on the score board. At the end of the game, the player with the most fame points wins the succession struggle.
- Fame points are shown in the game by a laurel icon.
- When a player gains fame points, move their power tokens and power markers on the score board by the same amount as the fame gained. A power token on the score board shows the ones digit of your fame points, and a power marker tracks the tens and higher.
Setup Phase (round 1)
The Setup Phase prepares the round.
- Reveal Shinogi (Rank 1): turn face up all 8 Shinogi cards (Rank 1) placed around the Astrogation board.
Setup Phase processing from round 2 onwards is described later in the manual.
Action Phases 1 to 4
The Action Phase is the central phase of this game. By taking various actions you gain various resources, and by spending the resources you gain to increase your jobs (Shinogi cards), you aim to gain fame points.
Action Phases 1 to 4 are resolved with the same procedure. Each Action Phase performs the following steps in order. A 2-player game needs additional processing, which is explained at the end of this section.
-
Reveal Family cards. On the Action board, in every Family slot (the frames marked [Family]) that has no Family card in it, reveal one card at a time from the top of the Family deck prepared in "2. Family deck" setup. At the start of each Action Phase, six Family cards are therefore face up.
-
Select actions. Every player selects three actions to perform in this Action Phase. From their hand, each player places the corresponding action cards in front of their action slot, face down. (The types of action are explained in "Types of Action" on page 19.)
- At this point, take care that the cards placed face down in the action slot are not visible to the other players.
- The "6. Sakazuki" action card cannot be placed in the rightmost position of the slot. Take care with this.
-
Recover used action cards. Any player who has cards placed on top of their action slot returns those cards to their hand. (The timing for cards being placed on top of the action slot is explained in "Recovering power markers and updating the action slot" on page 24.)
-
Reveal action cards. All players reveal, at the same time, the action cards they placed in their action slot in step 2.
-
Mental check. Check the Mental value of every player and decide the order in which the actions are carried out.
- If several players have the same Mental value, the player whose power token is placed further to the left has the higher Mental.
- In the rest of this section, players are referred to as Player A, B, C and D in order of Mental, which is the order in which the actions are carried out.
Types of action
Table as printed on page 19. Numbers are shown for the 1st to 4th positions of each area. "1 or 4 players" and "2 or 3 players" mark the positions that apply only to that player count.
1. Day off (Mental track)
- 1st: gain 5 Mental.
- 2nd: gain 4 Mental.
- 3rd: gain 3 Mental.
- 4th (1 or 4 players): gain 5 Mental and a ring-shaped resource icon of 2. (The name of this icon is not printed in the text; it is kept as the icon. The 4th position value is hard to read on the page and is transcribed as printed.)
2. Arena (crossed swords, the force resource 武力)
- 1st: gain 3 force.
- 2nd (1 or 4 players): pay 1 Mental, gain 2 force.
- 2nd (2 or 3 players): pay 2 Mental, gain 5 force.
- 3rd (1 or 4 players): pay 1 Mental, gain 5 force.
3. Plant (gears, the industrial products resource 工業製品)
- 1st: gain 3 gears.
- 2nd (1 or 4 players): pay 1 Mental, gain 2 gears.
- 2nd (2 or 3 players): pay 2 Mental, gain 5 gears.
- 3rd (1 or 4 players): pay 1 Mental, gain 5 gears.
4. Downtown area (heart resource)
- 1st: gain 3 hearts.
- 2nd (1 or 4 players): pay 1 Mental, gain 2 hearts.
- 2nd (2 or 3 players): pay 2 Mental, gain 5 hearts.
- 3rd (1 or 4 players): pay 1 Mental, gain 5 hearts.
5. Laboratory (medicine)
- 1st: gain 2 medicine.
- 2nd (1 or 4 players): pay 1 Mental, gain 1 medicine.
- 2nd (2 or 3 players): pay 2 Mental, gain 3 medicine.
- 3rd (1 or 4 players): pay 1 Mental, gain 3 medicine.
6. Sakazuki (invite a Family member)
- 1st: pay 3 Mental, gain a Family card.
- 2nd: pay 2 Mental, gain a Family card.
- 3rd (1 or 4 players): pay 1 Mental, gain a Family card.
- 3rd (2 or 3 players): gain a Family card.
- 4th (1 or 4 players): gain a Family card.
7. Astrogation (visit other planet states and small planets to increase Shinogi)
- 1st: gain 5 territory (シマ, the hand icon) and 1 Shinogi (the envelope icon).
- 2nd: gain 3 territory and 1 Shinogi.
- 3rd (1 or 4 players): gain 1 territory and 1 Shinogi.
- 3rd (2 or 3 players): gain 1 Shinogi.
- 4th (1 or 4 players): gain 1 Shinogi.
- Note: the hand icon is read as territory (シマ) from the rules text on page 15, which lists territories as a source of fame. The printed page does not name the icon in this table.
8. Failed Action (replacement action, used when the intended action could not be taken because of your relations with other factions)
- 1st, 2nd, 3rd and so on: gain one of 2 Mental, 1 medicine, or 1 Shinogi (envelope).
- The action happens in the same order as the power marker placement, as printed in the note on this page.
Reading Action Board Effects
On the Action board, icons are drawn as [resource paid] ▸ [resource received].
- Pay and receive. Brain 1 ▸ gears 2 means: the resource paid is 1 Mental (shown in red as "resource paid"), and the resource received is 2 gears (shown in blue as "resource received"). If the resource to be paid cannot be paid, the resource to be received cannot be gained either.
- Receive only. Where no resource is paid, the icon shows only the arrow and the resource received.
- Several resources received. If several icons are shown on the receiving side:
- Without a slash, all of the resources shown are gained.
- With a slash ("/"), the player gaining the resources chooses one of the resources shown separated by the slash.
- When several different kinds of resource are gained at the same time, the player gaining them chooses the order in which they are processed.
Resource handling (paying and gaining)
Mental (brain), the basic resources (crossed swords, gears and heart), and medicine (syringe) are tracked with the boards, markers and tokens. The other resource, the general-purpose resource (the ring-shaped icon), is used as far as possible during the action in which it is gained. It cannot be carried over to a later action or round.
Mental (brain). Move your power token on the Mental track on the Action board up or down by the value of the Mental you pay or gain.
- When paying Mental, move the token down.
- When gaining Mental, move the token up.
- The Mental track runs from +4 (upper limit) to -4 (lower limit). You cannot pay or gain Mental beyond these limits.
- If you move to a value that already holds other players' power markers, place your power marker immediately to the right of the rightmost marker already there.
Basic resources (crossed swords, gears and heart). On your spaceship board, move the general-purpose marker in the recess of the matching basic resource left or right by the value paid or gained.
- When paying a basic resource, move the marker to the left.
- When gaining a basic resource, move the marker to the right.
- The upper limit of each basic resource is 10 and the lower limit is 0. You cannot pay or gain beyond these limits.
Medicine (syringe).
- When paying medicine, move medicine markers equal to the amount paid from your hand to the common area.
- When gaining medicine, take medicine markers equal to the amount gained from the common area into your hand.
- If medicine markers run out, use a substitute such as an unused power token, or any other suitable object.
General-purpose resource (ring icon). When paying or gaining the general-purpose resource, you may freely combine one or more of the basic resources (crossed swords, gears and heart) so that the total equals the value given. Only basic resources may be used to pay for it, and only basic resources may be gained through it.
Note: Mental and basic resources can only be held up to the scale's limit (Mental: +4 and each basic resource: 10). Any excess gained beyond the limit is lost after gaining. Each resource cannot be paid beyond its lower limit (Mental: -4; all others: 0).
Family, Shinogi and Movement
Family (Family icon)
Gain one available Family card from the revealed Family cards at "6. Sakazuki" on the Action board.
Acquiring cards. When you acquire a Family card, a Shinogi card or a Payment card, the tag pictures at its left and right (the half-hexagon tags) must line up with the tag at the end of your faction, in a formation that matches. Grey tags (the tags with a grey colour) may be combined with any tag.
- A card whose tags do not link to any end of your faction cannot be placed, and in principle cannot be acquired.
- Acquiring more cards and completing more tags is the shortcut to winning the succession struggle.
Movement (movement icon), Shinogi (envelope icon), and Astrogation action
Movement and Shinogi are the resources linked to the Astrogation board.
Movement (hand-and-ship icon).
- You may freely move your power markers on the Astrogation board by up to as many hexes as the movement value.
- You do not have to use all of your movement.
- There is no limit to the number of power markers in one area. You may pass through areas where other players' power markers are placed, and you may place your power markers in areas where other players' markers are placed.
- Movement generated by one icon cannot be split between uses. (This does not apply where movement comes from separate icons, such as [2] + [3].)
Shinogi (envelope icon).
- From an area on the Astrogation board where your power marker is placed, you may acquire one available Shinogi card by paying the resources it specifies.
- When you acquire a Shinogi card, you may gain the fame points printed on it.
- As with Family cards, a Shinogi card can only be acquired if its tags connect to the tag at the end of your faction, unless either tag is grey.
Areas where Shinogi can be acquired.
- The central mothership area, and the small planet areas on the board, let you acquire Investment and Drug Trafficking Shinogi cards.
- The four planet areas at the corners (in yellow, red, blue and green) let you acquire Investment and Drug Trafficking Shinogi cards, and in addition you may choose any Shinogi card in the two frames next to that area.
Placing power tokens when acquiring Shinogi. When you acquire a Shinogi card in a small planet area or a planet area, you may place one of your power tokens in the square frame connected to the area in which you acquired it.
Territory (シマ). Each area is called the territory of the player with the most power tokens placed in that area.
Two-envelope icon. The envelope icon with two envelopes overlapping means that you do the Shinogi action twice. Unlike other icons, it is not an icon plus a number. Because it represents two uses, it may be split and used separately.
Astrogation Action Boost. When you carry out the Astrogation action (the 7 icon) and then acquire Shinogi, or move, you may pay the corresponding resource before or after the movement, or between the Shinogi and the movement, to gain additional resources. The additional resources you may gain are printed on your spaceship board in the "Astrogation Action Boost" area. The content is the same on all spaceship boards.
Note: the example in the manual shows that the boost gains are processed in an order chosen per icon. Movement obtained from the Astrogation action may be used in the order you choose.
Shinogi available in each area
Each area of the Astrogation board offers a set of Shinogi cards. The arrows on the map diagrams on page 22 show which face-up Shinogi cards belong to which area. The Standard Map and the Extra Map have different layouts.
Standard Map. Arrows from each planet area point to these Rank 1 Shinogi cards:
- Blue planet (upper left): Illegal Casino Operation and Rip-Off.
- Yellow planet (upper right): Extortion and Cabaret Management.
- Red planet (lower right): Manufacturing and Trafficking of Weapons, and Smuggling in.
- Green planet (lower left): Poaching and Whorehouse.
Extra Map. Arrows from each planet area point to these Rank 1 Shinogi cards:
- Red planet (centre left): Illegal Casino Operation and Rip-Off.
- Green planet (upper right): Extortion and Cabaret Management.
- Yellow planet (lower left): Poaching, Whorehouse, and Manufacturing and Trafficking of Weapons.
- Blue planet (lower right): Smuggling in.
In each area, besides the Shinogi cards revealed at the place indicated by the arrows, the Drug Trafficking and Lean Sharking Shinogi cards are also included among the choices for acquiring Shinogi.
Note: if several Shinogi cards are stacked on top of each other, only the top card, which is face up, may be selected. The cards underneath may be looked at freely.
Shinogi acquisition procedure
-
Choose a Shinogi. Check the position of your power marker on the Astrogation map, and select one available Shinogi card.
-
Pay resources. Pay the resource printed at the top right of the Shinogi card selected in step 1. A standard Shinogi card shows two patterns separated by "or"; paying either one is sufficient.
-
Acquire the card. Gain the Shinogi card selected in step 1. The rules for acquiring a card are the same as those under "Acquiring cards" for Family cards.
- Place the acquired Shinogi card so that its tag and picture connect with the tag and picture at the left or right end of your faction (or a grey tag).
- If you place the acquired card on the left side of your faction, place part of it underneath the cards or boards already placed, so that the tags connect.
-
Gain fame points. Gain the fame points printed at the lower right of the acquired card. The meaning of each fame icon is described beneath it.
- When fame is gained by reference to "completed tags," only the tags of your own faction are referred to; other players' tags are not.
- Tags completed by acquiring this Shinogi are included.
-
Add influence. Place one of your power tokens in the frame corresponding to the area in which you acquired the Shinogi card.
- If the corresponding frame has no free space, or if you performed the Shinogi in the mothership area, step 5 is not performed. Acquiring the Shinogi card itself still takes place.
Agari Phase
The Agari Phase gives rewards according to each player's achievements up to this round.
1. Mothership bonus. A player who has a power marker in the mothership area gains fame points equal to X, where X depends on the round:
- Round 1: X = 4
- Round 2: X = 6
- Round 3: X = 10
That player may then acquire up to two Payment cards. Acquiring a Payment card requires paying the resources printed on it. Payment cards are acquired in order of Mental, from highest to lowest, as of this point.
Payment card acquisition procedure:
- Choose a Payment card. Choose one of the Payment cards placed in the common area.
- Pay resources. Pay the resources shown at the top of the Payment card selected in step 1, marked (1). All Payment cards cost the same: the general-purpose resource in the amount of 6.
- Acquire the card. Gain the Payment card selected in step 1. The rules for acquiring the card are the same as "Acquiring cards" under Family cards. Place the acquired Payment card so that the tag and picture at one end of your faction connect (or a grey tag connects).
- Gain fame points. Gain the fame points in the lower half of the acquired Payment card, marked (2). For Payment cards, the fame is common across the card types except for the tag kind: for each completed tag of the kind shown (hexagonal tags of the corresponding symbol), gain 2 fame points.
- Completed tags are referred to only within your own faction. Other players' tags are not referred to.
- Tags completed by acquiring this card are included.
2. Shima bonus. Each player gains fame points equal to the number of their shima multiplied by Y, where Y depends on the round:
- Round 1: Y = 2
- Round 2: Y = 3
- Round 3: Y = 5
Shima rules. Excluding the mothership area, among all areas where Shinogi can be acquired, the area in which a player has the most power tokens among all players is called that player's shima. A player with the most power tokens in an area may make that area their shima.
- If several players are tied for the most power tokens in an area, that area is a shima of each of those players.
3. Family refresh (rounds 1 and 2 only). In the Sakazuki area, discard all the Family cards revealed there to the discard place.
Setup Phase (rounds 2 and 3)
The Setup Phase prepares the round. The Setup Phase in rounds 2 and 3 adds processing that differs from round 1.
- Return all top officers to the mothership. Every player moves their power markers on the Astrogation board to the mothership area.
- Recover action cards. Every player returns the action cards in the upper row of their action slot to their hand. By the end of the Setup Phase, all action cards are in hand.
- Reveal new Shinogi (Rank 2 and Rank 3). Place the Shinogi cards of the rank matching the round number face up around the Astrogation board. The newly placed Shinogi cards are placed one per each of the 8 frames around the Astrogation board. They are placed at random.
- If Shinogi cards from the previous round remain, place the new Shinogi card on top of them.
Setup Phase processing in round 1 is described above, under "Setup Phase (round 1)."
Phase Management
At the end of each phase, advance the general-purpose marker on the Progress board to the frame of the next phase. This shows at a glance which phase the game is in.
End of the Game
The game ends when the Agari Phase of round 3 ends.
- If any effect is triggered in the Agari Phase of round 3, resolve all of those effects first.
- Then check the fame points of all players on the score board.
- The top officer of the player with the most fame points becomes the next leader of Iena, and that player is the winner of the game.
Two-Player Game (Supervisor)
In a 2-player game, the supervisor card is used. Add the following processing at the start of every Action Phase, at the end of Action Phases 1 to 3 in each round, and at the start of rounds 2 and 3.
At the start of each Action Phase (before the Family cards are revealed)
- Reveal the cards from the top of the supervisor's action selection deck one at a time, and place 3 "Action (supervisor)" cards in the slots below the supervisor card.
- If the supervisor's markers are already on the Action board, first remove all of those markers from the board, then go to step 2.
- On the Action board, in each area that corresponds to a revealed "Action (supervisor)" card, place one supervisor's marker in the "1st" position of that area, one at a time.
- If the same "Action (supervisor)" card is revealed twice, place one supervisor's marker in each of the "1st" and "2nd" positions of that area.
- Supervisor's markers placed in this step are handled in the same way as the players' power markers. During that Action Phase, no other player may place a power marker in the place where a supervisor's marker is placed.
At the end of each round's Action Phases 1 to 3 (after power markers are recovered and the action slot is updated)
- Of the "Action (supervisor)" cards placed below the supervisor card, place the two leftmost cards face up where all players can see them. Move the remaining card face down to the bottom of the supervisor's action selection deck.
- If cards are already face up, place the two new cards side by side with those cards.
At the start of rounds 2 and 3
- Turn all face-up "Action (supervisor)" cards face down, shuffle them well, and make them into a new supervisor's action selection deck.
Effects and Rewards
Reading effects and rewards
The notation of effects and rewards is made up of three items in principle. There are exceptions, such as the Astrogation Action Boost and Payment cards.
- Icon notation: the content of the effect or reward is shown with icons.
- Text notation: the content of the effect or reward is written out as sentences. While learning the game, check the text alongside the icons.
- Classification: the classification of the effect or reward is shown by icons and similar marks.
Example: the card "Land Grabbing" shows gears 3 or crossed swords 3, or syringe 3 and (a Mental icon) 3, as icon notation. Its text notation reads: "For each completed tag of gears, crossed swords or syringe type, gain 3 fame points."
Types of effect and reward
Effects fall into three broad types, shown by a classification mark:
- Activated effect (起動効果), marked with a green "!" mark. Activated effects are triggered by a condition during play.
- One-time effect (単発効果), marked with an orange lightning mark. One-time effects are resolved once, when the condition is met.
- Persistent effect (常駐効果), with no mark. Persistent effects apply as long as the card is in your faction.
Rewards have no types other than one-time effects. The Astrogation Action Boost does not belong to any of these three classes.
Examples from the manual:
- Shirley Brompton (one-time, lightning mark): "When you acquire this card, gain 4 general-purpose resource and 2 Mental."
- Sonya Kali (activated, "!" mark): "Each time crossed swords are completed, gain 1 syringe."
- Subaru Hoshigaoka (persistent, no mark): "When acquiring Shinogi, in that area you may select Shinogi cards from the 2nd card onward."
- Millia Mira Enable (activated, "!" mark): "Each time a heart is completed, gain 2 crossed swords."
One-time effects (単発効果)
A one-time effect is resolved once, when the card is acquired or when a specific condition is met. Most one-time effects gain some resource or fame. All Shinogi card and Payment card rewards are classified as one-time effects. Once an effect has been resolved on acquiring its card, it is never resolved again.
Activated effects (起動効果)
An activated effect may be resolved repeatedly, each time the condition it specifies is met. When shown by an icon, it reads: "the condition that triggers the effect" ":" "the effect resolved". Some activated effects may be resolved by paying one of some resources, shown as "the condition that triggers the effect" ":" "resource paid" "▶" "effect gained".
Persistent effects (常駐効果)
A persistent effect always applies, as long as the card or board holding it is in your faction. In the base set, only the Family card "Subaru Hoshigaoka" has a persistent effect, and its icon is unique to it.
Basic Rules for Effects and Rewards
- A one-time effect must always be resolved when the card is acquired. Resolving an activated effect is optional: even if its condition is met, you may ignore it.
- When you acquire a card with a one-time effect, and the condition of an activated effect is met at the same time, resolve the one-time effect first, then resolve the activated effect.
- If the conditions of several activated effects are met at the same time, the player resolving those effects chooses the order freely.
- If, while another effect is being resolved, the condition of an activated effect is newly met, you gain the right to resolve that effect as well, once it is its turn.
- Note: if this becomes hard to follow, place a power token or similar marker on the waiting activated effect so that it can be seen.
- When resolving an effect that gains resources, if the resource limit means you cannot receive the full amount specified, gain only the amount you are able to receive.
- When resolving an effect that includes paying resources, if you do not have enough of the resource to pay, that effect cannot be resolved at all.
- You cannot interrupt the resolution of one effect in order to resolve another.
- Note: the Astrogation action, which depends on an interrupting effect, follows different rules from the processing of the Action board.
- Unless stated otherwise, an effect applies only to the owner of the card or board holding it, including any condition the effect states.
- Also, unless stated otherwise, when an effect refers to specific cards or to the number of completed tags, only the cards placed in your own faction, or only the tags completed in your own faction, are referred to.
Icon Notation Rules
One-time effects
- The icons for the resources and fame points you gain are mostly shown on the card at the time you acquire it. (Where the timing of activation is given, it is written as "the timing at which the effect is resolved" ":" "the effect resolved".)
- Where the number of a resource or fame point to be gained is shown as "X", the way of producing that value is also shown.
- When several resources may be gained, the player gaining them chooses the order of processing.
- The timing for resolving a one-time effect at the end of the Agari Phase of round 3 is shown with the marker "ROUND 3 AGARI PHASE".
Activated effects
- As above, activated effects are written as "the condition that triggers the effect" ":" "the effect resolved".
- If "X" is written, the way of producing that value is also shown.
- Some activated effects may be resolved by paying one of several resources.
- Icons used as activation conditions include: the crossed-swords, gears, heart and syringe resources, each triggered after gaining that resource. A condition may be met when a tag of a specific picture is completed on the left or right. A grey-tag combination is triggered when it is completed. Icons of the actions (Day off, Arena, Plant, Downtown area, Laboratory, Sakazuki and Astrogation) are triggered after your processing for that action is complete. The 1st-position icon of any action is triggered each time your processing at the top position of that action is complete. A cube icon is triggered after you place a power token on the Astrogation board.
Icons for special effects
- Move your power marker on the Astrogation board: a power marker of the player resolving the effect is moved to the mothership area, to any other area with another player's power marker, or to any optional small planet area.
- Acquire a Shinogi of a specific tag: an effect that allows you to acquire a Shinogi card with a specific trait regardless of the position of your power marker on the Astrogation board. The envelope icons with a heart or a hand-and-ship icon indicate Shinogi with a heart or with a movement tag.
Other Rules
Astrogation Action Boost
The Astrogation Action Boost is an effect that converts resources during the Astrogation action (the "7. Astrogation" action). It may be used at any timing while you are in the middle of processing the "7. Astrogation" action.
- Each spaceship board has the same common boosts printed on it.
- If you use the top officer "Alice Bylfort," you may also use the special Astrogation Action Boosts listed below.
- The number of times each effect may be used differs. During one processing of the "7. Astrogation" action you may use more than one effect.
Example: the spaceship "Vivace" has three common boosts:
- Pay 4 crossed swords, and place one of your power tokens in an area where your power marker is on the Astrogation board. This may be used only in the small planet or planet areas, and once per Action Phase.
- Pay 2 gears, and gain 1 territory (the hand icon). This may be used any number of times per Action Phase.
- Pay 4 hearts, and gain 1 envelope (Shinogi). This may be used once per Action Phase.
Special boosts for Alice Bylfort:
- Pay 2 syringes, and gain 1 envelope (Shinogi). Once per Action Phase.
- Pay 2 syringes, and gain 3 territory. Once per Action Phase.
- Pay 4 general-purpose resource, and gain 2 syringes. Once per Action Phase.
Shinogi upgrade
Of the Shinogi cards, the two kinds Drug Trafficking and Lean Sharking (investment) have an upgrade.
- When three cards of the same kind are placed in a row in your faction, you may turn one of them face down, and return the remaining cards to their original positions on the Astrogation board. You then gain the additional resources and fame points printed on the flipped card's reverse.
- Drug Trafficking, when upgraded, flips to the card "Control of the Drug Market."
- Lean Sharking, when upgraded, flips to the card "Hostile Takeover."
- A player who places three Shinogi cards (Drug Trafficking or Lean Sharking) in a row must carry out the Shinogi upgrade.
- The Shinogi upgrade does not change the kinds or the number of the completed tags you hold.
- During the Shinogi upgrade, you cannot resolve an activated effect whose condition is the completion of a tag.
Territory Bonus
When another player, who does not hold that area as their shima, acquires a Shinogi card in an area that is your shima, you may gain fame points equal to the number of the round (X = ROUND).
Handling Failed Actions
When processing the Action board, if you cannot pay the resources required and fail to gain the resources, return your power marker that was placed in the corresponding area to "8. Failed Action," and return the action card you used to place that marker to your hand.
- The same processing may be carried out in step 6 of the "Sakazuki" action, if no Family card can be gained (for example, because of the combination of tags).
Solo Play
Solo play uses different setup and rules in some places compared with a game for 2 to 4 players.
Setup
- In addition to the normal setup, prepare 3 power tokens of each colour that is not in use, and keep them in front of you.
Rule changes
- In step 6 of each round's Action Phase ("Decide actions: place power markers"), place power markers of the same colour for each round.
- In step 8 of each round's Action Phase ("Recover power markers and update the action slot"), do not recover power markers from the Action board.
- As a result, when placing power markers in step 6, you add further power markers to those already on the Action board.
- If you carry out the same action twice in one round, the second time it is processed at the 2nd position of that action, and the third time at the 3rd position.
- At the start of the Agari Phase of each round, move all power markers on the Action board to your hand.
Apart from these changes, play the game as normal.
Aim of the Game
The aim of the game is to gain higher fame points. At the end of the game, players are ranked according to their fame points, as follows:
| Rank | Honor score (fame points) |
|---|---|
| SS | 151 and above |
| S | 141 to 150 |
| A | 121 to 140 |
| B | 101 to 120 |
| C | 81 to 100 |
| D | 80 and below |
Aim for a higher rank with the various top officers and strategies.
Q&A
Q. If you acquire a Shinogi card in an area where you have no power marker, through the effect of a Family card such as "Tiana Eclipse" or "Kagami," may you place a power token?
A. Yes. In that case, place a power token in the area where the Shinogi card was acquired. If that area is not your shima, the player whose shima it is gains the "Shima bonus."
Q. When another player acquires a Shinogi card in an area that is your shima, and as a result that area becomes the shima of the player who acquired it, may you still receive the "Shima bonus"?
A. Yes. Whether the "Shima bonus" is received is decided at the start of each player's Shinogi acquisition processing.
Note: the manual points to the 96gumi website for additional Q&A and errata. Those were not part of the printed rulebook read for this transcription.