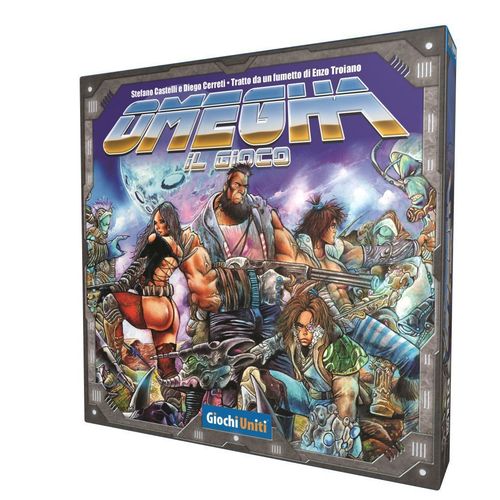
Omegha: il Gioco
Omegha: il Gioco Rulebook
Table of Contents
Table of Contents
- Goal of the Game
- Components
- Tokens
- Setup
- Game Concepts
- Card Types
- The Round of Play
- Combats
- Challenges
- Searches
- Items
- End of Game
- The Missions
- Campaign Prologue
- Mission 1: Get Out of the Mud
- Mission 2: Hot Stuff
- Mission 3: Alien Vest
- Mission 4: Big Game Hunt
- Mission 5: The Pursuers
- Mission 6: Let's Show Them!
- Mission 7: The Dark Lord
- The Campaign
- Solo Play
- Icon Key
- Quick Reference
Goal of the Game
Omegha: il Gioco is a cooperative tabletop game in which the players work together to complete the missions assigned to them. It can be played either as separate individual sessions, simply by selecting one of the missions available in this manual, or as a long campaign that requires the missions to be faced one after another, following the storyline.
Each player takes on the role of a Hero in a group that moves together along a path of events to complete the chapter of its adventure. Each turn the group decides which direction to follow, with only the type of location it is about to visit as a guide, facing new challenges as they come.
Components
- 4 Hero Sheets
- 8 Hero Combat Cards (2 per class)
- 36 Upgrade Cards (containing Talents and Abilities, divided by class)
- 30 Enemy Cards
- 5 Boss Enemy Cards
- 2 Pursuer Enemy Cards
- 24 Location Cards
- 21 Time Cards
- 36 Item Cards
- 19 Damage tokens (double-sided, values 1 and 3)
- 10 Mission tokens
- 10 Experience tokens (double-sided, values 1 and 3)
- 10 Charge tokens (double-sided, values 1 and 3)
- 5 Ability tokens
- 9 Challenge tokens
- 1 Guide token
- 1 Lock Time token
- 1 Initiative token
- 1 Time Marker
- 1 Group token
- 1 Time Track board (Plancia del Tempo)
- 6 special six-sided dice
- 9 Elite Enemy tokens
- This Rulebook
Tokens
Omegha: il Gioco uses several types of tokens for various functions. Some tokens show the values 1 and 3 on their two faces, so that different totals can be indicated by flipping them as needed.
- Damage tokens (values 1 and 3)
- Charge tokens (values 1 and 3)
- Mission tokens
- Experience tokens (values 1 and 3)
- Ability tokens
Setup
Before starting a game, the players must choose one of the missions to be faced and modify the set of components as indicated in the "Setup" paragraph of that mission.
Note: the following setup is for the Normal difficulty level. The chapter "The Missions" of this manual provides the instructions for applying the Legendary and Omegha difficulty levels.
-
Shuffle the Enemy deck, without including Pursuers and Bosses, and keep it face down within reach.
-
Shuffle the Item deck and keep it face down within reach, leaving room for a discard pile.
-
Keep the Boss Enemy cards, the tokens and the dice within reach.
-
Divide the Upgrade deck according to class. Shuffle the four resulting decks together and set them aside.
-
Choose a player to take the role of the first Guide of the adventure. The Guide has the final word on the group's choices in case of disagreement between the players. To identify which player is the Guide, that player takes the Guide token.
-
Starting with the Guide, each player chooses one of the available Heroes and takes:
- A Hero Sheet, placed in front of them, on which the Damage and Experience tokens they accumulate will be placed.
- A Hero Combat Card, to be placed on the Hero Sheet.
Note: Omegha: il Gioco includes 8 Hero Combat Cards, 2 per class. Players may choose one of the two versions of a given class, but not both, as the game is structured to be played with Heroes of different classes and not with several copies of the same class.
-
The remaining Hero Sheets and Combat Cards are returned to the box.
-
Place the Time Marker on space 1 of the time track on the Time Track board. Shuffle the Time cards and place the deck face down in the appropriate space on the board, leaving room for a discard pile.
-
Shuffle the Location deck, taking care to follow any setup indications required by the current mission, then draw the first two cards and place them face down side by side in an area of the table where everyone can see them. These will be the first two Locations available to the group; place the Group token in front of them. Leave room in the centre of the table for staging combats and challenges.
The adventure now begins.
Game Concepts
Heroes
Heroes are the characters played by the players. Each Hero differs from the others by the combination of characteristics and abilities given by its class.
Each Hero has a Hero Sheet, which always stays in front of its player, and a Hero Combat Card, which is used during combats. The Combat Card shows the Hero's characteristics:
- Strength: on the left, represents the Hero's capacity to inflict damage in combat.
- Resistance: in the centre, represents the Hero's capacity to take damage. When a Hero accumulates Damage tokens on its card in a quantity equal to or greater than its Resistance, it loses consciousness and can no longer act until it is healed or revived.
- Cunning: on the right, represents priority in combat and the ability to solve puzzles. At the same time, a low Cunning embodies reckless courage under enemy fire and readiness to act in combat.
- Class: indicates the Hero's type, that is, the specialisation from which it can draw to gain new capacities.
- Name.
Hero Classes
- Fighter: skilled in combat and able to withstand a great deal of damage. Rely on it when you have to face enemies.
- Scout: fast and deadly, a versatile character with good mobility, at the cost of low resistance.
- Tech: specialised in using both human and alien technology to get the best out of exploration and battle.
- Psycho: exposed to radiation and to the chemical-bacteriological contamination of the environment, has developed supernatural abilities that can be very useful.
Upgrading Heroes
During the adventure Heroes will accumulate Experience Points, represented by Experience tokens placed in the space dedicated to them on the personal Hero Sheet. These can be spent during the Restoration Phase of the game rounds to gain additional special abilities and upgrades.
To upgrade a Hero, the player must first spend a number of Experience Points equal to the total number of Upgrade cards the Hero will then possess. For example, to gain the first Upgrade card, 1 Experience Point must be spent. To gain the second, 2 Experience Points must be spent, and so on.
Once the required Experience Points have been paid – they are returned to the general supply – the player draws two Upgrade cards from the deck relating to the class of their Hero and keeps one of them. The other card goes back into the deck, which is then shuffled. Upgrade cards obtained by the players are placed on the left of the Hero Sheet, as indicated by the arrow on the sheet.
Upgrade cards are of two types: Abilities and Talents.
Abilities
Abilities are cards representing additional capacities that can be acquired by the Heroes of the relevant class. Their effect is always considered active, unless some effect makes them Exhausted: in that case they lose their effect until the players Restore them or during a subsequent Restoration Phase.
Example: the Scout Ability "Rapid" (Ability – Scout). Combat: the Cunning of the Hero is reduced by 1 (minimum 0).
Talents
Talents are cards representing special actions that Heroes can use at specific phases of the round, depending on what is specified on the cards themselves. Each Talent can be used only once during each round and becomes available again during the next Restoration Phase. Talents can also be used during the turn of other players or to interrupt the actions of enemies, depending on what is written on the card.
Exhaust a Talent card by turning it 90° to show that it has been used. Exhausted Talent cards are restored during the next Restoration Phase.
Example: the Scout Talent "Sottomano" (Talent – Scout). Combat: take a [symbol] from one Hero or pass a [symbol] to another Hero. You may move 1 space before or after this action. The [symbol] is a small black icon that could not be identified at the print resolution of the rulebook; it is left in brackets here and should be checked against the printed card.
Ability Tokens
To keep track of the effects of Talents and Abilities, or of specific effects of certain Items or enemies, use the Ability tokens supplied with the game. Similarly, you can use an Ability token to temporarily mark the point from which a Hero has moved in Combat, to indicate where to resume the progress of the combat round.
Time
Omegha: il Gioco's Heroes cannot take their time. Each of their actions will make time pass, and this will cause certain conditions to occur that will hinder the group, for example through the activation of game effects adverse to the Heroes, and sometimes by modifying part of the rules.
To keep track of the passing of time there is the Time Track board, a board containing several spaces along which a Time Marker advances whenever the game requires it. Exploring a Location card and resting are actions that cause time to pass, represented by Time units. Whenever the Time Marker reaches the end of the track, the Guide draws a face-down Time card and places it in the space on the right of the Time Track board, then returns the Time Marker to space 0 (zero) so that its advance can continue. Time cards drawn during a round are revealed during the Resolution Phase of that round, when their effects are immediately applied, in the order the players prefer.
Note: the section on the Resolution Phase says the order of the revealed Time cards is decided by the Guide, while this section says it is chosen by the players; both are printed in the rulebook. The rulebook also gives the Guide the final word on the group's choices in case of disagreement.
Some Time cards have an immediate effect and are then discarded, while others have a continuous effect indicated by the keyword Permanent, remaining exposed on the Time Track board in the two spaces dedicated to them (at the bottom). No more than two Permanent Time cards can be in play at the same time: if a third is revealed, the Guide decides which one to discard to make room for the new one.
Discarded Time cards form a discard pile in the space dedicated to them on the board. If it is necessary to draw Time cards but the relevant deck is empty, all Heroes in play immediately receive 1 Damage for each card to be drawn.
Card Types
Enemies
Enemy cards represent the opponents – human or otherwise – that the Heroes must defeat during their adventure.
These cards show, on the right, the Enemy's Cunning in combat; on the left, its Strength (that is, the damage it inflicts each turn unless in some way avoided by the Heroes); and in the centre, its Resistance (the amount of damage the enemy can take before being eliminated). Furthermore, enemies show an arrow on their card, useful for determining which side they inflict damage on when they have Heroes on both sides. Some enemies have attributes such as Small, Beast and Boss, and possibly special abilities.
Enemy card: Name, Resistance, Strength, Ability, Cunning, Direction.
Locations
Location cards represent places visited by the Heroes during their adventures and the situations they run into. These cards are shuffled into a single deck (unless the current mission indicates otherwise) and drawn each round to create the group's path. Each card has a symbol on its back indicating the type of location the group is heading for: a symbol for a Dangerous Zone, a symbol for an Open Space, and a symbol for a Structure (such as a town or a refuge).
Once a location has been chosen and reached by the group, it is revealed, showing its various characteristics: the difficulty of the challenge and/or combat, the Time to pass to enter it, the risk the group may decide to run (rolling or not rolling a die and applying the result in case), any special effects, and the Reward in case of success.
Note: some locations may have no challenge to resolve, no combat to face, or neither.
The Round of Play
A game of Omegha: il Gioco is divided into rounds, which follow one another until the success or failure conditions of the current mission are met, or until all the Heroes in the group are knocked out.
A round is divided into three distinct phases, which follow in this order:
- Restoration
- Exploration
- Resolution
If special abilities or instructions on cards refer to a specific phase of the round, they apply at the start of that phase, before the players take any other actions.
Restoration Phase
The group may choose to have the Heroes rest in order to remove any Damage tokens: for every 2 Time units spent, each Hero may remove 1 Damage token. After deciding how many Time units to spend resting, the Time Marker is moved accordingly and the Damage tokens are removed from the Heroes. If the players disagree on the amount of time to spend resting, the player holding the Guide token has the final, unquestionable decision. If the Time deck is empty, the Heroes can no longer rest.
Any Upgrade and Item cards that have been exhausted are Restored and become available again (if turned, return them to the upright position).
In this phase the players may also swap Item cards with each other (without ever moving the Charge tokens on them). Finally, the players may spend their Experience Points to acquire Upgrade cards (see "Upgrading Heroes").
Exploration Phase
The Exploration Phase consists of moving the Group token from its current position to a new Location card. The players can see the type of the Location cards they may visit thanks to their different backs, which identify open spaces, structures such as villages and buildings, or dangerous zones.
The group chooses which location to visit among those available (that is, the two Location cards in front of the current position and the one not visited among the two previous ones, if any), reveals it, places the Group token on it and advances the Time Marker by as many spaces as indicated on the card itself. If the players disagree on which card to visit, the player holding the Guide token has the final, unquestionable decision.
Location Types
- Open Space: clearings, roads and fields, places where the usual level of danger is reduced.
- Structure: villages and buildings are excellent places to look for supplies, although now and then they hide nasty surprises.
- Dangerous Zone: if you are looking for trouble – but also for good rewards – there is nothing better than these places.
Effects of a Location
A Location card that is explored may trigger three different effects:
- Event: the Location card triggers a simple event described in the text of the card itself. Once the event is resolved, the Location card is considered completed and the Exploration Phase ends.
- Challenge: the group must face a dice mini-game. The value shown equals the number of Challenge tokens the group must resolve to complete the challenge. Challenges slow the Heroes' mission, consuming precious time.
- Combat: the group meets enemies that must be defeated in order to proceed with the mission. The value that accompanies the word Combat indicates the number of enemies to face. To calculate the number of enemies the players will face, take the number of Heroes in play and add the number shown on the card. For example, if in a game with 4 Heroes a Location card showing "+2 Enemies" is revealed, the players must face 6 enemies. Other indications on the card may modify the conditions of the combat, perhaps adding Bosses or other effects.
Risk
Every Location card gives the group the possibility of running a risk in order to obtain various bonuses. Check the possible results of the die roll and decide whether or not to run the risk, carefully weighing the effects of the negative results.
The group decides whether to roll the die for Risk (whose results are shown in the table at the centre of the text), applying the result obtained if any, which may be positive or negative. The group then faces the planned event (Combat, Challenge or No Event, indicated at the start of the text) and, on success, collects the Reward, that is, everything indicated at the end of the card.
Note that Experience and Damage, in the Risk as well as in the Rewards, are always given or removed to all Heroes, unless specified otherwise.
Example: the Location "Hostile Territory" (Time cost 2) reads "Combat 2". Its Risk table gives: red die – +2 Enemies; blue die – 1 Search Roll; white die – 1 Experience. Its Reward on success is: 1 Experience, remove 1 Damage, 1 Search Roll.
Resolution Phase
Once the effects of the Location card have been resolved, the round ends, and any Resolution effects present on the cards in play are applied. The Time cards drawn during the round are also revealed one at a time and their effects applied, in the order decided by the Guide (see "The Passing of Time").
Then two more Location cards are drawn to form the fork following the one just faced, if there are not already any, and those that have been completely passed by the Group token are discarded.
The Guide token passes to the player on the left of the player who was holding it.
If the Location deck runs out, follow the instructions of the current Mission.
Note: the indications printed on the cards always take priority over these rules.
Combats
Combat in Omegha: il Gioco is handled through a mini-game. When the group of Heroes encounters a Location card that calls for a combat, the following instructions must be followed.
Setting Up the Combat Area
The Guide takes from the Enemy deck as many cards as indicated on the card that triggers the combat (that is, the number of players plus the number indicated, unless special instructions apply), plus any other Enemy cards required by special effects (such as Time cards or special rules of the current Mission). Then shuffle these cards together with the Hero Combat Cards in play into a single small deck.
Place the Initiative token at one point on the table and, starting from it, place face up all the cards of the small deck, forming the Combat Circle as shown in the following image.
Figure: the Combat Circle, with the Initiative token, the Hero Combat Cards and the Enemy cards arranged around the table.
Elite Enemies
Once a Combat Circle has been formed, check for any Elite enemies among those deployed. To do this, roll 1 die for each deployed enemy, up to a maximum of 6 dice. Then add Elite tokens to the enemies according to the following table.
| Difficulty Level | Result needed to add an Elite token |
|---|---|
| Adventurer (Avventuriero) | white die face |
| Heroic (Eroico) | blue die face |
| Omegha | red die face |
The die faces in the table are shown as coloured icons in the rulebook: a white cube, a blue cube and a red cube.
Elite tokens are drawn at random from their supply and assigned to the enemies in clockwise order, one per enemy, starting from the Initiative token.
When an enemy is eliminated, its Elite token is discarded and returns to its supply.
Elite tokens modify the characteristics of enemies as described below.
Elite Tokens
- Gang Leader (Capobanda): Add 1 Enemy to the combat. When this token is paired with an enemy, another enemy must immediately be drawn and added to the Combat Circle, to the right of the enemy that received the Elite token. Note: if some effect removes the token, the additional enemy remains in the combat.
- Armoured (Corazzato): The enemy does not take damage from die results of the fist type. Any additional damage provided by abilities, items or equipment, if linked to the same die roll, is also ignored.
- Frenzied (Frenetico): The enemy attacks on both sides if valid targets are present (Heroes or other enemy cards). The attack happens first on the left and then on the right.
- Camouflaged (Mimetico): The enemy does not take damage from die results of the crosshair type. Any additional damage provided by abilities, items or equipment, if linked to the same die roll, is also ignored.
- Mutated (Mutato): The enemy's Strength value is increased by 1.
- Resistant (Resistente): The enemy's Resistance value is increased by 2. Note: if the token is removed and, because of this, the number of Damage already on the enemy is equal to or greater than the new Resistance value, the enemy is immediately eliminated.
- Fast (Veloce): The enemy's Cunning value is decreased by 1 (minimum 0).
Note on icons: in the Elite token texts the die-face symbols are shown as icons; they are rendered here by name (fist, crosshair). The Combat section of this rulebook shows the red die symbols as a knife, a fist and a crosshair.
Combat Sequence
From the card corresponding to the Initiative token, Heroes and enemies act in clockwise order. Starting with the enemies and Heroes with the lowest Cunning (usually 1), and then again starting from the Initiative token, those with Cunning 2 act, and so on, until all the Heroes and enemies involved in the combat have acted.
When a Hero acts, its player may choose one of the following actions:
- Attack an adjacent enemy (or one within the Hero's attack range).
- Use one of the Hero's Abilities, if indicated on its card.
- Use an Item card.
- Move up to 2 spaces clockwise or anticlockwise, changing position within the Combat Circle. When this happens, the Hero's card is turned to show that it has already taken an action.
In addition, a Hero may always play a Talent card, even during the turn of another player. Like Ability cards, Talent cards are restored during the Restoration Phase.
When an enemy card acts, its direction must be checked using the arrows on the card: if there is a Hero adjacent to the enemy in that direction, the enemy attacks it; otherwise, it attacks the adjacent Hero in the opposite direction. If there is no Hero on either side, the enemy passes its turn without attacking (unless special effects on its card or other elements of the game say otherwise).
When an enemy or a Hero is eliminated, having received at least as much damage as its Resistance, its card is removed from the Combat Circle and the circle closes up. Damage in excess of Resistance is not counted. Damage tokens on enemy cards removed from the combat are returned to the supply.
The combat rounds continue until the Combat Circle no longer contains only Heroes or only enemies.
Attacking
When a Hero attacks an enemy (which must be adjacent to the Hero's Combat Card, unless its special abilities say otherwise), the player rolls a number of dice equal to the Hero's Strength (plus any modifiers): each red result inflicts 1 damage on the declared target. Unless special effects specify otherwise, it is not possible to split dice rolls between different targets. Place Damage tokens on the enemy cards that are wounded, to keep track of the damage.
When an enemy attacks, it inflicts on the adjacent Hero that is its target damage equal to its Strength. The target Hero of the attack may defend against the damage inflicted by enemies by rolling a number of dice equal to the enemy's Strength value: for each red result, the Hero avoids taking one Damage token.
End of Combat
If all enemies are eliminated, the Heroes have won the combat: the group receives any Rewards indicated on the card that originated the combat. If at least one Elite token was present in the combat, each Hero gains 1 additional Experience Point.
Heroes who have been knocked out (fuori combattimento) remove one Damage token and become active again. The players put their Heroes' Combat Cards back on their personal sheets, while the Enemy cards are shuffled back into their relevant deck, except for special enemies (such as Bosses), which are set aside again.
If instead all the Heroes have been knocked out, the game ends with the Failure of the Mission.
Challenges
Some Location cards show the indication Challenge: these are intricate situations that require a solution from the whole team of Heroes, and they slow the Heroes' progress through the mission, consuming precious time. To resolve them, the players must face a dice mini-game.
Setting Up a Challenge
At the start of each challenge:
- The Guide reveals as many Challenge tokens as indicated on the card that triggered the challenge and places them in the centre of the table, where the group can see them well.
- The Guide takes six dice, rolls them and places them, clearly visible to everyone, in the centre of the table.
Carrying Out a Challenge
Each player, starting with the Guide and then in any order, may reroll up to as many dice as the Cunning value of their Hero (note that in doing so it is possible to reroll dice already rolled by other players). Once the rerolls are done, the player must turn over the Hero Combat Card of the Hero they have just acted with, advance the Time Marker by 1 unit, and assign at least 1 die to a Challenge token of their choice. The turn then passes to the next player clockwise.
To assign a die to a Challenge token, the result of that die must be one required for the resolution of that token itself. The dice symbols relevant to the challenge are shown in the rulebook as a blue brain, a blue flexed arm (biceps) and a white burst.
When a Challenge token receives all the dice it needs for its completion, it is removed from the challenge, and the dice assigned to it are rerolled to make them available again. A padlock symbol on a token indicates that, once it is completed, one of the dice will nevertheless remain Locked on it.
If the players complete all the tokens present in the challenge, the challenge is considered completed and the Reward associated with the challenge may be obtained.
At the end of each round (that is, when all the Heroes have taken a turn in the challenge), the group may decide to abandon the challenge, considering it Failed. By failing a challenge, the Heroes obtain no Reward and advance the Time Marker by 3 units.
If, at the end of a player's turn, that player cannot assign any die, the challenge is considered Failed: the players may decide to continue the challenge, advancing the Time Marker by 3 units and rerolling all the dice (including any that may be Locked).
When all the players have acted, they turn their Combat Cards back face up, to indicate that they are ready for a new round of the challenge, and the Guide takes the first turn.
Searches
Some Location cards or special Mission effects allow the group to make Search rolls.
This is a test that requires the Guide to roll a die: with a red result the search is successful, and the group may choose one of the following benefits:
- Draw an Item card and assign it to a Hero.
- Take a Mission token (if the current Mission requires it).
- Fully recharge an Equipment card.
Note: when an event grants a Mission token, the group may decide to renounce it and draw an Item card instead.
Items
Item cards (carte Oggetto) are gained by the Heroes in various ways during the game, through rewards on Location cards or the resolution of a Challenge token, for example. Once obtained, they must be taken by the individual Heroes, as the group decides. There is no limit to the number of Item cards a Hero may carry.
Item cards assigned to a Hero are placed on the right of the Hero Sheet, as indicated by the arrow on the sheet.
During the Restoration Phase, the players may exchange Items between Heroes (together with their Charges). It is not possible to exchange only Charges.
There are two types of Item cards: Consumables and Equipment.
Consumables
Consumables serve to activate special effects and may be discarded or used up. After use, it is necessary to roll a die and compare the result with those indicated on the Item card. Some Consumables are used up with use, which is indicated by a symbol on the card. Using a Consumable Item in combat requires a whole Hero Action.
Equipment
Equipment is assigned to a Hero and has a limited number of Charges, but may be kept even once empty, in case it can be recharged. When an Equipment card is drawn and assigned to a Hero, place on it as many Charge tokens as indicated by its Capacity value on the card.
The text on Equipment cards indicates when they can be used. Using an Equipment card of the Weapon type replaces the normal attack action during combat. After each use of an Equipment card, remove one Charge token from the card.
Example: the Equipment card "Hukker's Carapace" (Equipment – Armour), Capacity 4. Combat: if you obtain at least one white result when defending, add +1 Strength to the next attack made by the Hero in this same combat.
End of Game
The game ends when one of the following conditions is met:
- All the Heroes are fuori combattimento (knocked out): the players lose the game.
- The completion conditions of the current Mission are met: the players win the game.
- Any failure conditions of the current Mission are met: the players lose the game.
The Missions
Omegha: il Gioco is structured so that it can be played either in a single session – choosing one of the missions available – or in a campaign that develops throughout the whole storyline.
Each mission has a narrative section that places the events within the storyline of the game, as well as a specific set of rules. In case of differences between the general rules of this rulebook and the specific rules of a mission, the latter take precedence.
Difficulty Levels
Before starting a game, whether it is a single mission or part of the campaign, choose the difficulty level with which you want to face your adventure, and apply the relevant effects:
Adventurer Level
Each Hero begins the adventure with an Upgrade card: the players draw three Upgrade cards for each Hero and keep one.
In addition, the players draw one Item card for each Hero, as starting equipment.
The Elite Enemy tokens in combat are assigned using the results of the white die.
Heroic Level
The Elite Enemy tokens in combat are assigned using the results of the blue die.
During Setup, place the Lock Time token on space 7 of the Time Track board.
Omegha Level
The Elite Enemy tokens in combat are assigned using the results of the red die.
During Setup, place the Lock Time token on space 7 of the Time Track board.
Campaign Prologue
The narrative text of the campaign prologue is flavour and is not transcribed here.
Mission 1: Get Out of the Mud
The narrative description of the mission is flavour and is not transcribed here.
Setup
Remove 4 random Dangerous Zone cards from the Location deck.
Special Rules
Heroes who own at least one Equipment card receive 1 Damage at the start of each combat.
When the group has at least 4 Item cards, add an Elite token to the first enemy in every combat.
Success Conditions
The mission ends in success when the group has 8 Item cards, or when the Location deck is finished and every Hero has at least one Item card.
Campaign Bonus: in the next mission, every Hero begins with an Item card.
Failure Conditions
If the group is defeated during a combat, or if the Location deck runs out without the group having at least four Item cards, the mission is failed.
Campaign Malus: in the next mission, any Equipment obtained receives only one Charge token instead of being fully charged.
Mission 2: Hot Stuff
The narrative description of the mission is flavour and is not transcribed here.
Setup
Remove from the Location deck, at random, 2 Dangerous Zone cards, 2 Open Space cards and 2 Structure cards.
Remove 2 Biker Bandit (Moto Banditi) cards from the Enemy deck and set them aside.
Special Rules
In every combat, add the 2 Biker Bandits set aside during Setup. At the end of a combat, set them aside again.
Once the last Location card has been resolved, the players are ambushed by bandits who want to prevent them from reaching the scientists. Carry out a combat including the Bandit Chief (Capo dei Banditi), two Biker Bandits and as many Bandits (Banditi) as there are players. As a Reward for this combat, each Hero receives 1 Experience.
Success Conditions
The mission ends in success when the Location deck runs out and the group survives the bandits' assault.
Campaign Bonus: in the next mission, the group may reroll the die used for the use of Item cards (accepting the second result).
Failure Conditions
If the group is defeated during a combat, the mission is failed.
Campaign Malus: in the next mission, always add 2 Bandits to the combats (keep the 2 Bandit cards aside during the Setup of the game).
Mission 3: Alien Vest
The narrative description of the mission is flavour and is not transcribed here.
Setup
Remove from the Location deck, at random, 2 Structure cards and 2 Dangerous Zone cards.
Special Rules
When, in combat, you defeat an enemy of the type Gort, Brongorr, Divoratore or Mordiruggine, set aside the card of the first copy eliminated for each type, instead of shuffling it back into the Enemy deck.
When you successfully pass a challenge, you may use one of the Enemy cards in the group's possession as an ally in the next combat. Mark the relevant enemy with a Mission token. At the end of the next combat, or when the creature is eliminated, remove the Mission token and return the card to the group's possessions.
Success Conditions
The mission ends in success when the group possesses 1 card of each of these four enemies: Gort, Brongorr, Divoratore and Mordiruggine.
Campaign Bonus: in the next mission, in every combat caused by a Location card, the group may decide to put to flight an enemy (not a Boss) just formed in the Combat Circle and replace it with the first one drawn from the Enemy deck, before assigning the Elite tokens.
Failure Conditions
The mission is failed if the group is defeated during a combat, or if the Location deck runs out without the group possessing the 4 required Enemy cards.
Campaign Malus: the "good stuff" remains firmly in the scientists' hands. The alien substances will test the Heroes, who in the next mission will all begin with 1 Damage.
Mission 4: Big Game Hunt
The narrative description of the mission is flavour and is not transcribed here.
Setup
Remove from the Location deck the two Ambush (Agguato) cards, and one Location card of each of the following types: Excursion (Escursione), Hiding Place (Nascondiglio), Sortie (Sortita) and Citadel Entrance (Ingresso alla Cittadella).
Special Rules
The group may use Search rolls to make baits (esche), represented by Mission tokens: each successful search gives the group one bait. It is also possible to make one additional Search roll for each Elite or Boss enemy eliminated at the end of a combat.
At the start of each combat, the group may decide to use one or more baits. For each bait used, roll a die: with a blue result, add a Durango Enemy card to the combat; with a red result, add an Enemy card to the combat instead.
If the Location deck runs out, the group may decide to insist on the hunt by shuffling all the discards together to form a new deck. However, fatigue sets in: in every Restoration Phase, each Hero must roll a die and, with a red result, takes 1 Damage.
Success Conditions
The group concludes the mission with success if it manages to eliminate a Durango.
Campaign Bonus: fear spreads through the enemy ranks. In the next mission, the group may remove one Elite token from each combat, chosen by the Guide.
Failure Conditions
The group has failed if it is defeated in combat, or if the Location deck runs out for the second time.
Campaign Malus: the enemies take courage from the triumph of the great Durango. In the next mission, add an Elite token in every combat.
Mission 5: The Pursuers
The narrative description of the mission is flavour and is not transcribed here.
Setup
Remove from the Location deck the Preparation (Preparazione) and Supplies (Rifornimenti) cards.
Keep the Pursuer (Inseguitore) Enemy cards within reach.
Remove from the Time deck the Human Hunters (Cacciatori di Umani) cards.
Special Rules
In every combat, add one Pursuer enemy (two if the group is made up of at least three Heroes).
Success Conditions
The group concludes the mission with success if each Hero manages to deal at least 1 fatal Damage to a Pursuer before the end of the Location deck. When a Hero deals the blow that causes a Pursuer to be eliminated, take a Mission token and place it on that Hero's personal sheet.
Campaign Bonus: in the next mission, the group may remove one Pursuer Enemy card from each combat.
Failure Conditions
If the group is defeated in combat, or if the Location deck runs out, the group has failed.
Campaign Malus: you have not managed to shake off these infernal hounds. In the next mission, add one Pursuer Enemy card to every combat.
Mission 6: Let's Show Them!
The narrative description of the mission is flavour and is not transcribed here.
Setup
Remove from the Location deck the Elsewhere (Altrove) and Preparation (Preparazione) cards.
Special Rules
When the group resolves a Citadel Entrance (Ingresso alla Cittadella) card, it keeps aside one Item card, which is passed along with the Guide token.
After the second Citadel Entrance card has been resolved, or after the Location deck has run out, the group faces a final COMBAT +3, to which the Boss Dark Lord (Signore Oscuro) and two Pursuers (Inseguitori) are added, minus one Pursuer for each Citadel Entrance card in the group's possession. This combat gives no Reward.
Success Conditions
The group concludes the mission with success if it manages to put the Dark Lord to flight by winning the combat in which he appears, without any Hero being knocked out.
Campaign Bonus: if the group concludes this mission with success, each Hero begins the next mission with 1 additional Experience.
Failure Conditions
If the group is defeated in combat, or if any Hero is knocked out during the final combat, the group has failed.
Campaign Malus: in this case the Dark Lord grows stronger with his troops. In the next mission, add one enemy and one Elite token to every combat. Moreover, place an Elite token on the Dark Lord.
Mission 7: The Dark Lord
The narrative description of the mission is flavour and is not transcribed here.
Setup
Place a Sortie (Sortita) Location card at the bottom of the Location deck.
Keep the Dark Lord (Signore Oscuro) Boss separate from the Boss deck, and add him to the combat only when indicated.
Special Rules
The group must spend 1 extra Time unit on every Location card for which it chooses not to roll on the Risk table.
If the group can explore the last card of the Location deck (the Sortie), it MUST do so.
In the combat of the Sortie Location card, add the Dark Lord Boss with an Elite token.
In combats in which the Dark Lord is present, automatically add four Elite tokens: two to the first two enemies on his left, and two to the first two enemies on his right.
If the Dark Lord appears before the last card of the Location deck, the group may attempt to flee: roll a die and obtain a blue result to discard the current Location card and explore, instead, the first card drawn from the deck. The group may immediately decide to discard Item cards in order to add dice to roll, up to a maximum of six.
Success Conditions
The mission is concluded with success if the group defeats all the enemies in the combat in which the Dark Lord is present.
Failure Conditions
The mission fails if the players are defeated in combat.
The Campaign
Omegha: il Gioco includes a structured campaign along a series of consecutive missions, to be faced in sequence. The group of players may decide to play the Campaign starting from the first mission, keeping track of successes and failures in order to apply special effects between one mission and the next.
In Campaign mode the missions must be played in order. Players may decide to continue the storyline even if a mission has been failed, applying any consequences indicated in the additional rules of the next mission (indicated in the Campaign Malus box of the failed mission). Conversely, if a mission is successful, its outcome gives bonuses for the next mission (indicated in the Campaign Bonus box of the successfully completed mission).
At the start of each mission of the campaign, the players receive:
- Experience Points equal to the number of the mission to be faced.
- Item cards equal to the number of the mission to be faced (to be shared with the whole group).
For example, when starting the second mission of the campaign, the players begin with 2 Experience Points to spend, and the group draws 2 Item cards in total to assign to the Heroes.
Any Item and Upgrade cards obtained in previous missions are discarded.
Solo Play
Omegha: il Gioco also supports games for a single player. The rules to be used remain unchanged, with the following exceptions:
- At the start of the game, the player chooses whether to use 2, 3 or 4 Heroes (playing with just one is not recommended). Then assemble the group of Heroes according to the normal rules, placing in front of themselves as many Hero Sheets as the number of Heroes used.
- It is not necessary to use the Guide token.
- During Challenges, the player chooses arbitrarily the order in which their Heroes act.
Icon Key
- Strength (characteristic): represents the capacity of a Hero or an enemy to inflict damage in combat.
- Resistance (characteristic) and Damage (icon): Resistance represents the capacity of a Hero or enemy to take damage. On Damage tokens, the icon indicates the Damage itself.
- Cunning (characteristic): represents priority in combat and the capacity to solve puzzles during Challenges.
- Experience Points: represent the experience accumulated by a Hero during its adventures. They are represented by tokens placed on the Hero Sheet and can be spent during the Restoration Phase to obtain upgrades.
- Die Results: indicate the colour of the die needed to obtain a particular game effect. This icon appears in three colours, as on the faces of the special game dice: white, red and blue.
- Exhaust Action: indicates the need to exhaust the card used, making it unavailable until the next Restoration Phase.
- Time Units: indicate the passing of time on the Time Track board. Time moves, for example, when Location cards are explored or when the Heroes rest.
- Locked Die: during Challenges, when a completed token shows this icon, one die must remain on it. Locked dice can be unlocked as described in the rules.
- Item Card: indicates the Item cards Heroes can acquire during their adventures. They represent weapons, protections, vehicles and various tools. They are divided into Consumables and Equipment.
- : indicates a type of Item card that, after use, may either be discarded or exhausted.
Quick Reference
The following summary is printed on the back page of the rulebook.
The Game Turn
Restoration
- Pass the Guide to the left.
- Restore Exhausted cards.
- Acquire upgrades.
- Rest (optional).
- Exchange Items between characters (optional).
Exploration
- Move the group to an available Location.
- Apply the effects of the Location reached: a. Advance Time. b. Roll the Risk (optional). c. Face the Challenge (if required). d. Fight (if required). e. Reward or Failure.
Resolution
- Reveal the Time cards drawn.
- Draw two new Location cards.
Combat and Challenge
Combat
- Form the Combat Circle starting from the Initiative token.
- Heroes and Enemies act cyclically in order of Cunning, from the lowest value to the highest.
- Each turn, a Hero may perform one of the following actions: a. Attack. b. Move (up to two spaces). c. Use or exchange an Item.
- At any moment, a Talent may also be used.
- Enemies automatically inflict Damage; Heroes may defend.
Challenge
- Reveal the indicated Challenge tokens.
- The Guide rolls all the dice.
- On their turn, each Hero may act by spending 1 Time unit and: a. Reroll dice equal to their Cunning. b. Place one or more dice on a Challenge token.
- Remove the completed Challenge tokens.
- The group may spend 3 Time units to unlock all the dice, rerolling them.
Note: the printed summary reads "Sida" in one line; this is a misprint for "Sfida" (Challenge), rendered accordingly above.