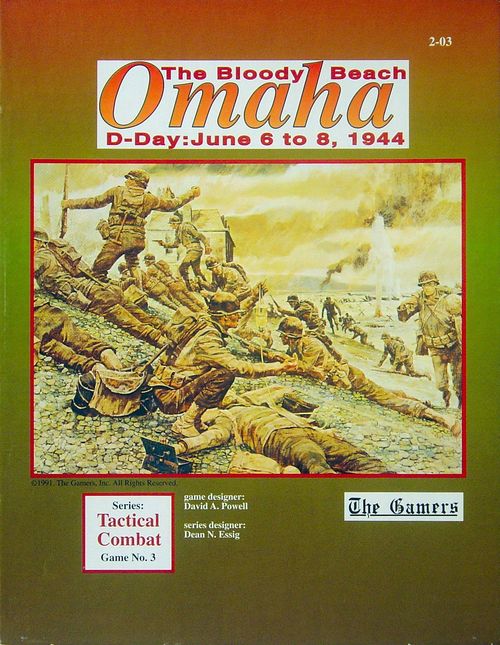
Omaha: The Bloody Beach
Omaha: The Bloody Beach Rulebook
Table of Contents
Table of Contents
- 1.0 Terrain and Map Notes
- 1.1 Woods Hexes
- 1.2 Forest Hexes
- 1.3 Bocage (Hedgerow) Hexsides
- 1.4 Building Hexes
- 1.5 Village Boundaries
- 1.6 Defensive Zone Hexes
- 1.7 Historical Pill Box Locations
- 1.8 Map Edge Hexes
- 1.9 Cliff Hexsides
- 1.10 Extreme Slope Hexsides
- 1.11 Sea Hexes
- 1.12 The Tide Lines
- 1.13 The Shingle
- 1.14 The Turn Record
- 1.15 The Hex Numbering System
- 1.16 The Beach Sector Boundaries
- 1.17 The Landing Beach Boxes and Sector Scatter Lines
- 2.0 American Special Rules
- 2.1 The Landing System
- Example of Landing Process
- 2.2 LCT(R)'s and Area C Fires
- 2.3 US Command Confusion and Leaders
- 2.4 The Beach Obstacle Hexes
- 2.5 Shingle Breaches
- 2.6 Naval Gunfire
- 2.7 The 29th Infantry Division
- 2.8 US Battery Composition (at full strength) and Called Fire Delay
- 2.9 Artillery Ammunition
- 2.10 US Airpower
- 3.0 German Special Rules
- 3.1 German Release System and Variable Reinforcements
- 3.2 German General Op Sheet Restriction
- 3.3 Pill Box Units
- 3.4 Rocket Pits
- 3.5 '88' Special Rules
- 3.6 Panzer Lehr Hummels
- 3.7 Infantry Guns
- 3.8 Bicycle Infantry Units
- 3.9 German Battery Compositions and Called Fire Delay
- 3.10 German Artillery Ammunition
- 3.11 Historical German Order of Arrival
- 4.0 General Special Rules
- 5.0 Command and Control
- 6.0 General Victory Conditions
- 7.0 Set Up Notes
- TCS Addenda—Errata (26 Jun 91)
- 8.0 Teaching Scenarios
- 9.0 Main Scenarios
- Scenario 1. The Sixth of June
- Scenario 2. The Landings
- Scenario 3. D-Day: The Eastern Beaches
- Scenario 4. D-Day: The Central Beaches
- Scenario 5. Getting Inland: The Afternoon of D-Day
- Scenario 6. The Seventh of June
- Scenario 7. Night Assault on Formigny
- Scenario 8. The Campaign Game: The Big Red One
- Scenario 9. Panzer Truppen: Panzer Lehr and the Rommel Plan
- Historical American Landing Plan
- TCS Line Entry Command System—a Quick Variant
- German Organization of Forces
- American Organization of Forces
- Players' Notes
- Designer's Notes
- Historical Notes
- Shingle Hexsides — Effects Diagram
1.0 Terrain and Map Notes
1.1 Woods Hexes
Woods hexes are those with even a small amount of woods symbol within the hex border.
1.2 Forest Hexes
Forest hexes are those with at least 50% of the hex filled with woods symbol.
1.3 Bocage (Hedgerow) Hexsides
Bocage (or Hedgerow) hexsides are dark green hexside features. Direct fires may be fired upon units which are behind a bocage hexside only if those units are adjacent to the hexside the fire must cross. Overwatch triggers caused by movement are not allowed if the LOS to the trigger passes through a bocage hexside. Overwatch fires caused by fire are allowed given the above. In all cases, ignore bocage hexsides adjacent to the firing unit.
Targets which are engaged through bocage hexsides adjacent to themselves receive the modifiers for fire combat as if they were in a Forest hex. Indirect fires, artillery and mortars (which are not firing in conjunction with direct fire units), are not modified because of bocage hexsides.
Bocage hexsides cost +2 MP for the movement of all non-vehicle/carrier units. They are impassable to all vehicles and carriers. Roads (primary or secondary) negate the movement point cost of bocage hexsides for units which are moving along the road. They do not negate any of the other effects of bocage hexsides.
See example, page 3.
Design Note: The intent here is to allow units alongside different bocage hexsides to engage each other, but to allow moving units to use bocage to provide covered and concealed routes of approach and withdrawal.
Use of Hedgerow (Bocage) Hexsides — Example (Black Side)
(The diagram is not reproduced; its caption reads as follows.)
- By direct fire, A can engage 1 and 3, but they are treated as if they were in forest hexes.
- By direct fire, B can engage 1 (with the forest modifier in effect), but not 4 or 2.
- Unit C can fire on 1, 4, and 2—but only 1 gets the forest hex modifier.
- Unit D, if moving directly toward unit C, does not generate overwatch fire from 2.
- Mortar unit A can engage 2, if C or D spots.
- Mortar unit B generates an overwatch trigger seen by 1 if it fires.
- If unit C fires on 1, it generates an overwatch trigger visible from 1 (naturally!), 4 and 2.
- Unit A cannot see 4 or 2 directly.
- Unit 5 cannot be seen, spotted or engaged by black ground units no matter what it does.
- Units E and 1 can engage each other freely and both get the forest modifier.
- Note that no unit ever gets the forest modifier for being behind a hedgerow if it is engaged by indirect fire assets which are not in conjunction with direct fire weapons.
1.4 Building Hexes
Buildings are those building symbols which are in black. Red buildings indicate village or city hexes. Only one building in a hex is needed to make the hex a building hex.
1.5 Village Boundaries
In order to facilitate the decision as to which hexes are part of a village, and which are not, Village Boundaries surround all multi-hex villages on the map. Any hex containing a building or village/city symbol within the boundary is considered to be part of that village.
1.6 Defensive Zone Hexes
These are marked with a grey symbol and a negative modifier which is applied directly to the Area and Point Fire Tables. The modifier is a -2 in addition to the terrain and dug in effects of each hex. Defensive zone hexes are considered to face in all directions—they may not be "flanked," etc.
1.7 Historical Pill Box Locations
These are provided for reference only. The player is not obligated in any way to use these hexes, although they may be used, if desired, to speed set-up.
1.8 Map Edge Hexes
Hexes that contain at least half of a hex are playable. Units forced off the map edge are removed from play and are considered to be destroyed. No off map movement is allowed.
1.9 Cliff Hexsides
These are marked with a red cliff symbol. These hexsides are completely impassable to all units and units forced to cross them are destroyed.
1.10 Extreme Slope Hexsides
Extreme Slopes are marked with a brown symbol. These are impassible to Vehicles, Carriers, and Tow-Only units. If any of these units are forced to move through such a hexside, they are destroyed. Foot-mobile units (infantry and weapons units with their own movement allowances) may move through these hexsides at the cost of two (+2) additional movement points.
1.11 Sea Hexes
Sea hexes are those containing all blue or are seaward of the current tidal line. These hexes are impassible to all units except when following a Sector Scatter line to their landing sector. Units forced into sea hexes are eliminated. Note that when landing, units move from their Beach Box to the appropriate sector hex which contains at least a small amount of dry land. This isn't Tarawa!
Artillery bursts in all sea hexes can be seen and used for artillery adjustment. Such bursts are not lost, but they never affect enemy units.
1.12 The Tide Lines
These represent the incoming and outgoing tides along Omaha Beach, of which the variation between high and low tide was great. Each Tide Line is the position of the edge of the beach during the hours listed along the line. A given tide line is the edge of all-sea hexes for the entire hour listed. No unit may move into hexes further out from the land mass than the hex containing the current tide line (even including DD tanks, which, if they did manage to survive the drive to the beach, will never be enthusiastic about repeating the experience!)
1.12a Effects of Tide Lines. The hex containing a given hour's tide line is the last available land hex. Hexes beyond that tide line "outward" are all-sea hexes and impassible. Units which are in hexes that become "all-sea" by tidal movement, may advance one hex in the Command Planning Phase in order to remain on land hexes (even if suppressed or paralyzed.) Such movement does not draw overwatch fires. Tide line movement occurs upon the commencement of the Command Planning Phase of each hour turn. Tow Only units which have no available carrier or vehicle unit in their hex are destroyed if tidal movement causes their hex to become all sea.
1.13 The Shingle
The Shingle is a build up of small stones created by the tidal action of the beach. It is impassible to all vehicles and carriers except at "shingle breaches." Other units must pay a +2 MP cost to cross these hexsides. Any unit adjacent to the shingle that is fired on with area or point fires which cross any shingle hexsides receives a -2 dice roll modifier. Artillery and other indirect fires are not modified by this (mortars are modified when fired in conjunction with direct weapons which must fire across shingle hexsides.) See Shingle Hexside Effects Diagram on the last page of this booklet.
1.13a The Shingle and Retreat Movement. Historically, in any beach invasion (Omaha included) the "sea wall" is the point all troops can make it to as a matter of safety. It is further advances that are difficult to obtain. The shingle is Omaha's sea wall. Therefore, units required to retreat when seaward of the shingle may retreat toward or along it. Units may, however, never voluntarily conduct SYR movement toward the shingle. Units already adjacent to the shingle which receive an required SYR result (or choose such a result) become paralyzed and +1 to the company morale.
1.14 The Turn Record
The Turn Record Track and Day Record are used to keep track of the current game day and time.
1.15 The Hex Numbering System
This is used to identify the individual hexes on the game maps. The maps are lettered A, B, C, and D and are marked as such. A hex number pertaining to a given map will begin with the map letter, such as A10.10. The digits before the decimal point identify the hex row, reading along the horizontal dimension of the map from left to right. The digits after the decimal identify the exact hex along that particular hexrow, reading along the vertical dimension from bottom to top. Not every hex is numbered. Each fifth hex (xx.05, xx.10, xx.15) is numbered to create gridlines. For example, to find hex 29.17, follow the gridline for xx.15 until you find the 29.xx hexrow, then count up two hexes to 29.17.
1.16 The Beach Sector Boundaries
The beach is divided up into as many as six hex "beach sectors" each being considered a portion of the historical beach of which they are named. Boat landings are directed into the different beach sectors to simulate the confusion of the landing. Also, beach sectors must be used as the planned starting point of the American amphibious attack when using op sheets.
1.17 The Landing Beach Boxes and Sector Scatter Lines
These are used during the landing sequence only. Units landing in one of the three assault waves are placed into the appropriate landing Beach Box. Then one die is rolled to determine which Scatter Line to use for each boat or boat group as explained in the American Landing Rules.
2.0 American Special Rules
2.1 The Landing System
The general sequence of events in the Landing System is as follows: Before play begins the American player assigns his units to boats in assault landing waves numbers 1 through 3 (remaining units are considered to be in the transport waves.) The max number and capacity of boats available is given on the US Landing Sheet which should be detached from Map C. Each boat is assigned to a Beach Box on the Landing Schematic (which is the boat's planned landing beach.) On the turn the wave is scheduled to land, the player moves each Beach Box group from the Landing Schematic to the appropriate Beach Box on the game map. The player then rolls two dice for each boat to determine if they survive the landing. This dice roll depends on the type of boat/craft and the number of pill boxes remaining in play on the beach. By boat group, the survivors roll to see first which beach sector they land in and then, individually, in which hex of the beach sector. They are then placed in the correct tide line hex in move mode. The above is repeated for each boat and boat group.
2.1a The Wave Structure: Assault and Transport. The player has two available types of landing: assault and transport. Assault landings occur in three waves—one each on the 0640, 0740 and 0940 6 June turns. Assault landings may not occur on other turns. Once game play begins, the composition, boat structure, beach, and wave assignment of assault wave units may not be changed. On any hour turn on or after 1000 6 June, the US player may begin transport landings. Transport landings may be freely decided on each hour turn thereafter. The player is free in transport landings to land any remaining unit or units, to any map beach box as desired. On any turn thereafter he may decide to not land new units as desired and may start up again whenever he likes. Transport boats may not be saved up, only the number available may be used, wasted or unused load point capacity is lost.
2.1b Load Points. Each type of unit is assigned one or more load points per step. This represents the amount of space and weight required of a given unit type's step on board a boat. The Load Point values of the different unit types are as follows:
| 1 Step of... Unit | Number of Load Points / Step |
|---|---|
| Infantry, Mortar, MG | 1 |
| AT Gun | 2 |
| FA (towed), Truck, Halftrack | 5 |
| Tank, FA (SP) | 6 |
2.1c Load Classes. A "load class" is the division of units into three categories that represent the loading/unloading requirements and "bulkiness" of different units. Boats and other carriers are rated on the maximum load class (as well as load points) they can handle. The four classes are I, II, III, and IV. Load Class I includes all infantry, MG, mortar and AT steps. These are units that require little by way of ramps and are generally foot powered. Load Class II only includes towed field artillery guns. Load Class III contains halftracks, and trucks. Class III represents items which are so heavy as to be beyond the abilities of a Dukw, but within the abilities of a Rhino Barge. Last, Class IV represents the heaviest items—tanks and Self-Propelled Artillery Guns. A boat capable of a given level of load class may transport lower load classes freely.
2.1d Boats and Boat Groups. There are four types of boat available in the game in addition to Dukw's. These are called LCA, Rhino, LCT and LCI for simplicity's sake. LCA's (Landing Craft, Assault) include both LCA and LCVP types with each "boat" representing 2-3 craft. Rhino's include both Rhino barges and the occasional LCT which would not be used for armored landing. LCT's (Landing Craft, Tank) are those LCT's which were devoted to heavy vehicle movement. LCI's (Landing Craft, Infantry) are basically very large LCA's. The qualities and abilities of these boats are as follows:
| Boat | Max Load Class | Max Points Per Boat |
|---|---|---|
| LCA | 1 | 9 |
| Rhino | 3 | 30 |
| LCT | 4 | 25 |
| LCI | 1 | 25 |
| DUKW | 2 | 5 |
LCA's may be placed into boat groups of three, two or one as desired. The purpose of a boat group is that these three boats follow one another onto the beach and land in the same beach sector. It facilitates the landing of infantry companies into the same beach area, which generally occurred historically. All other boats and all Dukw's land in 'groups of one,' or individually.
2.1e DD Tanks. DD M4 Shermans are outfitted to swim English ponds. On June 6th, they attempted, and failed, to take to the sea. DD tanks do not count against any load, class or boat limit—they are on their own. While they give the player an ability to land tanks early in the assault waves—when they are desperately needed—they also give the player an opportunity to lose most of his armor. Players interested in the historical invasion are free to use two companies of DD tanks in the first wave, and are wished good luck! DD's may be used in any of the assault waves but may never be landed as DD tanks (under their own power that is) in a transport wave. DD tanks are designated by a yellow highlight of their nomenclature.
2.1f Dukw's. Like DD tanks, Dukw's ("ducks") have a poor historical record of reaching the beach afloat. These were used to carry towed artillery in the landing—much of which was lost at sea. Unlike DD tanks, these must be used if the player wants to use LCT's and Rhino's in the second and third waves. All Dukw's must be loaded with at least 4 load points (class I or II), before the US player may use any LCT's or Rhinos at all.
2.1g Availabilities of Boat Types and Wave Establishment. Each of the three assault waves must be established before the game begins. This set of decisions are some of the most important of the game for the US player and should be made only after careful consideration. The historical landing plan is included in these rules only as a guide, it is not required in any way. The available boats for each wave follows:
| Boat | Wave 1 (0640) | Wave 2 (0740) | Wave 3 (0940) |
|---|---|---|---|
| LCA | 12 | 29 | 24 |
| Rhino | 0 | 6 | 3 |
| LCT | 4 | 0 | 3 |
| Dukw | 0 | 15 | 12 |
2.1h Setting Up the Landing Schematic. Boats given above are the total available for all beaches. The player must divide the assault waves into boat load stacks on the Landing Schematic as desired following the load class and load point rules above. Each stack on the schematic must equal the load of one boat of some type. At this time it is best to assign LCA's into their three boat, boat groups and segregate boats by type. Any beach may be assigned to any unit in any wave (provided the unit's op sheet agrees) and the landing location (planned or otherwise) of previous waves has no effect on future assignments. Thus, a player can land wave one on eastern beaches, draw the German units there and then land further west with later waves, or some other combination.
Take note of the US Landing Tables provided on the sheet to be detached from Map C. This sheet contains the important tables and charts included here for easy reference, and explains some simple ways to set up units on the Landing Schematic sheet so as to show things like boat types and split units.
2.1i Landing Survival and Losses. When attempting to "make the beach" from the Landing Beach Box, each boat (assault and transport) must check for survival. The Survival Roll is a two die roll based on the boat type and may be modified by the number of Pill Boxes remaining on the beach. Boats which fail this check, and their loads, are removed permanently from play. No other "fires" occur to the boats running for the beach. This survival check includes German fires, rough seas, beach obstacles, and mines. Each boat in a LCA boat group checks separately and no reorganization of boat groups is allowed afterward.
| Boat | Success Roll |
|---|---|
| LCA | 2-12* |
| Rhino, LCI, LCT | 2-11* |
| Dukw w/class II load | 2-5 |
| Dukw w/class I load | 2-8 |
| DD Tank | 2-4 |
*Use Modifiers below
| Pill Boxes Remaining | 0-5 | 6-13 | 14-20 | 21 or more |
|---|---|---|---|---|
| Dice Modifier | -1 | 0 | +1 | +2 |
2.1j Note on Landing Losses—Random Losses. Units may be split between boats within a group, and losses may require that a unit suffer some step losses. In such instances, players may either specify before hand the exact composition of each boat, or simply determine losses at random if an LCA is sunk. Use the following example as a guide:
A/1/16 is loaded aboard a boat group of two LCA's. As the company has 17 load points, 9 are on one boat and 8 on the other. When rolling for boat survival, always roll for the most fully laden boat first. Assume the first LCA did indeed sink. Now choose A company units at random (out of a cup, etc.) until 9 steps are lost. Say the first two choices are infantry platoons: the first platoon is completely eliminated, and the second loses four steps (leaving it with one.) The remaining units scatter to the beach.
Note that units may only be divided among LCA's. Other landing craft types may only contain complete units. (Unless a single unit is so large as to require more than one boat—such as artillery battalions—in these cases splitting is allowed but must be recorded on paper.)
2.1k Effect of Pill Box Numbers on Survival. As listed in the Survival Roll modifiers, German pill boxes affect the survival roll for incoming boats. This is, of course, a representation of the volume of fire the Germans can place on approaching boats. While a simplification, it is an accurate and painless representation of the German beach defenses, which, as a whole, were fairly ineffective in dealing with the "target rich environment" they were handed.
2.1l Landing Placement: Scatter, Beach Sectors, and Boat Groups. After checking for survival, remaining boats and boat groups are then scattered into one of a number of beach sectors based on their Beach Box. These are shown as pathways to the beach from the Beach Box. For each boat or boat group, roll one die. The path with that number is the one used by that boat. Place the boat (or boat group) adjacent to the correct beach sector based on the pathway. Repeat as needed for each boat (boat group) and Beach Box. Boat Groups always land in the same beach sector.
After the sector has been determined for all landing boats, roll one die per boat (those in boat groups roll separately this time.) Counting from one edge of the beach sector, the number rolled is the hex along the current tide line in which the boat lands. All units land in Move Mode. Repeat as needed. The edge of the sector used is not important as long as the same edge is used consistently for all landings.
Note that beach sectors Dog Red 1 and Fox Red 8 have special boundaries for in-sector scatter. The die rolls pertaining to these divisions are those printed on the map. In Dog Red 1, some of these "minor beach sectors" have more than one hex assigned to them. In this case, the US player may select which hex of those in a "minor sector" in which to land.
Should a landing scatter roll from Dog Red cause units to be sent off map, these units are permanently removed from play.
2.1m Transport Landings. The majority of the US units land in transport landings after the assault waves. These are much more free-form than the assault landings. Transport landing units and boats are assigned the hour turn before they are to land and the use of a transport landing is decided at that time. Players may use all some or none of the transport capacity on any hour turn on or after 1000 6 June (clearly, to start on the 1000 turn, transports must be assigned on the 0900 turn—this is the correct turn to do so and is allowed.) Unused capacity may not be saved. Once assigned to the Transport Landing Box for a beach in the previous hour turn, the boats and units must attempt to land in the next hour turn. Two types of transports are available: LCI and LCT whose characteristics were given earlier. On any hour turn there is 1x LCI and 5x LCT available to be used. The player is not required to begin transport landings at any particular time. He may not start earlier than 1000 6 June, however, it may be prudent to wait longer. The decision is left in the player's hands (as it was in real life), but he should take care to make the decision to start when he thinks the beach is cleared enough to be safe for transport landings.
Transport landings do not scatter and will land at the designated beach. The player is free to choose which beach sector of the correct beach is to be used at the instant of landing, i.e. if Fox Green has been designated as the beach of landing when the transport landing was assigned (the hour before), then the player may choose any of the Fox Green sectors. This decision need not be made until the instant the landing is to take place.
NO transport landed unit may have an implemented op sheet.
2.1n After The Landing... Landings are considered to be the first activity in a given US Action Phase. Units which land may then move during that Action Phase using all of their available movement allowance, with no deductions for having landed.
Example of Landing Process
(The diagram is not reproduced; the printed text of the example follows.)
In the Beach Box: A-B, C-D, and H-I are two boat LCA boat groups. E and F are LCT's. G, L, J and K are minimally loaded Dukw's. (Orientation to show boat type has been omitted in this example so as to improve readability.)
Survival Rolls: There are 20 pill boxes left on the beach—giving a modifier of +1 for LCA's and LCT's. Dukw's have class I loads. Survival rolls as follows:
- A—3+1=4, survives
- B—6+1=7, survives
- C—3+1=4, survives
- D—12+1=13, destroyed
- E—5+1=6, survives
- F—6+1=7, survives
- G—9, destroyed
- H—8+1=9, survives
- I—9+1=10, survives
- J—9, destroyed
- K—4, survives
- L—9, destroyed
Scatter to Beach Sector: One roll is made per boat or boat group. The result is as follows: A-B: 2, C: 6, E: 6, F: 2, H-I: 2, K: 6. The below is followed separately for the boats going to other sectors. This example will concern itself with only those boats going to the sector given for the die roll of two.
Scatter in the Beach Sector: These second wave units are landing at 0740, so the 0700 tide line is used. The hexes along that line are numbered here for the die roll needed to place a boat in that hex. Our boats distribute as follows. Note that boats in a boat group roll independently this time. A: 4, B: 3, F: 4, H: 5, and I: 2
Final Hex positions on Landing: (As above: A: 4, B: 3, F: 4, H: 5, and I: 2.)
2.2 LCT(R)'s and Area C Fires
Along this part of the Omaha Beach assault some nine LCT(R)'s were used. In this game the US player has four. A LCT(R) is a modified LCT fitted to fire 1000 rockets. Because of limitations in the ability of the LCT to position itself with any degree of certainty and the uncontrolled nature of the rocket's flight, they have the distinction of being some of the least accurate prep fires ever used. The total number of launchers available to the beach has been reduced to create a better average accuracy, and in order to avoid overemphasizing their effectiveness.
2.2a Description and Use of LCT(R)'s. The four LCT(R)'s may be fired at any desired target hex in the pattern C described below on the very first game turn (and never later.) Target hex assignment is made before play begins. Target hexes selected must be at or within 15 of a beach obstacle hex. These fires cannot be adjusted, fire the designator round (with the distance roll x 3) and then execute a 1000 FFE based on that hex. LCT(R) fires are a "battery 1" of 1000 rounds and each LCT(R) may only fire once in the game. The fire generates a limited number of smoke markers due to the pre-game nature of the fires—most have dissipated before play begins. The US player should check the hexes of his choice for smoke using the Miller Table roll itself. Subtract from the 10 markers any used by the impact of rounds in attacks. The US player may continue checking hexes for smoke until he runs out of smoke markers.
2.2b Area C Fire For Effect Concentration. Area C consists of all hexes at or within 10 of the designator hex. Each fire generates 10 smokes. The Miller Table for this fire is as follows (the same table is used for all hexes at or within 10 of the designator round's impact):
| Rounds Impacting Hex | 0 | 1 | 2 | 3 | 4 | 5 | 6 | 7 |
|---|---|---|---|---|---|---|---|---|
| 11...66 Dice Roll | 12 | 21 | 33 | 45 | 55 | 63 | 65 | 66 |
Each Rocket attacks as a 155mm HE round.
2.3 US Command Confusion and Leaders
The player's initial op sheets must be based on the planned beach of landing using the beach sector limits as a guide. No op sheet can be followed normally unit units assigned to it arrive at the correct beach. Historically, this problem was immediately inflicted on the US troops, who had been heavily trained on what to do on THEIR beach, but nowhere else.
2.3a General US Op Sheet Restrictions. The US player may not have more than 12 implemented Op sheets at any one time.
Units moving under the direction of a leader may never accumulate weighted turns (for Op sheet implementation) at a rate other than 1 per turn—despite the lack of enemy fire, etc.
Any Op sheet for a landing unit must designate the correct Beach Sector (e.g. Fox Green 2.) Note that units must start in the Beach Box related to their correct Beach Sector—in other words, the unit above would have to start its landing scatter from the Fox Green Beach Box, and from no other. No unit with a landing Op sheet may start carrying out its assigned tasks until it is on the correct Beach Sector.
Units landing in transport landings never arrive with Op sheets in any form. They must start the implementation procedure from scratch after landing.
2.3b Op sheets or No? Given the already time consuming task of laying out the landing schematic, the US player may want to forego the development of potentially useless op sheets. If desired, it is suggested that players agree to not create US op sheets until after the landing. All US units are then assumed to have landed on the wrong beach and the lateral movement to the correct beach is not possible. The US player must rely on the Shingle rule and his leaders to get in a position in order to issue new op sheets from scratch. The choice is up to the players, but it can work either way.
2.3c Three Methods of Command After Landing. There exist three methods of controlling the American forces after landing on the beach (presumably the wrong beach.) These are: the seaward side of the shingle rule, lateral movement, and leaders.
2.3d The Seaward Side of the Shingle. The first method of controlling landed (and mixed up) American units is the "seaward side of the shingle rule:" any US unit may move and fight as desired on the side of the shingle closest to the sea. There are no command restrictions on the use of units on the hexes seaward of the shingle.
Units which find themselves landward of the shingle (due to the action of leaders below) and do not currently posses an op sheet sending them there, are able to fire and execute voluntary SYR's (toward the sea) but may never move in regular voluntary movement.
2.3e Lateral Movement to Correct Beach. The second method is to march the troops laterally to the correct beach (along the shingle and on the seaward side) and then begin the original op sheet. A corollary of this would be to implement a new op sheet for where the units are (as opposed to where they were supposed to be.) Neither plan is to be recommended as either way, the US units end up like ducks in a shooting gallery for an extended period.
2.3f Leaders. The last historically valid method for getting off the beach was the result of vigorous leadership of a few battalion and regimental officers. A few units tried the lateral duck-walk above, and many more were content to fight their war from the shingle, but a few brave souls decided that the beach meant death and getting inland was the first priority.
Leader Selection. Contained in this game are all of the battalion and regimental commanders of the 1st ID's infantry as well as the Assistant Division Commander. After creating his landing plan (or uses the historical one given), the US player selects those leaders whose subordinate units land in the assault landings or in the first transport landing. Place these leaders into a cup. Roll two dice on the table below and select at random that number of leaders from the cup. Leaders do not use load points. The leader then lands with that boat. If the boat does not survive the landing, neither does the leader(s) on it.
Leader Losses. Leaders are not affected in any way due to the normal fires into their hex. At the beginning of every friendly action phase in which an enemy unit has a clear LOS within visibility and its weapon range to the hex the leader is in roll two dice for the leader. If the roll is 12 the leader is killed and no longer affects play. Roll for all leaders filling the above conditions separately. Only one roll is made per leader, regardless of the number of enemy units which can conceivably fire on the leader's hex. Flip dead leaders to their "Grave" (RIP, 6 June 1944) side and leave them in the hex where they were killed.
Leader Effects. Leaders have only one effect. All friendly units at or within three hexes of the leader at the start of the Action Phase (provided the leader did not die above) may move and fight anywhere on the map freely, without reference to op sheets or orders. Leaders themselves have no combat ability and are always in move mode with 8 MP's. Leader movement never causes overwatch fires. Leader effects are not constrained by their actual unit assignment. Leader units may observe artillery and mortar fires.
Leader Selection Table
| Dice | 2-4 | 5-6 | 7-8 | 9-10 | 11 | 12 |
|---|---|---|---|---|---|---|
| Leaders Available | 3 | 4 | 5 | 7 | 8 | 9 |
Leader Removal. All leaders are automatically removed from play at the beginning of the 1300 6 June turn.
2.3g Unassigned Units and the Beach. Units with no Op sheets to follow are considered to be unassigned (TCS—6.5) and are required to retreat after a defense of no more than 3 turns (TCS—6.5c.) While this is applied most of the time, units seaward of the Shingle are free from all conditions listed in section 6.5.
Thus, an attack by a determined pill box squad cannot send the Big Red One swimming back to England.
2.4 The Beach Obstacle Hexes
Along the edge of the beach, in a continuous line, are beach obstacle hexes. Each is marked with a wire and mine symbol. These hexes do not represent the anti-landing craft beach obstacles which littered the beach from the low to high tide line—these are taken care of by the survival roll required of landing craft—but are, instead, the wire and mine areas designed to entrap the landing force on the beach. These defenses are, however, incomplete and each hex may or may not actually contain a barrier.
2.4a Testing Beach Obstacle Hexes. To determine if a particular beach obstacle hex contains mines, wire or both, it is necessary to "test" the hex. In order to test a hex, an infantry type unit (of either mode) must cease all movement adjacent to the obstacle hex. At the end of a friendly Action Phase, if the unit is not suppressed or paralyzed, it may test one hex. A given unit may only test one hex in a turn and no hex may be tested more than once to get a "better" result. Only one test roll is made, regardless of the number of units adjacent to the hex. The roll results are as follows:
One Die
- 1-4: Mines and Wire (Mark with regular Mine Marker)
- 5: Wire Only (Mark with Wire-Only Marker)
- 6: No Obstacle (Clear, mark with a step loss or blank marker)
2.4b Mine and Wire Hexes. In these hexes, the usual TCS method of mine breaching (15.3 only, units may not force such hexes, as per TCS 15.2) This breaching action is done at the end of the next friendly Action Phase. Afterward, mark with a breach marker as is done in 15.3 TCS.
2.4c Wire Only Hexes. These hexes require the expenditure of 1/2 the movement allowance of the first crossing unit to clear. These MP's are expended independently of any movement point costs for terrain. Only infantry units may clear wire only hexes. Mark the cleared hex with a step loss or blank counter.
2.4d Clear Hexes. These are treated as normal clear terrain during the next turn. Mark them with a step loss or blank counter.
2.5 Shingle Breaches
A shingle breach is a bulldozed section of shingle that allows the passage of vehicles and carriers at the rate of one unit (counter) per turn per breach—see also the special rule concerning artillery battalions in 4.5. Bulldozers are not included in the game as they would draw abnormal amounts of fire—since the German player knows what their use is—and would serve no other game function. Potential shingle breach hexsides are marked on the map and none of them exist prior to the following of the below rules.
2.5a Conditions and Requirements. In order to open a printed shingle breach hexside to traffic, all of the following conditions must be met at one time:
- No pill box exists within range and LOS (visibility has no effect) of the potential breach hexside.
- US units (of any type) occupy each of the "Breach Security Hexes" marked on the map (with yellow circles) which are connected to the desired breach hexside. The connections are for reference only and need not "be followed" to the breach security hex.
- A US Tank, of any type, is at or within 3 hexes of the breach hexside.
- No German unit, of any type, is at or within 5 hexes of the breach hexside.
2.5b Effects of a Breach. Once established, a breach hexside allows vehicle and carrier traffic to move through the shingle (at the rate of one counter per turn per breach.) Other units may use the shingle breach to cross the shingle without the usual movement point penalty. Shingle breaches have no effect on the fire protective effects of the shingle. Upon passing the breach hexside into the opposite hex, a unit is considered to have "road moved" to get there—with the required fire modifiers for that reason in effect.
2.5c Germans and Shingle Breaches. German units are free to use an established shingle breach as they desire and are able to force their way through to one—US shingle breaches are the only way Tiger tanks can get on the seaward side of the shingle to drive up and down the beach upon US infantry units (the ultimate desire of all panzer commanders!)
2.6 Naval Gunfire
For Omaha Beach, no less than two battleships, three cruisers and eleven destroyers were acting as naval support. The battleships tended to pound the flanks of the beach—Point du Hoc and Port Bessin specifically—and the cruisers seem to have had a limited shore fire support role. A couple of heavy cruisers (the British Glasgow, and French Georges Leygues) look as if they are firing on the beach (in fire diagrams) but these vessels are actually firing over the beach to seal that third flank—the landward edge—of the beach. The destroyers, however, attempted to take an active part in the land battle. I say "attempted" because poor communications (wet and lost radios), safety considerations (friendly troops being too close), and poor visibility conspired against active firing. Thus, the quantity of fires available is much less than a first glance would presume.
2.6a Availability of Naval Gunfire. On each turn on or after 0940 6 June, the US player may fire one destroyer fire mission. Destroyer ammunition expenditure is not recorded.
2.6b Composition of Fire Missions. Each destroyer fire mission is called for in the same manner as regular artillery missions. Each mission consists of 30x 5" HE rounds (same effect as 155 HE.) The mission is called, adjusted, and fired normally, except that the designator distance roll is x2 (x3 at night.) Fires always land in an Area A concentration. Destroyers cannot make use of any of the TRP rules.
2.6c Conditions and Restrictions on Naval Gunfire Support. In order to fire a destroyer mission against a given target, the following conditions must be met:
- No friendly units are at or within 8 hexes of the intended target.
- The potential target hex must be in view of the Naval Gunfire Observer, who is considered to be just off the north map edge (Maps A & B) on ship. Since naval fire in this case is considered to be direct fire only and is fired based on what the ships can see, the target hex must be visible to a nominal observer at 10 meters elevation at any point along the north map edge—the US player selects where.
The observation of naval fires by ground units is ignored in this game—the few Naval Fire Support Teams to survive on the beach had no ability to communicate during the first, critical hours. The following is provided as an optional rule, for those who really want NFST's!
2.6d Naval Fire Support Teams (Optional). Each landing battalion is assumed to have one NFST. Before play, the US player must assign this team to any infantry unit of that battalion. Once assigned, it cannot be reassigned and it shares whatever fate befalls its assigned parent. The NFST adds nothing to the parent, except the ability to observe naval gunfire as if it were regular artillery (given the "friendlies within 8" limitation above.
Now the catch, for each NFST landing on the beach, roll one die. On a six, the radio works and the unit may observe fires. Any other result and the NFST's radio doesn't work and the team is ignored for the rest of the game.
2.7 The 29th Infantry Division
A few elements of the 29th ID are included in the game. These are: a part of the 116th RCT and the 115th RCT. The 116th troops are units which were in the assault waves but drifted onto the 1st ID's beaches. The 115th was a follow-on unit which, because of the mess on the 29th's beaches, was released to land in the 1st ID area of operations. No extra command confusion is inflicted because of these units—the entire landing was under 1st ID control anyway—but they must be returned to the 29th's sector by the time listed below. At that point, the 29th ID became activated as a unit and its RCT's went to its divisional control and off the map. Also, the 175th RCT (29th) did historically land on these game maps, but has been omitted as they did an immediate right face and marched off the map following the shingle and in no way participated in the combat on these maps.
Units from the 29th ID are marked with a khaki stripe to facilitate their identification.
2.7a 29th ID Unit Requirements. The player is not required to land the 29th ID units at any particular time except in games following the historical sequence of events. In strictly historical games, the 116th RCT units must be scheduled to land in the 1st and 2nd assault waves for Dog Red and Easy Green beaches. The 115th RCT must land, in a strictly historical game, in either the third assault wave or the first transport landing.
2.7b 29th ID Unit Map Exit Requirement. In any game version, all 29th ID troops must exit the game map via the West map edge no later than 1200 7 June. No particular penalty is attached to this rule among players of integrity, if the US player is not "dependable" in this sense, he forfeits the game itself. How's that for draconian measures?
2.8 US Battery Composition (at full strength) and Called Fire Delay
There are no US called fire delays. The battery composition of available batteries (after landing them) follows.
| Battery | Guns | Batteries |
|---|---|---|
| Cannon /16 RCT | 6x 105mm | 1 |
| Cannon /18 RCT | 6x 105mm | 1 |
| Cannon /26 RCT | 6x 105mm | 1 |
| Cannon /115 RCT | 6x 105mm | 1 |
| 62 Arm FA Bn | 16x 155mm (sp) | 2 (A,B) |
| 5 FA Bn | 12x 155mm | 3 (A,B,C) |
| 7 FA Bn | 12x 105mm | 3 (A,B,C) |
| 32 FA Bn | 12x 105mm | 3 (A,B,C) |
| 33 FA Bn |
TRP's are allowed but must be assigned before any units are placed on the map. US TRP's are not active and may not be used until 0100 7 June.
2.9 Artillery Ammunition
Initial: Each battery/battalion is considered to land with 20 rounds of HE and 3 rounds of smoke per gun. To determine the amount of battery fires landed with each battery, multiply the rounds per gun by the number of guns surviving the landing. Divide this number by either 4 (for 5, 7, 32, 33, or 186 FA Bns), 8 (for 62 FA Bn), or 6 (for the cannon companies) to produce the exact amount of battery fires landed. Round all fractions down. In addition to the above, each battery that lands with at least one gun adds one illum round to the pool.
Later Additions: At 0600 7 June, add the following to the ammunition pool:
- 105mm: HE:50, Smoke:10, Illum:5
- 155mm: HE:35, Smoke:7, Illum:2
At 0600 8 June, add the following:
- 105mm: HE:75, Smoke:15, Illum:5
- 155mm: HE:50, Smoke:10, Illum:2
There is no limit to the amount of ammunition the US player may have in his pool, given the theoretical maximum imposed above.
2.10 US Airpower
Each turn in which the weather is clear, the US player rolls two dice, and on a roll of 8 or more, he has two A-20 aircraft available for use. However, the dice roll for enemy use of the sortie has been changed. Now, the German player may use the sortie on a roll of 8 or more. Furthermore, add one to this roll on any turn of June 6th.
2.10a Characteristics of the A-20: The A-20 may be specified as either "bomb laden" or "gunship" by the US player—the choice is made before the above "ownership" roll. These two types may chosen in any combination, with each of the four aircraft being separate.
Bomb Laden: Strafe three targets with a firepower of 5 and bomb one target with a firepower of 36 (or a hit roll of 8 or more, with automatic kill.)
Gunship: Strafe four targets with a firepower of 15.
2.11 US Overdraft Reinforcements
On the 1200 7 June turn, the US player may add up to 5 steps of infantry to each line company of 16/1 (A, B, C, E, F, G, I, K, L.) No unit may be made greater than its full strength in steps. Excess steps are lost and not used in the future.
3.0 German Special Rules
3.1 German Release System and Variable Reinforcements
In the opening stages of the battle, German reactions will be slowed by the lack of acceptance that this is, indeed, THE invasion. The following restrictions are designed to reflect this hesitation.
In each scenario, German starting forces are defined as being in one of two conditions: Released or Unreleased. Of these, released forces move and fight normally. Unreleased forces can only be used once they have been released through the appropriate roll on the Variable Reinforcement Table of that scenario. The roll is made in the Command Planning Phase.
Each turn, the German player rolls either one or two dice (as called for by the table) and consults the table. If the result is a company or battery release, the German player may release an on-map ground unit or off-map artillery battery of his choice. Off-map batteries to be released may be freely selected from the German Battery Composition Chart below. Note that artillery is released by battery, not battalion, it would require three releases to release an entire battalion. Batteries within a battalion may be released separately.
Note that in the two one-map scenarios, there are no on-map units to release. Instead a smaller table is provided to determine which company is available. The released company enters as a reinforcement.
If the result on the Variable Reinforcement Table calls for a Variable Reinforcement, the player may treat it as a company/battery release, or instead roll on the second table to determine what unit is available for entry. If the unit so determined is already in play, the release is lost.
All German reinforcements enter from anywhere along the south edge of the maps in play.
Automatic Release. Any unreleased German company is automatically released if any US ground unit moves to or within 5 hexes of any of its component units. Only individual companies are released in this manner, such a release does not trigger an entire battalion, etc.
Reinforcements and Op Sheets. German reinforcements may enter with implemented Op sheets only if those op sheets were drawn up before the game. Otherwise, German reinforcements may enter the map and move for two turns, but then must halt and implement op sheets. German on-map unreleased forces should be considered to have op sheets and be in a reserve status, which may attempt to be removed after they are released. These op sheets should be drawn up before play.
3.2 German General Op Sheet Restriction
The German player may never have more than 6 implemented Op sheets at one time.
3.3 Pill Box Units
To represent the German beach defense units (a battalion of the 726th Infantry Regiment) pill box units exist. These represent more than one emplacement and do not represent the stereotypical "pill box, concrete" of West Wall and movie fame. Some are, to be sure, but most are open pit emplacements surrounded with a lot of dirt and sandbags.
3.3a Pill Box Fires. Each pill box unit has two fire abilities: point and area. The point fire ability is that of an AT gun. The area ability is that of the numerous MG's in the complex. These MG's have a longer range due to pristine fields of fire with range stakes and abundant tripods and telescopes. They have a higher than normal firepower due to the ammunition supply stockpiled with each gun. They are formidable defense emplacements.
3.3b Abilities. A pill box may fire its two weapons as if they were two units—against different targets, the same target combined, overwatch and overwatch mark independently of each other.
3.3c Restrictions. Pill boxes may never move. They have no morale. The pill box itself is a one step unit (see below for conversions) Pill boxes are affected by the improved positions they may inhabit.
3.3d Pill Box's as Targets. Pill boxes are point targets and have a defense rating. They may only be destroyed by 1) point weapon fires, 2) AT Rolls made within the pill box's hex, or 3) the Artillery and Mortars Point Fire Table (only by artillery rounds, never mortars.) As mentioned above, only those AT Rolls made by attackers who are within the pill box's hex may destroy the pill box. AT Rolls made at range one or two are of no effect. While pill boxes have two fire abilities, these may never be targeted separately by enemy fires. Pill boxes may take advantage of any available improved position modifier. Pill boxes are never considered to be dug in and are always in fire mode. Pill boxes may never be destroyed by aircraft.
3.3e Conversion of Pill Boxes. At the beginning of any Mode Determination Phase, the German player may voluntarily convert any of his pill boxes into "pill box" infantry squads. These squads are two step, fairly poor infantry units which, at least, are mobile. The trade may be a poor one, but that is for the player to decide. Once converted, a pill box (and its AT gun) may never be regained, rebuilt or otherwise brought back into existence. When converted for any reason, the pill box squad may be placed on the map into either mode in the same hex.
3.3f Pill Box Destruction and Conversion Roll. When a pill box is destroyed by one of the enemy fire methods, an automatic conversion occurs. Roll one die: on a...
- 1-2: Replace the pill box with a full strength squad
- 3-4: Replace the pill box with a squad minus one step (half strength)
- 5-6: The squad is destroyed with the pill box (or surrenders), no conversion is made.
Never use this table when making a voluntary conversion as above listed, only when a forced conversion happens because of the destruction of a pill box unit. When forcibly converted, the replacement squad appears suppressed and is never attacked again separately by the fires that destroyed the pill box and cannot be fired on by other US units that phase. Conversion itself does not trigger overwatch fires.
3.3g Positioning of Pill Boxes—Historical and Free Set Up. Marked on the game map are the "historical" positions of the available pill box units. As an abstraction, these are, of course, approximations. In normal game play, the historical positions are for reference only, the player may set up his pill boxes freely. The following are the only restrictions on set up:
- A. No pill box may ever be set up seaward of the beach obstacle hex line, all must be south of that line of hexes. A variant would be to allow them anywhere south of the highest tide line.
- B. No pill box may be further than 5 hexes inland from the beach obstacle hex line.
3.4 Rocket Pits
Behind the German beach defenses were some 40 "rocket pits" containing 320 mm rockets. These are represented in the game with 10 rocket pit units (in order to increase the hit probability of each by eliminating a certain number of guaranteed misses.) Rocket pit units may be set up in any hex which is no further than 10 hexes from a beach obstacle hex in the inland direction.
3.4a Rocket Pit Mechanics. Rocket pits may only be used once each. They fire as do mortar units, with all the same abilities and restrictions. They are, however, subject to the "targeting roll" below, can never fire smoke, and are eliminated upon firing (regardless of their hit or miss.) Rocket pits cannot move and are one step point type targets. Rocket pits are always in fire mode. Rocket pits get the Mortar Fire modifier on the Morale Table.
3.4b Targeting Roll. Whenever a rocket pit fires its one shot, roll a die. On a 1-3 it hits its intended target and may be combined with other fires against that target just like a mortar. Afterward, remove the used rocket pit from play. On a 4-6, the rocket pit misses. Conduct the original fire combat (if other units were able to fire upon the target) to conclusion. Then, roll one die for direction and one for distance (like a designator round) from the original target hex to see where the rockets did land. Attack any unit on which they happen to fall. This erratic attack is made regardless if the target has been attacked earlier in the phase, it may not be combined with other fires, and doesn't "use up" the target such that other units which have not fired yet cannot shoot at their desired target. Regardless of the method of resolution or its results, the firing rocket pit is removed from play after firing and never returned.
3.4c Destroying Rocket Pits. Aside from their one-time use, the US player may decide to try to destroy a rocket pit on purpose or accidentally. These rules are then in effect: rocket pits can never be destroyed by direct (area or point) or regular (area) mortar fires. Only overrun, assault, or the Artillery and Mortar Point Fire Table can destroy them. They can be destroyed by AT Rolls.
3.5 '88' Special Rules
Included in this game are a large number of 88mm Flak guns. These units were also trained in antitank fires. Because of their flak mission, however, they have an abundance of HE ammo available. For this reason, these weapons are not "x1/2 at all ranges" like normal AT guns, but use the usual range effects like tank guns. Pill Box 88's are also subject to the above.
3.6 Panzer Lehr Hummels
These vehicles are provided with the optional Panzer Lehr units. They represent the cannon support battery attached directly to the 901st PG. As such they should be represented as "on map" artillery, but because of extensive experience, unusual deployment doctrine, and close support capabilities, these units deserve special rules.
3.6a Conduct of Fires. Generally, the Hummels function exactly as do mortar units (and not like on map artillery.) This gives them their historical quick reaction ability, as they are then able to directly support other unit fires. As "mortar" units, they fire indirectly (with an observer) in the Direct Fire Segment. They may fire smoke and overwatch fires just as do mortar units. More than one Hummel may fire in the same attack. Ignore the on map artillery direct fire rules (TCS—3.7e) except for direct point fires below. Hummels, like mortar units, do not expend or record ammunition.
3.6b Point Fires. Unlike in regular area fires above, Hummels may fire direct point fires as do on map artillery (TCS—3.7e.) Indirect point fires are handled on the Artillery and Mortar Point Fire Table (with Hummels counting as artillery.)
3.7 Infantry Guns
Infantry Guns—represented by the up-side-down T symbol—are basically close support cannon. They fire direct fires only and are only effective on the Area Fire Table. While technically capable of indirect fires, the equipment and training did not exist for this mode of use.
3.7a Infantry guns are always Both type targets (just like AT guns).
3.7b Infantry guns are handled for morale purposes in the same way as AT guns. They move and fire like any other unit.
3.8 Bicycle Infantry Units
Certain German infantry units are mounted on bicycles for speedier transportation. While the true merit of such a mode of transportation—especially in a tactical sense—is subject to doubt, as a factor in operational movement it must be included. Such units are marked with a bicycle symbol.
3.8a In all primary and secondary road hexes, when considered to be moving along a road, bicycle units pay 1/2 the usual movement cost for foot units (1/4 on primary roads and secondary roads.) This movement benefit may only be used in hexes that are 6 or more hexes from any enemy unit.
3.9 German Battery Compositions and Called Fire Delay
The following represent the available German batteries:
| Battery | Guns | Batteries |
|---|---|---|
| 4/352 Bn | 12x 150mm | 3 (1,2,3) |
| 10/1716 | 4x 155mm (French) | 1 |
| 1/1352 Bn | 12x 105mm | 3 (1,2,3) |
| 3/1352 Bn | 12x 105mm | 3 (1,2,3) |
| Optional for Scenario 9 only: 1/130 Arty/Lehr | 12x 150mm | 3 (1,2,3) |
There is a called fire delay of two for all 4/352 and 10/1716 guns. Other German guns have no called fire delay.
German TRP's may be assigned, but must be established before play begins. No TRP's may be assigned seaward of the Shingle.
3.10 German Artillery Ammunition
Each scenario specifies the batteries available at start and the starting ammunition pool. Ammunition for 150mm and 155mm French guns is added as specified below, with the addition made into the general pool each time another battery of the correct type is released.
- per battery of 150's: HE:50, Smoke:7, Illum:2
- per battery of French 155's: HE:60, Smoke:7, Illum:2
105mm ammunition is added to the general pool at specified times. In scenarios which encompass one or more listed times, add the new ammunition to the pool at the beginning of the named turn. Additions are made on the following turns: 1300 6 June, 0700 7 June, 1300 7 June.
Each addition consists of: 105mm: HE:50, Smoke:10, Illum:3
3.11 Historical German Order of Arrival
This historical order of arrival should only be used in what is to be a strictly historical game. Usually, German reinforcements should be obtained via a Variable Release and Reinforcement Table.
In a strictly historical game, the German player rolls normally for Company/Battery Release. Any company of 2/916 must roll for off-map removal once released, as described in scenario 1. Ignore any roll of 11 or 12, signifying a variable reinforcement—nor should this roll be used for additional company/battery release.
Instead, the only German reinforcements received are the ones listed below. They are subject to all normal rules—including order status—for entering German reinforcements.
| Time | Units |
|---|---|
| 1020 6 Jun | 1/352 Panzer Jager |
| 1100 6 Jun | 1/915, 2x AT from 14/915, 2x Inf Gun from 13/915, 2x Truck/915 |
| 1700 6 Jun | Ersatz Bn/352 |
| 2300 6 Jun | 3/352 Panzer Jager |
| 1700 7 Jun | 513/30 Mobile Bde |
Design Note: As you can see, this is really a rather pathetic force to stop the US hordes. Additionally, some troops had a transient existence on the map (most notably 517/30 Mob) but had little effect on the battle. These units were all committed to fighting against the British to the east, or against the bulk of the 29th ID to the west.
3.12 German Minor Variant
Less Effective Use of Panzer Lehr. On any turn after 1800 6 June, the German player, having made a successful roll for variable reinforcement (not a company/battery release), may elect to substitute the entire 1/901/Lehr for the actual reinforcement. On the turn of the roll, one company of 1/901 may enter the map. On each subsequent hour turn, one more company may enter (treat battalion troops as a company for this purpose) until all 1/901 units have entered, or the scenario ends—whichever occurs first. These units may be used in any scenario that allows German variable reinforcements, except scenario 9. When this option is used, shift the level of victory at the end of the game one level in favor of the US player in addition to any other applicable level shifts.
4.0 General Special Rules
4.1 Company/Battalion Assigned Vehicles and Units
Certain vehicles and units of both sides are assigned directly to company, battalion, or higher commands. These units may be used as any other and are counted as are AT guns when calculating Command Size Modifiers (see 6.6d TCS.) Trucks, halftracks and wagons never count for size modifiers.
4.2 Battalion Weapons Companies
Infantry battalions on both sides are comprised of line companies and heavy weapons support companies (line and weapons, hereafter.) In US battalions, companies D, H, & M are weapons companies for the 1st, 2nd, and 3rd Battalions, respectively. German companies numbered 4, 8, and (sometimes) 12 are weapons companies for their 1st, 2nd and 3rd Battalions. Any unit in a given battalion may spot for a mortar unit in that unit's battalion weapons company.
Additionally, the US player (only) may group all three regimental weapons companies mortars together (stacked or adjacent to each other) to form a "massed battery." Such a massed battery may fire together at targets spotted by any unit from that regiment. Any or all massed mortars may fire at one target.
4.3 Weather
Each hour turn, during the Command Planning Phase, one player rolls one die and compares the result to the Weather Table printed below and on the game map.
4.3a Weather Table
| Time | 0100-0600 | 0700-1200 | 1300-1900 | 2000-2400 |
|---|---|---|---|---|
| Mist | 2-3 | 2-3 | 2 | 2 |
| Clear | 4-9 | 4-12 | 3-9 | 3-8 |
| Lt. Rain | 10-11 | 13 | 10-11 | 9-10 |
| Hvy Rain | 12 | 14 | 12 | 11-12 |
- +1 to dice if weather is currently Lt. Rain
- +2 to dice if weather is currently Hvy. Rain
Note: The weather on 0640 and the 0700 hour 6 June is always clear.
4.3b Weather Effects
| Type | Visibility |
|---|---|
| Mist | 12 |
| Clear | 75 |
| Lt. Rain | 5 |
| Hvy Rain | 2 |
Air sorties are only available in Clear weather.
4.4 Trafficability
In all scenarios, trafficability is good.
4.5 Artillery Battalion Markers
In order to save on uselessly expended counters and a rear area nightmare, artillery battalions markers were used in the place of the numerous guns and trucks/halftracks the units contained. Listed on each counter is the full strength establishment of the unit. Players who are unhappy with this abstraction may readily replace these counters with hand made units for the listed on-map guns and vehicles. I find the abstraction easy to live with and frees the player to attend to the fighting instead of moving the rear area around.
4.5a Use. The Battalion marker represents the rough area occupied by the artillery battalion it represents (or, in special cases, a cannon company battery.) It goes into and out of battery just like on map guns (3.7 TCS.) Movement is handled normally—the marker has a move and fire modes like any other unit. The transportation assigned the battalion (trucks or halftracks) may never be used for any other purpose than the transportation of the battalion, i.e. a player cannot "take advantage of" extra truck capacity in a battalion to move an infantry unit.
4.5b Fire Combat and Battalion Markers. Fire resolution against an abstracted artillery battalion is handled in the following way: Fires only count against the battalion if they are directed at or into the hex containing the marker. Otherwise, fires are handled normally (only one area fire roll is made against the marker—the units are not considered to all be in the same hex so as to invite multiple rolls.) Each step loss inflicted on the battalion marker counts as one gun system lost. Fires have no effect on the level of transportation available to the battalion, i.e. the battalion always has enough transport to move normally. The Battalion Marker can fire its guns as on map artillery in the direct fire mode as if all guns were located in the same hex as the marker.
4.5c Landing Restrictions and Requirements for the US Player. Because of its size, an Artillery Battalion Marker will involve a number of landing craft of, possibly, different types. Simply make a note of what each boat is carrying. Each boat rolls for survival separately and if it fails, its load is considered destroyed. Problems of mobility induced by, say, the trucks of a battalion being destroyed on landing, are ignored as the guns can be considered to find more transportation available from other units on the beach. All boats required to land the battalion are considered a boat group and all will land in the same hex, an exception to the usual landing scatter rules. Therefore, only one roll is made for the battalion for beach sector and only one for exact hex.
4.5d Movement and Handling. In all ways, the battalion marker functions as the units it represents (see On-Map Artillery, TCS 3.7.)
4.5e Shingle Breaches and Battalion Markers. To move artillery battalion markers through a shingle breach, simply place the marker adjacent to the breach. After a number of turns equal to the number of carriers in the unit (or guns in the case of the SP artillery) have elapsed, place the marker on the other side of the shingle breach. Starting in the next turn, it may move normally. Note that no other unit may use a given shingle breach during the period in which an artillery battalion is crossing.
4.5f Fire Coordination. A positive effect of this grouping of batteries is that all batteries in a battalion may fire in the same fire mission against one target hex. When expending ammunition for such a fire, subtract one battery fire (times the number of battery fires used by each battery) for each battery firing. Thus, it is possible for a battalion to join in together to create a 96 round fire for effect. No additional requirements or called fire delays are caused by this usage. The use of a battery in a battalion fire does not eliminate that battery's ability to fire other missions in the same turn—provided its total of eight battery fires has not be used up.
4.6 Overwatch Fires
Play must use the new Overwatch Permission to Fire Rule. TCS 2nd Ed. 8.9b page 15. See also the TCS Addenda in this rule book.
Players should note that this rule only affects overwatch fires triggered by movement, those triggered by fire need not secure "permission to fire."
4.7 AA Ratings
Ratings given are the same for both sides as defined by unit type.
- Infantry, MG, 88mm Flak and Pioneers: 11+ out to normal range.
- Quad 50's, Bofors, 20mm & 37mm Towed, and Wirblewinds: 10+ out to normal range.
- All Others (must have a weapon): 12+ out to 4 hexes, inclusive.
4.8 Restrictions for a Purely Historical Game (optional)
In order to play along strictly historical lines, the following conditions must be met:
- A. Use the Historical Landing Schedule for all American arrivals.
- B. Use the German Historical Order of Arrival. Roll for release normally, but ignore any references to variable reinforcements.
- C. Landing Delays (optional) In order to better simulate the mess of the landings, impose the following delays on US units arriving on the wrong beach:
- Right beach, wrong sector (when using orders)—one turn delay of landing.
- Wrong beach, but adjacent to correct one—two turn delay of landing.
- Two or more beaches from correct one—three turn delay of landing.
Example: A unit scheduled to land at 0640 on Fox Green scatters to a Fox Red sector—this unit will come ashore on Fox Red at 0720.
Delays for landing on the wrong sector of the right beach are only used if op sheets are used which determine the correct sector in which to land for a unit, otherwise this delay would be ignored.
This rule will create quite a bit of extra record keeping, and may be freely ignored by those not interested in its effects.
4.9 Tow Only Mortar Units
Certain mortars for both sides are considered "tow-only." This designation means that they may not move under their own power, but must use a carrier to move. These mortars are, however, considered passengers and do not use up the towing capability of the carrier. In addition, despite their designation, these units are not exempt from the usual provision against mortars being carried by vehicles.
Should a tow-only unit (which is not being carried) receive any type of morale retreat result, the unit is destroyed.
5.0 Command and Control
5.1 US Command Prep Ratings
From the start of the game until 1200 7 June, the US Command Prep Rating is 5. Starting with the 1220 7 June turn, the Command Prep Rating for units of the 1st Infantry Division drops to 3, while the rating for any units of the 29th Division still in play drops to 4. In any case where units from both divisions are on the same op sheet, the higher rating (4) is used.
Design Note: The initial rating for the US player stems from the incredible confusion the landings created. In 24 hours, almost 50,000 troops and 20,000 vehicles were put ashore on Omaha, with units often arriving on the wrong beaches. After 1200 7 June, the two ratings reflect the fact that the 1st ID was the veteran of both combat and amphibious landings, whereas the 29th, while well trained and motivated, was still green. On the whole, once across the beaches, the advance inland was held up as much by this confusion as by the initial German resistance.
5.2 German Command Prep Ratings
The German Command Prep Rating is always 3.
5.3 US Higher Commander's Intent
The original invasion plan called for all four of our maps to be in US hands by 2400 6 June. Failing this objective, securing a safe "maintenance" zone around the beaches is essential.
5.4 German Higher Commander's Intent
The German defense is based on Rommel's stated desire to "stop the invaders on the water's edge." Zeiglemann, second in command to the 352nd, felt this objective was too ambitious. German victory hinges on two things: the failure of the US to reach its objectives and the amount of losses inflicted on the US force.
6.0 General Victory Conditions
6.1 German "Simple" Victory (Sudden Death)
This one is easy: if at any time after the first turn, no American units remain on the mapboard, the German player automatically wins a massive victory. This would signal the failure of the invasion. Roll two dice. On a 2-5, Eisenhower calls off the whole thing and returns to England with the rest of the invading army to sit out two long years awaiting another opportunity. On a 6 or 7, he pulls out and the armies are sent to the Mediterranean or, possibly, the Balkans. On an 8 or more, he decides to tough it out and not call off the rest of the invasion because of Omaha's failure. Regardless of the above, the German player has done his part for the Fatherland!
6.2 Victory Conditions
Each scenario has its own specific victory conditions, presented in descending order from the largest US victory to the largest German victory. The following victory conditions and rules apply to all scenarios:
When determining victory, all of the specified minimum conditions must be met. If neither side fulfills its conditions, the result is a draw.
In some situations, shifts are awarded to one side or the other (sometimes both) for meeting specific requirements or using options. For example, if the US won a raw major victory (before adjustment), and is given one shift, while the Germans have earned two shifts, the final result would be a single shift, in favor of the Germans. The level would be dropped one, to a US minor victory.
Restrictions on Eliminated Units and Victory Determination:
- A. No carrier (halftracks, trucks, or wagons) ever counts as an eliminated unit.
- B. Units forced to leave the map(s) in play are never counted as eliminated units.
- C. Artillery units count each lost gun individually. For instance, if Cannon/16/1 is eliminated, it counts as six units lost. The attached transport (three halftracks in this case) is not counted (as per A above.)
- D. Units eliminated prior to the start of the scenario when required step losses are subtracted, never count towards the total units eliminated count.
Restrictions on Exited or Location Specific Units:
- A. Carriers never count as exited or location-specific units. Example: a German truck would not count as one of the five units within 10 hexes of the shingle in scenario 3.
- B. Step losses within a unit do not detract from its ability to fulfill a victory condition.
6.3 Defining Lines of Communication
Some scenarios call for exited units to be able to trace a "line of communication" (LOC) from their exit hex, usually a road. This LOC must be traced from the exit hex to a landing beach via an open shingle breach.
- A. The LOC must be traced exclusively along a primary or secondary road to at or within 5 hexes of a open shingle breach.
- B. No enemy unit may be placed in such a way as to be able to place direct fires upon this LOC. Mortars and other indirect fire weapons do not negate a LOC.
6.4 "Control" of Villages
Control of a village is given to a player who can demonstrate that at least one of the below conditions is true:
- A. His units occupy all building/village hexes considered part of the village according to the village boundary at the time control is being decided.
- B. His forces alone occupy that part of the village which is not empty.
- C. The village is entirely empty of units and his forces were the last to pass through any of its hexes.
In all other cases, the village is either contested or in enemy hands.
6.5 "Open" Shingle Breaches
To be considered open for victory purposes, a shingle breach must be opened by the US player using the rules regarding shingle breaches above and the US player must be in possession of the breach.
7.0 Set Up Notes
Definitions:
- w/i X Y = Set up units within X hexes of Y location.
- AT = AT Gun
- C = Carrier
- I = Infantry
- IG = Infantry Gun
- M = Mortar
- MG = Machine Gun
- PB = Pill Box
- T = Tiger
- V = Vehicle
- any(##) = an "any" of size ##
7.0a Losses are removed from units in any manner the owning player chooses. Losses for given units are listed immediately following the unit's hex location in terms of numbers of different kinds of steps. Such as "A/1/16 B23.02 (5I, 1M)" When a number of different units set up with the same instructions, the loss expression is placed just after the unit it affects to avoid confusion.
7.0b Company Morales, unless specifically stated otherwise, begin all scenarios at 0.
7.0c German units always set up second and cannot set up adjacent to any US unit.
7.0d On the 0640 6 June turn, all German units listed under Beach Defenses should be considered dug in. The German player may not move, roll for unit release/reinforcement or call for fire. In effect, the turn starts with the US LCT(R) fires, and then proceeds with the US Action Phase. Once completed, the turn is over.
TCS Addenda—Errata (26 Jun 91)
Oops! The Mortar and AT gun symbols are still switched in the Weapon Unit types diagram on the top of page 3. You-know-who forgot to switch them when the 2nd Ed went to press...
8.9 Overwatch Fires (Simplification addenda, Optional)
To simplify the die roll procedure, add the following to the given rules...
...A roll for Permission to Fire is as follows. On a 5, overwatch fire is allowed by units which are not overwatch marked as desired. On a 6, roll another die. This roll is the number of overwatch marked units that may fire in addition to any non-marked units the player desires to fire. When automatic permission is granted (range 3 or less) a permission roll of 5 can be assumed, but a die must still be rolled and a 6 hit to fire marked units. All other overwatch rules are in effect. The additional roll per overwatch marked unit is dispensed with.
12.5 Mode Change in Movement (Addenda, Optional)
Vehicle and carrier units (only) may change mode during movement. Such units may change mode at a 1/2 cost of their mode change movement allowance. This mode change may be made at any point in their movement as long as the required movement points are still available. Units that are overwatch marked and switch mode have the marker automatically removed. Mode change during the Mode Determination Phase is unchanged.
8.8g Minor Weapons Differences (Optional)
This rule gives life to the minor steps of weapons difference between +2 and -2 on the Point Fire Table. It is not recommended for play, unless a given player is particularly concerned about such things. This rule has no effect on Point Fire Table columns other than +2 to -2.
| Dice Mod \ Attack - Defense | +2 | +1 | 0 | -1 | -2 |
|---|---|---|---|---|---|
| -1 on..... | - | - | 1 | 1-2 | 1-4 |
| 0 on..... | 1-2 | 1-4 | 2-5 | 3-6 | 5-6 |
| +1 on.... | 3-6 | 5-6 | 6 | - | - |
(One Die)
8.0 Teaching Scenarios
The following scenarios are not historical situations. Instead, they are hypothetical and designed to illustrate specific rules concepts in order to assist players in learning the game system. Each should take no more than an hour or two to play. Each scenario lists the rules sections it highlights. If a given rules section is mentioned, such as 12.0, all sections of 12 are in use, not just the introduction, 12.0.
All teaching scenarios require the following sections: 1.0 to 1.3h, 3.0 to 3.6b, 4.0 to 4.2, 5.0 to 5.1d, 8.0 to 8.8e, 12.0 to 12.1f. None of them require the command rules (6.0) and it is recommended that these rules not be used at first, so that new players can concentrate on the game's mechanical aspects.
Weather is clear and trafficability good in all these scenarios.
Teaching Scenario 1. Armor Fight
- Map Area: C35.35 to C35.20 to C49.20 to C49.35, inclusive.
- Start: 0800
- End: 1000 (7 turns)
- Artillery: None
- Set Up:
- US: A/745 w/i 3 C35.26
- German: 1/1/352 PJ, 2/T 130/Pz Lehr east of C37.xx, inclusive.
- Reinforcements: None
- Rules Illustrated: 8.9, 14.0 (if desired)
- Victory:
- US: Exit 9 or more tanks via C49.26
- German: Avoid the above and lose no more than 5 vehicles.
Teaching Scenario 2. Infantry Fight
- Map Area: C1.35 to C1.20 to C20.20 to C20.35, inclusive.
- Start: 0800
- End: 1100 (10 turns)
- Artillery: None
- Set Up:
- US: 3/26 w/i 5 C16.34 or C20.20
- German: 5/2/916 w/i 3 C6.25
- Reinforcements: None
- Rules Illustrated: 9.0, 13.0 (if desired)
- Victory:
- US: Occupy all red village hexes of Formigny.
- Draw: Neither side fills its conditions
- German: Occupy all red village hexes of Formigny.
- Shift: Shift victory one level in favor of the Germans if 3 or more US units eliminated.
Teaching Scenario 3. Armor Overrun Assault
- Map Area: Same as #2
- Start: 0800
- End: 0900 (4 turns)
- Artillery: None
- Set Up:
- US: I &R/16 (one platoon) C15.30
- German: 2/T 130/Pz Lehr w/i 4 of C6.25
- Reinforcements: None
- Rules Illustrated: 8.9, 8.10, 9.0, 14.0
- Victory:
- US: Avoid the German conditions and kill at least one tank.
- Draw: Neither side fills its conditions.
- German: Destroy the US unit.
Teaching Scenario 4. Forward Observer
- Map Area: D31.35 to D31.25 to D51.25 to D31.35, inclusive.
- Start: 0800
- End: 0900 (4 turns)
- Artillery:
- US: 1/62 Arm FA Bn (8 x155mm) Ammo: 15—HE No called fire delay.
- German: None
- Set Up:
- US: An unseen spotter (not physically on the map) is in hex D40.30
- German: 1/1/915 w/i 1 D35.27
- Reinforcements: None
- Rules Illustrated: 9.0, 10.0, 11.0
- Victory:
- US: Destroy 6 or more German steps or make the German company morale exceed 10.
- German: Avoid the above.
Teaching Scenario 5. Minefield Assault
- Map Area: A47.25 to A47.15 to A41.15 to A47.25, inclusive.
- Start: 0700
- End: 1100 (13 turns)
- Artillery: None (as an option, give each side one battery (6x105mm) with 10—HE, 3—Smoke and no called fire delays.)
- Set Up:
- US: E/2/16, F/2/16, 1xM(81) from H/2/16: all north of the Shingle.
- German: 2 xPB(75), 2x PB Sqd, 3x Rocket Pit, 1x M(120) from 4/1/726: PB's in designated PB hexes, all others south of the xx.19 hex line, inclusive.
- Note: All hexes of the obstacle line have been probed and have been found to be real minefields.
- Reinforcements: None
- Rules Illustrated: 9.0, 13.0, 15.0
- Victory:
- US: Create at least 2 minefield breaches.
- Draw: Neither side fulfills its conditions.
- German: Avoid the US conditions and destroy at least 10 US steps.
Teaching Scenario 6. Jabos!!
- Map Area: All of Map C.
- Start: 0800
- End: 1000 (7 turns)
- Artillery: None
- Set Up:
- US: None. The US Player gets 3x A-20's per turn armed as desired. See 2.10
- German: 1/130/Pz Lehr: in any clear or village hex on Map C.
- Reinforcements: None
- Rules Illustrated: 17.0 (also take note of air rules in 2.10.)
- Victory:
- US: Destroy 7 or more tanks
- German: Avoid the above.
9.0 Main Scenarios
Scenario 1. The Sixth of June
Balance: +1
One of the most dramatic aspects of the Normandy invasion was the drama played out on the beaches themselves. The forces coming ashore at Omaha met the fiercest initial resistance of all five landings and suffered from the most disorganized landing also. With battalions and companies hopelessly intermingled, the US troops still managed to retain enough initiative and effectiveness to start the drive inland—though the "success" on June 6th still appeared quite precarious.
- First Turn: 0640 6 June
- Last Turn: 2200 6 June (47 turns)
- Maps in Play: All
US Information
Set Up: The US player follows the landing procedures described in this book to lay out his waves. These then land at the times given. The forces chosen by the player constitute the troops he has and will have available. He may use the historical landing plan or devise his own, as desired.
Artillery:
- LCT(R)—Four LCT(R) fires are available for use in the 0640 game turn.
- Naval Gunfire—Available as per the Naval Gunfire rules in this booklet.
- Regular Artillery—As landed, these units become available. Ammunition is calculated as per rule 2.9 in this book.
Reinforcements: US reinforcements are based on the player's own landing plan in the initial waves and the follow-on transport landings.
Implemented Op Sheets? Yes, if player chooses to do so, must be tied to a specific beach sector and drawn before the game.
US Special Rules: The leader rules are in effect for this scenario.
German Information
Set Up:
- Beach Defenses (all are released)—
- 15 xPB(50), 8 xPB(75), 4 xPB(88): in fortified zone hexes, max one per hex
- 10 x Rocket Pit, 4/1/726, 3/1/726: anywhere w/i 10 Shingle (landward side)
- 1/1352: w/i 10 C28.19
- 3/1352: w/i 10 D9.27.
- Historical Note: Optional historical set up: 3/1/726 w/i 10 Colleville, 4/1/726 w/i 10 Port en Bessin.
- Other Units (not yet released)—
- AT/1 Flak: w/i 5 C10.15
- 5/3/1 Flak: w/i 5 C29.04
- 4/3/1 Flak: w/i 5 D11.03
- 2/916, 1xIG(75) of 13/916, Recn/916, 1xAT(75): w/i 10 C11.33.
Artillery: 1/1352 and 3/1352 are available at start, other batteries must be released via the Variable Reinforcement Table. Ammo, at start: 105mm: 100—HE, 10—Smoke, 5—Illum. Additional ammo is added as batteries are released.
Reinforcements: All German reinforcements are from the following Variable Reinforcement Table.
Variable Reinforcement Table
| Dice | Result |
|---|---|
| 2-8 | No Effect |
| 9-10 | Company/Battery Release |
| 11-12 | Variable Reinforcement, see below |
Reinforcements
| Dice | Result |
|---|---|
| 2 | KG Meyer (915 (all), Fus/352) |
| 3-4 | 1/916 |
| 5-6 | 1/352 PJ |
| 7 | Ersatz/352 |
| 8-9 | 1/915 |
| 10 | Pio/352 |
| 11 | 517/30 Mob |
| 12 | 30 Mob (all) |
Implemented Op Sheets? Yes
Historical Orders (optional): All units listed under beach defenses are in a prepared defense of the beach, except 3/1/726 and 4/1/726 which are in reserve with instructions to counterattack to recapture lost pill box positions. All unreleased on-map forces are in reserve, but may never roll for commitment until they are released.
German Special Rules: Release of 2/916—Whenever the German player uses a company release on 2/916 (treat the battalion weapons (8/2/916) as a single company for this purpose) he must roll one further die. On a 1-3, the unit is activated normally. On a 4-6, that company is removed from play immediately. In the latter case, the unit is considered to have moved off-map to fight the landings of the 29th ID near Vierville.
Victory Conditions
- Massive US: Control all red village hexes on maps A & B, and the villages of Formigny, Surrain, La Chateau Rouge, La Ville, Bellefontaine. All shingle breaches must be open. No German unit is within 20 hexes of the Shingle.
- Major US: Control all red village hexes on maps A & B. All shingle breaches must be open. No German units can be within 15 hexes of the shingle west of the B36.xx hexrow.
- Minor US: Control at least 5 of the following: St. Laurent, Les Moulins, Le Bray, Colleville, Le Grande Hameau, St. Honerine des Pertes, Cabourg 2, Chateau D'Eau, or Huppain. No German units can be within 10 of the shingle west of hexrow B36.xx. At least 4 shingle breaches must be open.
- Draw: No US or German conditions have been met.
- Minor German: The Germans hold at least 5 of the villages listed in the US Minor conditions above.
- Major German: The Germans hold at least 6 of the villages named above. No more than 3 shingle breaches are open.
- Massive German: No US troops are south of the shingle.
Shifts:
- 1 shift in favor of the Germans if 110 to 199 US units are eliminated.
- 2 shifts in favor of the Germans if 200 or more US units are eliminated.
Scenario 2. The Landings
Balance: 0
This scenario focuses exclusively on the landings of the 1st Infantry Division, covering the landings themselves and the initial scramble to get off the beaches on June 6th.
- First Turn: 0640 6 June
- Last Turn: 1800 6 June (35 turns)
- Maps in Play: A and B, only.
US Information: See scenario 1.
German Information
Set Up: Beach defense units: as per scenario 1. Do not use those units listed as "Other units (not yet released)"
Artillery: Same as scenario 1, except no Illum rounds are available.
Reinforcements: All German reinforcements are from the following Variable Reinforcement Table.
Variable Reinforcement Table
| Dice | Result |
|---|---|
| 2-9 | No Effect |
| 9-10 | Table 1 below |
| 11-12 | Table 2 below |
(Printed as shown in the rulebook; the 9 appears in both the first and second rows.)
Table 1
| Die | Result |
|---|---|
| 1-3 | Any one battery may be released |
| 4 | Any one company of 2/916 |
| 5 | 4/3/1 Flak |
| 6 | No effect. |
Table 2
| Die | Result |
|---|---|
| 1-2 | Ersatz/352 |
| 3 | Pio/352 |
| 4 | 1/352 PJ |
| 5-6 | 1/915 |
Note: Units listed on these tables not available for on-map release, enter as reinforcements.
Historical Orders (optional): see scenario 1.
German Special Rules: None
Victory Conditions
- Massive US: Control St. Laurent, Colleville, Le Bray, Chateau D'Eau, Huppain, Villers sur Port, Le Grand Hameau, and Cabourg 2. No German units can be within 10 hexes of the shingle west of hexrow B36.xx. At least 6 shingle breaches must be open.
- Major US: Control at least 6 of the 8 towns above. No German unit can be within 5 hexes of the shingle west of hexrow B36.xx. At least 5 shingle breaches must be open.
- Minor US: Control at least 4 of the above villages. At least 4 shingle breaches must be open and no German unit is at or within 5 hexes of any of the breaches counted as open.
- Draw: Neither the German nor American conditions have been met.
- Minor German: US player controls 4 or less of the above villages. No more than 3 shingle breaches may be open.
- Major German: US player controls 3 or less villages. No more than 2 shingle breaches are open.
- Massive German: No US units are south of the shingle.
Shifts:
- 1 shift in the German player's favor if 80 to 124 US units are eliminated.
- 2 shifts in the German player's favor if 125 or more US units eliminated.
Scenario 3. D-Day: The Eastern Beaches
Balance: +2 (with historical landing: 0)
This one map scenario, along with its companion covering the central beaches, is presented to allow players to examine the landings in less time than the full versions would require. Still, one should not forget these are unit-intensive scenarios and will still take time to play.
- First Turn: 0640 6 June
- Last Turn: 1200 6 June (17 turns)
- Maps in Play: Map B, only
US Information
Set Up: The US player sets up his forces according to the US Landing rules with the following landing craft available for the three waves:
| Boat | Wave 1 | Wave 2 | Wave 3 |
|---|---|---|---|
| LCA | 6 | 14 | 12 |
| Rhino | 0 | 3 | 1 |
| LCT | 2 | 0 | 1 |
| Dukw | 0 | 7 | 6 |
All units that scatter off map B are removed from play and may not return. Such units are not considered eliminated for victory purposes. Ignore any concerns about units scattering onto map B, as such drift has been taken into account when using the above boat allowances. Do not set up forces in map A beach boxes in an attempt to get them to scatter onto the map—it is not going to happen unless playing with the historical variant below.
Alternatively, the player may elect to use the historical landing plan and deploy the forces listed for Fox Green. When using this variant, roll for scatter for units on Easy Red (even though they are not on the map) to see if they accidently land in play. If such units do so, scatter them on landing like any other unit, and they remain in play from that point. Units which drift off map B are still removed from play.
Artillery:
- LCT(R)—The US player is allowed one LCT(R) fire on the first game turn.
- Naval Gunfire—Starting with the 1000 turn, one destroyer fire mission is available on every other game turn—1000, 1040, 1120, 1200, etc.
- Regular Artillery—Must be landed in the assault waves above. Consult the rules in this booklet concerning their ammunition available.
Reinforcements: All US troops not landing in the assault waves arrive via transport landings. On the 1000 turn, the US player has 3 x LCT available. On the 1100 turn, he has 1 x LCI and 2 x LCT. No transports are available on the 1200 turn. When using the historical variant, only those units listed as transport landings may enter as transport landings.
Implemented Op Sheets? Yes, if player chooses to do so, must be tied to a specific beach sector and drawn before the game.
US Special Rules: US leader rules are in effect for the entire scenario.
German Information
Set Up:
- Beach Defenses (all released)—
- 7 x PB(50), 3 x PB(75), 1 x PB(88): in any fortified zone hex, max one per hex.
- 5 x Rocket Pits, 3 x PB Sqd, 4/1/726: anywhere w/i 10 the shingle, landward side only.
Artillery: 3/1352 is released. Other batteries require release via the Variable Reinforcement Table.
Ammo, at start: 105mm: 50—HE, 5—Smoke. Additional ammo is added as batteries are released.
Reinforcements: All German reinforcements are from the following Variable Reinforcement Table.
Variable Reinforcement Table
| Dice | Result |
|---|---|
| 2-9 | No Effect |
| 10 | Table 1 below |
| 11-12 | Table 2 below |
Table 1
| Die | Result |
|---|---|
| 1-3 | Any one battery may be released |
| 4 | Any one company of 2/916 |
| 5 | 4/3/1 Flak |
| 6 | No effect. |
Table 2
| Die | Result |
|---|---|
| 1-2 | Pio/352 |
| 3 | 1/352 PJ |
| 4-6 | 1/915 |
Implemented Op Sheets? Yes.
Historical Orders (optional): All units listed under beach defenses are in a prepared defense of the beach, except PB Sqd's and 4/1/726 which are in reserve with instructions to counterattack to recapture lost pill box positions. All unreleased on-map forces are in reserve, but may never roll for commitment until they are released.
German Special Rules: None
Victory Conditions
- Massive US: All red village hexes controlled, including all of Villers sur Port and Chateau D'Eau. The US player must exit at least 10 infantry or mortar platoons via route D 97 or D 206 maintain a Line of Communication to them. All shingle breaches must be open and no German unit is within 10 hexes of the shingle.
- Major US: Control Le Grand Hameau, St. Honerine Des Pertes, and Huppain. All shingle breaches must be open. No German units are within 10 hexes of the shingle west of 30.xx.
- Minor US: Control 2 of the above villages and 3 shingle breaches must be open. No German units are within 10 hexes of the shingle west of 30.xx.
- Draw: No US or German conditions have been met.
- Minor German: At least 5 units are within 10 hexes of the shingle west of 30.xx hexrow.
- Major German: Control 2 of the villages named above and at least 5 units are within 10 hexes of the shingle west of 30.xx hexrow.
- Massive German: Control all of the villages named above and no more than one shingle breach is open.
Shifts:
- 1 shift in the US favor if using the historical landing plan.
- 1 shift in the German favor if 35 to 49 US units eliminated
- 2 shifts in the German favor if 50 or more US units eliminated
Scenario 4. D-Day: The Central Beaches
Balance: +2
This is a companion scenario to #3, focusing on the central beach sectors of Omaha. Historically, these beaches (Easy Red, Easy Green, and Dog Red) were the scene of the major advance inland on D-Day, and most of the transport landings occurred here in support of that drive. Players should especially note the differences between the historical landing plan here and that used for the beaches in scenario 3.
- First Turn: 0640 6 June
- Last Turn: 1200 6 June (17 turns)
- Maps in Play: Map A, only.
US Information
Set Up: Use the rules presented in scenario 3 plus the changes due to the beaches and maps used here (Dog Red, Easy Red, Easy Green and map A, as opposed to Fox Green and map B) and following for scenario 4.
| Boat | Wave 1 | Wave 2 | Wave 3 |
|---|---|---|---|
| LCA | 6 | 15 | 12 |
| Rhino | 0 | 3 | 2 |
| LCT | 2 | 0 | 2 |
| Dukw | 0 | 8 | 6 |
Artillery:
- LCT(R)—Three LCT(R) fires are available for use on the first turn.
- Naval Gunfire—Starting with the 1020 turn, one destroyer fire mission is available every other turn—1020, 1100, and 1140.
- Regular Artillery—see scenario 3
Reinforcements: Same as scenario 3 except:
| Turn | LCI's | LCT's |
|---|---|---|
| 1000 | 1 | 2 |
| 1100 | 0 | 3 |
Implemented Op Sheets? Yes, if player chooses to do so, must be tied to a specific beach sector and drawn before the game.
US Special Rules: US leader rules are in effect for the entire scenario.
German Information
Set Up:
- Beach Defenses (all released)—
- 8 x PB(50), 5 x PB(75), 3 x PB(88): any fortified zone hex, max one per hex
- 5 x Rocket Pit, 3/1/726: anywhere w/i 10 the shingle, landward side.
Artillery: 1/1352 is released. Other batteries require release via the Variable Reinforcement Table. Ammo, at start: 105mm: 50—HE, 5—Smoke. Additional ammo is added as batteries are released.
Reinforcements: All German reinforcements are from the following Variable Reinforcement Table.
Variable Reinforcement Table
| Dice | Result |
|---|---|
| 2-9 | No Effect |
| 10 | Table 1 below |
| 11-12 | Table 2 below |
Table 1
| Die | Result |
|---|---|
| 1-3 | Any one battery may be released |
| 4 | Any one company of 2/916 |
| 5 | 4/3/1 Flak |
| 6 | No effect. |
Table 2
| Die | Result |
|---|---|
| 1-2 | Ersatz/352 |
| 3 | 1/352 PJ |
| 4-6 | 1/915 |
Implemented Op Sheets? Yes.
Historical Orders (optional): All units listed under beach defenses are in a prepared defense of the beach, except 3/1/726 which is in reserve with instructions to counterattack to recapture lost pill box positions. All unreleased on-map forces are in reserve, but may never roll for commitment until they are released.
German Special Rules: None
Victory Conditions
- Massive US: Clear map A of German units and exit 30 or more infantry/mortar units via routes D 208 and/or D 517. All exited units must have a line of communications.
- Major US: Control Colleville, Le Bray, and St. Laurent. All shingle breaches must be open. No German unit can be closer than 10 hexes of the shingle.
- Minor US: Control either Colleville or St. Laurent. At least 2 shingle breaches must be open. No more than 10 German units may be closer than 10 hexes of the shingle.
- Draw: Neither side meets one of its conditions.
- Minor German: 11 or more German units within 10 hexes of the shingle and no more than 1 shingle breach open.
- Major German: Control both Colleville and St. Laurent as well as meeting the conditions for a German minor victory.
- Massive German: No more than 15 US units of any type south of the obstacle line.
Shifts:
- 1 shift in the German favor if 55 to 74 US units eliminated.
- 2 shifts in the German favor if 75 or more US units eliminated.
Scenario 5. Getting Inland: The Afternoon of D-Day
Balance: +1
This scenario covers the period directly following the landings, as US troops started to make headway off the beaches. The initial penetrations were critical to the overall success of the operation because reinforcements and supplies couldn't continue being dumped on the beach if they were still under direct or indirect German fires. Players who wish to bypass the landings may wish to pick up the action here, just afterwards. This scenario can be ended at either nightfall on June 6th or be continued as an alternate start for the campaign game.
- First Turn: 1000 6 June
- Last Turn: 2200 6 June (37 turns) or 1200 8 June (119 turns)
- Maps in Play: All
US Information
Set Up: All units set up at or within 2 hexes of the listed hex.
16 RCT—
- A/1/16: A30.25 (5I, Company Morale (CM)=6)
- B/1/16: A37.24 (2I, 1M, CM=3)
- C/1/16: A26.26 (4I, CM=4)
- D/1/16: A28.26 (2MG, 1M, 3AT, CM=8)
- E/2/16: A31.26 (5I, CM=3)
- F/2/16: A34.24 (6I, 1M, CM=8)
- G/2/16: A30.20 (4I, CM=2)
- H/2/16: A40.23 (3MG, 1M, 1AT, CM=6)
- I/3/16: A34.20 (4I, 1M, CM=2)
- K/3/16: A46.19 (5I, 2M, CM=2)
- L/3/16: A44.20 (4I, CM=1)
- M/3/16: A48.22 (4MG, 2M, 2AT, CM=10)
- I&R/16: B7.24 (4I)
- 2x 16AT(57): B1.24
- 3x 16AT(57): A27.26
- 5x 16Truck: A30.26
116 RCT—
- E/2/116: A28.24 (5I, 2M, CM=7)
- F/2/116: A17.25 (6I, 1M, CM=6)
- G/2/116: A14.28 (4I, 1M, CM=4)
- H/2/116: A11.29 (4MG, 2M, 2AT, CM=7)
- I/3/116: A17.28 (1I, CM=1)
- K/3/116: A21.27 (1I, CM=1)
- L/3/116: A19.25 (2I, 1M, CM=3)
- M/3/116: A23.27 (1MG, 1M, 1AT, CM=5)
18 RCT—
- E/2/18: A31.27
- F/2/18: A43.24
- G/2/18: A40.24
- H/2/18: A44.23
- I&R/18: B2.24
115 RCT—
- A/1/115: A29.27
- B/1/115: A37.25
- C/1/115: A44.24
- D/1/115: A35.25
- E/2/115: A26.27
- F/2/115: B13.24
- G/2/115: A48.23
- H/2/115: A24.27
Other units—
- B/635 TD: B5.24 (2C, 4AT, 3I, CM=6)
- A/81 Chem: A46.23 (2M, 1C)
- C/81 Chem: B3.24 (1M, 1C)
- 7 FA Bn: A41.24 (6 guns)
- A/197 AA: A22.27 (3V)
- B/197 AA: A41.23 (4V)
- C/197 AA: B12.23 (3V)
- A/467 AA: A42.24 (3V)
- A/741 Tk Bn: w/i 5 A33.25 (7V)
- B/741 Tk Bn: w/i 2 A24.26 (14V)
- C/741 Tk Bn: w/i 3 A46.22 (13V)
The following leaders set up with any unit of their command: LTC Horner, LTC Hicks, BG Wyman, COL Taylor, LTC Meeks
Gaps in the Obstacle Line: (all are inclusive of end hexes)
- A15.24 to A21.25
- A27.24 to A34.22
- A43.21 to A49.30
Artillery:
- Naval Gunfire—Normal one fire mission per turn.
- Regular Artillery—7th FA is ready to fire, other batteries may be landed via further transport landings.
- Ammo: 105mm: 30—HE, 4—Smoke, 1—Illum. Further ammo added according to the US Special rules in this booklet.
Reinforcements: All reinforcements are brought on by transport landings with the first at 1000 6 June. Units and landing location for this first transport landing must be designated before the game.
Implemented Op Sheets? None
US Special Rules: The leader rules are in effect until 1200 6 June.
German Information
Set Up:
- Beach Defenses (all released)—
- PB(88): A6.25, B2.21, and B45.22
- PB(75): A8.27, A11.24, A24.21, B8.21, B19.22
- PB(50): A12.26, A40.20, B4.21, B10.21, B16.21, B23.20, B31.22, B48.22
- PB Sqd's: A22.24, A27.23, A49.16
- 4/1/726: w/i 15 B40.15
- 3/1/726: w/i 5 A39.10 (3I)
- 1/1352 Arty: w/i 10 C28.19
- 3/1352 Arty: w/i 10 D9.27
- Other Forces (not yet released)—
- 5/2/916, 6/2/916, 1x IG/13/916, 1x AT/14/916: w/i 10 C6.25
- AT/1 Flak: w/i 5 C10.15 (2AT, 1C)
- 4/3/1 Flak: w/i 5 D11.03 (2 guns)
- 5/3/1 Flak: w/i 5 C29.04 (1 gun, 1C)
Artillery: Batteries released to fire: all/1/1352, all/3/1352, 10/1716
Ammo:
- 105mm: 50—HE, 10—Smoke, 3—Illum
- 155mm: 60—HE, 7—Smoke, 2—Illum
Ammo added during the game as per the German Special Rules in this booklet.
Reinforcements: All German reinforcements are from the following Variable Reinforcement Table.
Variable Reinforcement Table
| Dice | Result |
|---|---|
| 2-8 | No Effect |
| 9-10 | Company/Battery Release |
| 11-12 | Variable Reinforcement, see below |
Reinforcements
| Dice | Result |
|---|---|
| 2 | KG Meyer (915 (all), Fus/352) |
| 3-4 | 1/916 |
| 5-6 | 1/352 PJ |
| 7 | Ersatz/352 |
| 8-9 | 1/915 |
| 10 | Pio/352 |
| 11 | 517/30 Mob |
| 12 | 30 Mob (all) |
Implemented Op Sheets? Yes.
Historical Orders (optional): see scenario 1.
German Special Rules: see scenario 1.
Victory Conditions: Same as scenario 1. 95 US units have been eliminated prior to the game, and they do count for German victory level shifts.
Alternative Situations:
- A. Extended Play (A shortened version of the campaign game). All of the scenario 5 rules are in effect except the victory conditions. Use the victory conditions from scenario 8 instead.
- B. Two Map version. Use only maps A & B. Ignore any set ups listed for maps C & D. Use the Variable Reinforcement Table and victory conditions from scenario 2. This version of the scenario ends at 1800 6 June.
- C. One Map version. Use only map A. Ignore set ups and information for maps B, C, & D. Reinforcements and victory conditions are those from scenario 4.
Note: Even in these cases, the 95 dead US units still count toward German victory shifts. In version C, this will put a heavy burden on the US player to achieve any sort of victory.
Scenario 6. The Seventh of June
Balance: +4
Following the landings the day before, the Americans prepared to drive inland in order to secure objectives which were to have been secured by follow-up forces during D-Day itself. By the morning of D+1, most of the 1st ID was ashore and a massive traffic jam filled the beaches. This day long scenario covers the efforts to seize the D-Day objectives in the face of a disorganized German resistance.
- First Turn: 0600 7 June
- Last Turn: 2200 7 June (48 turns)
- Maps in Play: all
US Information
Set Up:
- 1/16: w/i 4 C36.35 (23I, 4M(60), 3MG, 2M(81), 3AT)
- 2/16 (less G/2/16): w/i 3 A37.09 (27I, 3M(60), 3MG, 1M(81), 1AT)
- G/2/16: w/i 2 A42.02 (11I, 1M)
- 3/16: w/i 4 B7.15 (28I, 4M(60), 3MG, 2M(81), 2AT)
- AT/16, I&R/16: with any of the above (4I, 6AT)
- 1/18: w/i 3 A23.11 (9I, 1M(60), 1MG)
- 2/18: w/i 3 A46.06 (11I, 2MG)
- 3/18: w/i 2 A30.08 (7I, 1MG)
- 1/26, I&R/26: w/i 3 A41.18
- 2/26: w/i 2 A30.17
- 3/26: w/i 2 A27.14
- 1/115: w/i 2 A12.08 (4I, 1M(60), 2MG)
- 2/115: w/i 2 A16.14 (5I, 1MG)
- 3/115: w/i 2 A22.16
- 2/116, 3/116: w/i 5 A14.20, on or west of D517
- 2/116—(34I, 5M(60), 3MG, 3M(81), 3AT)
- 3/116—(23I, 4M(60), 4MG, 2M(81), 3AT)
- B/745: w/i 5 A26.15 (3V)
- 741 Tank Bn (less D Co.): w/i 5 A18.18 (42V)
- Cannon/18: w/i 5 A29.20
- 62 FA Bn: w/i 5 A25.23 (2 guns)
- 5 FA Bn: w/i 5 A20.20
- 7 FA Bn: w/i 5 A30.25 (6 guns)
- 32 FA Bn: w/i 5 A18.15 (2 guns)
The following may set up on any Easy Red or Fox Green beach sector, seaward of the shingle: 81 Chem (3M, 2C), 2 x 16 Rgt Trucks, 197 AA (17V), 18 Rgt Trucks, AT & I&R, 26 Rgt Trucks, AT & Cannon Co., 745 Tank Bn (less B/745), B/635 TD (3C, 5AT, 3I), D/741 Tank Bn, 115 Rgt AT & I&R, A/467 AA (4V)
Artillery: The batteries listed in the set up are available to fire. Further batteries may be landed in future transport landings and will become available as they do.
Ammo:
- 105mm: 145—HE, 30—Smoke, 10—Illum
- 155mm: 58—HE, 8—Smoke, 4—Illum
Additional ammo is provided as batteries land and on the first turn (0600) add the 0600 7 June allotment to the US pool.
Reinforcements: The following are available to land in future transport landings. Other units, not listed here or in the set up are considered destroyed and may not be used.
- 4042 QM Truck Co
- 33 FA Bn
- 186 FA Bn
- 115 Rgt Trucks, and Cannon Co./115
Implemented Op Sheets? None
US Special Rules:
- All units attached to the 29th ID must exit the map along the west edge of either maps A or C by 1200 7 June, or the US player forfeits the game.
- The US Overdraft replacements show up at 1200 7 June, see the rules regarding them in this booklet.
German Information
Set Up: (all are released)
- AT/1 Flak (2AT, 1C), Ersatz/352: Anywhere on map C, west of the C30.xx hexrow.
- 6/2/916, 1x AT/14/916, 1x IG/13/916: w/i 3 A5.15 (6I)
- 5/2/916: w/i 5 C6.25
- 2x PB Sqd: w/i 5 A4.25
- 4/1/726, 2x PB Sqd: w/i 5 B19.15 (5MG)
- 3/1/726, 2x PB Sqd: w/i 3 A41.11 or A45.12 (8I, CM=4)
- 2/915, 1/352 PJ: w/i 10 D9.33 (8I)
- 3/352 PJ: w/i 10 C28.20
- 5/3/1 Flak: w/i 10 C43.20 (1 gun, 1C)
- 4/3/1 Flak: w/i 10 D14.30 (2 guns)
- 1/1352: w/i 10 C28.19
- 3/1352: w/i 10 D9.27
- 1x PB(88): A6.25
- 1x PB(88), 1x PB(75), 4x PB(50): 1 each in hexes B48.22, B45.22, B31.22, B23.22, B19.22, B16.21.
Artillery: All batteries are available at start. On map A, Germans may only choose as TRP's hexes which are either major road intersections (two major roads joining in the hex) or red village hexes.
Ammo:
- 105mm: 100—HE, 10—Smoke
- 150mm: 50—HE, 25—Smoke
- 155mm: 20—HE, 5—Smoke
No further ammunition will become available.
Reinforcements: Roll two dice every hour turn—on a roll of 10 or more, one battalion of the 30th Mob enters as reinforcements (German player's choice of Bn.) On the second successful one of these rolls, the 30 Mob units enter in addition to a battalion. Once all three 30 Mob battalions enter the map, no further reinforcements are available.
Reinforcement Orders (Optional)—The above units may enter the game with an implemented Op sheet to proceed to a player-specified village on map C or D and enter a hasty defense. One Op sheet per battalion is used in this case. These Op sheets automatically fail if, on approach to the village, it is found to be occupied by any US units—in other words, these Op sheets do not allow the battalion to attack to take its defensive area.
Implemented Op Sheets? Yes
Historical Orders (optional): German units are in hasty defenses with orders to defend in place.
Victory Conditions
- Massive US: Control all of the following: Trevieres, Mosles, Tour en Bessin, and Formigny. There can be no German units within 25 hexes of the shingle on beach sectors of Dog Red to Fox Green, inclusive.
- Major US: Same as above, except only two villages need be captured.
- Minor US: There are no German units on map A and B. The US player has control of Formigny or has at least 35 steps of infantry south of the L'Aure River.
- Draw: Neither side meets one of its conditions.
- Minor German: Control Formigny and no US infantry is south of the L'Aure.
- Major German: The US player controls none of his objectives on maps C and D. The Germans have at least 10 infantry units on maps A or B.
- Massive German: Same as Major German, except the Germans have 20 infantry units on maps A or B.
Shifts:
- 1 shift in the German favor if 35 to 74 US units eliminated.
- 2 shifts in the German favor if 75 or more US units eliminated.
- Do not count losses prior to the beginning of this scenario.
Scenario 7. Night Assault on Formigny
Balance: 0
By the end of June 7th, most of the D-Day objectives were in American hands. Still, a few scattered pockets of resistance proved troublesome to eliminate. Most notable among them was Formigny—where the day's advance had been halted early. Plans were conceived for a night attack with elements of 1/18 and B/745 Tank attacking from the southeast while 3/26 attacked due south. Coordination difficulties resulted in a piecemeal effort from both pincers and Formigny remained in enemy hands until the morning of June 8th.
- First Turn: 2300 7 June
- Last Turn: 1200 8 June (26 turns)
- Maps in Play: Map C only—in the boundaries: C1.35 to C20.35 to C20.15 to C1.15. Any unit forced outside this area may not return, but does not count for victory purposes.
US Information
Set Up:
- 3/26: w/i 5 C16.34 (5I)
- B & D/1/18 (less AT/D/1/18) (3I), B/745 Tank Bn (5V): w/i 5 C19.18
Artillery: 5 FA Bn (only) is available to fire. It is at full strength. Ammo: 105mm: 50—HE, 15—Smoke, 7—Illum. No other batteries or ammunition will become available.
Reinforcements: None
Implemented Op Sheets? None (yes, that means they need to spend quite a while getting ready!)
German Information
Set Up: 1/Ersatz (3I), 5/Ersatz (2M), 2x AT(88) AT/1 Flak, 1x Truck AT/1Flak, 5/2/916 (4I): w/i 5 C6.25
Artillery: 1/4/352 and 2/3/1352 are available to fire. Note the called fire delay in the German Special rules in this booklet for 4/352 (CFD=2.)
Ammo:
- 105mm: 25—HE, 7—Smoke, 5—Illum
- 150mm: 15—HE, 5—Smoke, 1—Illum
No other batteries or ammunition will become available.
Reinforcements: None
Implemented Op Sheets? Yes, but no prepared defenses.
Historical Orders (optional): Hasty defense of Formigny.
Victory Conditions
- Major US: Control Formigny and hex C6.22 by 0600 8 June.
- Minor US: same as above except by 1200 8 June.
- Draw: Neither side's conditions are met.
- Minor German: Control either Formigny or hex C6.22 at the end of the game.
- Major German: Possible only through shifts, see below.
Shifts:
- 1 shift in the US favor if 6 or more US units eliminated.
- 1 shift in the German favor if 10 or more US units eliminated.
Scenario 8. The Campaign Game: The Big Red One
Balance: +1
This scenario covers the first three days of the Normandy invasion on the 1st ID's sector of Omaha Beach. Players can follow a strictly historical version or mix the various options to suit their taste. Feel free to experiment. This is truly a monster game and one we hope conveys some of the feeling of hitting the beach in June of 1944. Good luck, oh brave souls who play this one all the way through!
- First Turn: 0640 6 June
- Last Turn: 1200 8 June (129 turns)
- Maps in Play: all
US Information: Follow the same rules as scenario 1.
German Information: Follow the same rules as scenario 1.
Victory Conditions
The following villages are used for victory determination:
- Map A—Colleville sur Mer, Le Bray, St. Laurent sur Mer, St. Clair
- Map B—Port en Bessin, Huppain, Villers sur Port, St. Honorine des Portes, Le Grand Hameau, Cabourg #1
- Map C—Formigny, Trevieres, Surrain, La Beufrerie, Le Chateau Rouge
- Map D—Mosles, Tour en Bessin, Le Calvaire, La Ville, Etreham, Belle Fontaine
(21 villages in all)
- Massive US: Control 19 or more villages. All shingle breaches are open. No German units within 25 hexes of the shingle. CONDITIONS MUST BE MET BY 0600 7 JUNE.
- Major US: Same as above, except conditions met by 2200 7 June.
- Minor US: Control 15 or more villages. All shingle breaches open. No German units within 25 hexes of the shingle. Conditions are met by the end of the game.
- Draw: Neither side fills one of its conditions.
- Minor German: Control 9 villages. At least 15 German units are within 15 hexes of the shingle. Meet conditions at the end of the game.
- Major German: Control 12 villages. At least 20 German units are within 15 hexes of the shingle. Meet conditions at the end of the game.
- Massive German: Control 15 villages. At least 30 German units are within 15 hexes of the shingle. Meet conditions at the end of the game.
Shifts:
- 1 shift in the US favor if 54 to 107 US infantry or mortar units exit off the south edge of maps C & D via any major road hex by the end of the game and these units maintain a line of communications.
- 2 shifts in the US favor if 108 US infantry or mortar units or more exit off the south edge of maps C & D via any major road hex by the end of the game and these units maintain a line of communications.
- 1 shift in the German favor if 135 to 219 US units eliminated.
- 2 shifts in the German favor if 220 or more US units eliminated.
Scenario 9. Panzer Truppen: Panzer Lehr and the Rommel Plan
Balance: -1
When Erwin Rommel assumed command in France, he at once set about revising the previous defensive planning—he found much to be dissatisfied about. One of the Field Marshal's most controversial proposals involved the breakup of the central panzer reserves and station these powerful divisions close to potential invasion beaches. This flew in the face of conventional wisdom—since scattering the central reserves would make a rapid, powerful counterattack impossible. Rommel argued that allied airpower would void this plan anyway and wanted to station at least one mobile unit in each zone to provide the forces needed to stop the enemy at the water's edge.
Ultimately, Hitler compromised between the two camps and sent some panzers to the coast, moved others up a few miles, and provided a smaller central reserve. Rommel was proved correct by the Allied airpower—OKW seriously miscalculated its effect on the movement of forces toward the invasion site—and the Germans never did manage to launch a strong counterattack within the first critical month of the landings.
But what if Rommel had gotten his way? The "Desert Fox's" plan calls for Panzer Lehr to deploy right behind Omaha Beach.
In this variant, elements of Panzer Lehr are available to commit to this sector of the American landings. Other Lehr Kampfgruppen are assumed to be on their way to Vierville and Utah and are not included here. Naturally, the availability of these extra forces would have greatly changed the deployment of the 352nd Division—especially the detachment of the 915th Regiment to act as Corps reserve.
- First Turn: 0640 6 June
- Last Turn: 1200 8 June (129 turns)
- Maps in Play: all (Panzer divisions require beaucoup maneuver room!)
US Information: Same as scenario 1.
German Information
Set Up: Same as scenario 1, except:
- Delete all 916 units (2/916 and some regimental units) from the set up.
- Add the following, all are "yet to be released:"
- 1/915: w/i 10 D34.25
- 2/915: w/i 10 C25.25
- All remaining 915 units: w/i 10 D14.10
Artillery: Same as scenario 1, except add the following: Also available for release: 1/130 Arty/Lehr—12 x 105mm (batteries 1,2,3) no called fire delay.
Whenever a battery of Lehr artillery is released add the following ammo: 105mm: 25—HE, 5—Smoke, 2—Illum
Reinforcements: All German reinforcements are from the following Variable Reinforcement Table.
Variable Reinforcement Table
| Dice | Result |
|---|---|
| 2-6 | No Effect |
| 7-9 | Company/Battery Release |
| 10-12 | Variable Reinforcement, see below |
Reinforcements
| Dice | Result |
|---|---|
| 2-3 | Pio/352 |
| 4 | Ersatz/352 |
| 5 | 352 PJ (all) |
| 6-7 | Fus/352 |
| 8 | 2/916 |
| 9 | any one company 901/Lehr, Rgt troops count as one company. |
| 10 | any one company 130/Lehr |
| 11 | Recon/Lehr |
| 12 | 901/Lehr (all remaining) or 130/Lehr (all remaining)—German player's choice |
Implemented Op Sheets? See scenario 1.
Historical Orders (optional): See scenario 1.
German Special Rules: None
Victory Conditions: Same as scenario 8.
Historical American Landing Plan
This landing plan is provided as a reference to assist the US player in setting up his own landing plan or for those who wish to recreate the historical landings—or simply do not want to bother setting up a landing plan. To use this plan to avoid setting one up before play, place the units listed in the beach boxes named on the turn of the wave in question. Boat groups are those LCA's listed as carrying the same company. Once in the beach box, land normally. This method will avoid extensive pre-game set up as would be required of the player who wants to establish his own landing plan—at the cost of a good bit of surprise. Its your choice...
First Wave (0640)
Fox Green—
- 2 LCA: I/3/16
- 2 LCA: L/3/16
- C/741 landing as DD's
Easy Red—
- 2 LCA: E/2/16
- 2 LCA: F/2/16
- 1 LCT: 4x M4 from A/741
- 1 LCT: 4x M4 from A/741
- 1 LCT: 4x M4 from A/741
- 1 LCT: 4x M4 from A/741
- B/741 landing as DD's
Easy Green—
- 2 LCA: E/2/116
Dog Red—
- 2 LCA: F/2/116
Second Wave (0740)
Fox Green—
- 2 LCA: C/1/16
- 2 LCA: K/3/16
- 2 LCA: M/3/16
- 3 LCA: B/635 TD (less carriers)
- 1 Dukw: I&R/16
- 1 Dukw: 2x AT/16
- 1 Dukw: 1x AT/16
- 1 Rhino: C/81 Chem, 2x Trucks/16
- 1 Rhino: 6x C/197 AA
- 1 Rhino: 3x C/197 AA, 3x B/197 AA
Easy Red—
- 2 LCA: A/1/16
- 2 LCA: B/1/16
- 2 LCA: D/1/16
- 2 LCA: G/2/16
- 1 Dukw: 3x MG-H/2/16, 1x AT-H/2/16
- 1 Dukw: 2x M(81)-H/2/16, 1x MG-H/2/16
- 1 Dukw: 2x AT-H/2/16
- 6 Dukw: Cannon/16 (less all carriers)
- 1 Rhino: Carriers for Can/16, 3x Trks/16
- 1 Rhino: 6x B/197 AA
- 1 Dukw: 2x AT/16
- 1 Dukw: 2x AT/16
- 1 Dukw: 2x AT/16
Easy Green—
- 2 LCA: L/3/116
- 2 LCA: G/2/116
- 1 Rhino: 6x A/467 AA
Dog Red—
- 2 LCA: I/3/116
- 2 LCA: H/2/116
- 2 LCA: M/3/116
- 2 LCA: K/3/116
Third Wave (1000)
Easy Red—
- 2 LCA: E/2/18
- 2 LCA: F/2/18
- 2 LCA: G/2/18
- 2 LCA: H/2/18
- 1 Rhino: 2x Trks/16, 4x B/635 TD Halftrks
- 1 Rhino: Trucks/7 FA Bn
- 12 Dukw: Guns/7 FA Bn
- 1 LCT: 5x A/197 AA
- 1 LCT: 4x A/197 AA
- 1 LCT: A/81 Chem, I&R/18
Easy Green—
- 2 LCA: A/1/115
- 2 LCA: B/1/115
- 2 LCA: C/1/115
- 2 LCA: D/1/115
- 2 LCA: E/2/115
- 2 LCA: F/2/115
- 2 LCA: G/2/115
- 2 LCA: H/2/115
- 1 Rhino: 3x A/467 AA
Historical Transport Landings
| Time | Units |
|---|---|
| 1000 6 Jun | 3/115 |
| 1100 | 1/18, Rgt trps/115 (less trks and Can/115) |
| 1200 | 3/18 |
| 1300 | Rgt troops/18, 5 FA Bn |
| 1400 | A/745 Tank Bn |
| 1500 | 62 Arm FA Bn |
| 1600 | B/745 Tank Bn, 1 Platoon/D/745 |
| 1700 | C/745 Tank Bn, 1 Platoon/D/745 |
| 1800 | 1/26, rest of D/745 |
| 1900 | 2/26 |
| 2000 | 3/26 |
| 2100 | Rgt troops/26, 32 FA Bn |
Remaining units appear in any desired order in transport landings on June 7th:
- 4042 QM Truck Co
- 33 FA Bn
- 186 FA Bn
- Rgt troops/115
- Cannon/115
- Recn/1 ID
- D/741 Tank Bn
TCS Line Entry Command System—a Quick Variant
One of the problems of the TCS system is that even the player who is careful about creating only the op sheets he needs will still end up with quite a bit of paperwork to keep track of. While the existing system is an excellent simulation of the way things work in real life, the number of commands under the player's control can quickly overload the player's ability to keep up—especially so without a staff of experts to do parts of the job for him. This is especially true in monsters such as Omaha, so I'll offer a solution to the problem here—the line entry command system. For the full-effect of the command system, I prefer to use the standard version and not this abbreviated one. Some players may want to use this all the time, others might when games require the control of many units.
To be fair, this system was based on a system I saw Dave Powell using in his Omaha playtests. Requirements here, other than an understanding of the original system, are: a sheet of lined paper per side, a pencil, and a little honesty. We all have the first two items, players without the latter should reconsider the type of games they are attempting to play.
This system is vaguely reminiscent of the one used in the CWB series. Basically, one line on the paper is devoted to each battalion task force and assets assigned there. So, the sheet can be filled out before play (line by line) so that less set up work is involved in the game itself. The first entries on the line should be: Base Organization, attached units, size of force. In a game of Omaha it would be best (for the Americans) to make each line correspond to an infantry battalion and assign attached units/figure size after the landing occurs. Otherwise you will spend forever trying to get your task forces together. The rules for attachment and detachment of units remain the same—just switch line entries as needed.
The line looks as follows so far:
1/16/1 w/ 1 Plt A/741 Tnk Size 5
Next comes the honesty part. After the size, on the line, write a very quick statement of the mission of the task force (when, that is, you want to give it one.) Something like: Attack to capture village A. The details of this operation should be kept in mind (or jotted down somewhere if that isn't what you like.) If you need more precision in your orders (so you can follow them or prove to your opponent that you were...) you probably should use the original system and avoid this simplification. Make the order statement part of the line when you wish to assign the mission, such as:
1/16/1 w/ 1 Plt A/741 Tnk Size 5: Attack to capture village A.
During following Command Phases, add up weighted points to the right of the order and make rolls normally. When the order becomes implemented, erase the weighted turns and place a check (✓) after the mission to show this. Conduct the mission as you planned it.
Using this system, an army the size of Omaha's can be managed with a minimum of paperwork—leaving you to fight your battle and have fun. This system, while a simplification of the original, contains many of the most important features while cutting down on "paper sheet confusion."
For detailed battle plans, ones in which the player has some exact idea of how he wants the fight to go (as well as how he wants it done) or in multiple player games, the line entry system is not the right way to do it—in these occasions use the original system. Certainly, a mix of the two methods (to take advantage of the benefits of both) can be done and would be the best way to play.
The variant I'm proposing here is an aid to speed up play and to make big games more manageable. Players who play an Omaha with the full command system are brave souls indeed and should be congratulated. The line entry system will make that game accessible to others (myself included, suffering as I do from fits of laziness when playing games.)
(The page also carries a promotional notice for the "Omaha Beach Club", a just-for-fun recognition club for players who finish the Americans' side through 1200 6 June; it contains no game rules and is not reproduced.)
German Organization of Forces
- 84th Corps
- 1 Flak Corps
- 4/3/1 Flak (10x 20mm AA, 5x Truck)
- 5/3/1 Flak (10x 37mm AA, 5x Truck)
- AT/1 Flak (12x AT(88), 6x Truck)
- 30 Mobile Brigade
- Brigade Troops (2x Wagons)
- 513/30 (9x Inf, 3x 81mm Mort)
- 517/30 (9x Inf, 3x 81mm Mort, 5x R35)
- 518/30 (9x Inf, 3x 81mm Mort)
- 352 Infantry Division (partial)
- 915 Infantry Regiment
- Rgt Troops (2x Inf, 3x AT, 6x IG, 5x Trucks)
- 1/915 (9x Inf, 5x 81mm Mort, 6x MG)
- 2/915 (same as 1/915)
- 916 Infantry Regiment
- Rgt Troops (2x Inf, 3x AT, 6x IG, 5x Trucks)
- 1/916 (9x Inf, 5x 81mm Mort, 6x MG)
- 2/916 (same as 1/916)
- 352 Fusilier Bn (9x Inf, 5x 81mm Mort, 6x MG)
- 352 Pioneer Bn (9x Inf, 3x 81mm Mort)
- 352 Ersatz Bn (12x Inf, 2x 81mm Mort)
- 352 PanzerJager Bn
- 1/352 PJ (14x Marder III)
- 2/352 PJ (10x StuG III)
- 3/352 PJ (8x 37mm AA, 4x Truck)
- 915 Infantry Regiment
- 1 Flak Corps
American Organization of Forces
- 5th Corps
- 4042 QM Truck Co (9x Truck)
- 1st Infantry Division—The Big Red One
- Recon Co (2x Inf)
- 16 Regimental Combat Team
- Rgt Troops (1x Inf, 9x AT, 7x Truck, 1x Cannon Co)
- A & C/81 Chem Mortar Bn (6x 4.2" Mortar, 4x Truck)
- 741 Tank Bn
- A Co. (16x M4)
- B Co. (16x M4DD)
- C Co. (16x M4DD)
- D Co. (16x M3)
- 1/16 (9x Inf, 2x 81mm Mort, 3x 60mm Mort, 4x MG, 3x AT)
- 2/16 (same as 1/16)
- 3/16 (same as 1/16)
- 7 FA Bn (1x Battalion marker)
- 62 Arm FA Bn (1x Battalion marker)
- 197 AA Bn
- A Co. (6x Quad 50, 3x Bofors)
- B Co. (same as A Co.)
- C Co. (same as A Co.)
- B/635 TD Bn (8x AT, 2x Inf, 4x Halftrack)
- 18 Regimental Combat Team
- Rgt Troops (1x Inf, 9x AT, 7x Truck, 1x Cannon Co)
- 745 Tank Bn
- A Co. (16x M4)
- B Co. (same as A Co.)
Players' Notes
American
The U.S. player may set up one of the landing scenarios or the campaign game, and, comparing his landing forces to the thin German line on the ground, proceed to lay plans for a cake-walk. If so, he will be in for a shock. The first few turns of landing are going to generate enormous losses in men and vehicles. Five or six turns into the game an opposite reaction may set in, the down side of earlier overconfidence. To those of you who may declare, at 0840 6 June, that the invasion is impossible and the Allies should have tried the Med., I say wait a bit longer. Watch the reaction your own forces are having on your opponent.
The truth of the matter is that, in the full 2 1/2 day scenario at least, the Americans bring some decided advantages to the fight. The Allied planners expected a hard fight. They allocated plenty of forces to bludgeon their way through the Atlantic Wall, if necessary. Over time, the Germans will be subjected to an attrition ratio they cannot afford since, the initial beach defense line is but a shell with little strength behind it.
For those of you who wish to experiment with your own landing plans, you will find yourself on the horns of a dilemma. You need armor and heavy AT guns early to bust open the German defenses. Of course, the earlier these forces arrive, the less ruptured the German defenses, thus hastening U.S. losses in exactly those heavy weapons categories needed. For instance, using the two DD tank companies as DD's will mean losing heavily, leaving you with only 4-6 extra tanks of the 32 available. On the other hand, holding them back guarantees that they won't be there to help destroy German pillboxes at all. I do recommend getting some artillery ashore early. An unorthodox but very effective use of the guns is in direct fire against pillboxes. However, be prepared to lose them when the German realizes their significance.
By the late morning, U.S. forces should have opened several holes in the German line, and begun moving inland. The leaders will help open the way. But, for solid advances on 6 June you will need troops with implemented Op sheets. Units of the first and second waves will probably be bled white and of limited use in the afternoon. Third wave and transport landed forces should begin working on Op sheets right away, even while under fire on the beach.
Variable German reinforcements will invalidate any set strategies, other than the obvious (and most important) one: Get off the beach! While seaward of the shingle, U.S. troops are crowded into a narrow, ready made killing zone where German artillery will have free rein. The U.S. player must smash his way inland at almost any cost. This will cause heavy casualties, but so will cowering behind the shingle. Room for the following waves to disperse will be critical to the overall success of the U.S. effort.
All but the luckiest U.S. players will experience a time lag in their drive inland. The Leaders leave the game by noon, and all but infantry and light weapons units will be restricted by the limited effectiveness of the shingle breaches. A few units should have Op sheets by midday, but most of the American power will be stranded on the sand. When implementing Op sheets, remember that one or two companies inland are better than full battalions stuck on the tideline.
Effective Op sheet planning will be one of the most important tasks the U.S. player has. While still on the beach, start early in laying the groundwork for future advances. Not all the troops will be needed to breach the initial defensive German crust. Any vehicles moving inland on 6 June will require plenty of time, both for planning and moving past the shingle breach bottlenecks. U.S. forces will take a long time to implement orders due to the size of the force and the overall Op sheet limitations.
Once inland, the U.S. player should exercise a more cautious approach. By then, artillery should be ashore and more consistent for supporting operations than is naval gunfire or airpower. Now is the time for the American to heed his earlier losses, and proceed with operations only at a sustainable loss rate. Beware of throwing away the game by recklessness on the 7th and 8th.
It is unlikely that the Germans, with their variable reinforcements, will be able to put together a powerful counterattack force. Instead, The American troops will usually have to meet and defeat enemy forces piecemeal. This places the burden of attack squarely on the U.S. player. Of course, sometimes the Germans are going to get lucky, and hit you with a roundhouse punch just when you least expect it.
Other scenarios will introduce some variation into the basic broad outlines presented above, but for the most part, this advice will stand you in good stead. Scenario Nine is the one exception to this. It gives the German much greater power to hit back with, especially if they get Panzer Lehr troops on the board early. I think this situation is nearly balanced or tilted slightly in the German favor. Here, U.S. losses are going to be heavy. Even once off the beach, you will no doubt have to contend with a defense in depth supported by Panzers.
German
Boy, look at all those olive-drab counters. There's a lot of 'em and what's worse, they never seem to stop coming.
Well, perhaps things aren't as bad as they seem. With a bit of luck and some well place units, you can kill a lot of invaders on 6 June. Just remember, keep shooting!
First, pay careful attention to unit placement. The beach defenses are powerful but ultimately doomed. Before they go, they need to inflict as many U.S. losses as possible. The pillboxes are the most critical forces to place, since they are immobile. An even distribution is needed, with each unit sited so as to see as much of the beach as possible. Also, lend somewhat greater importance to the center of the maps, as the drift lines will tend to place most U.S. forces here.
The minute the Americans are ashore, start using your most potent weapon: artillery. Fire at least two missions per turn, and any potential breakthrough points should receive continuous attention. The most critical reserve releases you make will be artillery batteries, in order to ensure adequate ammunition. Since observers for all these missions are vital, now previous placement of forces can pay off.
With any luck, the American will develop shell shock from the bombardment and sit dazzled while you batter him into submission. Barring that unlikely event, you now need to prepare for the inland phase as well. Hopefully, at least one battalion size element will arrive via the Variable reinforcement Table, and be ready by mid-afternoon to take up blocking positions on the first two maps. Once you lose effective observation of the beach, save your artillery for blunting the American spearheads inland. There may even be room for a small counterattack or two while the U.S. is still weak. The afternoon of the 6th is especially favorable for offensive action since U.S. artillery strength should still be very limited, and many U.S. troops may be inland without adequate implemented Op sheets. Just a couple of turns of attack may send whole U.S. battalions scuttling back to the beach.
The Germans are destined to fight a holding action in most of the scenarios. Do not dissipate your forces in bloody attacks that will simply make the U.S. job easier. However, on rare occasion, the Variable Reinforcement Tables will conspire to place in German hands real power for a change. Use it to hit hard. This may well catch an overconfident American player off balance. In Scenario Nine, with Panzer Lehr, the likelihood of assembling such strength is greater, and the German playing this scenario should not be afraid to use attacks early and often.
The overall key to German victory is un-yielding, tenacious defense, coupled with aggressive play in the initial stages. Bleed the Americans white, and use your artillery whenever possible.
Designer's Notes
The design of this game differed somewhat from previous efforts in that it was more of a collaborative effort between Dean and myself, necessitated by the injuries to Dean's hands. Dean had made significant progress on the game so I found much of the initial effort done. My job was to bring the project to completion and in as timely a manner as possible.
Omaha has another unique aspect: it is the largest design we have yet attempted. With four maps and 1680 counters, it is clearly a monster game. Our publishing philosophy is to try and put out games that range the spectrum, including the occasional foray into the large game field. Rest assured, however, that we will not abandon smaller one and two map games either.
Despite its size, Omaha has a specific focus; recreating the initial landings in the 16th Infantry Regiment's sector of Omaha beach. Though Normandy has been the subject of many games, none have examined that critical initial period in any detail. Amphibious operations are among the most difficult of all types of combat actions, with their own mix of problems and needs. This game portrays the first two phases—getting ashore, and getting inland—and succeeds quite well in recreating those two specific tasks.
Omaha is a large-scale infantry battle, with armor on both sides restricted by terrain and availability. The game is usually a bloody affair as was the battle itself. Ultimately the U.S. player has at his disposal almost five regiments of infantry, plus numerous supporting forces. Despite this strength, his task is a daunting one, made worse by the sense of confusion generated by the initial landings.
It was decided early on in the design that, in order to succeed, Omaha must not be burdened with the other two major aspects of the operation. These were the enormous engineering and logistical efforts that went hand in hand with the shooting. The Engineer brigade supporting the Omaha Beach operation numbered over 12,000 men, larger than the German 352nd Infantry Division defending the site. To accurately simulate this effort would have created a game of staggeringly unplayable proportions. Players may notice that there are no engineers in the game, even though their function was critical to the success of the landings. Some actions, such as breaching gaps and minefields, and destroying enemy pillboxes, have been abstracted into the infantry (who were equipped for some of this anyway). Other functions, like stevedoring and road-building (the U.S. troops built the equivalent of a temporary four-lane highway directly on the beach) were bypassed completely. Having taken this step, the engineers themselves must not be included in the game directly. With all their tasks abstracted, the U.S. player would simply employ them as extra infantry, a terrible distortion of reality. These troops were far to valuable to waste in such a fashion.
By eliminating a truly frightening amount of game-play bean counting through these abstractions, the players can now concentrate on the combat action. Harbor no illusions: this is a bloody, violent slugfest right from 0640 June 6th, and both sides must gird themselves for no-holds barred contact. The critical planning element still exists, however, and each commander must orchestrate his resources, and will experience significant delays in implementing them. Thus he can ill afford to fly by the seat of his pants.
Now that I've laid out our rationale for the broad scope of the game, I want to address a number of specific points which might raise questions in player's minds.
Unit Strengths and Ratings
U.S. infantry platoons display firepower ratings ranging from 3 to 5. The lower figure represents a standard TO&E platoon, while the higher numbers represent varying degrees of augmented firepower. Veteran U.S. troops tended to accumulate extra weapons (especially BAR's and MG's) whenever possible, recognizing that their German opponents were superior in this regard. Hence, troops of the 16th, 18th and 26th regiments were raised to 4 to reflect this accumulation. Since they were the first wave, troops of the 16th and 116th were specifically augmented with extra weapons and demolition gear for the assault so, these units got another point, to 5 and 4, respectively.
In a further effort to increase firepower, the U.S. company mortar units in the 16th and 116th each had one of their three 60mm mortars replaced with an 81mm tube, increasing these units' ratings to 4 also. However, the mortar units were not given the extra range an 81mm provides. Evidence suggests that only the larger tubes themselves were present, not the extra fire control equipment that would have made controlled long range fire possible.
In addition to the above augmentations, the U.S. assault companies were assigned extra manpower, to replace the expected landing losses. Generally, these overdrafts were approximately platoon strength, 30 men and 1-2 officers. The overdraft didn't accompany the initial force, but instead joined their units the next day. In the game, the overdraft replacements only affect the line companies, since these extra troops did not also bring along extra mortars and MG's to fill out the hard-hit heavy weapons companies.
German units' fire strengths were almost exclusively based on the number of MG's present. MG's were the centerpiece of German small unit tactics. In fact, the Germans were much better organized for modern warfare than their U.S. opponents, and often they had a 3 or 4 to 1 advantage in LMG's. Fortunately, accurate information on equipment levels for all involved German units was available.
Ad-Hoc Forces
Some German artillerymen, once their cannons were overrun, continued the fight with various small arms scrounged or previously available. These scratch forces are almost impossible to document as to size or armament. At the same time, the number 4 company of the 352nd Field Replacement Battalion was an artillery training company, whose members were not committed as infantry but instead initially replaced losses in the gun crews. Given these two facts, I made a simple trade. The player has the use of the number 4 company along with the rest of its battalion, and need not worry about exchanging artillery crews for weak infantry units or step replacements. I feel that this abstraction produces historically accurate results with a minimum of fuss.
By the same token, several groups of U.S. troops, having lost their heavy equipment in the landing, became infantrymen by default. The largest of these was Cannon Co. of the 16th, all of whose guns were lost or rendered inoperable while still in the water. However, these provisional infantry forces did little more than pull HQ security and track down the occasional sniper, and including them would give the U.S. player a completely unrealistic extra assault element. Going a step further, I eliminated numerous towed anti-aircraft units completely, which actually landed to provide overhead cover for HQ's and beach activities. The reasons are simple: many of these awkward towed weapons never made it through the surf, and there wasn't any Luftwaffe to shoot at anyway. None of these units were used in an effective ground role on D-Day. (Later in the campaign the U.S. Army reached the same conclusion. Thousands of AA Artillerymen spent the Fall of '44 going through re-training programs to become infantry replacements.)
Airpower
The U.S. Player will now have aircraft available about every other turn. Players should notice that there is a much greater than normal risk in using these sorties. The allies had not yet developed good ground support techniques. Furthermore, the damage to radios during the landings rendered any communications with off-map elements chancy at best. (Remember, the 30th Infantry Division took to calling the Army Air Corps the "American Luftwaffe" after numerous unfortunate incidents later in the year.) In short, U.S. airplanes had only a limited tactical role on D-Day. Of course, they were of immense strategic value, and tremendously delayed the arrival of distant German reinforcements.
Artillery TRP's
The U.S. Player assigns TRP's before set up begins, but cannot use them until June 7th. Before D-Day the U.S. guns were still in England and therefore couldn't register TRP's. As batteries landed and set up, they registered TRP's as a matter of course, but allowing the U.S. player to do this in the middle of play would be a particularly devastating inaccuracy.
The German player is prohibited from placing TRP's seaward of the beach obstacle line for more abstract reasons. Once the Germans could no longer place observed fire on the beach, German artillery became more of a nuisance than a threat. In the game, the Germans could theoretically pump deadly accurate fire onto the beach long after the battle moved inland by placing all of his TRP's on the beach. This effect isn't justified.
The Landing Plan
The historical landing organization (and, for that matter, the wave structure) is only an approximate representation of the actual invasion timetable. Actual landing plans had troops landing in a series of carefully timed arrivals to ensure a continuous flow of forces over the beach, with from three minutes to two hours between touch-downs. A completely historical schedule would have various units arriving every turn, with varying movement point penalties to pinpoint their exact landing time. Keeping track of all this would be quite burdensome. The Allies did envision three wave groupings, and we simplified that into three distinct landing times. The landing assets available were reduced to reflect the omission of all of the above discussed engineering and support troops.
Additionally, the landing elements of the 116th Regiment, 29th Division are somewhat abstracted, since most of these forces were actually scheduled off-map to the west. There was a severe eastward drift. Hence, most of these units found themselves on 16th Infantry beaches anyway. We will possibly publish a companion piece to Omaha, covering the rest of the 29th's landings. We will then provide a complete historical landing schedule for the 29th as well.
The landing pattern itself, with its various die rolls and scatter patterns, is designed to recreate the confusion U.S. troops underwent when they discovered that they weren't in the right place. The pattern tends to exaggerate the spread of the landings somewhat. This deters the probability-counting gamer who has the advantage of the entire pattern being laid out before him, and who would try to 'beat the system' by figuring out which beach sectors would be best to land troops on for desired Op sheets. We deemed it more important to emphasize the U.S. initial disarray rather than slavishly recreating the exact drift and touchdown points of most landing units.
Finally, an optional rule introduces one other missing element into the landing scheme, the significant delays some units experienced before reaching the beach, mostly due to getting lost on the run-in, etc.. This rule was omitted at first due to the excessive bookkeeping it required, but then I decided to allow people to employ it as desired. Some gamers may be interested in examining the landings in great detail, including the delay. I believe the rule's actual effect on play is minimal.
Leaders
For the first time in a TCS game, individual leaders are present. The normal system handles command and leadership within the confines of the Op Sheet system. On the morning of the 6th, however, all traditional command lines broke down. The initial move inland was finally accomplished by scratch forces lead by individual officers and NCO's exercising the finest qualities of individual example and leadership. Of course, one of the first things these officers did was begin re-establishing the command system (the only method whereby larger forces could be employed). So, in effect, the Leaders phase themselves out at 1200 June 6th.
The Bocage
The Normandy hedgerows are a much celebrated aspect of the campaign. I found them quite easy to simulate. The primary effect of the bocage was to channel combat and prevent extensive fields of fire. The blocking of opportunity fires will present both sides with avenues of approach and retreat free of enemy interference. Combat between opposing hedgerows was violent and bloody, and so units can still fire at a target through an adjacent hedgerow hexside during direct fire. The final result is a series of running fights as units leapfrog from one defensive position to another, with the various fields difficult to take frontally but vulnerable to maneuver.
One aspect of hedgerow fighting that was difficult to recapture was the U.S. tendency to avoid this type of maneuvering, at least initially. Time and again German troops noticed that U.S. advances could be halted merely by placing some small force directly in the path of attack. The Americans would go to ground and call for fire, prepare frontal attacks, etc., rather than move to a flank. Over time, the U.S. troops got better. Simulating this rigidity without completely hamstringing freedom of U.S. action is difficult. As an option, the players might require that U.S. Op sheets get quite specific about routes of advance, etc.. This would, of course, limit American freedom of action and make for more work in drawing up orders. I rejected this course for fear of overly damaging playability, but those so inclined should feel free to experiment.
The Historical Perspective
It is and unlucky German player indeed who is limited only to his historical reinforcements. Upon examining the actual course of events, I felt that the German response was a 'best case' scenario from the U.S. point of view. It was beset with confusion and delay that allowed the invaders, once through the tough beach crust, to move inland with little real resistance from the enemy. The variable reinforcement tables in the scenarios will all produce more effective German responses, on average, than the historical one. Clearly, some actions were mistakes (notably the frittering away of the reinforced 915th Regiment) and the German should not be doomed always to repeat them. My aim was to achieve a midpoint response, better than the abysmal historical showing but not a guaranteed full activation of all available troops. Both extremes are now possible, but not likely.
The U.S. player may well wonder if the losses he has sustained are historically accurate as well. To that I can only say that not every step loss represents killed or wounded men. In the confusion of the battle, many thousands of troops became separated from their commands or lost their equipment. Once either of these things happened, they were no longer combat effective, no matter what the state of their health. It took some days for the initial assault regiments to reorganize and resupply, and stragglers drifted in all the while.
In the final analysis, Omaha covers a lot of ground. This game, or any game, can only approximate the invasion. It was a massive undertaking and succeeded only through the efforts of many brave men.
Historical Notes
The story of the Normandy Invasion has been the subject of countless popular and serious historical accounts which have done a far better job than I can accomplish in these few pages. Instead, I will remain within the scope of the game itself. I will try to present a clear overview of the Omaha landing of the First Infantry Division. Details of the 29th's landings on the western third of Omaha (Vierville) and Pointe De Hoc (the Rangers) are left for coverage in a later game.
The First was the U.S. Army's most experienced unit in the ETO by June of '44. They were veterans of landings in North Africa and Sicily, as well as extensive combat service since November of '42. Hence, it was selected to spearhead the landing at Omaha, the critical linchpin beach linking the Cotentin peninsula bridgehead with the British sector on the east. The 29th Infantry Division, a green—but exhaustively trained—unit, was teamed-up with the 1st ID. Tactical control of the landings themselves was under the firm control of Clarence Heubner, commander of the Big Red One.
The objective of the landing was three-fold: secure a deep lodgement in order to allow supplies to be landed without interference over the beaches, secure enough room inland to allow for the rapid arrival of reinforcements (the Allied Chiefs recognized the critical importance of building Allied numerical superiority before German reserves arrived), and link up with the British on the east and the American Airborne troops to the northwest so as to present a unified, mutually supporting front against expected German counterattacks. In a nutshell, the Omaha troops needed to get off the beaches as quickly as possible, and drive deeply inland on the first day. The overall plan called for a lodgement three to five miles deep by the end of June 6th. (In game terms, the objective for the U.S. forces was to capture all four maps by nightfall on the first day.)
In response, the German Army's plans called for the invasion to be halted on the beach, met with a volume of fire that would preclude a successful advance. In the Omaha sector, the German 352nd Infantry Division was assigned the task. The 352nd had been raised in January of 1944, built from the cadre of the 321st Infantry, a unit badly ravaged in Russia. Unlike the 700 series coastal divisions deployed along most beach sectors, the 352nd was a good quality unit, with its heavy weapons left mobile instead of permanently placed in defensive positions. In March, the 352nd was moved forward to the coast and assigned the defensive sector north of Bayeaux.
The sector was originally held by the 726th Regiment of the 716th Division, a static unit with numerous Polish and Russian troops. When the 352nd moved forward (a movement missed by Allied intelligence, which continued to believe the division was 20 miles away at St. Lo) the 726th remained in place, now subordinate to and reinforced by the forces of the 352nd. Two of the 352nd Grenadier Regiments, the 914th and 916th, took up coastal positions, while the 915th was retained by the 84th Corps HQ as Corps reserve.
The end result of this deployment was to concentrate greater firepower on the beach. Before the arrival of the 352nd, the 716th Division was alone responsible for over 53 miles of coastline. Now any landing at Omaha would be met in force.
On the other hand, German reserves were lacking. The 84th Corps could only call on the three battalions of 30th Mobile Brigade in the hours immediately following any landing, and this brigade (a bicycle mounted command lacking in artillery or heavy support weapons, though well equipped with mortars and small arms) was almost 30 miles away. This was the reason General Marcks, the 84th commander, removed the 915th and the 352nd Fusilier Battalion from divisional control. This three battalion force, augmented by some of the StuG IIIs and Marders of the 352nd PanzerJager Bn, represented Marcks' only rapid response reserve in time of crisis. No doubt Marcks approved of Rommel's plan to deploy the Panzer divisions closer to the beaches. This would have put the entire Panzer Lehr Division within his sector, just a few miles from the tidal flats. Fortunately for the Allies, Rommel did not win his point.
Omaha was not assigned any airborne forces to support the ground landings, but benefitted from their drops nonetheless. The two U.S. parachute divisions, 82nd and 101st, were both landing behind Utah beach, well within the German 84th Corps' sector. The paratroops were widely scattered. Groups landed between Isigny and Carentan, towns which controlled the crossings over the Vire and Douve Rivers, respectively. The crossings were critical to both sides: the Americans needed them to unite Omaha and Utah, while the Germans required them to rapidly shift forces within the 84th Corps sector.
The 84th Corps reaction was a mistake. Upon being informed of landings by paratroops, General Marcks released the reserve to move west from Bayeaux and engage the airborne forces. Why did he assume that the paratroops would have landed without a seaborne assault? Alternatively, assuming he was expecting a seaborne follow-up, why did he rate the paratroops a greater threat? Finally, 84 Corps reports indicated that both Caen and Ste. Mare Eglise were focal points of airdrop activity. If Marcks did expect seaborne landings in those sectors, why did he expect that the Allies would land in two separate beachheads 20 miles away and make no attempt to link them via landings in-between?
At any rate, Marcks committed the Corps reserve at 0400, well before any reports were received describing amphibious landings. The three battalions began to march west across the length of the imminent Omaha landing site towards Carentan. Despite hindrances by uncooperative French truck drivers, Kampfgruppe Meyer (915 and 352 Fusilier, named for the commander of the 915th) was well on its way by 0700.
At 0640, the first wave was scheduled to touch down. At 0635, the DD Shermans were supposed to come ashore and provide covering fire for the landing craft. However, the first stage of the Allied plan had already gone awry. In the 16th RCT sector (the lead assault element of the 1st ID) two full companies of Shermans, 32 tanks from the 741st Tank Battalion, were almost all sunk on the drive in, inundated by heavy surf. Five DD tanks made it ashore, only two under their own power. Fortunately, Allied planners had hedged their bets, and A company of the 741st was landed normally in the first wave. Without even the reduced armor support provided by those tanks that did get ashore, the going would have been even harder than it was for the assault troops.
The first wave suffered from the dual shock of fierce German defensive fire and badly scattered landings. Most of the air and naval bombardments had overshot the beaches completely, and the German defenses were quite intact. The rocket armed LCT's that slammed into the beaches just minutes before touch-down, pouring a thousand rockets apiece inland, also failed to inflict serious German loss but did manage to provide cover for the troops by starting some grass ablaze and obscuring German positions. Such cover proved spotty at best, however. Finally, many of the troops had drifted well to the east, and instead of evenly distributed assault forces along both regimental sectors, most men found themselves on 16th RCT beaches.
As a result, the first wave was almost completely unsuccessful. The best they could manage was to advance to the shingle (a large rockpile washed up at the high-tide line) and promptly became pinned down behind its cover. Communications with commanders still afloat proved impossible, as most radios failed to survive their initial submergence. Casualties were extremely heavy.
At 0740, The second set of waves was due to begin, bringing ashore supporting weaponry and more troops. Both 1st Division and 16th RCT command were anxious about the situation on the beach but had no real communication with the men ashore. Occasional first-hand impressions filtered back from landing craft coxswains and the like, who conveyed an impression of confusion and failure.
The second waves touched down amid chaos. Dead and wounded littered the beach, and many casualties floated in the surf-line, drowned by the rising tide. Wrecked equipment and discarded weapons were scattered everywhere. German fire continued seemingly unabated. The follow-up troops also made the mad dash for the shingle, mingling with the first wave companies. Formal command structures broke down, and rarely could company and battalion officers locate their troops.
The Americans had not abandoned the fight. As men regained their wind, many set to cleaning their fouled weapons. Officers and NCO's, despairing of completing original missions, assembled scratch forces and prepared to move inland. Slowly, position by position, the attackers began to reduce German strongpoints. The first advances were not made up the draws, as expected, but directly up the bluffs, between E-1 and E-3, and later near F-1 and east of St. Laurent.
At 0940, the third wave began to land. These troops experienced much of the same thing on landing, but also found some progress being made. The E-1/E-3 penetration was moving inland, with a patrol of G/16 pushing on to Colleville. 3/16 opened up the F-1 Draw and was sending patrols south as well.
Paradoxically, just as progress was finally being made on the beach, scattered reports were making their way back to the commanders afloat, painting a picture of disaster. There was some debate about even sending 18 and 115 Regiments ashore. Many wondered if the troops already ashore could be evacuated. Finally, the decision was made not to give up yet, and so the first reserves were released for the beach. The 115th was diverted from the still well defended 116th sector and came ashore at Easy Red. There it collided with the 18th Regiment beginning their own landings. The first troops began landing just before 1000 and continued until midday.
The volume of fire on Easy Red had slackened due to the successes of the assault groups. So, the men of both regiments had an easier landing than their early-morning counterparts. By midday, several multi-company sized forays had moved inland, and there was some room for the new arrivals to assemble in relative safety. The various commanders on the beach eagerly seized upon these new troops, ordering them to move inland. The 18th Infantry was re-assigned to the objectives of the now fought-out 16th and ordered to get going.
The German response continued to be poor. Early German reports had also claimed that the invasion was halted. Attention was directed toward the more successful British landings east of Bayeaux. Finally, KG Meyer was diverted and sent against the landings, being ordered to counterattack Gold Beach around 10 am It started to retrace its steps immediately but would take several hours to get in position. The 30th Mobile Brigade was ordered forward also. Some companies of the 916th stationed at Formigny were moved over to counterattack towards Vierville (and promptly moved off the game map).
The afternoon of the 6th was a period of consolidation and reduction of the German forward defenses. Follow up troops and equipment poured ashore, with the beaches still under sporadic (but mostly ineffective) German artillery fire. By nightfall, only a couple of German pockets remained in the immediate beach area, most notably at Colleville and on the west end of St. Laurent. By 2400, 2/18th had slipped south of Colleville to isolate the Germans there. Also, the 26th Infantry was ashore, inland between the D-3 and E-3 draws.
German efforts continued to be futile. 2/915 was detached from KG Meyer and, augmented with a company of Marders from 352 PJ Battalion, was ordered to attack towards the beaches east of Colleville. Their advance was halted about 3/4 of a mile south. (The 352 Division telephone log indicates that at least some of the 2/915th entered Colleville and became surrounded there.) The 352nd Engineer Battalion was committed towards Vierville as well, further impeding the progress of the U.S. 29th Division. Elements of 352 Field Replacement Battalion were sent forward around Formigny to form a defensive line.
June 7th was to prove disastrous for the German defenders. Virtually all of the available forces were committed, and the U.S. troops had begun to sort themselves out. 29th Division HQ was activated. (1st Div. HQ so far had complete tactical control of the landings.) The 115, 116 & 175 Regiments were moved west to the Vierville Area.
Now numerous battalions began to move inland. 1st Division's main effort was made by the 18 and 26 Regiments. This allowed the bulk of the badly hurt 16th RCT to recuperate and collect stragglers. 1/18 and 3/26 moved to capture Formigny, but German resistance held out. These two battalions settled for bypassing and isolating the town by evening. 3/18 took Surrain, and then advanced to Mandeville (due east of Trevieres) by dark. 2/26 and 2/18 advanced to the southeast, and captured Mosles. 1/26, supported by 3/16, advanced east towards Huppain and Port-en-Bessin to link up with the British 47 Commando.
Overall resistance was light, with the Germans mostly giving ground rather than risk destruction. KG Meyer and 1/916 were virtually destroyed in ineffective counterattacks against the British off-map to the east. This severe loss greatly curtailed the 352 Division's ability to mount any sort of a defense in depth. Late on the 7th, scratch forces still held Formigny and Trevieres, but German troops could only hold most of the map area with skirmish strength units.
That evening the final German reserves were brought into play. The 30th Mobile Brigade (after an exhausting 90 kilometer bicycle ride under constant air harassment) was fed into the fight. One battalion, 513/30 Mobile, was ordered to Formigny but probably never got that far, joining the defense of Trevieres instead. The other two battalions were again committed to the east, trying to renew the fruitless counterattack northeast of Bayeux.
Also by evening, the U.S. 2nd ID was starting to land but would not be sent into action until late on the 8th or 9th of June. Free of enemy interference, the U.S. 5th Corps was coming shore in force.
The morning of the 8th continued in the same vein. All three battalions of the 26th RCT moved east and southeast to capture Tour-en-Bessin. This created a large pocket around the remnants of KG Meyer, the 30 Mobile Brigade and the last elements of the 726th Regiment. Caught between the 26th and two British brigades, few of these forces escaped in fighting condition and many prisoners were taken.
After repelling a night attack, Formigny finally fell and was reported secure by 1300 hours 8 June. The bulk of 18th RCT continued a broad front advance due south between Trevieres and Mosles. They secured a number of crossings over the Aure River but failed to take Trevieres itself. The 29th Division made similar advances to the west.
At this point, the 352nd Division was almost finished as an effective unit. It would continue to hold the line as U.S. troops advanced simply because no other German troops could arrive for several days to replace it. By the end of the month, it would be fighting around St. Lo as a mere Kampfgruppe.
While the U.S. did bring very powerful forces to bear, the German commanders made two critical mistakes which greatly weakened their own response to the invasion. As previously discussed, the abortive commitment of KG Meyer against the paratroopers gained the 84th Corps nothing and moved that command completely out of position when the sea landings came. This precluded any rapid counterattack against the invaders while they were most vulnerable. Second, repeated effort to launch a counterattack from Bayeux towards Gold Beach resulted in disaster. KG Meyer's first attempt resulted in its own destruction with only 90 men and six assault guns surviving out of the two full battalions and company of StuG IIIs committed. This destruction took little more than a couple of hours and hints at some very poor tactical decisions by Meyer (who was killed in the attack). Renewed commitments to this strategy only repeated the initial outcome. Most of the 30 Mobile Brigade was killed or captured there in turn. The British had faced much less severe resistance, and so their troops were in good shape compared to the U.S. forces on Omaha. What might have happened if the Germans had reinforced their initial success at the waterline, moved only blocking forces against the British, and sent KG Meyer against the 16th RCT?
The critical difference for the Americans was the leadership present on the beaches. Both the 1st and 29th Assistant Division Commanders, BGs Wyman and Cota, did much to bring order out of chaos, and the various regimental and battalion officers made heroic efforts to move inland despite the confusion. Their efforts paid off in victory.
Shingle Hexsides — Effects Diagram
(The diagram is not reproduced; its captions read as follows.)
- Unit A is protected by the shingle (i.e. the modifier is used) from direct fires from any of the numbered units.
- Unit B, however, is unprotected against direct fires from any of the numbered units here.