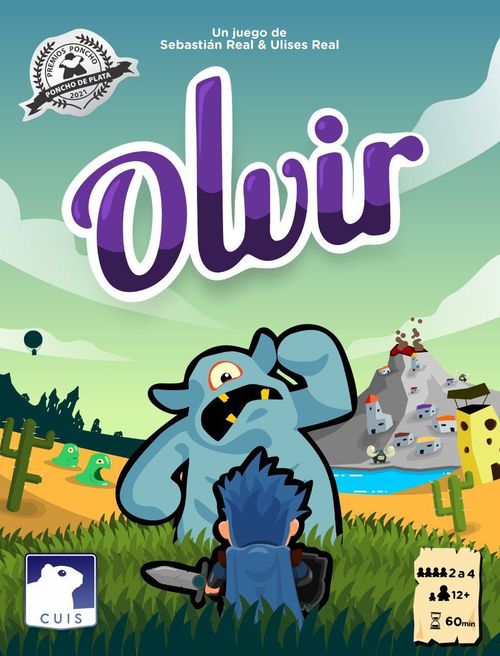
Olvir
Olvir Rulebook
Table of Contents
Table of Contents
What's in this box
- 1 Sword
- 5 Guards
- 4 Adventurers
- 5 Moks
- 2 Cycloptes
- 3 Cabrus
- 4 Hearts
- 4 Action markers
- 16 Adventurer markers
- 1 Die
- 3 Miscellaneous markers
- 3 Beast boards
- 4 Adventurer sheets
- 1 Strength board
- 1 Dignity board
- 5 Map pieces
- 1 Calendar
- 12 "Wanted" cards
- 18 Reward cards (6 per city)
- 18 Beast upgrade cards
- 24 Resource cards
Object of the game
This great adventure has 2 kinds of objectives, or rather one objective split into 2 categories. To know how to win, read the objective of the game that applies to you:
I'm a kid... I have to take the role of an intrepid adventurer travelling through the dangerous lost lands of Olvir. On this fabulous journey I must gather materials and fight dangerous beasts to fulfil the demands of the citizens of the "Castle of Olvir", of the city of the sleeping volcano "Crato" and of the mysterious dwellers of the sands who live in "Nomadus". I can also take part in the hunting competitions... and all this to become the most famous adventurer and above all, for the glory of Olvir!
I'm a grown-up... I have to collect more victory points than the others. Bah... here they call it "Glory", it's all the same to me.
Setup
-
Build the game map using the 5 map pieces. First place the map piece with the castle of Olvir, then place the other map pieces respecting 2 conditions:
- A. Olvir, Cratus and Nomadus can never be adjacent to each other.
- B. No space on the map may be left isolated by water.
This map is just an example — you can build it however you like!
-
Each player takes an adventurer and their adventurer sheet, and places the heart of their colour on the 6 of the life track and the action marker on the 5 of the action track. The adventurer piece is placed on the map in the castle of the city of Olvir. The youngest player takes the sword.
-
Find the three lairs on your map and place the beasts in the lairs that correspond to their level (Level 1, Level 2, Level 3).
-
Shuffle each deck of reward cards separately and leave them face down, then turn over the top card of each deck and leave it in view of everyone. Each of these revealed cards will be the reward that each city gives to whoever fulfils its quest.
-
Shuffle all the "Wanted" cards and leave the deck face down near the reward cards. Beside each reward, place face up a number of "Wanted" cards equal to the glory value of the reward (1/2/3/4).
-
Place 3 guard pieces in Olvir, 1 in Nomadus and 1 in Crato.
-
Place the 3 beast boards near the map and an adventurer marker of each player on each of the boards, on the first space of each track.
-
Place all the resource cards within reach of all players.
-
Shuffle the beast upgrade deck and place it beside the beast boards.
Once the game is set up, everything is ready to start playing.
How to adventure in the land of Olvir?
The game is divided into phases (morning, afternoon and night), and when the 3 phases are over the day advances; when the 5th day ends, the game ends.
At the start of each phase all players put their action point marker on 5 if it is a morning or afternoon phase, and on 4 when it is the night phase. The game can now begin:
- The player with the sword uses all their action points, then activates beasts, and then it is the turn of the player to their left, until all players have played the phase.
- All actions cost action points, and each time an action is used the player must spend those points by moving the marker on their character sheet. You cannot take actions if you do not have enough action points to spend.
Terrain types
Desert, Mountain, Balloon, Forest, City, Water, Lair.
Actions
1 — Move
Spend 1 action point to move your adventurer to an adjacent space.
Important:
- It is not possible to enter water.
- Entering a mountain costs 2 points.
- Each beast you leave when you move immediately deals you 1 damage.
2 — Chop a tree
Spend 2 action points and get a wood resource card if you are in a forest.
Important:
- You cannot chop if there is at least one beast in your space.
2 — Mine iron
Spend 2 action points and get an iron resource card if you are on a mountain.
Important:
- You cannot mine if there is at least one beast in your space.
3 — Fish
Spend 3 action points and get a fish resource card. To be able to fish you must be in a space adjacent to water.
Important:
- You cannot fish if there is at least one beast in your space.
1 — Rest
You recover one life point (+1). Slide your heart one space to the right.
Important:
- You cannot rest if there is at least one beast in your space.
1 — Fulfil a demand
If you have all the resources that a city is looking for and you are in it, you can hand over those resources, returning them to the common pool, to win the reward. Then you must move the "Wanted" cards to their discard pile (start one if there isn't one yet).
Important:
- You keep the reward until the end of the game and earn its glory points.
- You cannot complete the demand unless you hand over all the items that the city you are in is looking for.
- You cannot hand in a demand if there is at least one beast in that city.
1 — Use a balloon
Spend 1 action point if you are on a space with a balloon to immediately travel to another space with a balloon.
Important:
- You cannot use a balloon if there is at least one beast on the departure or arrival space of the balloon.
Guards and citadels
- Whenever you are in a city occupied by at least one beast but with an active guard, you can take any action that would be forbidden by the presence of the beast.
- The guards of the city of Olvir are considered present in all spaces of the city, no matter which of its hexes they are placed in.
- The city of Olvir is very large (it occupies 4 hexes) but you can only hand in the resources for its demand at the castle.
Guards have an active side and an exhausted side.
1 — Attack
Spend 1 action point to start an attack if you are in the same space as at least one beast. First choose which one you will attack if there is more than one, and then follow these steps:
Combat:
-
Check the beast's strength and set the strength meter marker to that value.
-
Roll the die.
-
If the result is equal to or higher than the beast's current strength you defeat it: remove the beast from the map and take the resource card that the beast generates when defeated. The combat ends.
-
If the result is lower than the beast's strength but higher than 1, the beast deals you one point of damage; to show it, move your heart down one point. You must also automatically lower the strength meter marker by one point; the beast is now a little weaker. The beast's strength marker can never be lower than 2.
You can immediately start a new attack by spending 1 action point. Continue the combat from step 2 with the beast's new strength value. If you have no more actions, or simply if you wish, the combat can end.
-
If your result is a 1, the beast strikes back: read the counterattack on the beast's board and carry it out completely. Unless the counterattack says otherwise, you must automatically lower the strength meter marker by one point. You can immediately spend 1 action to start a new attack, returning to step 2. If you have no more actions, the beast fled, or you simply wish, the combat ends.
(Each beast board shows the beast's strength, its counterattack, the resource it gives, and its hunting competition track; the strength meter shows the result needed to win.)
0 — Hunting competition
Whenever you enter a city, no matter which, you can brag about all the beasts you have defeated in your adventures. To do so, discard as many beast resources as you wish and improve your position in the hunting competitions.
For each resource discarded, move up one place on the hunting track of the beast that the resource belongs to.
All spaces of the hunting tracks can be shared by several players at once, except the last space ("Hunting champion!"), which once occupied cannot be shared. The values drawn on the hunting tracks are glory points that are counted at the end of the game.
Important + tips:
- You cannot hand in beast resources if there is at least one beast in the city and no active guard.
- All hexes of the city of Olvir are valid for handing in beast resources for the hunting competition.
- Keep in mind that resources handed in for the hunting competition will not be available to fulfil a demand, and vice versa.
- Although handing in beast resources for the hunting competitions is a free action, you cannot do it if your adventurer is defeated (see later).
Resource limit
Something important you need to know about resources:
- Your adventurer can never have more than two resources of the same type.
- Resource cards have 2 sides, and the back of these cards represents 2 resources of the same type; if you already have one resource and get a second one, simply flip the card over. If you have 2 resources of a type and spend one, do the same: flip the card over.
- Don't confuse resource with reward! You can have as many rewards as you manage to get.
1 — Do nothing
If you have unused action points left, or simply if you wish, you can "do nothing": just deduct one action point and do nothing.
Important:
- If you do nothing, for each beast in your space you receive 1 point of damage (if you do nothing 2 times, you receive it 2 times, and so on).
- If you have action points left you cannot start activating beasts; you must either take some action or do nothing.
Activate beasts
When a player finishes using all their action points they must immediately activate beasts. To do so, first check how many beast activation points they have available; those points depend on the adventurer's current health.
Each activation point must be assigned to a single beast. You must use all your activation points.
For each activation point the player can:
A — Spawn a beast: If there are defeated beasts off the map, place one in the lair corresponding to its level. If there are one or more adventurers in its lair, all of them receive 1 point of damage when the beast spawns.
B — Move a beast: Each beast has a movement value shown on its board; check its movement and then move it:
- If the beast moves 2 or more spaces it cannot end its movement in the same space it started from, but it can move fewer, down to a minimum of one space.
- The beast must move at least one space.
- Beasts spend only one movement point when entering a mountain.
- Beasts cannot enter water.
- A beast cannot end its movement where there are already 2 beasts, unless it is a lair space.
- If a beast enters a city with one or more active guards, it immediately exhausts one of the guards.
- If the beast ends its movement in the same space as one or more adventurers, all of them receive 1 point of damage, unless there is an active guard, who is exhausted and the adventurer is not damaged.
End of a phase and advancing the calendar
Once all players have played their actions and activated beasts, the phase ends. When the phase ends, the calendar markers must be advanced and then a new phase begins, started by the player who holds the sword.
Calendar
The phase marker must advance one space: if it is morning it moves to afternoon, and if it is afternoon it moves to night.
Whenever the marker advances, players must set their action marker to the action points the phase indicates.
If the phase played was a night phase, at the end of it these steps must be followed:
- Camp: Players may spend one wood to recover all their life points, even if there are beasts in their space.
- New orders: Each city that is not offering a reward must generate a new one. Reveal the top card of each city without a reward, then draw and reveal as many "Wanted" cards as the glory value of the reward and place them beside it. If there are no "Wanted" cards left, shuffle their discard pile and form a new deck.
- Train soldiers (guards): All exhausted soldiers are turned to their active side.
- Pass the day: The day marker advances, and beware because... as the days go by the beasts become more and more powerful!
- Upgrade beasts: Between one day and the next, 2 or 3 beasts may need to be upgraded; the dots on the board tell you which beasts (of which level) are upgraded. For each beast that is upgraded, draw a "beast upgrade" card and place it next to the beast board. Each upgrade gives the beast a power that stays with it until the end of the game.
- Start a new day: Put the phase marker back on morning. The player with the sword starts a new phase. If the fifth day has been played, the game ends and final scoring must be done.
Rewards
Besides giving glory points, rewards give powers or items that players can use during their turn.
There are 3 types of rewards:
- Permanent: Their power applies whenever possible and the player wishes.
- Exhaustible: When you use it you must turn the card 90 degrees to show that it is exhausted; while it is exhausted you cannot use it again. At the end of the phase, straighten all your exhausted cards.
- Flippable: When you use one of these cards you must turn it face down. While the card is face down you cannot use it. When the night phase ends you can turn all your flippable cards face up again.
Important:
- Unless the card says otherwise, you do not have to spend actions to use it.
- All your rewards add glory points at the end of the game, regardless of whether they are exhausted or flipped at that moment.
- Cards with the beast symbol cannot be used if there are beasts in your space, unless you are in a city with an active guard.
Being defeated
If, due to combat, a beast's movement or any other reason, your health reaches zero, you are considered defeated. A defeated player must:
- Flip their pawn to show that it is defeated.
- Set their action marker to zero (your actions end).
- Receive the sword from the player who holds it.
- Move down one space on the dignity track.
- While your pawn is flipped, nothing can affect you.
- Continue your turn by activating beasts; if you were defeated you activate only one, and then your turn ends.
At the start of the next phase you must:
- Straighten your pawn.
- Recover all your health.
- Start the phase with one action point fewer than the phase grants (e.g. if it is morning, instead of 5 points you will have 4).
Using resources
Some resource cards can be used by players to obtain certain advantages.
-
Wood: You can discard a wood to camp when the night phase ends; if you do, you recover all your health.
-
Iron: After rolling a die during a combat you can discard one or more irons to add one point to the die result for each iron discarded.
Tip: Iron can be a great help in combat, both to reach that result you fell short of and to save yourself from any counterattack.
-
Fish: You can discard a fish to immediately recover 2 health points, even with beasts in your space. You cannot use a fish if your health is at zero.
Who wins?
Once the five days have gone by, the game ends immediately.
Each player must add up all the glory points they have earned:
- Points from reward cards.
- Points earned in each of the hunting competitions.
- Points from the dignity track (it is quite likely that this track will make you subtract points instead of adding them).
Once all points are added up, the player with the most glory points is the winner; in case of a tie, the winner is whoever is higher on the dignity track (whoever was defeated fewer times). If the tie persists, both players are the winners.
Combat example
Juan is in a space with a Mok and a Cabrus; he spends 1 action point to start a combat. He chooses the Cabrus as the target of his attack, since he needs a horn to complete a demand.
- He checks the Cabrus's strength, which is 5 (4 that it has naturally and 1 more due to a beast upgrade it got the night before). The strength meter marker is set to 5.
- Juan rolls the die and gets a 3, far from the 5 he needs; although he has 2 irons he could use to reach 5, he needs one to hand in for the demand. Juan loses 1 life point and moves the strength meter down one space.
- Juan attacks the Cabrus again, spending 1 action point; now its strength is 4. He rolls the die and gets a 1! Oh no... the Cabrus would deal him 2 damage and run off to the farthest mountain, which is the ability of its counterattack. Juan absolutely needs that horn, so he spends one of his irons to add one point to his die; now his result is 2. He doesn't manage to eliminate the Cabrus but he avoids the counterattack. Juan loses one life point and moves the strength meter down one space.
- Juan attacks the Cabrus again, spending his last action point; the Cabrus now has 3 strength points, so he needs a 3 or more to beat it. He rolls the die and gets a 4, finally defeating the Cabrus. He removes the Cabrus piece from the board and takes a "Cabrus horn" resource card, and now he has everything he needs to fulfil the demand.
Quick reference
Actions (action point cost):
- 1 — Move one hex (2 if you enter a mountain). Take 1 damage for each beast you leave.
- 2 — Chop a tree
- 2 — Mine iron
- 3 — Fish
- 1 — Rest (+1 life)
- 1 — Fight
- 1 — Fulfil a demand
- 0 — Hunting competition
- 1 — Do nothing (take 1 damage for each beast present in the space)
Activate beast:
- Spawn a beast in its lair.
- Move a beast.
- If the beast ends its movement where there are adventurers, all of them receive damage.
- If there is a guard, it is exhausted and the adventurers are not damaged.
- There can be no more than 2 beasts in any space, except in the lairs.
Fight:
- Spend 1 action to start a combat.
- Roll the die.
- Result equal or higher: you win the combat.
- Lower result: you lose 1 life, lower the strength track by one point. For 1 action you can go back to step 2, comparing with the beast's new strength.
- Whenever you roll a 1, the beast hits you with its counterattack.
- Whenever you roll a 6, you defeat the beast.
- When you win a combat you get the resource that the beast generates.