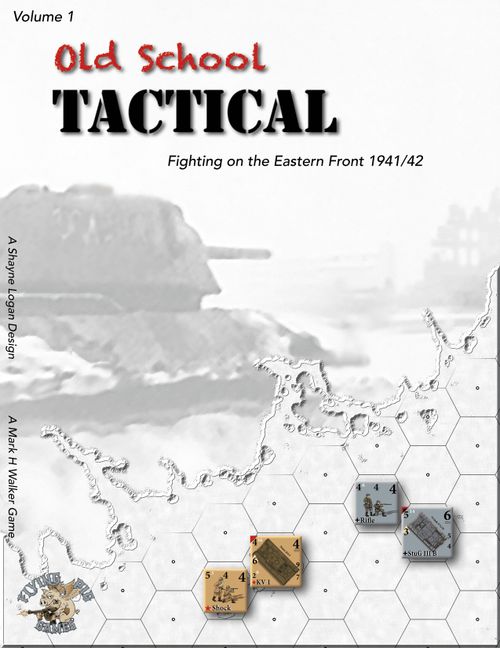
Old School Tactical: Volume 1 – Fighting on the Eastern Front 1941/42
Old School Tactical: Volume 1 – Fighting on the Eastern Front 1941/42 Rulebook
Table of Contents
Table of Contents
- 1.0 The Game
- 2.0 Sequence of Play (SOP)
- 3.0 Gameplay
- 4.0 The Impulse System
- 5.0 Unit and Weapon Counters
- 6.0 Squads
- 7.0 Single Person Counters (SPC)
- 8.0 Crewed Weapons
- 9.0 Vehicles
- 10.0 Support Weapons (SW)
- 11.0 Unit Cards
- 12.0 The Battlefield
- 13.0 Battlefield Markers
- 14.0 Terrain
- 15.0 Hexside Terrain
- 16.0 Structures
- 17.0 Morale
- 18.0 Rally
- 19.0 Unit Quality
- 20.0 Stacking Limits
- 21.0 Hidden Units
- 22.0 Limited Actions
- 23.0 Movement
- 24.0 Transport
- 25.0 Assault Move
- 26.0 Airborne Operations
- 27.0 Combat
- 28.0 Infantry Combat
- 29.0 Vehicle Combat
- 30.0 Melee
- 31.0 Tank Duel
- 32.0 Airstrikes
- 33.0 Off Board Artillery (OBA)
- Glossary
1.0 The Game
1.1 The Map
The maps are made up of hexes containing different terrain types. For scale, each hex represents 50m of real world terrain. The terrain in a hex has a cost in Movement Points (MPs) which units spend when moving into the hex.
Often only sections of the large map is used in a game, in which case the section in play is noted with cardboard markers or optional neoprene strips.
1.2 Trackers
The edges of a large map have numbered sections or 'trackers' which are updated during the game. Players keep track of Turn number, Impulse Points, Victory Points and Enemy Casualty Points using these trackers. There are also optional neoprene pads available which have these same trackers on them.
Trackers have boxes representing units of 10, and boxes 0-9 which represent units of 1. Appropriate markers are used on the trackers.
1.3 Turn Tracker
Turn Tracker is used to count down the number of turns in a scenario.
For example, in a 14 turn scenario, place a counter on the 10 square and a counter on the 4 square for the initial turn. At the start of the next turn, the counters are moved down to 13.
The game ends after all Impulse Points have been used when the Turn marker is on 1, the exception is Extended play.
1.4 Extended Play
With Impulse Points expended and the Turn marker on 1, each player rolls 1D6. If the total is 7 or greater, move the Turn marker to zero and play 1 extra turn, otherwise the scenario ends.
1.5 Victory Point Tracker
Victory Point Tracker is used to accumulate points for conditions met during portions of the scenario.
For example, the German player receives 3 Victory Points per turn for controlling a certain hex.
This tracker is not used in all scenarios. Some scenarios will determine Victory Points at game end.
1.6 Enemy Casualties Tracker
Enemy Casualties Tracker keeps a running total for all casualties inflicted on your opponent.
Casualty Point values are:
- Full Squad or Crewed Weapon = 2 points
- Reduced Squad or Reduced Crewed Weapon = 1 point
- Vehicle and crew = 2 points
- Vehicle only = 1 point
- Crew = 1 point
- Truck = 1 point
- Armored transport (ie. SdKfz 251/1, M3A1 HT) = 1 point
- Leader/Armor Leader = 1 point
- Sniper = 1 point
- No points for destroying weapons.
1.7 Mounting Losses
As casualties increase during a scenario, a player will take penalties and will be able to do less.
- For every 5 Enemy Casualty Points suffered, that side loses 1 Impulse Point from their total for the turn. The Impulse Point total can not fall below 1.
For example, the German has a total of 12 Enemy Casualty Points on the Americans. When rolling for Impulse Points on the following turn, the American player will subtract 2 from his total. Say a roll of 8, now becomes a total of 6 Impulse Points for the turn, and the American side can perform 2 less actions.
1.8 Impulse Point Tracker
Impulse Point Tracker keeps a running total for Impulse Points used during a turn. Impulse Points are subtracted from the total when used.
- Perform an action with a unit, subtract an Impulse Point.
- Perform a Group Action, subtract 2 Impulse Points.
1.9 Player Aid
The Player Aid is a double-sided cardstock sheet with vital information for the players. One side contains the tables needed for combat resolution. The Infantry Combat Table (ICT) is used when attacking foot units and the Vehicle Combat Table (VCT) is used when attacking vehicles. Important modifiers are also listed.
The back side contains the Terrain Effects Chart which list terrain types in the game and their effects as far as cost in MPs to move into the hex, as well as any combat and Line of Sight (LOS) effects.
Infantry Combat Table — 2D6 roll (rows) cross-referenced against Firepower (columns); results: X-Destroyed, C-Casualties, B-Broken, S-Shaken
| 2D6 Roll | -5 or < | -4 | -3 | -2 | -1 | 0 | +1 | +2 | +3/+4 | +5/+6 | +7 or > |
|---|---|---|---|---|---|---|---|---|---|---|---|
| 12 or > | C | C | C-S | C-B | X | X | X | X | X | X | X |
| 11 | B | B | C | C-S | C-B | X | X |
Infantry Combat Table — Firepower Modifiers (cumulative): Adjacent target +1; Melee +2; Degraded LOS -1 per hex (max -2); Shaken 1/2 FP (fractions rounded down); Intensive Fire -1.
Infantry Combat Table — Die Roll Modifiers (cumulative): Moving fire -1; Attached Leader +1; Height advantage +1; Height disadvantage -1; Ambush +1; Shaken unit in Melee -1 (max); Elite, Engineer, Assault, Shock unit in Melee +1 (max); Poor quality unit in Melee -1 (max); Intensive Fire -1.
Infantry Combat Table — Leader Casualty Roll: Owning player rolls 1D6 when attached unit suffers a combat result. If unit destroyed (with X or C): a roll of 1-3 and Leader is destroyed. Casualty: a roll of 1 and Leader is destroyed. Failed Gut Check: Leader also takes a Gut Check roll for same result. Passed Gut Check or No Result: no Leader Casualty Roll.
Vehicle Combat Table — 2D6 roll (rows) cross-referenced against Firepower (columns); results: X-Destroyed, D-Damaged, B-Broken, S-Shaken
| 2D6 Roll | -5 or < | -4 | -3 | -2 | -1 | 0 | +1 | +2 | +3/+4 | +5/+6 | +7 or > |
|---|---|---|---|---|---|---|---|---|---|---|---|
| 12 or > | D | D | D-S | X | X | X | X | X | X | X | X |
| 11 | B | B | D | D-S | X | X | X |
Vehicle Combat Table — Firepower Modifiers (cumulative): Adjacent target +1; Melee +2; Degraded LOS -1 per hex (max -2); Shaken 1/2 FP (fractions rounded down); Intensive Fire -1.
Vehicle Combat Table — Die Roll Modifiers (cumulative): Moving fire -1; Attached Leader/Armor Leader +1; Height advantage +1; Height disadvantage -1; Ambush +1; Intensive Fire -1. Used for both rolls (to Hit and Attack).
Vehicle Combat Table — To Hit Modifiers (cumulative): Captured equipment -1; Shaken crew -1; Reduced crew -1; Elite unit +1; Poor quality unit -1; Target immobile/bogged +1; Acquired target +1; Adjacent target +1; Degraded LOS -1 per hex (max -2).
Critical Hit on a roll of 12 (unmodified). On a Critical Hit, shift FP column 1 to the right.
Vehicle Combat Table — Vehicle Damage Rolls: Attacker rolls 1D6 — 6: Abandon Roll; 5: Immobilized; 4: Main gun damage; 3: Mgs damage; 1,2: Minor damage. Second non-minor damage on an already damaged vehicle, abandoned automatically.
1.10 Game Markers
Cardboard counters are used to represent various things on the gameboard and also administrative markers to track various game functions.
Impulse, Casualty and Victory Point markers are used on their appropriate trackers, and they are differentiated by side to assist with solitaire play.
Markers are used to track game functions, such as the turn, casualties, the status of a unit, etc. Some examples are:
- When a unit moves, place a Moved marker on top to show this action has been performed.
- Place a Fired marker on a unit when it fires.
- After a unit has performs a second action, flip the counter to Used.
- A Melee marker denotes close combat.
- Shaken and Broken markers are placed on units with damaged morale.
- Damage markers are placed on vehicles to denote damage.
- Control markers denote ownership of control hexes.
- All Fire, Movement and Used markers are removed at the end of the turn in the Remove Markers phase.
2.0 Sequence of Play (SOP)
The sequence of play in the game is fairly straight forward and some of these phases may not be used in a given scenario or turn. This shows the order in which players progress through a turn, going top to bottom. The play aid displays this for players to reference.
Turn Sequence: Pre-Turn Actions (Turn Marker, Reinforcements, Smoke Markers, Scenario Rolls, Free Rally/Bog Rolls, Reform Phase) → Turn Gameplay (Initiative Roll, Impulse Pts Roll, Play Turn, Melee Phase) → Turn End (Remove Markers, Score Victory Pts, End of Turn) → Game End (Last turn: Extended Play Check, End of Game, Victory).
2.1 Pre-Turn Actions
Turn Marker - Adjust the Turn Marker. Turn count is down, so move 1 down on the Turn Track at the beginning of a new turn.
Reinforcements - Any reinforcements for a scenario become available for the turn.
Smoke Markers - Smoke lasts for 2 turns, so the markers are changed to a new state at the beginning of a new turn. Smoke counters are flipped over to Smoke 2, and any Smoke 2 counters are removed.
Scenario Rolls - Any required die rolls for certain things on a given turn for things such as OBA, weather conditions etc.
Free Rally/Bog rolls - All Shaken and Broken units get a free rally attempt using normal rally rules and modifiers. Bog Rolls - All bogged vehicles roll in an attempt to free themselves.
Reform Phase - Reorganize units, Support Weapons and Leaders. Leaders can attach or detach with units in the same hex. Leaders can merge 2 reduced Squads of the same type into a full Squad. Support Weapons can be shuffled between units in a stack.
2.2 Turn Gameplay
Initiative Roll - Both players roll 2D6. Highest roll wins initiative for the turn and gets the first Impulse. Ties are re-rolled.
Impulse Pts Roll - Roll a number of dice, set by the scenario, to get a number of Impulse Points for the turn.
Play Turn - All actions are carried out using available Impulse Points until both sides have none remaining.
Melee Phase - All Melee combat takes place in marked Melee hexes.
2.3 Turn End
Remove Markers - Remove all unit markers from the map that are no longer active. These include Moved, Fired, Intensive Fire, Strike and Acquired Target markers.
Score Victory Pts - Total Victory Points, if required, at this point.
End of Turn - Turn is over, return to the top of the SOP for the start of a new turn, unless it is the last turn in which case proceed to game end.
2.4 Game End
Extended Play Check - If it is the last turn, check for extended play. Each player rolls 1D6. A total of 7 or greater and there is 1 turn of extended play, return to top, otherwise the game is over.
End of Game - Game over.
Victory - Victory conditions are counted and a winner is declared.
3.0 Gameplay
3.1 Scenarios
Scenarios in the playbook are used to setup and play the battles.
- It will give a description of the battle and list the number of turns.
- It will list map coordinates, the hexes which form the corner boundaries of the map to be used. Place Map Edge markers on the coordinate hexes and trace imaginary lines around the corners to frame the section of the map to be used in the battle. Use similar hex-lines to border the area, so if hex D21 is a coordinate trace vertically using all D hexes, and trace laterally using all hexes with 21 as the number. There are also optional neoprene border strips available which can outline the playable area.
- The coordinates and the hexlines traced are in play. Half-hexes are not in play, though LOS can be traced through them.
- The scenario will list all forces involved and their setup and/or entry parameters.
- It will list any Control hexes used for victory conditions.
- It will note the Gut Check number and the number of Impulse Points for each side.
- It will list any special rules or conditions to be used.
- It will list any off board assets to be used, such as Airstrikes and Off Board Artillery.
- Finally it will list the Victory conditions.
- It is always an automatic victory for a side that destroys all enemy units.
3.2 Control Hexes
Control markers are placed in any control hexes at scenario start to show ownership.
- Control may be neutral or controlled by either side at setup.
- To change ownership, a unit must move into or through the control hex while maintaining good order status. Ownership is maintained until changed again or contested.
- Single person counters, crews, trucks and vehicles without functioning armaments may not contest or capture Control hexes.
- Control hexes are contested when an unresolved Melee remains ongoing in the hex at the end of the turn. Contested Control hexes are not scored.
- If after a Melee, only one side remains in the hex, then the Control hex is owned by that side, even if the unit is not good order.
3.3 Luck Cards
Unless stated otherwise on the scenario sheet, one Luck card is drawn randomly from the deck by each player at the start of the game.
- Draw the card after units have been setup on board.
- Card is placed face down and not revealed to the other player until used.
- Normally, they are used during the course of a player's Impulse and do not cost an additional Impulse Point to use. However some cards may be played against the enemy while they're acting.
- The player continues with his Impulse before or after using a Luck card.
- Luck cards are removed once they are used.
- Some cards may at times be unusable, in that case your luck is bad.
- Optionally, players can remove vehicle Luck cards from the deck when the scenario only involves infantry.
Example Luck card — Strafing Run: Launch an airstrike on a line of 3 consecutive hexes. All units in hexes are attacked separately with a FP of 4. Vehicle targets use their flank defense. One hex must be in LOS of a good order unit.
For example, the American player uses the Luck card 'Strafing Run' when the enemy units bunch up. After carrying out the attack, the American player can still act.
3.4 Initiative
At the beginning of each turn, both players roll 2 six-sided dice (2D6) for the Initiative.
- High roll wins the Initiative and plays first for the turn.
- Ties are re-rolled.
- Player winning Initiative may pass the first play only if they have less Impulse Points in total than the other side.
4.0 The Impulse System
The Impulse system used in Old School Tactical represents the uncertainty of battlefield command.
The fluctuation of Impulse Points portrays poor communication, supply shortages, fear under fire, courage under fire, getting lost, disregarding orders, and a thousand other things that do not appear in any textbook. This system can be frustrating at times, but it is also realistic in that chaos is always a part of battle.
The fluid nature of the battle will also effect your use of Impulse Points.
- Play alternates from one player to the other after the use of an Impulse Point (or two in case of a group action).
- In general, an Impulse Point is used as any one action performed by a unit such as: Move, Fire, Assault move, Rally, call in an off board artillery (OBA) strike, etc.
- The scenario will set the number of dice rolled for Impulse Points. It may also list additional Impulse Points added to the dice roll. For example, 2D6 + 3 means that 2 dice are rolled and 3 additional points are added to the total.
Sample scenario stat line: GUT CHECK: 7 IMPULSE PTS: 2D6+3
- At the beginning of every turn, both players roll dice to determine their Impulse total. For example, the German player has 3 dice to roll. A 1, 3 and a 6 are rolled, therefore 10 Impulse Points are available to the Germans for that turn.
- Impulse Points are subtracted from your total on the Impulse tracker as they are used.
- During play, a player may pass if his Impulse Point total is less than that of his opponent. For example, the German player has 10 Impulse Points and the American player has 4. As play switches to the American side, the player passes and allows the German to go again.
- If you have no action to perform but you have an equal or greater number of Impulse Points than your opponent, then you can just remove an Impulse Point without performing any action.
- The turn is over when both players have used all of their Impulse Points.
For example, the German player using the Impulse Point tracker has 13 available Impulse Points. After moving a unit on the board, 1 Impulse Point is spent and the tracker is adjusted by moving the marker on the right from the 3 to the 2 box. The running total would then be 12 Impulse Points.
5.0 Unit and Weapon Counters
A unit counter represents soldiers, crewed weapons and vehicles in the game. It can be a Squad of soldiers or a crew operating a weapon. A unit can also be a single person such as a Leader or a Sniper.
And a unit can also be any vehicle such as a tank or a truck.
All counters representing the fighting elements of a player's forces are units.
- Units representing soldiers, whether single or in groups, and moving by using their feet are called foot units. Crewed weapons are also foot units.
- Units representing vehicles are called vehicles and are further categorized by their mode of movement; Wheeled or Tracked.
- Units as targets are either soft (unarmored) and attacked by black numbered HE (High-Explosive) Firepower values, or hard (armored) and attacked by red numbered AP (Armor-Piercing) Firepower values.
- Support Weapon counters represent weapons which are used by units to provide additional HE or AP firepower to that unit.
6.0 Squads
All Squads are foot units and soft targets. A Squad counter represents approximately 8-12 individual combatants.
A Squad counter shows four values: Firepower, Range, Defense and Movement.
- Firepower (FP) - attack value of unit.
- Range - maximum number of hexes this unit can fire.
- Defense - value used when unit is attacked.
- Movement - number of Movement points.
Squads are depicted by the illustrations of two soldiers on the front side of the counter. The reverse or reduced side of the counter is split diagonally into two colors.
Note that reduced Squads are considered the same as Squads when applying game rules.
- Squad counters are flipped to their reduced Squad side when casualties are taken.
- Reduced Squads have reduced stats.
- A reduced Squad taking a casualty is removed from play.
- Red circle denotes reduced status.
6.1 Engineers
Pioneers, Sappers and Engineers are Engineer Squads with unique equipment and abilities.
- Engineers may place a Smoke counter in their own or an adjacent hex. This costs an Impulse Point and counts as a Firing action.
- Engineers reveal Mines when moving onto or adjacent to a hex with Mines (the Engineer does not undergo the attack).
- Engineers can dismantle Mines, Wire and Roadblocks in their own or adjacent hexes as a Firing action. The player spends an Impulse Point and declares the obstacle is being cleared. The Engineer must remain in the hex, and remain in Good Order until the turn's end. Obstacles are then removed.
- Engineers are the only units allowed to use Flamethrowers.
- Engineers add +1 (max) to their attack die roll in Melees.
For example, a German Pioneer exposes a hidden enemy Mines counter when moving. In a subsequent Impulse, the German player attempts to clear the obstacle as a Firing action by the Pioneer, and as long as the Pioneer is good order at turn's end, the Mines are removed. The Pioneer is marked as Used, after a Move and then a Firing action.
6.2 Mobile Troops
Mobile troops represent Squads of foot units (soft targets) with inherent modes of transport which give them increased mobility. Motorcycle and cavalry units are considered mobile troops.
These units are considered to be dismounted when they occupy terrain with heavier cover and structures. Separate counters and rules for unmounted are therefore not needed.
- Mobile troops pay movement costs as foot units when moving through terrain.
- Mobile units must stop when entering a hex with heavy terrain such as structures, bocage and woods (terrain which blocks LOS is considered heavy). Do not have to stop in road/structure, road/woods hexes if using the road.
- Mobile units must stop when entering a hex of water, stream/river and marsh.
- Mobile units can have attached Leaders and support weapons like other Foot units.
- As these units have their own attached modes of transport, they cannot be transported by vehicles, nor use Rolling Cover.
- In practical terms, use these units as you would other Foot units.
7.0 Single Person Counters (SPC)
All Single Person counters are foot units and soft targets. Single Person counters are represented by an illustration of a single soldier on the front side of the counter. Single Person counters do not have a reduced side.
- These counters represent a single person such as a Leader or Sniper.
- Single Person counters may not capture or contest control hexes.
- Single Person counters may not carry or use support weapons.
- Single Person counters and unattached Leaders may attempt to evade Melee. Owning player rolls 1D6 (1 six-sided die); a 5 or 6 succeeds and the owning player moves the counter to an adjacent hex. Fail, and the unit must fight in the Melee.
- A Single Person counter is destroyed with a Casualty or an X result on the Infantry Combat Table (ICT). For Attached Leaders, see Leader Casualty Roll (28.2).
7.1 Snipers
- Snipers may not be a part of a Fire Group or Group move.
- Snipers may occupy a hex with other friendly units, but do not count against stacking limits.
- When attacking Squads with attached Leaders, a Sniper can elect to attack the Leader only.
- When attacking Leaders, Armor Leaders and other Snipers, Firepower is doubled.
- Snipers add +1 Def and +1 FP to a side's total in Melee.
- If caught alone in a Melee, Snipers have a Firepower and a Defense of 1 and do not get the +2 FP Melee modifier.
- Snipers can use Stealth movement (23.3).
7.2 Leaders
- Leaders have no inherent Firepower and may not attack other units on their own.
- In place of the Firepower on the counter is a number in a white circle. This is the Leader's command range (number of hexes from the Leader, not including the Leader's hex).
- Other units must be within this command range to get the +1 DRM for Rally attempts and Artillery Spotting rolls.
- Leaders must be attached to a unit or group to apply a +1 DRM to all combat rolls (to hit, attack, Melee). Maximum is +1 even if there is more than 1 Leader in a hex.
- Attached Leaders add +1 Def and +1 FP to a side's total in Melee.
- Leaders must be in good order to apply any bonus.
- Leader bonuses only apply to foot units and not vehicles, see Armor Leaders (7.4) for vehicles.
- If caught alone in a Melee, Leaders have a Firepower and a Defense of 1 and do not get the +2 FP Melee modifier.
7.3 Attaching Leaders
Leaders are attached or voluntarily detached in the Reform Phase. It does not cost an Impulse Point.
- Leaders may be attached to any foot unit or Crewed Weapon. They may not attach to other Single Person Counters or vehicles (exception; Armor Leaders).
- Only one Leader can attach to a single unit.
- The Leader must be in the same hex with a unit to attach and it must be declared by the player.
- Leaders can start a scenario as attached.
- Leaders entering as reinforcements can enter as attached.
- Place the Leader counter on top of the unit it is attached to.
- An attached Leader moves with its unit without additional Impulse Point costs. For example, a Lieutenant attaches to a Rifle Squad. They now activate as one, spending 1 Impulse Point when performing an action.
- Leaders use their Movement Points when unattached. When attached, they use the Movement Points of the unit to which they are attached.
- If a Leader is in a stack and one unit is eliminated in an attack, the Leader is automatically attached to the remaining unit.
- Leaders can assist in Rally attempts of other Shaken/Broken Leaders.
- Combat bonuses are only applied to units to which the Leader is attached. Other units merely in the command range of the Leader only get bonuses for Rally and Artillery Spotting rolls.
7.4 Armor Leaders
These represent excellent Leaders attached to a single vehicle.
- Armor Leaders only have a command range number on the counter.
- Other vehicles must be within the command range to get the benefits of leadership for Rally and Artillery Spotting rolls.
- Armor Leaders cannot Group move or Group fire vehicles.
- Armor Leaders only apply combat bonuses to the vehicle they are attached to. A +1 DRM to all combat rolls (to hit, attack, Melee) for the vehicle they are attached to.
- Armor Leaders add +1 Def and +1 FP to a side in Melee.
- Armor Leaders must remain with the vehicle they are attached to at scenario's start and cannot move to other vehicles.
- If the vehicle is destroyed or abandoned, the Armor Leader is removed from the game, even if the crew survives.
- Armor Leaders do not take Leader Casualty rolls when their vehicle is attacked.
- Armor Leaders can only be attacked by Snipers. Their Defense in the attack is 5. If Armor Leader is killed by a Sniper, vehicle automatically becomes Shaken.
- 1 Casualty Point is scored when an Armor Leader is removed from game as a casualty.
7.5 Leaders Across Branches
There are different military branches for all sides used in this game. And sometimes co-operation was not always the greatest among the troops. Some scenarios may have units on a side with differing military branches. Basically Leaders must be of the same military branch as the unit it is attached to for any combat (Attack, To Hit, Melee) bonuses.
- Leaders must be of the same military branch to confer any combat bonuses on units.
- Leaders from different military branches, can only assist in Rally attempts.
- Leaders can still form Groups of units from different branches. A Fire Group will only get combat bonuses if one of the units is of the same branch as the Leader.
- Russian Commisars can assist all Russian units.
For example, a US Airborne Lieutenant can attach and move with a US Army unit, but it cannot apply any modifiers to the unit other than a Rally modifier. Same applies to German SS and Army units, Russian Army and Guard units, Japanese Army and SNLF units, British and Commonwealth units, US Army and USMC, etc.
8.0 Crewed Weapons
All Crewed Weapons are foot units and soft targets. Crewed Weapons are represented by an illustration of the weapon, and include at least an attack factor, defense factor and a movement factor. A PaK 40 and HMG are examples of Crewed Weapons.
A Crewed Weapon counter shows: Max Range, Covered Arc, HE Firepower, Max AP Firepower, No Move/Fire indicator, Defense, Crewed indicator, and Foot Movement.
- Max AP (Armor Piercing) Firepower - maximum attack value on armored vehicles (AP FP at short range).
- HE (High Explosive) Firepower - attack value on soft targets.
- Max Range - maximum range of weapon.
- Defense - value used when attacked.
- c - crewed designation.
- Foot Movement - number of hexes unit can move by foot. A 'T' signifies the unit may only move by transport.
- * - weapon may not fire after Moving/Unloading.
- * - weapon may only occupy ground levels in structures.
- Covered Arc - points to the front, firing arc of the weapon.
- Crewed Weapon counters are also flipped to their reduced side when suffering casualties.
- When a Crewed Anti-tank Gun (ATG) is eliminated in battle, attacking player rolls 1D6. On a 5 or 6 the gun itself remains on the field. Place an Unmanned marker on the gun.
- An ATG may be reactivated or captured by moving any type of Squad/reduced Squad into the hex. Remove the Unmanned marker and Squad counter and use the gun counter as normal. If it's used by a reduced Squad, use the reduced side of the weapon counter. The gun's covered arc remains as it was when captured or until changed as per the rules by the new owner. Place a Captured marker on the weapon.
- Action limits of the unit manning the gun are still maintained. So a unit that has already used its movement or firing actions for the turn may not then move and fire again after manning the weapon.
- A newly captured ATG may be fired in the same turn on a new Impulse but it is Moving Fire.
- Re-manning or capturing an unmanned weapon is declared when the player moves onto the weapon.
- Anti-tank guns may occupy Bunkers, Pillboxes and Level 1 (ground level) of structures.
- FlaK 36 (88mm's) are large and may not occupy structures, Pillboxes or Bunkers.
- Unmanned ATGs may be destroyed at will when moved onto, at no Impulse Point cost. Such action is executed after any Opportunity Fire on the hex. No Enemy Casualty Points are scored.
- Crewed Weapons marked with an asterisk * may not fire after moving/unloading into a new hex.
- Crewed Weapons marked with an asterisk * may only occupy the ground level of multi-level structures.
- Crewed Weapons with a covered arc are marked with a red and gray triangle in the corner. The triangle is placed on a hex side. Lines are traced out from 2 adjacent hexes to show the firing arc of the gun. The weapon may only fire in the area of the covered arc.
- Guns can change their covered arc by spinning gun in the same hex. The unit can fire, but it incurs all penalties for Moving Fire. Spinning the weapon and firing after occur as 2 separate actions.
8.1 Sustained Fire
Heavy and medium machine guns (crewed weapons) are powerful weapons on the battlefield. Special mechanics are required to reflect the high rate of fire of these weapons.
- A crewed HMG, MMG capable of using this will have Sustained Fire noted on its data card. (Note that some older versions of data cards may not have this.)
- Crewed weapons using this mechanic must declare it before firing. HMGs, MMGs do not automatically use this and may still fire normally.
- Support weapon LMGs and secondary armament MGs on vehicles may not use this mechanic.
- A crewed weapon may not use Sustained Fire as part of a Fire Group.
- Sustained Fire allows the weapon to fire at two separate targets in the same or conjoined hexes (must have LOS to both targets) or it can fire at the same unit twice in a row.
- Separate attack rolls are carried out for each attack.
- Targets are declared before firing and cannot be changed after result of first attack. For example, if firing at same target twice and unit is destroyed on first attack, second attack is not redirected but instead lost.
- The attacks are carried out one after the other as part of the same Impulse by the controlling player.
- It costs 1 Impulse Point to use, and counts as a normal Firing action. Place a Fired marker.
- Ammo Out / Gun Damaged occurs if a pair of natural 1s or 2s is rolled in any attack while using Sustained Fire. The Crewed HMG, MMG counter is removed immediately and replaced with a Reduced Rifle Squad (regardless of manpower of the weapon). No Enemy Casualty Points are scored.
For example, the American player declares Sustained Fire for the MMG. Separate attacks are carried out, one after the other, against the German Rifle Squad and the German Pioneer Squad. If natural double 1s or 2s occur in either attack, the MMG suffers Ammo Out/Gun Damaged.
8.2 Abandoning Weapons
- Inherent crews may not voluntarily abandon their weapons.
- Re-manned or captured ATGs may be abandoned at any time by replacing the Unmanned marker or destroying the gun and placing the unit counter in the same hex.
- Use the same type of Squad that re-manned or captured the weapon.
- If the unit suffered casualties while manning the weapon, this is reflected in the unit counter placed.
9.0 Vehicles
Most vehicles in the game, are armored and hard targets. They are attacked using AP Firepower. Trucks and Jeeps are soft targets and are attacked with HE Firepower or small arms.
Vehicles are depicted by an illustration of the vehicle on the front side of the counter. The reverse side of the counter is an illustration of the vehicle when destroyed.
A vehicle counter shows: Unit Facing, Max Range, Movement, HE Firepower, Max AP Firepower, Secondary Range, Secondary Firepower, Front Defense, and Flank Defense.
- Unit Facing - the triangle represents the front facing of the vehicle.
- Max AP (Armor Piercing) Firepower - maximum attack on armored vehicles (AP FP at close range).
- HE (High Explosive) Firepower - value of attack on soft targets.
- Max Range - maximum number of hexes the main armament may fire.
- Secondary Firepower - attack value of vehicle machine guns.
- Secondary Range - maximum range of machine guns.
- Front Defense - used when the vehicle is attacked through its front facing arc.
- Flank Defense - used when the vehicle is attacked through its flank facing arc.
- Movement - number of Movement Points (MPs).
The front covered arc uses the hex directly in front of the vehicle's hex (A), and the 2 hexes adjacent to this hex and slightly lower (hexes B and C). LOS is traced out from the front of the vehicle along these paths and this area represents the covered arc of the vehicle.
- Vehicle counters represent a single vehicle.
- Under the Movement number is a symbol for movement type, wheeled or tracked.
- The main armament of a vehicle is listed on its counter and data card. HE and AP attack values are listed for the weapon, as well as its maximum range (# of hexes).
- Secondary armament on a vehicle represents machine guns which can attack soft targets. They have their own separate firepower and range. Unless noted otherwise, secondary armaments can fire in any direction.
- The red Unit Facing triangle is pointed to a hex-side (not vertex) to designate the vehicle's facing. Vehicles with a solid red Unit Facing triangle can fire their main armament in any direction, normally in a turret with a 360 degree mount.
- Vehicles with a covered arc are designated with a red and gray Unit Facing triangle and represent a main armament that is fixed and not free to fire in any direction. Vehicles with a covered arc are limited to firing their main armament in a covered arc extending from the front facing of the vehicle.
- When destroyed, the counter is flipped to become a Wreck.
- A Casualty Point is counted for both the vehicle and the crew, so 2 points total.
- Trucks and the Armored transports do not roll for crew survival and are only counted for 1 Casualty Point.
9.1 Open Top Vehicles
Vehicles with an open top are distinguished by a gray fill on the counters and is noted also on their data cards.
- Open top vehicles have crews which are exposed and can be fired upon by small arms (foot units inherent firepower and machine guns). When using small arms, the attacker halves their Firepower (rounding down fractions). Exposed crews are attacked on the Infantry Combat Table using a 5 Defense for the crew plus any terrain modifier for the hex.
- Exposed crews do not take casualties. Any result of X becomes an automatic Broken (no Gut Check roll) and any C result becomes an automatic Shaken. Broken/Shaken results roll the Gut Check as normal. The vehicle can only be Broken or Shaken by small arms fire.
- An open top vehicle in Melee has a -1 applied to its Defense.
- Open top vehicles have -1 applied to its Defense when attacked by aircraft and OBA.
- Open top vehicles have -1 applied to its Defense when attacked by thrown infantry support weapons (Molotovs, Bundles, Satchels, Sticky Bombs) and Flamethrowers in adjacent hexes.
9.2 Unarmored Vehicles
These represent vehicles like Trucks and Jeeps which are soft targets.
- Unarmored or soft vehicles can be attacked by small arms.
- Soft vehicles are automatically hit by small arms, the attacker halves their Firepower and the vehicle is attacked on the Vehicle Combat Table as normal.
- When attacked by heavier crewed guns, vehicle main armament and anti-tank SWs, first roll to hit. If a hit is made, the soft vehicle is then attacked on the Vehicle Combat Table using the HE Firepower.
9.3 Dual Armaments
Certain vehicles are armed in such a way as they are considered in game to have 2 main armaments. This is listed on the unit data cards for these units.
- Only 1 of the main armaments (MAs) may be fired per Impulse. Basically only 1 MA can fire in a given Firing action.
- Any secondary armaments may be fired normally each Impulse.
- In most cases, 1 weapon is hull mounted while the other is in a turret. Hull mounted weapons can only fire in the vehicle's covered arc, while the turret weapon can fire in 360 degrees.
- If vehicle takes Main Gun damage in combat, owning player makes a 1D6 roll. On a 1-3 the turret weapon is damaged, on a 4-6 the hull mounted weapon is damaged.
- Note that sometimes only 1 weapon's stats are shown on the counter, but all are shown on the data card.
9.4 Limited Fire
Certain vehicles are limited in the use of their main armament. Slow rates of fire because of 2 part shells, very limited ammo in the vehicles and other notable factors that may hinder its use in the field.
- A vehicle restricted by Limited Fire can only fire its main armament once per turn.
- Secondary armaments can still fire twice.
10.0 Support Weapons (SW)
These represent portable weapons used by Squads. Depending on the type, they may be single or multi-use.
A support weapon counter shows Firepower and Max Range.
- Support weapons will have a Firepower and range on the counter. It will have a red AP Firepower number if the weapon can be used against armored vehicles.
- Single use SWs are removed after use. Multi-use can be used through the course of the scenario.
- Place the support weapon counter directly beneath the unit which possesses it.
- A support weapon's Firepower can be added to the Squad's to increase the Firepower (FP) for an attack.
- A LMG may be fired to its max range on its own even if the unit firing it is out of range.
- Satchel Charges, Grenade Bundles, Molotovs, Panzerfausts and Sticky bombs are single use and removed once used.
- Light Machine Guns, BARs, Anti-Tank Rifles, Ampulomets, Mortars, Panzershrecks, Bazookas, Flamethrowers and PIATs are used for the duration of the game.
- Flamethrowers, Satchel Charges, Grenade Bundles and Molotovs can be used against vehicles in an adjacent hex at half FP (round down fractions). The vehicle is hit automatically but the Squad's FP is not added to the attack. The attack is resolved on the Vehicle Combat Table (VCT).
For example, a Rifle Squad uses a Light Machine Gun (LMG) for a total of 4 (Rifle) + 2 (LMG) = 6 Firepower.
For example, a Rifle Squad throws a Grenade Bundle at a Polish armored car in an adjacent hex. 3 FP of Bundle +1 FP Adjacent target modifier is halved to a 2. The Rifle's FP is not used in the attack. The attack is through the vehicle's frontal arc, so its front defense of 2 is used. 2 FP - 2 Def = 0 column of the VCT.
- When a Squad carrying a support weapon is destroyed, the support weapon remains on the field and can be picked up and used by either side.
- A unit may only use 1 support weapon at a time and that support weapon may only be used by that Squad in the turn.
For example, in a stack of 2 Rifle Squads and a LMG, the LMG may only be used by the 1 Squad during the turn.
- In a stack, if a unit using a support weapon is eliminated, the support weapon is automatically transferred to the remaining unit.
- A unit may only carry 1 support weapon while moving, but it may be stacked with any number of them in a hex.
- Support weapons may be picked up or destroyed at no cost by an active unit in the same hex.
- Support weapons may be transferred between stacked units at the start of a new turn in the Reform phase.
- 1 support weapon per Squad/reduced Squad may be used in Melee.
- Support weapon's FP is added to the Squad's, and then total is then halved when a unit is Shaken. For example, a Shaken Rifle Squad with a LMG would have a FP of (4 + 2) /2, rounded down = 3.
10.1 Anti-tank Support Weapons
Squad Anti-tank support weapons are used against vehicles. If they have a HE Firepower, they can also be used against foot units in structures, Bunkers and Pillboxes.
- Anti-Tank SWs fired at vehicles require using their to hit rolls. Then an attack roll is taken on the Vehicle Combat Table (VCT) if a hit is achieved. The AP Firepower (red) of the weapon is used against an armored vehicle or the HE Firepower (black) is used if it is a soft vehicle (Truck). The Squad's FP is not added to the attack on the vehicle. Note that Anti-tank Rifles do not have an HE Firepower value, so use a 1 HE FP when attacking soft vehicles with them.
- If the Anti-tank SW has a HE Firepower, it can be fired at foot units in structures, Bunkers and Pillboxes, in which case their HE value is added to the Squad's FP in the attack. No to hit roll is required.
- Bazookas, Panzershrecks and Panzerfausts may not be fired from inside of Bunkers and Pillboxes because of blowback from the weapons. They may be fired from structures but all units in the firer's hex must pass a Gut Check roll or become Shaken (after weapon has fired).
- Anti-tank support weapons can only be used in a Melee when an enemy vehicle is involved. Firepower added by the weapon in this case is 2.
10.2 Satchel Charges
Satchel charges are packs filled with heavy explosives. They are single use and removed after use.
- Satchel Charges are special in that they attack all units in the target hex equally. Attached Leaders in the hex face a Leader Casualty Roll (28.2).
- The Squad's FP is not added into the attack, but throwing the Satchel Charge counts as a Firing action by the unit.
- Firepower of the attack is always an unmodified 10, though the attack rolls themselves may be modified (example; attached Leader, Moving Fire).
- If a Shaken unit uses a Satchel, the Firepower remains a 10, but a -1 DRM is applied to attack roll.
- Check for structure collapse when using a Satchel Charge with a +1 DRM to the collapse roll (see Structure Collapse, 16.7).
- Satchel charges may not be used in Melee.
For example, a German Pioneer throws a Satchel into an adjacent heavy structure holding 2 US Rifle Squads. 2 separate attacks are carried out against the Rifles with 10 Firepower, the Firepower of the Pioneer is not used in the attack. The Rifles get the benefit of +2 Defense for the heavy structure. So each attack will be: 10 FP - 6 Def (4 + 2) = +4 column of the ICT.
Results of attacks carried out, one Rifle Squad is Broken and the other takes a Casualty and is flipped to its reduced side. The German Pioneer is marked as Fired. A 1D6 roll takes place immediately to check if the structure collapses into rubble and a +1 DRM is added to the roll for the Satchel charge's powerful explosion. So a 5 or 6 would collapse it.
10.3 Mortar Support Weapons
Mortar SWs represent a single weapon used by a Squad in the game, as opposed to multiple tubes used in an OBA Mortar Strike.
- Mortars have a minimum and maximum range and cannot target units outside of these ranges.
- The Squad firing the mortar does not combine its FP with the mortar attack, but it counts as a Firing action by the unit.
- Target hex chosen must be in LOS of the firing unit. The attack cannot be spotted by other units.
- Attached Leaders give +1 DRM to both accuracy and attack rolls.
- A 1D6 roll for accuracy is made with 4 or higher being accurate. +1 modifier to the roll if a Leader is attached to firing unit. -1 modifier if firing unit is Shaken or has moved before firing.
- If inaccurate, roll 1D6 for drift direction using normal artillery Drift rules (see Drift, 33.3). The attack is then moved 1 hex only in that direction and the attack is carried out.
- Area of effect is 1 hex only.
- The attack hits all units in the target hex, so separate attacks are carried out against each unit. Attached Leaders in the hex face a Leader Casualty Roll (28.2).
- Armored vehicles cannot be targeted with Mortar support weapons and fire from the Mortar support weapons do not affect them. This cancels unrealistic use of a single tube hitting moving vehicles on the battlefield, whereas an OBA strike in a hex affects vehicles because it is multiple tubes and a true area effect.
- Soft vehicles, such as trucks, in the target hex are attacked on the VCT.
- Mortar support weapons do not cause structure collapse or airburst.
- Can fire Smoke into the target hex. 1 hex only.
- Degrading terrain between the mortar and the target hex does not remove FP from the attack.
- Mortars may not be used in Melee.
- Mortars cannot be fired from inside Structures, Bunkers or Pillboxes. But can be fired from Woods and Ruins.
11.0 Unit Cards
Unit cards are provided to be used as references by players.
- Vehicle, gun and some support weapon cards have Weapon Tables which provide To Hit numbers and AP Firepower numbers for the unit at various ranges.
- Range is the number of hexes from the unit to the target, not counting the attacking unit's hex.
- Other important factors for the unit are noted with an asterisk on the card.
A Foot Unit Card carries: Unit Name, Counter stats, Additional characteristics, and a Counter Graphic.
A Vehicle Card carries: Unit Name, Unit Graphic, Main Armament, Counter stats, a Weapon Table, Movement Type, and Additional characteristics.
A Support Weapon Card carries: Unit Name, Unit Graphic, Armament, Counter stats, Additional Characteristics, and a Weapon Table.
12.0 The Battlefield
12.1 Line of Sight (LOS)
LOS is an imaginary line drawn from center hexdot to center hexdot.
- In order to attack a unit or spot a hex for an Air or OBA strike, your unit must have LOS to that unit/hex.
- Aids such as string or rubber bands may be used to check LOS.
- There is no cost or limit on LOS checks.
- LOS is always reciprocal, so if unit A has LOS to unit B, then B also has LOS to A.
- Terrain features and battlefield objects will block, degrade or have no effect on LOS. These LOS effects are noted on the Terrain Effects Chart (TEC).
- Unit counters on the board do not affect LOS or fire through their hexes except Wrecks, which degrade LOS. A 50m space is large and one can assume that even though units may be firing through it, they are not spraying indiscriminately through their own troops when attacking units down range.
- Melees do not affect LOS or fire through their hexes.
- The hex terrain, including hexside terrain, of the firing unit and target unit does not affect LOS. For example, a Rifle unit in Brush terrain attacks a unit in Woods terrain. LOS sight is not degraded by the Brush, nor blocked by the Woods. Rather the Woods terrain simply adds +2 to Defense of target unit in the hex.
12.2 Blocked LOS
- If LOS to a target is blocked by terrain, then the attack cannot proceed.
- A target cannot be spotted through blocking terrain.
- In structure hexes, only the structures themselves block LOS. If LOS passes through a structure hex without hitting the structure itself, it is then treated as degraded.
- In hill hexes, only the hill itself blocks LOS. If LOS passes through the hex without hitting the hill, it is considered degraded.
12.3 Degraded LOS
- Some terrain and battlefield markers hinder attacks by degrading LOS.
- LOS may be traced through a maximum 2 hexes of degrading terrain, any more and LOS is considered blocked.
- A -1 to Firepower for each degraded hex the attack passes through, up to a maximum of -2 FP.
- A -1 DRM is applied to hit dice rolls for each degraded hex the attack passes through up to a maximum of -2.
- If the target is in degrading terrain, the FP is not reduced by it. Rather the Defense modifier of the terrain is used.
- In a fire group, if both attacking units trace LOS through the same degrading hex, the -1 FP is only applied once to the group. If a group comprises 2 adjacent units with different LOS to the target, a max of 2 degradations is still allowed and applied to the group. In short, the Firepower of the group is added together and then the degrading terrain subtracts FP from the total as long as there is only 2 hexes overall of degrading terrain between the units of the fire group and the target.
Diagram note: White lines show clear LOS through hexes and units' Firepower is not affected. Yellow line shows that LOS is degraded by the brush terrain, attacks through hex suffer -1 to Firepower. Red line shows that LOS is blocked by the structure, and attacks cannot occur on this path.
12.4 Levels
There are 5 height levels in the game. Levels 0, 1, 2, 3 and -1. Each is roughly 3-4 meters in height.
- Level 0 is ground level, base level.
- A level 1 hex is higher than level 0 and is marked with a light blue triangle and center dot.
- A level 2 hex is higher than level 1 and is marked with a red triangle and center dot.
- A level 3 hex is higher than level 2 and is marked with a yellow triangle and center dot.
- A -1 level hex, or gully is lower than level 1 and is marked with a gray, inverted triangle and center dot.
- Firing from higher levels increase a unit's range by 1 hex when attacking targets at lower levels.
- Units on higher levels can trace LOS over all lower level terrain, Wrecks and 1 storey structures apart from a 1 hex blind spot directly behind it. If the ground level terrain is blocking terrain then the LOS into the blind hex is blocked, if it is degrading then the LOS into the blind hex is degraded.
- Farms, wheatfields, shell holes, roads, open, Bunkers, streams and Wire have no appreciable height and have no effect when tracing LOS from higher levels.
- Hedges and stone walls do not degrade LOS between different levels but the defensive bonus still applies to adjacent units.
- Smoke is considered multi-level and cannot be seen over.
- Attacking from a higher level adds +1 to all 'to Hit' and attack dice rolls. Height advantage modifier.
- Attacking from a lower level adds a -1 to all 'to Hit' and attack dice rolls. Height disadvantage modifier.
12.5 Hill and Gully LOS
- Hill and gully hexes are marked with colored level triangles and the edges are shown with visible contrasting lines.
- Hills blocks LOS for units at the same level or lower.
- If LOS is traced through a hex with a hill, without hitting the hill itself, LOS is degraded.
- Units on level 1 hills (or higher) can trace LOS over ground level terrain apart from a 1 hex blind spot directly behind it. If the ground level terrain is blocking then the LOS into the blind hex is blocked, if it is degrading then the LOS into the blind hex is degraded.
- To trace LOS over a level 1 hill hex (with the blind spot behind), units must be at level 2 or higher.
- Units on a hill may only fire at lower levels if it is on a crest hex. A crest hex is the higher hex of adjacent hexes of different levels (outer hex of a hill).
- If a unit is back 1 hex or more from a crest, then it is considered on a plateau and may only fire at units at the same or higher elevations.
- The reverse is also true, as an attacker from a lower level may only target units on a crest hex but not those on a higher plateau.
- Gullies can be thought of as inverted hills, and units will have to be on the edges to trace LOS out of them and to be seen by units on other levels.
- LOS of higher levels is not effected by gullies.
- Slopes are in effect when hill hexes of different levels are adjacent to each other, in which case LOS is traced directly up or down the slope and there is no blind spot created.
- Terrain in a slope hex will add the blind spot (either blocking or degrading) when tracing from a higher spot on the slope.
- Lower level terrain adjacent to a higher level hill or structure still casts 1 blind hex directly behind it. A false plateau is not created.
- When attacking from a hill hex to another hill hex, all ground level terrain along the path is ignored.
- Remember that LOS is reciprocal, so if a unit can see a unit on lower levels, that unit can see it in return. If the higher level unit can attack a unit, then the lower level unit can attack the higher unit with the same LOS path.
For example, a HMG is on a level 1 hill and attacks units on a lower level. 1/ The attacker's LOS hits a woods hex and Rifle Squad 1 occupies the hex behind it. The HMG cannot see Rifle Squad 1 as it is in a blind hex. 2/ Rifle Squad 2 is attacked with full FP as the hedge does not degrade the LOS from the higher level. 3/ The HMG cannot attack Rifle Squad 3 as it is in a blind spot 1 hex directly behind the structure. 4/ Rifle Squad 4 is 1 hex behind degrading terrain, so LOS is degraded and 1 FP is subtracted from the HMG's attack.
Diagram note: Levels 0-3 shown in one picture; note that this is also a Slope.
Design note: Sometimes problems arise when tracing LOS across levels of height and one of the biggest offenders was terrain creating false plateaus. So the best solution is just to eliminate these false plateaus altogether, and simply install the simple fact that when tracing LOS from higher elevations, terrain on lower levels will have a blind spot immediately behind them, much like a cast shadow. And whether that space is blocked or degraded is dependant on the preceding terrain.
For example, a Sniper is on a level 1 hill crest hex. It has clear LOS to lower levels in front and to the sides. However if tracing LOS behind it across other level 1 hill hexes, it becomes a plateau and can only trace LOS in this direction to the same or higher levels.
12.6 Structure LOS
Tracing LOS to and from multi-level structures is treated the same as LOS with hills. Structures that are multi-level are marked with colored triangles and center dots, the same as hills.
- Level 1 and level 2 structures (2 and 3 storey) can trace LOS over lower level structures, Wrecks and terrain, with the same blind hex immediately behind it. For example, a unit firing from a 2 storey structure can see over and trace attacks past a hex of woods, but there is 1 blind hex immediately behind the woods.
- Although level 1 buildings can be traced over from higher levels, multi-level buildings will always block LOS. So for example, a unit on a level 3 hill cannot see over a level 2 building.
- When attacking from a multi-level building to another multi-level building, all ground level terrain along the path is ignored.
- Height advantage/disadvantage attack modifiers are used with higher level structures and even between Level 2 and Level 3 buildings.
Diagram note: This diagram illustrates various LOS aspects across a 3 level hill. A MMG is on the crest hex of a level 3 hill. LOS paths are shown in different colored lines and the type of LOS to the hex is noted in the circles. C is Clear LOS, D is Degraded LOS, B is Blocked LOS. S represents a Slope. P represents a Plateau. Remember the 1 blind hex rule when tracing LOS to lower levels (with the exception of slopes) and whether the preceding hex is blocking or degrading terrain.
12.7 Heavy Urban LOS
- Tracing LOS in the confines of a city requires some specific rules. These rules affect play on Map 3 (Stalingrad expansion).
- All multi-level hexes are marked with colored triangles and matching colored center dots. If the structure carries a little bit outside of the hex, but it has no triangle, then the hex is considered open terrain. These little bits are ignored when tracing LOS.
- Level 1 structures are used in whole.
- If the hex contains both a road and structure, the player must declare what terrain the unit is using.
- When a player's unit ends its move in the road, place an On Road marker on the unit.
- If a unit is attacked on the road in this dual terrain hex, LOS can be traced to any portion of the road in the hex and does not have to see the center hex dot.
- The same applies if the unit is attacking from the road hex.
- If the hex is a normal road only hex, the center dot is still used for LOS.
- Dual terrain hexes of Rubble/road and debris/road, the road is used for movement and the terrain is used for Defense. The center hex dots are used for LOS.
Diagram note: Hexes N20 and O20 have building art but they are not marked with the triangles, so not a part of the building. They are thereby treated as open hexes. A unit in N21 can fire into N19 and O19. Fire inside of the building itself is limited to adjacent hexes.
13.0 Battlefield Markers
These light brown markers represent changes to the battlefield as a result of construction or damage. The effects of the counter applies to all eligible units in the hex. For example, 2 Rifle Squads are in a hex with a Trench counter, both Squads receive the +2 Defense modifier.
A maximum of 1 battlefield marker is allowed per hex (excluding Smoke), so multiple Covers are not allowed in a single hex for example, nor could one roll for cover when already in a Bunker.
Terrain and fortification Defense bonuses are cumulative. For example, a Cover (+1) in the woods (+2) adds a total of +3 Defense.
Battlefield markers will show the Defense modifier on the counter or a Firepower value in the case of a Mines marker.
Note that, COT is short for 'Cost of Terrain'. This is the cost in Movement Points to enter a hex.
13.1 Cover
All units, including vehicles, may attempt to improve their defensive position, even in a structure.
- Owning player spends an Impulse Point and rolls 1D6. A 5 or 6 is successful and a Cover counter is placed in hex. May be rolled for multiple times by the same unit in a turn as there is no limit on attempts.
- +1 Defense to all units in a hex with Cover.
- A Cover counter is removed once all units leave the hex, or are destroyed. The Cover remains as long as the owning player has a unit in the hex.
- Cover attempts cannot be made in hexes containing a Bunker, Pillbox, Foxholes, Trench, Wire or Roadblock.
- Cover attempts are allowed in Rubble terrain on a mapboard, but not in a battlefield marker of fresh Rubble.
13.2 Foxholes and Trenches
Foxholes and Trenches are placed at the scenario start. They cannot be dug in the course of gameplay.
- +1 Defense to all foot units in Foxholes.
- +2 Defense to all foot units in a Trench.
- Vehicles get no Defense bonus for being in a hex with Foxholes or Trenches.
- Foxholes and Trenches remain in place on the map for the entire scenario and can be occupied by either side.
13.3 Mines
Mines are provided to a side in a scenario and are hidden at game start.
- Mines are revealed when the hex is entered by an enemy unit, immediately triggering the Mines' attack.
- Engineers reveal Mines when moving onto or adjacent to a hex with Mines (the Engineer does not undergo the attack).
- Engineers can dismantle Mines (see 6.1).
- Revealed Mines remain on the battlefield, attacking any enemy unit that enters their hex (exception: Engineers) until they are removed.
- The owning player may move through his own Mines without revealing them or triggering an attack.
- Mines attack foot units on the ICT with a Firepower of 5.
- Mines attack vehicles on the VCT. The hit is automatic and a Firepower of 5 is used against the vehicle's flank defense.
- Passengers on a vehicle hit by Mines suffer Collateral Damage (24.4).
- As Mines normally affected vehicle mobility, any Damage (D) result on a vehicle from a mine attack is an automatic Immobilization.
13.4 Bunkers
Bunkers are fortifications that are provided to a side in a scenario and listed in the setup instructions.
- Normal stacking rules apply for hexes with Bunkers.
- Vehicles may not enter Bunkers, only the hex terrain itself.
- Bunkers may not be placed in a structure or stream/river hex.
- Units inside Bunkers receive +3 Defense.
- It costs 1 Movement Point (MP) for a unit to enter or exit Bunkers. Units also pay the cost to enter the terrain of the hex itself.
- Bunkers may be occupied by either side.
- Place the Bunkers counter on top of the units occupying them.
- Units may fire out of a Bunker in a 360 degree arc.
- Bunkers may be destroyed by the a unit occupying them. It costs an Impulse Point and counts as a Firing action.
- Bunkers can be destroyed by attacks which involve a collapse roll (OBA, Air attacks and heavy weapons with 'collapse' on their data cards). After attack on unit in Bunker, make a 1D6 collapse roll. If a 6 is rolled the Bunker is destroyed and removed from play. Destroyed Bunker does not inflict more damage on the unit inside.
- Crewed weapons are destroyed if Bunker destroyed and replaced with a Crew counter. 1 Casualty Point scored.
- AT guns with a covered arc still pay a penalty for changing their arc inside a Bunker.
- Melee is still triggered in the hex when an enemy unit (even a vehicle) assault moves into the hex. Note that although vehicles cannot enter Bunkers, they can engage at extreme close range and therefore engage in Melee.
13.5 Pillboxes
Pillboxes are hardened concrete fortifications with firing embrasures. They are provided to a side in a scenario and listed in the setup instructions.
- Normal stacking rules apply for hexes with Pillboxes.
- Vehicles may not enter a hex with Pillboxes.
- Pillboxes may not be placed in a structure or stream/river hex.
- Units in Pillboxes receive +3 Defense.
- It costs 1 Movement Point for a unit to enter or exit Pillboxes. Units also pay the cost to enter the terrain of the hex itself.
- Pillboxes may be occupied by either side.
- Place the Pillbox counter on top of the units occupying them.
- Pillboxes have a covered arc denoted by the red and gray triangle on the counter. This is pointed to a hexside in the same manner as vehicles.
- Units inside the Pillbox can only attack at range through this limited covered arc. The reverse also applies that enemy units can only attack units in the Pillbox at range through this arc.
- The flank of the Pillbox only comes into play when enemy units are adjacent. Adjacent enemy units can attack into the Pillbox and those units inside can fire back. An exception is Crewed weapons inside the Pillbox which may only fire out of the limited covered arc.
- Pillboxes may not change their facing.
- Pillboxes may not be destroyed.
- Like Bunkers, Melee is still triggered in the hex when an enemy unit (even a vehicle) assault moves into the hex.
13.6 Wire
Barbed Wire fortifications are provided to a side in a scenario and listed in the setup instructions.
- Units in a Wire hex receive -1 Defense.
- It costs 1 MP+Cost of Terrain (COT) for foot, 4 MP+COT (Bog Roll) for wheeled, 3 MP+COT (Bog Roll) for tracked.
- Regardless of cost, all units must stop movement once the Wire hex is entered.
- COT is short for 'Cost of Terrain'. This is the cost in Movement Points to enter a hex.
- Wire is removed immediately by vehicles moving into the hex, unless the vehicle bogs down. If subsequently the vehicle unbogs itself, the Wire is then removed.
- Wire can be dismantled by Engineers (6.1).
- Wire is destroyed automatically by satchel charges.
- When OBA strikes a Wire hex, attacking player rolls 1D6. 5-6 and the Wire is removed, 1-4 and the Wire remains.
- Wire does not affect LOS.
13.7 Roadblocks
Roadblocks are provided to a side in a scenario and listed in the setup instructions.
- Vehicles may not enter hex.
- It costs 1 MP+COT for foot units to enter.
- Foot units in a Roadblock hex receive +1 Defense.
- Engineers can dismantle Roadblocks (6.1).
- Roadblocks are destroyed automatically by satchel charges.
- When OBA strikes a Roadblock hex, attacking player rolls 1D6. 5-6 and it is removed, 1-4 and the Roadblock remains.
- Roadblocks degrade LOS.
- Roadblocks can be thought of as anti-tank barriers if not placed in actual road hexes.
13.8 Rubble
Rules for Rubble apply to both the battlefield markers and actual Rubble terrain on a mapboard.
- Rubble counters are placed when a structure collapses on the battlefield.
- Rubble may also be present as terrain on the map, signified by a black center dot with a black ring around it.
- It costs 2 MP for foot, 4 MP (Bog Roll) for wheeled, 3 MP (Bog roll) for tracked to enter a hex with Rubble.
- Rubble degrades LOS.
- Units in Rubble receive +3 Defense.
- Units can roll for Cover in mapboard Rubble hexes, but cannot in a hex with a Rubble battlefield marker (1 battlefield marker per hex).
13.9 Smoke
Smoke battlefield markers are placed by a side during play.
- Smoke is placed by Engineer units, mortars and Off Board Artillery (OBA).
- Smoke lasts for 2 turns. In the Smoke Counter Phase, all Smoke counters are flipped to their Smoke 2 side and all Smoke 2 counters (counters which began the phase as Smoke 2) are removed.
- When Smoke rounds are placed by OBA, place a Smoke counter in the Strike hex, and Smoke 2 counters in the 6 surrounding hexes.
- A unit in a Smoke hex has +1 Defense and -1 to its Firepower when firing out of it.
- Smoke degrades Line of Sight (LOS).
- Smoke placed by Engineers and mortar support weapons only fills the target hex and is a Firing action.
- Smoke is multi-level and degrades LOS on all levels. In other words, LOS cannot be traced over Smoke by units on higher levels.
13.10 Wrecks
Wrecks occur when a vehicle is destroyed in the course of gameplay, the vehicle counter is flipped to its Wreck side.
- Vehicle Wrecks degrade LOS through their hex.
- Although Wrecks could be smoking or on fire, they do not add Smoke to the hex.
- There is no additional cost for units to move into a hex with a Wreck.
- Units in a hex with a Wreck receive +1 (max) Defense. Multiple Wrecks in a hex is still only +1 Defense.
- Wrecks stay on the map for the duration of the game.
- Wrecks do not count against stacking limits for the hex.
14.0 Terrain
This section covers some common terrain types in OST and their characteristics. Specific new types of terrain in a theater will be listed in the playbook for that specific game.
Note that COT is short for 'Cost of Terrain'. This is the cost in Movement Points to enter a hex.
- Most terrain encompasses the entire hex, including the hexsides. Hedges, bocage and stone walls cover the hexsides only and is known as hexside terrain.
- All units in hex use the terrain as a modifier in their Defense value for combat.
- Vehicle units must check for bogging down in some types of terrain. If a Bog roll is required, a 'B' is listed with the movement cost and the section on the player aid TEC is red.
- If terrain cannot be entered by a unit, the movement cost is listed as 'X'. The section on the player aid TEC is gray.
- LOS can pass through terrain, be blocked by it, or be degraded.
- LOS can only be degraded twice. A third hex of degrading terrain blocks LOS.
- LOS that can be traced through a structure or hill hex without hitting the structure or hill itself is degraded.
- If LOS is traced down a hexside with 2 different terrain types, the LOS of blocking terrain takes priority, then degrading terrain, then open. In other words, the heavier terrain takes precedence. For example, LOS is traced down a hex spline with Brush on one side and Woods on the other. Woods terrain is used and therefore LOS is blocked. If it was Brush on one side and Clear on the other, the LOS would be degraded by the Brush.
- If there is more than 1 type of terrain in a hex, the Defense modifiers are cumulative and the cost for movement is used for the worst type. For example, in a hex with a Stream and Brush the Defense modifier is -2 Stream +1 Brush = -1 for the hex, and the movement costs for the Stream would be used.
14.1 Open
- Open ground with no prominent features.
- Costs 1 Movement Point (MP) for all unit types.
- No combat or LOS effects.
14.2 Brush
- Small trees, shrubs and tall grasses.
- Costs 1 MP for foot, 3 MP (Bog Roll) for wheeled, 2 MP for tracked.
- +1 Defense for units in Brush.
- Degrades LOS.
14.3 Farm
- Plowed and planted fields.
- Costs 1 MP for foot, 3 MP (Bog Roll) for wheeled, 2 MP for tracked.
- No combat or LOS effects.
14.4 Wheatfield
- Fields with planted grains.
- Costs 1 MP for foot, 3 MP (Bog Roll) for wheeled, 2 MP for tracked.
- Does not degrade or block LOS.
- +1 Defense for units in hex.
14.5 Woods
- Forested areas with large trees and undergrowth.
- Costs 2 MP for foot, 3 MP (Bog Roll) for tracked vehicles. Mobile units must stop when entering.
- Wheeled units cannot enter Woods.
- +2 Defense for units in hex.
- Foot units in woods attacked by OBA suffer the effects of Airburst (See OBA, 33.4).
- A Woods hex blocks LOS.
14.6 Orchard
- Planted rows of trees with no underbrush.
- Costs 1 MP for foot, 3 MP for wheeled, and 2 MP for tracked vehicles.
- +1 Defense for units in hex.
- Foot units in orchards attacked by OBA suffer the effects of Airburst (See OBA, 33.4).
- A Orchard hex degrades LOS.
14.7 Cemetery
- Prepared grounds with graves and markers.
- Costs 1 MP for foot, 2 MP for all vehicles.
- +1 Defense for units in hex.
- Degrades LOS.
14.8 Stream/River
- Shallow water that can be crossed by units, but some deep water rivers are impassable.
- Costs 2 MP for foot, 4 MP (Bog Roll) for wheeled, and 3 MP (Bog Roll) for tracked.
- -2 Defense for units in hex.
- No LOS effects.
14.9 Marsh
- Wetlands with some vegetation.
- Costs 2 MP for foot, 4 MP (Bog Roll) for wheeled, 3 MP (Bog Roll) for tracked.
- -1 to all Bog Rolls (including rolls to free bogged vehicle).
- -2 Defense for units in hex.
- No LOS effects.
14.10 Shell Holes
- Craters caused by artillery and air attacks.
- Does not affect LOS.
- Costs 2 MP for foot, 4 MP (Bog Roll) for wheeled, 3 MP (Bog Roll) for tracked.
- +1 Defense for units in the hex.
14.11 Debris
- Junk and battle wreckage littering the hex.
- Degrades LOS.
- Costs 2 MP for foot, 3 MP (Bog Roll) for wheeled, 2 MP (Bog Roll) for tracked.
- +1 Defense for units in the hex.
14.12 Rubble
- Piles of wood and stone from collapsed structures.
- Degrades LOS.
- Costs 2 MP for foot, 4 MP (Bog Roll) for wheeled, 3 MP (Bog Roll) for tracked.
- +3 Defense for units in hex.
14.13 Roads
- Prepared surfaces, whether dirt or paved, which ease the movement of vehicles.
- Costs 1/2 MP for vehicles, 1 MP for foot, if entering via another contiguous road hex.
- No combat or LOS effects.
- When a road is in a hex with other terrain such as Woods or Rubble, the road is used for Movement costs if the hex is entered via another contiguous road hex. Entering from non-road hex, pay COT entered. The other terrain of hex is used for Defense.
- Note in some games, roads may not be in good shape and vehicles will pay 1 MP instead of 1/2. This will be noted in scenarios or playbooks.
14.14 Hills and Gullies
- Hill and gully hexes are marked with colored level triangles and the edges are shown with contrasting lines.
- Moving up or down a hill level, costs 1 MP+COT for all units.
- A move of 2 levels in one hex costs 2MP + COT.
- Hill hexsides with dark triangles represent steep slopes that cannot be traversed by any units.
- Hills blocks LOS for units at the same level or lower.
- If LOS is traced through a hex with a hill, without hitting the hill itself, LOS is degraded.
- Units on hills can trace LOS over ground level terrain apart from a 1 hex blind spot directly behind it. If the ground level terrain is blocking then the LOS into the blind hex is blocked, if it is degrading then the LOS into the blind hex is degraded.
- Units on higher elevations add +1 to their range when attacking targets at lower elevations. For guns, the +1 range is added onto the maximum range and doesn't change any stats at closer ranges.
Diagram note: LOS is blocked when tracing through hill graphic (red). LOS is degraded when tracing through hill hex but not intersecting hill graphic (yellow).
15.0 Hexside Terrain
- Terrain which only encompasses the hex line. It is traced from corner point to corner point of the hex.
- Can degrade or block LOS when the LOS crosses through it.
- A unit which moves through a hexside with hexside terrain must pay the cost to cross the hexside as well as the COT of the hex it enters.
- Often a Bog Roll is required when crossing hexside terrain. If the Bog Roll is failed, the vehicle is bogged down in the hex moved into, after the hexside terrain. Only roll once for bog even if the hex terrain entered also requires a Bog Roll.
- Defense for units adjacent to hexside terrain is applied only if the attack is traced through it.
- No Defense modifier for hexside terrain if unit is attacked by Airstrikes, OBA and mortar SWs.
- The Defense modifier is added to any Defense modifier of the hex itself. For example, if the defending unit is in an orchard hex with a stone wall, the unit receives a +1 for the orchard and a +2 for the stone wall for a total of +3.
- If LOS is traced through 2 different hexsides with hexside terrain of the same hex, it is degraded twice.
- When units are on both sides of the same hexside terrain, both units will receive its' Defense modifier when attacking each other.
- When hexside terrain is alongside the firing unit, or the target unit, it is not considered degrading LOS but rather a part of the hex itself. So a -1 FP for degrading terrain is not used by firing unit if hexside terrain is adjacent to it or the target.
- Firing through the length of a hexside terrain (hex spline), LOS is degraded once and the Defense modifier is applied once if units are adjacent.
Diagram note: This example of hexside terrain shows both bocage and stone walls. Note there is also orchard terrain in some of the hexes.
For example, a British Rifle Squad is in a cemetery bordered by stone wall on 3 hexsides. If an attack comes in the direction of #1, the Rifle Squad's Defense of 4 gets an additional +1 for cemetery terrain for a total of 5 Defense. If an attack comes in the direction of #2, the Rifle Squad's Defense of 4 gets the +1 for the cemetery as well as +2 for the stone wall hexside terrain. In this case, the total would be 7 Defense.
15.1 Hedge
- A planted row of thick foliage.
- Hexside terrain.
- Degrades LOS.
- Costs 1 MP+COT for foot, 2 MP+COT (Bog Roll) for all vehicles. For example, a tank crosses a hedge into a brush hex. It costs 2 MP to cross the hedge and 2 MP for the brush hex, so 4 MPs total. It also must take a Bog Roll.
- +1 Defense for units adjacent to a hedge if the attack is traced through it.
15.2 Stone Walls
- Sturdy stone and brick constructions.
- Hexside terrain.
- Degrades LOS.
- Costs 1 MP+COT for foot, 3 MP+COT (Bog Roll) for wheeled, 2MP+COT (Bog Roll) for tracked vehicles.
- +2 Defense for units adjacent to a stone wall if the attack is traced through it.
15.3 Bocage
- Earthen mounds with dense vegetation.
- Hexside terrain.
- Bocage traces along the hexsides like other hexside terrain. If the artwork spreads out a little, keep in mind that it follows the hexlines.
- Blocks LOS unless a foot unit is in a hex adjacent to the bocage. In this case, the foot unit can fire through the bocage and enemy units can fire at the foot unit in the bocage. Firepower is not affected. The foot unit receives a +2 Def when the attack is traced through the bocage.
- Unit in bocage hex receives no Defense modifier if attack is traced into hex but not through the bocage itself.
- Units in structures adjacent to bocage can only fire into adjacent bocage hex. Reverse is also true. Units in structure use structures' Defense modifier only.
- Vehicles adjacent to bocage are not considered in the bocage itself and therefore cannot attack through it or be attacked through it (except by enemy foot units adjacent to bocage). This LOS is blocked.
- Vehicles cannot move through bocage.
- Movement cost to move through a Bocage hexside for foot units is 2 MP + COT entered.
- Mobile units (Motorcycle, Cavalry) must stop in hex after moving through Bocage.
Diagram note: In this example, both a foot unit (Rifle) and a vehicle (Marder III) are adjacent to bocage hexside terrain. LOS can be traced out of, and into the hex through the bocage with the foot unit. However the LOS is blocked in the case of the vehicle.
16.0 Structures
16.1 Light Structure
- Mostly wooden buildings, depicted in shades of brown on the map.
- Foot units entering a hex with a structure occupy all levels of the building.
- Crewed Weapons are foot units and may also occupy structures.
- Mobile units must stop when entering structure hex, unless it also has road.
- LOS is blocked in the hex only by the structure itself, the rest of the hex degrades LOS.
- Costs 2 MP for foot units to enter a hex with a structure.
- +1 Defense for units in a Light Structure hex.
- Collapses on a 1D6 Collapse roll of 5 or 6. Collapsing light structure attacks units inside with a 1 FP (multi-story add +1 FP). See Structure Collapse (16.7).
16.2 Heavy Structure
- Sturdy structures made of stone and concrete, usually depicted in shades of gray on the map.
- Foot units entering a hex with a structure occupy all levels of the building.
- Crewed Weapons are foot units and may also occupy structures.
- Mobile units must stop when entering structure hex, unless it also has road.
- LOS is blocked in the hex only by the structure itself, the rest of the hex degrades LOS.
- Costs 2 MP for foot units to enter a hex with a structure.
- +2 Defense for units in a Heavy Structure.
- Collapses on a 1D6 Collapse roll of 6. Collapsing heavy structure attacks units inside with a 2 FP (multi-story add +1 FP). See Structure Collapse (16.7).
16.3 Multi-level and Multi-hex Structures
- Multi-level structures are marked with colored triangles and matching color center dots.
- Units in a multi-level structure occupy all levels simultaneously.
- Units entering a multi-level structure hex do not pay movement costs associated with elevation changes.
- LOS is traced into and out of the highest level for all attacks.
- Crewed Weapons with a * may only occupy the ground level and have LOS from that level only.
- LOS inside multi-hex structures is limited to adjacent hexes. Normal Defense modifiers apply for structure type (+1 Light, +2 Heavy).
Diagram note: This multi-hex building, only the center hex with the blue triangle is 2 levels, the other 2 hexes are ground level.
16.4 Row Houses
- Row houses are multi-hex structures that are divided by thick, impassable walls.
- A white line along the hex-line denotes row houses.
- LOS and attacks may not be traced through these white lines.
- Units may not move through these white lines.
- Normal Defense modifiers apply for structure type.
16.5 Ruins
- Ruins are heavily damaged, heavy structures.
- Costs 2 MP for foot units to enter a ruins hex.
- Ruins add a +2 Defense.
- Like other structures, vehicles can only enter a ruins hex if it also contains a road.
- Mobile units must stop when entering a ruins hex, unless it also has road.
- Weapons with blowback and mortar support weapons can fire from ruin hexes as they are not as enclosed as normal structures.
- Being unstable, these structures are more likely to collapse. A +1 DRM is used in any collapse rolls on a ruins hex.
- Collapses on a 1D6 Collapse roll of 6. Collapsing heavy ruins attack units inside with a 2 FP (multi-story add +1 FP).
16.6 Road and Structure hex
- Where road and structure terrain are in the same hex, the player must declare to opponent whether the unit is moving on the street or moving in the structure.
- If on the road, pay road movement cost and use 0 Defense.
- If in the structure, pay 2 MP for each hex and use structure types Defense value.
- Normal stacking rules apply to the hex.
- If unit ends its movement in the road, mark it with an On Road marker.
- Vehicles may only use the road in these hexes and do not get the Defense modifier for the structure.
- Restricted road movement is sometimes encountered when vehicles use road/structure hexes (especially in urban settings). Just check a hex center dot to hex center dot when moving, if there is any structure graphic between those points, the vehicle cannot move along that path. Note that this only applies to vehicles, not foot units.
Diagram note: Restricted Road movement example. A vehicle is moving by road through Road/Structure hexes. The red lines show paths that are restricted because the line from dot to dot passes through structure. The colored arrows show viable paths to reach the hexes.
16.7 Structure Collapse
When a hex with a structure or Bunker/Pillbox is attacked by OBA, Air Strikes, and some heavy weapons, a 1D6 is rolled by the attacking player to check for collapse.
- Heavy structures and Bunker/Pillboxes collapse on a roll of 6. Light Structures collapse on a roll of 5 or 6.
- Heavy weapons that can collapse structures and Bunkers, have 'collapse' listed on their unit data cards.
- Empty structures can also be fired at in order to collapse them. It counts as a firing action. A to hit roll is required, and if hit a 1D6 collapse roll is then made.
- Check for collapse after initial attack on any units in the structure are resolved.
- Check for structure collapse even if there are no units in the hex.
- Rockets and Satchel Charges add +1 to the collapse roll.
- +1 DRM to collapse roll on ruins.
- A Rubble counter is placed in the structure hex with a collapse. If the hex is a structure and road hex, the road is no longer viable and the hex is just Rubble.
- All units in a collapsing structure hex undergo a separate attack using the structures Defense modifier as Firepower against the units' unmodified Defense. +1 to FP when collapsed structure is multi-level.
- All support weapons are destroyed and lost when a structure collapses.
- Crewed Weapons are also lost in a collapse. A crew counter replaces the weapon counter and 1 Casualty Point is scored by the attacker. The Crew counter must also take the attack.
For example, an OBA strike collapses a ruins structure with a Rifle Squad inside. The Rifle Squad escapes the initial artillery attack with no damage, but then undergoes an attack of 2 FP (heavy structure) against its Defense of 4. The attack is carried out on the -2 Firepower column of the ICT. The Rifle Squad suffers a casualty as the result of this attack. Note that all structure hexes caught in this OBA strike undergo collapse rolls, even if unoccupied. Rubble markers are placed in all hexes suffering collapse.
17.0 Morale
Morale represents the troops' mental and physical states and their corresponding levels of readiness.
Units in the game can be in 3 states of morale: Good Order, Shaken or Broken.
17.1 Good Order
- A Good Order unit is in a normal state and has nothing affecting its performance. These units have no markers on them.
17.2 Shaken
- A Shaken unit has a Shaken marker on it.
- A Shaken unit's Movement and Firepower is halved (fractions rounded down).
- A Shaken unit may not Assault move.
- A Shaken unit may not Spot a target for OBA/airstrikes.
- Shaken units must retreat from a Melee hex if good order enemy remains, to any adjacent hex of the owning player's choice. Hex cannot contain enemy units. If it can't retreat, it is destroyed.
- If an already Shaken unit suffers another Shaken result, it becomes Broken.
- Shaken units in Melee get a -1 DRM (max).
- Shaken weapon/tank crews get a -1 DRM in any to hit rolls.
17.3 Broken
- A Broken unit has a Broken marker on it.
- The unit has been severely rattled and may not move or fire.
- A Broken unit may not Assault move.
- A Broken unit may not Spot a target for OBA/airstrikes.
- A Broken unit in Melee does not return fire. If it survives, it must retreat to any adjacent hex, of the owning player's choice, not containing enemy units. If it can't retreat, it is destroyed.
- If a unit is already Broken, further morale results do not affect the unit. It does not become more Broken or suffer casualties.
17.4 Gut Check (Morale Check)
Scenarios provide a Gut Check number for each side. It represents the state of the troops, their abilities and willingness to fight. It is a point at which a unit will crack under combat conditions.
- Any combat result of Shaken or Broken on the ICT or VCT, requires the defending unit to roll 2D6 for a Gut Check.
- If Gut Check number or higher is rolled, the unit passes and the Shaken/Broken result is ignored.
- If the roll is less, the unit fails its Gut Check and the Shaken/Broken marker is placed on it.
- The Gut Check roll is always unmodified.
For example, a scenario lists the French side as having a Gut Check of 8. Therefore when suffering a combat result of Shaken or Broken, the French player takes an unmodified 2D6 roll and must roll an 8 or higher to pass the Gut Check and disregard the Shaken/Broken result.
Sample scenario stat line: GUT CHECK: 8 IMPULSE PTS: 1D6+2
18.0 Rally
Rallying is an attempt to bring unsteady troops back into the fight. A player can attempt to rally their Shaken and Broken units during the turn by spending an Impulse Point for each attempt. There is no limit on the number of rally attempts for a single unit in a turn.
- Owning player rolls 2D6 in any rally attempt.
- To rally a Shaken unit, a 7 or higher must be rolled.
- To rally a Broken unit, a 9 or higher must be rolled.
- The dice roll can be modified by the conditions below (also shown on the player aid). These modifiers are cumulative.
- If the rally attempt is successful, the marker is removed and the unit continues play as normal.
- A failed rally attempt on a Shaken unit and the Shaken marker remains. A failed rally attempt on a Broken unit and the marker is flipped to Shaken.
18.1 Free Rally
At the beginning of each turn, in the Free Rally phase, both sides make a free rally attempt on each unit which is Shaken/Broken. The rally attempts are modified and carried out normally.
18.2 Merge Units
At the beginning of each new turn, in the Reform Phase, 2 reduced Squads of the same type may be merged into a full Squad once again. There is no cost in Impulse Points for this.
- Reduced units must be in the same or adjacent hexes and must be good order. Note, the Free Rally Phase occurs before this phase.
- A good order Leader must be attached to one of the reduced units.
- The unit is reformed as a full Squad in the hex with the Leader.
- Reduced Weapon Teams cannot be merged to create a Weapon Team.
- Full Squads may not be fractured down to reduced Squads voluntarily.
19.0 Unit Quality
Unit quality represents the abilities of troops in battle. Troops can be Elite, Regular or Poor Quality. Some modifiers may be applied with quality of the unit, good or bad.
Unit quality may be noted on the scenario sheets or on a unit data cards, such as US Airborne being Elite.
If nothing is noted in setup instructions, then units in the scenario are Regular quality.
- Elite units represent soldiers with great cohesion. They are also better trained and equipped than most units.
- Elite units get a +1 DRM in any to hit and rally rolls.
- Elite units get a +1 DRM (max) in Melee.
- Regular units have nothing noted regarding their quality. They have good cohesiveness and have been trained and equipped up to standards. Regular quality units do not receive any DRMs.
- Poor quality units represent poorly organized units with little training and not the best of equipment.
- Poor quality units get a -1 in any to hit and rally rolls.
- Poor quality units get a -1 DRM (max) in Melee.
20.0 Stacking Limits
Stacking limits reflect the ability of an area to hold only a certain amount of troops and vehicles of a side.
- A maximum of 2 units, 2 Leaders and any number of support weapons of a side are allowed in a single hex.
- Stacking limits are still enforced for each side in a Melee.
- A vehicle transporting another unit is counted as 1 unit for stacking purposes.
- Units may not move into or through a hex if this would exceed the stacking limit at any time.
21.0 Hidden Units
Some scenarios allow hidden units at game start. Snipers and Mines always start scenarios as hidden unless noted otherwise.
- Simply record the position on paper and place counters on board when revealed.
- Hidden units may not improve their positions with Cover, but any Cover or Bunker counters available at game start may also be hidden with the unit.
- Leaders and support weapons which are attached to a hidden unit, are also hidden by default.
- Hidden units are revealed when they fire or move.
- Hidden units are revealed and take fire from any OBA strikes which hit their hex.
- Hidden units are revealed when an enemy unit attempts to move into the hex occupied by the unit. The enemy unit is halted, the hidden unit is placed onboard and can choose to ambush this enemy immediately as an OppFire and ambush.
- When a hidden unit fires, its initial attack is considered an ambush and all ambush modifiers noted on the play aid are applied. A +1 DRM is applied to any to hit rolls and attack rolls made by the ambushing unit.
- Once revealed, hidden units remain revealed.
For example, a Polish Anti-tank Gun is hidden in a forest. When a German Armored Car moves near, the Polish player reveals the hidden gun and attacks the vehicle as Opp fire. As this first attack is an ambush, a +1 is applied to both the to hit roll, and also to the attack roll if a hit is achieved.
22.0 Limited Actions
These represent high energy actions by units in a game which are limited in their use. These markers are placed on units when these actions are performed. These actions cost the player 1 Impulse Point per unit using the action.
- Move, Assault Move and Fire are limited actions. Units are limited to 2 of these per turn of which only 1 may be a move action (excluding assault move).
- When a unit moves, place a Moved marker on it.
- When a unit fires, place a Fired marker on it.
- After 2 of these limited actions, the unit is marked Used by flipping the marker to its Used side.
- A unit can fire twice and forgo moving.
- If moving first and firing on a subsequent Impulse, the Moving Fire modifier is applied.
- If firing first and moving on a subsequent Impulse, the Moving Fire modifier is not used. Design note: the reason for not modifying the Fire in point 4 is that the attack occurs with better firing positions and good targets. As opposed to point 3 where the unit is moving tactically (looking for cover and targets), even when it fires.
- Rally and Cover attempts are not limited actions. Any number of attempts by a unit on a turn is allowed. A Used unit may still make these attempts with no penalty.
- Intensive Fire is a special action that can be performed by a Used unit (see Intensive Fire, 27.7).
23.0 Movement
Each unit has a number of Movement Points (MPs) available for use which is known as a Movement Allowance. Each hex on the board costs a unit type a number of MPs to enter. See each game's specific Terrain Effects Chart for specific details.
- A unit may only move once per turn (excluding assault move). For example a unit may Move adjacent to an enemy hex, and subsequently Assault Move into the hex on a separate Impulse in the same turn.
- Movement Point costs are listed for each type of terrain and differ depending on whether it is a foot, wheeled or tracked unit moving into the hex.
- Some hexes have more than one type of terrain. For a road/woods hex, the road is used for Movement costs and the woods for Defense. For road/structure hex the player must declare which terrain type the unit is using, but vehicles must use the Road.
- A unit may only move as far as its Movement Points will allow, but does not have to use them all.
- A unit can always move at least 1 hex, regardless of Movement Points and terrain, but may not move into prohibited terrain.
- Terrain movement costs and combat effects are listed on the Player Aid for quick reference.
- Battlefield markers can also affect movement through a hex.
- Units may not move into or through an enemy occupied hex using normal Movement.
- Moving units that are attacked by Opp Fire or Mines must stop in that hex if they become Shaken, Broken, Immobilized or take casualties.
- Vehicles do not stop when passenger units take fire. The passenger unit continues riding regardless of the combat result on it.
Diagram note: Movement costs example. Foot unit has 4 Movement Points (MP) available. White path: Brush for 1MP, open for 1MP, open for 1MP, open for 1MP. Blue path: Structure for 2MP, open for 1MP, open for 1MP. Red path: Open for 1MP, over wall (1MP) into olive grove (2MP), 3MP total for hex.
23.1 Group Move
Up to 2 foot units and 2 support weapons may move as a group, if they have an attached Leader.
- Must have an attached, good order Leader.
- The controlling player must declare the Group move and spend 2 Impulse Points.
- The group uses the Movement Points of the slowest unit in the group. For example, in a group with a Rifle Squad (4 MP) and a Pioneer (3 MP), the group will use 3 MPs.
- The units must start and remain in the same hex for the move.
- A moving group may only be attacked once per hex with Opp Fire.
- If a unit in the group must stop because of an Opp Fire attack's results, then the group must stop.
- Vehicles may not group move with other vehicles.
23.2 Rolling Cover (a Group Move)
A single Squad/Reduced Squad may Group move with an armored vehicle, using it for cover.
- Does not require an attached Leader, but one may move as part of the group.
- Controlling player declares Rolling Cover, places a marker on the group and spends 2 Impulse Points for the move. At least one of the units must be in good order.
- Squad and vehicle must start and remain in the same hex for the move, and may only move as far as the unit with the least MPs. For example, a Rifle Squad with a movement allowance of 4 uses rolling cover with a vehicle with a movement allowance of 6, this group can use a maximum of 4 MPs for movement.
- The group uses foot movement costs when moving into terrain, but both units must be able to enter the terrain and if a Bog Roll is required, the vehicle must still take it.
- Both units may still Fire normally, independently of one another, but may not Group Fire.
- The Squad receives +1 Defense plus any terrain while moving with the vehicle.
- If the vehicle is hit or destroyed by enemy Fire, the Squad must check for collateral damage. (See 24.4).
- When using Rolling Cover, units may Assault move as a group if there is an attached Leader/Armor Leader (see Assault Move, 25.0).
- Rolling Cover remains in effect until removed by controlling player during an activation, or one of the units is destroyed.
- If either unit becomes Shaken or Broken, Rolling Cover remains in effect for Defense, though movement can be affected.
- Passengers unloading from an armored vehicle are considered in rolling cover automatically when in the hex with the vehicle. A marker may be placed unless the unloaded unit then moves away from the vehicle.
23.3 Stealth Movement
Some foot units can use careful, stealthy movement and avoid Opportunity fire. If available, this will be listed on the unit card.
- Player must declare when using stealth movement.
- The unit can use up to half of its' Movement Allowance (round down fractions).
- Cannot be used when part of a group move unless both units are using the ability.
- Unit cannot be attacked with Opp Fire when using this.
- It is still marked as Moved.
23.4 Vehicle Movement and Facing
When moving vehicles, attention must be paid to the unit's facing.
- Vehicle facing is shown with the red corner on the vehicle counter, it is pointed at a flat hexside. That hex and the hex to the left and right of it are considered the vehicle's front arc. Incoming attacks traced through the front arc attack the vehicle's front Defense.
- The other 3 hexes behind it are the vehicle's flank. The hexlines separating the front and flank arcs are part of the flank arc. Flank Defense is used for incoming attacks traced through these hexes.
- A vehicle uses forward movement by moving into 1 of the 3 hexes in its forward arc.
- A vehicle uses reverse movement by moving into 1 of the 3 hexes in its flank arc. Reverse movement costs 1 MP + COT per hex moved in reverse.
- When moving to a new hex, the facing may then change freely to an adjacent hexside. Facing may only change 1 hexside per hex moved. This does not cost a Movement Point. This applies to reverse movement as well.
Diagram note: White arrows show forward movement hexes while the red arrows show reverse movement hexes.
- If the vehicle is fired upon when moving to a new hex, the attack is resolved before the unit changes its facing.
- A vehicle may pivot or spin in a hex to change its facing to any hexside at a cost of 1 MP.
- Spinning is counted as Moving and Moving Fire modifiers will apply.
- Spinning in a hex may be incorporated into the vehicle's movement path at a cost of 1 MP.
Diagram note: Vehicle movement example. Tank has 5 Movement Points (MP) available and is using tracked movement. 1 MP to move onto road, then 1/2 MP for each hex moved along road, then 2 MP moving into farm terrain. Notice facing of tank changed by 1 hexside (for no cost) along its movement path. Also note that direction of travel was in the vehicle's front facing arc.
23.5 Bogged Down
Vehicles might bog down in some terrain types. If a 'B' is listed in the movement costs of the Terrain Effects Chart, a Bog roll must be made.
- The owning player rolls 1D6 when entering the hex. A wheeled vehicle bogs down on a roll of 1 or 2, and a tracked vehicle bogs down on a roll of 1.
- If bogged, the vehicle ceases its movement in the hex moved into and places a Bogged marker. It may still fire its weapons.
- Vehicle may continue its movement if the Bog roll is passed.
- The owning player may only attempt to free a bogged vehicle by rolling 1D6 during the Free Rally/Bog Roll phase of the next turn. Only 1 attempt per turn.
- On a roll of 3 - 6 the vehicle is freed. The Bogged marker is removed and the vehicle may move as normal.
- On a roll of 2 the vehicle remains Bogged for the turn.
- On a roll of 1 the vehicle is Immobilized for the rest of the game. Place an Immobilized Marker on the vehicle. The vehicle's crew and armaments remain intact.
23.6 Enter and Exit Units
- Units enter the map as a move action, Movement cost is the COT of the hex entered.
- Units can enter as a single unit, a group, or as a vehicle with a passenger. Impulse Points are spent for the movement.
- At the end of the turn, all entering units that have not entered remain off board. They are available to bring on board on ensuing turns but the owning player must spend the Impulse Points to enter them.
- To exit a unit from the map, move to map edge and remove the counter from the board. It costs 1 Movement Point to exit the map.
- Units may only exit when allowed by the scenario.
24.0 Transport
Vehicles can transport Squads, Single Person Counters, Crewed Weapons and Support Weapons unless the vehicle's data card specifies No Riders.
- Units being transported are placed on top of the vehicle counter. Units are under the vehicle counter if in the same hex when not in transport.
- A vehicle can transport only one unit, an attached Leader and any number of support weapons.
- A vehicle can pick up and drop off support weapons along its path at the cost of 1 MP for each stop/pick up.
- Movement Points (MPs) used are separate for the passenger unit and the transporting vehicle. The foot unit (passenger) expends its MPs in the process of loading/unloading whereas the vehicle expends its MPs normally while transporting the passenger.
- Whether additional movement is involved or not, loading and unloading are considered Move actions.
- Units being transported may not fire from the vehicle.
- Vehicles transporting units may not fire their armament. An exception is armored troop transports which may fire their weapons as they are designed for this.
- A vehicle transporting another unit is counted as 1 unit for stacking purposes.
- A vehicle may not move, load/unload, and then continue to move. It may only load/unload at the beginning or end of its move. In other words, the vehicle cannot load or drop off units along a movement path.
- Passengers in/on a vehicle can be targeted and attacked separately from the vehicle itself. In other words, the vehicle and its transported foot unit are separate targets.
- If the vehicle is targeted and hit in an attack, the transported unit moving with the vehicle must check for collateral damage.
- Foot units riding in trucks always check for collateral damage when the truck is attacked by small arms fire.
- If passengers are attacked, a vehicle that is moving, continues moving regardless of the result of the attack.
- If a vehicle with loaded passengers is attacked by an enemy assault move into the hex, the passenger's Firepower and Defense values are halved (round fractions down) and added to that side's forces in the ensuing Melee. The passenger unit is also a target in the Melee.
Diagram note: A Soviet Shock Squad riding on a T34 tank.
24.1 Loading Onto a Vehicle
- It costs a foot unit 1 MP to load onto a vehicle. If the foot unit only has a Movement Allowance of 1 MP, or is Towed movement only, then it must be waiting in the hex to load.
- The foot unit must be in the same hex as the transporting vehicle in order to load.
- A foot unit can spend MPs to get to the vehicle's hex and then load as long as it has the 1 MP available to load.
24.2 Unloading From a Vehicle
- It costs a foot unit 1 MP + COT to unload. Unless the unit only has a movement allowance of 1 MP in which case the unit uses all its MP to unload.
- The transported unit is unloaded in the same hex as the transporting vehicle.
- The foot unit is considered to be in Rolling Cover by default when it unloads into the vehicle's hex.
- Once unloaded, the foot unit can continue to move if it has additional MPs.
- Unloaded Anti-tank guns have moved for the turn. They may set their covered arc as desired when unloading but may not Fire.
For example, a Rifle uses its Movement Points to move 2 hexes to a vehicle and loads. On another Impulse, the vehicle uses its Movement Points to move 6 hexes. Both units have used their moves for the turn, each marked as Moved.
24.3 Transport Vehicle Type
Passengers may receive some protection when riding in an armored transport, or be exposed when riding in a truck or on the exterior of a vehicle.
- Armored troop transports are marked with a black diamond icon on their counter. Units transported in an armored troop transport get +1 to their Defense when attacked.
- Armored troop transports can fire their weapons while transporting foot units.
- Units being transported with any vehicle other than an armored troop transport are considered exposed when fired upon and get -1 to their Defense.
- Units transported in trucks and other soft vehicles are also exposed and get -1 to their Defense.
24.4 Collateral Damage
Collateral damage occurs when foot units moving with/on/in vehicles suffer effects of the attacks on their vehicle. These attacks are unmodified and carried out on the Infantry Combat Table immediately after the attack on the vehicle.
Foot units can be in transport with the vehicle, or also when using Rolling Cover (23.2).
Only occurs if the vehicle is hit in the attack, if it is missed there is no collateral damage inflicted.
- If the vehicle is destroyed or abandoned, the foot unit remains in the same hex as the Wreck. An unmodified attack is then carried out on the foot unit using the -3 column of the ICT.
- Any other result and the foot unit undergoes an unmodified attack on the -5 column of the ICT.
- After Collateral Damage attack, the unit remains with the vehicle and is considered to be in transport or Rolling Cover as before.
For example, a German Rifle Squad attacks a British Sherman with a Panzerfaust. If a hit is successful, the British Rifle Squad riding on the tank will undergo a Collateral Damage attack after the attack on the tank is carried out. If the Sherman is destroyed or abandoned, the attack is carried out on the -3 FP column of the ICT. If the Sherman is merely hit or damaged, the attack is carried out on the -5 FP column of the ICT.
25.0 Assault Move
Unlike normal movement, an assault move enters an adjacent hex occupied by enemy units or an adjacent unoccupied control hex.
- An Assault move is 1 hex only.
- Units must be in Good order to make an Assault move.
- Unit must be able to enter terrain of hex Assault moving into.
- A unit may only perform 1 Assault move per turn.
- An Assault move is an action and costs 1 Impulse Point per unit.
- As this is different from regular movement, a unit is allowed to move and assault move in the same turn.
- More than 1 unit may use Assault move as part of a Group move, so long as 2 Impulse Points are spent.
- A vehicle may be part of a Group Assault move so long as it is adjacent to or in the same hex as other assaulting unit and there is an attached Leader/Armor Leader.
- Note that unlike a normal group move, starting units of a group moving into the assault hex do not necessarily have to start in the same hex, but can also start adjacent to each other.
- A Melee marker is placed on the hex and the combat takes place at the end of the turn in the Melee phase. Design note: Melees are fought at the end of the turn to keep the result in doubt as other units play out the turn.
Diagram note: A German Rifle Squad assault moves into the hex occupied by an enemy unit. A Melee marker is placed and the hex is blocked out until the upcoming Melee phase.
- Crewed Weapons, Crews, Single Person Counters, trucks, vehicles with no functioning armaments and vehicles transporting units may not Assault move.
- An Assault move may also be made to capture an unoccupied Control hex.
26.0 Airborne Operations
Aircraft are loaded with Airborne troops. Transport aircraft dispatch their troops in paradrops and gliders land to dispatch theirs.
26.1 Aircraft Loadouts
- Each transport aircraft can hold up to 3 Squads or crewed machine guns plus any attached support weapons and Leaders.
- Each glider can hold up to 2 Squads or crewed machine guns plus any attached support weapons and Leaders. Gliders can also carry an AT gun or Jeep in place of a Squad.
- The units are stacked on top of the aircraft counter in the order they will be dropped. Leaders on top of the unit and support weapons below the unit. Top unit drops first in the case of paradrops.
- Unit order does not matter with gliders.
For example, the C-47 is loaded with an MMG, an Airborne Squad and an Airborne Squad with an attached Sergeant.
For example, the Horsa glider is loaded with 2 Airborne Squads, an attached Lieutenant and a LMG.
26.2 Flight Paths
- Area of setup is determined by the scenario.
- Aircraft are setup on board with their loadouts.
- Aircraft must be spaced apart from each other a minimum of 4 hexes, not including the hexes of the aircraft.
- The red triangle in the corner of the aircraft counter represents the direction of flight and is placed on a flat of a hexside.
- All transport aircraft in the operation must be flying in the same direction. Initial direction of gliders is not important as their landing procedure will set the direction.
- Aircraft cannot be engaged by troops on the ground.
26.3 Paradrops
- After setup, each aircraft will then move 3 hexes in their flight direction.
- At each hex moved into by the aircraft on its flightpath, a unit and any attachments will be paradropped.
- The unit will drift automatically from this hex. Roll 1D6 for direction, with 1 being the hex North of aircraft hex, and roll 1D6 for number of hexes. This will give the hex that the unit will land in. The drift rules use the same basic mechanics as Artillery drift.
- If the unit drifts off map edge, it instead lands on last playable hex before leaving map.
- If the unit lands in non-open terrain, it is a hard landing and the unit must undergo an immediate attack on the ICT rolled by the owning player. This attack uses the -3 column of ICT for units landing in hexes with structures, woods, orchards, groves and streams. The attack uses the -5 or < column of the ICT for units landing in any other non-open terrain.
- Effects of the combat results are applied immediately.
- Hexside terrain (hedges, stone walls, bocage) and roads do not affect the unit's landing.
- If a unit paradrops onto an enemy occupied hex, owning player lands the unit to any adjacent open hex. If a hex of open terrain is not available, the unit must undergo attack of terrain it is landing in.
- If a unit paradrops into any hex adjacent to or containing an enemy unit, that enemy unit or group gets a free attack (no Impulse Points spent) on the unit. The attack is carried out using half Firepower and the results applied before the unit lands in any terrain.
- Attached Leaders take Leader Casualty rolls if the unit they're attached to suffers results from hard landings or enemy attacks.
For example, in an Airdrop, the aircraft moves to its first hex and drops the first unit. 1: American player rolls a 1 for direction and a 3 for distance. The Airborne Squad with the BAR and attached Sergeant lands in a woods hex. The Squad undergoes an attack on the -3 FP column of the ICT. It fails its Gut Check and becomes Shaken. The attached Sergeant must take a Leader Casualty roll. Sergeant passes his Gut Check and remains in good order. 2: A 5 is rolled for direction and a 5 for distance. This Airborne Squad lands in an orchard hex. It undergoes an attack on the -3 FP column of the ICT but suffers no result. 3: A 6 is rolled for direction and a 3 for distance. The MMG lands in open terrain and doesn't undergo an attack upon landing.
- Dropping supplies use the same methods for drift, but no attacks are resolved on landing.
- Paradrops may not cause overstacking. Owning player instead selects an adjacent hex to land.
- If paradrops occur in the course of a scenario as reinforcements, and not in a pre-scenario setup, then Airborne units are marked as Moved after landing.
- Aircraft counters are removed after completing the drops.
26.4 Glider Landings
- After setup on the board, each glider must check for their actual starting point using a drift procedure.
- First roll 1D6 twice for drift from starting location (use same mechanics used for artillery drift). First roll for direction, with 1 being the hex North of the aircraft hex. The second roll is for number of hexes in that direction.
- The glider counter is then moved to its new starting location with its loadout.
- Now roll 1D6 for the direction of landing. Spin the glider facing to its landing direction.
- Each glider now makes its landing by moving 4 hexes along the ground, terrain costs are not used. It travels the 4 hexes along its landing path unless it stops with a crash.
- Open terrain and roads are free to pass through. Other hexes that are non-open require a 1D6 roll to pass through, with a 1-2 causing a crash in the hex. Heavy terrain (LOS blocking terrain) such as woods and structures automatically cause a crash.
- Hexside terrain must be checked for crashing as well unless the hex is already being rolled for the terrain in the hex. If the hexside terrain causes the crash, it occurs in the hex after crossing the hexside.
- If there is a crash, the glider stops immediately in the hex and the counter is flipped to its Wreck side. Each unit in the crashed glider undergoes an immediate attack on the -3 FP column of the ICT.
- If at the end of its landing path, the glider hasn't crashed, the glider is then flipped over and an attack roll is made against its passengers on the -5 column of the ICT to check for landing injuries.
- Owning player of the gliders will make all attack rolls on the passengers.
- When glider counters are flipped, they become Wrecks, but not in structure or woods hexes where they are simply removed.
- If any drift and movement of a glider reaches a map edge, they are simply stopped there for the next part of the process.
- A glider's landing path is not be stopped by other friendly units on the board.
- Enemy units in the landing path cause a crash automatically. Results of the crash are carried out and then a Melee marker is placed in the hex.
Diagram note: Glider landing example. Glider initially setup at the bottom of picture. 1: Players rolls 1D6 twice for starting position. Rolls a 1 for direction which is directly North, then rolls a 3 which is distance. So the glider is moved 3 hexes North to its starting position. 2: Another 1D6 roll is made for final direction. A 2 is rolled and the direction for the landing is set. 3: On the landing, the glider crashes in the olive grove in the second hex of its movement path as it is heavy terrain. Glider is flipped to its Wreck side and attacks are carried out on the 2 Airborne Squads in the glider on the -3 column of the ICT. One Squad suffers a casualty and the other is Shaken.
27.0 Combat
27.1 Combat Formula
This basic combat formula is used for all combat in OST. The attacking or firing unit is referred to as the attacker, while the defending unit is referred to as the defender. All modifiers used in combat are cumulative.
Attacking unit(s), weapons Firepower value (HE or AP) of Attacker + Applied Modifiers = Attacker Firepower. The attacker FP may never reduce below 1.
Attacker Firepower Modifiers: Adjacent target +1 FP; Melee +2 FP; Degraded LOS -1 FP per hex (max -2); Shaken 1/2 FP (fractions rounded down); Intensive Fire -1 FP.
Defense value (Def) of Defender + Applied Modifiers = Defender Defense. Defender's Defense is modified by terrain and battlefield markers.
Attacker FP - Defender Defense = Attack FP
- The result of this will give a final Firepower of the attack which is then used as a column on the combat tables.
- 2D6 are rolled for the attack. The number rolled is cross referenced on the Firepower column and a combat result is given.
- The 2D6 attack roll may be modified by the following DRMs.
Die Roll Modifiers: Moving fire -1; Attached Leader +1; Height advantage +1; Height disadvantage -1; Cavalry Shock in Melee +1; Armor Shock in Melee +1; Ambush +1; Shaken unit in Melee -1 (max); Elite, Engineer, Assault, Shock unit in Melee +1 (max); Poor quality unit in Melee -1 (max); Intensive Fire -1.
27.2 Combat Tables
Tables on the player aids are used to resolve all combat.
- When attacking foot units (Squads, Crewed Weapons and SPCs), the Infantry Combat Table (ICT) is used.
- When attacking vehicles (Armored and Unarmored), the Vehicle Combat Table (VCT) is used.
27.3 Combat Sequence
This simple combat demonstrates the flow of a combat.
For example, a British Rifle Squad attacks a German Rifle Squad in a hex with Woods terrain. British Squad's Firepower of 4 attacks the German's Defense of 4 which is enhanced by the Woods for +2 Def for a total Defense of 6. Apply the formula: 4 (Attacker FP) - 6 (Defender Def) = -2 Firepower. As the target of the attack is a foot unit, the Infantry Combat Table (ICT) is used to resolve the combat. The -2 Firepower column of the Infantry Combat Table (ICT) is used. Now the attacker rolls 2D6, applies any DRMs and uses the row matching the result. The Firepower column and 2D6 Roll row are cross-referenced and a result is given for the combat. In this example a '7' was rolled and the result is 'Shaken'.
27.4 Firing
- When attacking, a player spends an Impulse Point (or 2 if using a fire group) and declares what unit is firing at which target, and if any additional support weapons will be used.
- To attack, the target must be within range of the attacking unit, and the attacking unit must have LOS to the target. Range is the number of hexes from the firer to the target, counted along the most direct path, not counting the firer's hex, but counting the target's.
- Targets may not be selected in Melee hexes.
- When firing at stacked units or a vehicle transporting another unit, a single specific target unit must be designated by the attacker. Exceptions include attacks by satchel charges (10.2) and mortar SWs (10.3) which affect all units in a target hex. Another exception is a HMG/MMG using Sustained Fire (8.1).
- Leaders must take a Leader Casualty Roll (28.2) when any unit in their hex suffers a combat result.
- Only Snipers can target a Leader when he is stacked with other units.
- If alone in a hex, Leaders may be fired upon by all units normally.
- A unit may use normal fire a maximum of twice per turn.
- Place a Fired marker on a unit when firing once. Flip the marker to Used after firing a second time.
27.5 Moving Fire
- A moving fire modifier is a -1 DRM applied to all to hit and attack rolls made by a unit which has moved (has a Moved marker) on an earlier Impulse.
- If moving first and then firing on a subsequent Impulse (when the unit has a Moved marker), the moving fire modifier is applied.
- If firing first and then moving on a subsequent Impulse (when the unit has a Fired marker), the moving fire modifier is not applied. Design note: the reason for not modifying the fire in point 3, is that the attack occurs with better firing positions and good targets. As opposed to point 2, where the unit is moving tactically (looking for cover and targets), even when it fires.
- Vehicles and weapons that are limited to firing in a covered arc which pivot or spin in their hex to change a covered arc apply the moving fire modifiers.
27.6 Opportunity Fire (Opp Fire)
When your opponent is moving, you can ask for a halt and fire at the unit when it moves into a new hex. The targeted unit must be in LOS and range of your unit conducting the OppFire.
- You spend an Impulse Point and carry out the attack as a normal firing action, the target unit's movement is paused.
- After firing, the attacking unit is marked with a Fired or Used marker.
- A unit suffering an effect (Shaken/Broken, casualties/destroyed or vehicle immobilized) must end its movement in the hex. If there is no effect, the unit can continue to move.
- An exception is units being transported. If the passengers are attacked the transporting vehicle may still continue its move regardless of whether the passengers suffer an effect or not.
- Another exception is vehicles taking damage that do not result in immobilization or abandonment. For example a moving vehicle suffers damage to its Main Armament, it is allowed to continue moving.
- Sequence of play after the Opp Fire. If there is no effect with your Opp Fire, it is still considered your next Impulse after your opponent completes their move. If there is an effect which halts the movement of the enemy unit (Shaken/Broken, casualties/destroyed or vehicle immobilization), the next Impulse returns to the moving player.
- A Group can be used for Opp Fire as long as 2 Impulse Points are spent and there is an attached Leader.
- A moving unit or Group may only be attacked once per hex moved into (including the last hex) with Opp Fire.
- Only one unit of a Group may be attacked in a hex with Opp Fire, unless attacked by a crewed MG using Sustained Fire which can target both. Other exceptions would be using a mortar SW or satchel charge, hitting the hex and affecting both units of a Group.
- Luck cards, OBA and Air strikes may not be used as Opportunity Fire.
Opp Fire Example 1: American player's Impulse. American spends 1 Impulse Point and moves a Rifle Squad. 1: German uses Opportunity Fire, spends 1 Impulse Point and attacks Rifle Squad. Attack result is 'Broken' on ICT. American player passes Gut Check and continues move. German HMG is marked Fired. 2: German uses Opportunity Fire again, spending another Impulse Point. This second attack has no effect. German HMG is marked USED. 3: American player completes the move of the Rifle Squad. It is marked Moved. Since the American player completed his move without being affected, the next Impulse goes to the German player. Note German HMG is using normal fire.
27.7 Intensive Fire
A good order unit that is marked Used can use Intensive Fire if it desperately needs to fire one last time.
- The unit is automatically marked as Shaken after using this option and an Intensive Fire marker is placed.
- Intensive Fire applies a -1 to Firepower, and applies a -1 DRM on any To Hit and attack rolls performed by the unit using Intensive Fire.
- After its use, a unit can perform no further actions in the turn, except self-defense in Melee.
27.8 Fire Groups
Fire Groups may be formed by 2 units and their support weapons as long as there is an attached Leader. Participating units must be in the same or adjacent hexes and all units must have LOS and range to the target.
- All FP factors of the group are added together for the attacker's Firepower and used against the same target in a single attack.
- It costs 2 Impulse Points to use a Fire Group.
- Crewed Weapons may be used in Fire Groups but vehicles may not.
- Vehicles may not be attacked by Grouped guns.
- Crewed MGs may be used in a Fire Group but cannot use Sustained Fire.
- If any of the units in the Group have moved, the Moving Fire modifier is applied.
- In a Fire Group, if both attacking units trace LOS through the same hex of degrading terrain, the -1 FP is only applied once to the group. If a group comprises 2 adjacent units with different LOS to the target, a max of 2 degradations is still allowed and applied to the group. In short, the Firepower of the group is added together and then the degrading terrain subtracts FP from the total as long as there is only 2 hexes overall of degrading terrain between the units of the fire group and the target.
- If each of the units in the Group fire through different degrading terrain the results are cumulative. For example, 2 German Rifle Squads are adjacent and form a Fire Group. If both units trace LOS through the same Brush hex, FP is only reduced by 1. However, if one Rifle traces through the Brush and the other traces through a Hedge, then the Group's FP is reduced by 2. The maximum of 2 hexes of degrading terrain is still followed, any more and the shot cannot be made.
For example, a German Leader in a hex with 2 Rifle Squads and a LMG forms a Fire Group. Rifle FP = 4, Rifle FP = 4, LMG FP = 2. Fire Group has a total FP of 10 and a +1 DRM is added to attack rolls due to the attached Leader.
28.0 Infantry Combat
The Infantry Combat Table (ICT) is used in all combat when the target unit is a Squad/reduced Squad, Single Person Counter or Crewed Weapon, or in other words a foot unit.
- For infantry combat in the game, take the attacking unit's Firepower (with any modifiers) and subtract the defender's Defense (with any modifiers). The result will give a Firepower column on the ICT to use for the combat.
- ICT has Firepower numbers listed along the top and dice roll numbers listed down the side.
- 2D6 is rolled by the attacker and any DRMs are applied.
- The dice roll is then cross-referenced with the Firepower column and a result for the combat is given. Results are applied immediately.
Infantry Combat example: a German Rifle with a LMG and an attached Leader attacks an American Rifle with Cover in an orchard hex. The American has a Defense of 4. The Cover and orchard terrain each add +1, for a total Defense of 6. The German Firepower is 4 for the Rifle and 2 for the LMG for a total of 6. Attacking through the stone wall hexside reduces the FP by -1 so the final FP of the attack is 5. The attack plays out as 5 FP - 6 Def = -1. The -1 FP column on the ICT is used to resolve the attack, and the German gets a +1 to the attack roll for having an attached Leader.
28.1 Infantry Combat Results on the Infantry Combat Table (ICT)
X - unit destroyed. The unit counter is removed from play and the appropriate number of Enemy Casualty Points are scored by the attacker.
C - casualties. The unit suffers casualties. If the unit is full strength, the counter is flipped over to the Reduced side and 1 Enemy Casualty Point is scored by the attacker. If the unit is a Reduced Squad, Crew or Single Person Counter, the counter is removed from play and 1 Enemy Casualty Point is scored by the attacker. If moving, unit must cease moving in that hex (except transported units).
B - the unit is Broken if it fails its Gut Check. Place a Broken marker on the unit. If moving, unit must cease moving in that hex (except transported units).
S - the unit is Shaken if it fails its Gut Check. Place a Shaken marker on the unit. If moving, unit must cease moving in that hex (except transported units).
Blank - no result.
There can be more than 1 result. For example, a C-S means Casualties are taken and the remaining Reduced Squad will be Shaken (if Gut Check is failed).
28.2 Leader Casualty Roll
Attached Leaders must roll each time a foot unit, or any foot unit in a group, it is attached to suffers casualties or a morale effect in combat.
- If the unit is destroyed (whether by a X result, or a C result on a reduced unit), a 1D6 roll of 1-3 and the Leader is also killed and removed from map. On a 1D6 roll of 4-6 he's ok.
- If the unit suffers a C result and is reduced, a 1D6 roll of 1 and the Leader is destroyed. On a 1D6 roll of 2-6 he's ok.
- If the unit suffers a Shaken/Broken result and fails its Gut Check, then the Leader must pass a Gut Check roll as well or suffer the same result.
- The Leader only takes one roll for the worst of a multiple effect result. For example, a C-S result and the Leader will only have to make 1 roll against the Casualty result.
- For artillery and air strikes affecting multiple units, the Leader still only rolls once for the result on its attached unit.
- Armor Leaders do not check for Leader Casualty when their vehicle is hit or takes damage.
Leader Casualty example: A German Rifle with an attached Leader is attacked. The attack result is Shaken. The Rifle fails its Gut Check roll and is marked Shaken. The attached Captain must also now check against the same result. It too fails its Gut Check roll and is also marked as Shaken.
29.0 Vehicle Combat
The Vehicle Combat Table (VCT) is used in all combat when the target unit is a vehicle. It is used against both armored (hard) and unarmored (soft) vehicles.
- In order to attack a vehicle, the attacker must have LOS to the target and be in range to engage it. If the target vehicle is armored, the attacker must also be using Armor Piercing (red) Firepower.
- Weapons may only fire up to their maximum range, and some have minimum ranges as well. The range applies to both the HE and AP Firepower uses for the weapon.
- The attacking player must first roll to hit a vehicle when firing at it.
- All vehicles, Crewed Weapons and Anti-Tank support weapons have Weapon Tables with to hit numbers listed at various ranges for the weapon on their unit data card. The range is listed in hexes to the target, not including the hex the attacker occupies.
- Attacking player rolls 2D6 and the roll must be equal to the To Hit number or higher to score a hit. Less and the shot is considered a miss.
- Upon scoring a hit, the attacker then compares their weapon or main armament's Armor Piercing value (red) at that range and subtracts the defending units front or flank Defense value, depending on which side of the vehicle the attack takes place plus any defensive terrain.
- This number is then used as the column for Firepower on the Vehicle Combat Table (VCT).
- 2D6 are rolled by the attacker and any DRMs are applied.
- This dice roll is then cross-referenced with the Firepower column and a result for the combat is given. Results are applied immediately.
- Vehicle main armament, Anti-tank Crewed Weapons and Anti-tank support weapons attacking Trucks must still roll to achieve a hit and then use their HE Firepower (black), not AP, in the attack, as Trucks are unarmored vehicles.
- Rolling a pair of unmodified 6s on the To Hit roll results in a 'Critical Hit'. This is an extremely well placed or lucky shot. When carrying out the attack, shift one column to the right on the VCT FP table.
- Vehicles firing their main armament's Firepower (black) at foot units do not roll a to hit number, they just fire as though carrying out a normal attack on foot units.
- Guns may only fire up to their maximum range. The maximum range applies to both the AP and HE uses for the gun.
For example, during play a Marder III takes a shot at an American tank 10 hexes away. Referencing the Unit card, at that range the German player needs a roll of 7 or higher to hit the target. If a hit is scored, the AP FP at that range is 9 and that value is used in the attack.
29.1 Vehicle Secondary Armaments (MGs)
Secondary armaments on a vehicle represent various machine guns available for use in combat.
- Vehicles with secondary armament get to carry out a second attack with their MGs on the same Impulse they attack with their main armament. It does not cost an additional Impulse Point.
- The attack from the MGs is carried out as normal fire against foot units.
- It uses HE Firepower (black) and has a separate range value from the MA.
- The target for the secondary attack does not have to be the same as the target for the main armament (except if using Opportunity fire, where it must be the same target).
- Vehicles cannot combine their main and secondary armament's Firepower into a single attack. It is resolved as 2 separate attacks.
29.2 Acquired Targets
- Firing again in the same turn, with the same unit at the same vehicle makes it an Acquired Target. Target is Acquired as long as LOS remains unbroken, even if the target moves.
- An Acquired Target modifier is +1 on the To Hit dice roll.
- Place Acquiring and matching Acquired counters on the attacker and target.
- Acquired Target status ends, and the marker is removed when the turn ends.
29.3 Vehicle Combat Results on the Vehicle Combat Table (VCT)
X - vehicle destroyed. The counter is flipped over to the Wreck side and the appropriate number of Enemy Casualty Points are scored by the attacker.
D - vehicle damaged. The vehicle is hit and damage is taken. If moving, it can continue unless abandoned or immobilized.
Attacker rolls 1D6 to determine damage:
- 1,2 - minor damage, no effect.
- 3 - the mgs are destroyed if the vehicle has secondary armaments. Place a Mgs damage marker.
- 4 - the main armament is destroyed. Place a Main Gun damage marker on the vehicle. If vehicle has dual armaments another 1D6 roll is required; on a 1-3 the turret weapon is damaged, on a 4-6 the hull mounted weapon is damaged.
- 5 - the vehicle is Immobilized. Vehicles stops movement. Place an Immobilized marker on the vehicle.
- 6 - Abandon Roll. Owning player must pass a Gut Check. If passed everything is OK, if failed the vehicle is abandoned and flipped to its Wreck side.
Note, the vehicle is automatically abandoned (no Gut Check roll) after a second non-minor damage result.
B - Broken. The vehicle crew is Broken if it fails its Gut Check. Place a Broken marker on the vehicle. If moving, the vehicle stops immediately in that hex.
S - Shaken. The vehicle crew is Shaken if it fails its Gut Check. Place a Shaken marker on the vehicle. If moving, the vehicle stops immediately in that hex.
Blank - no result.
There can also be more than 1 result on the VCT. For example, a D-S result means the vehicle is damaged and the crew must pass a Gut Check or become Shaken.
Vehicle Combat example: an American M18 Hellcat engages a German Hetzer and Rifle Squad. These 2 attacks cost 1 Impulse Point to the American player. First attack is on the Hetzer with AP of its main armament. The Hellcat has a clear LOS to the target and the range is 8 hexes. Checking the Data card for the M18 Hellcat, a 2D6 roll of 7 or greater is needed for a hit. If a hit is made, the Hellcat's AP FP at a range of 8 hexes is 9. Subtract the Hetzer's Front Defense of 8 and an attack on the +1 column of the VCT is carried out with a 2D6 roll. A second attack is carried out in the same Impulse with the secondary armament (machine guns) on the German Rifle Squad in the heavy structure. 2 FP - 6 Defense = -4 column of the ICT.
29.4 Vehicle Damage
Damage inflicted on a vehicle remains in place for the game's duration. With sufficient damage, the vehicle may also be abandoned.
- If a vehicle only has 1 armament, it is automatically damaged with either a Mgs or Main Gun damage result.
- Unarmed soft vehicles such as Trucks are automatically destroyed with any damage result other than minor damage.
- If damaged while moving, the vehicle may continue to move unless it is abandoned or immobilized.
- If a vehicle already has a damage marker and takes another damage result other than minor damage, the vehicle is automatically abandoned (no Gut Check roll). In other words, a damage roll of 3-6. For example, a M4A1 Sherman tank already has a destroyed main gun. It is hit again with a Damage result, this time the MGs are damaged. The Sherman is automatically abandoned and the counter is flipped to a Wreck. 1 Casualty Point is scored.
29.5 Abandon Vehicle
Sometimes in battle, crews would abandon their vehicles because of damage, injuries or simply losing their nerve.
- When a vehicle is abandoned, the counter is flipped and becomes a Wreck. There is no Crew counter placed as they are considered to have run from the battle.
- Only 1 Enemy Casualty Point is scored by the attacker.
29.6 Crew Survival
When a vehicle is destroyed, there is a chance for the crew to survive.
- Owning player rolls 1D6.
- On a roll of 6, the crew survives. Place a Crew counter in the same hex as the vehicle Wreck.
- If Crew survives, only 1 Enemy Casualty Point is scored for destroying the vehicle.
- Trucks and armored troop carriers have no crew survival and are only worth 1 Casualty Point.
30.0 Melee
30.1 Melee Phase
- In this phase all Melee combat takes place.
- Units in a Melee hex may not be fired at by other units.
- Units in a Melee are locked in and cannot do anything else (including Rally).
- Other units may not move into or through the initial Melee hex once set, though if the Melee continues into another turn, it can be reinforced.
- Melee hexes do not affect the LOS or fire of other units on the battlefield.
30.2 Melee Combat
Melees represent close quarters fighting and casualties are normally high.
- Only 1 Melee combat per hex, per Melee phase.
- Stacking limits are still followed, so a max of 2 units, 2 Leaders and 1 support weapon per Squad may be involved.
- All terrain and fortification modifiers are ignored in a Melee. Moving Fire modifiers are also ignored.
- Leaders and Snipers have a FP of 1 and a Defense of 1 in Melee.
- A Tank Shock +1 DRM is applied to a side in Melee combat that has a good order armored vehicle with functioning armament. Shock is not applied in the case of a Tank Duel.
- A Cavalry Shock +1 DRM is also applied to a side using a Cavalry Charge.
- DRMs used in Melee are cumulative.
- Shaken units have 1/2 FP (round down fractions) and get a -1 to their attack roll.
- Broken units do not get an attack roll in Melee but their Defense is used. For example, if a Squad assault moves into a hex with a Broken enemy unit, the Squad will get a free attack as the Broken unit does not get to fire back in the Melee combat.
30.3 Melee Combat Procedure
- Each player in a Melee must first calculate the Firepower column they will use in the combat.
- Each side adds up the HE Firepower (black) values of all units in the Melee hex. Vehicles use all HE Firepower as well as functioning secondary armament. Then the +2 FP Melee modifier is added to the total to arrive at their side's Firepower. +2 FP Melee modifier added is only applied once per Melee, not for each unit involved.
- Each side adds up the Defense numbers of all units in the Melee to arrive at their total Defense.
- The 2 sides are compared, each side's total FP goes against the other side's total Defense. This gives a column for each attacker to use.
- Separate attack rolls are now made against each enemy unit, including Leaders, in the Melee using the same FP column. The attacking player must declare the target for each attack roll. For example, if a defender has 2 units and a Leader, you roll the dice 3 times using the same FP column in each attack roll.
- Attacks against Squads, Crewed Weapons and Single Person Counters are resolved on the Infantry Combat Table (ICT) and attacks against vehicles are resolved on the Vehicle Combat Table (VCT).
- Attacks for each side are resolved simultaneously, with results applied to both sides after the combat, so it's possible that all units may be destroyed.
- Leaders in Melee are attacked directly, Leader Casualty rolls are not used.
- Vehicles use their front defense value.
- Trucks add their Defense to a Melee, but no FP.
Melee example: An American M4A1 Sherman and a Rifle Squad are in a Melee with a German Rifle Squad and a Sergeant. The American player's Total attack is 4 (Rifle) + 6 (Sherman, comprising 4 main gun HE + 2 secondary FP) + 2 (Melee FP modifier) = 12. Against the German's Total defense of 1 (Sgt.) + 4 (Rifle) = 5. 12-5 = 7 FP. The American player attacks on the +7 FP column of the ICT against the Rifle Squad and then attacks the Leader using the same +7 FP column. The American player also modifies their rolls with a +1 for Tank Shock because they have an armored vehicle. The German's Total attack of 4 (Rifle) + 1 (Sgt) + 2 (Melee FP modifier) = 7. Against the American's Total defense of 4 (Rifle) + 5 (Sherman front armor) = 9. 7-9 = -2 FP. The German player carries out 2 separate attacks on the -2 FP column. The ICT is used for the attack on the Rifle and the VCT is used for the Sherman. The German player also modifies their rolls with a +1 because of the Leader.
30.4 Melee Results
- Enemy Casualty Points are scored for any unit eliminated.
- Surviving, good order units remain in the Melee hex after combat.
- After combat, all Broken and Shaken units of both sides are retreated to adjacent hexes by the owning player. Hexes must be free of enemy units and retreating unit must be able to enter the terrain. If units cannot retreat, they are destroyed. Hexes of retreat should generally be back away from the Melee hex, if possible.
- However, if all units of the attacker (side which assault moved into hex) are destroyed or forced to retreat, then the defender's Shaken and Broken units remain in the hex.
- If all units on both sides are Broken or Shaken, then only the player that initiated the Melee will retreat out of the hex.
- Lone, surviving Leaders without an attached unit must retreat out of the hex at the end of a Melee if good order enemy units remain.
- Surviving trucks must retreat out of the hex at the end of a Melee if good order enemy units remain.
- Vehicles destroyed in a Melee have no crew survival.
- Vehicles which are required to retreat but cannot due to immobilization are automatically abandoned.
- If a Crewed Weapon unit is destroyed, the weapon is automatically destroyed as well.
- If there are only units of one side remaining in the hex, the Melee is considered resolved. The Melee marker is removed and all units are in play for the next turn.
- If both sides have surviving, good order units in the hex after combat, the Melee is unresolved. The Melee marker remains on the hex for the next turn. Another Melee combat will take place in the Melee phase of this turn.
- An unresolved Melee can be reinforced in the following turn by Assault moving new units into the hex up to the stacking limit. New units are factored into next combat.
- It is possible for a Melee to last for many turns.
Diagram note: This shows a possible Melee Result for the Melee example involving the US tank and Rifle against the German Rifle and attached Leader. In combat, the US Rifle Squad takes a casualty and is Shaken. It is retreated out of the hex. The US Sherman tank suffers no effect from the combat and remains in the Melee hex. On the German side, the Leader is destroyed and removed. The Rifle Squad suffers no effect from the combat and also remains. As there are good order units from both sides remaining in the hex, the Melee is unresolved and the Melee marker remains. The Melee continues into the next turn. This Melee can now be reinforced in the following turn.
30.5 Concentrated Attack
In an uneven Melee, the outnumbered player may choose to concentrate his attack on only 1 target to increase their odds.
- If used, the Melee is calculated for the outnumbered player to only attack the single enemy unit of their choice (and a possible attached Leader) and the second enemy unit is not attacked at all.
- Only Squads, Crewed Weapons and vehicles are factored in when counting total units, Single Person Counters are not.
- An enemy Leader in the hex will be added automatically to the target for a concentrated attack if the unit being attacked is a foot unit, if the target is a vehicle, the Leader is ignored.
- A player using this tactic must declare it before any Melee combat takes place.
- If the Melee is 2 units to 1, then this option is available.
- In the previous Melee example, the German player could choose to concentrate his attack solely on the American Rifle. So his FP of 7 is directed at the Rifle's defense of 4. He makes 1 attack on the +3 column of the IFT with a +1 for his Leader. The Sherman is not attacked.
31.0 Tank Duel
This special type of Melee occurs when an armored vehicle assault moves into a hex containing an enemy armored vehicle or two. This cannot occur when there are other types of units involved as it is between armored vehicles only. A Tank Duel is resolved differently from normal Melee.
- A Melee marker is placed as with other Melees, as the hex is again considered closed off for the turn. The combat is resolved in the Melee phase at the end of the turn.
- First, both players roll 2D6 for the First Shot and the highest roll will attack first. Ties are re-rolled. Modifiers to this roll are +1 DRM to a vehicle with an Armor Leader and -1 DRM to a Shaken vehicle.
- If the First Shot roll was won by 4 or more, then the first attack will be on the enemy vehicle's flank Defense, otherwise all attacks in a Tank Duel will be carried out on a vehicle's front Defense.
- Broken vehicles in a Tank Duel will not get to shoot obviously, but a First Shot roll is still made to check for a flank shot.
Diagram note: Tank Duel example, a German PzKpfw IV G assault moves into a hex with a US Sherman tank. A Melee marker is placed and a Tank Duel takes place in the Melee phase.
31.1 Tank Duel Combat
- The Vehicle Combat Table (VCT) is used to resolve these attacks.
- Vehicle's AP Firepower values (red) are used in combat.
- A To hit roll is not needed in Tank Duels, vehicles achieve a hit automatically if they get a shot.
- All terrain and fortification modifiers are ignored in a Tank Duel. Moving fire modifiers are also ignored.
- Vehicle with the First Shot attacks the other vehicle in a single attack using its AP FP against the enemy vehicle's front Defense (or flank Defense if achieved in the First Shot roll).
- The +2 FP Melee modifier is added to the Attacker Firepower. The combat is resolved in the Melee phase at the end of the turn.
- +1 DRM to attack rolls by vehicle with an Armor Leader.
- Shaken vehicles have 1/2 FP and apply a -1 DRM to their attack roll. Broken units cannot attack, so they do not return fire in a Tank Duel.
- Attacks are resolved sequentially in a Tank Duel, not simultaneously, so if the player with the First Shot destroys the enemy vehicle, damages its main armament, or causes it to be Broken, then there is not an attack in return against it.
- If an armored vehicle is in a Tank Duel and it has no AP Firepower then this vehicle is given an AP FP value of 1 for the combat.
- If an armored vehicle assault moves into a hex occupied by 2 enemy armored vehicles, a rare 3-way Tank Duel occurs. With 3 armored vehicles involved, the First Shot roll determines the order of the first 2 attacks only (one for each side). The third armored vehicle gets its shot after the first two vehicles have resolved their attacks.
- The player with the single armored vehicle in a 3-way Tank Duel gets one shot only and chooses their target when its their time to fire.
Tank Duel example: Both players roll 2D6 to check for First Shot. US player wins roll 8 to 6, so it makes the first attack. M4A1 Sherman's AP FP at range 0 is 7 and the Panzer IV's front Defense is 7. 7 AP FP - 7 Def = 0 FP column of VCT. This attack results in a Shaken on the German tank and is enforced immediately. The German player fails their Gut Check, so their tank is Shaken and a marker placed on the vehicle. Now the German player takes a shot as they still have functioning armament. PzKpfw IV G's AP FP at range 0 is 10, which is then halved to a 5 because the German tank is Shaken, and the Sherman's front Defense is 5. 5 AP FP - 5 Def = 0 FP column of VCT. A -1 DRM is also added to the attack roll. This attack results in a Minor Damage on the US tank. The Tank Duel is now over, and the German tank must retreat from the hex.
31.2 Tank Duel Results
- Tank duels last for 1 turn only.
- The Melee marker is removed at the end of combat and the surviving units are in play for the next turn.
- If both units are still intact, and good order, the unit which initiated the Melee must move out to an adjacent hex.
- If one player has a Broken/Shaken vehicle, it must retreat to any adjacent hex of the owning player's choice, free of enemy units. If both vehicles are Broken/Shaken, only the unit which initiated the Melee must retreat from the hex.
- Broken/Shaken units that cannot retreat are destroyed.
- Vehicles which are required to retreat but cannot due to immobilization are abandoned (see Abandon Vehicle).
32.0 Airstrikes
Airstrikes are missions carried out on ground targets by a side's aircraft. Availability and Firepower of these attacks is noted in the scenario setup instructions. Airstrikes may also occur by way of a Luck Card.
- It costs a player 1 Impulse Point to carry out an Air Strike (exception, Luck card).
- The strike affects 2 conjoined hexes. At least 1 of the hexes must be in LOS of a good order unit.
- Declare which 2 hexes the aircraft will attack and place Strike markers.
- Owning player rolls 1D6 to check for pilot quality which then gives a Firepower for the attacks.
- A roll of 1 or 2 and the pilot is Green, attacking both hexes with a FP of 4.
- A roll of 3, 4 or 5 and the pilot is Veteran, attacking both hexes with a FP of 6.
- A roll of 6 and the pilot is an Ace, attacking both hexes with a FP of 8.
- Firepower used in the attack is the same in both hexes and applied equally against all target types. For example a Firepower of 6 will be used as 6 HE Firepower against foot units and it will be used as 6 AP Firepower against armored vehicles.
- Separate attack rolls are made against each unit in each hex. All units in a target hex undergo the Airstrike attack.
- Defending units receive all modifiers for terrain and fortifications. Exception: hexside terrain provides no defensive bonus.
- Vehicles are hit automatically and resolve the attack against their flank Defense. Any vehicle passengers undergo a Collateral Damage attack.
- Hexes with structures check for structure collapse after the attack on the units in the hex.
- Attached Leaders take Leader Casualty rolls in the attack, while Leaders on their own are attacked normally.
Airstrike example: 2 adjacent target hexes are chosen. A pilot quality roll of 4 gives a Veteran pilot, so 6 Firepower is used in all attacks. The attack on the tank gives us 6 AP FP against the vehicle's flank Defense of 1. 6 AP FP - 1 Def = +5 FP column of the VCT. The attack on the Rifle Squad in the other hex gives us 6 HE FP against the unit's Defense of 4. 6 HE FP - 4 Def = +2 FP column of the ICT. If there is a result on the Squad, the attached Leader undergoes a Leader Casualty Roll.
33.0 Off Board Artillery (OBA)
This includes fire from off board mortars, field guns and rocket artillery.
- It costs 1 Impulse Point to call an OBA strike and the attack proceeds immediately.
- Firepower used in the attack is applied equally against all target types.
- The area of effect includes the Strike hex (where Strike marker lands) and the 6 surrounding hexes.
- The Strike hex uses the full Firepower of the attack, and the six surrounding hexes use half of that number (with any fractions rounded down). These 7 hexes represent the artillery strike's area of effect.
- A player can fire Smoke rounds instead with any OBA strike. In this case, a Smoke counter is placed in the Strike hex and Smoke 2 counters are placed in the 6 surrounding hexes.
33.1 OBA Artillery Procedure
- First a target hex for the OBA Strike marker is chosen by any good order unit acting as a spotter. The target hex must be in the spotter's LOS.
- Spotting range for all units is 20 hexes up to a maximum of their weapon ranges if greater.
- Declare whether the strike is an explosive strike or a Smoke mission and place the Strike marker in the target hex.
- Once called, the OBA strike is carried out and cannot be cancelled.
33.2 Accuracy Roll
- Now an accuracy roll is made using 1D6. An accuracy number is given along with the Firepower in the OBA chart.
- The accuracy number or higher must be rolled for the Strike marker to remain in place, otherwise it will move to a new hex.
- +1 DRM is added to the accuracy roll if the spotting unit is a Leader. A -1 DRM is added if there is any degrading terrain (whether 1 or 2 hexes) between the spotting unit and the target hex.
- If accurate, the artillery strike is carried out on the Strike hex and the six surrounding hexes.
- If inaccurate, follow the drift procedure and move the Strike marker to a new hex before carrying out the OBA strike.
33.3 Drift
- Roll 1D6 for direction, with 1 being the hex on the North side and counting to 6 clockwise.
- Then 1D6 is rolled for distance, in number of hexes, to move the Strike marker along the direction path.
- Move the Strike marker to its new hex and carry out the strike.
- If the Strike marker drifts off the playable map, it affects nothing and is discarded.
Diagram note: OBA Accuracy and Drift. An OBA artillery strike is called for hex Y11, but the accuracy number is not rolled so drift is applied. A 1D6 roll of 2 gives direction for the drift. Then for drift distance another 1D6 roll gives a 3, so the Strike marker is moved 3 hexes to hex BB10. The artillery strike is then carried out in hex BB10 and the six surrounding hexes.
33.4 Carrying Out OBA Strike
- If it is a Smoke mission, a Smoke counter is placed in the Strike hex and Smoke 2 counters are placed in the six surrounding hexes.
- If it is a explosive mission, separate attacks are carried out against each unit in every hex of the affected area.
- Defending units receive all terrain and fortification modifiers. Exception: all hexside terrain, like stone walls, provide no defensive bonus.
- Vehicles are hit automatically and resolve the attack against their flank Defense. Any vehicle passengers undergo a collateral damage attack.
- Attached Leaders in a hex take Leader Casualty rolls in the attack. If there are multiple foot units in the hex, the owning player chooses a foot unit to pair the Leader to before carrying out the combat. The Leader then only suffers the effects for that unit only.
- Leaders in a hex on their own are attacked normally.
- Any hidden units in a hex of an OBA attack are revealed and attacked.
- An OBA strike may drift onto a player's own forces and the attacks are carried out as normal.
- An OBA strike is considered to be active for the entire turn, so the Strike marker is left in place and any units moving into the 7 hex area of effect must immediately undergo the attacks with the same Firepower.
- Units caught in the original strike may still move out of their hex without undergoing another attack, as long as they don't move through another hex in the 7 hex area of effect.
- When foot units and Crewed Weapons are attacked by OBA in a Woods hex, Airburst applies. Incoming artillery shells striking the trees made it deadly for nearby troops.
- For Airburst, the Woods +2 Defense is removed and a -1 Defense modifier is applied to the foot units instead. Fortification modifiers are still used.
- The Strike marker is removed at the end of the turn.
OBA example: An artillery strike lands in hex BB13 among French units. The Firepower in the Strike hex is 6, while the FP in the six surrounding hexes is 3. 1: The Panhard 178 armored car is attacked on its flank Defense of 2 with an AP FP of 3. 3 AP FP - 2 Def = +1 FP column of VCT. 2: The Rifle Squad with a Defense of 4 in the woods is attacked by the 3 HE FP. But Airburst applies, so a -1 is applied to the Rifle's Defense. 3 HE FP - 3 Def = 0 FP column of ICT. 3: The Rifle Squad with a Defense of 4 in a light structure which adds a +1 to its Defense. 3 HE FP - 5 Def = -2 FP column of ICT. After attack on this unit, a 1D6 collapse roll is done for the structure. It will collapse on a roll of 5-6.
Glossary
Some terms which you will come across with the game.
- AP - Armor Piercing. Attack value used against armored vehicles. Red value on unit counters.
- ATG - Anti-tank Gun. Crewed heavy weapon used against armored vehicles.
- ATR - Anti-tank Rifle. Support weapon used against armored vehicles.
- COT - Cost Of Terrain. Number of Movement Points required to move into a hex of that terrain type.
- Crest - The edge of a hill. Can see lower levels from a crest hex.
- D6 - A six sided die. 1D6 means rolling 1 six sided die, 2D6 means rolling 2 six sided dice, etc.
- Def - Defense. Value used by target unit in combat.
- DRM - Die Roll Modifier. A number that is either added to or subtracted from a die roll.
- FP - Firepower. Value of attack used in combat against an enemy unit.
- HE - High Explosive. Attack value used against foot units and soft targets.
- ICT - Infantry Combat Table. Table on Player Aid used when attacking soft targets.
- LOS - Line Of Sight. Tracing a line to a target hex and determining if it can be seen and attacked.