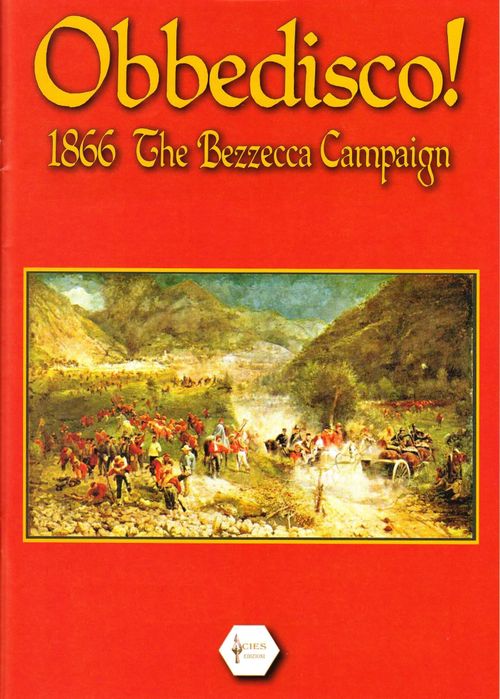
Obbedisco!
Obbedisco! Rulebook
Table of Contents
Table of Contents
1. Historical Notes
The Bezzecca campaign was a bold mountain war campaign, led by the Italian general Giuseppe Garibaldi. He led his group of volunteers, the "Corpo volontari italiani", against the Austrian general Kuhn in Trentino.
Italy declared war on the Austro-Hungarian Empire, trying to exploit the contemporary state of war between Austria and Prussia (the Seven Weeks' War) in order to liberate Veneto, Trentino and Friuli. Although Italy gained Veneto at the peace table, the brief war was marked by two defeats for the young Italian nation: Custoza and Lissa, on land and at sea.
With the Bezzecca campaign, Garibaldi and his troops won the only important battle for Italy after the war. Garibaldi and the volunteers were stopped only by the end of hostilities, and the general's famous reply to the King's telegram ordering the immediate cessation of military operations was a concise and pithy "Obbedisco" ("I obey").
In the end, Garibaldi did not manage to free Trentino from the Austrians, a tragic outcome for some of the local Italian rebels, who were condemned to death as traitors by the Austrian governors at the end of the war.
1.1 Game Components
Obbedisco: the Bezzecca Campaign consists of the following elements:
- A map;
- A sheet of 140 counters;
- This set of rules with the historical scenario and commentary;
- A player aid card.
The game uses one or two six-sided dice (not included).
1.2 Game Scale
Each game turn represents one day, while each strength point represents about 800 men. One hex represents 1 km (about 0.62 miles).
1.3 Activation Chits
Each leader has a number of activation units ("chits") corresponding to its initiative. The activation units are placed in an opaque container (cup, bags, etc.).
Drawing an activation unit from the opaque container determines which leader is activated. Further activation units are Random Event and End of Turn.
1.4 Strength Points Versus Units
Strength points (SPs) are generic and totally interchangeable. SPs are used to indicate states of reduced strength compared to a leader's initial strength. An SP can only move when its leader is activated.
1.5 Disorder
An indicator used to show the disruption of a unit with respect to the CCI (Command, Communications, Intelligence). Disorder negatively affects the combat of the unit concerned, and reduces its MP by 1.
1.6 Fatigue Points (FP)
These markers are used to indicate the growing inability of a unit to move and fight.
1.7 Commanders
Each commander has an initiative value (bottom left), used for activation and movement, and a command value (bottom right), used for rallies, for morale and as a modifier to combat ability.
The reverse side of the commander counter represents the unit's full combat strength, expressed in SPs.
1.8 Rout
This marker is used to indicate that the cohesion of a combat unit has almost completely collapsed. Such a unit must retreat when activated, and suffers greatly from unfavourable combat conditions until it recovers.
1.9 Zone of Control (ZOC)
These are the six hexes adjacent to an SP. Each unit/leader with a fatigue level from 0 to 3 projects a ZOC into all six adjacent hexes. Units with fatigue four have no ZOC.
The ZOC does not project into terrain of level 4 or 5.
2. Game Sequence
All the steps of each game turn must be carried out in the following order.
2.1 Activation Chits
At the start of a turn, both players place in an opaque container all the activation chits, one for each point of initiative of each leader currently in play in that turn (that is, those already on the map and the turn's reinforcements).
Example: Menotti (a leader with initiative 2) will have 2 chits in the container.
In addition, one "End" chit and three "Random Event" chits are placed in the opaque container. The players alternately draw activation chits from the opaque container to determine the sequence of play. The players may be called upon to add further "End of turn" chits to the opaque container as a result of random events.
The turn ends when:
- the "End of turn" chit has been drawn after both players have activated at least one leader (ignore this chit and put it back in the opaque container if it is drawn early), or
- both players declare that they pass.
2.2 Operations
The activated leader may move and begin a combat with its unit. No other leader may move or fight at this time.
2.3 Recovery
Note: in the printed rulebook, the items under this heading are numbered 3.3.1 and 3.3.2; the numbering is kept as printed.
3.3.1 Disordered units that are not in an enemy ZOC may reorganise automatically (the disorder marker is removed). Disordered units in an enemy ZOC must pass a command test (rule 11) to reorganise.
3.3.2 A unit in rout at least 4 hexes away from the nearest enemy unit must pass a command test to see whether it reorganises. If the leader passes the command test, the unit recovers and becomes disordered with 2 fatigue points, which cannot be recovered in this same turn.
If the command test fails, or if the unit is too close to the enemy, it moves 4 hexes (ignoring terrain costs, but not entering mountain hexes) towards its map edge, leaving the map if necessary.
If this is the last turn of the scenario, both players calculate victory points and a winner is declared (see the victory conditions, rule 14).
4. Movement
Both armies consist of counters representing the various leaders. The number of SPs of each leader is shown on the back of the counters.
4.1 Movement Activation
To determine how far a leader can move when activated, the player rolls a die and adds the leader's initiative value.
If all of a leader's movement is made on road, and the moving force does not enter or leave an enemy ZOC, 2 is added to the movement.
2.4 Combat Activation
When a leader enters an enemy ZOC it may carry out an attack as part of its movement.
To make an attack during movement, the leader must spend 2 MP over and above the cost of entering the ZOC. This type of attack entails an immediate 1 fatigue point for the attacker.
If the leader does not want to attack, or does not have enough MPs, the activation must cease.
2.5 Movement and ZOC
If a leader begins its move in an enemy ZOC, it pays 1 additional MP to leave the ZOC, and it may not enter directly into another ZOC.
An assault launched from an enemy ZOC costs 2 MP, in addition to the terrain cost of the defender's hex, and entails an immediate 1 fatigue point for the attacker.
If the leader wins the assault, it may continue its movement, but it may not carry out any other combat in the same activation.
2.6 Fatigue
Each movement or combat after the first activation in the same turn costs 1 fatigue point.
A leader may not attack if this would bring it to its 4th fatigue point (a leader may not make more than two attacks in a turn).
2.7 Forced March
A leader may carry out a forced march; this entails an immediate 1 fatigue point for the attacker.
The player announces that the leader will make a forced march, places the appropriate fatigue level marker on the leader, and rolls 2 dice instead of 1 to calculate its movement points. The road movement bonus applies normally, where relevant.
A leader may not make a forced march if, by doing so, it would incur a 4th fatigue level.
2.8 Reaction Movement
If a leader enters an enemy ZOC, the defending leader may attempt a reaction movement to move away.
The defending player rolls a die, adding or subtracting the difference between the initiative values of the two leaders. If the result is 5 or more, the defending leader may move away one hex.
This procedure may be repeated several times, but for every attempt after the first, the leader takes 1 fatigue point, even if the die roll fails.
Leaders with 3 or 4 fatigue points may not attempt reaction movement.
2.9 Stacking Limits
Each hex may hold only one leader, with its combat units, and/or one garrison.
During a move or a retreat, it is possible to pass through a hex occupied by a friendly leader, but both units are automatically disordered. It is always possible to pass through a garrison without penalty.
3. Garrisons
Garrison units have only 1 or 2 SPs (strength points). They cannot move or attack, but they can defend normally.
A garrison unit automatically recovers 2 fatigue points at the end of each turn, or 1 if it is in an enemy ZOC. Garrisons are considered entrenched if they are not in hexes containing a Fort. Garrison units are automatically eliminated if forced to retreat.
4. Fatigue
This is one of the most important concepts of the game, as it takes into account not only the strain suffered by the unit, but also stragglers, morale and other factors that affect a combat unit when it is forced to make an extra effort.
4.1 Fatigue Points
Each unit has a maximum fatigue capacity of 4 FP (fatigue points).
Note: "DR" is kept as printed. It is the abbreviation used for the modifiers applied to combat die rolls.
A leader with 0-1 FP has no penalty. A leader with 2 FP loses 1 MP and has a -1 DR modifier applicable to any combat. A leader with 3 FP loses 3 MP, its strength may not attack, and it has a defence modifier of -2 DR. A leader with 4 FP may not move or attack, loses its ZOC, and its strength for defensive purposes is reduced to 1 SP, regardless of the strength printed on the counter. If a leader exceeds 4 FP, it routs (this is possible only as a result of combat).
4.2 Garrison Fatigue Points
Garrison units with 4 FP do not reduce their SPs, but have a -4 DR modifier in combat. Garrisons forced to retreat are eliminated.
4.3 Application of Fatigue Points
Because of the various activities during a turn, FP are not always applied in the same way.
A re-activation of a leader costs 1 FP after the completion of its movement. If a leader attacks as part of its movement, it receives 1 FP before combat. A leader that starts from an enemy ZOC and attacks receives 1 FP after the combat (cumulative with any others received as a result of the combat itself). If the leader had previously been activated in the same turn, it receives 1 FP before combat, not after.
4.4 Recovering Fatigue
During the end-of-turn phase, each leader that is not in an enemy ZOC automatically recovers 2 FP. If the leader is inside an enemy ZOC, it recovers only 1 FP.
However, if the leader passes a command test (rule 11), it recovers +1 FP beyond the normal amount (that is, 3 FP outside an enemy ZOC, 2 FP inside). If this command test fails, there are no consequences.
Note: the printed text reads "PF" in this passage; it is read as FP.
5. Combat
To resolve a combat, both players roll a die.
Both players add the strength points stacked with the leader, any morale modifiers (see optional rule 14.1), the combat values of the leaders, and any modifier for the type of terrain.
5.1 Results
After both players have rolled the die, the (modified) results are compared.
5.1.1 The Same Total
Both leaders stay in place or retreat 1 or 2 hexes towards their map edge (at the player's choice, but the defender declares any retreat before the attacker). In this case, the opposing player may not follow up. Both leaders gain 1 FP after the combat.
Both leaders make a command test. If the test is failed, the unit/leader is disordered.
5.1.2 Difference of 1 - 2 Points
The losing leader is disordered and gains 1 FP. It must retreat 1 or 2 hexes (at the player's choice). If the leader occupies a city, trench or fort, it may remain in the hex.
The winner makes a command test, with a +1 modifier to the die roll. If the test succeeds, the victorious leader may advance 1 hex.
5.1.3 Difference of 3 - 4 Points
The losing leader is disordered, gains 2 FP and must retreat 1 or 2 hexes (towards a source of supply). This retreat is mandatory, regardless of terrain.
The winning leader may advance 1 hex.
Garrisons forced to retreat are eliminated.
5.1.4 Difference of 5 or More Points
The losing leader routs and retreats 4 hexes towards its map edge (and leaves the map if forced to do so). Garrisons are eliminated.
The winning leader may advance up to 3 hexes, but if it enters an enemy ZOC after the first hex, it must stop there (it may enter a ZOC as the first hex traversed, but must stop at the second).
7.1.5 If a leader exceeds 4 FP, it is in rout (see 7.3).
Note: the cross-references in this subsection (7.1.5, 7.3) are kept as printed.
5.2 Effects of Disorder
A disordered leader receives a -1 modifier to its combat value and -1 MP (this modifier is cumulative with others). Recovery from disorder takes place during the End of Turn phase.
5.3 Effects of Rout
A routed leader loses its ZOC, may not attack, defends as if it had 4 FP, and is forced to use rout movement.
If it suffers any other negative result (that is, it is forced to take further FP), the leader is immediately forced to move 4 hexes towards its map edge and loses 1 SP.
Note: this is the only way to eliminate SPs in this game.
A routed leader that is activated by its activation chit is forced to move 4 hexes towards its map edge. After this movement, the routed leader may not be activated again for the rest of the turn.
Clarification: a leader may be activated for rout movement only once per turn, in addition to the normal rout movement due to a combat result.
7.3.1 If a leader suffers losses (or, if Austrian, detaches SPs), a number of SPs equal to the leader's current value must be placed under the leader, using the appropriate counters.
6. Trenches and Fortifications
Fortifications and trenches represent the field works used in the campaign. Forts are large structures built before the war, and are printed on the map. Trenches are indicated by appropriate counters.
Note: there are only two forts on the map: Ampola and Lardaro.
6.1 Forts
These hexes give a +4 modifier to a defender inside them, and allow units to avoid retreats after combat. Only garrisons or leaders with 3 or fewer SPs may use a fort. Other units in the hex may not use the fort.
6.2 Trenches
Trenches are built during play and give a +1 modifier to the defender. All units may use defensive trenches.
To build a trench, a leader gains 1 FP and does not move or fight during the activation phase.
Trenches are automatically destroyed when the leader that built them moves away (voluntarily or in retreat).
A trench may be built in any hex except a fort. The modifiers are cumulative.
9. Terrain Effects
A leader pays movement points for each hex side it crosses. The costs of the various terrain types are shown on the TEC.
9.1 Leaders roll a die if they move onto hills (terrain level 3, 1200-2350 m) without using road hexes. On a die roll of 1 or 2, the leaders receive 1 FP.
9.2 Leaders roll a die if they cross hex sides of mountains (terrain level 4, 2350-2900 m). On a die roll of 1-3, the leaders receive 1 FP.
10. Supply
To be supplied, a leader must trace a line of communication to its supply source. The line may be at most 10 MP long, along a road that connects the leader to the supply source.
The line of communication may not pass through hexes not occupied by units that are in an enemy ZOC, or through terrain of level 4 (2350-2900 m) or higher. A line of communication may be traced through hexes occupied by friendly units that are in an enemy ZOC.
Note: the printed wording of the first sentence above is ambiguous; it is translated literally.
6.3 Italian Supply Source
For the Italian player, the supply source is the road hex on the map edge along Lake Idro.
10.1.1 The line of supply may not pass through hexes 5803, 5903, 5904 and 5905.
Note: the Austrian fleet, with its 22 vessels, always maintained control of Lake Garda, preventing logistics between the Italian ports.
6.4 Austrian Supply Source
For the Austrian player, the supply sources are the roads leading off the eastern map edge, Roncone and Riva del Garda.
6.5 Effects of Being Out of Supply
Unsupplied leaders have a -2 modifier to the die roll for combat, and -2 MP for each activation.
Garrisons are always supplied.
7. Command Test
Command tests are a very important rule of the game. To pass a command test, a leader must roll 6 or more on a die, adding its command value. Garrisons add 1 to the roll.
Command tests are made as a result of combat (rules 7.1.1 and 14), recovery (rule 6.3) and random events (rule 12).
Note: these cross-references are kept as printed.
8. Random Events
Players roll 2 dice each time a "Random Event" chit is drawn from the opaque container. The results are shown in the random events table.
Note: the random events table is not part of this rulebook file.
9. Set Up
Note: the printed rulebook numbers this section 9, as it also numbers the terrain section above as 9; the numbering is kept as printed.
Obbedisco: the Bezzecca Campaign, 1866 lasts 10 turns (13-22 July). The first leaders are the following:
9.1 The Italians
- La Porta at Storo (3819);
- Spinazzi at Bondone (4025);
- Salamone - enters on turn 2;
- Sprovieri - enters on turn 3;
- Carbonelli - enters on turn 4;
- Menotti - enters on turn 4;
- Bruzzesi - enters on turn 6;
- Chiassi - enters on turn 8.
Note: all Italian reinforcements enter the game at Ponte Caffaro. If there is already a leader at Ponte Caffaro, the reinforcing leader enters hex 3625, then continues along the road to 3627.
9.2 The Austrians
- Montluisant at Bezzecca (4707);
- Kaim at Riva del Garda (5802);
- Hoffern at Roncone (3600);
- Thour at Tiarno di Sopra (4410);
- Garrisons at Riva del Garda, Biacesa, Fort Ampola and Fort Lardaro.
10. Victory Conditions
Note: this section is numbered 10 in the printed rulebook, as is the Supply section above; the numbering is kept as printed.
The Italian player wins an immediate strategic victory if, at any moment of the game, it moves 4 leaders off the map along the road to Roncone (3600), or 2 leaders off the map along the road to Riva. Each of these leaders may not be disordered, and must have a strength of at least half of its starting strength.
The Austrian player wins an immediate strategic victory if it simultaneously controls Storo, Lodrone and Ponte Caffaro.
If neither player wins a strategic victory by the end of turn 10, the Italian player checks the cities it controls and determines the level of victory. The target cities are Storo, Condino, Cimego, Pieve di Bono, Roncone, Bezzecca, Molina di Ledro and Riva.
To control a city, it must be physically occupied by an Italian leader, or an Italian leader must have been the last unit to pass through the hex.
10.1 Victory Levels
The following victory point levels determine the scale of victory or defeat:
- 0-1 cities controlled at the end of the game: decisive defeat
- 2-3 cities controlled: marginal defeat
- 4 cities controlled: draw
- 5-6 cities controlled: marginal victory
- 7+ cities controlled: decisive victory
11. Optional Rules
The following rules add further detail to the game, and may be used to adjust the balance between two players of different skill.
11.1 Morale Control
Note: this rule attempts to simulate the peculiarity of the various small conflicts that characterised the campaign, in which most of the combatants withdrew rather than fighting prolonged battles. Casualties across the whole campaign were very limited, and in most combats there were only a few dozen dead or wounded soldiers. Even at Bezzecca, the Italians lost only 126 dead and 300 wounded out of a force of almost 20,000 combatants!
Before combat, the attacker tests morale with a command test. If the test fails, the attacker is disordered and may not attack; the leader may choose to retreat 1 or 2 hexes. If the test succeeds, the attack goes ahead normally. If the die roll is a natural "6", the attacker gains a +2 modifier for combat.
If an attacker passes its test, the defender must do the same. If the test fails, the defender is disordered and must retreat 1 or 2 hexes. If it is already disordered, the defender routs. If the defence passes the test, combat is carried out normally. If the die roll is a natural "6", the defender receives a +1 modifier for combat.
11.2 Austrian Detachments
Each Austrian unit may, during play, detach 1 or 2 SPs (each unit has a corresponding counter).
This is possible only once, at the start or at the end of an activation, not during movement.
Such a detachment functions exactly like a garrison.
11.3 Balancing Rule
If it seems that the Austrian player is losing too many battles on the road to Roncone (it is possible!), the Loos brigade may be given to it as an automatic reinforcement at Roncone on the turn after the Italians capture Cimego.
12. Further Reading
- Zaniboni, Ugo. Bezzecca dagli inizi nel 1866. Trento 1987.
- Hibbert, Christopher. Garibaldi e i suoi nemici: il fragore delle armi. Boston: Little, Brown, 1966.
- Mack Smith, Denis. "Giuseppe Garibaldi", storia di oggi, volume 41 (August 1991), pp. 20-26.
- Mack Smith, Denis. Vittorio Emanuele, Cavour e il Risorgimento. London: Oxford University Press, 1971.
- Martin, George Whitney. La camicia rossa e la Croce di Savoia: la storia del Risorgimento Italiano, 1748-1871. New York: Dodd, Mead, 1969.
- Solmi, Arrigo. La realizzazione dell'Italia moderna. Port Washington, New York: Kennikat Press, 1970.
- Trevelyan, George Macaulay. Garibaldi e i mille. New York: Longmans, Green, 1948.
Note: the printed rulebook's credits section is not transcribed.