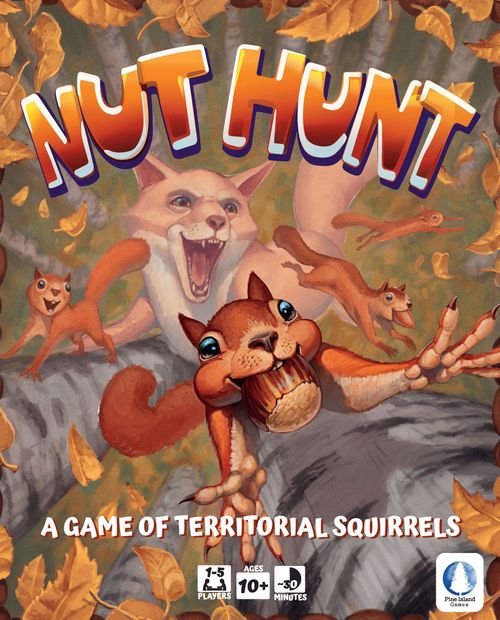
Nut Hunt
Nut Hunt Rulebook
Table of Contents
Table of Contents
Game Overview
Turns have a simple structure with one mandatory action (moving the fox), followed by a choice of three optional actions (recruiting a squirrel, hassling the fox, or scouting an objective). Plus, there is a free action that can be taken at any time: to exchange three of the same nut for one of any nut.
A game of Nut Hunt ends when a player places their 4th nest.
Components
- 19 Location Tiles
- 1 Fox Compass Tile
- 1 Fox Die
- 1 Fox Meeple
- 75 Squirrel Meeples (15 in each of 5 colors)
- 25 Squirrel Nest Meeples (5 in each of 5 colors)
- 100 Nut Cards (25 of each type)
- 45 Objective Cards
Game Setup
- A. Randomly place the 19 Location Tiles in a hexagonal grid like the one shown (make sure all the Tiles are oriented in the same direction). Note: your tile locations will vary from the diagram, just make sure the overall shape is the same.
- B. Place the Fox Compass alongside the board.
- C. Place the Nut Cards face up, organized by type.
- D. Place the Fox on the central Tile.
- Shuffle and deal each player 3 Objective Cards face down. Each player chooses 2 Objectives to keep, and discards their 3rd Objective face down to the bottom of the Objective Deck. Note: the strongest opening hands contain Objectives that overlap or intersect.
Choose a starting player. Play will proceed in clockwise order. If you can't agree on who goes first, we recommend whoever most recently ate a Nut.
In turn order each player places 1 Squirrel on an unoccupied green bordered starting Tile. When placing a squirrel during the initial set up, Forage for any combination of 2 Nuts as described on the Location Tile. Repeat this process in reverse turn order until each player has placed 2 Squirrels, and collected 4 Nuts.
Example: in a three-player game, Squirrel placement would follow the turn order: player 1, 2, 3, 3, 2, 1.
Special Case: If playing a 5-player game and the central Tile is a green bordered starting Tile, then place Squirrels in the following turn order: player 1, 2, 3, 4, 5, 4, 3, 2, 1, 5. The 5th player may place their second squirrel on an already occupied starting Tile. They Forage as usual.
Anatomy of a Tile
- Forage: Denotes the resources a Tile produces. The active player Forages for 2 Nuts during the Fox Movement phase of their turn, and 1 Nut if they take the optional Hassle the Fox action.
- Recruit Cost: Denotes the quantity and type of Nuts required to Recruit a Squirrel onto the Tile.
- Border Color: Starting Tiles are denoted by a green border. These are the Tiles with Recruit Cost of 2 Nuts.
Special Tiles: Frog Pond & Pine Barrens
There are two special Tiles: Frog Pond and Pine Barrens.
- No Squirrel may be recruited onto or Scatter onto the Frog Pond. The Fox can move onto and through the Frog Pond (the Fox is an excellent swimmer).
- No Squirrel may be Recruited onto the Pine Barrens. However, Squirrels may Scatter onto the Pine Barrens. Scattering is the only way to move Squirrels onto the Pine Barrens.
Scattering Squirrels
Squirrels aren't known for their bravery. In fact, they run away a lot. In Nut Hunt, Squirrels Scatter either from the Fox or when an opponent builds a Nest.
- Scattering from the Fox: when the Fox moves onto a Tile, all Squirrels (not nests) on that Tile must Scatter onto adjacent Tiles. However, they may not Scatter directly onto the Tile that the Fox just vacated or onto the Frog Pond.
- Scattering from Nests: When a player builds a Nest, all opposing squirrels must Scatter onto adjacent Tiles. They may not Scatter onto a Tile occupied by the Fox or onto the Frog Pond. Squirrels Scattering from a Nest may Scatter onto a Tile that had been occupied by the Fox earlier in the turn.
- You choose where your own Squirrels Scatter. If a player has several Squirrels on a Tile, they may Scatter onto different adjacent Tiles.
- Resolve Scattering in turn order beginning with the active player.
- If Scattering Squirrels result in a Nest being built, immediately resolve Squirrels Scattering from the new Nest, and then work backwards to the original location that Squirrels are Scattering from.
Nests
Nests are worth 2 points each at the end of the game. They are also the key to securing your territory of Location Tiles, are anchor points that don't Scatter, and trigger the end of the game (when any player places their 4th Nest).
- Building a Nest: if any action (Recruiting a Squirrel or Squirrels Scattering) results in one player having 3 Squirrels on a Tile, immediately remove the 3 Squirrels and replace them with a Nest.
- Nest Building is mandatory; if you ever have 3 Squirrels on a Tile, you must build a Nest.
- When a player builds a Nest, all opposing Squirrels on that Tile must Scatter. Players may later Recruit Squirrels onto the Tile, Squirrels may Scatter back onto the Tile, and even two or more players may have Nests on the same Tile -- it is only when the Nest is built that Squirrels must Scatter.
- Nests do not move once placed. They do not Scatter from the Fox or from other players building Nests on the same Tile.
If you're playing a 2-player game, we recommend checking out the Competitive Rule Variant.
Territories
A territory is a contiguous group of Location Tiles occupied by a player's Squirrels and/or Nests. It does not matter if other players' Squirrels or Nests are also on those Tiles; territories may overlap.
Structure of a Turn
A turn has two phases. First the Fox Movement phase in which the Fox is moved, Squirrels Scatter, and Nuts are Foraged. Then the Optional Action phase in which the active player takes one of three optional actions (or passes the turn).
- Fox Movement (mandatory): Squirrels Scatter; the active player Forages for 2 Nuts.
- Optional Action (choose up to 1 action): Recruit a Squirrel; Hassle the Fox; Scout an Objective.
Free action: at any time (on anyone's turn) you may exchange three of any one kind of nut for one nut of another kind.
Fox Movement
- At the beginning of each turn roll the Fox Die.
- Move the Fox in the direction indicated by the Fox Compass.
- The Fox may move onto the Frog Pond.
- If the Fox would move off the gameboard it "bounces off" the edge and moves in the opposite direction. It's like a giant forest wrestling ring, with Dwayne "The Fox" Johnson bouncing off the ropes.
- When the Fox moves onto a Tile with Squirrels, those Squirrels must Scatter.
- Nests are immune to Scattering. The Squirrels hunker down and wait for the Fox to leave. Both may occupy the same Tile with no effect on gameplay or scoring. However, any Squirrels on that Tile Scatter as usual (even if there is a Nest of the same color on the Tile).
- Remember, Squirrels scattering from the Fox Movement cannot scatter back onto the Tile that the Fox came from. However, they can Scatter onto that Tile indirectly, due to Nest building.
Forage for Nuts
When the Fox moves onto a Tile during its mandatory movement each turn, the active player Forages for 2 Nuts (based on the Tile the Fox moved onto). To Forage, the active player may select any combination of 2 Nuts that the Tile produces (denoted by "FORAGE").
Example: The active player rolled a 3. The Fox "bounces off" the edge and moves onto Muckville Marsh.
Optional Action
Choose up to 1 Optional Action to perform each turn: Recruit a Squirrel, Hassle the Fox, or Scout an Objective.
Remember, you can exchange any 3 of the same Nut for 1 Nut of a different type, as a free action, at any time.
Recruit a Squirrel
Squirrels don't come cheap. Well, they do, they cost a handful of Nuts. Each Tile other than the Pine Barrens and the Frog Pond have a corresponding Recruit Cost denoted on the bottom right of the Tile.
- As a turn action the active player may pay the Recruit Cost of any Tile and place one Squirrel onto that Tile.
- You can only Recruit 1 Squirrel per turn, even if you have the Nuts to pay for more.
- A Squirrel cannot be recruited onto the Frog Pond or the Pine Barrens (the only way for Squirrels to move onto the Pine Barrens is to Scatter onto it).
- Squirrels may not be Recruited onto a Tile occupied by the Fox.
- Squirrels may be Recruited onto Tiles containing opposing Squirrels or Nests (or your own).
Hassle the Fox!
- To Hassle the Fox, the active player pulls the Fox onto an adjacent Tile on which they have at least one Squirrel or Nest.
- If the active player does not have a Squirrel or Nest in a Tile adjacent to the Fox, then they may not take the Hassle the Fox action.
- Resolve Squirrels Scattering as usual. Remember, Squirrels may not Scatter directly onto the Tile just vacated by the Fox.
- After moving the Fox, the active player may Forage for 1 Nut (of a type represented in the Forage of the Tile that the Fox was hassled onto).
- You only Forage 1 Nut when Hassling the Fox... After all, what do you think your Squirrels are throwing to get the Fox's attention?
Scout an Objective
To Scout an Objective, look at the top 2 Cards of the Objective Deck. Keep up to 1, and discard the rest, face down, to the bottom of the Deck.
While Objectives are the primary method of scoring points, keep in mind that missed objectives cost points, and there is no way to discard Objectives once they are in your hand.
End of Game
When any player places their 4th Nest, resolve any mandatory actions (Squirrels Scattering, Nest Building, and Subsequent Scattering) and immediately end the game. Do not finish a round, or a turn. The Squirrels are bundled up in their Nests, and the Fox is taking a well-deserved break.
Squirrels Scattering may result in multiple players with 4 Nests, and in rare cases, it's even possible to build a 5th Nest!
Scoring
Objectives are only scored at the end of the game. So, watch out for that wily Fox!
- Score 2 points for each Nest.
- Score the base points of completed Objectives.
- Score the distance bonus of completed Objectives.
- Deduct 2 points for each failed Objective.
Completing an Objective
An Objective is completed if a player ends the game with a Squirrel or Nest on each end point on the Objective Card as well as on a contiguous territory of Location Tiles connecting the endpoints. At least one Nest must be on the path of territories to complete an Objective.
You don't need to build Nests on the end points of the Objective, a Nest just needs to be somewhere connected to the territory.
Example: the Yellow player completed the Objective Willow Wallow to Muckville Marsh. They have squirrels and/or squirrel nests on each tile in a contiguous run of territory (including the endpoints of the Objective), and they have a Nest connected to the territory. It does not matter if other players also have Squirrels and Nests within the territory.
In the example, the Yellow player failed the Objective Mouse Meadow to Hickory Haunt. They control a contiguous run of territory, but they do not have a Nest connected to that territory.
Distance Bonus
To calculate the distance bonus of completed routes, count the shortest possible path between two end point Tiles. Apply the corresponding bonus based on the number of intervening Tiles. The Distance Bonus is always applied to the Shortest Possible route between two Tiles (and may cross the Frog Pond). It doesn't matter if you take the long way around; the Distance Bonus is always calculated based on the shortest possible route of intervening Tiles.
- 0 Intervening Tiles (the endpoints are adjacent) = +0
- 1 Intervening Tile = +1
- 2 Intervening Tiles = +2
- 3 Intervening Tiles = +3
There is no Distance Bonus penalty for failed Objectives.
Scoring Example (Green)
- Mouse Meadow to Hickory Haunt: Objective Score +4, Distance Bonus +2
- Heart of the Wood to Pine Barrens: Objective Score +6, Distance Bonus +0
- Mouse Meadow to The Tangle: Objective failed, penalty -2
- Nests: 3 x 2 = 6
- Total Score: 16
Determining the Winner
Add the points above; the player with the most points wins.
Resolving ties: If two or more players are tied, then the player with the most Nests (among the tied players) wins. If there is still a tie, then the player with the most Squirrels (among those players) wins. If there is still a tie, then those players share the victory.
Single Player Rules
In Single Player you will face off 1-on-1 versus the Automa which uses the Objective Deck and Fox Die to determine its actions. Familiarize yourself with the multi-player rules, because your turns follow the same turn structure.
Set up as usual, drawing 2 Objectives, placing 2 Squirrels on green bordered Starting Tiles, and Foraging for a total of 4 Nuts.
Deal the Automa a number of Objective Cards based on difficulty:
- Standard: Automa begins with 2 Objectives. (Hint: Focus on completing your Objectives.)
- Advanced: Automa begins with 3 Objectives. (Hint: Use Automa Nest building and the Fox to Scatter your Squirrels advantageously.)
- Expert: Automa begins with 4 Objectives. (Hint: Strategically break up the Automa's territory.)
This will be the Automa's Starting Hand. Keep these cards separate, as this Starting Hand will be used in scoring for the Automa.
Using the Automa's Starting Hand
- Place one Automa Squirrel on each end point of its Objectives.
- If an Automa Squirrel would be placed on the Tile occupied by the Fox, do not place that Squirrel.
- The Automa may start with multiple Squirrels on the same Tile and with Squirrels sharing a Tile with player Squirrels. For instance, at Advanced difficulty the Automa will have up to 6 Squirrels.
Player Turn
- The Player goes first.
- Player turns are resolved as normal (Move the Fox, Forage, and take up to 1 Optional Action).
- If an Automa Squirrel would Scatter (from the Fox or from building a Nest), roll the Fox Die to randomize the direction in which each Squirrel Scatters.
- If an Automa Squirrel would make an illegal Scatter (onto the Frog Pond, a territory occupied by the Fox, or directly onto a Tile just vacated by the Fox), re-roll the Fox Die to determine a new direction of Scatter.
- Automa Squirrels bounce off the forest edge, just like the Fox.
Automa Turn
- Reveal the top Objective Card.
- Place one Automa Squirrel on each end point of the Objective.
- If an Automa Squirrel would be placed on the Tile occupied by the Fox, do not place that Squirrel (for example, no Automa Squirrel is placed on Birch Grove because the fox is there).
- Resolve any necessary Automa Scattering as described above.
- Discard the Objective to the side. This Objective is not added to the Automa Hand for end of game scoring.
- The Fox does not move on the Automa turn.
End of Game (Single Player)
Alternate turns until either the Player or the Automa places its 4th Nest, complete mandatory actions (Scattering and/or Building Nests) and end the game.
- Automa scores normally using the Automa starting hand as their Objectives.
- Player scores normally.
Competitive Rule Variant
For two player games, or cut-throat players at any player count, we recommend using this Competitive Rule Variant.
When a player builds a Nest, instead of all opposing Squirrels Scattering:
- Remove one Squirrel from each other player on that Tile.
- Any remaining Squirrels Scatter as usual.
If playing with new players, especially in a 3+ player game, this rule can lead to some feel-bad moments. So, we recommend only using it when everyone has a few games under their belt, 1-versus-1, or in a competitive setting.
Frequently Asked Questions
Is what Nuts I have public knowledge? Yes. If someone wants to know what Nut Cards you have, you must show them.
Is there a hand limit? (German edition) There is no hand limit for Nut Cards or Objective Cards. But remember that failed Objectives cost points at the end of the game.
Can Squirrels Scatter onto the Tile that the Fox occupies? No.
Can Squirrels be Recruited onto the Tile that the Fox occupies? No.
Can two players have Nests on the same Location Tile? Yes! Multiple players may build Nests on the same Tile, and the same player may even build multiple Nests on one Tile.
Does gameplay end immediately when a player places their 4th Nest? Finish mandatory actions (Squirrels Scattering), and then end the game (no further Recruiting, Hassling, or Scouting allowed).
If the game ends when a player builds their 4th Nest, why does the game come with 5 Nests of each color? After the 4th Nest is built players resolve mandatory actions (Scattering), so it is possible to build a 5th Nest.
What happens if we run out of components (Squirrels or Nuts)? It's unlikely that you will run out of components, but if you do, use a suitable replacement.
Can Squirrels Scatter onto a Tile that the Fox had Occupied earlier in a turn? Only indirectly. Squirrels cannot Scatter directly onto the Tile the Fox just vacated. But, if a Nest being built causes them to Scatter, then they can go anywhere other than where the Fox currently is.
When do you score Objectives? All Objectives are scored at the end of the game -- not mid-game. So, watch out for that fox!
If more than one player needs to Scatter their Squirrels, who Scatters first? The active player Scatters first, and Scattering proceeds in turn order. If Squirrels Scattering results in a Nest being built, resolve Scattering from that Nest and work backwards to the original Tile being Scattered from.
If a player builds a Nest can a chain of Scattering allow another player to build their own Nest on that same Tile before their Squirrels Scatter? This is a rare situation, but there are circumstances when the order of Squirrels Scattering allows a player to build a Nest using Squirrels that would have otherwise had to Scatter.
Squirrels Scatter in player turn order, starting with the active player. When a Nest is built -- immediately resolve Scattering caused by the newly built Nest, and then work backwards to the original cause of the Scatter. Since Squirrels aren't known for their long memory, they may Scatter onto Tiles with unresolved Scattering (other than where the Fox is).
For example, in the figure the Yellow player builds a Nest on Willow Wallow. The Blue player's Squirrels Scatter onto Rabbit Patch completing a Nest. The White player may Scatter their Squirrels from Rabbit Patch to Willow Wallow, completing a Nest on Willow Wallow.