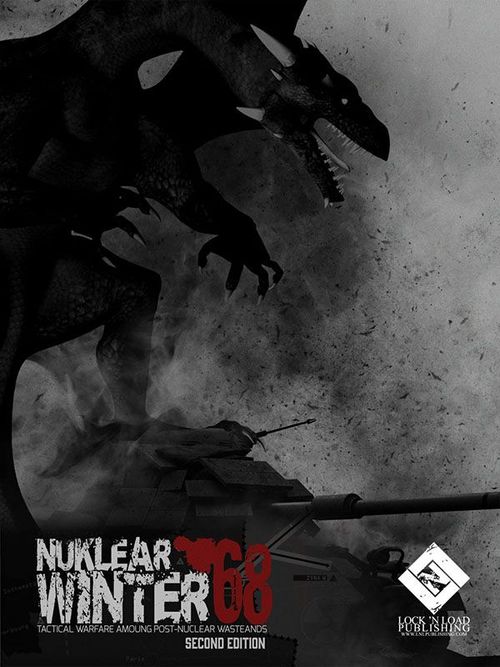
Nuklear Winter '68
Nuklear Winter '68 Rulebook
Table of Contents
Table of Contents
Timeline
1943 - Following the disaster at Stalingrad, a small Anti-Hitler group is formed in Berlin around Oberstleutnant Claus von Stauffenberg. Between recruiting allies and dodging the Gestapo it takes some time and several failed attempts until they finally manage to get close to their target.
1944 - July 20th, Adolf Hitler dies. Stauffenberg's plastic explosive device causes severe injuries to the Führer who dies later in the evening. Heinrich Himmler, head of the Schutzstaffel, seizes power and takes control of the armed forces on all fronts.
September, Atomic Bomb research breaths new life under Himmler's personal supervision. The 1939 Uranmaschine project that stalled for the last two years now has the Party's full support and new funding is made available to speed up the development.
1945 - Stalemate on the Eastern Front. The Abwehr receives information about Allied plans to Atom bomb Reich homeland targets. Himmler orders the construction of underground fallout shelters close to every major industrial city.
1946 - The Eastern front is stabilized and Himmler detaches enough forces to the Western front to push back the long awaited Anglo-American debarkation in France. The combined Wehrmacht-Waffen SS forces are so successful that the US president Truman decides to Atomic Bomb Germany into submission.
April 7th, the Americans drop humanity's first Atom Bomb over Frankfurt. According to most estimates, the immediate effects of the blast killed approximately 60,000 people.
April 18th, Himmler and the OKW staff descend into the vault built near Paderborn. Orders are sent to hand-picked elite units to disengage combat, pull out from the frontline and relocate to their pre-assigned underground camps. Operation Clausewitz is set in motion and, on April 21st, nuclear warhead equipped V-2s are launched against London and Paris.
April 26th, the US reacts with waves of B-29s simultaneously dropping Atomic Bombs over Berlin, Hamburg, München and Düsseldorf.
Without water, food and electricity, the population's morale declines rapidly while the army without a leader and no communications falls into disarray. Germany collapses. Radiation levels skyrocket. Armed guards are posted on all major access routes into the former German territory and all land traffic is halted. The Zone thus formed is cut out from the rest of the world and everyone inside is left to fend for himself against the nuclear holocaust.
1947 - January 2nd, unable to control the rioting or stop the waves of fleeing refugees, the Military starts looking for alternative solutions. Fearing a pandemic, the decision is made to build a wall and a series of automated defenses around the Zone. The deadline for this titanic undertaking is set for early 1948.
What seemed like an ephemeral European change in weather balance is actually a radical global climate effect generated by the nuclear war. Severely cold weather and reduced sunlight affect the flora and fauna all over the globe. Nuclear winter has begun.
1948 - March 19th, the building of the Nuclear Wall is completed. It's been quiet for the last few months; no one from the inside approached the perimeter in the latter stages of the works and everybody thinks that there are no living souls left in the Zone. The corpses of those killed by bullets, famine or the plague are left to rot piled up against the concrete blocks. Still, life beyond the Wall follows its own course, far from the eyes of the civilized world.
1952 - The first major attempt to escape out of the Zone in years. Organized bands simultaneously attack at night several Western Wall guard posts with grenades and machinegun fire. The attackers are repelled but the soldiers take heavy casualties. Some of them report the silhouettes continued maneuvering even after taking multiple direct hits. Situation becomes even stranger when, in the morning, no bodies are to be found at any of the assaulted outposts. The High Command denies that the attacks ever took place.
April 4th, the NATO alliance is established to deal with increased activity and potential danger stemming from inside the Zone. The treaty is signed in Washington by the United States, all the Western European countries and Russia. Doubts over the strength of the relationship between the United States and Russia ebbed and flowed, along with doubts over the credibility of the NATO defense against a prospective danger emerging from inside the Zone.
1955 - Low level recon flights over the Zone reveal shocking details. Human settlements are spotted close to the ruins of all the major German cities. There are large numbers of people still living inside the Zone, far beyond what any analyst could have predicted. Dramatic landscape changes scar the earth; nothing looks like the pre-war countryside used to look like. Shaken pilots talk about strange creatures roaming the desolate environment and an ominous feeling that someone, or something, was watching them the entire time.
1960 - Environmental specialists estimate that the Nuclear Winter is nearing its end. Temperatures begin to rise a few degrees a year and the dust and ash clouds covering the Earth are starting to dissipate. The latest photos from the Zone unveil a barren wasteland littered with debris and rubble of the past. Patches of dead vegetation and dried out toxic rivers dot the sea of scorched land.
1968 - March 1st, an aging Himmler gives the order to emerge from the vaults. Unaware of the changes that took place on the surface, the Führer is determined to rebuild the Holy Roman Empire with the Wewelsburg castle transformed into the Zentrum der neuen Welt ("Center of the new world") following the final victory.
Information about the re-emergence of the Reich's forces inside the Zone reaches the NATO headquarters in Brussels. It takes several weeks before several US-Russian expeditionary forces are created and sent to collect information about the enemy's composition and capabilities along with pertinent environmental conditions.
Oblivious of the climatic, technological and political changes inflicted by more than 20 years of nuclear winter, the Wehrmacht is about to face the mysterious Black Hand, elusive, abhorrent masters of the wastes, and the combined might of the modern, highly mechanized and versatile NATO alliance.
Components
Nuklear Winter '68 (NW68) is a tactical platoon level simulation set in an alternative universe where the Nazi regime survived the Second World War. The game contains a rulebook, a map, 352 counters and 15 campaign-linkable scenarios depicting the struggle for power around Wewelsburg in what was formerly Western Germany, now known as the Zone. Facing one another are the surviving forces of Das Dritte Reich (the Third Reich), the NATO alliance and the obscure Black Hand.
Note: NW68 uses six-sided dice, abbreviated as D6. When the rules direct you to roll 2D6 you should toss two, six-sided dice.
The Map
The 20x30 hexes map covers an area of about 14 km² around Wewelsburg in North Rhine-Westphalia, Germany. Site of Himmler's planned Zentrum der neuen Welt (Center Of the New World), the historical Wewelsburg castle plays a central role in the conflict. Each turn represents 5-15 minutes, and each hex is approximately 150 meters from hexside to hexside. The terms map, board, game map, and game board are used interchangeably throughout the rules.
The Counters
There are two kinds of game pieces in Nuklear Winter '68: unit counters and administrative markers. Each combat unit in NW68 represents 35-50 individuals or, depending on the type of armored platoon, 3-5 vehicles. Some counters though, such as the air units, V-2, SS-Scud or the Black Hand's Ravager represent only one unit.
Sample counter — King Tiger (formation 1/130): Speed 6; printed factors 10 / 6 / 5 / 4 / 18.
Nationality is color coded as follows: German units are feldgrau (dark-grey), NATO units are blue and the Black Hand are red. All units have the following information on them: formation, unit type, attack, defense and speed factors. Most combat units are printed on the reverse side with reduced strengths representing combat losses. Unit definitions that will be used throughout the rulebook:
Full Strength - Full-strength counters are at their full capacity of men and equipment. They are indicated by a horizontal, colored band behind the counter ratings.
Reduced Strength - Reduced-strength counters have a reduced amount of men and equipment. They are indicated by a horizontal white band behind the counter ratings.
AP Firepower - Armor Piercing Firepower: this red number represents the number that will be added to the 2D6 roll result when attacking hard targets.
HE Firepower - High Explosive Firepower: this yellow number represents the number that will be added to the 2D6 roll result when attacking soft targets.
AA Firepower - Anti-Aircraft Firepower: This blue number represents the number that will be added to the 2D6 roll result when attacking helicopters and planes.
Range - This number represents the maximum distance in hexes a unit may fire with that weapon. A white number indicates that the weapon may be fired on the move, and at long range. A colored range factor indicates a fixed-range weapon (no close or extended range modifiers) that may not fire on the move, attack airborne targets or be used in assaults.
Armor - The armor factor of the unit. Yellow identifies the soft units, red ones are hard targets while the blue represents air units. This is the number the attack value of the firing unit must exceed to inflict any hits.
Speed - This number represents the maximum distance a unit may move during its activation, subject to terrain costs.
Unit Types
There are two main types of combat units in NW68: land units and air units. Land units are:
Soft, unarmored units:
- Regular and elite infantry
Hard, armored fighting vehicles (AFVs):
- Tanks
- Armored personnel carriers (APCs)
- Recon
- Self propelled artillery (SPA)
- Self propelled anti-air (SPAA)
Huge - Some units in NW68 are considerably larger and more powerful than most of their counterparts. These are the Huge units, identified by the specific, Huge symbol. Due to their large size, Huge units have several limitations. Huge units:
- are considered to be level 1 objects for LOS purpose calculations
- may only take cover in, or behind, other level 1, LOS blocking terrain hexes (e.g. woods, urban, smoke)
- Huge infantry units may not use Weapons, be transported in APCs, fill up or use Sandbags, lay smoke or mines
Airborne - The airborne units in NW68 are the helicopters, the Scourge, and the planes providing Close Air Support.
Commanding Officers
Commanding Officer chits are a special type of marker used to indicate the active leader of the formation on the battlefield. At the start of the scenario, the owning player must designate one unit from each formation as the Commanding Officer by placing a CO marker on top of the unit counter. The Black Hand are an exception to this rule; they have no formations or COs.
Note: The terms Commander, Commanding Officer, and CO are used interchangeably.
Sample counter — CO / 2IC, 1st Ranger: printed factors 2 / 1 / 2 / 7.
The CO marker itself does not count against stacking limitations, but the CO unit does. Multiple COs may coexist in the same hex but each one may only influence the units in its own formation.
CO units may move, attack and be attacked in the same way as any other formation unit. The CO ratings will improve their own combat performance, and the performance of other formation units within their area of influence. This will make them valuable targets for the enemy, but that's a risk that any officer on any battlefield voluntarily assumes.
The CO unit may improve the firepower of any one formation unit, itself included, once per activation, with the appropriate factor according to the distance between the two. This includes ranged, moving and opportunity attacks, assaults, group fire and SPA/SPAA strikes. The CO may only influence formation units, which are not yet Finished.
CO can call in up to two artillery strikes and/or CAS missions upon any hex in their LOS as the first action of their activation.
Whenever the CO unit is eliminated during the game, the next ranked unit in the formation assumes command. The CO marker must be flipped to its reduced side, marked as 2IC (Second In Command). The 2IC unit uses the same radio equipment (i.e. same radio ranges) but its command abilities are less effective than that of the CO.
The 2IC assumes command on the formation's next activation or the Cleanup phase, whichever comes first. The owning player simply chooses any other formation unit, of any type and designates it accordingly with the 2IC marker.
The CO may also be replaced at the owning player's option, for whatever reason, by following the same replacement rule. The CO may only be demoted and pass command to the 2IC at the start of its formation's activation or the Cleanup phase. The original CO unit may never return as full CO for the remainder of the game.
LCR / Local CO Rating - This is a measure of the CO's command skill at range 0 (i.e. same hex) by direct communication. Unless Finished, the Local CO Rating may be added to the Attack Value (AV) of the unit itself or any one unit from its formation stacked in the same hex. The Local CO rating may also be added to the die roll when attempting to rally any and all units stacked in the CO's hex (including the CO unit itself).
RRR / Radio Range Rating - These two ratings indicate the operating range of the CO's radio, and, the CO's ability to command its formation units by radio up to that range. Unless Finished, the CO's Radio Range rating (RRCO) may be added to any one formation unit's overall attack value within the Radio Range. The CO's Radio Range rating may also be added to all units' rally attempt roll within the radio range.
Note: Simply stated the CO's Rating can be used to assist one attacking unit per activation, but an unlimited number of rallying units.
ERR / Extended Radio Range - This is the maximum effective range of the CO's radio when operating amid the Zone's radiation fields. Formation units are always In Contact up to this range, but garbled communication prevents effective command (i.e. no CO bonus at this range).
Formation units starting their activation beyond the CO's Extended Radio Range (ERR) are considered Out Of Contact (OOC), except for the Recon units which remain In Contact at any range thanks to their specialized training and equipment. OOC units may still operate beyond their CO's ERR but may only move at up to 1/2 Speed due to the extra caution needed to advance alone through unknown territory.
Rallying - The CO/2IC may only attempt to rally its Shaken units at the beginning of the formation's activation. A Shaken unit is rallied by its CO once proper communication between the two is established.
To rally a Shaken unit, the owning player must roll 2D6 and compare the result against its CO's Extended Radio Rating. Any result higher than the ERR establishes communication and the Shaken unit is rallied. The CO Ratings may help improve the communication (i.e. dice roll modifiers) as follows:
- +Local CO rating if the Shaken unit is stacked with its CO
- +Radio Range rating if the Shaken unit is within Radio Range
Shaken and OOC effects are cumulative. A unit suffering from both effects may not move or fire its main gun (AP FP), although it may fire its machine gun (HE FP) with reduced effectiveness.
Note: Helicopters, planes and Black Hand units do not use field COs. When Shaken, they automatically rally on their next activation.
The CO Radio system reflects each army's strengths and weaknesses. NATO uses modern radio equipment with better ranges, but suffers when it comes to communication itself. Units have more maneuvering freedom but their larger numbers and dispersion coupled with the language barrier between different nationalities hinders effective communication, especially when it comes to rallying. The Reich's outdated equipment can only be compensated by the troops' training and discipline.
The Black Hand's units are not organized in formations and don't need COs on the battlefield. Not much is known about their command structure but both the zealots and armor seem to be operating highly effective as independents as if commanded through invisible links. They are always considered In Contact and may operate normally at any range from one another. (In effect, all Black Hand units on the map may activate as one big formation, without the benefits and limitations of the CO/2IC).
Infantry
Infantry units in NW68 are either regular or elite. Both types can ride in APCs (exception: Huge units, such as the Ravagers, cannot ride in an APC) and use Weapons. Infantry units are soft (i.e. unarmored) targets that may only be attacked with HE ammunition.
Sample counter — US Rangers, 1st Ranger: Speed 4; printed factors 6 / 3 / 5 / 3 / 13.
Infantry units are slower and lack the offensive punch of armored vehicles but are excellent defenders, especially in urban areas where they have the advantage against AFVs. During assaults against unescorted AFVs in urban terrain, infantry will receive an extra +2AV when attacking, in addition to the usual +2AV assault modifier.
Infantry units may always fire on the move. When moving at half speed, rounded down, they may fire any of their non-fixed range Weapons with a -2AV accuracy penalty.
Infantry units, except for the Huge ones, may fill up Sandbags to improve the defensive position in their hex as the first and only action during their activation. Only one Sandbags marker may exist in a hex, regardless of the existing terrain type. The +1DV bonus will be added to the armor of any land unit, except for the Huge ones, defending in the hex. Once built, Sandbags may not be destroyed, although they may be used by any unit controlling the hex.
Infantry units, and certain other designated units, may lay Minefields. Each unit may lay a minefield, in its own hex or any one adjacent hex, as the sole action during its activation. Units which activate more than once per turn may lay one minefield per activation. Only one Minefield marker may exist in a hex at any given moment, but Minefields are not limited by the available counters. If the available markers are used up, use a convenient substitute. Minefields attack any units (friendly or otherwise) as they enter the hex using the AP or HE FP printed on the minefield marker, as appropriate. Sandbags alter the Minefield's attacks, Smoke doesn't. After resolving each Minefield attack, roll 1D6 to check for depletion. On 1-2 remove the counter; otherwise it remains in place.
Infantry units, and certain other designated units, may deploy Smokescreens. Each unit may place a Level 1 (L1) smoke marker in its own hex or one of the adjacent hexes as the sole action during its activation. Units that activate more than once per turn may deploy one smoke marker per activation. Two Level 1 smoke markers in the same hex create a Level 2 (L2) smokescreen but never higher than that. Level 2 smoke blocks LOS while Level 1 smoke adds +1DV to any unit targeted through that hex. Each level of smoke thickness equals one level of height for LOS calculation purposes. All smoke counters are reduced by one level during the Cleanup phase.
Note: Black Hand infantry units are immune to the wasteland environment and may cross the Water and Radiation hexes with a +1MP penalty per hex.
German and NATO infantry, both regular and elite, are survivors of pre-nuclear combatant units. The vaults have been stocked with enough weapons, equipment and provided with training facilities to keep the troops battle-ready. Equipped with the WWII era FG42 and Model 24 Stielhandgranate the Fallschirmjägers are more than a match for the modern US Rangers with their M16 rifles and M61 grenades.
Zealots are some of the most dangerous creatures of the wastes, the new post-apocalyptic battleground. Elusive, swift and relentless, they are a threat for anything less than armor venturing on their territory. And that's anywhere in the wastes. Their origin is definitely human, but their biological evolution, social hierarchy, military organization and goals are currently unknown.
Fanatic and ruthless, the descendants of the 7th SS Volunteer Mountain Division Prinz Eugen are the elite force of the Greater Reich. Armed with vintage StG44s they wreak havoc and fear among their enemies. Facing them are the secretive Vympel unit of the former Russian Spetsnaz special forces. Specialized in deep penetration and covert missions they are highly mobile and extremely resourceful.
The result of Black Hand's bio-engineering experiments, towering at over 6 meters high, the deformed Ravagers are truly a frightening sight. They wield no weapons, nor can they ride in transporting units, but at close range their power is devastating. At close range they throw trees, huge stones and even tank wrecks but, when assaulting, they simply stomp, grab and crush any unfortunate enemy, even those in the air.
Weapons
Weapon markers represent pieces of equipment superior to the standard ones issued to the troops. Weapons are assigned in the scenario's OOB, may be found as a result of an Event during the mission, or may be recovered from another infantry unit.
Sample marker — MG 42 Machinegun: printed factors 6 / 4.
Weapons may be placed on the board and assigned to a unit as soon as the weapon is received/found or kept off the board until used for the first time, at the owning player's option. Weapon markers do not count toward stacking or transport limitations.
An infantry platoon may employ multiple Weapons, but may only use one per attack. When attacking with a Weapon, simply use the appropriate Firepower and Range inscribed on the Weapon marker instead of the infantry's inherent ones, following the ranged combat rules. If the unit is equipped with more than one Weapon, the owning player must declare which one will be used to attack before rolling to hit. Units firing Weapons may receive the CO's LCR or RRR bonus according to the range between the two.
Whenever a unit with a Weapon is eliminated, it leaves all Weapon markers it possessed on the map. These Weapons may be picked up by any other infantry unit starting its activation in that hex. Units carrying Weapons may drop them at any time during their activation. Two infantry units stacked together may exchange Weapons freely at the start of either one's activation.
Note: Huge units, such as the Ravager, may not use Weapons.
The dual colored AP firepower rating found on some Weapons, such as the Diskord AT/AA Launcher, indicates that the Weapon may attack both armored and airborne units following the relevant combat rules.
The Reich uses the legendary MG42 to rip through advancing infantry. The Panzerfaust 3 and the Luftfaust are the latest infantry carried Wunderwaffe (wonder weapons) developed and tested in the years spent underground from prototypes and unfinished projects at the end of WWII.
The NATO forces use the heavily stocked M60 machinegun developed from the Wehrmacht's tried-and-true WWII era MG42, the M72 LAW (Light Anti-tank Weapon) that was ready to see combat in the '65 aborted Vietnam intervention, and the Russian produced 9K32 Strela-2 portable anti-air guided missile launcher. Strela's guiding system often fails to function properly due to high radiation levels so the Germans and the US chose to employ the more reliable, shorter range non-guided missile systems for their launchers.
The Black Hand zealots use the high rate of fire, devastating, scavenged XM134 Miniguns that may also bring down air targets. Their own produced Diskord viral rocket launcher uses an intelligent organic guiding system that may target both armor and air units as indicated by the AP blue star.
Armored Units
Armored units are motorized vehicles, wheeled, half-tracked or tracked, with various degrees of protection against armor piercing rounds. Capable of dealing tremendous amounts of damage at long distance and very mobile, they are the backbone of any army bent on conquering the battlefield. Armored vehicles include APCs, recon, light, medium and heavy tanks, self-propelled artillery (SPA), and self-propelled anti-aircraft artillery (SPAA).
Sample counter — T-64, 4th Guards: Speed 7; printed factors 12 / 10 / 4 / 5 / 20.
The Reich's AFVs are heavy armored, slower, and armed with higher caliber guns. The tank design by the end of the war in '47 asked for thick armor and high caliber guns and German engineers working on new developments in the vault labs continued on this path. The E-100 project cut short before the end of the war was completed and successfully tested several years before the '68 emergence and is now ready for its baptism of fire against the enemies of the Reich. Every other AFV that the Reich is ready to unleash are end of war units safely stored and maintained in guarded underground garages.
The NATO forces already stockpiled great numbers of M60A1s for the Vietnam conflict that never happened. However, this model has been rendered rather obsolete by the latest Russian tanks developed underground: the T-62 with its thin skinned sloped armor, extremely robust, armed with the world's first smoothbore gun, and the improved T-64 with its impressive 125mm gun. The other two new weapons developed by NATO designers are the new SPA M109 Paladin and the revolutionary, radar guided SPAA ZSU-23-4 Shilka.
The Black Hand probably had a rough time building armored units out of the debris left from the world destruction they themselves escaped from. From the looks of it, their mechanics came up with two solutions: scavenged M113 chassis and the scrap built tank chassis. With so many wrecks in various states of destruction and degradation readily available, the M113 became the default platform for a variety of AFVs. Thus, the Pest, the Blighter and the most powerful of them all, the Megrim, were created. The Rancor, born out of the anticipated need for a heavier tank is an amalgam of cannibalized parts from an unidentifiable number of former vehicles.
Tanks
Tanks are the toughest units in NW68. They have the thickest armor and the guns to kill just about anything. Tanks may use their AP FP against hard targets and the HE FP against soft or airborne targets.
Tanks are capable of firing on the move. When traveling at up to half speed, rounded down, they may fire any of their weapons with a -2AV accuracy penalty.
Unless stacked with an infantry unit, tanks are disadvantaged when assaulted by infantry in urban areas (i.e. the assaulting infantry receives an additional +2AV). During assaults against unescorted infantry in clear terrain (i.e. any terrain type except for positive cover hexes), AFVs will receive an extra +2AV when attacking, in addition to the usual +2AV assault modifier.
Armored Personnel Carriers
Armored Personnel Carriers (APCs) are vehicles designed to transport infantry units to the battlefield. APCs are capable of high speeds, but are thinly armored and usually armed with only a machine gun, although some variants may carry anti-tank weaponry. APCs in NW68 are either half-tracked (e.g. SdKfz 250) or fully tracked (e.g. M113, Pest).
Sample counter — SdKfz 250, 2/130: Speed 6; printed factors 8 / 3 / 4 / 3 / 14.
APC units are indicated by the loading symbol next to their Speed rating. Each APC can only transport one infantry platoon, regardless of either unit's strength status (e.g. Shaken and/or reduced). To indicate this, place the transported unit under the APC counter. Infantry loaded APCs count as one unit for stacking limit calculations.
Loading - To load an infantry unit, both the APC and the transported unit must be in the same hex. If the infantry unit and APC begin the activation in the same hex, the APC may move up to ½ speed after loading the infantry unit. Loading may be done regardless of each unit's strength status. The APC may move up to 1/2 Speed, rounded down, to link up with the infantry platoon before loading.
Unloading - APCs that begin their activation loaded may travel at full Speed. Conversely, the APC may unload and then move up to ½ Speed, or, it may move up to 1/2 Speed and unload. Unloading may take place anywhere, regardless of each unit's strength status, as long as they follow the stacking limitations at the end of the turn. The only action available to the unloading infantry is an optional 1 hex move away from the APC, regardless of the terrain's cost.
Infantry units may not fire independently while transported. However, unless Shaken, any transported unit grants an additional +1FP to the APC's overall AV, in addition to any other combat bonuses. APCs may fire on the move with a -2AV penalty when traveling up to half speed, rounded down.
While transported, the infantry suffers the combat effects of the APC transporting it. Whenever the APC becomes Shaken, reduced, rallied or destroyed, the same effect applies to the transported unit. Shaking an APC has no effect on a transported infantry unit that is already Shaken, but reducing the APC eliminates an already reduced infantry unit inside it.
Note: Huge infantry units cannot be transported.
Recon
Recon units actively seek to determine the enemy's intentions by gathering information about their composition and capabilities. Lightly armored and extremely fast, their role in NW68 is to support the main thrust by denying the enemy their concealment bonus.
Sample counter — Puma, 1/130: Speed 7; printed factors 9 / 4 / 4 / 3 / 15.
Recon units can be part of a formation but most of the time they operate as independent units attached to formations to help them deal with enemies entrenched in defensive positions. Recon units can fire on the move with a -2AV accuracy penalty when moving up to 1/2 Speed.
Recon-capable units are identified by the recon symbol. Recon units are always In Contact, unrestricted by their formation's CO/2IC Extended Radio Range.
Enemy units within LOS of an enemy Recon unit do not receive the +1DV concealment bonus when attacked. Also, Recon units have the ability to call in artillery strikes or Close Air Support (CAS) missions upon any hex in LOS as the first action on their activation.
Self-Propelled Artillery
Self-propelled artillery (SPA) vehicles give mobility to traditional artillery. With decent speed on tracks, thin armor, and machine guns for self-defense against infantry, they are able to provide either direct or indirect fire. The ability to stop and fire, then immediately change position is very useful in a mobile conflict.
Sample counter — M109 Paladin: Speed 5; printed factors 11 / 20 / 7 / 20 / 15.
Self-Propelled Artillery units are fixed range weapons, as indicated by their colored range factor. SPA units:
- May not fire farther than their range factor
- Do not receive the close range AV bonus
- May not fire on the move
- May only opportunity fire with direct fire
- May not attack airborne units
- May not assault
- May not lead or assist in assaults/group fire
SP Artillery units may either fire directly at any hex in LOS or fire indirectly as if they were Off-board Artillery. Indirect fire missions may be called in by the formation CO/2IC or recon units attached to the same formation, provided that the spotting unit has LOS to the target hex. Each unit in the targeted hex is rolled for separately, attacked with the appropriate firepower factor and may suffer any combat results as described in the Combat Results section.
When firing indirectly, the target hex must still be within the SPA's firing range but, in this case, an accuracy check must be made. To do so, roll 1D6. On a roll of 1, the artillery strike misses and the defending player may choose any target-adjacent hex as the new target hex. On a 2-6 roll, the strike hits the target hex.
The Black Hand's Blighter is a terrible and versatile machine. Armed with the same intelligent organic missile guiding technology as the Diskord, the Blighter may fire at both land and air targets. Wherever it strikes, every living thing dies a horrible, painful death even protected by thick layers of armor. Infection spreads rapidly amongst those foolish enough to close in on the strike site.
The German V-2 rocket and NATO's Russian-built SS-1C Scud-B are special artillery units, in that they may attack as both on-board and off-board artillery.
Sample counter — V-2: printed factors 14 / 8.
The V-2 is a static unit; it is actually a complex installation that cannot be directly attacked, reduced or eliminated by conventional means, although it may be captured by enemy units controlling its hex. The Scud has limited mobility and cannot be captured or reduced, although it may be disrupted and eliminated with AP rounds.
Each V-2 or Scud unit has only one missile to fire. After the missile has been launched, the counter must be immediately removed from the game map unless scenario rules dictate otherwise. In game terms, both missile types have unlimited range, but the target hex must still be within LOS of the launcher or spotted by a friendly CO or recon unit.
Both the V-2 and the Scud are ultimate weapons of mass destruction. They may be launched carrying any type of warhead allowed by the scenario's OOB. When attacking, the strike hits every unit in the target hex and all six adjacent hexes with the appropriate firepower or effect, depending on the missile warhead used.
The Black Hand doesn't have access to such technology or the means to either replicate or mass-produce it. They may, however, capture a German V-2 and use it to deploy their horrific biological pathogens. Capturing the missiles seems to be very high on the list of zealot priorities, for they appear in great numbers and attack relentlessly wherever a new launch site is detected.
Self-Propelled Anti-Aircraft
Self-propelled Anti-aircraft (SPAA) vehicles are anti-aircraft guns or surface-to-air missile launchers mounted on a mobile vehicle chassis. Platforms used in NW68 include the modified M113 APC chassis (e.g. the Blighter) and various types of chassis (e.g. the Ostwind and ZSU-23-4 Shilka), which provide modest protection from aircraft, artillery, and small arms fire for front line deployment.
Sample counter — ZSU-23-4 Shilka: Speed 6; printed factors 9 / 7 / 6 / 5 / 15.
Self-propelled Anti-Aircraft vehicles are identified by the blue AA firepower factor. The German and NATO SPAAs use machine guns to attack enemy aircraft and may do so with the appropriate bonuses/penalties for long, normal and close ranges. SPAA units may always fire their non-fixed range weapons with a -2AV accuracy penalty when moving at up to 1/2 Speed, fractions rounded down.
The Black Hand's SPA/SPAA Blighter uses missiles to bring down both land and airborne targets with its fixed range launcher, as indicated by the dual colored AP/AA firepower and range factors. The Blighter's fixed range launcher may not fire further than its printed range factor, receives no bonus at close range, may not group fire, fire on the move or opportunity fire, may not assault or assist in assaults.
Air Units
Air units in NW68, identified by the blue armor factor, are of two types: helicopters and ground attack planes. Both the helicopters and the planes have the same role, which is Close Air Support (CAS). CAS is defined as air action by fixed or rotary winged aircraft against hostile targets that are in close proximity to friendly forces. Although both air units have the same role, they are quite different in the way they move, their armament and how they attack.
The Reich had to rebuild several of their successful Ju-87G Stuka. The scarcity of available materials left from the armor building program led to only a handful few constructed and ready to fly in '68. The rebuilt Stukas have been armed with two underwing-mounted Tungsten carbide firing 37mm cannons and 1000Kg worth of free-fall bomb load. This new variant was proudly nicknamed the Kanonenvogel (Cannon-bird). However, the greatest accomplishment was the completion of the Haunebu III project. Envisioned as one of the war turning weapons in the early days of WWII, the project could never be completed before 1946. In the vaults, under the direct supervision of Himmler himself, the third prototype finally achieved the specifications of the initial design. Unbelievably ugly and slow, armed to the teeth with four 37mm FlaK guns covering all the 360 degrees around it and two 57mm R4M Orkan rocket launchers, the Haunebu III literally is a flying fortress lumbering over the battlefield raining baneful fire over the enemies of the Reich.
The NATO High Command commissioned hundreds of UH-1 Iroquois for Vietnam as a highly mobile troop delivering platform. For the conflict with the Reich and the Black Hand, many of the "Hueys" have been retrofitted as gunships with two Mk. 4 FFAR 70mm rocket launchers and four 7.62mm machineguns forward-facing on wingstub assemblies and pintle-mounted in doorways. The other aerial death-dealing weapon of the NATO is also an US built aircraft - the A-6 Intruder. Capable of carrying a loadout of about 16 tons and the ability to accurately deliver it, the Intruder is the most dangerous sight for any foe in the wastes.
The NATO experts believe that the Scourge is, just like the Ravager, the result of the Black Hand's genetic experiments. The creature resembles the mythical dragon only deformed to a nightmarish level. The Scourge seems to be about 8 meters long, a 25 meters wingspan and an estimated weight of 500Kg. Aggressive and voracious, they have been sighted flying in flocks of 3-5, sometimes less, in what looked like hunting raids. The Scourges have no regard for personal safety when their prey comes into sight - witnesses speak of creatures shrieking in suicidal dives and then ripping large animals to shreds with their huge sharp claws and fangs before feasting on the mangled corpses. When the prey fights back or hides behind some cover, the Scourges have been seen spurting toxic fluid jets at more than 100 meters away that melt whatever stood between them and their meal. Why do these beasts obey their masters or how do the zealots control them is a mystery to every military specialist, but one thing is certain - the Scourge is one of the most terrifying creatures in the wasteland.
Helicopters
These are the gunships available to every side in NW68. The Scourge serves the gunship role for the Black Hand and the Haunebu serves it for the Germans. Helicopters are organized in formations but have no field COs to command them. Since they are airborne most of the time, helicopters do not count against stacking limitations and must be attacked separately from other units in the hex.
Helicopter Movement - Helicopters may fly as far as their Speed allows, 1 Speed point per hex entered regardless of their altitude level or the terrain type they're flying over. Helicopters can fly at different altitude levels, switching between them when hovering or anytime during the flight at a cost of 1 Speed point per change.
-
Cruise altitude - This is the default altitude for UH-1 Huey helicopters (e.g. when entering the map). Helicopters cruise at level 2 regardless of the type or height of the terrain beneath them, for LOS calculation purposes. Helicopters can only fire their AP weapons at Cruise altitude. Recon capable helicopters may perform reconnaissance only at Cruise altitude.
Sample counter — UH-1 Huey, 335th Cowboys (Cruise): Speed 20; printed factors 13 / 8 / 5 / 4 / 16.
-
Nap-of-the-earth (NOE) - Helicopters flying at this altitude, identified by the NOE symbol, are skimming over the ground and are considered to be on the same level with the terrain for LOS calculation purposes. Transport-capable helicopters may only load/unload and transport infantry at this altitude level, following all the APC transport rules and Speed limitations.
Sample counter — UH-1 Huey, 335th Cowboys (NOE): Speed 20; printed factors 5 / 4 / 16.
-
Hovering - Movement is not mandatory for helicopters. When a helicopter does not move at all during its activation, it is considered to be hovering. Hovering helicopters may conduct pop-up attacks or be kept on overwatch, ready to react on enemy movement following the opportunity fire rules.
Helicopter Combat - Helicopters follow the ranged combat rules for land units. They may fire any of their available, non fixed-range weapons on the move when flying up to 1/2 Speed and receive all the range bonuses and penalties to their non-fixed range firepower. Helicopters may never assault or be assaulted, even when flying NOE.
- Pop-up attacks - A hovering helicopter may attack during its activation by switching altitude levels prior to and after the attack, allowing it to conduct pop-up attacks from behind covering terrain. If this action makes the helicopter visible (i.e. in LOS and range), enemy units may react with opportunity fire.
Helicopters may be attacked by any AA or HE weapon, following the ranged combat rules. The blue colored FP, specialized AA weapons are just higher powered, more accurate, longer ranged versions of the HE weapon systems, optimized to attack airborne targets only. SPA and OBA, except for Nuclear artillery, may not attack airborne units.
Helicopters may be Shaken but never reduced, they are one step units. When Shaken, a helicopter automatically rallies during its next activation. Destroyed helicopters leave a Wreck in the hex. If there are any units in the hex, roll 1D6 to check for any damage incurred from the falling debris. On a roll of 1-2, one random unit in the hex is Shaken.
Airplanes
The rebuilt German Ju-87G Stuka and the American A-6 Intruder are the aircraft included in NW68, although the Black Hand's Scourge serves a similar function. The number of available CAS planes is detailed in each scenario's OOB description. CAS missions must be requested by the CO/2IC or recon units on the field in the same way OBA missions are. Requesting a CAS mission must be done as a first action by the CO/2IC/recon unit during their activation.
Sample counter — Ju-87G Stuka: printed factors 3 / 25, 12 / 5 / 17.
One, or all of, the available planes, may be called at once by a CO/recon unit and will arrive over the battlefield on the first friendly activation next turn. The planes currently flying a CAS mission over the battlefield are not available for another mission next turn due to refueling and rearming necessities (i.e. a Stuka providing CAS in turn 2 may not be called, while in the air, for another mission in turn 3. If it survives turn 2, it may be called again in turn 3 to provide CAS in turn 4). The mission is not called against a specific target or hex, but, once arrived, the plane may attack any enemy unit.
Plane Movement - Planes enter on a side chosen by their owner, and exit the map on the opposite side. Planes always enter the map on the hex and side of the owning player's choice. Planes are always considered to be flying at level 2 for LOS calculation purposes. Planes have a minimum and a maximum number of hexes they may move during an activation, as indicated by their minimum and maximum Speed factors on the counter.
After the ingress (i.e. start) and egress (i.e. exit) sides have been chosen, the route to the target and then towards the exit will also be chosen by the owning player. The only restriction in following that path is that the plane must always move forward (i.e. away from the ingress side, towards the egress side) with no more than one side-hex move allowed per advanced hex.
Planes must start flying on the owning player's first activation towards the opposite side of the map, and must continue to do so during each of the owning player's subsequent activations until they are either shot down, exit the map or the turn ends, whichever comes first. If destroyed, the plane is removed from the map and will not be available for CAS missions for the remainder of the game.
If the plane exits the map before the end of the turn, it may re-enter the map on any egress side hex for another bombing run during the next friendly activation. All the planes on the map at the end of the turn are removed on the Cleanup phase. They are considered to be refueling and rearming and will be available for CAS requests starting with the next turn.
Planes may not enter a hex occupied by an other plane or helicopter flying at the same altitude level. Helicopters may not pop-up or switch to a higher altitude level as long as there is a plane above them.
Planes Combat - A plane may only attack one hex per turn. The target may be closer to the starting hex than the plane's minimum flying distance, but the plane must move at least up to that minimum distance following the bombing run. By the same token, a plane may attack in the starting hex but must move at least up to its minimum flying distance afterwards.
In order to attack, the plane has to be in the same hex with the enemy units. The plane may attack any or all the enemy units in the hex, each unit type with the appropriate firepower. If not Finished, enemy units may react with opportunity fire. The plane's attacks are resolved in the order chosen by the owning player. Immediately after the attacks are resolved, the plane must fly up to at least its minimum flying distance and may continue flying up to the maximum distance allowed by its Speed rating.
Planes may be attacked by any AA or HE weapon, following all the ranged combat rules. SPA and OBA, except for Nuclear, may not attack airborne units.
Planes cannot be reduced, although they may become Shaken, planes are one-step units. Shaken planes are automatically rallied during their next activation. When destroyed, planes leave a Wreck in the hex. If there are any units in the hex, roll 1D6 to check for any damage incurred from the falling debris. On a roll of 1-2, one random unit in the hex is Shaken.
Markers
These are the administrative markers in NW68. They are used to keep track of various game effects, the number of available artillery strikes, the ordering of events and formation activations, and so on. There is no limit to the number of administrative markers in play at any time. Administrative markers never count towards stacking limitations.
Off-Board Artillery - the Artillery markers are used to keep track the number of off-board artillery strikes of each type which are available to the player time during a scenario. These markers are not side-specific.
Smoke/Shellholes/Mines/Sandbags - these counters are to mark the positions of the various obstacles and conditions which may affect LOS and defensive modifiers. These markers are not side-specific.
Objective/Control - these markers are used to mark the scenario objective hexes and the side controlling each location. Objective markers are neutral while Control markers are side-specific.
Shaken/Out Of Contact/High Morale/Finished/Wreck - these markers are placed on the map to keep track of the various states of a combat unit. These markers are not side specific.
Activation/Event/Advance - these markers are always put in an opaque cup and pulled out randomly to determine the order in which the formations activate. The Activation markers are side-specific while the Event and Advance markers are neutral. The Advance marker, assigned by scenario specific rules, grants a formation an extra activation.
Off-Board Artillery
Off-board artillery (OBA) mission types and their availability to each side are assigned in each scenario's Order Of Battle (OOB). These may include the V-2 and SS-Scud. Up to two OBA missions may be called by the CO/2IC and recon units against any hex in their LOS as the first action during their activation. The CO/2IC and recon units are then free to take any other available action before being marked as Finished.
There are several kinds of OBA missions, each one with its own damage type and area of effect. For every targeted hex a check must be made in order to see if the artillery strike hits or misses it. Roll 1D6: on a roll of 1 the strike misses its target and the defending player may choose any adjacent hex as the new target. On a roll of 2-6, the strike hits the target and the effects are applied. Depending on the OBA type, the strike may affect only some or all the units in the targeted hexes.
Smoke - Unlike the smoke produced by infantry, artillery smoke is thicker, more persistent and affects a larger area. OBA smoke is laid as Level 2 smoke and affects three hexes: the target hex and any two adjacent ones, attacker's choice.
Sample marker — Smoke: printed factor 3, L2.
The smoke's thickness, up to a maximum of 2, equals its height level for LOS calculation purposes. Thus, Level 1 smoke equals a level 1 obstacle while Level 2 smoke equals a level 2 obstacle, but never higher than that. The Level 2 smoke is thick enough to block the LOS of any unit attempting to fire through it. Any attack traced through a Level 1 smoke hex adds +1DV to the defending unit.
The smoke levels are cumulative. Two same-hex Level 1 smoke markers create Level 2 smoke. LOS is blocked when traced through two Level 1 smoke hexes or a Level 1 smoke and a Wreck hex. During the Cleanup phase all the smoke markers on the map are reduced by 1 level. Level 1 smoke markers are removed.
Barrage - Conventional ammunition strikes affect all the land units in the target and any two adjacent hexes. Each unit in the targeted hexes is rolled for separately, attacked with the appropriate firepower factor and may suffer any combat results as described in the Combat Results section. Any defensive bonuses from the terrain, Sandbags and concealment apply and are cumulative.
Sample marker — Barrage: printed factors 3, 10 / 10.
All hexes struck by Barrage will be marked with a Shellholes marker each, unless the terrain already is of the Shellholes type or another Shellholes marker is already in place.
Chemical - Chemical artillery missions represent attacks with a non-persistent nerve agent, Sarin. Chemical strikes affect all the land units in the target and any two adjacent hexes chosen by the attacker. The Sarin's effect is determined and applied to each individual unit in the struck hexes immediately upon the agent dispersal by rolling 1D6.
Sample marker — Chemical: printed factor 3.
On a roll of:
- 1 - The unit receives 2 hits
- 2-3 - The unit receives 1 hit
- 4-6 - Nothing happens
Mark the struck hexes with Chemical markers until the end of the turn. Any unit attempting to pass through a Chemical hex must make the same check to see if it's affected by the Sarin. All the Chemical markers are removed from the map on the Cleanup phase.
Optional: During every Cleanup phase, starting with the first one after the attack, roll 1D6 to check for Sarin dispersal. On a roll of 3-6, the chemical agent persists. On a roll of 1-2 the Sarin disperses and all three markers are removed from the map.
Biological - Using an unidentified agent, the biological attack works as a weapon and a conversion tool at the same time. Biological attacks affect only the infantry platoons in the target hex, transforming them into Zealots, regardless of the initial state of the unit or the side making the attack.
Sample marker — Biological: printed factor 1.
To determine the success of the attack, roll 1D6 for each infantry unit in the target hex. On a roll of:
- 1 - Replace the infantry with a full strength Zealot unit
- 2 - Replace the infantry with a reduced Zealot unit
- 3 - The unit receives one hit
- 4-6 - Nothing happens
If the converted unit was Shaken, the new Black Hand unit is no longer Shaken. If the biological attack results in a jointly occupied hex, assault combat ensues. If the Black Hand losses this combat it retreats into an adjacent hex of the Black Hand player's choosing. The Black Hand's own infantry units are immune to biological attacks. The newly appeared Zealots will be controlled by the Black Hand player starting with his next activation. The Zealots will keep any Weapons they may have used prior to their transformation.
If there is no Black Hand player, put 2 Black Hand AMs in the cup during the Cleanup phase and the Zealots may start acting by themselves on their next activation. Masterless Zealots will always move towards the closest enemy unit, following the fastest route, and will attack as soon as the target is in normal range and LOS. Zealots will not move away as long as they already have an enemy unit in normal range and LOS.
Nuclear - The nuclear artillery strike is the deadliest weapon in the game, and also has the largest area of effect. Only one nuclear strike per opponent may be launched in a game turn. The nuclear artillery shells strike every unit in the target hex and the six adjacent hexes.
Sample marker — Nuclear: printed factors 6, 15 / 10.
Each unit in the targeted hexes is rolled for separately, attacked with the appropriate firepower factor and may suffer any combat results as described in the Combat Results section. Any defensive bonuses from the terrain and sandbags apply and are cumulative. Air units caught in the blast's area of effect are instantly eliminated.
The central target hex struck by nuclear shells will be marked with a Radiation marker, unless another Radiation marker is already in place. Radiation hexes are impassable to all units, land or airborne, except for the Black Hand's units, which may pass through at a +1MP cost per hex. Surviving units in the blast area may move out but will be attacked with the appropriate Nuclear firepower for each Radiation hex they pass through. Radiation markers are not removed from the map during Cleanup.
Formations
A formation consists of all units (including one designated as CO) which share the same Formation ID. The Black Hand units are not organized into formations, their command structure and organization is currently unknown.
Usually, each formation has its own activation markers (AMs) to determine when it activates, but their number may change according to each scenario's specific rules. There are scenarios where independent units are attached to a formation - these units activate when the formation they have been linked to activates. A Black Hand AM activates all the Black Hand units in the field when drawn during the Actions phase. Effectively, all Black Hand units in the game belong to one formation.
Sample counters — CO, SdKfz 250, SS-VT, all of formation 1/7 SS: printed factors 3 / 2 / 1 / 6 (CO), 8 / 3 / 4 / 3 / 14 (SdKfz 250, Speed 6), 6 / 3 / 6 / 3 / 13 (SS-VT, Speed 6).
Course of Play
Each game is set up according to the scenario instructions. Units, objective and control markers plus any game start effects are placed on the specified starting positions. Any reinforcement units and artillery markers should be kept nearby. Activation and Event markers must be placed in an opaque cup (henceforth called a "cup") to be drawn randomly during the game.
Actions Phase
In the Actions phase, the players alternate drawing Activation Markers from the cup to determine when and which formations activate, what events occur and when the turn ends.
The number of markers drawn during a turn is always equal to the total amount of Activation and Event markers in the cup minus the number of players. No more than two consecutive activations per player are allowed. Whenever a third consecutive AM is revealed, it must be returned to the cup and players continue to draw until another side's AM is pulled out. Neither Events nor the start of a new turn may break this rule.
The formula dictating the number of AMs drawn during a turn takes into account the total number of AMs that were in play at the start of that particular turn. Formations that arrive as the result of an Event or special scenario rule have their AMs added to the cup during the Cleanup phase of their turn of arrival. Reinforcements have their AMs placed into the cup at the beginning of a turn. Similarly, the AMs of any formation eliminated during the turn are removed from the cup during the Cleanup phase of that turn.
Players may either agree upon or randomly decide who pulls the first marker. It doesn't matter who pulls out a marker. After the last legal activation or event has been resolved, the play advances to the Cleanup phase.
- Activation marker - the formation activates. All the units in that formation have their Finished markers removed, if any, and become eligible to move and fire. 2IC may assume command. This is called the Formation Impulse and the formation will be referred to as the Active Formation.
- Event marker - roll 2D6 and consult the Events Table.
Formation Impulse
Whenever a formation's Activation marker is pulled from the cup, the formation activates and may start taking actions. This is called the Formation Activation and the formation will be referred to as the Active Formation.
A formation may have several activations per turn depending on the number of AMs it has in the cup and how many of them are drawn before the end of the phase.
Finished markers are removed from all units in the formation.
The Second In Command (2IC) may assume command. Whether the previous CO/2IC was killed or the owning player wants to demote him (i.e. change the CO unit), the change may take place now.
The active CO/2IC may try to rally its formation Shaken units. Units without a CO, such as the Black Hand, helicopters or planes, are automatically rallied.
Every formation unit, except for Recon units, outside their CO's Extended Radio Range at the start of an activation are considered Out Of Contact. OOC units will only be able to move at up to half speed during this activation, but suffer no other penalties.
Each formation unit may now take actions, alone or in groups: move, fire and assault, or any other action permitted by its type, status, or scenario specific rules.
Movement
A unit's Speed represents the maximum distance in hexes that the unit may travel during its activation, subject to terrain costs. Moving is not mandatory, and units that move might trigger opportunity fire each time they enter a new hex. After moving, mark units with a Finished marker.
A unit with a white range factor, may fire on the move if it travels at up to half speed, fractions rounded down. These two actions may be executed in any order:
- Move up to 1/2 Speed, then fire with a -2AV accuracy penalty, OR
- Fire with a -2AV accuracy penalty, then move up to 1/2 Speed
Group Movement
Units of the same formation which begin their activation in the same hex (i.e. stacked) may start moving together. This is called Group Movement. Each unit in the group must pay its own terrain movement costs. Groups may split off at any time. Units moving in a group may also fire on the move as a group, as long as they don't travel farther than the slower unit's 1/2 Speed.
Stacking
Stacking is limited to 2 combat units per hex at the end of an activation. That is, a unit may pass through a hex that is already occupied by two units, so long as there are no more than two units remaining in the hex at the end of the activation.
If, for any reason, there are more than two combat units in a hex at the end of an activation, the owning player must remove excess units (of his choice) until the remaining units do not exceed the stacking limit.
An APC with embarked infantry counts as one unit for stacking purposes. Administrative markers do not count toward stacking limitations. Units of the same formation which begin an activation stacked may move and fire together as a group.
Events
The volatile world in which the story of NW68 takes place is full of unforeseen events. Event markers are only used in certain scenarios where the setup requires them to be added to the cup even if the Black Hand isn't involved in the scenario. Event markers do not supersede the "two consecutive AMs per player in a row" rule.
Even when not directly engaged with the other two armies, the Zealots are relentlessly haunting them. Some fear that the Zealots are the direct manifestation of the Zone itself, the incarnation of its spirit.
When the event marker is pulled, randomly determine whom the event will affect, and roll 2D6 and cross-reference the result with the Events Table. Events may not be passed and their effects, affecting the indicated player.
Whenever the spawn hex is occupied by non-Black Hand units, the newly appeared Zealots enter the game assaulting those units from any vacant, adjacent hex. If there already is a Black Hand unit in the spawn hex, the Zealot stacks-up with it or, if the stacking limit has already been reached, may spawn in any adjacent hex. Masterless Zealots will act following the Biological attack rules. Black Hand units will not appear and attack other Black Hand units, although other events can affect the Black Hand.
Events Table (roll 2D6):
| Roll | Event |
|---|---|
| 2 | One Ravager appears at the abandoned building in hex O9. |
| 3 | One Zealot unit appears in each waste water pool in hexes G3, E7 and V13. |
| 4 | One Zealot unit appears in each ruined church in hexes J6 and Z5. |
| 5* | All units on Road hexes are assaulted by Zealots, one Zealot per hex. |
| 6* | All units on Urban hexes are assaulted by Zealots, one Zealot per hex. |
| 7* | All units on Hill hexes are assaulted by Scourges, one Scourge per hex. |
| 8 | Black Hand surprise attack! Two of your infantry units, randomly chosen, are attacked with Biological agents. |
| 9 | Your Commander has an inspiring presence on the battlefield! Rally any one of your Shaken units. If none of your units are reduced, place the High Morale marker on any unit. |
| 10 | Scouts have discovered a cache of pre-war supplies. Return any one of your reduced units to its full strength side. If none of your units are reduced, place the High Morale marker on any unit. |
* No Op-fire allowed against the attackers. Regardless of each attack's outcome, the assaulting unit is removed from the map immediately afterwards.
Cleanup Phase
This phase occurs after the last Activation or Event has been resolved in the Action phase. In the Cleanup phase, the following actions must take place:
- All Finished markers are removed from the map
- All Chemical markers are removed from the map
- All Smoke markers are reduced by one level
- 2IC may assume command
- Supply points may be used to refit damaged units
- All Event and Activation markers, except those for eliminated formations, are returned to the cup
Note: Supply points represent spare parts, fuel, equipment and personnel that may be used to refit reduced units, 1 supply point for each reduced unit step, anywhere on the map. When refitting a reduced unit, flip it to its full strength side; any other conditions (e.g. Shaken, OOC) remain in effect.
Supply points are received by scenario specific rules. Supply points may only be used in the Cleanup phase of the turn in which they were received. Any unused supply points are lost.
Terrain
Whatever terrain type surrounds the center or at least 3/4 of the hex dictates the entire hex's terrain type. The Water terrain type covers both rivers and lakes. The terrain counts as Water even when a river crossing a hex does not flow precisely over its center. Roads may cover the center of a hex, but do not change the predominant terrain type of the hex. Roads crossing over rivers represent bridges that allow for movement through that hex. A unit spending its entire activation moving through contiguous road hexes receives a +1MP bonus.
Terrain affects LOS ranges, speed and defensive values for the units entering them, as detailed in the Terrain Chart. Units on hill edge hexes receive a +1DV bonus against units firing from the ground level. Units do not receive any hill defense bonus when attacked from another hill or a height greater than their current height (e.g. by air attack).
Terrain Chart:
| Terrain | MP Cost (Inf) | MP Cost (Veh) | Defense (Inf) | Defense (Veh) | LOS Thru | Hide |
|---|---|---|---|---|---|---|
| Clear | 1 | 1 | - | - | Y | N |
| Crop Field | 2 | 1 | +1 | - | Y | Inf |
| Hill | +1 | +1 | +1 | +1 | N | N |
| Road | 1 | 1 |
* Two Wrecks along the line block LOS.
Victory Points by Unit Type:
| Unit Type | VP - Reduced | VP - Destroyed |
|---|---|---|
| CO/2IC | +1 | +1 |
| Infantry | 1 | 2 |
| APC/Recon | 1 | 3 |
| Tank | 2 | 4 |
| SPA/SPAA | 1 | 3 |
| Helicopter/Plane | 2 | 4 |
| Objective | - | 5 |
Victory margins: 1-5 Tactical, 6-10 Decisive, more than 10 Crushing.
The terrain in NW68 has been deeply affected by the climatic changes after the nuclear holocaust. The dust clouds shielded the Earth from the sun light and everything went cold. Radioactive storms and low temperatures almost eradicated life - everything green withered and turned to brown. Over 90% of the fauna died of starvation or thirst, although some predatory species adapted to the new environment. Rivers and lakes quickly transformed into pools of radiation and death. Thus was the Nuclear Winter.
When, eventually, temperatures began to rise, they didn't return to what was called normal before the war. The ecosystem balance was disrupted beyond anything Nature itself could do to repair. The frozen hell was slowly reverting to a desolate wasteland where sand was conquering every last meter of ground. Sun is now scorching the Earth and the few last vertical structures left in the world offer little protection to the wandering life forms. It is now the year 1968 AD and this is the new background for the events that are about to take place.
Sample counter — King Tiger (formation 1/130): Speed 6; printed factors 10 / 6 / 5 / 4 / 18.
Line Of Sight
Units must see each other in order attack one another. Some terrain types block line of sight (LOS), some do not. For LOS calculation purposes, urban, woods and hill hexes are considered to be level 1 obstacles that can block LOS. Units never block LOS, except for the Huge ones.
LOS is established by tracing a line free of any obstacles from a hex center to another hex center. LOS is obstructed if the line crosses any part of a LOS blocking terrain hex. LOS is also obstructed if it cuts across two or more Wreck hexes. If LOS passes along the edge of two hexes, it is always affected by the hex with the lesser obstacle. If both hexes contain LOS blocking terrain then the LOS is obstructed.
Hill LOS - Just like any other terrain, a hill covering the center of a hex fills the entire hex even if the artwork does not. Level 1 obstacles (e.g. urban, woods, hills) increase the elevation level for LOS purposes; a woods/urban hex on a hill equals a level 2 obstacle.
A unit can fire from a lower hex into a hill edge hex, but not beyond it at other hill hexes. A unit on a hill can fire at a target on another hill hex but not through or beyond a Level 1 obstacle on that hill. Ground hexes directly behind Level 1 obstacles are blind spots for units on a hill edge.
Concealment
Any land unit in a cover hex (e.g. urban, woods, shellholes), not in LOS of an enemy recon unit and not marked as Finished, is considered to be concealed. Concealed units receive a +1DV bonus when attacked.
A unit ceases to be concealed as soon as it moves or fires (i.e. thus revealing its position), an enemy recon unit has a clear LOS to its hex or an enemy unit enters a hex adjacent to its position.
The bonus is added to the defending unit against any type of attack except assaults (e.g. both artillery and air units have a hard time striking concealed units without recon information).
Control
A hex is controlled by the last player who had a unit in the hex, which includes simply moving through it. Objectives are marked at the start of a game as per scenario rules, with the side of the controlling army face up.
Combat
The two forms of combat in NW68 are ranged combat and assault. Units attacking on an enemy's turn are firing opportunity fire.
Any active formation unit not marked as Finished may use the appropriate inherent firepower, or Weapon, to attack an enemy unit within LOS and range. A unit may only attack once per activation, although it may be attacked multiple times by different enemy units during the same activation.
Units may fire alone (or in a group if stacked at the beginning of the activation), with or without the formation CO's bonus. Any unit is marked with a Finished marker after attacking, unless it executes a moving fire attack as its first action and then continues to move up to 1/2 Speed, fractions rounded down.
To attack in Nuklear Winter '68 a unit must first hit its target, and then it can inflict damage. This is all accomplished with one roll of 2D6. To execute an attack the attacker first determines its AV and applies any modifiers for close range, long range, moving fire, etc.
Attack Value - The AV is calculated by adding the attacking unit's FP factor, the result of 2D6 roll (see below) and any other bonuses (e.g. CO/2IC or group fire bonus).
Defense Value - The DV is calculated by adding any bonuses (e.g. from terrain, sandbags, concealment, etc.) to the defending unit's armor factor.
Once determined, the attacker's AV is compared against the defender's DV and the resulting positive difference is the number of hits taken by the defender.
- AV (FP + 2D6 + bonus) - DV (armor + bonus) = number of hits
Long Range - Units with a white colored FP range factor can fire at up to double their printed range with that weapon. Units firing at long range receive a -2AV penalty (i.e. lowered accuracy).
Close Range - Units with a white colored FP range factor receive a +1AV bonus when firing at targets up to 1/2 range (i.e. increased accuracy).
Fixed Range - Weapons with the same FP colored range factor are Fixed Range weapons. Fixed range weapons:
- May not fire further than the printed range factor
- Do not receive the close range AV bonus
- May be fired on the move, except for SPA/SPAAs
- May be used in group firing, except for SPA/SPAAs
- May be used in assaults, except for SPA/SPAAs
Group Fire
Units starting their activation in the same hex (i.e. stacked) may fire as a group. One unit is designated as the fire leader with the second one assisting. Supporting fire is added as a bonus to the fire leader's overall AV:
- +1AV if an infantry unit is assisting the fire leader
- +2AV if an AFV is assisting the fire leader
The assisting unit must have at least one non-fixed range weapon, regardless of its range, to support the fire leader. SPA, SPAA and Shaken units may not assist in group fire. However, Shaken units may be designated as fire leaders.
A non-Finished CO's Local or Radio Range bonus may be added to the overall AV of the firing group as appropriate. Units eligible for opportunity fire may do so as a group.
Group firing is optional; units in a stack may still move and fire individually. Units moving in a group may also fire on the move as a group, provided that they don't travel farther than the slower unit's 1/2 Speed.
Opportunity Fire
A unit which is not Finished may attack with Opportunity Fire during the activation of an enemy unit, whenever the enemy unit moves into a hex that is within range and LOS. The unit conducting opportunity fire will be marked as Finished immediately after the attack resolution.
A unit entering a new hex may only be attacked once per hex, but may be attacked multiple times during its move by different attackers as it enters different hexes. Each unit in a group may be targeted by different attackers every time the group enters a new hex. Opportunity fire is not allowed against enemy units assaulting a friendly hex.
SP artillery may only react with direct opportunity fire (i.e. target unit is in LOS). Shaken and OOC units may react alone or grouped, following the ranged combat and group fire rules.
Opportunity fire always takes precedence over moving fire (i.e. defenders are constantly prepared to fire at enemy units moving within their LOS). This means that whenever an attacker fires on the move and a defender opportunity fires at the same time, the defender's opportunity fire will be resolved first.
Units Shaken and/or reduced as a result of opportunity fire may still attack and move freely according to their current Speed.
Moving Fire
Every land unit, except for SPA/SPAAs, may fire its weapon with a -2AV accuracy penalty when moving up to half speed, fractions rounded down. Air units are exempted from this rule as they have their own moving fire limitations.
Moving and firing may be executed in any order:
- Move up to 1/2 Speed then fire with a -2AV penalty
- Fire with a -2AV penalty then move up to 1/2 Speed
Assault
Assaults are a form of combat initiated by units moving into an enemy occupied hex, resolved as soon as the move into the enemy hex is completed. The units moving in are the attackers while those already in the hex are the defenders. Having the initiative, only the attackers roll to hit against the defenders. Stacking limitations for each side apply at all times.
Attackers - The attackers must use the appropriate FP weapon against one defending unit, with a +2AV assault bonus. If two units assault together, they do so as a group, with one being designated as assault leader and the other one assisting the attack with an additional +1AV from infantry units or +2AV from AFVs. When assaulting a group, the attackers must declare the targeted defending unit before rolling to hit.
During assaults against unescorted AFVs in urban terrain, unescorted infantry will receive an extra +2AV when attacking, in addition to the usual assault modifier +2AV. Similarly, unescorted AFVs assaulting unescorted infantry in clear terrain will receive an extra +2AV in addition to the usual +2AV assault modifier. Escorting indicates a mixed, infantry/AFV group.
A non-Finished CO's relevant range bonus may be added to its formation units' overall AV. Any appropriate Weapon type may be used by the attackers. Shaken units and SPAs may neither assault nor assist.
Defenders - The terrain and sandbags bonuses are added to the defending unit's overall DV; concealment is negated by assaulting units. Stacked units defending together do so as a group with the second unit assisting the assaulted one.
Assisting (i.e. laying suppressive fire) infantry units add +1DV while AFVs add +2DV to the assaulted unit's overall DV. A non-Finished CO's relevant range bonus may be added to its formation units' overall DV. Shaken units and SPAs may not assist.
Assault Resolution - Any and all of the hits resulted from the assault are received by the assaulted unit. The attackers are marked as Finished immediately following the assault resolution, regardless of its outcome. If the attackers don't manage to eliminate the assaulted unit, they are Shaken, and must retreat to the hex from which they came.
If the assaulted unit is destroyed, the attackers remain in the hex and the other surviving defender, if any, is Shaken and must retreat to one of the three hexes opposite from which the one the attackers came. If the defender can't retreat, it will be eliminated instead.
Sample counter — King Tiger (formation 1/130): Speed 6; printed factors 10 / 6 / 5 / 4 / 18.
Combat Results
Once determined, the attacker's AV is compared to the defender's DV and the resulting positive difference is the number of hits taken by the defender.
- AV (FP + 2D6 + bonus) - DV (armor + bonus) = number of hits
Every hit taken may either Shake or reduce a unit, depending on the initial status of that unit. The three steps of a unit before destruction are: full strength, Shaken and Shaken & reduced. Hits on a full-strength unit:
- 1 hit - The unit is Shaken
- 2 hits - The unit is Shaken and reduced
- 3 hits - The unit is eliminated
Hits on an already Shaken or a reduced & rallied unit:
- 1 hit - The unit is Shaken and reduced
- 2 hits - The unit is eliminated
Sample counter progression — King Tiger (formation 1/130), full strength → Shaken (1/2 marker) → Shaken and reduced (1 marker, reduced factors 9/6/4/4/18) → Wreck (+1 marker).
Any hit on a Shaken & reduced unit instantly eliminates it. If the eliminated unit was either armored or airborne, place a Wreck marker on the hex if there isn't one there already. When a full strength unit is reduced, flip the counter to its reduced side.
Shaken units are marked with a Shaken marker. Shaken units may only be rallied by the formation CO/2IC at the start of their activation. Shaken units:
- May move freely at up to 1/2 Speed
- May only fire the HE FP with a -1AV penalty
- May opportunity fire
- May not assault or assist in assaults/group fire
Wreck - Every destroyed AFV or air unit leaves a Wreck when it is eliminated, unless there is already a Wreck marker in the hex. Wrecks raise the terrain's movement cost by 1 for all the land units. Wrecks also increase the terrain's defense value by +1DV for all the land units passing through. Two Wreck hexes obstruct the LOS of the (same level) unit attempting to fire through them.
Order Of Battle
The number of units in each German formation is not always equal to the authorized wartime strength, mainly because there were not enough surviving or newly trained men to fill the ranks of all the pre-nuclear combat units. In the NATO camp, the Deployment Force is comprised of combined US and Russian units, rushed to area around Wewelsburg to contain and eliminate the double threat. The elusive Black Hand doesn't use any known, conventional organization form for their seemingly numberless forces.
Das Dritte Reich
- 1/130 Panzer Lehr Division (2xAMs) - 1xE-100, 2xKing Tiger, 1xPuma, 1xHummel
- 2/130 Panzer Lehr Division (2xAMs) - 1xE-100, 1xJagdtiger, 2xSdKfz 250, 2xFallschirmjäger, 2xPanzerfaust 3
- 1/7 SS Freiwilligen Division Prinz Eugen (2xAMs) - 2xSdKfz 250, 2xSS-VT, 1xPanzerfaust 3, 1xMG42
- 1/501 Schwere SS Panzer Abteilung (2xAMs) - 3xE-100
- 2/501 Schwere SS Panzer Abteilung (2xAMs) - 1xE-100, 1xJagdtiger, 1xSdKfz 250, 1xSS-VT, 1xPanzerfaust 3
- SG 2 Schlachtgeschwader 2 Immelmann (2xAMs) - 1xHaunebu III
NATO Deployment Force
- 4th Guards Kantemirovskaya Tank Division (1xAM) - 6xT-64
- OSNAZ Spetsgruppa V Vympel (1xAM) - 4xSpetsnaz, 2xM60, 1xLAW, 1xStrela-2
- 1st Ranger Battalion (1xAM) - 2xM60A1, 3xM113, 3xRangers, 2xLAW
- 2nd Ranger Battalion (1xAM) - 3xM60A1, 1xBRDM-2, 2xM113, 2xRangers, 1xLAW, 1xM60
- 58th Motor Rifle (1xAM) - 3xT-62, 2xM113, 2xSpetsnaz, 2xRangers, 1xLAW, 1xM60
- 335th Assault Helicopter Company Cowboys (2xAMs) - 2xHuey
Black Hand
- Black Hand (2xAMs) - 15xZealot, 5xRavager, 3xPest, 3xBlighter, 3xScourge, 5xMegrim, 5xRancor, 4xDiskord, 4xMinigun