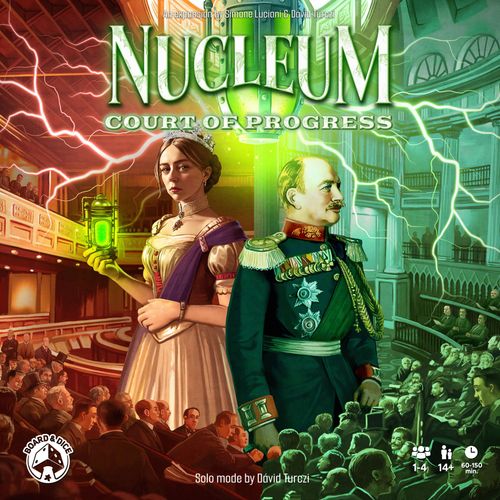
Nucleum: Court of Progress
Nucleum: Court of Progress Rulebook
Table of Contents
Table of Contents
Components
NOTE: Experiment F is playable with the base game without the rest of this expansion. In this case: 1) leave the Experiment F Alternative Starting Action tile depicting the Court action in the box, and 2) use the one marked with "*" instead. No additional special setup is required. The rest of these rules assume you are using the complete expansion. Experiment E can only be played with this expansion. The new Experiments are also compatible with Nucleum: Australia.
The expansion contains:
- 4 new Contract tiles
- 12 new Action tiles
- 1 Starting Action tile (marked with "*"; compatible with the base game for Experiment F)
- 4 Party Agenda tiles (double-sided)
- 4 Alternative Starting Action tiles (one each for Experiments A-D)
- 5 Starting Action tiles for Experiment E
- 5 Starting Action tiles for Experiment F
- 2 new Experiment boards (E and F)
- 3 Experiment F Chaining tiles
- 2 Special Shipping tiles (to use with the Nucleum: Australia expansion)
- 16 new Technology tiles
- 2 Turbine Effect tiles
- 1 Court side board
- 4 Side board overlays
- 2 Experiment player aids
- 4 Court player aids
- 8 Worker meeples (2 in each player color)
- 1 King marker
- 4 Neutral Politicians (numbered 1-4)
Changes in Setup
- Before performing the setup from the base game, remove 7 Action tiles shown in the frame titled "Tiles to replace". Replace them with the 12 new Action tiles showing the Court action. Additionally, remove the Starting Action tile (shown in the base game's icon set) from each Experiment, and in its place add the corresponding Alternative Starting Action tile showing the Court action.
- Add the 2 new Silver, 1 new Gold, and 1 new Purple Contracts to the respective stacks before shuffling.
- Perform the main board setup as described in the base game rules.
- Place the VP Flag token under the "90" spot on the VP track (instead of "70"). If you are using the Nucleum: Australia expansion and thus playing on the Australia map, place it under the "95" spot instead.
- Place the Court side board to the side of the main board, opposite of the base game's side board.
- Randomly select a side of each of the four Agenda tiles, and place them on the dedicated spots of the Court side board.
- Reveal one of the unused Setup cards, and use its reference number to determine which Party's seats receive 2 Neutral Politicians, one marked with an arrow, one numbered 2, and the King marker.
- 1-3: Capitalist Party
- 4-6: Free Thinker Party
- 7-9: Communist Party
- 10-12: Royalist Party
- 13: Ignore this and draw another card.
- Twice more, reveal another unused Setup card and use the same values as described in the previous step to determine where to place the Neutral Politician numbered 3 and 4. If the selected Party is not empty, select the next one instead. (Top to bottom: Capitalist -> Free Thinker -> Communist -> Royalist -> Capitalist...).
- In every Party with Neutral Politicians, move a numbered Neutral Politician into the Party Leader space.
- After performing player setup, every player adds the 2 new Worker meeples of their color into a reserve (increasing their number to 18).
New Concepts
Nucleum: Court of Progress introduces several new concepts and rule changes that can be added to the base game and/or Nucleum: Australia. All the new tiles requiring this expansion to be used can be distinguished by the icon shown on the left.
Parties
The Court side board depicts 4 Political Parties, from top to bottom: the Capitalist Party, the Free Thinker Party, the Communist Party, and the Royalist Party. Players place their Worker meeples into Parties for immediate benefits and a chance to score additional points during King's Day Scoring. From now on, every Worker meeple that is on the Court side board is called a Politician.
A player is a Member of a Party if they have at least 1 Politician in that Party. The player whose Politician is in the Party Leader space is the Leader of that Party. Each player can be a Member and even the Leader of multiple Parties at the same time.
The Party with the King marker is called the Dominant Party.
Court Action
This expansion introduces a new action: the Court action. This action allows you to place Worker meeples into Parties on the Court side board. Take one of your available Worker meeples, and place it into one of the four Parties—from now on it is referred to as a Politician. If you do not have an available Worker meeple and cannot get one by converting 1 Uranium, you must forfeit this action. Then:
- Receive the depicted benefit of the selected Party:
- Capitalists: Gain 2 Thaler and 1 Thaler income step.
- Free Thinkers: Take any Action tile from the market, paying no cost.
- Communists: Gain 2 VP and 1 Worker income step.
- Royalists: Gain 2 Achievement tokens and 1 VP income step.
- Check for Party leadership: If you have more Politicians in the selected Party than the current Leader (either another player or a Neutral Politician), move one of your Politicians to the Leader space, and move the previous Leader out of that space (back into the Party). If there is no Leader, move just placed Politician to the Leader space.
- Check for Dominance: If there are now more total Politicians (Neutral and belonging to players) in the selected Party than in the current Dominant Party, move the King marker to the selected Party.
NOTE: Your Special Directive tile allows you to take the Court action (however, the 1-Thaler discount is lost as this action has no associated Thaler cost).
Modified King's Day Scoring
A King's Day Scoring is triggered the same way as described in the base game rules: whenever a Milestone space becomes empty. Perform it according to normal rules, then score Party Agendas (from top to bottom) as follows:
- Each Leader of a Party (if one exists and it is not a Neutral Politician) scores their own Party's Agenda:
- Gain as many VP as the Agenda dictates (for details about each Agenda, refer to the Appendix on page 6).
- Each Member of the Dominant Party scores that Party's Agenda (therefore, the Leader of the Dominant Party effectively scores the Dominant Party's Agenda twice):
- Gain as many VP as the Agenda dictates.
- Remove Politicians from the Court:
- Each Leader of a Party (if one exists and it is not a Neutral Politician) returns 1 Politician from that Party to the reserve. If they only have 1 Politician in that Party, return the Politician from the Party Leader space. Do not go through the procedure to assign a new Party Leader, and do not move the King marker.
- Return exactly 1 Politician (if still present) belonging to each player from the Dominant Party to the reserve.
- Remove the highest-numbered Neutral Politician from the Court side board and return it to the game box, then move the Neutral Politician marked with an arrow to the Party below its current Party (or if it is already a Member of the Royalists, move it to the Capitalists). Then, assign Leaders and the new Dominant Party as follows:
- In each Party, if there are no ties for the most Politicians, the player with the most Politicians must move one to the Party Leader space (if they do not have the Politician there yet). The same rule applies to Neutral Politicians if they are the most present in a party. If there is a tie, no Party Leader is assigned; instead, you assign a Party Leader following the rules for the Court action the next time a player adds a Politician to that Party.
- Place the King marker next to the Party with the most Politicians. If there is a tie, leave the King marker at its current Party, even if the current Dominant Party has fewer Politicians than the tied Parties.
EXAMPLE: After awarding VP for King's Day Scoring according to the base game's rules, players score the Party Agendas.
- The Capitalist Agenda is scored first. Red (as the Party Leader) has fulfilled 3 Contracts and thus gains 1 VP per fulfilled Contract for a total of 3 VP.
- The Free Thinker Agenda is scored next. Yellow (as the Party Leader) scores 2 VP for each of their Residences on the map, for a total of 4 VP.
- The Communist Agenda is scored third. Blue (as the Party Leader) gains 1 VP for each city in their largest network. Blue has only 2 cities connected by a completed rail line, so they score a total of 2 VP.
- The Royalist Agenda is scored last. Blue (as the Party Leader here as well) gains 2 VP for each Party in which they have either a Member or a Leader, for a total of 8 VP.
- Every player with at least one Politician in the Dominant Party (Capitalists) scores that Agenda, receiving Victory Points for their Contracts. Red again scores 3 VP; Blue scores 1 VP, as they only fulfilled 1 Contract; Yellow scores 2 VP for 2 fulfilled Contracts; and Teal scores nothing, as they have not fulfilled any Contracts yet.
- Next, Party Leaders return Politicians to the reserve: 1 red Politician from the Capitalists, 1 yellow Politician from the Free Thinkers, 1 blue Politician from the Communists, and 1 blue Politician from the Royalists. Then, 1 Politician of each color is returned to the reserve from the Dominant Party (Capitalists), Neutral Politician number 4 is removed from the Court side board, and Neutral Politician with an arrow is moved from the Capitalists to the Free Thinkers.
- Red remains the Leader of the Capitalists, Yellow remains the Leader of the Free Thinkers, Red becomes the Leader of the Communists, and Blue remains the leader of the Royalists, even though there is a tie, since they still have their Politician on the Leader space. The King marker is moved to Free Thinkers as they now have 6 Politicians compared to the Capitalists who have 5 Politicians.
Experiment F Chaining Tiles
Experiment F comes with three new Chaining tiles. Each of these tiles, unlocked by the Level 3 Technology of this Experiment, allow you to take the printed action, then play a non-Chaining Action tile (see the following additional rules) immediately on top of this Chaining tile and resolve it.
Additional rules and clarifications:
- You cannot place Chaining tiles as a railway.
- You cannot play more than one Chaining tile on the same turn; this rule includes the Shipping tile from Nucleum: Australia.
- You may play a Special Directive tile on top of the Chaining tile.
- You must fully perform the action depicted on the Chaining tile before placing (and performing the actions of) the Action tile placed on top of it.
- Chaining tiles are treated as Action tiles for purposes of fulfilling the Contracts, Milestones, and Experiments' scoring technologies.
- You may not fulfill an additional Contract in the same turn by placing Chaining tiles.
Modified Final Scoring
Perform Final Scoring following the base game rules with the following addition:
- Score Party Agendas as described for King's Day Scoring but without removing any Politicians from any Party (Leader or otherwise).
NOTE: Remaining Politicians on the Court side board do not count as Worker meeples in your personal supply and thus do not contribute toward scoring your leftover resources.
Modified Endgame Conditions
In 3- and 4-player games, the number of conditions that must be met to trigger the Endgame is increased from 2 to 3, while in 2-player and solo games, the number of conditions remains unchanged. If you are combining this expansion with Nucleum: Australia, use the same number of conditions described here (no further modifications are needed).
NOTE: These modified Endgame conditions are identical to the ones described in Nucleum: Australia.
Expert Variant
Players who are already well acquainted with Nucleum and Nucleum: Court of Progress are encouraged to try the following expert variant. Players no longer take Experiments in reverse player order; instead, in player order, players proceed to an open auction, using VP to determine their order in choosing an Experiment. The auction is an open-bidding process: each player can "offer" an amount of VP to be first to choose—and this amount must be higher than the previous bid amount—or pass. In a 4-player game, the player who passes first chooses last, then the next player to pass must lose the amount of VP equal to their last bid and be third, and so on. In a 3-player game, only the first and second players to choose lose their last bid amount of VP, and in a 2-player game, only the first player to choose loses their last bid amount of VP. All players must mark down (in any way they choose) the amount they bid and lose that number of VP at the end of the game, just before tallying up VP and determining the winner. The expert variant is not supported by the solo mode.
NOTE: This expert variant is identical to the one described in Nucleum: Australia.
EXAMPLE: Players A, B, C, and D are bidding for priority of choosing Experiments, as follows: A, "1 VP"; B, "3 VP"; C, "4 VP"; D, "6 VP"; A, "7 VP"; B, "Pass." Being the first to pass, B will be the last to choose an Experiment and loses no VP. Bidding continues as follows: C, "8 VP"; D, "10 VP"; A, "Pass." So, A will choose third and must lose their last bid amount of 7 VP. Bidding continues one final time: C, "11 VP"; D "12 VP"; C, "15 VP"; D, "Pass." Therefore, D loses their last bid amount of 12 VP and chooses second, while C loses their last bid amount of 15 VP and chooses first. All these VP are lost at the end of the game, before determining the winner.
Appendix
Silver Contracts
- (C64) Be the Party Leader of the Dominant Party. Gain 1 income step of your choice.
- (C65) Have 3 Politicians on the Court side board. Gain a Level 1 Technology.
Gold Contracts
- (C66) Have 5 Politicians on the Court side board. Gain 5 VP and 2 income steps of your choice (same or different).
Purple Contracts
- (C67) Have 6 Politicians on the Court side board. Gain 12 VP.
Party Agendas
The Appendix prints the Party Agenda faces in the order shown below. The icon on each face identifies the Party and side.
- Score 1 VP per fulfilled Contract.
- Score 1 VP for each Mine (Uranium Mine and Coal Mine, if using Nucleum: Australia) and Turbine you have on the map.
- Score the highest Milestone tile where you have at least one marker present using a multiplier of 2.
- Score 1 VP per unlocked Technology.
- Score 1 VP per city in your largest network.
- Score 1 VP for each different city where you have at least one Urban Building, Mine (Uranium or Coal, if using Nucleum: Australia), or Turbine.
- Score 2 VP per Party where you are either a Member or the Leader at the start of Party Agenda scoring (before any Politicians have been removed).
- Score as many VP as the amount of electricity required by your highest-energy, non-Government, energized Urban Building on the map.
Technologies
| Level | Technology | Effect | Appears on |
|---|---|---|---|
| 1 | (E1) | After placing a Uranium Mine or a Turbine, gain 1 Uranium. | Experiment E (& Experiment A) |
| 1 | (E2, F2) | Sites with red borders require an extra cost of only 1 Thaler (instead of the usual 2 Thaler). | Experiments E & F |
| 1 | (F1) | Whenever you gain a Contract, gain 1 Achievement token. | Experiment F (& Experiment D) |
| 1 | (E3) (F3) | Whenever you use a Turbine belonging to another player, pay that player 1 Thaler from the bank (instead of your own supply) and produce +1 electricity. Note: You may choose to use an opponent's Turbine to be able to transport a Uranium even before using the Nucleum's (free) allocation. | Experiments E & F |
| 2 | (E4) | Immediately gain 4 Achievement tokens and 4 Thaler. | Experiment E |
Turbine Effects
- After you take an Energize action, gain 1 VP income step.
- After you take an Energize action, you may take the rightmost (cheapest) Action tile from the market, paying no cost.
Solo Rules: Baron Von Automat and the Life of Politics
The solo rules from the base game remain unchanged. Make sure the Baron's relevant starting Action tile has also been replaced with a new one showing a Court action.
The priority order of the actions is now as follows: (Place a Boat, if playing with Nucleum: Australia >) Court > Urbanize > Industrialize > Develop > Contract > Energize > Subsidize.
NOTE: Make sure to remember the rule from the base game that the Baron never gets rid of the last tile depicting a non-Subsidize action. This now includes the Court action as well!
NOTE: The Baron's Politicians are removed from the Parties after scoring in the same way a human player's Politicians would be.
NOTE: If the end of the game is triggered by the Baron recharging three times it can trigger a 3rd King's Day scoring (immediately if you've already recharged 3 times, or later when you do). Regardless, after you and the Baron have both taken one more turn, you still score the Court as part of Final Scoring (potentially a 4th time) as described in this expansion's core rules.
Baron Placement of Workers
The Baron places a Worker from the general supply to one of the Parties. If possible, the Baron places a Worker in a Party where:
- It currently has an equal number of Politicians as the current Leader or there is no Party Leader (i.e., placing there would allow it to become Party Leader).
- If there are multiple or no such Parties to target and If it has no Politicians in the Dominant Party, it places there.
- Otherwise, it places in the targeted Party where it has the fewest of its own Politicians (compared to the other Parties).
- If there are multiple targeted Parties with an equal number of Politicians, draw a Logic card and use its primary tiebreaker to select a Party.
Then, depending on which Party it placed into, the Baron receives a bonus:
- Capitalists: It gains 1 Thaler.
- Free Thinkers: Remove the rightmost Action tile from the market (and return it to the box).
- Communists: It gains 1 Worker. (if the Baron's reserve is empty, it gains 3 VP instead.)
- Royalists: It gains 2 VP.
If there are no Workers in Baron's general supply, it treats the Court action as unavailable.
Scoring the Parties (Baron)
When scoring Parties (during King's Day and Final Scoring), the Baron ignores the Agenda tiles and instead scores 4 VP for each Party Leader it has and an additional 4 VP if it has at least one Politician in the Dominant Party.
Adjusting the Difficulty
To increase the difficulty, use one or more of the following rule modifiers:
- After setup, add one of the Baron's Worker meeples (from the supply) to the empty Party (the one without Neutral Politicians). It becomes the Party Leader.
- After setup, add one of the Baron's Worker meeples (from the supply) to all the Parties where there is a Neutral Politician Leader.
- During the second and third King's Day Scoring and during Final Scoring, the Baron scores 6 VP for each Party Leader it has and an additional 6 VP if it has at least one Politician in the Dominant Party (i.e., it scores 2 VP more per scoring opportunity than normal).
To decrease the difficulty, after setup, add one of your Worker meeples (from the supply) to the empty Party (the one without Neutral Politicians) but without receiving the benefits. This Politician becomes the Party Leader.