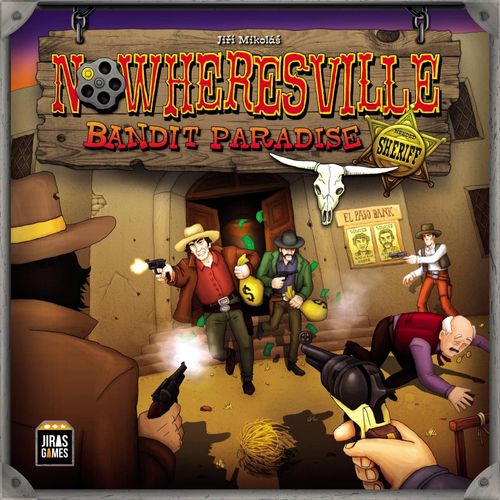
Nowheresville: Bandit Paradise
Nowheresville: Bandit Paradise Rulebook
Table of Contents
Table of Contents
Game Setup
- Each player chooses a Bandit card, usually by the picture or the Attributes. The individual Attributes for each bandit include: Experience (important in ties), Courage (helps with robberies), Bullets (how many times the Bandit shoots at an opponent) and the maximum amount of Hits (basically the bandit's life). Numbers shown in white determine the amount of Attribute tokens, which are distributed at the start of the game. These tokens are spent during the game (Courage and Bullets).
- According to your bandit's Courage and Bullets Attributes take the appropriate amount of tokens. After each use of either Attribute during the game you must pay the appropriate token to the bank.
- Each player receives 500 Dollars.
- Each player also receives 9 Decision cards in a single color (with a colored frame).
- Lay out the Location cards in the middle of the playing surface, according to the picture. Put the Bank, Coach and Prison cards into one row, then the Shop and Black Market cards under them in the second row. The third row should consist of the Town card, the fourth row of the Bandit School card and the last row of the Saloon card. HINT: If you wish for more shootouts and more interaction, leave out the Saloon card.
- Shuffle the Money deck and place it face-down in easy reach. The deck contains bank notes with values of 100 and 200 dollars. Deal 1 face-down bank note above both the Bank and Coach cards.
- Place the remaining (and unchosen) Bandit cards face-up next to the Prison card. If you assault the Prison, you can help one Bandit escape and add him to your gang.
- Prepare the "Equipment" deck by shuffling its cards and placing them face-down next to the Shop / Black Market cards. Deal three cards face-up and place them next to the "Shop" card as commonly available wares.
- Shuffle and place the "Victims" deck face-down next to the Town card. Deal the topmost card face-up and place it on the other side of the Town card. Place the "Fortune" deck next to the Saloon card.
- Place the bands/bullets, Attribute tokens, Wound tokens and the die in easy reach.
The Goal and the End of the Game
The winner is the player who first accumulates a certain amount of Money. This depends on the number of players:
- 2 players — 3000
- 3 players — 2500
- 4 and 5 players — 2000
A player's amount of Money is kept secret during the game.
HINT: These goals are set for a game lasting approximately 60 minutes. If you wish to lengthen or shorten the game, increase or decrease the final amount of dollars required.
Starting the Game
The game is played in Rounds until one of the players is declared a winner at the end of a Round. Each Round has two Phases:
1. Maintenance Phase
- Add 1 face-down bank note (Money card) above both the Bank and Coach cards. ATTENTION! If either the Bank or the Coach were just robbed, put two bank notes to that card instead.
- Fill the available Equipment cards near the Shop to three. If there are three weapons available at once, discard them and deal three new Equipment cards. Once you exhaust the Equipment deck, shuffle its discard pile and form a new deck.
- If any player successfully attacked a Victim in the Town last Round, deal a new face-up Victims card to the Town.
2. Player Turns
Location Assignment. First all players simultaneously plan the target Locations for their bandits. Each player has 9 Decision cards, from which 8 correspond to the Location cards in the middle, whereas the 9th means that the bandit stays "in his hideout" and heals his wounds. Each player thus chooses one of his cards and places it face-down in front of his bandit. If he has more bandits, he has to choose a card for each of them – he can never have two bandits travelling to the same Location. Once all players have chosen their Locations, their Decision cards are revealed.
Location Resolution. Locations are resolved from bottom to the top, so the first one will be the Saloon, then the Bandit School, the Town and so on until the Bank. If no bandit was sent to a Location, nothing happens there. If there is a single bandit, he gets the best reward the Location offers (see Locations below). If there are more players on the same Location, they have to agree on an order in which they receive the rewards (the worse the position in the order for a player, the worse the reward – even nothing!). If they cannot agree on an order, a Shootout ensues.
Locations
The order agreed by the players is always important for a Location. If they cannot agree, the order for receiving the rewards will be decided by a Shootout (see further below).
1. Saloon
- The first player draws the topmost Equipment card and places it face-up next to his bandit. Then he has to draw a Fortune card and resolve it.
- The second player has to draw and resolve a Fortune card.
2. Bandit School
- The first player has the opportunity to improve two of the following three bandit Attributes. He collects the chosen ones as tokens. Each choice lists the Attribute cap for the bandit, which cannot be exceeded. Bullets and Courage are Attributes that are being spent during the game. The three choices are:
- 3 Bullets (used in Shootouts, one Bullet per a single shot at an opponent). A player's bandit may never have more than 6 Bullets.
- 1 Experience token with a value of 2 (the Experience is used as a tie-breaker during Shootouts and when determining shooting order). A player's bandit may never have more than 3 Experience tokens (each token has a value of 2).
- 1 Courage token (which adds +1 to the die roll during a Robbery). A player's bandit may never have more than 3 Courage tokens.
- The second player chooses only one Attribute to be improved.
3. Town
- The first player can choose one of these three options:
- He will work legally and earn 200 dollars.
- Or he harasses the townsfolk, see the Robbery.
- Or he steals something by taking the topmost Equipment card and adding it face-up to his bandit.
- The second player earns 100 dollars for helping out on a nearby ranch.
4. Shop
- The first player pays 100 dollars and chooses one of the three offered cards in the Shop. He adds it to his bandit face-up.
- The second player pays 100 dollars and chooses one of the remaining two cards in the same way.
- The third player pays 100 dollars and takes the last Equipment card from the Shop.
5. Black Market
- The first player pays 200 dollars and secretly draws three Equipment cards, placing one of them face-down to his bandit and returning the rest face-down on top of the deck. These "face-down" rules apply to the other two players in order as well. The bandit's face-down Equipment card can be revealed at any time during the game and then later used normally.
- The second player does the same, but only draws two cards, choosing one of them.
- The third player also pays 200 dollars and takes the topmost Equipment card face-down.
6. Bank & Coach
- Only the first player in order can attempt a robbery at the Bank or chasing the Coach – see the Robbery.
7. Prison
- Only the first player in order can attempt to free a bandit from the Prison and thus get a new accomplice into his gang – see the Robbery. If the action succeeds, the player chooses any available bandit card and places it in front of him as another member of his gang.
8. Heal
- If a player plays this Action card, his bandit cannot be involved in a Shootout and the order of players does not matter with this card either. The player's bandit stays "home" and heals all his Hits (all Hit tokens are removed from him).
Robbery
Equipment cards are divided between Robbery equipment and Guns. Robbery equipment cards will be used during Robberies and they contain three symbols with associated values. These values hint to the type of Action and the Location in which they can be best used. "Cowboy hats" can be used for prison breaks or Town assaults. The "Safe" can be used for the Bank robbery and the "Envelope" for the Coach robbery. Guns on the other hand will be used during Shootouts.
If a player chooses the Robbery action, he chooses which Robbery equipment cards belonging to his bandit he will use (he can opt to not use any). He adds the values for the appropriate symbol (for instance if he is going to rob the Bank, he adds up the Safe values from those Equipment cards). Then he rolls the die and adds the result to the symbol values.
Success. If the total result is greater than the target number on the Location card (all of them show 8 except the Victim cards, which have varied numbers), the player's Action succeeded. He places all used Robbery equipment cards to the Equipment discard pile and according to the Location he earns the reward (on the Bank and Coach cards he gets all the accumulated Money, on the Prison card he gets a new member for his gang and on the Town card with the associated Victim card he gets the amount of Money shown on the Victim card from the common Money pile).
Failure. If the total result is lower than or equal to the target number (8 or the number on the Victim card in the Town), the player has the option of using his "Courage" Attribute and for each Courage token spent (limited only by his available tokens) he can add +1 to the die roll. If even this does not help to bring the total over the target number, the Action fails. ATTENTION! As a penalty for a failed Action the player has to discard one of the Robbery equipment cards used for the Action (he does not discard all of them as after a success). If no Robbery equipment was used, none is discarded.
Shootout
If there are more players (bandits) contesting for a single Location, the participating players have to agree on the player order in which they receive the rewards from the Location. If an agreement cannot be reached, the order has to be decided by a Shootout – it is enough for a single player to suggest this option. The other players can choose to run away (worsening their order on the Location automatically), or they face the proponent. If more players run away and subsequently again fail to agree on their order, a new Shootout is performed etc…
A HINT for a more visceral game variant: You can use the following rule. "The player who runs away from a Shootout does not get any place in the order of rewards on the Location and misses it completely."
The Shootout participant with the highest "Experience total" chooses the first shooter. The Experience total for a bandit is summed from his Attribute value, the Experience value on the bandit card, the Experience tokens and the Experience value on the Gun card/s, which the bandit currently uses. If more players/bandits share the same Experience total, the highest die roll decides. Then the players go around the table from the first shooter and throw their rubber bands (bullets) at an opponent's bandit card. For each shot the shooter has to discard one Bullet token (some Guns might contain a permanent free bullet or two, which equal that many free throws in each Shootout).
ATTENTION! Each bandit automatically possesses a Colt revolver (which is listed on his card). If the bandit does not use a two-handed weapon (a gun), he gets one Colt bullet for free.
The rubber bands are thrown from a distance of 0.5 – 1 meter (more experienced players may increase the distance). Each hit landing on the bandit picture (when the picture is overlaid by the rubber band) equals to 1 hit (the bandit receives a Wound token). A headshot equals 2 hits, but this is only valid for the face, not the hat.
A Shootout can have more than two participants and they decide which bandits to target. The players can shoot until they have Bullets left. Once a Shootout commences, no one can run away from it anymore. A player might even save Bullets and end the Shootout when the other players have no bullets left, or do not want to shoot anymore.
!! The bandit having the least Wounds at the end of the Shootout is the winner and gets the best available position in the order of the Location rewards. Next order of other bandits (in shootout) is determined by the number of wounds, too. !!
You of course also count in the Wounds with which the bandit entered the Shootout. If more bandits end up with the same Wound amount (or with no Wounds at all), their order is decided by their current Experience total (as a reference see the decision about the first player selection in the Shootout above). If even this does not solve the tie, they have to roll a die.
The throwing style is up to the player agreement. We recommend throwing the rubber bands in a flat way, which means holding it on an open palm, gripping lightly by the thumb and with a small swing letting the thumb loose. The shooting distance is also up to the player agreement. The only important thing is to maintain the same distance for all.
Weapons
Each bandit has his own Colt (shown on the bandit card). A player can either use one two-handed weapon (a gun) or two single-handed weapons (pistols) for a Shootout at most. The size of a weapon is pictured as one or two hands on a Gun card. If a player has multiple weapons available, he has to state before a Shootout which of these he will use. Gun cards contain these statistics:
- Experience. The Experience value that can be added to the Experience total during shooting order determination.
- Bullets. Some weapons offer a one-time amount of Bullet tokens, which are collected when the player acquires the weapon (a white number with the "plus" sign). Others offer free Bullets, e.g. free shots usable during each Shootout. In this way each bandit has a free shot when using his Colt. Subsequent Bullets can be acquired in the Pistol school.
- The type and the size of the rubber band, which the weapon fires. The size ranges between 1 and 3: 1 being the smallest rubber band, 2 the middle-sized one and 3 the biggest one. For each shot the player has to pay/discard a Bullet token. The size and the type of the rubber band depends on the weapon being used. If the weapon offers a free Bullet, the appropriate size and type of the rubber band has to be used as shown on the Gun card (for instance in case the player has two pistols with different rubber band sizes).
- Two-handed weapon. A player can use one two-handed weapon (a gun).
- One-handed weapon. A player can use two single-handed weapons (pistols) for a Shootout at most.
The Death of a Bandit
If a bandit receives as many Wound tokens as is his Hits Attribute written on the bandit card, he dies. His owner discards all Equipment cards belonging to the bandit and all Attribute tokens he had. The player keeps only the Money. If the player owning the deceased bandit has more than 1000 dollars, he has to pay 300 to the shooter (the dying bandit is robbed by the victor). If this is the original bandit the player started the game with, he keeps the bandit card and continues playing with the bandit with only his starting Attributes.
If another gang member is shot dead, that bandit card is discarded and the accomplice lost.
More Bandits in a Gang
Any player can free a bandit from the Prison to become his accomplice. However each gang can only have up to three members (including the original bandit). When planning a Location visit, each bandit owned by the same player has to visit a different Location. Only the Money is common to all bandits of a single player, in any other way the bandits work independently. Each has his own Attributes and Equipment cards, which cannot be transferred between bandits, except for the Gun cards. ATTENTION! Every time an accomplice acquires any Money during the game, the player has to pay him a provision immediately (he has to discard 100 dollars).
Fortune Cards
A player must take the top Fortune card if his bandit visits the Saloon. About 2/5 of the cards are negative (encounters with the Sheriff) and 3/5 of the cards help the player.
1. Saloon
- Incorruptible Sheriff. The player chooses an opponent who will portray the Sheriff. The Sheriff shoots at the bandit with middle-sized penetration-shaped rubber bands (like with a gun). The bandit can thus be wounded and possibly even killed.
- Corruptible Sheriff. The player can choose to either bribe the Sheriff with the given amount of Money, or face him as above.
2. Heal
- The player keeps this card. When he later uses it he can heal 3 Wounds. This card can only be used during the Location assignment part of his Turn, not during a Shootout or after it.
3. Money
- The player receives the amount of Money shown on the Fortune card.
4. Master
- Lucky Shot. The bandit gets a +1 free Bullet for every subsequent Shootout. The size and shape of the rubber band depends on the weapon the bandit is using.
- Bullets. The bandit gets the amount of Bullet tokens shown on the card.
- Wicked Man. The bandits keep the cards and have more "Experience".
- Brave Man. The bandit gets a "Courage" token.
Recommendations for a Game of 2 or 3 Players
- For two players: Each player starts with two bandits straight. Each player decides which of his bandits will be the starting bandit and which one will be the accomplice. Do not use the Saloon card.
- For three players: Do not use the Saloon card.
Final Tips
- The shooting distance should be adjusted according to the age and experience of the players. We recommend starting between 0.5 and 1 meter.
- If you ran out of Money during the game (when resupplying the Bank or Coach cards), exchange 1000 dollars worth of money for a token showing this value and replenish the Money cards.
- If you want to change the dynamics of the game, you can alter the "Robbery" rules. Now you will only need to equal the values on the target cards (Bank, Coach, Prison and Victims), not necessarily going above as usual.
- Again, if you want to change the dynamics of the game, you can alter the Maintenance phase of the Round. If there are any remaining Equipment cards in the Shop, discard them and draw three new Equipment cards. Similarly discard and draw a new Victim card in the Town.