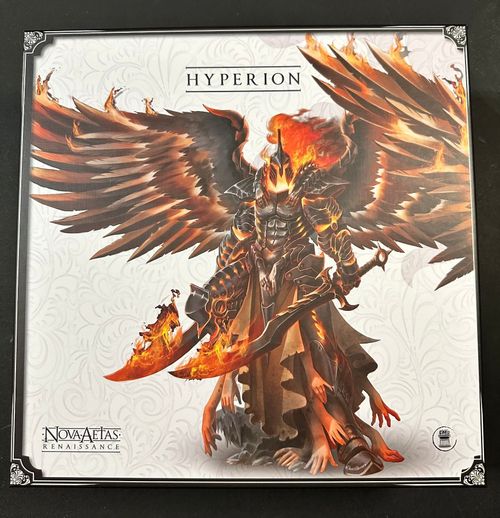
Nova Aetas Renaissance: Hyperion
Nova Aetas Renaissance: Hyperion Rulebook
Table of Contents
Table of Contents
Components
- 1 Hyperion miniature
- 3 Myrmidon miniatures
- 17 Mission Cards
- 2 Mission Envelopes
- 1 Event Card "A World in Flames"
- 17 Hyperion Action Cards
- 4 Reward Cards
- 4 Injury Cards
- 1 Myrmidon Enemy Card
- 1 Myrmidon Draft Card
How to Use This Expansion
This Expansion adds a new Side Campaign to be included in any Nova Aetas Renaissance Campaign of the Core Game or any Expansion.
This Side Campaign comprises one Encounter Side Mission and a Hunt Mission, to be played in order starting from Mission H1 - The Ritual.
If you decide to use Hyperion in your Campaign, add the Event Card found in this box to the Campaign Event Card Deck.
If you draw the Event Card "A World in Flames" during a Travel Phase, you may decide to undertake it like a normal Side Mission.
Once you begin this Side Campaign, you must play the 2 S Missions it is made up of consecutively, starting from Mission H1 - The Ritual.
Hunt Mission
Mission H2 of this Side Campaign is a Hunt Mission and follows all the rules for this type of Mission, described in the core Rulebook of Nova Aetas Renaissance.
Completing the Side Campaign
After playing Mission H2, no matter the result, follow the regular rules to resume the Nova Aetas Renaissance Campaign. If you want to face Hyperion again in the future, you must only play Mission H2, without playing the whole Side Campaign again.
Mark this Hunt among the available ones on the Campaign Sheet.
Quitting the Side Campaign
At the end of the Encounter Mission, you might have to abandon the Side Campaign.
If this happens, put the Event Card "A World in Flames" back in the Event Card deck and play the next Main Campaign Mission.
You can undertake this Side Campaign again in the future, but if you have never completed it before you must always begin from Mission H1 - The Ritual.
Event Card: A World in Flames
You meet a small line of refugees on the road, fleeing their village. They tell you that bandits with disfigured faces have set their homes on fire…
◆ You can mark Side Mission H1 "The Ritual", in the Active Side Missions.
Hyperion Injuries
While playing Missions H1 and H2, these 4 Injury Cards must be kept separated from the Core Game Injury Card deck.
If you so wish, you can shuffle them with the Core Game Injury Cards during every other Mission.
The Injury Cards shown on the printed page are:
- Damage to Temple: The [icon] Tests cost you 1 additional [hourglass icon].
- Laceration: [start of text hidden on the printed page] that use [icon], re-roll 1 [icon] of your choice.
The names and text of the other two Injury Cards are hidden on the printed page; see the Transcriber notes above.
Bounty
Instead of waiting to draw the Event Card "A World in Flames" at any point in the Main Campaign you can mark the title of this Side Mission in the Active Side Mission Slot and play it as if you had drawn the Event Card "A World in Flames."
Large Models
Some Models occupy more than a single Battlefield Square. These Models are called Large Models. These Models occupy only a single Square during movement. In other words, while moving, a Large Model is considered as a normal Model, and then returns to occupying more Squares the moment the movement ends. When players need to determine the movement of a Large Model, they choose any of the Squares occupied by the Model and count starting from the chosen Square (a normal-sized Model can be used to simulate the movement of the Large Model). When the Large Model finishes its movement, the players place the Model so that the Squares occupied include the Square where it finished its movement. If placement is not possible because the required Squares (usually 4) are not all available, players refer to the following rules:
- If there are Models occupying the Squares, the Large Model pushes the Models occupying them into adjacent available Squares or the nearest available Square.
- If there are Scenic Elements occupying Squares, place the Large Model in Squares that are available or occupied by other Models. If this is not possible, the Large Model ends its Movement in a Square that allows its placement.
Large Models and Area Effects
A Large Model is considered to be targeted by an Attack with the Area Trait if at least one of the Squares it occupies is within the Area of the Attack.
If a Large Model is the target of an Attack with the Area Trait, it suffers only the Effect intended for the target, even if it occupies multiple Squares within the Area.
If a Large Model is not the target of an Attack with the Area Trait and occupies more than one Square within the Area, it suffers the additional Effect only once.
Large Models and Line of Sight
A Large Model always has a valid Line of Sight on all other Models and vice versa.
Plotbook
H1 - The Ritual
H1-1
You decide to dig deeper into the words of the poor people you have met. You head to their village and discover that the population is being harassed by a group of bandits who have found safe refuge in the nearby forest at the base of a hill.
The village chief, a certain Luca da Riace, tells you that this group of criminals calls themselves "The Flaming Hand." They wear predominantly red clothes and some of them proudly display burns on their bodies or faces.
The village chief offers to pay you a good sum of money if you can drive them off their lands...
... Then he leaves, muttering to himself about a quick change of jobs.
- Reveal [1].
H1-2
In the heart of the forest, you come across a marshy clearing that blocks your path. You are considering how to cross it without becoming stiff terracotta soldiers when a figure appears from behind a tree between you and the marsh.
The man gives you a stunned look—it's clear he wasn't expecting visitors—then he recovers, quickly fastens his pants and, putting two fingers to his mouth, lets out a deafening whistle.
Only now do you notice his clothing in shades of red and his disfigured face. It seems that the surprise effect has faded. Three individuals armed with long rifles rush from the woods beyond the swamp.
- Reveal [2], then continue reading.
- The Stradiot Model represents the Redeemer of the Flame in this Mission.
- Reveal [3], then continue reading.
- The Arquebusier Model represents the Judge of the Flame in this Mission.
- Reveal [4].
H1-3
Beyond the marsh, reddish glows are reflected on the vegetation, similar to those produced by a large bonfire. However, there is something unnatural about them.
The same light seems to dance in the eyes of the man standing in front of you.
- Place an Event Token on the Gemini and Sagittarius Sectors of the Horologium.
- Reveal [5], then continue reading.
- Reveal [6].
H1-4
From the branches of the trees, other followers of the Flame throw themselves on you, ready to give you battle. It seems that they don't want you to find out what they are planning.
- Place 2 Stradiot Models on Tile 1A in Squares adjacent to the Tree or, if occupied, in Available Squares as close to the Tree as possible.
- If not present, place the Enemy Activation Token in the Horologium Sector following the Active one.
- Continue the Mission.
H1-5
In front of you, a recently burned portion of wood opens up. Several individuals sing a low singsong inscribing symbols in the still smoking ash.
You are not facing ordinary bandits, but a sect, devoted to a deviant cult, intent on celebrating an arcane ritual. A ritual you intend to stop.
Setup: Take the following from the box:
-
Tile 2A
-
3x Burned Tree
-
1x Stradiot (Redeemer of the Flame)
-
Reveal [7].
H1-6
Other enemies come out to protect their companions. They too bear the marks of severe burns, as if they had been branded on the face by a red-hot metal hand.
- Place 2 Stradiot Models [blue icon] and 2 Arquebusier Models [orange icon] as shown on the Map.
- If not present, place Enemy Activation Tokens in the Horologium Sector following the Active one.
- Reveal [8].
H1-7
The ritual reaches its climax. The occult forces it was trying to harness become tangible and envelop three of the followers of the Flame, consuming their flesh and bones in a whirlwind of incandescent flames from which infernal creatures emerge.
- Remove all Enemy Models in the Game Area from the game, except for the Myrmidon Models.
- Place the Myrmidon Models in the Squares indicated on the Map.
- If not present, place the Myrmidon Activation Token in the Horologium Sector following the Active one.
- Remove the Event Tokens from the Horologium.
- Discard [5].
- Reveal [9].
H1-8
You routed all the followers who crossed your path and extinguished the flames of the creatures some of them had turned into.
You warily approach the pyre in the center of the scorched clearing, with the flames continuing to burn with an unnatural brilliance even now that there are no more followers of the Flaming Hand. Some tongues of fire appear to form a figure, but the light suddenly becomes too strong for you to keep your eyes open. You are enveloped in an intense but restorative heat, which a few moments later vanishes as if it were sucked into the pyre.
When you manage to open your eyes again, the pyre has disappeared and a huge figure stands out in front of you, spreading its enormous wings and lowering a fiery gaze upon you.
You must face it if you want to get back to the village.
- Each Hero discards an Injury.
- Start Mission H2 Titan Hunt, without performing a Rest Phase.
H1-9
The adepts of the Flaming Hand prove to be very stubborn and resolute. They won't let you get close to the heart of the ritual. You are having the worst of it and decide that a tactical escape is your best chance to recover and regroup.
Unfortunately, some of you have suffered injuries caused by a magical fire that needs more effective healing than the simple herbs you have.
- Each Hero that has at least 1 Wound Token on their Hero Sheet rolls 1 [triangle icon], if they do not obtain [badge icon]; draw a Card from Hyperion's Injuries deck. The Hero gains the Injury described on the drawn Card.
- You may choose to erase The Ritual from Active Side Missions. If you do, place the "A World in Flames" Event Card in the Event Card Deck.
- You must quit this Side Campaign.
- Perform a Rest Phase in the Town or Village where you are to play the next Campaign Mission.
H1-10
High flames shroud the body of the defeated enemy. You shield your eyes from the heat—sparks and tongues of fire dart all around. When the flames die out, a strange being arises from the charred remains—an armor of the ancient Greek Myrmidons, animated by the power of the Flame, prepares to attack.
- Replace the defeated Model with a Myrmidon Model.
- If not present, place the Myrmidon Activation Token on the Horologium Sector following the Active one.
- Return the Mutation Token to Slot 1 on [5].
Playing with Hyperion in a Game of Black Rose Wars: Rebirth
Game Components
- 1 Mage Card: Hyperion can be chosen as a Mage during step 8 of the Setup described in the core game rulebook.
- 1 Reference Card
- 3 Hyperion Cells
- 3 Personal Spell Cards
- 1 Forgotten Spell Card: Add this card to the Forgotten Spells Deck of the core game.
- 1 Forgotten Evocation Card: Add this card to the Evocation Deck of the core game.
- 3 Evocation Cards: Add these cards to the Evocation Deck of the core game.
Setup
During the Setup described in the core game rulebook, apply the following at the steps indicated:
- Step [8]: Hyperion can be chosen as a Mage. The player takes the Model of Hyperion and the three Myrmidones. The player using Hyperion and the Myrmidones does not have to clip any Mage Base to the Models.
- Step [8]: Place the Mage Card on the Mage Sheet so that it shows the Hyperion side.
- Step [9]: Remove the A Burning World card from the Forgotten Spells Deck.
- Step [11]: after revealing the Cells, the player using Hyperion replaces the Cell of their color with a Hyperion Cell, then places the other two on the perimeter of the Lodge in any position, so that they have 2 additional Cells for Hyperion.
Hyperion Special Rules
When the Mage Card shows the Hyperion side, use the following rules:
- Your [gear icon] target [1 icon].
- Once you are defeated, remove the Hyperion Model from the Lodge and place a Myrmidones in each of your Cells, then turn your Mage Card over to the Myrmidones side.
Myrmidones Special Rules
When the Mage Card shows the Myrmidones side, use the following rules:
- All Myrmidones are considered Models of your Mage.
- The 3 models of Myrmidones share the Health value indicated on the Mage Card. If a Myrmidones suffers Damage, it is deducted from the shared Health.
- When you need to perform an Action you first choose which of your Models performs it.
- When you need to resolve/apply an Effect that takes your Mage into consideration without targeting a specific Myrmidones Model, choose which of your Models resolves/applies the Effect.
- When you perform the Momentum Action, perform it with each of your Models.
- You can perform the Phalanx Physical Action.
- When you are defeated, remove the Myrmidones Models from the Lodge and place the Hyperion Model in one of your Cells, then turn your Mage Card over to the Hyperion side.
Phalanx (Physical Action, [icon])
- Move a Myrmidones up to 1.
- That Myrmidones performs [icon].
- Move up to 1 a Myrmidones that did not move with this Physical Action.
- That Myrmidones performs [icon].
- Move up to 1 a Myrmidones that did not move with this Physical Action.
- That Myrmidones performs [icon].