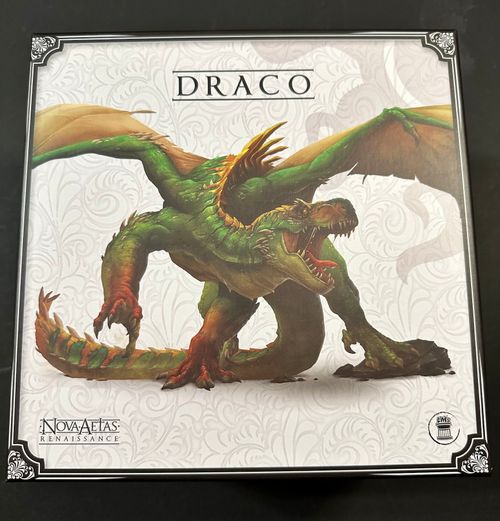
Nova Aetas Renaissance: Draco
Nova Aetas Renaissance: Draco Rulebook
Table of Contents
Table of Contents
Components
- 1 Draco Miniature
- 27 Mission Cards
- 3 Mission Envelopes
- 1 "I Saw a Devil" Event Card
- 22 Draco Action Cards
- 4 Reward Cards
- 1 Achievement Card (Key)
- 2 Activation Tokens
- 4 Remains Tokens
- 3 Crate Tokens
- 8 Shadow in the Mist Tokens
- 3 Wound Tokens
How to Use this Expansion
This Expansion adds a new Side Campaign to be included in any Nova Aetas Renaissance Campaign of the Core Game or any Expansion.
This Side Campaign comprises two Encounter Side Missions and a Hunt Mission, to be played in order starting from Mission D1 - An Incredible Discovery.
If you decide to use the Draco in your Campaign, add the Event Card found in this box to the Campaign Event Card Deck.
If you draw the Event Card "I Saw a Devil" during a Travel Phase, you can decide to undertake it like a normal Side Mission.
Once you begin this Side Campaign, you must play the 3 Side Missions it is made up of consecutively, starting from Mission D1 - An Incredible Discovery.
Quitting the Side Campaign
At the end of Mission D1 and D2 you might have to abandon the Side Campaign.
If this happens, put the Event Card "I Saw a Devil" back in the Event Card deck and play the next Main Campaign Mission.
You can undertake this Side Campaign again in the future, but if you have never completed it before you must always begin from Mission D1 - An Incredible Discovery.
Hunt Mission
Mission D3 of this Side Campaign is a Hunt Mission and follows all the rules for this type of Mission, described in the core Rulebook of Nova Aetas Renaissance.
Completing the Side Campaign
After playing Mission D3, no matter the result, follow the normal rules to resume the Nova Aetas Renaissance Campaign. If you want to face the Draco again in the future, you must only play Mission D3, without playing the whole Side Campaign again.
Mark this Hunt among the available ones on the Campaign Sheet if at least one Hero visits the Inn during a Rest Phase.
Bounty
Instead of waiting to draw the Event Card "I Saw a Devil," at any point in the Main Campaign you can mark the title of this Side Mission in the Active Side Mission Slot and play it as if you had drawn the Event Card "I Saw a Devil."
Large Models
Some Models occupy more than a single Battlefield Square. These Models are called Large Models. These Models occupy only a single Square during movement. In other words, while moving, a Large Model is considered as a normal Model, and then returns to occupying more Squares the moment the movement ends. When players need to determine the movement of a Large Model, they choose any of the Squares occupied by the Model and count starting from the chosen Square (a normal-sized Model can be used to simulate the movement of the Large Model). When the Large Model finishes its movement, the players place the Model so that the Squares occupied include the Square where it finished its movement. If placement is not possible because the required Squares (usually 4) are not all available, players refer to the following rules:
- If there are Models occupying the Squares, the Large Model pushes the Models occupying them into adjacent available Squares or the nearest available Square.
- If there are Scenic Elements occupying Squares, place the Large Model in Squares that are available or occupied by other Models. If this is not possible, the Large Model ends its Movement in a Square that allows its placement.
Large Models and Area Effects
A Large Model is considered to be targeted by an Attack with the Area Trait if at least one of the Squares it occupies is within the Area of the Attack.
If a Large Model is the target of an Attack with the Area Trait, it suffers only the Effect intended for the target, even if it occupies multiple Squares within the Area.
If a Large Model is not the target of an Attack with the Area Trait and occupies more than one Square within the Area, it suffers the additional Effect only once.
Large Models and Line of Sight
A Large Model always has a valid Line of Sight on all other Models and vice versa.
Hunt Deck for Missions D2 and D3
Two of Draco's Missions have a special setup as they include two different modes for the Hunt.
D2 Mission
Set up Draco's Action Card Deck by including only the Cards that have the card number in yellow (e.g. 3) and excluding the 6 Draco Action Cards that have the card number in red (e.g. 3).
D3 Mission
The 6 Draco Action Cards marked with a red number are to be placed in sequence in the Draco Deck, after the card with the same number (e.g. the red-numbered 3 goes after the card numbered 3).
Source note: the printed page also carries an Italian gloss of this example ("la carta con 3 va posta in sequenza dopo la carta 3"); it is a translation residue and is omitted here.
Plotbook
D1 - An Incredible Discovery
D1-1
You are at the inn for a break, savouring local specialities, when your attention is drawn to a parchment attached to the counter. It reads: "On account of the substantial number of lamentations of merchants robbed on the road towards Civita di Bagnoregio, the mayor offers a handsome reward for the recovery of the stolen goods and a special prize for the killing of the felons responsible for such crimes."
After lunch, you go straight to a guard post to get the necessary information and set off.
- Reveal 1.
D1-2
You reach the silent woods at the foot of the limestone hill hosting the village. After a careful investigation, you spot a small camp, set near some old ruins. You see the bandits, undoubtedly Nordic mercenaries, leisurely eating and discussing in their own language. Around them are scattered sacks, barrels and chests bearing a variety of emblems–wares clearly belonging to different convoys and owners. A thin-faced guy leaned on a cart–who is playing with a key dangling from his neck seems to be the boss. You decide to take this opportunity to sneak up on them.
- Reveal 2, then continue reading.
- The Stradiot Model represents the Felon in this Mission.
- Reveal 3, then continue reading.
- The Gunslinger Model represents the Bandit in this Mission.
- Reveal 4, then continue reading.
- The Moldovian Guard Model represents Ippolito in this Mission.
- Reveal 5.
D1-3
The bandits are more tenacious than you expected and you must opt for a clumsy escape attempt. You barely survive the bullets whistling dangerously near your heads and get to safety. Wounded and mortified, you ask yourselves if it would be wiser to avoid such skilled outlaws.
- You may decide to erase An Incredible Discovery from the Active Side Missions. If you do, shuffle the Event Card "I Saw a Devil" in the Event Card Deck.
- You must quit this Side Campaign.
- Perform a Rest Phase in the Town or Village where you are to play the next Campaign Mission.
D1-4
You draw near, cautiously staying in the bushes, looking for a good spot from which to launch your assault at the bandits' camp. With a good use of surprise effect, recovering the stolen goods should not be that hard.
The hard part is opening the biggest chest in sight. It's a colossus of yellow-tinted wood and metal, so solid it seems armored. It features many elaborate locks that remind you of a creation of Leonardo Da Vinci, famous for the complexity of his creations.
- Reveal 6.
D1-5
The chest bearing Da Vinci's lock seems more fortified than the Pope's stronghold–brute force won't help with it.
- If you have [D1 item icon] D1 read [book icon] D1-8, otherwise, perform the following Test:
- Test [attribute icon] - [search icon] Search +1 [bonus icon]; [search icon] Lockpicking +1 [bonus icon]
- 4+ [success icon]: read D1-8.
- 0-3 [fail icon]: picking the lock is beyond your skills. Continue your Activation.
D1-6
You cannot spend much time with this chest's lock, or you risk getting hit. You do your best to open it quickly.
- Perform the following Test:
- Test [attribute icon] - Brutality +1
- 3+ [success icon]: read D1-9.
- 0-2: you are unsuccessful in your attempt. Continue your Activation.
D1-7
In the heat of the fight, you open the crate, which is not locked. You quickly stretch your arm inside and pick up a big tome, elegantly bound, with a sapphire set in the middle of the cover.
- Flip the Blue Crate Token on the side with the book "Il Milione" and place it on your Hero Sheet.
- Continue your Activation.
D1-8
You raise the heavy lid and unveil the chest's content. You will have time to inspect it later–right now, you just snatch everything and get back up, on guard.
- Flip the Yellow Crate Token on the side with the Treasure and place it on your Hero Sheet.
- Continue your Activation.
D1-9
The lock opens with a click. You pull out a small, sealed casket. There are no locks or keyholes on it,–it'is clear that the bandits had no idea how to open it either.
- Flip the Green Crate Token on the side with the Casket and place it on your Hero Sheet.
- Continue your Activation.
D1-10
You manage to retrieve most of the loot. Some things were destroyed, others must have been sold by the bandits already. After a brief walk in the woods you get back on the street that climbs the cliff to the village. There, you are welcomed by the mayor, some merchants and a few curious locals. The merchants barely pay attention to you and throw themselves on their belongings. The mayor thanks you and assures that you will receive the reward you deserve.
Once the merchants, clearly satisfied, leave the square, you notice that a piece of parchment was left on the ground. It is an ancient map of the village and the surrounding areas, on which a writing stands out, reading: "The Devil protects us and protects its interests."
- Gain rewards from merchants for each item recovered:
- Treasure: 10 [coin icon].
- Il Milione: 1 Philosopher's Stone.
- Casket: you may immediately craft Equipment after revealing the Loot.
- Each Hero discards an Injury.
- Start Mission: D2 An Unexpected Encounter, without performing a Rest Phase.
- If all Enemies have been defeated, read D1-11.
D1-11
The mayor, visibly relieved, thanks you for removing the bandits' menace and hands you an additional reward–a bizarre leather armor that looks like something out of an ancient fable.
- The Heroes gain [D1 item icon] D1: Draconic Armor.
D2 - An Unexpected Encounter
D2-1
The warm welcome you receive at the inn in Civita di Borgoregio vanishes when you start asking the folks who want to thank you for your efforts information about the map you stumbled into. Someone confirms it is a map of this area, although worn out and incomplete, but once they notice the sentence "The Devil protects us and protects its interests" they get annoyed and walk away, shaking their head.
"Eeeheheheh—are you here to hunt the Devil?" A man with streaked hair and a hollowed face drew near you table. "You're already dead then! You don't know it yet, but you're dead!" Before you can answer, he points something on the map: "This big, split stone is its lair! I know it well, being that I come from Elsewhere."
While you still try to focus that point of the map, the man leaves the inn. You are thinking of getting up and follow him, but the innkeeper brings you back to reality. "Pay no heed to him," he says dropping mugs full of foaming beer on the table. "Ol' Nando has a screw loose. He's been living here for many years but he's always been—extravagant, let's say."
Yet, your instincts tell you there is more than just madness in that man. Curiosity has the best of you—you leave the beverages untouched and hurriedly go for the door, hoping to find him outside. You immerse yourselves in a foggy evening. A dense mist blurs the houses' contours and you cannot find your bearings in this unfamiliar village. Shadows move around you, but when you get closer you realize they are only illusions created by the mist.
Suddenly, you hear the old man's laughter. You try to follow it, but a sound unlike any you have ever heard makes you turn—a huge shadow moves in the square, sniffing the air, looking for something. The Devil is here!
- Reveal 1.
D2-2
A fiery breath clears the mist for an instant, letting you see a glimpse of a monstrous reptile, with huge, membranous wings. It senses you in the damp air and gets ready to attack.
- Place the Draco Model on the [Draco icon] Squares indicated on the Map.
- Shuffle the Shadow in the Mist Tokens and place them on the [Shadow icon] Squares indicated on the Map.
- Shadow in the Mist Tokens are considered to be Models.
- Place the Draco Activation Token on the Aries Sector of the Horologium.
- Place the Shadow in the Mist Activation Token on the Aquarius Sector of the Horologium.
- The Shadow in the Mist Activation Token is not considered an Enemy Activation Token, so it is not considered for the purpose of determining the minimum [hourglass icon] a Hero must spend.
- Reveal 3, then continue reading.
- Reveal 2.
D2-3
The ancient creature is stronger than you–that Draco is a Devil indeed. You flee before it's too late, running down a steep slope shrouded in a thick mist, the same mist that hindered you earlier, now helps cover your escape.
- You may decide to erase An Incredible Discovery from the Active Side Missions. If you do, shuffle the Event Card "I Saw a Devil" in the Event Card Deck.
- You must quit this Side Campaign.
- Perform a Rest Phase in the Town or Village where you are to play the next Campaign Mission.
D2-4
You reach the old man's house, near the central plaza. It is an old building made of thick tuff bricks, damp and covered in moss. All over the outer walls, big blackened nails hold in place a number of paper strips. The old man ushers you in. "We'll be safe here, the pages of the Bible protect us." The house interior reflects the owner—the room is a chaotic mess. Ol' Nando quickly throws on the ground a pile of stuff that hid an old, dirty table. "Hurry, bring the map." He points at the split stone on the map again and continues. "This is the Devil's lair—and the passage to go back to my lands, to my world." The man turns sad. "Please, kill it! I must cross the threshold." The town is now shrouded in silence—the Draco must have retreated. It is time to go from prey to hunter.
- Ol' Nando gives you 2 Healing Potions (if available) and 2 Panaceas (if available).
- Start Mission: D3 Draco Hunt, without performing the Rest Phase.
D2-5
You ignored the old man and focused on the monster that invaded the town, forcing it to retreat. Covered by mist, it threw itself beyond the balcony on the southern slope of the hill and dived in the thick woods. You only have to follow it and deal the final blow.
- Start Mission: D3 Draco Hunt without performing the Rest Phase.
D2-6
The Draco claws Ol' Nando brutally, inflicting a fatal wound. While the light abandons his eyes, the Draco lifts off and plunges over the balcony on the southern slope of the hill. You cannot lose heart now, you must follow the Draco before you lose it and find its lair. The map could be crucial now—the split rock pointed out by Ol' Nando is you best lead.
- Each Hero must start the next Mission with a Disadvantaged Token.
- Start Mission: D3 Draco Hunt, without performing the Rest Phase.
D2-7
Ol' Nando's crooked smile emerges from the mist. He tells you to follow him—his house is a safe place, he says, Devil-proof.
- Reveal 4, then continue reading.
- Leave the Ol' Nando Token in its Square. From now on, it represents his Model.
- Remove all other Shadow in the Mist Tokens from the Battlefield.
- Continue your Activation.
Material for Black Rose Wars and Rebirth
Source note: this final page of the publisher's PDF is a Black Rose Wars and Rebirth add-on ("Material for Black Rose Wars and Rebirth"), printed in the same file as the Draco Side Campaign. It is transcribed here as its own section. The card text is taken from the card art on the page.
You may use the material listed below and the Draco Miniature to add a new Forgotten Spell to your Black Rose Wars and Rebirth games.
- 1 Forgotten Spell Card: add this card to the Forgotten Spells Deck of the core game.
- 1 Forgotten Evocation Card: add this card to the Evocation Cards Deck of the core game.
When you prepare the Forgotten Spells Deck, add the "Dracaris" card and put the Draco Evocation cards among those available for the game.
Dracaris (Forgotten Spell)
- Remove all your Evocations.
- Defeat all [Model icon] from the Target Room.
- Summon Draco.
Draco (Forgotten Evocation)
Beast — Forgotten. Three stat values, 2, 3 and 6, appear beside pictograms on the card (the pictogram names are not printed in the text layer, so they are not named here).
When resolving an Effect with the summon keyword, do not summon any Model, instead heal 1 [wound icon] on Draco. When Draco suffers [wound icon], it suffers 1 of those [wound icon] and ignores the others.