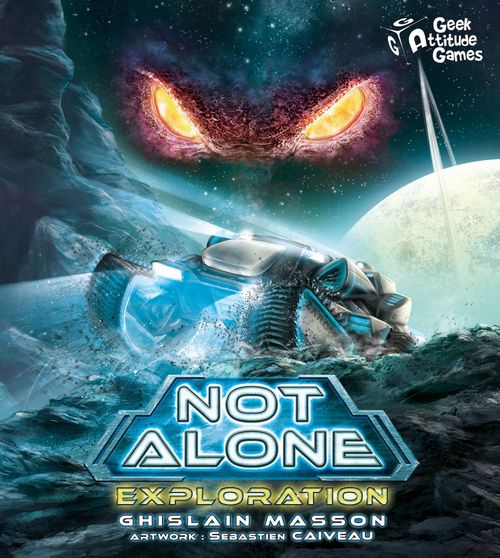
Not Alone: Exploration
Not Alone: Exploration Rulebook
Table of Contents
Table of Contents
Before Starting
Replace the Drone, Ingenuity, and Amplifier Survival cards in your copy of NOT ALONE with the expansion cards of the same name. Add the other new Survival cards to the base game.
Replace the Interference Hunt card in your copy of NOT ALONE with the Interference card from the expansion. Add the other new Hunt cards to the base game.
This expanded range of Hunt and Survival cards can now be used with any combination of places in NOT ALONE and EXPLORATION.
Components
53 Place cards, 15 Survival cards, 13 Hunt cards, and 1 rulebook.
Set-up
In general, set-up for EXPLORATION is the same as the base game.
Start by choosing the ten places that will make up the planet Artemia. Make sure you've chosen a place corresponding to each number between 1 and 10.
Depending on your familiarity with NOT ALONE, you can use all ten expansion cards from the outset or swap them in gradually. If you're doing the latter, we recommend starting with just the new places numbered 6-10. Set up the rest of the play area as you would the base game.
Note that three of the new places have specific rules for set-up:
- THE DOME: The Marker counter from the base game is now known as the Shield counter. Put it on Place 1 of the planet Artemia [1].
- THE LABYRINTH: Take the five Place cards numbered 6-10 that you have chosen for the planet Artemia. Shuffle them, and deal them out face down beneath places 1-5 [2]. Use the rest of the corresponding Place cards numbered 6-10, face up, to make the reserve. Make sure you adjust the total of each Place card in the reserve according to the number of Hunted [3].
| Hunted | 1 | 2-3 | 4-6 |
|---|---|---|---|
| Cards in the reserve | 1 | 2 | 3 |
- THE POLE: There are only two copies of the Pole card in the expansion. Use the first to form the planet Artemia [2] and place the second in the reserve, irrespective of the number of Hunted [4].
Notes on New Place Cards
THE NEXUS: If the Creature catches at least one Hunted on the Nexus, the Assimilation counter moves forward 2 spaces, instead of the normal 1.
THE OASIS: The Hunted takes back the played Place card, plus one from his discard pile for each of his missing Will counters, until his discard pile is exhausted. If no Will counters have been lost, no extra Place cards are taken.
THE FJORD: In Phase 1 of the next turn, the Hunted plays 1 Place card from his hand, face down, and 1 Place card from his discard pile, face up. If there are no Place cards in his discard pile, he may only play the 1 Place card from his hand. At the start of Phase 3, the Hunted must choose which of his 2 Place cards to explore. In Phase 4, he discards both Place cards.
THE DOME: As it moves between places 1-4, the Shield token offers no protection to the Hunted. Hunt tokens and Hunt cards operate as normal. The Shield action only applies when the Shield token reaches the Dome.
THE LABYRINTH: To reveal a place, turn over one of the 5 face-down Place cards in the planet Artemia so that its face is revealed. If a place hasn't been revealed yet, it is inaccessible for the Hunted.
THE MANGROVE: If a Hunted reveals the Mangrove as a consequence of the Labyrinth and uses its power immediately, neither the Mangrove nor the Labyrinth are taken back in hand. Apply the same rule if the Labyrinth reveals the Swamp from the base game.
THE ARCHIPELAGO: The Hunted who activates the power of the Archipelago may heal himself or heal another Hunted. If there are no more Survival cards to draw, shuffle the discards to make another draw pile.
THE POLE: Once the Pole card is played, it returns to the reserve in Phase 4 whether or not its power has been activated. The power is activated even if a Hunted loses his last Will counter to do so.
THE FUNGI: Place up to 2 Will counters, one per space, on free spaces of the Rescue track between the Rescue counter and the Victory space. When the Rescue counter moves onto one of these spaces, the Hunted decide between themselves who should receive the Will counter.
This aspect of the Fungi's power may not be used if the reserve of Will counters is empty, or if there is no free space on the track. If a Hunted needs to take back one or more Will counters but the reserve is empty, he must take the appropriate number of Will counters from the Rescue track. If there is a choice, he may choose which to take.
Note: a Hunted may never have more than three Will counters and the number of Will counters in play may not exceed three per player.
THE PORTAL: It teleports a Hunted to another place. This means he may be caught on the second place by Hunt tokens and/or Hunt cards! The Portal is discarded in Phase 3 and the second Place card in Phase 4.
Notes on Hunt Cards
TEMPORAL RIFT: If there are 2 Hunted on the target place, move the Assimilation counter forward 2. If it reaches the Victory space, the Creature wins the game. If it does not, move the Rescue token forward 2 spaces.
HUNGER: If a Hunted copies the power of the place with the Creature token, he may only copy one of the two selected places.
INERTIA: The Target token's effect is resolved immediately after the Place cards are revealed. If this results in all the places' powers becoming ineffective, the effects of the Creature and Artemia token are still applied.
UBIQUITY: When you swap the Hunt token, if a token straddles two adjacent places, the token that replaces it must also straddle these two places.
Further Notes
Copy the power of a place: This effect lets you use the power of a revealed place without playing its card, even if the place is ineffective or inaccessible. A Hunted who copies a place's power is immune to the effects of any Hunt tokens on the copied place.
Instead of using the power of your Place card, copy [...]: It applies only if the Hunted can use the power of the initial card he played in Phase 1.
Inaccessible place: The Hunt tokens may be placed on, or moved to, inaccessible places.
Ineffective place: The power of an ineffective place may be copied, if the appropriate Place or Survival card is played.
Immediately after Place cards are revealed (Phase 3), [...]: The effect of the Hunt card is applied as soon as all the Hunted have revealed their Place cards, but before they resolve them.
Rules Reminders
All Hunted must play a Place card during Phase 1. The Resist and Give Up actions allow a Hunted to manage his hand before playing a Place card.
Unless explicitly indicated, the effect of a Survival card applies to the Hunted who played it, and only lasts one turn. Being caught by a Hunt token does not prevent the play of a Survival card.
If a Hunt token straddling two adjacent places is moved, it must be moved to a single place adjacent to one of the cards that it initially straddled.
Instead of using the power of a Place card in Phase 3, a Hunted may always take back 1 Place card of his choice from his discard pile. However, if he is prevented from using the power of his Place card, he may not choose to take back a card instead.
The Labyrinth Card Variant
Set-up
- Place the four Place cards numbered 1-4 that you have chosen for the planet Artemia plus the Labyrinth in place 5.
- Take one of each Place card numbered 6-10 from the base game and one of each numbered 6-10 from this expansion. Shuffle these ten cards together to form a draw pile, face down, next to the Labyrinth.
- Use the rest of the Place cards matching these ten places to make the reserve. Make sure you adjust the total of each Place card according to the number of Hunted.
While Playing
If you use the power of the Labyrinth to reveal a place, take the top 3 Place cards from the face-down draw pile (2 if there are only 2 left). Then do as follows:
- Put one of these three cards, face up, in an unoccupied space below places 1-5 in the planet Artemia. Then you may use the power of this chosen place or take the matching card from the reserve.
- Discard a second card, face up, next to the draw pile. Remove all cards matching this one from the reserve.
- Place the third card, face down, on the bottom of the draw pile. If there were only 2 cards left in the draw pile, skip this step.
Neither the discard pile nor the planet Artemia may contain two places with the same number! You may look at the discard pile at any time. When the draw pile is empty, remove the discard pile from the game.
Sequence of Play
The sequence of play and the resolution of each phase are the same as those in the base game.
A reminder of the sequence of play in Phase 3:
- Any Hunted who have a choice of Place cards (for example, Hunted who used the powers of the Fjord or the River on the previous turn) choose the place that they wish to explore. Then all Hunted reveal their Place cards simultaneously.
- The order of resolution goes as follows: places with no Hunt tokens are resolved first. Then, the place with the Target token, if applicable. Then, the place with the Artemia token, if applicable. Then, the place with the Creature token. Each step is resolved in a clockwise direction, beginning with the player to the left of the Creature.
End of Game
The win conditions are the same as those in the base game. If the Assimilation token gets the Victory space first, the Creature wins. If the Rescue token gets there first, the Hunted win.