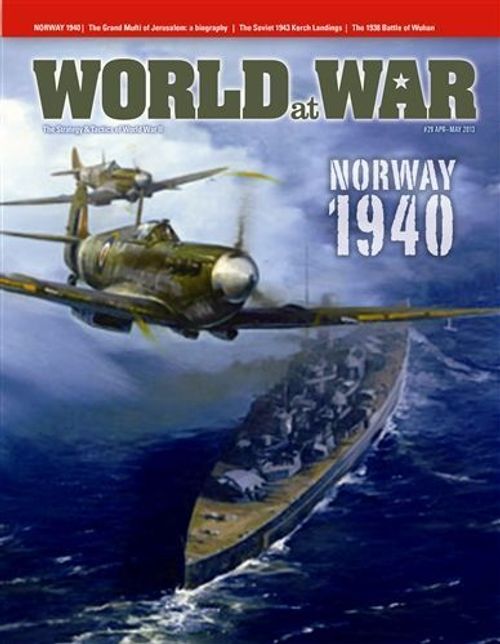
Norway 1940 (2013)
Norway 1940 (2013) Rulebook
Table of Contents
Table of Contents
- 1.0 Introduction
- 2.0 Components
- 3.0 Set Up
- 4.0 How to Win
- 5.0 Control
- 6.0 Sequence of Play
- 7.0 Random Events
- 8.0 Stacking/Mobility Restrictions
- 9.0 Actions
- 10.0 Movement Continuity
- 11.0 Combat
- 12.0 Reinforcements/Withdrawls
- 13.0 Refit
- 14.0 Fog o' War
- 15.0 Bases, Disruption & Recovery
- 16.0 Map Home Bases
- 17.0 Special Units
- 18.0 Shock Effect
- 19.0 Optional Draw Game
- 20.0 Optional Rules
- 21.0 Supply
- 22.0 Airbasing Limitations
- 23.0 Entrenching
- 24.0 Aircraft Carrier Depletion
- 25.0 Actions List
- 26.0 Events List
- 27.0 Scenario (Norway, 1940)
- Rules Changes, Additions, Clarifications
1.0 Introduction
Norway, 1940 is a wargame based on the award-winning Red Dragon Rising system, simulating the German combined naval-air-land campaign to conquer Norway in 1940. The historical campaign was a German victory, but at the cost of much of the Kreigsmarine.
There are two players: the German player and the Allied player.
1.1 Game Scales
Most ground units represent either brigades or regiments.
Aircraft units represent Luftwaffe gruppen, or groups of three Allied squadrons (i.e., 36-60 aircraft).
Ship units mostly represent one fleet aircraft carrier, divisions of two battleships, or four cruisers, squadrons/flotillas of about 6 to 12 destroyers, or various numbers of other ships types. Each game turn represents one half-week of operations.
1.2 System
The game system is based on Red Dragon Rising and South Seas Campaign, which appeared in Strategy & Tactics and World at War. However, some substantial changes have been made for purposes of this game. Note that these rules changes are not retroactive to prior games in the system.
1.3 Rules Color Codes
Critical notes and exceptions are printed in red, whereas examples, designer's notes and historical notes are printed in blue. "Actions" that are specific to the Allied player (see 25.0) are printed in Orange (i.e., only the Allied player may play orange Actions), whereas actions that are specific to the German player are printed in Purple (i.e., only the German player may play purple Actions). Actions printed in black can be played by either player.
2.0 Components
A complete game of Norway 1940 includes these rules, the mapsheet and 228 die-cut counters. Players will need a six-sided die to resolve combat and events during play.
2.1 Game Map
The game map is drawn to emphasize the strategically critical sea zones and land areas on and near Norway. Additionally, there are areas representing Home bases: the Third Reich (Germany) and Britain (Allies). Every unit in the game is considered to be in only one sea zone or land area at any one time.
Map Errata: On the +3 and +2 rows of the German VPs chart, the reference to "Allied" should be printed as "German" instead.
Map Displays
- Special Reinforcements. Units that are available under certain circumstances.
- Bases Available. Base units which are not yet built, or which have been destroyed, are placed here.
- Units for Refit. Units that were on the map but were eliminated via combat or other reasons are placed here (see the Refit rule; 13.0).
- Units Destroyed. Units that have been destroyed permanently are placed here (see the Refit rule; 13.0).
- Units Withdrawn. Units withdrawn by specific game events are placed here.
- Events in Play. Random events that are in effect or which the player is maintaining for future use.
- Events Discarded. Random events that have been played and then permanently removed from the game, per each marker explanation.
2.2 Counters
There are 228 unit counters representing land, sea and aerial combat units. Other counters are provided as memory aids.
Counter Errata: the following units should be printed as "Reinf" on the back (as indicated by the scenario rules):
- British KOH Armor
- British 15 Infantry
- British 6 Antiaircraft
- British A/508 Mountain Infantry
Three (not only two) of the following units should be printed as "Start" on the back (as indicated by the scenario rules):
- British Skua B air unit
The following units should be printed as "Spec Reinf" on the back:
- British HL Mountain Infantry
- German Bismarck BB
- German Graf Zeppelin CV
Additionally, there are two German 138 infantry units; One should be printed as "139" instead.
The "Fall Greb" chit should be "Fall Gelb".
2.3 Sample Combat Unit
Movement and Range Factors. The parenthesized number is the unit's movement (naval and ground) or range (air).
Backprinting Reinforcement Codes. Units are backprinted with information to indicate their placement or arrival on the map.
- Start = deploys at start of game.
- Reinf = reinforcement unit.
- Spec = special reinforcement.
Exception: Aircraft carrier units can be flipped to their back side and placed below an explosion (hit) marker if playing with optional rule 23.0; it represents a carrier with most of its organic air group shot up.
2.4 Nationality & Background Colors
A unit's nationality, the side to which it belongs during play, is shown by its background color. In the game, all German units are friendly to all other German units. All Allied units, regardless of nationality, are friendly to all other Allied units. Friendly units can operate together without restriction in Norway, 1940.
- German Units: Gray
- Allied Units
- Norwegian: Light blue background
- British: Olive drab background
- French: Blue background
- Polish: Green background
2.5 Abbreviations
Units are printed with specific abbreviations; the abbreviations have no effect on play, and only exist for historical purposes.
German
- Br: Brandenburgers
- GG: General Goering
- KG 100: Kampfgruppe 100
- KM: Kriegsmarine
- MG: Machinegewehr
- NbFz: Neubaufahrzeug
- SST: SS Totenkopf
Allied
- BACP: Bataillons Alpins de Chasseurs à Pied
- CA: Chasseurs Alpine
- Carp: Carpathian
- FM: Finnmark
- Gd: Guard
- HL: Highland (experimental mountain unit)
- HOK: Army High Command
- Ind: Independent
- KOH: King's Own Hussars
- LE: Legion Etrangere—Foreign Legion
- LW: Landswern
- RG: Royal Guard
- RM: Royal Marine
- SSB: Special Service Brigade
2.6 Ship-Type Abbreviations
Ship units, in addition to their identifying icons, also are printed with abbreviations of their types.
Aircraft Carrier Types
- CV: Aircraft Carrier
Combat Types
- BB: Battleship division
- BC: Battlecruiser division
- CA: Cruiser squadron
- CD: Coastal Defense
- CL: Light cruiser
- DD: Destroyer
- PT: Patrol torpedo boat or gunboat
Amphibious Types
- ATR: Armed Merchant Cruiser
- LCTR: Amphibious Landing Craft
- TR: Transport ships
Submarine Types
- SS: Attack Submarine
2.7 Aircraft-Type Abbreviations
Aircraft, in addition to their identifying icons, also are printed with abbreviations of their types.
Aircraft Types
- B: Bomber
- DB: Dive Bomber (Stukas)
- F: Fighter
- FP: Float Plane
- R: Reconnaissance
- SP: Seaplane
- Tr: Transport (air)
2.8 Ground Unit Types
The ground unit types in the game are identified by NATO-style symbols. Ground units are further broken into two broad (relative) categories: heavy and light. This heavy/light characterization is important in terms of the transportability, by sea and/or air, of each ground unit. Those symbols are as follows.
[The unit-type symbol chart is graphic in the source and is not reproduced in the text layer.]
2.9 Ground Unit Sizes
The size of each of the ground units in the game is indicated by the symbol atop each one's unit-type identification box. If that symbol is bracketed, it means that unit is ad hoc, or otherwise transitional in organization, or that the symbol is the nearest size equivalent to that unit. Those symbols are as follows.
- X = brigade, German kampfgruppe
- III = regiment, French demi-brigade
- II = battalion
- I = company or troop
2.10 Naval Vessels, Submarines, Surface Ships
There are two broad categories of naval vessels in the game: submarines and surface ships. If a rule is said to apply to "naval vessels," it applies to both submarines and surface ships. If a rule only applies to submarines or to surface ships, the appropriate naval vessel category will be used in that rule. "SS" are the submarine types in the game; all other naval types are surface ships. Within the category of surface ships are Aircraft Carriers, Combatants, and Transport craft (see 2.6).
2.11 Step Strength
A "step" is a wargaming term to describe the overall ability of a given unit to absorb some certain amount of punishment (hits) in combat prior to being eliminated from play and removed from the map. There are no two-step units in Norway 1940.
Note: A CV unit may be flipped to its reverse side and placed with an explosion (hit) marker if playing with optional rule 24.0).
2.12 Carrier-Based Aircraft
All the actual aircraft units in the game are land-based (or seaplanes based on water.) The aircraft aboard aircraft carriers are built in to those ships' combat factors, and are inseparable from them.
2.13 Static Ground Units
Certain ground units in the game are immobile once placed on the map. That is, once placed, they never move except to go into the dead pile. These have a movement of zero.
2.14 Memory Aid Markers
In addition to the combat units described above, the counter-mix also includes seven types of memory aid markers. Those markers are as follows.
- Battle is a reminder of which area a battle is taking place when units are removed from the map to resolve combat.
- Disruption indicates a land base that received sufficient damage to render it incapable of providing support, temporarily.
- Entrenched indicates a fortified zone. There are two sets of entrenchment markers, one for the Allies, and one for the Germans.
- German Airdrop Supply is used to indicate an area receiving parachute-dropped supply.
- Interception is used to indicate fighter units which can interrupt enemy air unit movement.
- Turn indicates the current game turn.
- Random Events (see 7.0).
Note: Random event markers are not units. They may not be used to conduct actions. The specific instructions for each are under their rules.
2.15 Important Definitions
The following terms in the game are explained below.
- Base. A general term for the following features printed on the map: airbases, ports, mobilization centers.
- Aircraft Carriers. CV units in the game are called aircraft carriers.
- Force. A force is one or more units conducting an action together. Generally, units comprising a force must begin their Action in the same area, and then move and/or attack into the same area. Also, if a player has more than one unit in an area, he may use less than all of them to compose a force. Composing a force is done on an Action-by-Action basis, and does not carry over to future actions or turns.
- Friendly & Enemy. A friendly unit is a unit you control. An enemy unit is a unit controlled by the other player.
- Transport. Any naval unit with a transport strength on the reverse is a transport unit. Note that this includes certain warships, as well as dedicated transport units.
2.16 Unit types
The following terms refer to specific game piece types, explained as follows.
- Air. Refers to all land-based aircraft units (e.g., P-40), but not to aircraft carrier units.
- Ground. Refers to all units with a NATO style icon (e.g., infantry, bases).
- Land. Refers to all ground and land based air units.
- Naval. Refers to all surface ships and submarine units.
- Surface Ship. Refers to all non-submarine naval units.
- Submarine. Refers to all submarine naval units.
3.0 Set Up
The Allied player starts and completes his side's set up first. Then, the German player conducts his set up.
3.1 Allied Set Up & Reinforcement Pool
The Allied player should set up his side's units according to the instructions provided on the Initial Allied Set Up Table. Allied units not initially deployed on the map constitute the Allied Reinforcement Pool. Place the Norwegian reinforcement units in one pool, and all other Allied units in a second pool. For details on their entry into play, see 12.0. The Set-up Table lists units by their specific type and sometimes unit identification. When any type of unit contains individual units within it that have differing factors, randomly pick the proper amount from among them.
3.2 German Set Up
Once the set-up of the Allies has been completed as described above, the German player should carry out the set-up of his forces according to the instructions given on the Initial German Set Up Table. German reinforcements are placed in a separate pool.
3.3 Scenario Set Up
See the game charts.
3.4 Game Turns
The game begins on Turn 1, and continues to the end of Turn 18, unless one side wins a sudden death victory, or one player concedes.
Actually, there is a pre first turn German action phase which consists of four Actions; On pre-turn activations, all German naval units have their movement factors doubled (No unit can be activated twice).
4.0 How to Win
There are two ways to win Norway, 1940 - sudden death, or by victory points.
4.1 German Sudden Death Victory
Play stops, and the German player is declared the winner, the instant that German player controls all mobilization and port areas in Norway.
4.2 Allied Sudden Death Victory
Play stops, and the Allied player is declared the winner, the instant that all of the following situations are created: 1) the Allies control three mobilization areas in Norway, 2) there are no German BC or CA units in any sea zones (they may be in the German Off Map area), and 3) there are three or more eliminated German air units.
Note: If playing with the optional variant units, case "(2)" above also includes BB and CV units.
4.3 Victory on Points
If no player has won a sudden death victory by the last turn of the game, then each player totals up victory points (VP) for objectives controlled and enemy units eliminated, listed as follows.
- VP for objective areas controlled by one or more friendly ground units (see 5.0).
- VP for enemy units eliminated include all enemy units in the Units for Refit and Destroyed boxes. Units that are being returned to play via refit are not counted.
Designer's Note: This means it is a good idea to refit units even if they do not make it back into play by the end of the game, to avoid losing points.
4.4 German VP
The German player is awarded victory points during the game as follows.
- +15 VP = control Oslo and Narvik (each).
- +10 VP = control of other Norwegian port areas (each).
- +2 VP = control Faroe islands.
- +3 VP = for each Allied CV, BB or BC eliminated.
- +2 VP = for each other type of Allied naval unit eliminated.
- +2 VP = for each Allied air unit eliminated.
- +1 VP = for each Allied ground unit eliminated.
4.5 Allied VPs
The Allied player is awarded victory points during the game as follows.
- +15 VP = control Oslo and Narvik (each).
- +10 VP = control of other Norwegian port areas (each).
- +2 VP = control Faroe islands.
- +3 VP = for each German air unit eliminated.
- +2 VP = for each German ground unit eliminated.
4.6 Variable Allied VP
Though all other eliminated German units award a specific VP value to the British player, the following types of German units award a variable VP value when eliminated, determined by a six-sided die roll (1D6) per each unit eliminated, and then modified (+) with the VP value listed as follows.
- CV, BB = 1D6 + 6 VPs
- BC = 1D6 + 5 VPs
- CA = 1D6 + 4 VPs
- CL = 1D6 + 3 VPs
- DD = 1D6 + 2 VPs
- SS = 1D6 + 1 VPs
- TR = 1D6
4.7 Levels of Victory
When calculating victory on points, subtract the number of VP of the player with the lower total from the number of VP of the player with the higher total. This therefore gives the final victory differential, which determines victory as follows.
- Strategic Victory: 36 or more
- Theater Victory: 24-35
- Marginal Victory: 12-23
- Draw: 0-11
5.0 Control
Players "control" zones in certain circumstances. Players can use their own control markers as a mnemonic. The control status of the various land areas on the map has a bearing on determining the winner of the game (see section 4.0), as well as determining which side's forces can make use of the base facilities (if any) located within them (see section 10.0).
Note: Sea zones on the map are never controlled by either player, regardless of occupation.
5.1 Norway
Zones in Norway can be controlled by either player. Initially, all land areas in Norway begin the game as Allied-controlled. This can change in the course of the game. A Norwegian land area becomes German-controlled if, at any point, a German ground unit occupies that zone and there are no Allied ground units in it. Place a German control marker there. Control reverts back to the Allied player if, at any time, an Allied ground unit moves into a German-controlled area, and there are no German ground units in it.
5.2 Contested Control
Contested control occurs if there are both German and Allied ground units in the same Norwegian land area.
Note: Control is only via having ground units in a space; you have to have "boots on the ground." Naval and air units can never control nor dispute control. And, obviously, only land areas can be controlled. Sea zones (and the skies) are never controlled by anyone.
5.3 Home Bases
The Allies always control Britain. The Germans always control the Third Reich.
Home bases are considered to be mixed land areas/sea zones on the map.
5.4 Geographic Peculiarities
Only German units may enter the Kattegat Sea Zone.
Old Hands Note: In this game there are no "zones of control."
6.0 Sequence of Play
Norway, 1940 is played in game turns. Each game turn consists of a sequence of steps, the outline for which is given below. Each time the Turn Record Phase is reached, move the turn record marker forward one space. If this is the last turn of the scenario, the game comes to an end, and victory is evaluated at that time. Also, if the conditions for a sudden death victory are reached at any point during the game, the game comes to an immediate end.
6.1 Turn Sequence of Play Outline
The Action Phase
Each turn of Norway 1940 has an action phase. At the start of each turn's action phase both players roll a die and compare the results. The player who rolled the higher number starts first action. The difference between the two rolls determines how many Action Points both players receive for that Action Phase. Mark this difference with some marker or a die. First player plays his first action, then second player plays his first action, then the first player plays his second action, followed by the second player playing his second action, and so on. Both players have the same number of action points to play.
Example: If the Allied player rolled a 4 and the German player a 1, then the Allied player would start first of his 3 activations, followed by the German player. Both players take theirs first actions, then second actions, and so on.
Number of Actions is determined by the difference of each player's die roll.
- Dice difference of 1: Each player has three actions, one Naval, one Ground and one Air in whatever order he choose. Each of these actions can be swapped for Reinforcements or Refit actions.
- Dice difference of 2: Each player has two regular actions, and a bonus third action for activation of Submarine unit(s) only.
- Dice difference of 3: Each player has any three actions.
- Dice difference of 4: Each player has any four actions.
- Dice difference of 5: Each player has any five actions.
- Doubles - both players roll the same die roll number: Each player starting with the German roll to check if Random Event occur. The German player picks an event chit on a die roll of 1-4. The Allied player picks an event chit on a die roll of 1-3. Other results are no effect. Any player may implement his event in that phase. Doubles do not count for a turn, rather as a mid-turn. It is a mid-turn, which is not marked on the Turn Record Chart. If any actions are triggered it is in that doubles rolled phase, that is between two turns.
If doubles are rolled again, another event checks happened, and the turn is not started yet, it is still a mid-turn.
Therefore, the minimum number of actions in a turn's action phase is three.
Each unit may be activated only once per turn.
After the second player played his last action, the turn is over. Advance the turn counter marker on the Turn Track. During event triggered actions (happening when both players roll the same number - doubles) do not advance the Turn marker.
6.2 Baseline Action
Each player can perform a minimum of three Actions per turn. Additional Actions may be added via the Shock Effect (see 18.0). Event markers triggered actions are happening in a mid-turn.
6.3 Multiple Actions
Each unit may be activated only once per turn. Exception: units already activated in a turn may be activated again via Terror Spreads Shock Effect (see 18.1).
6.4 Irrevocability
Once a step or a sub-routine within a given step has been completed by a player, no portion of it may be "taken back" or in anyway redone unless the opponent graciously gives their permission to do so.
7.0 Random Events
Each time players rolled the same number (doubles) in the Action Phase (see 6.1), both players must make a Random Event Pre-Check by rolling a die. The German player picks an event chit on a die roll of 1-4. The Allied player picks an event chit on a die roll of 1-3. Other results are no effect. The German player checks for event first, followed by the Allied.
If doubles are rolled again, another Random Event check happens; this can happen repeatedly. All of this plus eventual event triggered actions happens in a mid-turn; do not advance the Turn marker after that.
7.1 Event Chit Pick, Play & Status
If an Event Chit indicates that it must be played, then the player plays that marker and implements the event. Otherwise, the player has an option to keep the marker in the "Events Available" box, face down. He may play it on any future friendly Resolution Phase by flipping it face up at that time.
7.2 Resolution Phase
Generally, Event Chits are played only in the mid-turn phase. Exceptions are noted in the descriptions.
7.3 Expending Event Chits
Generally, when an Event chit is played, it is returned to the Pool. Exceptions are noted in the instructions. If a chit is indicated as being placed in the discard box, then place it there. It may not be used again in the course of the game. Some events remain in effect for the remainder of the game.
7.4 Capacity
A player may have any number of Event chits in his available box. A player may implement more than one event per turn.
8.0 Stacking/Mobility Restrictions
"Stacking" is the term used to describe the piling of more than one friendly unit in the same sea zone or same land area at the same time. In general, stacking is an unlimited number of units, with this exception.
Small Islands
Small islands are any land bodies encompassed entirely by surrounding waters. For example, the Faroe Islands may have a maximum of three ground units, and three air units stacked there.
Note: No friendly and enemy unit may ever occupy the same small island at the same time (see 11.7).
8.1 Combat Zone
Friendly and enemy units may be in the same area.
8.2 Over-stacking Penalty
If either player is, at any time, discovered to have his forces over-stacked on a Small Island, the penalty is the elimination of the minimum number of units (of owning player's choice) necessary to bring each such locale back into compliance with the stacking rule.
8.3 Invading Restricted-Stacking Areas
No more than three ground units may be used to launch a single amphibious invasion (see 11.7) of a Small Island. Of course, there's no limit to the number of such operations that may be launched over the course of the game. Also note that the stacking rule places no restrictions on the number of naval vessels that might support invasions with their combat factors, nor on the number of air units that may fly into that area and attack there. Otherwise, there are no restrictions on the number of units that may attack any other area or zone.
8.4 Service Cooperation
Units belonging to all three major categories of units (ground, aircraft and naval vessels) may stack together in every land area and/or sea zone on the map, if otherwise eligible to exist there. There are no inland water bodies or exclusive land areas anywhere on the map. All Allied units may stack and make all actions together.
8.5 Theater of Operations
Units may freely move anywhere on the map, within the normal movement rules. Note, though, that units may not ever enter an enemy's on-map base (or home) areas (Third Reich or Great Britain).
8.5 Air units stacking In Airbases.
Each Airbase has a stacking limit of six Air units. Unlimited number of Air units can be stacked in a Home base.
9.0 Actions
(Also known as Operations)
An "Action" is the term used to describe the basic increments of movement, combat and/or other player-initiated Actions as the game progresses. These are listed on the Actions Chart. Some of them may be conducted only by one player or the other, while most are available to be conducted by either player.
9.1 Type of Actions
There are four basic types of actions in the game. These are given in general categories of the American staff system for historical reasons. For game purposes, they serve no purpose of function other than to help the players index the type of action they want to conduct. These categories include.
- G-1 Actions (personnel)
- G-2 Actions are not used!
- G-3 Actions (operations)
- Restriction: See 9.7 for Air Action Limit.
- G-4 Actions (logistics)
Note: Most of the Actions played during the game will be combat (G-3) Actions.
9.2 Action Choices
Each time a player begins playing an Action, he should announce to his opponent which Action he'll be conducting at that time. Neither player may ever conduct Actions listed as being available only to the other player. Players may pick the same Action any number of times in a row, but no unit may be activated more than once in a turn; exception: see Shock Effect 18.0. All possible Actions in the game are fully described on the Actions list at the end of these rules.
9.3 Free Actions
Random Events may call for a player to pick Event chits or reinforcements. These are "free" Actions, and are executed immediately in the so-called mid-turn.
9.4 Action Unilateralism
In general, an Action involves only one force of units in one area or zone.
9.5 Event-Generated Action
If doubles are rolled for the Actin Phase, Random Event check happens; Event Chits are played during the mid-turn phase; don't advance the Turn marker after this.
9.6 Multiple Actions
Generally, a unit may never participate in more than one Action per turn.
Exception: Shock Effect - Terror Spreads, when already activated units can activate again (see 18.0 below).
10.0 Movement Continuity
Generally, movement occurs between contiguous land areas or sea zones within the parameters of the Actions detailed in section 25.0. However, if there is more than one movement route, the player has the option to use whichever one desired. If a unit can move more than one area/zone, then the second must be adjacent to the first entered. This would apply to any subsequent movement in due course.
10.1 Forces & Movement
A player designates which of his units to move. Generally, those units must all start in the same area/zone (unless part of amphibious movement whereby the ground units to be transported begin their location in a land area adjacent to the ships that will be transporting them). This may be some or up to all units in an area or zone. Once a force has been formed for movement, it must move together. Units can't move in different directions or be dropped off along the way.
10.2 General Restrictions
Certain kinds of units are limited to moving on certain locations on the map, listed as follows.
- Naval units may only move into sea zones and Home Bases. Naval units may stay at sea an unlimited amount of time.
- Air units may move into sea zones, land areas and Home Bases. Note, though, that air units must end an Action phase back on a friendly airbase or they are eliminated.
- Ground units may only move into ground zones and Home Bases. Additionally, they may be transported by airlift or sealift through sea zones.
10.3 Naval Unit Movement
Naval units may move a number of zones in a single Action according to the movement factor printed on their counter. Naval units must cease movement as of the instant they enter a zone containing any enemy naval units.
Example: A German naval unit with a movement of (2) that starts in the Kattegat sea zone, moves into the Skaggerak, and then moves one more sea zone to the west, where it must stop for that game turn.
10.4 Naval Vessels in Land Areas & Harbors
Naval units may never enter land areas, except Home base area/zone. Certain areas contain a harbor symbol (anchor); if a player controls that harbor area, then the player may provide certain logistical support operations to naval units in the adjoining area—but note that the naval units may not enter that land area. The harbor applies to all sides of the land area having a coastline adjacent to a sea zone.
10.5 Aircraft
The aircraft units in the game are generally land-based. They may only ever operate from land areas containing friendly airbases, base units or Home bases. They may fly over sea zones and attack targets in sea zones (as well as land). Air units may move through zones containing enemy air units (but, see the Optional Interception Action; 20.2).
10.6 Aircraft Unit Basing
Air units may operate from land areas containing friendly airbases, only.
10.61 Overrun Airbases
If, for any reason, an air unit starts or ends any Action phase (of either player) in an area that is enemy controlled, then it is eliminated. An air unit in a contested zone may conduct operations normally. This does not prevent air units from flying out of an airbase for Actions, but it must land at a base at the end of that Action.
Furthermore, if, at any time, there are ground units in a land area with enemy air units on the ground, and there are no enemy ground units also in that area, then all those air units are eliminated.
10.62 Returning to Base
An air unit must land on a base it started on, unless it is conducting a Rebasing Action.
10.7 Aircraft Range
Aircraft range is printed on each air unit counter. Range is the number of areas land based aircraft may move to conduct an attack. Each sea zone or land area entered on the way to the target counts as one expended numeral of range (not including the original base area from where the air unit flew). When returning from the target area/zone, the air unit again counts out the areas/zones through which it is moving. Effectively, an air unit moves twice per Action—once (up to its full range factor) to the target and back again to its base (up to its full range factor).
Example: An air unit with a range of (2) starts in Germany, moves into the Skagerrak, then moves into Oslo to attack a target there. After the attack is completed, it returns back to Germany (if it survived).
An air unit must always land in the base from where it took off, with the exception of the Re-basing Action. When moving air units to and from a target, or re-basing them, you must count out the actual areas entered. Air units may move through enemy units without any effect (but, see Interception Action Optional rule; 20.2).
Note: Since range is simply the distance to the target, an air unit effectively moves twice per Action, once to the target and then once after the combat to land at its starting base.
10.8 Carrier Aircraft
Carrier aircraft are figured into the strength of the aircraft carrier units in the game. Thus, they are handled slightly differently—they do not actually fly separately from the aircraft carrier units (but, see the Long Range Carrier Airstrike Action).
10.9 Ground Movement
Ground units may move from a land area they occupy to an adjoining land area if their entire movement is via land areas (e.g., from Oslo to Telemark). Ground movement may not be across all-sea boundaries. Ground units may move across all-sea boundaries only via sealift or airlift.
10.10 Movement Limit
A ground unit may move a number of contiguous land areas up to equal to its movement factor or less, if preferred. Units with a movement of zero may never move once placed on the map, even by transports.
10.11 Moving into a Combat Area
Ground units must stop the instant that they enter a zone containing an enemy ground unit. They can move out of that zone with their next Action.
10.12 Mountains
For a ground unit to move across any mountain boundary, it must first roll one die. If that die roll is 1-3, that ground unit may cross that boundary. But if that unit's die roll is 4-6, then it loses all of its movement for the remainder of the turn. If more than one unit is moving per Action, roll for each unit individually and immediately apply the results. Exception: Mountain and Norwegian light units can cross a mountain boundary on a die roll of 1-5.
Designer's Note: Heavy units may cross mountain boundaries owing to the presence of roads that are not otherwise printed on the map.
10.13 Amphibious Operations
Ground units may only enter sea zone via ships that are of the "Amphibious" class, of their own side. Note that certain warship units can also provide transport.
10.14 Transport Capacity
LCTR, ATR and TR units may transport one heavy unit of any size, or two light units. BB, BC, CA, CL and DD units may transport one light unit under certain circumstances
10.15 Procedure
To demonstrate that a ground unit is transported by an amphibious unit, place that ground unit beneath the amphibious unit's counter. Note that boarding an amphibious unit isn't a separate Action; it's simply a part of moving them out to sea. While at sea, ground units are—for all movement and combat purposes—considered an inseparable part of the amphibious unit transporting them. That is, if their amphibious unit comes under attack, no separate attacks are ever made against the transported ground units, nor do those ground units engage in any manner of combat while being transported. Transported ground units share the fate of that transport unit when it comes to combat. If an amphibious unit is sunk, then all transported ground units are also sunk (placed in the Refit box). Note that transport units are protected targets (see 11.5).
Ground units being transported may conduct no Actions, nor do they apply their combat factors (until they disembark).
10.16 Perpetually at Sea
Within the scope of the game, ground units may remain aboard amphibious units at sea for any length of time. When unloading, a transport must be adjacent to a coastal area—simply place the ground units on the land. This is not a separate Action—it is part of that amphibious movement. Embarking and disembarking is purely at the player's option. If/when an amphibious unit is used to deliver ground units as an amphibious assault (to either an enemy-controlled or a contested land area), the transport unit is subject to return fire from the enemy units defending there, but only from units which have an anti-surface ship factor of one or higher.
A transport movement doesn't necessarily require the amphibious unit itself to move if the entire movement is across one sea zone.
Example: A German amphibious (TR) unit is in the Skagerrak. It picks up a German ground unit in the Third Reich and then disembarks it into Oslo. The amphibious unit itself does not move, as the Skagerrak is adjacent to both the Third Reich and to Oslo. If the player wanted to move the ground unit to Stavenger, then the amphibious unit would have to have moved it one or two spaces to a sea zone adjacent to a Stavenger coastline, at which time the ground unit could be disembarked in Stavenger.
10.17 Movement Peculiarities
Small Islands
Some small islands are contained entirely within a sea zone. They do not impede the movement of naval or air units through that sea zone. Units may enter small island areas by paying no additional movement cost.
Diagonal Sea Zone Movement Permitted
To represent the curvature of the Earth, diagonal movement (that is, moves from one sea zone to another when they're touching only at one corner point) is allowed just as if those two zones were connected along a linear border.
11.0 Combat
Combat is when enemy units fight each other. In general, combat is voluntary, that is, it is at the discretion of the player taking an Action. It only occurs between opposing units in the same sea zone or land area (but, see Coastal Bombardment and Carrier Strike rules below). Combat is always mandatory when conducting:
- an amphibious assault onto a small island, or against a land area containing a fortification; or
- an airborne or airlift move onto an enemy occupied land area; or
- air units attacking in an enemy occupied area.
At other times, combat may occur (active player's choice) whenever an Action specifically allows for combat. Generally, combat would be up to the player taking the Action. If a player chooses not to engage in combat in an area, opposing units can theoretically co-exist indefinitely within the same land areas and/or the same sea zones (but not if on a small island; see below).
Combat can occur in the following conditions.
- Air versus Air, Naval or Ground units in the same area/zone.
- Naval versus Air or Naval units: in the same zone.
- Naval versus Naval or Ground units: in an adjacent land area.
- Aircraft Carrier Long Range Strikes (11.6) versus Air, Naval or Ground units in another area/zone.
- Ground units versus Ground and Air units: in the same area.
Ground units may not initiate combat against enemy Naval units (but see the Coastal Defense rule, 11.9).
Combat may not occur across zone/area boundary lines, with the exception of Long Range carrier strikes and naval bombardment missions. Note that when air units conduct missions, they move across boundary lines to attack a target within a particular area.
11.1 Combat Procedure
When combat occurs, remove the units from the map and place them in a convenient place to resolve the battle. Place the Battle marker in the area/zone as a reminder of the place to return surviving units, if any. Units engage in combat, both offensively and defensively, by firing (rolling a die) at opposing enemy units. In each combat, a participating unit may fire at any one opposing unit. In turn, each of your firing units may be fired at by one or more opposing units in that same battle (it does not have to be the unit it fired at, except in Air Combat, fighter units attacking non-fighter units. See 11.4). In general, it's impossible for either player to withhold units from participating in a battle going on within its zone or area. However, note the important exception described below in rule 11.5 (Protected Targets).
All fire within a given battle is considered to be taking place simultaneously within and between both sides. Thus, there's no advantage to rolling your combat resolution die rolls before the other player. All combat die rolls are rolled, and their results noted before any unit reductions or eliminations take place. But for formality's sake, the player who conducted the Action that caused the combat being resolved should be allowed to fire first.
A player is required to designate each of his attacking units' intended targets before rolling the die. The is a special rule concerning protected target rule (11.5) prohibiting some units from being attacked first. A unit can waste its attack, or be ineligible to targets enemy units in that area/zone.
Also note there are never any multi-round battles. Each involved unit on both sides is allowed to fire once, and that battle is then over until some new Action allows it to be fought again.
Example: Say the German player conducts a Long Range Strike Action against enemy ground and air units in a land area (using a He-111 bomber and an Me-110 fighter against the Narvik zone). There is a British infantry brigade and a Gladiator fighter unit in Narvik. The German player uses the Me-110 to attack the fighter (using the AA combat factor), and then the He-111 to attack the infantry brigade (using the anti-ground combat factor). Both British units subsequently fire back using their AA factors. Note the German player could have used both his air units to attack the fighter or the brigade if the first one had missed, but even if the German player attacked only one British unit, both could fire back, each at one German unit, or both at one German unit.
11.2 Maximum/Minimum Combat Strength
Certain Events and Actions may cause a unit's various combat strengths to be raised or lowered. If more than one such modification applies, use the cumulative total/difference. However, a unit with a printed combat strength of "0" may not ever have it raised to "1" or more, but nor may a unit with a combat strength of "1" or more ever be lowered to "0" ("1" is the minimum).
11.3 Combat Resolution
Each unit in the game is printed with four combat factors. A unit's anti-ground combat factor is used by that unit whenever it fires at an enemy ground unit. A unit's anti-aircraft combat factor is used by that unit whenever it fires at an enemy aircraft unit. A unit's anti-submarine combat factor is used by that unit when it fires at an enemy submarine unit. A unit's anti-surface ship combat factor is used by that unit when it fires at an enemy surface ship unit.
A unit may fire only once per combat. If a unit has both an anti-air and anti-surface combat factor, it could choose to fire at either an enemy air unit or an enemy naval unit, but not at both.
If one or more of a given unit's combat factors is "0" (zero), that unit can't fire at that kind of target. For instance, a submarine with an anti-aircraft combat factor of zero may never fire at enemy aircraft units. Note, though, that doesn't mean the opposite is true. That is, a submarine with an anti-aircraft combat factor of zero could certainly be fired on by enemy aircraft that had an anti-submarine combat factor of "1" or higher.
The units' various combat factors are, in essence, hit numbers. That is, if a given unit with, let's say, a combat factor of 2, is attacking an enemy unit (of the appropriate type for that combat factor), that enemy unit is hit on a die roll result of two or one (the hit number or less). The attacked unit's combat values in no way reduce the combat value of the attacking units. There are no combat odds in Norway, 1940.
11.4 Aircraft
Air units based in an area that is being attacked by enemy ground units automatically rise to fight. There is no separate Action to provide combat air patrol, defensive support, etc. Moreover, they must fight in the air if their area is attacked by ground units—a player may not leave them on the ground.
Air units attacking air units on the ground
If the area is attacked by air units only, all defending fighters based in the area (eligible to fly) are airborne and defend. Other types of air units are still based (non-flying) and can be attacked on ground using anti ground ratings. Exception: Strafing - If fighter type air units attack enemy air units based on the ground, use fighters' anti-air rating.
Air to Air Combat
Only fighter aircraft (F) can initiate an attack on other air units with its anti-air combat factor. All other (flying at the moment) air units (B, DB, R, SP, FP, TR; those with an anti-air factor greater than 0) can return fire defensively only if attacked by an enemy fighter, and then only fire at the fighter that attacked them. Fire is not simultaneous in that case; all attacking fighter units have first fire, then only surviving non-fighter, attacked air units, may return fire.
11.5 Protected Targets
Aircraft Carriers and Transport (TR) naval units (along with the ground units they may also be transporting), are together considered protected targets when receiving enemy fire in surface naval combat (which would include fire from both surface ships and submarines.) That is to say, no protected target may be attacked unless every other non-protected-category surface ship in the same zone or area has also been attacked by at least one other enemy unit. This restriction does not apply to enemy air attacks against these unit types—air units may single out aircraft carriers and transports to attack them, if desired.
Exception: If an aircraft carrier is conducting a surface attack against an enemy force, it may attack otherwise protected targets without being required to meet the provisions of the above (the carriers' surface attack strength represents its torpedo and dive bomber contingent).
11.6 Ranged Combat
Generally, all attacking units must be in the same area/zone as all defending units, however, the following are exceptions.
- Coastal Bombardment. A force of naval units may use its anti-ground strengths to attack a land area that is adjacent to its sea zone (and bordered by a coastline). Enemy units on that area may not fire back, with the exception of units that have an anti-surface naval combat factor (such as fortification and coastal defense units).
- Aircraft Carrier Long Range Strikes. Aircraft carriers may attack enemy units in either their own area, or in an adjacent area/zone. If attacking in an adjacent area/zone, then the defender does not fire back (even if the defender has air or coastal defense units).
Note: If conducting both Coastal Bombardment and Long Range Strikes, all attacking units must be in the same zone, and also target defending units in the same zone.
11.7 Small Islands
When an attacking ground force enters a small island (via an amphibious or airborne assault), it must attack. If it fails to eliminate all enemy units defending in that area, then the attacking ground units are eliminated. Consequently, there never will be a case of opposing ground units occupying the same small island at the same time.
11.8 Parenthesized Ground Combat Strength
Ground units printed with parenthesized combat strengths are considered support units. They may utilize their parenthesized strengths only if there are other ground units in that same area with non-parenthesized ground combat strengths.
11.9 Coastal Defense Units
Certain ground units have an anti-surface ship combat factor. They may use this only in the following cases.
- If enemy naval units conduct a bombardment against the area where they are located in. They fire back (simultaneously) at the bombarding units in that case.
- If an enemy amphibious force conducts an amphibious landing against their area. They may fire at an amphibious unit. If the amphibious unit is sunk or damaged, this has no effect on the ground units, which land normally. That is to say, coastal defense units may only fire defensively against naval units, and only if the enemy has initiated an Action against their area.
All Forts can "absorb" (negate) first hit taken.
11.10 Combined Attacks
More than one unit may participate in the same attack, but a player may never combine different types of units as one accumulated strengths and die roll. An enemy unit may be attacked by multiple but distinctly different attacks, even if from different types of units, provided that each attacking unit is eligible to attack that kind of enemy unit.
Example: An area with a lone enemy infantry unit may be attacked by two invading air units, each using its "anti-ground" strength, as well as an invading infantry unit, also using its anti-ground strength.
Furthermore, there is no restriction on the types of enemy units that can be attacked, assuming there is at least one attacking unit that is eligible to attack the type of enemy unit it is targeting. But regardless of how the attacker arranges his attacks, every enemy unit in that same area/zone is also eligible to select targets and return fire in exactly the same way, once the attacker has completed all of his attacks, and regardless of their outcome.
12.0 Reinforcements/Withdrawls
Additional units which appear in the game are called reinforcements. A player places potential reinforcement units in the "pool" for his side. A pool is simply a large-mouth opaque container, such as a coffee mug or empty ammunition can. Whenever called for by Actions, a player picks reinforcements from this pool at random. Once he has pulled them, he places them on the map in accordance with the instructions below. Each player maintains his own pool.
12.1 Placement
Whenever a reinforcement is drawn, the drawing player must abide by the following stipulations.
- German reinforcements are placed in the Third Reich Home base area/zone.
- British, French and Polish reinforcements are placed in Great Britain Home base area/zone.
- Norwegian ground reinforcements are placed in Allied-controlled or in contested Norwegian Mobilization areas. Norwegian air reinforcements are placed into Allied-controlled or contested Norwegian airbase areas, and Norwegian naval reinforcements are placed in Allied-controlled or contested Norwegian ports.
Note: The Allied player can only place a limited quantity of Norwegian units in each Mobilization area, equal to the number printed in the box.
12.2 Counter Limit
The quantity of counters included in the game is the limit of reinforcements that may ever be obtained. A player may never take reinforcements in excess of it. If a player is called upon to take more reinforcements than available, no units are accrued for later turns. If the Allied player is supposed to take more Norwegian units than he has as eligible placement zones, the excess units are returned to the pool.
This does not apply, however, to any markers (entrenched, disrupted, etc.) of which players can always create more, should there be a shortage.
12.3 Special Reinforcements
Certain specific reinforcements are designated as Special. These are placed in play only if certain conditions are triggered. Initially, place them in the Special Reinforcements box until deployed.
12.4 Withdrawals
Certain Events call for units to be withdrawn from play. Withdrawn units are simply picked up and removed from the map, regardless of their position (they are not moved across the map). They do not count as eliminated units for VP purposes.
Withdrawn units are placed into the Withdrawn box and may not be returned to play unless some specific event allows for it. For example, some withdrawals will cause a unit to be placed back in the Reinforcement Pool.
13.0 Refit
Whenever any unit is eliminated, place it in the friendly Refit box. Each player may refit a number of units per its refit capacity limit (see 13.4). A unit is eligible to be refit if the Refit Action is played.
13.1 Refit Tables
The Refit Table gives the die roll ranges for refit outcomes.
[The Refit Table is not reproduced in the text layer of the source.]
13.2 Refit Procedure
When playing a Refit Action, use the following procedure:
- designate the unit(s) to be refit;
- roll one die for each unit to be refit;
- cross-index the die roll with the unit type listed on the Refit Table. This gives the outcome of the refit.
13.3 Refit Outcomes
After rolling the Refit die roll, apply the following results per the Refit Table.
- Refit. Immediately place the unit on the map per the reinforcement placement rule (12.1).
- Damaged. Place the unit in the Reinforcement Pool (it may be picked normally as a Reinforcement Action).
- Destroyed. Permanently remove the unit from the game.
13.4 Capacity
Each nationality is restricted to a particular refit limit, listed as follows.
- German: refit up to three units per Action (total).
- British: refit up to two units per Action (total).
- French: refit up to two units per Action (total).
- Polish: refit up to two units per Action (total).
- Norwegian: refit one unit per Action.
13.5 Refit Placements
Refitted units may only be refit in particular areas on the map, listed as follows.
- German Naval Unit: In Third Reich
- German Air Unit: In Third Reich or a German controlled airbase in Norway.
- German Ground Unit: In Third Reich or a German controlled port in Norway.
- Allied (but not Norwegian) Naval Unit: In Great Britain.
- Allied (but not Norwegian) Air Unit: In Great Britain or an Allied airbase in Norway.
- Allied (but not Norwegian) Ground Unit: In Great Britain or an Allied port in Norway.
- Norwegian Naval Unit: In Allied-controlled port in Norway.
- Norwegian Air Units: In Allied-controlled airbase in Norway.
- Norwegian Ground Unit: In Allied-controlled area designed as a mobilization area in Norway.
13.6 No Refit Fog of War
A player has to tell the other player the outcome of his Refit die roll, and must show the placing of damaged units back in the pool, etc.
14.0 Fog o' War
14.1 Air-Naval Attack
Land-Based Air units attacking enemy Naval units must check if they located a target. To locate enemy Naval units, each attacking friendly air unit needs to roll a die. If DR is 1-4, proceed with the attack. If DR is 5-6, the air unit cannot attack a Naval unit and return it to base.
14.2 Attacking Thin Air
As a result of the Fog o' War rules, it is possible to inadvertently launch attacks against enemy forces that cannot be affected (e.g., aircraft with no ASW strength attacking a zone containing only enemy subs). In this case, there's no combat, though this may still be useful as a means to determine the strength of an enemy force, since enemy units would have to be revealed.
15.0 Bases, Disruption & Recovery
There are three types of on-map bases: Airbases, Ports, Mobilization Centers.
15.1 Capacity
Each type of base has a specific basing limit, listed as follows:
- Airbases. Each Airbase can base six air units. Unlimited number of Air units can be based in a Home base.
- Ports. See the Emergency Evacuation Action.
- Mobilization Centers. The number is the number of Norwegian units that may be placed in that zone as Reinforcements or Refits per Action. If the Allied player has more Norwegian units than capacity, the excess (his choice) must be returned to the pool.
15.11 Controlling or Contesting a Base
Bases can be used by a player as long as he controls or even contests it. Enemy-controlled bases may not be used.
15.2 Base Disruption
Any base can become disrupted as a result of attacks on them (see 25.4 and 25.5). Place a Disrupted marker on any such base. The marker remains on that base until a Base Repair Action. There may not ever be more than one Disrupted marker on a particular base. If there is more than one type of base in a zone, then each may be disrupted individually and separately.
15.3 Effects of Base Disruption
If a base is disrupted, the following effects apply.
- A player cannot ever place any newly arriving reinforcements/refits on a disrupted base.
- A disrupted port does not provide any function called for in the game.
- Air units on disrupted bases may conduct only one Action, which is to rebase to another base (even to another disrupted base; any air unit may rebase onto a disrupted base).
15.4 Disruption Repair
This is an Action. If successful, then remove the Disrupted marker, and the base (or railroad) is restored to normal functionality.
16.0 Map Home Bases
There is two Home Bases: the German Third Reich base (which includes the Danish peninsula) and the Allied Great Britain base.
Home bases are considered to be mixed land areas/sea zones on the map. Naval units can operate or embark ground units whether they are in a Home base zone/area or in a sea zone adjacent to a Home base. The only difference is that they cannot be attacked while in a Home base.
All operations can be conducted from a friendly home base area, such as flying air missions which attack enemy targets, etc.
16.1 Perpetual Control
A player always controls his Home base. There is no need to garrison them.
16.2 Restrictions
Allied units may not enter or attack German Home base, and German units may not enter or attack Allied Home base.
16.3 Home Base Capacity
You can stack an unlimited number of units in a Home base. All types of units can be in a Home base. Home bases are assumed to have ports and airbases. They can be entered/exited by air and naval movement to the adjacent sea zones.
16.4 Home Base Entry/Exit
Great Britain is considered to be one mixed land area/sea zone at the southwest map edge. It is adjacent to sea areas 35, 36, 41 and 44.
The Third Reich is one mixed land area/sea zone south at the south map edge. It is adjacent to sea areas 45, 43, 39 and 40.
17.0 Special Units
17.1 Airborne
These are treated as infantry except they may be utilized in the Airborne Action.
17.2 Mountain
These are otherwise treated as infantry units, except that they can cross a mountainside on a die roll of "1-5".
17.3 Commandos
The Germans have a commando unit. This is held Off Map. It may be deployed onto the map only via the Launch Commando Operation Action. Once on the map, the unit acts as a normal unit thereafter. Branderbourger commando unit has Fire First capability - It rolls to hit before simultaneous fire.
17.4 Marines
British Marine units may be transported by any BB, BC, CA, CL or DD. Unlike other units being transported by non-amphibious ships, they may remain embarked at the end of the Action. They are otherwise treated per the Transport Action. They may be transported normally by amphibious units.
17.5 Naval Infantry
These are treated as normal infantry units.
17.6 Seaplanes
Seaplane (SP) units may be based on sea zones adjacent to a friendly or contested airbase or port on land (and count against its capacity).
17.7 Transport Seaplanes
Transport Seaplane (TrSP) units may take off and land only from sea zones. They may embark and disembark transported units and air supply markers on adjacent coastal areas.
17.8 Kampfgruppe 100
Kampfgruppe 100 (KG100) was a Luftwaffe pathfinder formation. There are two units belonging to it in the game: Do 17 and He 111 unit. They may not conduct any anti-ground, anti-submarine or anti-surface naval attacks by themselves. They can, however, be involved in these attacks with other German air units. If they are, then all other German units in the attacking force have their combat values increased by "1" (a maximum of +1, even if both KG100 air units are present). This does not affect anti-air combat.
17.9 Fortresses
Forts can "absorb" (negate) first hit taken. Eliminated Fort units may refit as usual. The only requirement is that they need to be placed in the city/area corresponding to its city name written on them.
17.10 Submarines
Submarine unit(s) in one Sea Zone may activate for "free" with the third, bonus Action for Subs if players rolled the dice difference of two for Action Phase.
No more than two units can attack (fire on) an enemy Submarine unit.
18.0 Shock Effect
Certain Actions will cause a shock effect. These include.
- Airborne Landing. Each time the German player lands an airborne unit in an area containing an Allied ground unit.
- Tank Attack. Each time a player makes a ground attack involving at least one armored or panzer unit against a ground unit and eliminates it with an unmodified die roll of "1".
- Airpower. Each time a player makes an air attack against an enemy ground unit and eliminates it with an unmodified die roll of "1".
- Terror Bombing. Each time the German player makes an air attack against an enemy base and thereby places a disruption with an unmodified die roll of "1".
- Sinking a Capital Ship. Each time either player eliminates an enemy BB, BC or CV unit (regardless of the die roll).
18.1 Shock Effect Procedure
When an action triggering shock has occurred, the player initiating that Action must roll one 6-sided die, and consult the Shock Table, listed as follows.
SHOCK TABLE
- 1: Resolve! The enemy player will gain one free action, which he must immediately use.
- 2-3: No effect.
- 4-6: Terror Spreads. The rolling player gains one free action which he must immediately use. Already activated units during this turn can be activated once more!
19.0 Optional Draw Game
At the end of the game, if a German victory has occurred, the Allied player must then determine the total quantity of German TR units that he has eliminated during the course of the game, and roll one die. If the quantity of German TR units that have been eliminated is at least double the Allied player's die roll result, that German victory is therefore downgraded to a draw instead (tie game), regardless of any victory points accrued by either side.
20.0 Optional Rules
Optional rules are only ever in effect at the agreement of both players, although players may agree to pick and choose some optional rules, while disregarding others.
20.1 Optional Actions
Players can use the following optional Actions.
Fighter Interception Mode (Germans only): German fighter air units may be nominated to be in "Interception Mode" as a G-4 Action. To do so, place an "Intercept" marker upon any German "F" type air units presently on the map. As long as air units are in Interception Mode, they can conduct no other Actions. Fighters remain in Interception Mode until the German player removes the marker as a subsequent action, or if eliminated or withdrawn. See 20.2 for details.
German Airstrike against Railroad (Targeting Railyards): German bomber air units based in one area may be launched as a G-4 Action toward and into any one enemy-controlled or contested land area in range, if a railroad symbol is present there, and then attack that railroad. If there are any friendly "B" type air units in that zone, they may join in that attack. To attack the railroad, the attacking player simply uses the bomber unit's anti-ground strength. If there are any hits, place a Disrupted marker upon the railroad symbol (but never more than one, excess hits do not count). However, enemy units with anti-air strength of at least "1" in that area may fire simultaneously at the intruders. This Action cannot be combined with an attack by friendly land or naval units (including carriers). It may be combined with the Airstrike Against Base Action.
The effect of a successful attack upon a railroad is that no rail movement is permitted in that area for the remainder of the game.
German Supply Drop (Air Supply): German transport air units in the Third Reich base area may be launched as a G-4 Action toward and into any one friendly-controlled or contested land area in range, if a German land or air unit is present there. Place an air supply marker in that area. The transport air unit then returns to the Third Reich base. There is no need to have an airbase in the area in which the air supply marker is being placed. The marker provides supply to all friendly ground and air units in that area for one Action. At the end of that Action, remove the supply marker. Otherwise, the marker remains on the map until utilized, or until the enemy gains control of the area, or—if at any point in the game—the German player decides to remove it (at no Action cost). Within these constraints, the one air drop supply marker may be used any number of times in the game. It may never be destroyed, but never may be used more than once at the same time.
20.2 Interception Mode
20.21 Intercepting
Interception is an Action by which the player puts his land based fighter air units into "Interception Mode" (or is an Action to take them out of Interception Mode) in preparation for a possible enemy Action. A single Action may do this for any or all friendly "F" type air units on the map. When in Interception Mode, the fighter unit(s) cannot perform any other Actions. Interception allows "F" type air units to move during an enemy Action, and does not count against the total Actions permitted during the game.
20.22 Procedure
Whenever enemy air units move (intrude) into an area containing friendly fighters in Interception Mode and then leaves that area, you may declare "Interception." Play then temporarily halts while you resolve the interception. The intercepting fighters "rise" in the area and attack the moving enemy air units. Then resolve air combat, with those intercepting air units temporarily considered to be the attacker; That is, only the intercepting air units may attack, and only the moving air units may be attacked; they are considered to be occupying a special separate altitudinal area in the sky above the area entered. Other units in the area/zone are ignored. Upon resolution of the interception, surviving intercepting units then return to base, and surviving intruding air units may continue to move to complete their missions (or may be returned to their own base instead, or some may continue their mission, and some may return to their own base).
Note: For all intents and purposes, fighters in Interception Mode have their anti-ground, anti-submarine and anti-surface naval strengths (if any) reduced to "0" (zero).
20.23 Interception Restriction
Interception may not occur, however, in an area which was the targeted destination of the moving air units. The intruders must be moving to another area to conduct an interception mission.
Note: A player may opt to not have fighters in Interception Mode intercept, in which case they stay on the ground. If enemy air units attack their area, they engage in air to air combat normally.
20.24 Interception Limitations
Each intercepting fighter may conduct only one interception per turn (as per rule 9.7).
21.0 Supply
21.1 Naval and Air Unit Supply
There are no Naval and Air rules; Naval and Air units are always in supply
21.2 Ground Unit Supply
For a ground unit to be supplied, it must be
-
in a friendly Home base; OR
-
in the same area as a friendly or contested port, and if a friendly naval amphibious class unit is adjacent to it (note that, in this case, only the side with a friendly naval amphibious class unit adjacent to that port could use the port, if they have ground units in the zone); OR
Note: If both sides have a friendly naval amphibious class unit adjacent to a port, then neither side is considered to have usage of that port.
-
adjacent to an area with a port, and if a friendly naval amphibious class unit is adjacent to it, but only if there is no intervening mountain border, and if there is no enemy ground units in that same area; OR
-
In a friendly or a contested area containing a railroad which can have a demonstrated path of connected areas back to a friendly port, and if a friendly naval amphibious class unit is adjacent to it. In this case, there may be no enemy ground units in any zone being traced through, or in the port's area; OR
-
German units in a friendly or contested area containing an airbase which also bases a friendly transport air unit (note that the transport air unit does not have to actually move or conduct any Action to provide the supply—the logistics are being provided automatically); OR
-
ground units and/or commando units that just made an airborne or an amphibious assault (they are in supply for that one Action); OR
-
ground units being transported by TR units (they are in supply as long as they are on the transport); OR
-
in the same areas as a friendly airdrop supply marker is also in supply; OR
-
Norwegian units occupying a Norwegian area where there is port, airbase or a mobilization symbol.
Exception: Ground units may not trace supply across a mountain border, except via a railroad symbol (that is not disrupted), or if a Norwegian unit (which is never affected by mountains when tracing a supply path).
21.3 Combat Effects
A ground unit which is not in supply has its combat values reduced to "1" (if already "1" or "0", then they are zero).
21.4 Movement Effects
A heavy ground unit which is not in supply may not move (it may be transported normally, however), but light ground units are unaffected.
22.0 Airbasing Limitations
The number of air units which can be based at an airbase cannot exceed its capacity, which is six air units for all airbases.
22.1 Contested Airbases
Airbases in contested areas have their capacity cut in half, and both sides may base air units there, dividing the normal capacity half and half.
Example: If Oslo is contested, then each side could base up to three aircraft in it.
23.0 Entrenching
Ground units may "entrench" as a G-4 Action. Place an entrenched marker in the land area. It only takes one ground unit to entrench in a land area, and then all friendly ground units benefit from the entrenched marker there. The area where the entrenching is conducted must be in supply when the Action is conducted.
23.1 Effects
When enemy units of any type (ground, naval, air) attack ground units in a zone which contains an entrenched marker, reduce their combat strength by "1". That aside, entrenched units conduct combat normally.
Entrenchments do not reduce the die roll for attacks against bases.
Example: A unit with a combat strength of "3" is firing at an entrenched enemy ground unit; it would therefore hit on a roll of "1-2".)
23.2 Duration
The entrenched marker remains in place until all friendly ground units in the zone leave or are eliminated in combat.
Note: The unit that originally constructed the entrenchment does not have to remain in the same area to maintain it.
Only friendly ground units benefit from the entrenched marker. Entrenched markers may not be captured and used by the enemy, although both sides may entrench in the same area. If enemy units completely control an area where the other player had entrenchments, they are simply removed from the map.
24.0 Aircraft Carrier Depletion
Each time an aircraft carrier unit conducts any kind of attack or defense in which it uses any of its combat strengths against enemy air or aircraft carrier units, the player owning the carrier must roll for depletion (this takes place immediately after the combat has been resolved).
On a die roll of "6," place an explosion chit atop that aircraft carrier to denote its depleted status. If an aircraft carrier is eliminated in a combat, this procedure is ignored in that case.
Historical note: Carrier air squadrons tended to take large numbers of losses when conducting operations, even if their carrier itself remained intact.
24.1 Effects
A depleted aircraft carrier has all of its combat factors reduced by one (-1) so long as it remains depleted (stacked with an explosion chit). Also, a depleted carrier may not conduct the Long Range Aircraft Carrier Strike Action.
24.2 Duration
An aircraft carrier remains depleted until it has performed a Remove Carrier Depletion Action. At that point, the explosion chit is removed, and the carrier is restored to normal function.
24.3 Elimination/Refit
If an aircraft carrier is eliminated in combat, then it is restored to play via refit; it returns with its full combat values.
24.4 Remove Carrier Depletion
The British player may return a depleted aircraft carrier to full-strength if that aircraft carrier is in the Great Britain base.
25.0 Actions List
Developer's Note: Actions are the driving force in the game; all units may only operate (movement, combat) via some specific type of Action, all of which are listed below. Any type of Action may be performed multiple times during a game, except those specific to one player or the other (purple Actions may only be performed by the German player, orange Actions may only be performed by the Allied player).
25.1 G-1 Actions
Call for Reinforcements (German only): This Action may be conducted as long as the German player's reinforcement pool contains units. The German player rolls one die and then blindly draws that number of units (one through six) from his reinforcement pool. Those units are then placed as per the reinforcement rule instructions (see 12.0).
Call for Reinforcements (Allies only): This Action may be conducted as long as the Allied player's reinforcement pool contains units. The player rolls one die and then blindly draws that number of units (one through six) from his own reinforcement pool. Those units are then placed per the reinforcement rule instructions (see 12.0). If this Action is performed after the German player has played the Fall Gelb Event, then any French reinforcements picked are discarded, and no substitute units are picked to replace them.
Conduct Norwegian Mobilization (Allies only): This Action may be conducted as long as the Norwegian reinforcement pool contains units. The player rolls one die and then blindly draws that number of units (one through six) from his mobilization pool. Those units are then placed as per the reinforcement rule instructions (see 12.0).
Appeal to the High Command (Random Event): Roll one die: If the die roll is even, there is no effect. However, if the die roll is odd, the player immediately picks one event marker at random.
Note: This Action may be taken only once per turn (during the Action Phase, not the Event Phase), and is in place of all other actions. The Event drawn is in addition to any Event picked previously in the turn. The Event must be played immediately, regardless of its type. Any Actions generated by that Event are taken immediately, as well.
Launch Commando Operation (Germans only): Pick up the Brandenburger Commando unit from the Special Reinforcement Box, and place it on any land area in Norway. Combat may occur if that land area is enemy-occupied. If there are already friendly units there (in addition to any enemy units), those friendly units may participate in combat as part of this Action with the commando unit. This Action may be taken only once per game. That unit has First Fire capability - In combat, it always rolls to hit before simultaneous fire.
G-2 Actions
Removed - Eliminated Recon Rules
25.3 G-3 Actions
Since these are a little more extensive, and provide most of the dynamic of the game, they have been broken down into sections via general type of unit.
25.4 G-3 Naval Actions
Move a Force of Naval Units (Sea Movement): You may move one or more naval units which begin in the same sea zone up to their movement factor. Regardless of movement ability, a naval unit must cease movement in the first area containing any enemy naval unit(s). The friendly naval units may start in a sea zone containing enemy units (or not); you can also move naval units directly from one sea zone containing enemy units to another sea zone containing enemy units, but must then stop.
Move a Force of Naval Units from a Home Base to a Neighboring Sea Zone (Undocking from Home Port): This uses one movement point. The naval units may attack at the end of the move (if conditions for combat otherwise exist).
Move a Force of Naval Units from a Sea Zone to a Neighboring Home Base (Docking in Home Port): This uses one movement point. Units cannot attack at the end of the move (per the Home base rule).
Rebase Naval Units (Port to Port Transfer): You may move one force of friendly naval units on the map up to twice its normal movement ability, within the following strictures. None of the naval units may enter an area containing enemy naval units (they may start in such an area). None of these units may launch any kind of attack. They may contain transported units, but may not pick up or disembark units. Additionally, all units moving via this Action must end their move in a sea zone adjacent to a friendly port, or in or adjacent a friendly Home base.
Use Naval Units in any One Sea Zone to Attack Enemy Units in that Same Sea Zone (Initiate a Naval Battle): See section 11.0 for more details.
Move a Force of Naval Units from one Sea Zone to another Sea Zone to Attack (Initiate a Naval Battle): Same as naval movement, but the moving force enters a sea zone containing enemy units, and then attacks them as part of that same Action. Furthermore, that attack may include the participation of some or all of the other friendly naval units that may happen to have already been in that zone when the moving ships arrived.
Use Naval Units in any one Sea Zone to Attack Enemy Ground Units in one Land Area Bordering that Sea Zone (Conduct Coastal Bombardment): The only enemy ground units which may be attacked in this way are fortress type units (other ground units may not be targeted). Use the naval unit's anti-ground unit strength (and all land units in that area may fire back if they have an anti-surface ship combat factor). This may be combined with a Launch a Long Range Aircraft Carrier Air Strike Action (see below) against those ground units.
Note: Air units in that zone may not fire back defensively.
Use Naval Units in any one Sea Zone to Attack Enemy Bases in one Land Area Bordering that Sea Zone (Conduct Coastal Bombardment): Attack enemy controlled or contested ports, airbases and mobilization centers in that area. Use the unit's anti-ground strength. Each base counts as a separate target per the normal combat rules. For each hit, place one disrupted marker on one base (but no more than one per base; excess hits are not counted). This may be combined with a Launch a Long Range Aircraft Carrier Air Strike Action (below) against those ground units.
Launch a Long-Range Aircraft Carrier Airstrike (Initiate Carrier Raid): This may be conducted only by aircraft carrier units. The aircraft carriers and any escorting naval units may first move up to their movement limit. The player then reveals which aircraft carrier units are launching the strike. Each aircraft carrier uses one of its combat factors against enemy forces in any adjacent sea zone or land area. This may be any combination of enemy units and bases (resolved per above). The combat is resolved normally, though the enemy units may not shoot back at the aircraft carrier (even if the enemy has air units). However, apply the Aircraft Carrier Depletion rule, if that optional rule is in effect.
Use Naval Amphibious Units to Move Ground Units to another Sea Zone (Conduct Amphibious Movement): Only amphibious type naval units may do this. The amphibious unit(s) must start the movement phase adjacent to a coastal area (but not a Home base) containing both a port and friendly ground unit(s). The amphibious unit(s) then embark the ground unit(s) (but not in excess of their capacity) and move up to their normal movement limit, carrying the ground units. At the end of the move, the ground unit(s) may stay aboard the amphibious unit(s), or be disembarked on an adjacent land area. This may trigger an Amphibious Assault Actions.
Each LCTR, ATR and TR unit can carry two light or one heavy unit. Note that non-amphibious naval units may accompany the amphibious units (see 10.14).
Use Warships to Move Ground Units (Emergency Transport): All BB, BC, CA, CL and/or DD units may perform this type of Action. The BB/BC/CA/CL/DD units must start the movement phase adjacent to a coastal area containing both a port and friendly ground unit(s). The BB/BC/CA/CL/DD units then pick up the ground unit(s) (but not in excess of their capacity) and may move up to their normal movement limit, carrying the ground units. At the end of the move, the ground unit(s) must be disembarked on an adjacent land area (if not, the ground units are eliminated). This may trigger an amphibious assault. Each BB/BC/CA/CL/DD may carry one light unit (no heavy units.) Note that other naval units may accompany the BB/BC/CA/CL/DD. This may be combined with Conduct Amphibious Movement.
Use Naval Amphibious Units to Evacuate Ground Units (Evacuation): Same as Conduct Amphibious Movement or Emergency Transport (above), except: 1) this may be done from a coastal area which does not contain a port; and 2) roll one die for each such unit. On a 1-3 it is picked up normally; on a 4-6 it is placed in the Refit box.
Use Naval Transport Units to Move Land-Based Air Units (Embarking Aircraft): Only TR units may perform this Action. It is performed in the same manner as Conduct Amphibious Movement, except that the unit(s) being transported may be any "F" type (only) air unit(s).
25.5 G-3 Air Actions
Rebase Aircraft from one Friendly Base Area to another Friendly Base Area (Air Ferry): Only land based air units may perform this. The move may be up to a distance of twice the air unit's range. The take-off and landing base areas may be friendly-controlled or contested. A player may use his side's Home base as either the takeoff or landing point for his rebasing. Home bases are considered to be land areas on the map. Rebasing units may conduct no attacks, offensive or defensive, as part of their rebasing Action. This is the only air mission that allows an air unit to land at a base other than the one at which it originally started.
Launch a Land-Based Airstrike against Enemy Ground and Air Units in a Land Area (Bombardment): Pick up any or all air units based in one area and move them to any one land area in range. Then, attack enemy units in that area. Also, if there are any friendly air units in that area, they may join in the attack. This cannot be combined with an attack by friendly land or naval units (including aircraft carriers).
Launch a Land-Based Airstrike against Enemy Naval Units (Air-Naval Attack): Pick up any or all air units based in one area and move them to any one sea zone in range. Then, attack enemy surface and submarine naval units in that zone. This cannot be combined with an attack by friendly aircraft carriers (or other naval units). Land-Based Air units attacking enemy Naval units must check if they located a target. To locate enemy Naval units, each attacking friendly air unit needs to roll a die. If DR is 1-4, proceed with the attack. If DR is 5-6, the air unit cannot attack a Naval unit and return it to base.
Launch a Land-Based Airstrike against Enemy Bases (Bombing): Pick up any or all air units based in one area and move them to any one land area in range. The land area must be enemy-controlled or contested, and it must contain ports, airbases and/or mobilization centers. Also, if there are any friendly air units in that area, they may join in the attack. Then, attack enemy-controlled or contested ports, airbases and mobilization centers in that area. Attacking units may be divided up between any of those bases, using their anti-ground unit strength. For each hit, place one Disrupted marker on one base (but no more than one per base, excess hits are not counted). This cannot be combined with an attack by friendly land or naval units (including aircraft carriers). Enemy units with anti-air capability in the area defends there simultaneously against the intruders. This Action cannot be combined with an attack by friendly land or naval units (including aircraft carriers).
Use Aircraft Carrier Units to Transfer Land-Based Air Units (Allies only): Only aircraft carrier units may perform this, and only British Hurricane and Gladiator fighter type units may be transferred in this manner. The fighters must start in a friendly or contested airbase, move up to twice their range limit to the aircraft carrier, and then move one more time up to twice their range limit to another friendly or contested airbase. Rebasing Hurricane or Gladiator units may conduct no attacks, offensive or defensive, as part of their rebasing Action.
25.6 G-3 Land Actions
Move a Force of Ground Units via Ground Movement (Land Move): Move one or more ground units in any one area to any one adjacent area. This may include movement from and into areas containing enemy land units. If there is more than one adjacent area, all moving units must be moved to that same one area. Also, see the provisions of the mountain rules (see 10.12).
Move a Force of Ground Units to an adjacent Land Area containing Enemy Units and Attack the Enemy Force within that Same Land Area (Land Assault): Same as Land Move, except that at the end of it the movement, attack the enemy land units in the area. Also, if there are any friendly ground units already in that area, they may join in the attack. See section 11.0 for more details.
Use a Force already in a Contested Land Area to Attack the Enemy Force within that Same Land Area (Close Combat): Simply attack the enemy units in a land area where friendly land units are already present. See section 11.0 for more details.
25.7 G-3 Combined Actions
Use Transported Ground Forces in any one Sea Zone to conduct an Amphibious Invasion of any one Invasion-Susceptible Enemy-Controlled Land Area bordering that Sea Zone (Amphibious Assault): A ground force being transported by naval transports or BB/BC/CA/CL/DD units disembarks on an adjacent coastal area which must contain a port (regardless of control status). The player must conduct an attack against enemy land units in that area if it contains a fortress unit, or is a small island. Otherwise, attacking is at the option of the amphibious assaulting player. This may also include the participation of friendly land units already in the same area. Naval units may not add their combat strengths to this combat. If the transporting unit is a LCTR, then the units may be disembarked on coastlines which do not contain a port.
Make a Combined Air-Ground Attack (Germans only): The German player moves or has in place ground units in an area, and then conducts an attack with them, while adding any one force of "DB" (Ju 87) air units that are within their printed range, as per a normal land based airstrike Action. This may also be combined with an Amphibious Assault or Glider Assault (but not Airborne Operation) Action.
Airlift Ground Unit from any Friendly Base to any other Friendly Base (Conduct Airlift): Only Air Transport units may perform this. The Air Transport unit(s) must start the movement phase in the same area as friendly ground units to be airlifted (which must also contain an airbase). The Air Transport unit(s) then pick up the land ground units and move up to their normal movement limit, carrying the land units, landing in a friendly or contested airbase. At the end of the move, the transported land units must be disembarked. If there are enemy air and/or land units in the same area, then an Air Assault combat must occur (see below). Other air units may accompany the Air Transport if they began in the same area. Each Air Transport unit can carry up to one light unit (no heavy units). The Air Transport unit may move up to twice its range (starting on a friendly airbase and landing on another friendly or contested airbase). Or, it may move one way to another friendly or contested airbase, drop off a unit, and then return (empty) to its starting base.
Make an Airborne Movement (Airborne Operation): This Action may only be performed if the German player has an airborne unit in play. This is conducted in the same manner as Conduct Airlift, except that the air transported land units must be "airborne," and they may land on any land area (no base is needed in the landing area). If there are enemy air and/or land units in the same area, then a Paradrop combat must occur (see below). This is resolved as part of this same Action. Air Transports may land in the target zone or re-base normally.
Make a Combined Airlift and Airborne Movement (Airborne Operation/ Conduct Airlift): Only the German player may do this. First execute an Airborne Operation into an area containing an airbase (area control status is irrelevant). Then conduct a Conduct Airlift Action into that same airbase. All moving units must start in the same area, and all units must be disembarked in the same area.
Make an Air Assault (Paradrop): This is mandatory when making a Conduct Airlift and/or Airborne Operation Action into a land area containing enemy air and/or land units. Upon reaching the target area, and after debarking air transported/paradropped units, all moving units must attack. All air and land units which were already in the area must also be involved in the attack. Air Transports rebase, but only if they survive the combat.
Make an Air Assault (Glider Landing): This is an alternative to an Air Assault (Paradrop) above, except that any Air Transports that participate in a glider landing are eliminated automatically immediately after conducting this Action. However, for the duration of any attack in the target area, each airborne unit is entitled to a -1 die roll modifier during combat.
25.8 G-4 Actions
Make a Railroad Movement (Railing): The unit must start in an area which contains a railroad symbol. It can then move an unlimited number of area via connected areas that are printed with undisrupted rail line symbols. All such areas must be friendly-controlled, and the starting area must be currently in supply.
Base Recovery from Disruption (Repair Base): This may be for any disrupted base, port or mobilization center in an area you control. Roll one die: on a "4-6", remove the disruption marker; on a "1-3", it remains in place. If there is more than one disruption in a single area, you can roll for each of them individually as part of the same Action.
Railroad Recovery from Disruption (Repair Rail): This may be for any disrupted railroad, in an area you control. Roll one die: on a "3-6" remove the disruption marker from the railroad symbol in that area; on a "1-2" it remains in place.
Refit Naval Units in the Refit Box (Rebuild Naval): See Rule 13.0.
Refit Air Units in the Refit Box (Rebuild Air): See Rule 13.0.
Refit Ground Units in the Refit Box (Rebuild Ground): See Rule 13.0.
Entrench Ground Units (Dig-in): Place an entrenched marker in the same land area as any friendly ground unit(s). The entrenching units must be in supply. See the Entrenchment (23.0).
26.0 Events List
26.1 German Events
During the Event Resolution Phase, the German player rolls one die: if the die roll is "1-4", the German player may draw one event chit, each of which is explained below.
- Atlantic Breakout. The German player may take one Action during the Event Resolution phase involving only non-submarine naval units. Remove this marker after playing.
- Captured Supply. Place this marker in one German-controlled or contested area with a Norwegian mobilization symbol. All German ground units in that area have their printed anti-ground combat factors increased by "1" (to a maximum of "5"). If using the Optional Supply rule, instead, all units in that one ground force are supplied for one Action. Return this marker to the pool after being used, or if the Allies gain control of the area.
- Dietl Takes Charge. The German player may take one Action during the Event Resolution phase involving only mountain units. Remove this marker after playing.
- Fall Gelb (Invasion of the West). The German player must play this the instant that it is picked. The German player rolls one die and must withdraw that number of German Heavy units from the map. For the rest of the game, the Allied player may not take the Call for Reinforcements (Allied) action, and French units may not Refit. Keep this marker face up for the remainder of the game.
- Gruppe XXI. The German player may take two Actions during the Event Resolution phase (using any types of units.) Remove this marker after playing.
- Luftwaffe Aircraft Captures Airfield. During the Event Resolution phase, one force of German aircraft units may land on any one Norwegian airfield which is Allied-controlled but has no Allied units in the same area. Move the German air units there and place a German control marker in that area. Remove this marker after playing.
- Luftflotte Five. The German player takes one Action during the Event Resolution phase involving air units. Return this marker to the pool after playing.
- Morale Check. The German player must play this the instant that it is picked. Each player determines the number of Norwegian mobilization areas that they control. If one side controls more than the other player, then that player takes one Action (any type). Return this marker to the pool after playing.
26.2 Allied Events
During the Event Resolution phase, the Allied player rolls one die. If the die roll is "1-3", the Allied player may draw one event chit, each of which is explained below.
- Auchinleck Takes Charge. The Allied player may take one Action during the Event Resolution phase involving only British, French and/or Polish land units. Return this marker to the pool after playing.
- Base Aircraft on Frozen Lake. Place this marker on any Allied or contested area which has no printed airbase. For as long as this marker is in play, the Allied player may base one air unit in it (as if this were a printed base). The marker remains in place until the Germans gain control of the area, or the Germans disrupt the base (at which point, remove permanently).
- Morale Check. The Allied player must play this the instant that it is picked. Each player determines the number of Norwegian mobilization zones that they control. If one side controls more than the other player, then that player takes one Action (any type). If neither side controls more than the other, ignore this event. Return this marker to the pool after playing.
- Norwegian Government Escapes. This can be played only if the Allies control or contest Oslo. The Allied player may take one action during the Event Resolution phase involving only Norwegian units (including Mobilization). Remove this marker after playing.
- Norwegians Rally. The Allied player randomly picks one unit from the Norwegian reinforcement pool, and places it in an area containing no German units (even if it has no Mobilization Center). Remove this marker after playing.
- Operation Catherine. The Allied player may take one Action during the Event Resolution phase, involving only British naval units. Remove this marker after playing.
- Operation R4. The Allied player may take three Actions during the Event Resolution phase. These may involve any units. Remove this marker after playing.
- Operation Wilfred. Designate one stack of German naval units in a sea zone (not in the German Home base or the Kattegat). Roll one die for each: on a "1", it is eliminated (owing to minefields). Remove this marker after playing.
27.0 Scenario (Norway, 1940)
27.1 Allied Set-up (set up first)
Norwegian Land Units
- Oslo: RG battalion, Oslo fortress.
- Kristiansand: Kristiansand fortress.
- Bergen: Bergen fortress.
- Trondheim: 3rd recon regiment, Trondheim fortress.
- Narvik: 6th infantry brigade.
- Finnmark: Finnmark brigade.
- Hegra: Hegra fortress.
Norwegian Naval Units
- Sea zone adjacent to any Norwegian ports: 1 x CD, 1 x DD, 1 x PT, 1 x SS, 1 x TR.
Norwegian Air Units
- Oslo: 1 x Gladiator.
- Bergen: 1 x He-115.
- Stavanger: 1 x Fokker CV
British Land Units
- British Home base: 24th GD, 146th, 148th infantry brigades; SF infantry battalion, RM marine battalion.
British Air Units
- British Home base: 1 x Gladiator, 3 x Skua, 1 x Sunderland, 1 x Hudson, 1 x Blenheim, 1 x Wellington, 1 x Whitley.
British Naval Units
- British Home base, or in sea zones 35, 36 and/or 41: CV Furious, 2 x BB, 1 x BC, 2 x CA, 1 x CL, 4 x DD, 1 x SS, 1 x ATR, 3 x TR, 1 x LCTR.
French Units
- British Home base: 5th mountain demi-brigade, 27th mountain demi-brigade, 13th LE demi-brigade, 342nd armor company. British Home base, or adjacent sea zones: 1 x DD, 1 x TR.
Polish Units
- British Home base: Carp infantry brigade, 1 x SS, 1 x TR.
Norwegian Reinforcement Pool
- 1st, 2nd recon regiments; 1st, 2nd, 3rd, 4th, 5th, 7th, HOK infantry brigades; A/LV, B/LV infantry regiments; HOK antiaircraft regiment.
Other Allied Reinforcement Pool
British
- 15th infantry brigade, A/SSB marine battalion, KOH armoured troop, 6th antiaircraft brigade, 1 x Hurricane, 2 x Skua, CV Ark Royal, CV Glorious, 1 x CA, 1 x CL, 2 x DD.
French
- BACP mountain brigade, 2nd mountain regiment, 24th infantry regiment, 343rd armor company.
Polish: None.
Allied Special Reinforcements box (Optional Units)
- Norwegian: Narvik fortification.
- British: 1 x Hurricane, 1 x Gladiator, HL mountain brigade.
Note: See the Allied Special Rules below for use of these units.
27.2 Allied Special Rules (Optional)
- Control. All Norwegian land zones. The Faroe and Shetland Island begin as Allied controlled.
- Allied Special Reinforcements
- 2a) Norwegian Early Mobilization. Prior to start of play, the Allied player rolls one die and picks that number of units from the Norwegian mobilization pool. Then, place them in Norwegian mobilization zones, no more than one per zone. The Norwegian player may also place the Narvik fortification special reinforcement unit in the Narvik area. This option gives the Germans 10 victory points.
- 2b) More RAF Fighter Support. The Allied player can add one extra Hurricane and/or Gladiator special reinforcement units to his starting order of battle. Each unit added gives the German player four victory points. Place both units in Britain.
- 2c) British mountain troops ready. Add the British HL mountain brigade to the at start forces in Britain. This gives the Germans three victory points.
27.3 Germans (set up second)
German Land Units
- German Home base: 138th, 139th mountain regiments; 159th, 193rd, 236th, 307th, 310th, 324th, 334th, 349th, 359th, 340th, 345th, 362nd, 355th, 367th, 388th infantry regiments; 1/1, 2/1, 3/1 airborne companies; 40th armor battalion; NbFz armor company; 4th, 14th MG motorized battalions, GG motorized battalions.
German Naval Units
- German Home base, or sea zones 39, 40, 43 and/or 45: 1 x BC, 1 x CA, 1 x CL, 2 x DD, 1 x PT, 1 x SS, 5 x TR. Any naval zone: 1 x SS.
German Air Units
- German Home base: 1 x Do-117 (Kg 100), 1 x He-111 (Kg 100), 1 x Me-109, 2 x Me-110, 1 x Ju-87, 2 x Ju-88, 5 x He-111, 1 x He-115, 11 x Ju-52, 1 x Ju-52 SP, 1 x Ju-90.
German Reinforcement Pool
- 110th motorized regiment, 111th motorized regiment, 13th motorized battalion, 136th, 137th mountain regiments, 66th mountain battalion, 2/2 airborne battalion, 4/1 airborne company, 6/SST infantry regiment, 2 x Ju-88, 2 x He-111, 1 x Me-109, 1 x FW-200, 1 x AR 196.
German Special Reinforcements box
- German commando company, 1st KM, 2nd KM naval infantry, BB Bismarck, CV Graf Zeppelin.
Note: See the German Special Rules below for use of these units.
27.4 German Special Rules
- Operation Weserübung.
- 1a) The game starts with a German pre-turn activation phase, which consists of four Actions. (No unit can be activated twice).
- 1b) On pre-turn activation, all German naval units have their movement factors doubled.
- Special Reinforcements
- 2a) Brandenburger Commandos. The Br unit is placed on the map using a Launch Commando Operation action.
- 2b) Naval Infantry. There are two German naval infantry units. The instant that a German BC, CA, CL or DD unit is eliminated in a sea zone adjacent to a coastal zone, roll one die. On an odd result, the German player places one naval infantry unit on an adjacent coastal land zone. On an even result, nothing happens. There are only two of these units, and once both have been placed in the Pool, no more are received. They refit normally.
- 2c) Battleship Bismarck and Carrier Graf Zeppelin. These are "what if" units. The Bismarck was not ready for action until later in 1940 and the Graf Zeppelin was never operational. The German player can add either or both to his starting order of battle by giving the Allied player victory points. The Bismarck gives 10 VP and the Graf Zeppelin 20. Place both units in the Third Reich.
Rules Changes, Additions, Clarifications
- Actions (Operations): Each turn consists of several Actions that both players use. Number of Actions is determined by the difference of each player's die roll.
- Dice difference of 1: Each player has three actions, one Naval, one Ground and one Air in whatever order he choose. Each of these actions can be swapped for Reinforcements or Refit actions.
- Dice difference of 2: Each player has two regular actions, and a bonus third action for activation of Submarine unit(s) only.
- Dice difference of 3: Each player has any three actions.
- Dice difference of 4: Each player has any four actions.
- Dice difference of 5: Each player has any five actions.
- Doubles - both players roll the same die roll number: Each player starting with the German roll to check If Random Event occur. The German player picks an event chit on a die roll of 1-4. The Allied player picks an event chit on a die roll of 1-3. Other results are no effect. Any player may implement his event in that phase. Doubles do not count for a turn, rather as a mid-turn. It is a mid-turn, which is not marked on the Turn Record Chart. If any actions are triggered, it is in that mid-turn phase, that is between two turns.
- If doubles are rolled again: another event checks happened, and the turn is not started yet, it is still a mid-turn. The minimum number of actions in a turn's action phase is three.
- Each unit may be activated only once per turn.
- Air-Naval Attack: Land-Based Air units attacking enemy Naval units must check if they located a target. To locate enemy Naval units, each attacking friendly air unit needs to roll a die. If DR is 1-4, proceed with the attack. If DR is 5-6, the air unit cannot attack a Naval unit and return it to base.