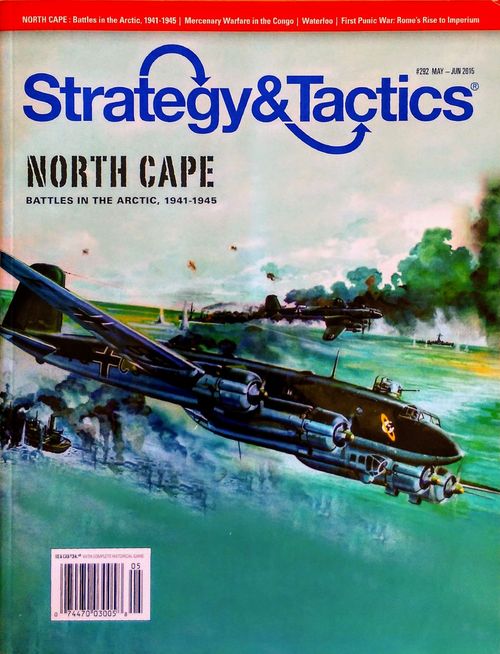
North Cape: Convoy Battles in the Arctic, 1942-45
North Cape: Convoy Battles in the Arctic, 1942-45 Rulebook
Table of Contents
Table of Contents
1.0 Introduction
North Cape: Convoy Battles in the Arctic, 1942-45 is a simulation of the convoy battles fought in the Barents Sea during World War Two. The game is played in several scenarios, each of which simulates one of the historical convoy battles around in the Arctic. Each side must attempt to find and locate enemy positions and complete their missions. The objective in the game for the German player is to sink the largest number of enemy merchant ships possible. For the Allied player, the objective of the game is to bring the greatest number of ships to the Soviet Union.
1.1 Abbreviations Used
The following abbreviations are defined as follows:
- AA: Anti-Aircraft
- ASW: Anti Submarine Warfare
- AT: Attack (aircraft)
- CV: Aircraft Carrier
- BB: Battleship
- BC: Battlecruiser
- CA: Heavy Cruiser
- CL: Light Cruiser
- DD: One or two Destroyers
- F: Fighter (aircraft)
- R: Reconnaissance
- Sub: Submarine
- Merc: Merchant Ship
- DE: Two or three minor escorts (corvettes, armed trawlers, etc.)
1.2 Game Scale
Each segment of time known as a game turn represents 4 hours. Each hex represents ~12 nautical miles.
Design Note: The movement ratings for ships assume that ships are traveling at their "cruise" speed, and also accounts for currents, swells, wind, zigzagging, the Gulf Stream, the Earth's curvature, course alterations, occasional stragglers, and so forth, ad infinitum, and thus will cover less distance than what their speed data alone might otherwise suggest. Similarly, each air unit represents multiple squadrons that are operating in shifts when they are launched, not every last aircraft of that contingent in the air at one time.
2.0 Game Components
North Cape includes these rules, one map, and one counter sheet of 228 units and markers. Players will need to provide one six-sided and one ten-sided die (not included with the game) to resolve various game activities.
Note: In all cases, a ten-sided die roll of "0" is to be regarded as a "10", not zero.
2.1 The Map
The maps shows the area of the Arctic Ocean north of Norway and the Soviet Union (the Barents Sea) where the Arctic convoy battles were fought (roughly between the latitudes of Tromso and Murmansk).
2.2 Polar Ice
The white lines printed on the map show the limit of the polar ice pack in different seasons of the year. The instructions of each scenario specify the exact limit of the ice pack for that particular scenario. Ship game pieces are not permitted to move above the currently applicable polar ice line. Moreover, any ship game piece that moves within two hexes of the applicable polar ice line is susceptible to collision with growlers and icebergs (see 11.2).
2.3 Units
Combat units in North Cape either represent individual ships (BBs, BCs, CVs, CAs, subs, merchants), or groups of 2-3 destroyers or minor escorts such as frigates, corvettes, armed trawlers, etc.). Aircraft squadrons represent approximately 20-25 planes.
2.4 Damage Markers
Any one unit receiving a damage result is placed beneath a "damage" marker. That unit's movement and printed factors are thus assumed to be halved (rounded down). Any unit that is damaged twice is eliminated.
However, some ship units are printed with a symbol that indicates an additional quantity of damage that it must endure before being eliminated (before sinking); This is indicated by a number printed in the upper righthand corner of that ship counter. When any such ship is damaged more than once, it is placed beneath another damage marker. Such a ship is not considered to be sunk until the damage markers it accrues is equal to its damage number. In all cases, however, no ship's factors are ever reduced more than half (rounded down) regardless of how much damage it accrues (until it is sunk, of course).
Example: The Tirpitz is printed with a damage number of "5". Thus, if the Tirpitz receives three damage results, it is placed beneath three damaged markers (or a "Damage 3" marker); its factors are halved (rounded down) in such a case, no matter how many damage markers it has accrued.
Note that there is no provision in the game for any damaged unit to be repaired (the time scale is too short for such events within the scope of the game).
3.0 Sequence of Play
Each game turn of North Cape is further subdivided in a series of game phases.
The players must play the game in the strict order of the sequence of phases (the sequence of play) as listed below:
1) Weather Phase (Sea State)
One of the players (it doesn't matter which) rolls one six-sided die and then consults the Weather Table. The "Weather" marker must be placed in the corresponding box (Good, Fog, Stormy) of the Weather Track.
| Die Roll | Weather |
|---|---|
| 1 | Clear |
| 2 | Clear |
| 3 | Fog |
| 4 | Fog |
| 5 | Fog |
| 6 | Storm* |
| 7 | Storm* |
| 8 | Storm* |
Die Modifiers: +2 Winter turns; +1 Spring or Autumn turns; -1 Summer turns.
* Air type units may not perform missions on Stormy weather turns.
2) Determine Weather Effect on Range
If the current weather condition is Fog, determine the maximum range of all air units that fly during that game turn (see 5.4).
3) Purchase Decoys
Both players (simultaneously and secretly) may each purchase a quantity of "Decoy" game pieces. Each Decoy game piece costs 2 victory points (which is added to the enemy side's victory point allotment). Each player then secretly draws that quantity of Decoy game pieces from his own pool of such game pieces, and sets them aside for now, but adds the total cost of all decoy game pieces to the enemy player's victory point allotment (which starts at zero VP for both sides). A player is never required to purchase any decoy game pieces, if he prefers not to.
Note: Neither player may wait to see how many decoy game pieces the other player purchased before his own purchases. All purchases are simultaneous; only the expenditure of which must be revealed.
Note: Neither player reveals the amount of decoy game pieces they purchased, but only the total cost their collective purchases, if any.
Note: It is permitted for either player to intentionally over-spend victory points when purchasing Decoy game pieces so as to deceive his opponent (so, for example, a player could spend six victory points but only secretly draw two Decoy game pieces, if he prefers).
After both players have announced that their purchases are complete, each must reveal how many victory points they spent (in other words, how many victory points are awarded to the other side), which must be indicated on the Victory Point Track on the game map.
Note: Decoy game pieces may not be saved from one turn to the next. All purchased decoy game pieces are removed at the end of the current turn, whether they were used or not.
Once both players have purchased all of their intended decoy game pieces, they are set with their starting set-up units or units already on the map (after the first game turn), to be placed on the map face-down (along with other face-down units, so as to deceive the opponent as to which game pieces are genuine units and which are decoy).
Note: The allotment of decoy game pieces included in the game is a purposeful limit. Neither side may ever have more decoy markers on the map at one time than are provided for his side.
Once any decoy is discovered, it must be removed from the map for the remainder of that game turn.
4) Conduct Missions Phase
See 5.0.
5) End of Turn Phase
All game pieces that had been successfully reconnoitered may be flipped back to their face down sides (and are not considered reconnoitered until successfully reconnoitered again during a subsequent game turn).
Next, move the turn marker one space on the Turn Record Track, and then begin a new game turn.
If this is the last game turn of the current scenario, examine the victory conditions and determine who has won the scenario.
4.0 Set-up and Stacking
Set-up is always regulated by the specific scenario (see 12.0), but stacking is otherwise unlimited. However, all ship units in the game are limited to placement and movement on a sea hex that is below the seasonal polar ice edge, or in a port hex. Otherwise, ship units in the game may move from, via, and to any eligible sea hex anywhere on the map per the movement rules (see 5.0), and may even remain in any sea hex perpetually (ships are never required to return to a base after being moved out to sea). All air units in the game may move from, via, and to any hexes anywhere on the map, although all air units must be returned to a friendly airbase or CV at the conclusion of the current mission.
When all units are set up on the map, they generally should be placed face-down so that the enemy player cannot see what types or kinds of units are there. Only a recon mission and combat mandates that any particular unit must be revealed (for both sides). Of course, a brazen player may proudly place any of his units face up for his enemy to see, if he is a real man.
Note: A reconnaissance attempt requires the reconnoitring player to reveal the unit that is performing the reconnaissance, but only if the attempt is successful.
4.1 Airbase Limits
There is no stacking restriction, per se, in the game, but each airbase is limited to stacking a maximum of five friendly air units at any one time. This limit applies to the British CV (Victorious) as well, although there are only four British air units, so it is a non-sequitur for purposes of this particular game. However, if the British CV is damaged, its stacking limit is reduced by one per each level of damage it suffers (for example, if the Victorious has a "Damage 2" marker, its air unit stacking limit is reduced from five to only three).
In the event that an air unit has performed a mission and is unable to return to an airbase (or the British CV, in the case of the British air units) because of airbase limits (or because the British CV is sunk), that air unit is simply eliminated instead.
4.2 Holding Boxes
The map is printed with five "Holding Boxes" which the Allied player may use to hold his ships (instead of maintaining unwieldy stacks on the map itself). As such, each holding box corresponds to a specifically numbered ship group which the Allied player may assign any way that he prefers (to a particular group of ships entering or are already on the map); A "Group" game piece is provided for each of the holding boxes. When a particular group of ships on the map is moved to a holding box, simply place a "Group" game piece in the hex where those ships are.
The Allied player may never form more than five groups at one time, and he may never hide the quantity of game pieces comprising any particular group (the German player is always permitted to count the quantity of game pieces that occupy any holding box), though it is perfectly legal for the Allied player to have any quantity of decoy game pieces (that he purchased that turn) in any holding box, and he may (and usually should) keep the game pieces in any such holding box(es) face down so as to conceal their identity from the German player.
Of course, if the German player conducts a successful reconnaissance upon a "Group" game piece on the map, he is permitted to know the identity of the game pieces in that group's corresponding holding box as per the result of that reconnaissance attempt (see 6.1).
Note: It is legal for a group of game pieces to be comprised of nothing other than decoy game pieces (purchased at the beginning of that game turn; see 3.0).
It is permitted for the Allied player to have a Group game piece on the map with any other game piece, whether face down or not, on the map in the same hex together. A Group game piece itself may remain face down, and it may move with any other friendly game pieces normally, or independently, if desired. It is even permissible for a Group game piece to move without containing any game pieces in its corresponding holding box. However, it is revealed normally if ever successfully reconnoitered by the German player.
No game piece may ever exist in a holding box without the corresponding Group game piece present on the map, however.
The German player is not provided with and may never use any holding box.
5.0 How to Perform a Mission
The Allies always perform the first mission of any game or scenario (which is usually just entering the map), but otherwise each side must alternate performing one mission at a time until one side or the other declines any intention to perform a mission (which then allows the other side to perform another mission). Both sides alternate conducting missions perpetually until neither side has any more missions to conduct (or no units with which to conduct missions).
Any type of mission can involve movement, although some do not necessarily require movement. To perform any kind of mission that involves movement, a unit (or stack of units) may be moved, if it is otherwise eligible to move. A player is never required to move any unit, if he prefers that unit to not move, but units only move as part of a specific mission (see below); in other words, units are not moved as part of any phase or step, but simply as part of a specifically announced mission. Air units are unique in that respect insofar as they must be automatically returned to a friendly base or CV after conducting a mission.
Each unit that is performing a mission may only move one at a time, unless in a stack (and all moving units are performing that same mission together); A stack of units may move together, provided that they begin stacked together in the same hex, and they move along the same exact route. In such a case, a stack can only move a maximum distance equal to the slowest unit in that stack (unless that slowest unit is dropped off along the way).
Note: It is not required that a stack of units move together, nor is it required that a stack end their movement in the same hex (some units in a hex may be "dropped off" along the way, such that some units may continue their movement as other units end their movement). A unit that is "dropped off", however, may not then continue its movement thereafter during that mission; Once a unit is dropped off, its movement is ended for that mission.
Otherwise, the mechanics for all movement is the incremental movement of a unit (or a stack of units) from its current hex to a series of connected hexes, one at a time, requiring the moving unit (or stack) to deduct one if its printed movement points to enter each such hex, until its printed movement is reduced to zero (or unless the moving player desires to end that unit's movement for that mission before then). Air units may not ever move beyond their printed range limit, however (see 5.1).
Exception: No ship type of unit may ever move to initiate combat with any type of air unit (although an air unit stacked with a CV may do so, after which it must return to the CV whence it came).
If a unit moves into any hex that is occupied by an enemy unit, its movement must be halted to resolve possible combat there.
Exception: Submerged submarine game pieces are not subject to Patrol intercept.
A unit's movement will also be halted if it is successfully intercepted (see 7.0).
After a Patrol, whether combat had occurred or not, that mission ends.
5.1 Mission Types
Each unit game piece (or stack) is only ever permitted to perform one type of mission at a time, and never more than one mission per type (Recon, Patrol, Sortie, Attack) per turn, although it is permitted for a unit to conduct each type of mission once during the same turn, if that unit is otherwise capable of that kind of mission.
A player may always choose to decide which type of mission he will perform first, but any unit that conducts a mission must complete that mission before it conducts another type of mission during the same turn.
The process of performing each mission type is explained as follows:
Recon: Any unit that moves (or already is) adjacent to a hex containing an enemy unit or stack may declare a reconnaissance of that hex (see 6.0), attempting to reveal the contents of that particular hexagon. After that reconnaissance attempt, regardless of the outcome, that mission has ended.
Note: A successful Recon is required to conduct an Attack mission into the same hex during that same game turn (but not required to conduct a Patrol interception, which is an automatically successful Recon for the intercepting unit only).
Patrol: Any unit that moves to (or already is in) a hex may automatically attempt to initiate combat with any enemy units that enter that hex (in conjunction with any other friendly units that are already in that same hex). A Patrol mission that intercepts any enemy unit is considered a successful reconnaissance (automatically) for the patrolling unit only (any other attacks would require a successful reconnaissance normally), but only allows combat after a successful interception (see 7.0).
Sortie: A unit may simply be moved to any particular hex on the map, if it is eligible to move. After a sortie (movement) is complete, that mission ends.
Note: It is perfectly legal for a player to sortie nothing but decoy game pieces, or a stack with some or mostly decoys, etc.
Attack: A unit may simply be moved to a particular hex on the map, if it is eligible to move, that is currently occupied by an enemy unit or stack, and thus attempt to initiate combat there (see 9.0), assuming the target has been successfully reconnoitered first (see above). It is possible for an enemy unit or stack to first initiate combat with that attacking unit as it is moving to attack as a Patrol Interception (see 7.0). After any resulting combat, regardless of the result, that mission ends.
Note: Certain types of units can only ever attack other certain types of units, as per the combat rules (see 9.0).
5.2 Mission Execution
Always beginning with whichever player had purchased the most Decoy markers during the preceding game turn*, each player (each side) is limited to performing one mission at a time. Both players must alternate conducting a single mission, each player taking a turn after the other, until each game piece on the map has performed one mission (or is not intended by the owning player to conduct any mission).
* During the first turn, the British always perform the first mission, or also if both sides had bought the same number of decoys.
As each player performs a mission, a player is permitted to declare a "pass", which means that he chooses not to conduct any mission at that time, but may yet still do so at a later time. Both players may do this at any time during a game turn, and repeatedly, but if both players ever declare a "pass" in a row (in other words, if both players declare a "pass", one right after the other), the game turn ends immediately.
A unit does not have to perform a mission; Indeed, a player may choose to cancel an intended mission before it begins. It is also permissible for a player to interrupt a mission and cancel it midstream (before it is fully executed). For example, an air unit that has been launched and is moving to a target to conduct an Attack mission may be halted halfway if the owning player declares that he is cancelling that mission.
Regardless, however, each unit may only ever conduct one mission at a time (Recon, Patrol, Sortie, or Attack). A particular unit that is conducting a specific mission may never change missions during the course of its current mission (for example, an air unit that is conducted a Recon mission cannot then suddenly conduct an Attack mission). Of course, different units in the same hex may each be assigned different types of missions therein, if otherwise eligible to conduct that kind of mission.
As mentioned, no unit in the game may change its mission assignment during the course of a present mission, even if stacked with another unit that is assigned to a different mission.
5.3 Range Limits
Ship units may remain at sea indefinitely, but all aircraft units are limited to a distance of hexes from the airbase or CV that they started on (counted in terms of connected and contiguous hexes). The range of each kind of air unit is printed in the lower right hand corner of that air unit game piece. Thus, no air unit may ever be moved to any hex (from where it began its mission) that is any farther than (from that base) than its own printed range number.
Of course, no air unit may share or impart its range number to any other unit; each air unit's ratings are completely unitary to itself.
Example: An air unit with a printed range of "25" is limited to be moved (regardless of the mission) from its current airbase or CV to a maximum of twenty-five contiguous hexes from that same airbase or CV during any turn.
No air unit is ever required to move up to its maximum printed range, if the owning player wishes to move fewer hexes.
Some air units are printed with a "U" as a range number, meaning "Unlimited". These air units have no range limit, and may reach any location on the map when moved, unless reduced by foul weather (see 5.4 below).
5.4 Weather Effect on Air Range
If the current weather condition is Fog, either player (it doesn't matter which) must determine the maximum range by rolling two ten-sided die, adding them together; that net result is the maximum range (the maximum number of hexes) that any air unit may fly during that game turn. For example, a roll of "4" and "6" would be a maximum range of ten hexes.
5.5 Decoy Game Pieces
Each decoy game piece can be moved in any manner and to any distance that the owning player desires, but of course any movement that exceeds the allowances of all rules will be a clue to the opposing player that it is a decoy. Such theatrics, no matter how obvious, do not require a hidden decoy to be revealed. Only a recon (if successful) or combat ever requires a decoy game piece to be revealed (except decoys that are stacked exclusively with submerged submarines; see below).
Note: In addition to movement, decoys can perform missions, though any activity that requires the decoy to roll a die will reveal that decoy if its die roll was successful (and thereby nullifies the die roll immediately).
A Patrol interception against a submerged submarine is not possible if the unit intercepting it is not ASW-capable. As such, a submerged submarine on its face-down side—as well as any Decoy game pieces it is stacked with—need not be revealed.
5.6 End of Turn
After both players have declared a "pass" (or simply have no more missions), all air units that are in a "Not Available" box are returned to any friendly airbase or CV (if otherwise within that air unit's range). No air unit may remain aloft beyond the end of a turn. In the case of any British air unit, it is automatically eliminated at this time if its parent CV had been sunk.
6.0 Reconnaissance
If a unit that is assigned to a Recon mission is currently adjacent to (or in) a hex that is presently occupied by an enemy game piece (presumably face down and unknown to the opposing player), the reconnoitering player may declare a recon attempt (with any type of unit) upon that enemy game piece.
Note: A successful reconnaissance (see below) is required to conduct an Attack mission upon any enemy unit (but is not required to conduct a Patrol mission. A Patrol interception is considered to be an automatically successful reconnaissance for the intercepting unit only). A submerged submarine cannot be reconnoitered (only detected per 8.1).
6.1 Procedure
To conduct a reconnaissance attempt, the reconnoitering player must roll one 10-sided die, which is correlated to the chart below.
Note: A reconnaissance attempt requires the reconnoitering player to reveal what unit is conducting the attempt, but does not cause the reconnoitering unit itself to become reconnoitered per 7.0 or 9.0.
Cross-reference the die roll with the result as indicated (the "Reveal Result"), which may require the reconnoitered player to reveal a portion of units in that hex (which might include any present decoys).
Reconnaissance Attempt
| Die Roll (D10) | Reveal Result |
|---|---|
| 1-3 (or less) | No effect (nothing revealed) |
| 4-6 | Reveal half of all units in the hex (of owner's choice) |
| 7-9 | Randomly reveal half of all units in that hex (round up) |
| 10 (roll of "0")+ | All units in that hex revealed |
A reconnaissance die roll must be modified if the following conditions apply (cumulatively), however:
| Condition | Modifier |
|---|---|
| If reconnoitering unit is an "R" type | +2 |
| If the hex is a Norwegian coast hex | +2 |
| If reconnoitering unit is an "AT" type | +1 |
| If current turn's weather is Clear | +1 |
| If only one enemy game piece is in hex | -1 |
| If the hex is within the iceberg zone | -1 |
| If reconnoitering unit is a submarine | -1 |
| If reconnoitering unit is a merchant | -3 |
| If current turn's weather is Foggy | -4 |
| If "Shadowing" (see 6.2) | -4 |
| If only submerged enemy subs in hex* | -1 |
* Including any decoy game pieces that are stacked with a submerged sub, which are only revealed if the reconnaissance is successful.
Each adjacent and eligible unit may attempt one reconnaissance (if conducting a Recon mission), however a reconnaissance may never reconnoiter more than once (one hex) per mission.
A unit that is revealed by a reconnaissance will remain revealed for the duration of that same game turn (and thus is eligible to be attacked by subsequent missions) unless that unit is subsequently moved as a sortie mission (which nullifies the reconnaissance).
If a successful reconnaissance is followed up by an attack mission, the attack automatically reveals all of the enemy units in that hex (in which case all of the enemy units defend as a single group normally).
6.2 Shadowing
A unit may attempt a reconnaissance from a distance of two hexes (instead of adjacent), but must add a - 4 to his reconnaissance die roll. All other rules apply normally.
Note: This is one method to avoid being intercepted by enemy patrolling units.
6.3 Run Silent, Run Deep
During a two-player game, whenever either player is attempting a reconnaissance upon an unrevealed submerged submarine (which is a mystery to the reconnoitering player), the submarine's player may choose to impose the -1 die roll modifier for a submerged submarine to which he is entitled, or he may choose to purposefully ignore that beneficial modifier so as to deceive his opponent about the true identity of his submarine unit. Of course, if he does choose to ignore that modifier, this therefore increases his opponent's odds of a successful reconnaissance attempt (in which case the submarine's identity will be revealed per the normal rules, even if it is not eligible to be attacked).
7.0 Patrol Interception
If a unit that is assigned to a patrol mission is currently adjacent to (or in) a hex that is presently entered by any moving enemy unit (as it enters that hex during its movement), the patrolling player may declare and then attempt to intercept and thus initiate combat by simply moving his unit (halting the enemy unit or stack there) and declaring an attempt to intercept and initiate combat there.
Exception: Air type units cannot ever be intercepted by ship type units. Similarly, submarines cannot ever be intercepted while they are submerged.
To conduct an interception attempt, both players must first reveal all of their own units (including decoys, if any) in that hex. Once in the same hex, neither player may hide any of his unit(s) present there, and all must be involved with any interception that occurs.
Note: Any enemy unit exiting an adjacent hex to any non-adjacent hex may not be automatically reconnoitered or intercepted (but could be automatically reconnoitered and intercepted if it subsequently enters another adjacent hex, per 7.0 above).
7.1 Procedure
To attempt a Patrol Interception, the players must array all of their own ships in a row, and then compare the intercepting player's single fastest game piece with the intercepted player's slowest game piece. That is to say, whichever intercepting game piece is printed with the highest speed number must then be compared to whichever enemy game piece is printed with the lowest speed number. If the intercepting player's fastest game piece is printed with a movement number that is equal to or higher (>) than the intercepted player's slowest game piece's movement number, a Patrol Interception has occurred, and combat must be resolved immediately.
Note: An air unit printed with a "U" speed number is assumed to be faster than any game piece it is intercepting.
7.2 Stragglers
After a successful interception attempt, an intercepted player may, if he so chooses, declare his slowest game piece(s) in any intercepted hex to be "Stragglers". In doing so, he may remove any or all of his other faster game pieces (in other words, those game pieces that are not equal to or slower than the intercepting player's fastest game piece) from the impending combat. This has no effect on any of the other game pieces in that hex, which must resolve combat there normally, and nor does it allow the removed game pieces to continue moving (they are still halted for the remainder of that turn), but combat will thus commence without those removed game pieces (which are still considered to be in that same hex, but are assumed to be moving away).
Game pieces removed from an impending combat cannot rejoin that combat after being removed.
Example: Three British DDs are moving to attack a surfaced German submarine, but enter within the patrol range of a patrolling German AT air unit (a Ju-88). The German player hence declares a patrol interception attempt as his mission, which is successful; the Ju-88 attacks and sinks two of the DDs in that interception hex. The British player then reveals a nearby aircraft carrier (off of the map) and launches an F air unit (a Sea Hurricane) from that carrier to conduct an attack mission…flying his Sea Hurricane to that Ju-88's hex (shooting down that Ju-88 air unit, not surprisingly). Next, it is now the German player's mission option, and so he simply submerges his submarine to end the encounter (submerged submarines cannot be attacked).
8.0 Submarines
Submarines are unique in that they can exist on the map in one of two states, either as "submerged" or "surfaced". A submarine is always assumed to be submerged, but can be surfaced at any time during its movement by placing a "surfaced" marker atop that submarine unit.
A submarine that is surfaced is treated like any other normal ship unit, except that—while surfaced—that submarine is entitled to add +1 to its printed movement (even if that submarine already moved its full movement of "3" as submerged before surfacing). Once any submarine has been declared "surfaced", it remains surfaced until its next mission (at which time it may be submerged once again, regardless of the mission type).
While a submarine is submerged, however, it is only ever susceptible to attack by enemy units that are ASW-capable (per 8.3), as well as immune to Patrol mission interceptions. In this way, any submarine can simply remain submerged and totally immune to all enemy interference, except when it is detected after attempting an infiltration; see 8.1 and 8.3.
If a Patrol Interception attempt is conducted against a submerged submarine that is on its face-down side, that patrol interception is not considered a successful reconnaissance for that intercepting unit if it is not ASW-capable. In fact, a submerged submarine on its face-down side—as well as any Decoy game pieces it is stacked with—need not be revealed in such a case. In these cases, the intercepted player may declare "Submarine" (even if it is a Decoy game piece) to indicate that the patrol interception is not successful.
Note: In this way, a patrolling player will not know if his "unsuccessful" interception was an actual submarine or a decoy.
8.1 Infiltration
A submerged submarine unit that is making an attack (but not when being attacked) may attempt to "infiltrate", meaning that it is not susceptible to being targeted by any enemy unit (even any ASW-capable units) while it is conducting an Attack mission or a Patrol interception attempt.
Note: If there are no ASW-capable units in the target hex (where the infiltration is attempted), this procedure is superfluous; Infiltration is automatic.
To infiltrate, the infiltrating player must simply roll one six-sided die, which is correlated to the chart below. Cross-reference the die roll with the result as indicated:
Infiltration Table
| Die Roll (1D6) | Result |
|---|---|
| 1 (or less) | Screened (no effect) |
| 2 | Screened (no effect) |
| 3 | Detected (sub is attacked) |
| 4 | Detected (sub is attacked) |
| 5 | Infiltrated (sub may attack) |
| 6+ | Infiltrated (sub may attack) |
The infiltration die roll must be modified if the following conditions apply (cumulatively):
| Condition | Modifier |
|---|---|
| If sub is stacked with a U-boat ace | +3 |
| If target hex is a Norwegian coast hex | +1 |
| If current turn's weather is Clear | +1 |
| Per ASW-capable unit in that hex | -1 |
| If current turn's weather is Foggy | -1 |
| If an enemy air unit is on patrol in hex | -2 |
| If current turn's weather is Stormy | -2 |
| If target recon hex is in iceberg zone | -3 |
Note: If there is more than one submarine trying to infiltrate, roll one six-sided die for each attempting submarine unit.
A die roll of "6" is always considered to be an Infiltrated result, regardless of the conditional modifiers, and a die roll of "1" is similarly always considered to be a Screened result, regardless of the conditional modifiers.
If the result is "Screened", it is considered to be no effect, ending that submarine's mission (the infiltration attempt has failed, but that submarine is nevertheless immune from any enemy attack during its mission).
If the result is "Detected", that submarine is eligible to attack normally, but it is thereafter susceptible to attack by any ASW-capable units in that same target hex (regardless of the results of that submarine's attack).
If the result is "Infiltrated", that submarine may conduct one attack normally, but it is immune to any enemy attacks (even from ASW-capable units) during that mission.
Note: A submarine's infiltration only lasts for the duration of its current mission. The enemy player may conduct a mission of his own to attempt to reconnoiter that sub, and another mission to attempt to attack that submarine normally. However, Patrol missions cannot be conducted against submerged submarines.
8.2 Submarine Attack
A submarine that conducts an attack does so per the normal combat procedure, using its printed Torpedo factor (see 9.8), even if it is detected (and whether submerged or not).
8.3 ASW Attacks
ASW-capable units, only, may conduct an ASW attack against a submarine unit that is not surfaced (either as a result of becoming detected, or during an ASW-capable unit's own mission that is endeavoring to attack that submarine unit in its current hex).
Note: If a surfaced submarine is attacked, it is attacked as if it is a normal ship unit.
To resolve an ASW attack, the attacking player must simply roll one six-sided die, which is correlated to the chart below. Cross-reference the die roll with the result as indicated:
ASW Attack Table
| Die Roll (1D10) | Result upon Submarine |
|---|---|
| 1 (or less) | Sunk (eliminated) |
| 2 | Sunk (eliminated) |
| 3 | Receives damage marker |
| 4 | Receives damage marker |
| 5 | Re-roll with -1 modifier* |
| 6 | Re-roll with +1 modifier* |
| 7 | No effect (sub dives) |
| 8 | No effect (sub dives) |
| 9 | No effect (sub dives) |
| 10 (a roll of "0")+ | No effect (sub dives) |
* This modifier is cumulative with all other modifiers below, but never applies more than once per die roll, regardless of how many times this result has already occurred.
The ASW attack die roll must be modified if any of the following conditions apply:
| Condition | Modifier |
|---|---|
| If the current turn's weather is Stormy | +2 |
| If the ASW unit is a Soviet DD unit | +2 |
| If the sub is stacked with U-boat ace | +1 |
| If sub is within the iceberg zone | +1 |
| If the ASW unit is any British unit | -1 |
| If current turn's weather is Clear | -1 |
A submarine unit that is undergoing an ASW attack is assumed to have no anti-aircraft at all (the submarine is under water).
9.0 Combat
Whenever any opposing ships (including any surfaced submarine) occupy the same hex during any Attack mission or any successful Patrol interception, combat must be resolved amongst all eligible units of any type in that particular hex.
9.1 Combat Order
Combat must be resolved in four stages, listed as follows:
-
Any air-to-air combat (see 9.2)
-
Any air-to-surface combat (see 9.3)
-
Any surface-to-surface combat (see 9.6)
-
Any torpedo combat (see 9.8)
Each of the above stages must be finished to completion before beginning the next stage, unless that stage is not relevant (if there are not units of that type in this particular battle). The procedure for each type of combat is listed as follows:
Note: In all cases, a ten-sided die roll of "0" is to be regarded as a "10", not zero.
9.2 Air-to-Air Combat
If both players have opposing air units in the same hex, and at least one air unit therein is printed with a red air-to-air factor, air combat must be resolved in that hex (before any other activity therein commences). If that hex is a base or aircraft carrier, any air units there are assumed to be aloft and participating in that air combat.
To resolve air-to-air combat, the player that had initiated combat in that hex (either as an Attack mission or as a Patrol interception) must select one of his air units (that is printed with a red air-to-air combat factor), and then choose a single enemy air unit as its target.
Note: Some air units are printed with a green air-to-air combat factor; Any such air unit cannot initiate air combat, but may only participate in air combat if it is targeted by an enemy air unit with a red air-to-air combat factor. In cases where there are only air units with green air-to-air combat factors, no air combat is resolved, and the air-to-air combat stage is skipped during surface combat.
Both players each roll one ten-sided die for his own air unit: If the die roll is equal to or less than (<) his own air unit's printed air-to-air factor, the other air unit is damaged (or eliminated if already damaged). Place a "Damage 1" marker atop that air unit. Per this procedure, it is certainly possible for both opposing air units to damage each other, if each rolls equal to or less than its own air-to-air factor.
Next, the other player must likewise select one of his other air units (that is printed with a red air-to-air combat factor), if any, and then choose a single enemy air unit as its target. Air combat is then resolved per the exact same procedure above.
Note: An air unit that has already been targeted is ineligible to be selected to conduct its own attack during the same air combat (it is engaged fighting the air unit that is attacking it).
Both players must alternate choosing their own (if eligible) air units and enemy targets, one at a time, until both sides have no more air units to attack with or remaining targets.
Note: A player may target any enemy air unit that he prefers, including any enemy air unit that has already been targeted during the same air combat. However, an enemy air unit is always eligible to roll an air-to-air combat die roll each time it is targeted by a different air unit.
Thereafter, any air unit that participated in air combat must be moved to that air unit's own "Not Available" box printed on the map (if it was not eliminated as a result of air combat). An air unit that resolved (defined as rolling an air-to-air combat die roll) air combat is not eligible to participate in air-to-surface combat during that same game turn.
9.3 Air-to-Surface Combat
Any eligible air unit present in a hex with any enemy ship units, provided that such air units did not resolve any air combat, may conduct an air-to-surface attack against any single enemy ship unit in its same hex. To do so, the player whom initiated combat in that hex (either as an Attack mission, Patrol mission, or successful Intercept mission) must choose a single enemy ship unit as the target of his air unit's air-to-surface attack. The attacking air unit must be printed with an air-to-surface factor of at least "1".
Note: Submerged submarines cannot be attacked by air-to-surface combat, and a submarine's anti-aircraft factor is ignored while submerged.
The attacking player then rolls one ten-sided die for his air unit: If the die roll is equal to or less than (<) his own air unit's printed air-to-surface factor, the targeted ship unit is damaged (or eliminated if already damaged). Place a "Damage" marker atop that ship unit. That ship unit's combat factors are then considered to be halved (rounded down) for the duration of the game, or until it is sunk.
Note: Some ship units are printed with a symbol that indicates that they must incur more than two damage markers to be sunk (eliminated), as indicated by the number that is printed within that symbol. Such a ship is not considered to be sunk until the damage markers it accrues are equal to that damage number.
However, if an air-to-surface attack die roll is higher than its air-to-surface factor, that air unit can potentially become damaged by anti-aircraft fire; The attacked player must simply roll another ten-sided die: If that die roll is equal to or less than (<) his targeted ship's anti-aircraft factor, that attacking air unit has become damaged (place a "Damage" marker atop that particular air unit, or eliminate that air unit if it was already damaged).
Note: A submarine's anti-aircraft factor only ever applies when that submarine is attacked while it is surfaced.
If both players have eligible air units in that same hex, the other player must then select one of his other units (that did not engage in air combat) that is printed with an air-to-surface combat factor, if any, and then also choose a single enemy ship unit as its target. The attack is then resolved per the exact same procedure above.
Both players must alternate choosing their own (if eligible) air units and enemy targets, one at a time, until both sides have no more air units to attack with or remaining targets.
Thereafter, any air unit that participated in air-to-surface combat must be moved to that air unit's own "Not Available" box printed on the map (if it was not eliminated as a result of air combat), or to the British CV (if a British air unit), if eligible to land there.
9.4 Base Anti-Aircraft
If any German ship unit is subject to an air-to-surface attack that occurs in a hex with a printed port or airbase symbol, that port or airbase is assumed to have an automatic AA factor of "6", which can never be reduced, and it also applies to all ship units in that hex (while in that hex).
9.5 Destroyer (DD) and Anti-Air (AA) Ships
DD and AA type ship units are normal ships in all respects, but they possess the unique capability to impose an anti-aircraft roll on any air unit that conducts an attack in the same hex where they are present, even if the attacking enemy air unit did not roll higher than its printed air-to-surface value. This capability applies even if the DD or AA ship itself is not targeted, or if it is currently damaged (though any damage inflicted upon a ship always occurs before anti-aircraft is resolved, so it is possible that a DD or AA ship could be sunk before it could impose an anti-aircraft roll).
This capability is indicated by a gun turret symbol printed below the letter code of that ship.
9.6 Surface-to-Surface Combat
If both players have opposing ship units (not submerged submarines) in the same hex, and at least one ship unit therein is printed with a gunfire factor, surface combat must be resolved in that hex (no reconnaissance is required in such instances). To do so, the player that initiated combat in that hex (either as an Attack or a successful Patrol interception mission) must select one of his ship units (that is printed with a gunfire factor), and then choose a single enemy ship unit as its target.
Both players each roll one ten-sided die for his own ship unit: If the die roll is equal to or less than (<) his own ship unit's printed gunfire factor, the other ship unit is damaged (or eliminated if already damaged). Place a "Damage" marker atop that ship unit. That ship unit's combat factors are thereafter considered to be halved (rounded down) for the duration of the game, or until it is sunk. Per this procedure, it is certainly possible for both opposing ship units to damage each other, if each rolls equal to or less than its own gunfire factor.
Note: Some ship units are printed with a symbol that indicates that they must incur more than two damage markers to be sunk (eliminated), as indicated by the number that is printed within that symbol. Such a ship is not considered to be sunk until the damaged markers it accrues is equal to that damage number.
Next, the opposing player must likewise select one of his other ship units (that is printed with a gunfire factor), if any, and then choose a single enemy ship unit as its target. Surface combat is then resolved per the exact same procedure above.
Note: A ship unit that has already been attacked is ineligible to be selected to conduct its own attack during the same surface combat (it is engaged fighting the ship that is attacking it).
Both players must alternate choosing their own (if eligible) ship units and enemy targets, one at a time, until both sides have no more ship units to attack with (that have not already attacked at least once) or remaining targets.
Note: A player may target any enemy ship unit that he prefers, including any enemy ship unit that has already been targeted during the same surface combat. However, an enemy ship unit is always eligible to roll a surface-to-surface combat die roll each time it is attacked by a different ship unit.
Thereafter, all surviving ships remain in that hex, and must undergo torpedo combat one time (see 9.8 below).
9.7 Weather Modifiers to Surface Combat
If the current weather is Foggy, all surface die rolls are modified with a +1 penalty. If the current weather is Stormy, all surface die rolls are modified with a +2 penalty.
9.8 Torpedo Combat
Only units with a Torpedo rating may engage in torpedo combat once, but only if they survived (even if damaged) surface combat or air-to-air combat (if it is an air unit with a torpedo rating). The procedure for this torpedo combat is otherwise exactly the same as surface combat, using eligible unit's torpedo ratings instead.
A unit that participated in surface combat or in air-to-air combat is eligible to engage in torpedo combat (assuming it survived) during the torpedo combat stage, provided that it is printed with a torpedo rating of at least "1".
9.9 Weather Modifiers to Torpedo Combat
If the current weather is Fog, all surface die rolls are modified with a +2 penalty. If the current weather is Storm, all surface die rolls are modified with a +4 penalty.
9.10 Concluding a Mission
When conducting each stage of the naval combat order, each eligible unit is permitted to attempt one attack per stage, if otherwise eligible to do so. That is to say, if a unit is printed with combat factors relevant to more than one stage of the combat order, it may attack during each pertinent stage (provided it wasn't eliminated before the current stage), but it can only ever attack once per each such stage, per turn, in any case.
After the combat order is completed in that hex, the game turn resumes until all of the intending units complete their missions, if any.
10.0 Winning the Game
Victory is defined by the accrual of victory points (VP), which are awarded for certain achievements during a scenario, listed as follows:
Victory Points Awarded to Achieving Side
| Achievement | VP (per) |
|---|---|
| Enemy BB eliminated (sunk) | 45 |
| Enemy BC eliminated (sunk) | 40 |
| Enemy CV eliminated (sunk) | 30 |
| Enemy CA eliminated (sunk) | 20 |
| Enemy CL eliminated (sunk) | 15 |
| Enemy DD eliminated (sunk) | 15 |
| Enemy DE eliminated (sunk) | 0 (zero) |
| Enemy AA eliminated (sunk) | 10 |
| Enemy FF eliminated (sunk) | 10 |
| Enemy Sub eliminated (sunk) | 5 |
| Allied Merc eliminated (sunk) | 2D6 |
| Allied Merc that enters either the Murmansk or the Archangel hex during the scenario (per Merc). |
Whenever a scenario ends, the players must each count the total quantity of victory points he has accumulated throughout the scenario; The side with the higher total has won the scenario.
Note: Achievements never deduct victory points from the other side's victory point tally, but only ever add to the achieving player's own victory point tally.
In the rare event that both sides have exactly the same victory points when the game ends, the German side is considered the winner.
There is no maximum quantity of VP that any side can accumulate.
11.0 Optional Rules
The following rules are to increase the game dynamics, but must be agreed upon by both players, per rule, to be used during a game or scenario.
11.1 U-boat Commander Aces
In certain scenarios, the German player must place under one or two of its U-boats a "U-boat Ace" game piece which represents an outstanding U-boat skipper. The U-boat Ace game piece must remain with that very same submarine for the entirety of a scenario.
U-boat Ace game pieces will modify various U-boat operations during game play, which is indicated by the relevant rule (for example, see 8.1).
11.2 Arctic Ice Pack (Growlers)
At the end of any movement occurring in an iceberg zone, a player must roll one six-sided die to determine if his moving ship or stack has collided with any icebergs.
On a die roll of 1-3, nothing happens (no icebergs have been encountered). On a die roll of 4-5, one ship of the owning player's choice is immediately damaged. On a die roll of 6, two ships of the owning player's choice are immediately damaged (or one ship if only one ship is present there). Place a "Damage 1" marker on any such ship.
Note: If playing solitaire (see 11.6), the German player selects which ship(s) are damaged.
11.3 HF/DF Detection
Once per each game turn, the Allied player may require the German player to reveal the location of a U-boat anywhere on the map (of the German player's choice).
On a die roll of 1-3, nothing happens (no detections have occurred). On a die roll of 4-5, one U-boat of the German player's choice is immediately revealed on the map. On a die roll of 6, two U-boats of the German player's choice are immediately revealed on the map.
A revealed U-boat is simply regarded as an automatic reconnaissance, and only for the duration of that game turn. If possible, the German player must always reveal a U-boat that is hidden. Otherwise, if no U-boats are currently hidden, the die roll is as if nothing happened.
11.4 Storm Dispersion
At the end of any movement occurring during a stormy game turn, the Allied player must roll one six-sided die to determine if any single stack anywhere on the map (of his choice) becomes dispersed.
On a die roll of 1-3, nothing happens. On a die roll of 4-5, one ship of the Allied player's choice is removed from that stack and placed into any adjacent hex (if otherwise legal) of the German player's choice. On a die roll of 6, two ships of the Allied player's choice must be removed from that stack and placed into any adjacent hex(es) of the German player's choice.
This condition only lasts for that current game turn, after which any such ships may be moved normally.
11.5 AA Artillery of Merchants in Convoy
Each increment of ten Merchant type ship units adds a +1 AA factor to that hex if it is attacked by an enemy air-to-surface attack. Fractions below ten are ignored (that is to say, if in a convoy there are 23 merchant ships, the Allied player may and +2 to the AA factor in that hex). [Transcription note: the printed sentence reads "the Allied player may and +2 to the AA factor"; a word appears to be missing from the source. Transcribed as printed.]
This AA addition only applies if there is an AA factor to add to. In other words, merchant ships alone have no intrinsic AA factor, and this modifier is not considered an AA factor, but rather only an addition to a present AA factor already in that hex.
11.6 Solitaire Play
North Cape can be played, as the Germans, solitaire. To do so, you simply select any one scenario normally, and set up all of the units of that scenario (exception, first remove all of the British air units from the scenario; They will be placed with the Victorious only after it is discovered by successful reconnaissance. Additionally, remove all British submarines (which are deployed later). However, all Allied ships that are specified by that scenario's initial deployment to "enter" the map and/or be set up in either the "To Murmansk" or "To Archangel" hex are now flipped face down and then mixed together so that you do not know which game pieces are specific ships.
Next, you then add all of the British "Decoy" game pieces (placed face down) to that mix, mixing them in thoroughly so that you cannot discern which game pieces were actual ships and which game pieces are decoys.
Once all of those game pieces have been mixed together, set them aside in exactly even quantities of four distinct groups; If there are any remainders or extras, remove them from the scenario (but, do not inspect them to see what specific ships have been removed). Then, set up each group per each of the separate initial deployments required of that scenario. Groups that are entering the map must enter via a hex that is closest to the current ice pack edge (depending on the season specified by that scenario), but never into a hex that is within an iceberg zone.
Note: If the scenario specifies an initial deployment of any ships in either the "To Murmansk" or the "To Archangel" hex, that group must be set up in the "To Murmansk" hex during winter scenarios, or the "To Archangel" hex during summer scenarios.
Moving Groups
Groups always move as complete stacks, unless they "scatter" (see below). Otherwise, when the scenario begins, you must move each group exactly three hexes, following a direction towards one side of the map or the other, depending on where that group began the scenario. If that group enters the map from the west map edge, it must (each turn) move to a hex that is exactly three hexes closer to the opposite side of the map, but following along the southernmost edge of the current iceberg zone. Likewise, if that group began the scenario in the "To Murmansk" or the "To Archangel" hex, it must (each turn) move to a hex that is exactly three hexes closer to the western side of the map, also following along the southernmost edge of the current iceberg zone. In either case, though, the specific hex to be moved to is determined by a die roll; Roll one six-sided die per each moving group: That die roll indicates the hex, counted southward from the iceberg zone's edge (three hexes from the moving group) to where that moving group will actually move during that game turn. This process must be repeated each game turn until that group has either reached the "To Murmansk" or the "To Archangel" hex (depending on the season), or the western side of the map (if moving from the opposite direction).
If any group of ships is attacked, combat is resolved normally. If the attack involves any air units, air combat must first be resolved normally if the attacked group contained the British CV Victorious (with any operable air units). In such a case, the British air units must always target whichever German "AT" type of air units are printed with the largest combat factors, in the order of largest factor to the least.
Reconnoitering Groups
If any group is successfully reconnoitered (or attacked), you may examine the makeup of that group. After concluding reconnaissance or an attack, that group of ships is flipped back over again to their back side, and then becomes susceptible to "scatter" immediately thereafter. To determine if a group of ships will scatter, roll one six-sided die: If that die roll is equal to or less than (<) the quantity of ships that have been sunk by that attack, that group then automatically scatters (this means that a reconnaissance by itself never causes a group to scatter, because it does not sink enemy ships). When a group of ships scatter, you must randomly mix them into six distinct (new) groups, if possible, without knowing the makeup of each group, and place each new group into each of the six surrounding hexes around that attacked group's initial hex (where the attack occurred).
Note: If there are not enough new groups to place in each of the six surrounding hexes, place as many as exist in the surrounding hexes, placing them in the hexes that are farthest away from the nearest enemy base.
If scatter causes a group to enter an iceberg zone hex, it must undergo a damage check (see 11.2) normally.
After a group scatters, each new group then moves normally per the aforementioned rule, but as a distinctly different group (each group moves along the iceberg zone via a separate die roll) until that group has either reached the "To Murmansk" or the "To Archangel" hex (depending on the season), or the western side of the map (if moving from the opposite direction).
Submarine Contact
Whenever moving a German ship or stack of German ships, you must roll one six-sided die when that ship or stack completes its movement during that game turn (but always after all other combat, if any, occurring as a result of that movement). If the die roll is a "6", that German ship or stack has encountered an enemy submarine. If this occurs outside of the Soviet movement limit zone printed on the map, a single randomly chosen British submarine must then begin an attack against that German ship or stack per 8.1. If this occurs within the Soviet movement limit zone, a single randomly chosen Soviet submarine must then begin an attack against that German ship or stack per 8.1. In either case, after the attack, and regardless of the result, that submarine is removed from the map, but it is eligible to be randomly chosen again per this rule unless it had been sunk attempting to attack a German ship or stack. In the event that there are no more remaining submarines (if they have all been sunk), then this rule is disregarded for the remainder of the current scenario.
Victory Determination
A solitaire game ends normally, and victory is then assessed normally, as specified by the current scenario.
11.7 Campaign Game
Players that desire to play a campaign game can do so by simply playing each scenario, one at a time, in chronological order (in the order listed below).
Victory points are to be assessed per each scenario, normally, except that any ship that had been sunk during a previous scenario cannot be included in any later scenario. In effect, a ship sunk during a scenario is thus considered to be permanently sunk during the entire campaign.
A campaign game can be played solitaire with no particular additional rules required.
11.8 KMS Scharnhorst
After completing its repairs as a result of the "Channel Dash", the Scharnhorst did not become operational until August of 1942. However, had the Scharnhorst not been damaged, it would have theoretically been available in time for the "Enter the Luftwaffe" and "Convoy is to Scatter" scenarios. Players may therefore add the Scharnhorst (to be set up in the "To Narvik" hex during the initial deployment) if utilizing this optional rule.
11.9 U-571
The German submarine U-571 game piece (from the fictional movie of the same name) is included in the game as a tongue-in-cheek addition for any players that wish to replace any of the historical submarines of any scenario, or just add it as an additional submarine to any scenario to represent the deployment of additional submarines to the area. In either case, U-571 is to be set up per the initial deployment of the other German submarines.
12.0 Scenarios
The following scenarios indicate the units to be used, as listed, and the victory level for victory points accrued.
12.1 Unternehmen Sportspalast
The first combat sortie of the Tirpitz, March 1942
Operation Sportspalast was the first serious attempt by the Germans to intercept an Arctic convoy. Having received information that a Murmansk-bound convoy had been sighted, the German High Command ordered the Tirpitz to sortie and intercept it. The Tirpitz left Trondheim on March 6th, escorted by three destroyers. The final results of the battle were indecisive; The Germans sank a single merchant ship (the Soviet ship Izhora), whereas British torpedo bombers somehow let the Tirpitz escape unharmed.
Scenario Length: 30 turns Season: Winter
Initial Deployment (Allies):
These ships all enter on turn 1 via any west map edge hex (below the winter polar ice edge):
- 15 merchant ships (chosen randomly)
- 1 DD (any British)
- 1 DE (any British)
- 1 CA (Berwick)
These ships all enter on turn 1 via any other west map edge hex (below the winter polar ice edge):
- 15 merchant ships (chosen randomly)
- 2 DE (any British)
These ships all enter on turn 1 via any other west map edge hex (below the summer polar ice edge):
- 2 BB (King George V, Duke of York)
- 1 BC (Renown)
- 1 CV (Victorious, with all British air units)
- 5 DD (Any British)
- 1 CL (Kenya)
May be placed on the map in any sea hexes below the winter polar ice edge:
- Trident
- Tigris
These ships all enter on turn 1 in either the "To Murmansk" or the "To Archangel" hex:
- 1 DD (any Soviet)
Initial Deployment (German):
These ships all enter (only after at least one merchant ship is successfully reconnoitered) via any south map edge hex, but west of the "To Narvik" hex:
- 1 BB (Tirpitz)
- 2 DD
May be placed on the map in any sea hexes below the winter polar ice edge:
- U-134
- U-377 (with U-boat Ace)
- U-403
- U-584 (with U-boat Ace)
Note: These U-boat aces are Otto Kohler (U-377) and Joachim Deecke (U-584).
May be placed on the map in any base hex:
- 1 R (He-115)
Victory Conditions: Whichever player accrues the most victory points is the winner of the scenario, though the German player is therefore automatically considered the winner if the victory points are even.
Special Rules:
The Soviet DDs may not move more than ten hexes from the hexes they start in.
The winter polar ice edge is in effect.
The German player may add the ship Prinz Eugen to be stacked with the Tirpitz when it enters the map (historically the Prinz Eugen had been damaged by the HMS Trident the month prior, and was out of action for the rest of the war), but if he opts to do so, the Allied player may then add two CAs (British) to any stack of British ships entering the map.
12.2 Enter the Luftwaffe
The Battle for Convoy PQ.16, May 1942.
The battle for convoy PQ.16 was perhaps the greatest success of the Luftwaffe against the Arctic convoys. Between the 25th and 27th of May, Ju-88s and He-111s of Geschwaders 26 and 30 managed to sink seven merchant ships, and damaged another three.
Scenario Length: 36 turns Season: Spring
Initial Deployment (Allies):
These ships all enter on turn 1 via any west map edge hex (below the winter polar ice edge):
- 35 merchant ships (chosen randomly)
- 1 AA (any)
- 4 DD (any British)
- 2 DE
These ships all enter on turn 1 via any other west map edge hex (below the winter polar ice edge):
- 2 CA (Kent, Norfolk)
- 2 CL (Liverpool, Nigeria)
These ships all enter on turn 1 via any other west map edge hex (below the winter polar ice edge):
- 2 BB (Washington, Duke of York)
- 1 CV (Victorious, with all British air units)
- 2 CA (London, Wichita)
- 1 DD (British)
- 4 DD (US)
- 1 DE
These ships all enter on turn 1 in either the "To Murmansk" or the "To Archangel" hex:
- 17 merchant ships (chosen randomly)
- 3 DD (1 British and 2 Soviet)
- 1 AA
- 3 DE
May be placed on the map in any sea hexes below the winter polar ice edge:
- Trident
- Tigris
- Tuna
- Satyr
May be placed on the map in any sea hexes below the winter polar ice edge, but within ten hexes of the "To Murmansk" hex:
- ShCh-404
- M-176
- D-3
Initial Deployment (German):
May be placed on the map in any sea hexes below the winter polar ice edge:
- U-703
- U-436
- U-591
- U-251 (with U-boat Ace)
- U-377 (with U-boat Ace)
- U-586
Note: These U-boat aces are Heinrich Timm (U-251) and Otto Kohler (U-377).
May be placed in any Norwegian base hex or hexes:
- 4 R (Bv-138)
- 6 AT (Ju-88)
- 6 AT (He-111)
- 1 R (He-115)
- 2 AT (Ju-87)
- 1 AT (Fw 200)
- 4 F (Bf-109)
These ships all enter (only after at least one merchant ship is successfully reconnoitered) via any south map edge hex, but west of the "To Narvik" hex:
- 2 BC (Scheer, Lutzow)
- 1 DD
Victory Conditions: Whichever player accrues the most victory points is the winner of the scenario, though the German player is therefore automatically considered the winner if the victory points are even.
Special Rules:
The Soviet DDs may not move more than ten hexes from the hex they start in.
The ships Kent, Norfolk, Liverpool, and the Nigeria cannot move east of the North Cape hex row.
The merchant ships that begin the scenario already in the "To Murmansk" or in the "To Archangel" hex are awarded victory points for exiting the west map edge instead.
The winter polar ice edge is in effect.
12.3 "Convoy is to scatter"
The slaughter of convoy PQ.17, July 1942.
The Soviet Union seemed on the verge of collapse during the summer of 1942. The need to send help required sending a convoy in the midst of the Arctic summer, with 24 hours of daylight. The menace of the Tirpitz coming out thus compelled the Admiralty to scatter the convoy, leaving them at the mercy of U-boats and the Luftwaffe. Twenty-four merchant ships were lost, and the convoys were suspended for the summer.
Scenario Length: 42 turns Season: Summer
Initial Deployment (Allies):
These ships all enter on turn 1 via any west map edge hex (below the summer polar ice edge):
- 35 merchant ships (chosen randomly)
- 3 DD (British)
- 2 DE
- 1 AA
These ships all enter on turn 1 via any other west map edge hex (below the summer polar ice edge):
- 2 CA (London, Norfolk)
- 2 CA (Wichita, Tuscaloosa)
- 1 DD (US)
- 1 DD (British)
These ships all enter on turn 1 via any other west map edge hex (below the winter polar ice edge):
- BB (Duke of York, Washington)
- 1 CV (Victorious, with all British air units)
- 1 CA (Cumberland)
- 1 CL (Nigeria)
- 3 DD (2 British, 1 US)
These ships all enter on turn 1 in either the "To Murmansk" or the "To Archangel" hex:
- 35 merchant ships (chosen randomly)
- 2 DD (2 Soviet)
- 1 AA
- 3 DE
May be placed on the map in any sea hexes below the summer polar ice edge:
- Trident
- Tigris
- Tuna
- Satyr
May be placed on the map in any sea hexes below the summer polar ice edge, but within ten hexes of the "To Murmansk" hex:
- M-176
- D-3
Initial Deployment (German):
May be placed on the map in any sea hexes below the summer polar ice edge:
- U-88
- U-255 (with U-boat Ace)
- U-457
- U-703
- U-408
- U-334
- U-657
- U-251
- U-377
- U-355
Note: The U-boat ace is Reinhardt Reche.
May be placed in any Norwegian base hex or hexes:
- 4 R (Bv-138)
- 6 AT (Ju-88)
- 8 AT (He-111)
- 1 R (He-115)
- 4 AT (Ju-87)
- 1 AT (Fw 200)
- 2 F (Bf-109)
- 4 F (Fw-190)
These ships all enter (only after at least one merchant ship is successfully reconnoitered) via any south map edge hex, but west of the "To Narvik" hex:
- 1 BB (Tirpitz)
- 1 BC Lutzow
- 1 CA (Hipper)
- 2 DD
Victory Conditions: Whichever player accrues the most victory points is the winner of the scenario, though the German player is therefore automatically considered the winner if the victory points are even.
Special Rules:
The ships Norfolk, London, Wichita, and the Tuscaloosa cannot move east of the North Cape hex row.
Use the summer ice pack limit.