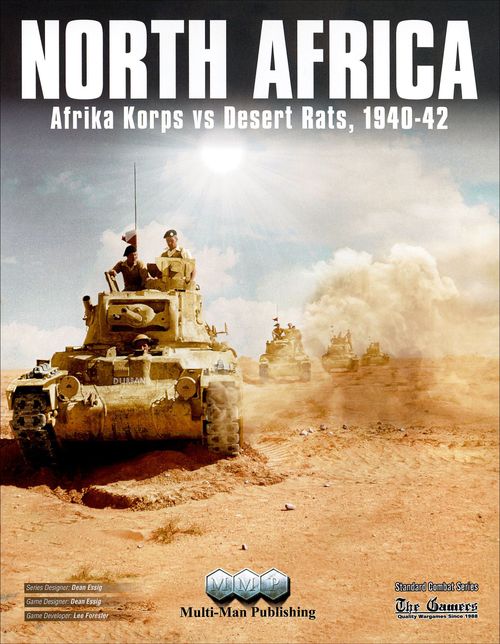
North Africa: Afrika Korps vs Desert Rats, 1940-42
North Africa: Afrika Korps vs Desert Rats, 1940-42 Rulebook
Table of Contents
Table of Contents
- 1.0 General Information
- 2.0 Sequence of Play & Pre-Turn Phase
- 3.0 General Rules
- 4.0 Optional Rules
- 5.0 Scenarios
- 5.1 Operation Brevity, 15 May 1941
- 5.2 Operation Battleaxe, 15 Jun 41
- 5.3 Operation Crusader, 19 Nov to 15 Dec 41
- 5.4 Gazala, 26 May to 29 June 42
- 5.5 El Alamein: The First Battle, 1 July 42
- 5.6 Operation Compass Campaign Start, 8 Dec 40
- 5.7 The Race to the Wire: German Intervention Campaign Start, April 41
- 5.8 Operation Crusader Campaign Start, 19 Nov 41
- 5.9 Gazala Campaign Start, 26 May 42
- 5.10 1st Alamein Campaign Start, 1 July 42
- Commonwealth Order of Arrival
- Axis Order of Arrival
- Designer's Notes
- Developer's Notes
- CW Random Event Table
- CW Rare Event Table
- Axis Random Event Table
- Axis Rare Event Table
- Terrain Effects Chart
- Combat Table
- Errata (5-22, 5 Jan 22)
1.0 General Information
1.1 Units & Ownership
1.1a Counter Colors.
The Axis player controls:
- Italian units (Blue Green)
- Wehrmacht units (Light Yellow-Tan)
- Luftwaffe (LW) units (Blue Grey)
The Commonwealth (CW) player controls:
- British units (Brown)
- Australian (Aus) units (Dark Tan)
- South African (SA) units (Orange)
- New Zealand (NZ) units (Mauve)
- Indian (Ind) units (Dark Brown)
- Polish (Red) units
- Free French (FF) units (Bright Blue)
- Sudanese units (Grey)
- Czech units (Ochre-Orange)
- Greek units (White with a Blue X)
- Yugoslav units (Purple)
Scenario Set Ups. If no nationality is listed: CW units are assumed to be British and Axis units are assumed to be German.
1.1b Nationalities. A player's units are completely interchangeable. There are no nationality restrictions.
1.1c Combat Units. A "Combat Unit" is any unit with a printed Attack and/or Defense Strength of at least one. Leaders, Supply Units, and markers of all types are not Combat Units and sometimes called "non-Combat Units."
1.1d Stacking Limit. The Stacking Limit is four Combat Units per hex. Unit step losses have no effect on stacking. Non-Combat units do not affect stacking.
Enforce the Stacking Limit for all friendly units:
- At the end of any Activation. (2.7)
- At the moment of an Attack or Overrun.
- When the owning player passes. (2.7)
Overstacking: If a stack is found to be overstacked, the owning player must eliminate its excess units. See also the stacking of Reinforcements. (2.3)
1.1e Non-Rebuildable Units. Leaders and Units with a White or Blue X on their counters cannot be rebuilt. Once destroyed or killed, they permanently leave the game and never go into any Rebuild Cup.
1.1f Supply Sources must be friendly controlled and either marked on the map with the side's symbols or listed in the scenario.
1.2 Scale
A hex is 5 miles, and a Turn is one month. Activations vary but represent 1-2 days of high activity. Units range from company to division in size.
1.3 The Maps
1.3a The Tobruk By-Pass. The Secondary Road around Tobruk becomes a Primary Road automatically at the beginning of October 1941 (Turn 11) as noted on the Map.
1.3b The Axis Safe Zone (ASZ). To keep the Italians from ever being entirely thrown off the map, there is an Axis Safe Zone (ASZ) west of Axx.30, marked with a Red Boundary.
No CW unit can enter, attack, or make an Artillery Barrage any hex in the ASZ. If a CW unit retreats into the ASZ, it is destroyed.
The CW can conduct Air Strikes into the ASZ, provided the spotter is outside of it.
Axis Reinforcements are unaffected by the ASZ and can enter it freely at all times.
Historical Note: The Italians were tasked with holding Libya and Egypt. Not running away!
1.3c Arco dei Fileni. Arco dei Fileni (A19.35) has an unlimited Stacking Limit and no Air Strike can be used against it.
1.3d Tobruk. Tobruk can act as a Reinforcement Entry Area when it can trace (overland) via Primary Roads to a friendly Supply Source and (even if that is not possible), allow a small amount of shipping into its port. Both can occur at the same time, but only for the player controlling the Tobruk hex itself.
Transfers to Tobruk: Tobruk (B50.08) must trace by Primary Road to either A19.35 or D38.01, as appropriate to do transfers. Any units in the locations above could be transferred to the Tobruk hex based on a die roll in the Reinforcement Phase. For the CW, you can transfer a number of units equal to the roll, but the Axis can only transfer half that roll (rounded up). Furthermore, the Axis cannot transfer any unit to Tobruk before March 1941.
Shipping to Tobruk: In addition to any transfers, one unit can ship from A19.35 or D38.01 to B50.08 in the Reinforcement Phase. The Axis March 1941 restriction do not affect shipping. Roll one die. On a roll of 3-6, the player can place ONE unit in Tobruk. This may be any Combat or non-Combat Unit. On a roll of 1 or 2, no unit is shipped that turn.
1.4 Control
A side "Controls" a hex whose Combat Units occupy it or were the last to move through it. Use Control markers to indicate control when needed.
1.5 Combat Multiples
Certain terrain features, Forts and Minefields affect a unit's combat strength by halving or multiplying the values.
The defender uses only the single best defensive multiplier for his strength, while the Attacker uses the single worst multiplier for his strength. Apply any shifts left due to terrain IN ADDITION to multipliers.
Play Note: You will notice that minefields and forts have their best effect outside defender-friendly terrain as sometimes their bonuses will not be on top of what the terrain gives.
2.0 Sequence of Play & Pre-Turn Phase
Each turn follows a specific Sequence of Play depending on whether it is an Active Turn or an Inactive Turn. Both Turns begin with the Pre-Turn Phase and end with the Clean-Up Phase. Active Turns may include multiple Activations during the Activations Phase, while Inactive Turns simply have a special Admin Movement Phase.
2.1 Sequence of Play
Pre-Turn Phase
- Random Events (2.2)
- Reinforcements (2.3)
- Initiative Determination & Inactive Turn Declaration (2.4)
Activations Phase
Inactive Turns:
- Admin Movement (2.5) (Go to Clean-Up Phase)
Active Turns:
- Air Strike Determination (2.6)
- Activations (2.7)
Alternate Activations until both players Pass and then go to the Clean-Up Phase.
Phases by Activation Type:
Full Activation
- Identify TWO Supply Units to Expend
- Movement (Overruns allowed)
- Combat
- Exploitation (Supply Units stacked with Rommel can move, 3.6a)
- Disorganized (DG) Recovery (3.1)
- Remove the Expended Supply Units
Limited Activation
- Identify ONE Supply Unit to Expend
- Movement (Overruns allowed)
- Combat
- Disorganized (DG) Recovery (3.1)
- Remove the Expended Supply Unit
Reaction Activation
- Movement (No Overruns allowed. Exception: Rommel, 2.7)
Pass
- None.
Clean-Up Phase
- Disorganized (DG) Recovery (3.1)
- Supply Trace (3.2)
- Unit Rebuild (3.4)
- Forts and Minefields (3.7 & 3.8)
- Advance Turn Marker
2.2 Random Events
In Campaign Scenarios, each player rolls on his side's Random Event Table. Make these rolls as 11...66 (with one die as the 10's digit and another as the 1's digit).
If the resulting Random Event cannot occur for any reason, nothing happens and there is no Random Event for that side that turn.
2.3 Reinforcements
The Reinforcements Phase handles a number of unit functions as listed on the Order of Arrivals (OOAs), including Reinforcements themselves, Removals, Exchanges, Withdrawals & Returns, and Training periods.
Newly arriving units called "Reinforcements" are listed in the scenario or the Orders of Arrival.
Reinforcements arrive in any friendly controlled Entry Area marked with the side's symbol. Scenarios may also add specific entry hexes.
If arriving Reinforcements would exceed the Stacking Limit in the Entry Area, the player can spread them out into adjacent hexes as needed so as to not do so. These hexes cannot contain EZOCs or be overstacked themselves.
Each player also receives the number of Supply Units listed in the scenario or the Turn Record Track for each turn.
Place arriving (or returning) Leaders into any friendly stack.
2.3a Removals. If the OOA lists a unit as a Removal, simply remove it directly from play from whatever location (map, box, or cup) or situation it might be in. Removals cannot be rebuilt.
2.3b Exchanges. If the OOA lists an Exchange, find the original unit listed and directly replace it with its new version in the identical situation or location as before. The original version cannot be rebuilt.
2.3c Greek Campaign. The OOA will list some units as being sent to Greece. These troops (2 NZ and 6 Aus) must be placed in the Greek Campaign Box (simply pick them up and put them in the box) as instructed. The needed unit can be either Full or Reduced-strength.
If a needed unit is currently in the Rebuild Cup, substitute it with another on-map unit (of the same type and Attack Strength). In this case, do not apply the CW Withdrawal Table's substitution requirement list, 2.3d.
Some Greek Campaign Box units may return to play when the Greek Campaign ends based on the instructions in the box. Some never will.
2.3d CW Withdrawals. The CW player rolls during the Reinforcement Phase in Campaign games as listed on the Turn Record Track as "CW Withdrawal."
Procedure:
- Roll two dice on the CW Withdrawal Table to see if (or how many) units must be withdrawn.
- For each unit withdrawn, roll one die on the middle column to determine the type needed and again on the third column to see when it returns or if it is Removed.
- Returning units arrive the number of turns later as rolled in #2, as a Reinforcement. Removed units are eliminated from play entirely. Withdrawn units do not go to the Rebuild Cup.
If the needed unit is unavailable, use a substitution (in the order shown) listed on the CW Withdrawal Table. Choose Full-strength units if available and Full-strength supersedes the type-priority list if there is a conflict.
Reinforcements arriving that same turn can be used to satisfy that turn's withdrawals.
2.3e Tripoli Cup. Put units setting up or arriving in Tripoli into a Tripoli Cup. These units randomly enter play as Reinforcements.
Each turn in the Reinforcement Phase, draw a number of units from the Tripoli Cup equal to the number of Axis Supply Units arriving that turn. Ignore any Random Event effects on Supply Units here: Use only the original value.
Some units are listed as Reduced-strength when placed into the Tripoli Cup, don't lose that information when drawn.
2.3f In Training. Certain CW divisions arrive in the theater still "in training." Training periods are listed in the OOA and the Training Status Chart.
These 2-step units all begin at Reduced-strength and cannot become Full-strength until completing their training period.
When the training period ends, all units belonging to that formation flip to Full-strength (in the Reinforcement Phase) and function normally.
2.4 Initiative Determination
2.4a Initiative. The scenario assigns Initiative for the very first turn, but players compete for it every turn thereafter. The player awarded Initiative determines which side conducts the first Activation or Admin Movement of that turn. It is awarded anew every turn.
Each player rolls two dice and the player with the higher total is awarded Initiative. Reroll any ties.
2.4b Active and Inactive Turns. Either player, beginning with the player with the first Activation, may declare an Inactive Turn immediately after determining Initiative. Conduct an Active Turn if the opposing player has (and commits to expending) a minimum of TWO Supply Units for this Turn. If he chooses or cannot not do so, conduct an Inactive Turn.
"Inactive Turns" restrict each player to only Admin Movement (Initiative player still chooses who goes first). After doing those Phases, both players move directly to the Clean-Up Phase. Only Inactive Turns have Admin Movement.
Design Note: Inactive Turns exist to take care of reinforcements avoiding wasted time when neither player is in a position to conduct operations. To avoid gamey ploys, if you want to have a regular turn, you need to commit to the supply expense.
2.5 Admin Movement
Each player may move all friendly units up to TRIPLE (3x) their normal MA, given:
- Units may not enter any EZOC unless the hex is already occupied by one or more friendly Combat Units.
- All Units must end their move in Supply. (3.2)
- Axis units may not move further east than the easternmost starting Axis unit (and CW units further west than the westernmost starting CW unit). Units used to set the limit of movement must themselves be able to trace supply to a Supply Source and never move in a way that violates their own boundary. The intent is that neither side can expand its territory. But Units can always move to hexes w/i 2 of a friendly city that can trace, in spite of the above.
- Units that begin the Phase in an EZOC cannot use Admin Movement.
If players agree, both sides conduct Admin Movement simultaneously to save time.
Supply Units are neither needed nor expended for Admin Movement, but they can move per the above.
2.6 Air Strike Determination
Each player rolls for their side the number of dice listed for Air Strikes on the Turn Record Track. Divide the side's roll by 2 (rounded up). The result is the number of Air Strikes that side has available that turn.
When the Air Surge Random Event occurs, add an additional die to the total (before dividing by 2).
Even with the Surge roll, each side can never obtain more than 8 Air Strikes in one turn. Unused Air Strikes cannot be saved from turn to turn and are wasted if not used.
The nationality of Air Strike counters is purely aesthetic.
2.7 Activations
Players alternate Activations starting with the side the Initiative Player selects. Activations are limited to Full, Partial, or Reaction Activations or Passing. After conducting any Activation or Pass, play proceeds to the opposing player, who then conducts an Activation (or Pass) of his own.
Players may use Activation markers as desired to indicate which units are (or are not) included in a given Activation.
At the end of each Full or Limited Activation, remove Expended Supply Units, all DG markers on ANY friendly units (there is no need to be in a Supply Unit's range to remove a DG), and any Activation markers used.
Play Note: In Full and Limited Activations you will need to keep track of expended Supply Units so as to activate units at the beginning of each of an Activation's Phases. We recommend moving Expended Supply Units last to avoid accidentally activating units that did not begin the Phase in that Supply Unit's range.
Full Activations: Each Full Activation requires that the player must flip TWO Supply Units to their Expended side. Units that begin each Phase (3.3) able to trace 10 hexes or less to either of the Expended Supply Units can use the listed Phases to:
- Move (including Leaders, 3.6)
- Overrun
- Attack
- Barrage (by Artillery or Air Strike)
- Remove DGs
See also the optional rule requiring "trace to both Supply Units." (4.3)
Limited Activations: Limited Activations only require ONE Supply Unit to flip to its Expended side. Given the Phases listed, units in a Limited Activation can:
- Move (including Leaders, 3.6)
- Overrun
- Attack
- Remove DGs
But nothing else.
Reaction Activations: The player can select a Reaction Activation only if the preceding enemy Activation that turn was Full or Limited. A Reaction Activation allows all Stacks w/i 10 or less of a chosen Combat Unit to move and nothing else. The owning player can choose any hex he wishes.
Exception: If a Stack contains Rommel at the start of the Activation, it can Overrun as well. No other actions can be conducted and only Rommel's Stack can overrun.
No Supply Units are expended in Reaction Activations.
Pass: If a player selects "Pass" as his Activation, play will go instantly to the other player's next Activation unless their previous Activation was a Pass as well. In the latter case, Activations end and play proceeds to the Clean-Up Phase.
Play Note: Given the above (and adequate Supply Units), a given Combat Unit may function multiple times in a single turn. This is expected and results in a higher tempo at a greater supply cost. If you want to run a series of barrages like 3rd El Alamein, then you need to stockpile your Supply Units!
3.0 General Rules
3.1 Disorganized Units (DG)
Artillery Barrages and Air Strikes can DG enemy Combat Units.
DG never affects Non-Combat Units.
DG units have their Attack Strength, Defense Strength, and Movement Allowance halved (round normally).
DG units have no ZOC.
Remove the DG marker from Activated friendly units at the end of each Full or Limited Activation and remove all DGs on both sides in the Turn end's Clean-Up Phase.
3.2 Supply Trace
During the Clean-Up Phase's Supply Trace Segment, all Combat Units must check to see if they are "in supply." These Supply Checks conform to SCS 12.1.
Any unit failing its Supply Check in the Supply Trace Phase is Out of Supply (OOS) and applies 3.2b.
Units unable to trace supply needed for an Activation simply do not Activate, they are not OOS.
To be "in supply," each stack must make a trace to at least one of the following:
- A Supply Source.
- A Primary Road hex that itself can trace a line of contiguous Primary Road hexes to a Supply Source (of any length).
- A friendly unexpended Supply Unit.*
Except for the distance from a Primary Road hex to a Supply Source, all these Supply Check traces can be no more than 10 hexes.
Important: Exception to SCS 12.1: Supply Trace during an Activation (only, not in the Supply Phase) IGNORE enemy Combat Units and unnegated EZOCs.
Design Note: With the short time scale of an Activation (1-2 days) units had enough onboard supply to keep operating. Activating includes both supply and command considerations.
* A Supply Unit used to allow units to be "in Supply" in the Supply Trace Segment becomes Expended, can supply any number of units, and will be removed at the end of the segment. Use of a Supply Unit is optional; the player can choose to risk the effects of being Out of Supply rather than expending one.
3.2a Oases. Oases qualify any units physically in their hex to be "in Supply." Oases cannot sustain any Activations.
3.2b Out of Supply Units. The only effect of being found to be Out of Supply is that the stack must check for Surrender. There are no other effects and the stack need not be marked as OOS.
Roll for each Stack found OOS in the Supply Trace Segment on the Surrender Table. Make these rolls after determining the supply trace of all units; a supply trace can't be opened by enemy units surrendering.
If the Surrendering units can be rebuilt, place them into their Rebuild Cup.
3.3 Supply Units
Supply Units represent the accumulations of physical supplies as well operational planning. They are used to conduct Activations, step in to allow Supply Trace (3.2) and create Forts (3.7) & Minefields (3.8).
The Turn Record Track list the number of Supply Units arriving as Reinforcements each turn under the heading Supply.
Supply Units only move during an Activation by tracing to an Expended Supply Unit (including itself) or during an Admin Movement Phase. Exception: If stacked with Rommel, Supply Units can move in an Exploitation Phase.
Supply Units do not count for stacking, have no Combat Strength and cannot be attacked. Supply Units retreat with their stacks normally. Supply Units are unaffected by DGs or Step Loss results in any Air Strike or Barrage.
If an enemy Combat Unit enters a Supply Unit's hex (meaning there is no friendly Combat Unit in the hex), Capture is not possible, instead roll one die for each Supply Unit below:
| Roll | Result |
|---|---|
| 1-3 | Eliminate the Supply Unit |
| 4-6 | Put the Supply Unit in any friendly Combat Unit's hex which can Trace Supply. If this is not possible, eliminate it. |
3.4 Rebuild Cups
Units which are destroyed (and can be rebuilt) are placed in a Rebuild Cup. There are three Rebuild Cups: The CW player has one, while the Axis player has one for his Italian units and another for German and Luftwaffe Units. Use any available cup or mug for this purpose.
The Turn Record Track gives the players Rebuild Points (divided exactly like the cups). Each Rebuild Point allows one random draw from the cup of the same type OR to recover TWO units to Full-strength from Reduced-strength. Up to 20 Rebuilt Points of each type can be saved for future use.
Place a drawn unit (at Full-strength) in any hex containing a friendly Supply Unit in Trace Supply.
Units wanting to recover to Full-strength must be in Trace Supply at that moment and that Trace Supply cannot involve an Oasis.
Do not mix the Tripoli Cup (2.3e) with any Rebuild Cup.
3.5 Barrages
Players can conduct Barrages using Artillery or by Air Strikes following the rules below. Regardless of type, the Barrage process is the same.
3.5a Procedure. Announce the Barrage and its type and roll one die for the target hex. Add +1 to the roll if that hex contains a Fort or Fort marker.
If the modified roll is less than or equal to the Artillery or Air Strike's rating, the hex is DG.
If the roll successfully DG's the hex, make another one die roll against that Stack (not per unit). If this second roll is a 5 or 6, inflict one step loss on one unit in that Stack (Barrage firer's choice). Otherwise, there is no additional effect.
3.5b Artillery. Full Activations allow a total of up to THREE Artillery Barrages to be used in the Active Player's Activation at the end of the player's Movement Phase (after all units have moved). You must declare and place the appropriate Barrage markers on their targets before executing any of them.
An Artillery Barrage's target hex must be w/i 5 hexes of a current Expended Supply Unit. Expended Supply Units could have moved that Phase.
Artillery Spotting: The target hex must be adjacent to a friendly unit when executed.
3.5c Air Strikes. Full Activations allow a total of up to TWO Air Strikes to be used in the Active Player's Activation. See also Optional rule 4.2. Unused Air Strikes cannot be saved for later. Air Strikes are allowed only in the following Phases, by side:
- Axis: Movement and Exploitation
- CW: Movement (only)
Air Strike Spotting: The target hex must be no more than 5 hexes from a friendly unit when executed. The spotting unit is not affected by doing so in any way and need not stay in that hex afterwards.
Design Note: Full Activations represent massive expenditures of ammunition and payloads that don't happen during normal operations.
3.6 Leaders
Both sides have Leaders representing a few key commanders from the campaign. Leaders are useful in assisting the attacks on their side. Leaders arriving as Reinforcements or returning from Capture or wounding can be placed in a hex with any friendly Combat Unit(s).
Leaders have no Movement Allowance and do not move like other units. Instead, all of a Player's Leaders can instantly be placed into any stacks containing any friendly Combat Unit(s) at the very beginning of each friendly Full or Limited Activation or Admin Movement.
Once the Leader is placed in a hex, it must accompany one unit of that hex in all Movement, Exploitation, and/or Advance after Combat which might occur.
At most one declared Leader per side can provide a column shift in a given combat. The Leader used must be stacked with an attacking or defending unit in a regular or Overrun combat. Declare their use before determining the odds.
Each player, beginning with the Attacker, declares his participating Leader, if any. After both players have done so, roll on the Leader Loss Table for each declared Leader.
The table result occurs before making the combat roll and Leaders apply no shift if killed, wounded, or captured. Remove Leaders who are killed, follow the table's instructions if Wounded, and give any Captured Leader to the opposing player. Players can exchange Captured Leaders any time they like.
If all the units stacked with a Leader are eliminated, automatically roll on the Leader Loss Table with the listed Die Roll Modifier. No enemy unit is needed. If the Leader survives the roll, the owning player places him with any friendly Combat Unit immediately.
3.6a Rommel. Rommel has two special abilities:
- His Stack can Overrun in a Reaction Activation.
- Supply Units stacked with him can move during Exploitation.
3.7 Forts
Starting in Jan 1941 both players can expend Supply Units to build Forts during the Clean-Up Phase. The number of Forts that can be created is limited by the counter-mix. The player can freely remove Fort markers in the Clean-Up Phase for re-use.
A hex chosen to build a Fort must fulfill all of the following:
- A friendly Combat Unit occupies it.
- It traces no more than 5 hexes to a Supply Unit. Which is removed after allowing up to TWO Forts to be built (or after one, if only one is built that Phase).
- It does not already contain a Fort (printed or marker).
- It is not a Delta or Salt Marsh hex.
If an enemy Combat Unit enters a Fort marker's hex, remove the marker and return it to the owning player's pool for future use.
As opposed to Fort markers, map printed Forts can be used by either side occupying it at the moment.
A Fort's effects are:
- Its Defense Strength is doubled.
- It cannot be Overrun.
- It applies a +1 DRM against Barrages or Air Strikes against it.
- It has no facing and is the same in all directions.
Fort markers are different from "Fort" units, the latter being merely garrisons and do not use any of the rules above.
3.8 Minefields
Starting in Jan 1942 the CW player (only) can expend Supply Units to build Minefields during the Clean-Up Phase. The number of Minefields that can be created is limited by the counter-mix.
Both players can remove Minefield markers in the Clean-Up Phase provided a friendly Combat Unit is in the Minefield hex.
The CW player can remove any Minefield marker and returned to the pool for future use in any Phase.
A hex chosen to build a Minefield must fulfill all of the following:
- A friendly Combat Unit occupies or is adjacent to it. If the unit is adjacent to the desired hex, the desired hex must not contain an enemy unit or EZOC.
- That unit is able to trace no more than 5 hexes to a Supply Unit. Which is removed after allowing THREE Minefields to be built (or after less, if only one or two is built in that Phase).
- It does not already contain a Minefield.
- It is not Delta or Salt Marsh.
Minefields affect both sides equally; mines have no friends.
Minefield Effects:
- MP Costs: Other Terrain (hex and hexside MP costs to enter the hex) is x2. Any unit that enters a Minefield hex must stop there, regardless of remaining MA or Advance after Combat. See below regarding Retreats.
- Combat Strengths: Units in Minefield hexes have both their Attack and Defense Strengths HALVED (round normally).
- Retreats: Any Stack retreating into a Minefield hex must stop (regardless of the Retreat remaining) and immediately destroy one step (Retreating player's choice).
3.9 Capture Awards
Some hexes on the map list awards for their capture. Each time a friendly unit enters an enemy-controlled hex with a Capture Award, that player immediately receives the number of Supply Units indicated in that hex. Supply Units cannot move in the Phase they are captured.
Intentionally trading ownership of a hex to "milk" its Capture Award is not allowed past third grade.
| Hex | Supply Unit Award |
|---|---|
| Tobruk | 4 |
| Alexandria (E/W) | 4 (per hex) |
| Benghazi | 1 |
| Bardia | 2 |
| Buq Buq | 2 |
| Mersa Matruh | 1 |
| Sidi Barrani | 1 |
4.0 Optional Rules
North Africa is an unforgiving game. Supply is crucial, and a few key activations can really unhinge a side's position. We feel this represents the campaign well, but if you would like to soften the curve a bit, these optional rules are available. Salt and Pepper to taste.
4.1 Recon Screens
A friendly Stack consisting of only Recon and/or Arm Car Combat Units (and maybe a Leader) can Screen.
Screens can:
- Voluntarily Retreat (after inflicting their ZOC on moving enemy units) at any point in the enemy's Phase up to and including the announcement of any Combat or Overrun. A Voluntary Retreat is handed just like a Retreat result from the CRT and is always 3 hexes.
- Screening Stacks can Voluntarily Retreat up to TWICE per Phase.
- Are unaffected by Artillery Barrages but affected normally by Air Strikes.
If multiple Screening Stacks are eligible, the non-moving player conduct their Retreats in any order he desires.
Design Note: This will slow down sweeps and allow Screening units more survivability, as they otherwise tend to get run over quickly. Note that the moving enemy unit that causes a Screen to retreat after entering its EZOC pays the MP cost of that ZOC even though the Screen retreats, and if the Screen retreats when a combat is announced may make it such that the Attacker's stack can make no attack at all that Phase.
4.2 Air Strikes
Beginning March 1941, both players may conduct one of their Air Strikes during each Limited Activation.
Design Note: This gives more weight to Limited Activations and players may find themselves using them more often. This is only recommended if the supply restrictions feel too stifling.
4.3 Full Activations
To conduct a Full Activation, all units must trace to BOTH Supply Units used at the same time.
Design Note: This requires more advanced planning and Supply Unit management. More importantly, it lowers operational tempo for both sides.
4.4 Reaction Activations
Limit the range for reacting units to TWO hexes rather than 10 of a chosen Combat Unit.
Design Note: This will make the game more of a knife fight and supply management even more crucial. It will also emphasize the need for mobile reserves.
4.5 Admin Activations
Each player may choose to conduct an Admin Movement as an Activation during a normal turn, not just during an Admin Turn. Each side can make a single Admin Activation per turn, costing ONE Supply Unit. That Supply Unit can be taken from anywhere on the map with no trace requirement.
Play Note: This will speed up deployment to the front line. If you chose to use this, we recommend using 4.3 Full Activations as well. Use this only if you are chaffing under RAW trying to get units up into combat.
5.0 Scenarios
The first five scenarios are smaller affairs, each with its own Victory Conditions. The remaining six scenarios are all Campaign starts.
Any perceived imbalances in the smaller scenarios can easily be addressed by giving the weaker side an extra Supply Unit or two. They are small enough to be easily replayed.
Campaign Game Victory Conditions
If it isn't obvious who won, the game is a draw. If you are still eyeballing each other over the Libya-Egypt Border at the end of 1942 waiting for the other side to make the first move, try again.
Your goals are the same as the historical commanders (you are running a theater of operations, remember?).
While Rommel wasn't ordered to go and conquer the Nile Delta and the Suez Canal, those were the objectives he chose. The Allies must both protect the Nile and the Canal and force the Axis back to the far west edge to clear Africa. In either case, if a side doesn't conquer the ground, it must clean the other side's clock to "win."
It is safe to say if you have an army at end of the game and he doesn't, you've won. You can't 'win' "by counting points for border settlements captured near Bardia." Come back with your shield or on it. Good luck!
5.1 Operation Brevity, 15 May 1941
General Information
- Map in Play: Map C
- Game Length: 1 Turn
- Set Up First: Axis
- Initiative Player: Commonwealth
- First Turn: May 41
- Last Turn: May 41
- Capture Awards: None Available
- Air Strikes: The CW receives 3 Air Strikes and the Axis 2 Air Strikes.
- Rebuilds: None
- Reinforcements: None
Commonwealth Information
Set Up:
- C40.26: 2-2-14 Mot Inf Bn (2 Rifle/7 Arm)
- C39.27: 3-4-9 Arm Bn (7 RTR); 4-6-11 Inf Bde (22 Gd)
- w/i 1 C37.28: Strafer Gott Leader; Jock Campbell Leader; 4-3-14 Arm Bn (2 RTR/7 Arm); 2-2-14 Mot Inf Bn (1 KRRC/7 Arm); 5-3-15 Arm Car Bn (11 Hus/7 Arm)
- C39.03: 4-6-11 Aus Inf Bde (21 Aus/7 Aus); 4-6-11 Aus Inf Bde (25 Aus/7 Aus)
Supply Units: Any CW Combat Unit Stack: 4 Supply Units
Axis Information
Captured Enemy Leader: O'Connor
Set Up:
- C44.31: 6-4-14 Pz Recon Bn (33/15 Pz)
- C45.29 (Bardia): 8-4-12 Pz Bn (2-5/5 Le); 1-2-4 Italian MG Bn (551); 3-5-3 Italian Inf Rgt (62/Trento)
- C42.28: 0-3-12 AT Bn (33 PJ/15 Pz)
- C42.29: 3-5-14 Italian Inf Rgt (8 Brs/Ariete)
- C42.30: 4-6-14 Pio Bn (33/15 Pz); 3-10-14 LW Flak Bn (1-18)
- C44.34 or C47.34: 9-5-12 Pz Bn (1-8/15 Pz)
- With any Axis unit: 0-3-12 AT Bn (39 PJ/5 Le)
Supply Units: Any friendly stack(s): 3 Supply Units
Special Rules
- CW Supply Source: C37.01
- Axis Supply Source: Any Road or Primary Road entering from the west map edge.
- Play begins with the Activation Phase.
Victory
The player controlling Ft. Capuzzo (42.29), Sollum (42.28), as well as both hexes adjoining Halfaya Pass (40.28, 41.28) wins. If neither player controls all these hexes, the game is a draw.
5.2 Operation Battleaxe, 15 Jun 41
General Information
- Maps in Play: Maps C
- Game Length: 1 Turn
- Set Up First: Axis
- Initiative Player: Commonwealth
- First Turn: June 41
- Last Turn: June 41
- Capture Awards: None Available
- Air Strikes: The CW receives 4 Air Strikes and the Axis receives 2 Air Strikes.
- Rebuilds: None
- Reinforcements: None
Commonwealth Information
Set Up:
- C37.29: Jock Campbell Leader; 4-7-14 Inf Bde (7 Support/7 Arm)
- C38.28: 5-3-15 Arm Car Bn (11 Hus/7 Arm); 9-6-12 Arm Bde (7/7 Arm Div); 2-1-15 Arm Car Bn (Royals)
- C39.27: Strafer Gott Leader; 7-5-12 Arm Bde (4/7 Arm Div); 3-4-9 Arm Bn (4 RTR)
- C39.25: 4-6-11 Ind Inf Bde (11 Ind/4 Ind)
- C40.24: 2-1-15 Ind Arm Car Bn (CIH/4 Ind)
- C37.23: 4-6-11 Inf Bde (22 Gd)
- w/i 1 C39.03: 2-1-15 SA Arm Car Bn (4 SA); 1-2-3 Czech Inf Bn (11 Czech); 4-6-11 Inf Bde (23); 4-6-9 SA Inf Bde (2 SA/1 SA) (Reduced-strength); 4-6-9 SA Inf Bde (5 SA/1 SA) (Reduced-strength)
Supply Units: Any friendly Stack(s): 4 Supply Units
Axis Information
Captured Enemy Leader: O'Connor
Set Up:
- C45.35: 6-4-14 Pz Recon Bn (3/5 Le); 8-4-12 Pz Bn (1-5/5 Le)
- C45.29: 3-5-3 Italian Inf Rgt (62/Trento)
- C39.31: 6-4-14 Pz Recon Bn (33/15 Pz)
- C40.28: Fort marker; 6-9-14 Inf Rgt (104/15 Pz)
- C41.30: Fort marker; 7-12-14 Inf Rgt (115/15 Pz); 3-10-14 LW Flak Bn (1-18)
- C42.28: 0-3-12 AT Bn (33 PJ/15 Pz)
- C42.29: 4-6-14 Pio Bn (33/15 Pz)
- C42.30: Fort marker; 3-10-14 LW Flak Bn (1-33)
- C44.29: 9-5-12 Pz Bn (1-8/15 Pz); 9-5-12 Pz Bn (2-8/15 Pz)
- C44.31: 4-3-15 Motorcycle Bn (15 Krd/15 Pz)
- Any friendly stack(s): Rommel Leader
Map B: 3 Supply Units
Special Rules
- Axis Supply source: Any road hex on the western map edge
- CW Supply source: C42.20 and Tobruk
- Play begins with the Activation Phase.
Victory
The player controlling Ft. Capuzzo (C42.29), Sollum (C42.28), as well as both hexes adjoining Halfaya Pass wins. If neither player controls all these hexes, the game is a draw.
5.3 Operation Crusader, 19 Nov to 15 Dec 41
General Information
- Maps in Play: Maps B and C
- Game Length: 2 Turns
- Set Up First: Axis
- Initiative Player: Commonwealth
- First Turn: Nov 41
- Last Turn: Dec 41
- Air Strikes: Each player receives 4 Air Strikes each turn
- Capture Awards: Tobruk
- Rebuilds: None
- Reinforcements: Only as listed in the scenario
Commonwealth Information
Set Up:
- w/i 2 B50.08 (Tobruk): 2-2-12 Arm Bn (1 RTR); 3-4-9 Arm Bn (4 RTR); 3-4-9 Arm Bn (7 RTR); 2-1-9 Polish Cav Bn (Lancers); 4-6-4 Polish Inf Bde (Carp); 1-2-3 Czech Inf Bn (11 Czech); 4-6-11 Inf Bde (14); 4-6-11 Inf Bde (16); 4-6-11 Inf Bde (23); 2-5-11 AT Bn (149 AT)
- B30.04: 4-6-9 SA Inf Bde (5 SA/1 SA)
- B34.05: 1-1-15 SA Arm Car Bn (3 SA); 4-6-9 SA Inf Bde (1 SA/1 SA)
- B35.02: 4-6-11 Inf Bde (22 Gd)
- B38.06: 7-4-12 Arm Bde (22/1 Arm) (Reduced-strength) (in Training, 2.3f)
- B38.03: 4-7-14 Inf Bde (7 Support/7 Arm)
- B40.05: 2-1-15 SA Arm Car Bn (4 SA)
- B39.02: Strafer Gott Leader; 7-5-12 Arm Bde (4/7 Arm Div)
- B41.04: Jock Campbell Leader; 9-6-12 Arm Bde (7/7 Arm Div)
- B42.04: 5-3-15 Arm Car Bn (11 Hus/7 Arm)
- B42.02: 3-2-15 Arm Car Bn (KDG)
- C31.30: 2-1-15 SA Arm Car Bn (6 SA); 2-1-15 SA Arm Car Bn (7 SA); 4-6-11 Ind Inf Bde (29 Ind/5 Ind)
- w/i 1 C37.32: 6-4-12 NZ Arm Recon Bn (2 NZ/2 NZ); 4-6-11 NZ Inf Bde (4 NZ/2 NZ); 4-6-11 NZ Inf Bde (5 NZ/2 NZ); 4-6-11 NZ Inf Bde (6 NZ/2 NZ); 3-3-11 NZ Inf Bn (28 Maori/2 NZ)
- C37.31: 3-4-9 Arm Bn (8 RTR); 3-4-9 Arm Bn (42 RTR); 3-4-9 Arm Bn (44 RTR)
- C38.31: 4-6-11 Ind Inf Bde (7 Ind/4 Ind); 2-5-11 AT Bn (65 AT)
- C39.29: 2-1-15 Ind Arm Car Bn (CIH/4 Ind)
- C37.26: 4-6-11 Ind Inf Bde (5 Ind/4 Ind)
- w/i 1 C40.26: 4-6-11 Ind Inf Bde (11 Ind/4 Ind)
- C39.03: 4-6-9 SA Inf Bde (2 SA/1 SA)
Supply Units:
- Tobruk: 5 Supply Units
- Any friendly stack(s) on Map C: 7 Supply Units
Reinforcements: Dec 41 Any friendly stack(s): 2 Supply Units
Axis Information
Captured Enemy Leader: O'Connor
Set Up:
- B60.30: 3-3-4 Italian Para Bn (1 Cara)
- w/i 1 B60.29: 2-4-14 Italian MG Bn (R.Gessi); 2-1-14 Italian Motorcycle Bn (PAI); 2-1-12 Italian Lt Arm Bn (3 Lt/Ariete); 3-2-10 Italian Lt Arm Bn (52 Mx); 2-3-3 Italian Inf Rgt (GGFF)
- w/i 1 B50.16: 0-3-6 Kor Bn (556); 2-2-15 Commando Co (v.Könen)
- w/i 1 B42.13: 3-5-11 Italian Inf Rgt (65/Trieste); 1-3-12 Italian MG Bn (101)
- B45.15: 3-5-11 Italian Inf Rgt (66/Trieste)
- B44.13: 3-5-12 Italian Inf Rgt (9 Brs)
- B50.11: 8-12-3 Italian Inf Div (Brescia)
- B49.11: 1-2-4 Italian MG Bn (551)
- B48.10: 3-5-3 Italian Inf Rgt (61/Trento)
- B48.11: 3-3-4 Italian Assault Eng Bn (31)
- B47.10: 3-5-9 Italian Inf Rgt (7 Brs)
- B47.09: 3-5-3 Italian Inf Rgt (62/Trento); 2-3-4 Italian MG Bn (Aosta)
- B47.08: 8-12-3 Italian Inf Div (Pavia)
- B47.07: 6-10-9 Inf Rgt (155/Afrika); 5-7-9 Inf Rgt (361/Afrika)
- B48.06: 4-12-3 Italian Inf Div (Bologna); 0-3-14 Italian AT Bn (551)
- B46.07: 3-4-9 Pio Bn (900/Afrika)
- B46.06: 7-8-14 Commando Rgt (288.Snd)
- B47.06: 2-1-14 Exp Co (580/Afrika)
- B46.02: Rommel Leader; 4-3-14 Pz Co (KStA); 1-3-12 Flak Bn (606)
- C42.29: Fort marker; 4-6-14 Pio Bn (200/21 Pz); 0-3-12 AT Bn (39 PJ/21 Pz)
- C39.32: Fort marker; 3-3-4 Italian Assault Eng Bn (32)
- C40.28: Fort marker; 7-12-14 Inf Rgt (104/21 Pz)
Supply Units: Any friendly stack(s): 5 Supply Units
Reinforcements: Dec 41 Any friendly stack(s): 2 Supply Units
Special Rules
- CW Supply Sources: C42.20, Tobruk
- Axis Supply Source & Entry Hex: Any road leading off the western map edge
- No Forts or Minefields may be constructed.
- Play begins with the Activation Phase.
- Surprise: Rommel steadfastly refused to believe that any major CW offensive was underway (concentrating on his own plan to take Tobruk). So... a) The CW player is ALWAYS the Initiative Player. b) The Axis player must conduct a Reaction as his first Activation each turn.
Victory
The Axis wins if they avoid the CW victory condition and control Bardia at the end of play.
The Commonwealth wins if at any time they can trace from Tobruk to Mersa Matruh via Primary Road hexes. If this occurs, the game ends immediately with a Commonwealth victory.
Any other result is a Draw.
5.4 Gazala, 26 May to 29 June 42
General Information
- Maps in Play: Maps B and C
- Game Length: 2 Turns
- Set Up First: Commonwealth
- Initiative Player: Axis
- First Turn: May 42
- Last Turn: June 42
- Air Strikes: Both players receive 4 Air Strikes each turn
- Capture Awards: Tobruk
- Rebuilds: None
- Reinforcements: Only as listed in the Scenario
Commonwealth Information
Set Up:
- B50.16: Fort marker; 4-6-9 SA Inf Bde (3 SA/2 SA)
- B50.14: 2-1-15 SA Arm Car Bn (6 SA); 2-1-15 SA Arm Car Bn (7 SA)
- B49.16: Fort marker; 4-6-9 SA Inf Bde (2 SA/1 SA)
- B49.14: 3-4-9 Arm Bn (7 RTR)
- B48.16, B48.17: Minefield marker, each
- B47.14: 3-4-9 Arm Bn (42 RTR)
- B47.15: Fort marker; 4-6-11 Inf Bde (69/50)
- B47.16: Fort marker; 4-6-11 Inf Bde (151/50); 2-5-11 AT Bn (65 AT)
- B47.17: Fort marker; 4-6-9 SA Inf Bde (1 SA/1 SA)
- B47.18, B46.16, B46.17: Minefield marker, each
- B45.15: Fort marker; 3-4-9 Arm Bn (44 RTR); 4-6-11 Inf Bde (150/50)
- B45.16, B44.15, B44.13: Minefield marker, each
- B42.16: 1-1-15 SA Arm Car Bn (3 SA)
- B42.14: Minefield marker
- B42.13: Fort marker; 6-10-12 French Inf Bde (1 FF); 1-2-12 French Inf Bn (1 Leg)
- B40.16: 3-2-15 Arm Car Bn (KDG)
- B38.17: 2-1-15 SA Arm Car Bn (4 SA)
- B41.14, B41.13, B42.12: Minefield marker, each
- B39.13: 4-6-12 Ind Inf Bde (3 Ind)
- B50.12, B49.12: Minefield marker
- B48.11: Fort marker; 3-4-9 Arm Bn (8 RTR)
- B46.12: Fort marker; 4-6-14 Inf Bde (201 Gd); 2-1-15 Arm Car Bn (Royals)
- B46.10: 7-4-12 Arm Bde (2/1 Arm)
- B45.09: Fort marker
Supply Units:
- B50.05 (Tobruk): 4 Supply Units
- C45.29 (Bardia): 2 Supply Units
- With any friendly unit(s): 4 Supply Units
Reinforcements: June 42 Any friendly stack(s): 2 Supply Units
Axis Information
Captured Enemy Leader: O'Connor
Set Up:
- B60.24: 0-3-6 Kor Bn (556); 2-2-15 Commando Co (v.Könen)
- B57.23: 3-3-5 LW FJ Bn (Lehr)
- B55.19: 6-7-5 Amphibious Bn (Hecker)
- B51.21: 3-3-4 Italian Assault Eng Bn (32)
- B52.17: 4-6-11 Inf Rgt (361/90 Le)
- B51.18: 4-6-11 Inf Rgt (200/90 Le); 2-4-12 Flak Bn (612)
- B50.18: 8-12-3 Italian Inf Div (Sabrtha)
- B49.19: 3-5-9 Italian Inf Rgt (7 Brs)
- B48.19: 3-5-3 Italian Inf Rgt (61/Trento); 3-5-3 Italian Inf Rgt (62/Trento)
- B47.20: 8-12-3 Italian Inf Div (Brescia)
- B47.21: 3-5-12 Italian Inf Rgt (9 Brs); 3-3-4 Italian Assault Eng Bn (31)
- B46.19: 8-12-3 Italian Inf Div (Pavia)
- w/i 1 B46.20: 3-2-14 Italian Arm Car Bn (Nizza/Ariete); 5-3-11 Italian Arm Bn (8 Med/Ariete); 5-3-11 Italian Arm Bn (9 Med/Ariete); 4-3-11 Italian Arm Bn (10 Med/Ariete); 3-2-10 Italian Lt Arm Bn (Novara/Ariete); 3-5-14 Inf Rgt (8 Brs/Ariete); 5-3-12 Italian AG Bn (551/Ariete); 5-3-12 Italian AG Bn (552/Ariete); 1-2-12 Italian AT Bn (AT/Ariete); 0-7-12 Italian AT Bn (6); 0-6-14 Italian AT Bn (501)
- B45.22: 3-2-14 Italian Arm Car Bn (8 Brs/Trieste); 3-5-11 Italian Inf Rgt (65/Trieste); 3-5-11 Italian Inf Rgt (66/Trieste)
- w/i 2 B45.24: Rommel Leader; 4-3-14 Pz Co (KStA); 1-2-3 Inf Bn (3-255); 1-2-3 Inf Bn (3-347); 1-3-12 Flak Bn (617)
- w/i 1 B45.23: 6-4-14 Pz Recon Bn (3/21 Pz); 4-3-15 Motorcycle Bn (15 Krd/21 Pz); 9-5-12 Pz Bn (1-5/21 Pz); 9-5-12 Pz Bn (2-5/21 Pz); 7-12-14 Inf Rgt (104/21 Pz); 4-7-14 MG Bn (8/21 Pz); 4-6-14 Pio Bn (200/21 Pz); 0-3-12 AT Bn (39 PJ/21 Pz); 3-10-14 LW Flak Bn (1-18)
- w/i 1 B44.23: 6-4-14 Pz Recon Bn (33/15 Pz); 9-5-12 Pz Bn (1-8/15 Pz); 9-5-12 Pz Bn (2-8/15 Pz); 4-7-14 MG Bn (2/15 Pz); 7-12-14 Inf Rgt (115/15 Pz); 4-6-14 Pio Bn (33/15 Pz); 0-3-12 AT Bn (33 PJ/15 Pz); 3-10-14 LW Flak Bn (1-33)
Supply Units: Any friendly stack(s): 8 Supply Units
Reinforcements: June 42: 2 Supply Units
Special Rules
- CW Supply Sources: C42.20, Tobruk
- Axis Supply Source & Entry Hex: Any road leading off western map edge
- No Forts or Minefields may be constructed.
- Play begins with the Activation Phase
Victory
The Axis Player wins if he controls Tobruk and/or Mersa Matruh at the end of play.
The CW Player wins if he avoids the Axis conditions and his units in Tobruk can trace supply off the east map edge (i.e., the siege has not started again).
Any other result is a draw.
5.5 El Alamein: The First Battle, 1 July 42
General Information
- Map in Play: Map D
- Game Length: 1 Turn
- Set Up First: Commonwealth
- Initiative Player: Axis
- First Turn: July 42
- Last Turn: July 42
- Air Strikes: The CW receives 4 Air Strikes and the Axis receives 2 Air Strikes.
- Capture Awards: None
- Rebuilds: None
- Reinforcements: None
Commonwealth Information
Set Up:
- D26.19: 4-6-11 Ind Inf Bde (9 Ind/5 Ind) (Reduced-strength)
- D28.19: 2-1-15 SA Arm Car Bn (4 SA); 4-7-14 Inf Bde (7 Support/7 Arm)
- D29.19: 4-6-11 NZ Inf Bde (6 NZ/2 NZ)
- w/i 1 D26.16: Strafer Gott Leader; 6-4-12 NZ Arm Recon Bn (2 NZ/2 NZ); 4-6-11 NZ Inf Bde (4 NZ/2 NZ) (Reduced-strength); 4-6-11 NZ Inf Bde (5 NZ/2 NZ) (Reduced-strength); 3-3-11 NZ Inf Bn (28 Maori/2 NZ)
- D30.17: 2-1-15 Ind Arm Car Bn (Guides/10 Ind); 2-6-9 Ind Inf Bde (18 Ind)
- D30.16: 4-6-9 SA Inf Bde (1 SA/1 SA)
- D31.16: 7-5-12 Arm Bde (4/7 Arm Div); 3-4-9 Arm Bn (8 RTR); 4-6-9 SA Inf Bde (2 SA/1 SA)
- D32.16: Fort marker; 2-1-15 SA Arm Car Bn (6 SA); 4-6-9 SA Inf Bde (3 SA/2 SA)
- D28.14: 3-2-15 Arm Car Bn (12 Lcr/1 Arm)
- D30.14: 3-2-15 Arm Car Bn (KDG); 2-1-15 Arm Car Bn (Royals); 7-4-12 Arm Bde (22/1 Arm)
- D30.12: 2-5-11 AT Bn (95 AT)
- D33.11: 4-6-11 Ind Inf Bde (5 Ind/4 Ind); 4-6-11 Ind Inf Bde (25 Ind/10 Ind)
- D34.09: 4-6-11 Inf Bde (69/50) (Reduced-strength); 4-6-11 Inf Bde (151/50) (Reduced-strength)
- w/i 5 D39.05: 3-4-9 Arm Bn (42 RTR); 3-4-9 Arm Bn (44 RTR); 2-4-11 FF AT Bn (CAC)
- w/i 1 D36.06: 1-1-15 SA Arm Car Bn (3 SA); 6-9-11 Aus Inf Bde (24 Aus/9 Aus); 6-9-11 Aus Inf Bde (26 Aus/9 Aus)
Supply Units: Any friendly stack(s) on Map D: 5 Supply Units
Axis Information
Set Up:
- D35.29: 3-6-12 AT Bn (605)
- D34.24: 8-12-3 Italian Inf Div (Brescia) (Reduced-strength)
- D33.23: 8-12-3 Italian Inf Div (Pavia) (Reduced-strength); 3-5-12 Italian Inf Rgt (9 Brs)
- D35.24: 3-5-11 Italian Inf Rgt (65/Trieste)
- w/i 1 D35.23: 4-3-11 Italian Arm Bn (10 Med/Ariete); 3-5-14 Italian Inf Rgt (8 Brs/Ariete); 5-3-12 Italian AG Bn (552/Ariete); 1-2-12 Italian AT Bn (AT/Ariete); 0-7-12 Italian AT Bn (6); 0-6-14 Italian AT Bn (501); 0-6-14 Italian AT Bn (503)
- D35.21: 4-3-14 Pz Co (KStA); 0-3-12 AT Bn (39 PJ/21 Pz); 4-6-14 Pio Bn (200/21 Pz); 3-10-14 LW Flak Bn (1-18)
- D29.23: 4-3-14 Pz Recon Bn (580/90 Le); 3-5-12 Italian Inf Rgt (12 Brs/Littorio)
- D33.21: Rommel Leader; 6-4-14 Pz Recon Bn (3/21 Pz); 9-5-12 Pz Bn (1-5/21 Pz)
- w/i 1 D32.21: 6-4-14 Pz Recon Bn (33/15 Pz); 9-5-12 Pz Bn (1-8/15 Pz); 4-6-14 Pio Bn (33/15 Pz); 0-3-12 AT Bn (33 PJ/15 Pz); 7-12-14 Inf Rgt (104/21 Pz); 3-10-14 LW Flak Bn (1-33)
- w/i 1 D33.19: 4-7-11 Inf Rgt (155/90 Le); 4-6-11 Inf Rgt (361/90 Le); 4-6-11 Pio Bn (900/90 Le); 2-4-12 Flak Bn (612); 1-3-12 Flak Bn (606)
- D33.18: 3-5-3 Italian Inf Rgt (62/Trento)
- D33.17: 3-5-9 Italian Inf Rgt (7 Brs)
- w/i 2 any Axis unit, not in an EZOC: 0-7-12 LW Flak Bn (2-25); 0-7-12 LW Flak Bn (1-43); 0-7-12 LW Flak Bn (1-53)
Supply Units: Any friendly stack(s): 4 Supply Units
Special Rules
- Axis Supply Source: D37.34
- Play begins with the Activation Phase
Victory
The Axis player wins if he captures D30.16, D30.17, D29.15, D29.14, and D32.16.
The CW player wins if he avoids the Axis conditions and retains control of D29.19, D28.15, and D26.19.
Any other result is a draw.
5.6 Operation Compass Campaign Start, 8 Dec 40
General Information
- Maps in Play: All
- Game Length: 24 Turns
- Set Up First: Axis
- Initiative Player: Commonwealth
- First Turn: Dec 40
- Last Turn: Nov 42
- Air Strikes: Roll normally
- Rebuilds: As per the Turn Record Track
- Reinforcements: As per Orders of Arrival
Commonwealth Information
Set Up:
- w/i 2 of C39.03: 4-6-11 Ind Inf Bde (7 Ind/4 Ind); 1-2-11 Inf Bn (3 Cldst); 3 Supply Units
- Any hex(es) east of Cxx.15 (inclusive): 3 Supply Units
- C41.15: 4-6-14 Inf Bde (Selby); 0-1-11 AT Bn (65 AT)
- C38.20: 2-1-15 Ind Arm Car Bn (CIH/4 Ind); 4-6-11 Ind Inf Bde (5 Ind/4 Ind)
- w/i 1 C39.03: 3-2-14 Aus Arm Recon Bn (6 Aus/6 Aus); 4-6-11 Aus Inf Bde (16 Aus/6 Aus); 4-6-11 Aus Inf Bde (17 Aus/6 Aus); 4-6-11 Aus Inf Bde (19 Aus/6 Aus)
- C38.19: 3-4-9 Arm Bn (7 RTR); 4-6-11 Ind Inf Bde (11 Ind/4 Ind)
- w/i 1 C37.20: Strafer Gott Leader; 5-3-15 Arm Car Bn (11 Hus/7 Arm); 4-3-14 Arm Bn (2 RTR/7 Arm); 6-5-14 Arm Bn (6 RTR/7 Arm); 3-2-15 Lt Arm Bn (7 Hus/7 Arm)
- C36.20: Jock Campbell Leader; 2-2-14 Mot Inf Bn (1 KRRC/7 Arm); 2-2-14 Mot Inf Bn (2 Rifle/7 Arm); 2-2-9 French Marine Bn (BIM)
- w/i 1 C35.18: O'Connor Leader; 2-1-15 Lt Arm Bn (3 Hus); 6-4-14 Arm Bn (8 Hus/7 Arm); 3-2-15 Lt Arm Bn (1 RTR/7 Arm); 4-6-11 Inf Bde (16); 0-1-11 AT Bn (3 RHA); 0-1-11 AT Bn (106 RHA)
- w/i 3 D36.06: 4-6-4 Polish Inf Bde (Carp); 2-1-9 Polish Cav Bn (Lancers)
- w/i 1 D39.05: 0-4-0 Fort Bde (Alex A); 0-4-0 Fort Bde (Alex B)
Axis Information
Italian Rebuild Cup (All Italian): 3-2-9 Arm Bn (1 Med)
Tripoli Cup (All Italian):
- 4-12-3 Inf Div (Bologna) (Reduced-strength)
- 8-12-3 Inf Div (Brescia)
- 8-12-3 Inf Div (Pavia) (Reduced-strength)
- 8-12-3 Inf Div (Sabrtha) (Reduced-strength)
- 8-12-3 Inf Div (Savona) (Reduced-strength)
- 0-1-3 Inf Bn (18 Lib)
- 0-1-3 Inf Bn (36 Lib)
- 2-3-4 MG Bn (Aosta)
- 2-3-4 MG Bn (Genova)
- 1-2-4 MG Bn (17)
- 1-2-4 MG Bn (25)
- 1-2-4 MG Bn (60)
- 0-1-2 GAF Bn (35)
Set Up:
- A48.20: 2-1-15 Italian Motorcycle Bn (ProvBrs); 0-1-3 Italian Ter Bn (226); 1 Supply Unit
- A55.15: 0-1-3 Italian Ter Bn (225)
- B60.24: 3-3-4 Italian Abn Inf Bn (It); 2-2-4 Italian Abn Inf Bn (1 Lib); 0-2-3 Italian Ter Rgt (54)
- B46.02: 4-12-3 Italian Inf Div (Sirte); 0-2-3 Italian MG Bn (61)
- w/i 2 B50.08: 1-1-15 Italian Motorcycle Co (22 Brs); 1-1-15 Italian Motorcycle Co (61 Brs); 0-1-3 Italian CD Bn (31 Lib); 0-2-2 Italian GAF Rgt (31); 0-2-2 Italian GAF Rgt (32); 1 Supply Unit
- w/i 1 C48.34: 4-3-9 Italian Arm Bn (3 Med)
- w/i 2 C45.29: 3-4-3 Blackshirt Inf Div (23 Mar); 0-2-2 Italian GAF Rgt (30); 0-1-3 Blackshirt MG Bn (201); 1 Supply Unit
- C42.28: 3-4-3 Blackshirt Inf Div (28 Oct); 0-1-3 Blackshirt MG Bn (202)
- C39.31: 0-2-3 Italian MG Bn (62)
- C40.29: 4-12-3 Italian Inf Div (Marm)
- C41.23: 4-6-3 Italian Inf Div (Ctnzro)
- C36.24: Fort marker; 0-2-3 Italian MG Bn (63)
- C36.23: Fort marker; 2-3-4 Italian MG Bn (VEC)
- C37.23: Fort marker; 4-12-3 Italian Inf Div (Cirene)
- C42.20: 1-2-4 Italian MG Bn (64)
- C43.19: 3-4-3 Blackshirt Inf Div (3 Jan); 0-1-3 Blackshirt MG Bn (204); 1 Supply Unit
- C42.17: Fort marker; 2-4-3 Italian Inf Div (1 Lib)
- C41.18: Fort marker; 3-8-3 Italian Inf Div (2 Lib)
- C41.19: Fort marker; 1-3-12 Italian Inf Rgt (5 Lib)
- C40.19: Fort marker; Maletti Leader; 3-2-8 Italian Camel Bn (Sahariano); 3-2-9 Italian Arm Bn (2 Med); 3-4-12 Italian Inf Rgt (1 Lib)
Special Rule
No Italian units may voluntarily move into the ASZ (1.3b). They may move there due to retreats in combat. Any units that begin a friendly turn in the ASZ (as Reinforcements, due to retreats, etc.) must leave it that turn or be eliminated and sent to the Italian Rebuild Cup (if rebuildable). This restriction ends at the beginning of March 1941.
Historical Note: The Italian commander's intent was to hold as much of Libya as possible. The CW commander's intent was to kick the Italians out of Libya and take El Agheila, not knowing that the Germans would intervene for a counterstroke.
Victory
Use the Campaign Victory Conditions.
5.7 The Race to the Wire: German Intervention Campaign Start, April 41
General Information
- Maps in Play: All
- Game Length: 20 turns
- Set Up First: Commonwealth
- Initiative Player: Axis
- First Turn: Apr 41
- Last Turn: Nov 42
- Air Strikes: Roll normally
- Rebuilds: As per the Turn Record Track
- Reinforcements: As per Orders of Arrival
Commonwealth Information
Rebuild Cup: None
Set Up:
- Greece Box: 3-2-14 Aus Arm Recon Bn (6 Aus/6 Aus); 4-6-11 Aus Inf Bde (16 Aus/6 Aus); 4-6-11 Aus Inf Bde (17 Aus/6 Aus); 4-6-11 Aus Inf Bde (19 Aus/6 Aus); 6-4-12 NZ Arm Recon Bn (2 NZ/2 NZ); 4-6-11 NZ Inf Bde (4 NZ/2 NZ); 4-6-11 NZ Inf Bde (5 NZ/2 NZ); 4-6-11 NZ Inf Bde (6 NZ/2 NZ); 3-3-11 NZ Inf Bn (28 Maori/2 NZ)
- w/i 4 A20.25: 2-1-15 Arm Car (KDG/2 Arm); 3-5-12 Inf Bde (2 Support/2 Arm) (In Training, 2.3f)
- w/i 5 A19.21: 3-2-15 Lt Arm Bn (3 Hus/7 Arm)
- A40.09: 2-2-9 French Marine Bn (BIM)
- A48.20: 6-9-11 Aus Inf Bde (20 Aus/9 Aus) (In Training, 2.3f)
- A55.11: 6-9-11 Aus Inf Bde (26 Aus/9 Aus) (In Training, 2.3f)
- B46.08: 4-6-12 Ind Inf Bde (3 Ind); 2-1-9 Ind Cav Bn (18 Ind)
- w/i 2 B50.08: 6-9-11 Aus Inf Bde (24 Aus/9 Aus)
- C39.03: 4-6-11 Inf Bde (16); 4-6-11 Inf Bde (22 Gd) (Already replaced for OOA)
- w/i 3 D36.06: 4-6-11 Aus Inf Bde (18 Aus/7 Aus); 4-6-4 Polish Inf Bde (Carp); 2-1-9 Polish Cav Bn (Lancers)
- w/i 3 D39.05: O'Connor Leader; Strafer Gott Leader; Jock Campbell Leader; 0-4-0 Fort Bde (Alex A); 0-4-0 Fort Bde (Alex B); 5-3-15 Arm Car Bn (11 Hus/7 Arm); 2-1-15 Ind Arm Car Bn (CIH/4 Ind); 4-6-11 Ind Inf Bde (5 Ind/4 Ind); 4-6-11 Ind Inf Bde (7 Ind/4 Ind); 4-6-11 Ind Inf Bde (11 Ind/4 Ind); 3-4-9 Arm Bn (4 RTR); 3-4-9 Arm Bn (7 RTR); 0-1-11 AT Bn (65 AT); 2-1-15 Arm Car Bn (Royals)
Withdrawal Returns: Roll one die for the following unit: On a 1-4: Roll one die again for the unit and the unit re-enters that number of turns later. On a 5-6: Put the unit in the Rebuild Cup. Unit: 4-6-11 Inf Bde (14)
Supply Units: Any friendly stack(s) on...
- Map A: 2 Supply Units
- Map B: 2 Supply Units
- Map C: 2 Supply Units
Axis Information
Italian Rebuild Cup (All Italian):
- 2-1-15 Motorcycle Bn (ProvBrs)
- 3-2-9 Arm Bn (1 Med)
- 3-2-9 Arm Bn (2 Med)
- 4-3-9 Arm Bn (3 Med)
- 2-3-9 Arm Bn (5 Med)
- 2-3-9 Arm Bn (6 Med)
- 2-3-9 Arm Bn (21 Med)
- 4-12-3 Inf Div (Cirene)
- 4-6-3 Inf Div (Ctnzro)
- 4-12-3 Inf Div (Marm)
- 4-12-3 Inf Div (Sirte)
- 3-8-3 Inf Div (2 Lib)
- 3-4-12 Inf Rgt (1 Lib)
- 3-5-11 Inf Rgt (10 Brs)
- 2-3-4 MG Bn (VEC)
German Rebuild Cup: 4-3-14 Pz Co (KStA)
Tripoli Cup (All Italian):
- 4-12-3 Inf Div (Bologna) (Reduced-strength)
- 8-12-3 Inf Div (Pavia) (Reduced-strength)
- 8-12-3 Inf Div (Sabrtha) (Reduced-strength)
- 8-12-3 Inf Div (Savona) (Reduced-strength)
- 3-5-3 Inf Rgt (61/Trento)
- 3-5-3 Inf Rgt (62/Trento)
- 3-5-9 Inf Rgt (7 Brs)
- 0-1-3 Inf Bn (18 Lib)
- 0-1-2 GAF Bn (35)
- 2-3-4 MG Bn (Aosta)
- 2-3-4 MG Bn (Genova)
- 1-2-4 MG Bn (60)
- 1-2-4 MG Bn (551)
- 3-3-4 Assault Eng Bn (32)
- 0-6-14 AT Bn (1 Mil)
Set Up:
- w/i 5 of A19.35:
- Italians: 2-1-12 Lt Arm Bn (1 Lt/Ariete); 2-1-12 Lt Arm Bn (2 Lt/Ariete); 2-1-12 Lt Arm Bn (3 Lt/Ariete); 5-3-11 Arm Bn (7 Med/Ariete); 3-5-14 Inf Rgt (8 Brs/Ariete); 8-12-3 Inf Div (Brescia); 0-1-3 Inf Bn (36 Lib); 2-3-14 MG Bn (S.Maria)
- Germans: Rommel Leader; 6-4-14 Pz Recon Bn (3/5.Le); 4-7-14 MG Bn (2/5.Le); 4-7-14 MG Bn (8/5.Le); 3-5-12 Pio Bn (200/5.Le); 0-3-12 AT Bn (39 PJ/5.Le); 0-3-6 Kor Bn (556); 2-2-15 Commando Co (v.Könen); 3-10-14 LW Flak Bn (1-18); 3-10-14 LW Flak Bn (1-33); 3-6-12 AT Bn (605)
Supply Units: Any friendly stack(s) on Map A: 4 Supply Units
Victory
Use the Campaign Victory Conditions.
5.8 Operation Crusader Campaign Start, 19 Nov 41
General Information
- Maps in Play: All
- Game Length: 13 Turns
- Set Up First: Axis
- Initiative Player: Commonwealth
- First Turn: Nov 41
- Last Turn: Nov 42
- Air Strikes: Roll normally
- Rebuilds: As per the Turn Record Track
- Reinforcements: As per Orders of Arrival
Special Rule
Surprise: Rommel steadfastly refused to believe that a major CW offensive was underway (concentrating on his own plan to take Tobruk). a) The Commonwealth is the Initiative Player for the first two turns. b) The Axis player may only conduct a Reaction on his first Activation for the first two turns.
Commonwealth Information
Rebuild Cup: 3-2-15 Lt Arm Bn (3 Hus/7 Arm); 4-6-12 Ind Inf Bde (3 Ind)
Set Up:
- w/i 2 B50.08 (Tobruk): 2-2-12 Arm Bn (1 RTR); 3-4-9 Arm Bn (4 RTR); 3-4-9 Arm Bn (7 RTR); 2-1-9 Polish Cav Bn (Lancers); 4-6-4 Polish Inf Bde (Carp); 1-2-3 Czech Inf Bn (11 Czech); 4-6-11 Inf Bde (14); 4-6-11 Inf Bde (16); 4-6-11 Inf Bde (23); 2-5-11 AT Bn (149 AT)
- B30.04: 4-6-9 SA Inf Bde (5 SA/1 SA)
- B34.05: 1-1-15 SA Arm Car Bn (3 SA); 4-6-9 SA Inf Bde (1 SA/1 SA)
- B35.02: 4-6-11 Inf Bde (22 Gd)
- B38.06: 7-4-12 Arm Bde (22/1 Arm) (Reduced-strength) (in Training, 2.3f)
- B38.03: 4-7-14 Inf Bde (7 Support/7 Arm)
- B40.05: 2-1-15 SA Arm Car Bn (4 SA)
- B39.02: Strafer Gott Leader; 7-5-12 Arm Bde (4/7 Arm Div)
- B41.04: Jock Campbell Leader; 9-6-12 Arm Bde (7/7 Arm Div)
- B42.04: 5-3-15 Arm Car Bn (11 Hus/7 Arm)
- B42.02: 3-2-15 Arm Car Bn (KDG)
- C31.30: 2-1-15 SA Arm Car Bn (6 SA); 2-1-15 SA Arm Car Bn (7 SA); 4-6-11 Ind Inf Bde (29 Ind/5 Ind)
- w/i 1 C37.32: 6-4-12 NZ Arm Recon Bn (2 NZ/2 NZ); 4-6-11 NZ Inf Bde (4 NZ/2 NZ); 4-6-11 NZ Inf Bde (5 NZ/2 NZ); 4-6-11 NZ Inf Bde (6 NZ/2 NZ); 3-3-11 NZ Inf Bn (28 Maori/2 NZ)
- C37.31: 3-4-9 Arm Bn (8 RTR); 3-4-9 Arm Bn (42 RTR); 3-4-9 Arm Bn (44 RTR)
- C38.31: 4-6-11 Ind Inf Bde (7 Ind/4 Ind); 2-5-11 AT Bn (65 AT)
- C39.29: 2-1-15 Ind Arm Car Bn (CIH/4 Ind)
- C37.26: 4-6-11 Ind Inf Bde (5 Ind/4 Ind)
- w/i 1 C40.26: 4-6-11 Ind Inf Bde (11 Ind/4 Ind)
- C39.03: 4-6-9 SA Inf Bde (2 SA/1 SA)
- D37.32: 4-6-9 SA Inf Bde (3 SA/2 SA)
- D35.29: 4-6-9 SA Inf Bde (4 SA/2 SA)
Withdrawal Returns: Roll one die: On a 1-4: Roll one die again for the unit and the unit re-enters that number of turns later. On a 5-6: Put the unit in the Rebuild Cup. Units:
- 4-6-11 Ind Inf Bde (9 Ind/5 Ind)
- 4-6-11 Ind Inf Bde (10 Ind/5 Ind)
- 4-6-11 Aus Inf Bde (18 Aus/7 Aus)
- 4-6-11 Aus Inf Bde (21 Aus/7 Aus)
- 4-6-11 Aus Inf Bde (25 Aus/7 Aus)
- 4-3-14 Aus Arm Recon Bn (9 Aus/9 Aus)
- 6-9-11 Aus Inf Bde (20 Aus/9 Aus)
- 6-9-11 Aus Inf Bde (24 Aus/9 Aus)
- 6-9-11 Aus Inf Bde (26 Aus/9 Aus)
- 4-6-11 Inf Bde (69/50)
- 4-6-11 Inf Bde (150/50)
- 4-6-11 Inf Bde (151/50)
- 4-6-11 Ind Inf Bde (161 Ind)
Supply Units:
- Tobruk: 5 Supply Units
- Any friendly stack(s) on Map C: 7 Supply Units
Axis Information
Captured Enemy Leader: O'Connor
Italian Rebuild Cup (All Italian):
- 2-1-15 Motorcycle Bn (ProvBrs)
- 3-2-9 Arm Bn (1 Med)
- 3-2-9 Arm Bn (2 Med)
- 4-3-9 Arm Bn (3 Med)
- 2-3-9 Arm Bn (5 Med)
- 2-3-9 Arm Bn (6 Med)
- 2-3-9 Arm Bn (21 Med)
- 4-12-3 Inf Div (Cirene)
- 4-6-3 Inf Div (Ctnzro)
- 4-12-3 Inf Div (Marm)
- 4-12-3 Inf Div (Sirte)
- 3-8-3 Inf Div (2 Lib)
- 3-4-12 Inf Rgt (1 Lib)
- 3-5-11 Inf Rgt (10 Brs)
- 2-3-4 MG Bn (VEC)
German Rebuild Cup: 4-7-14 MG Bn (8/21 Pz)
Tripoli Cup (All Italian):
- 8-12-3 Inf Div (Sabrtha) (Reduced-strength)
- 0-1-2 GAF Bn (35)
- 1-2-4 MG Bn (60)
- 0-4-14 AT Bn (2 Mil)
Set Up:
- A1.05: 0-1-3 Italian Inf Bn (18 Lib)
- A41.21: 0-1-3 Italian Inf Bn (36 Lib)
- B60.30: 3-3-4 Italian Para Bn (1 Cara)
- w/i 1 B60.29: 2-1-14 Italian Motorcycle Bn (PAI); 2-1-12 Italian Lt Arm Bn (3 Lt/Ariete); 3-2-10 Italian Lt Arm Bn (52 Mx); 2-3-3 Italian Inf Rgt (GGFF); 2-4-14 Italian MG Bn (R Gessi)
- w/i 1 B50.16: 0-3-6 Kor Bn (556); 2-2-15 Commando Co (v.Könen)
- w/i 1 B42.13: 3-5-11 Italian Inf Rgt (65/Trieste); 1-3-12 Italian MG Bn (101)
- B45.15: 3-5-11 Italian Inf Rgt (66/Trieste)
- B44.13: 3-5-12 Italian Inf Rgt (9 Brs)
- B50.11: 8-12-3 Italian Inf Div (Brescia)
- B49.11: 1-2-4 Italian MG Bn (551)
- B48.10: 3-5-3 Italian Inf Rgt (61/Trento)
- B48.11: 3-3-4 Italian Assault Eng Bn (31)
- B47.10: 3-5-9 Italian Inf Rgt (7 Brs)
- B47.09: 3-5-3 Italian Inf Rgt (62/Trento); 2-3-4 Italian MG Bn (Aosta)
- B47.08: 8-12-3 Italian Inf Div (Pavia)
- B47.07: 6-10-9 Inf Rgt (155/Afrika); 5-7-9 Inf Rgt (361/Afrika)
- B48.06: 4-12-3 Italian Inf Div (Bologna); 0-3-14 Italian AT Bn (551)
- w/i 1 B46.07: 3-4-9 Pio Bn (900/Afrika)
- B46.06: 7-8-14 Commando Rgt (288.Snd)
- B47.06: 2-1-14 Exp Co (580/Afrika)
- B46.02: Rommel Leader; 4-3-14 Pz Co (KStA); 1-3-12 Flak Bn (606)
- C42.29: Fort marker; 4-6-14 Pio Bn (200/21 Pz); 0-3-12 AT Bn (39 PJ/21 Pz)
Supply Units: Any friendly stack(s) on...
- Map B: 5 Supply Units
- Map C: 2 Supply Units
Victory
Use the Campaign Victory Conditions.
5.9 Gazala Campaign Start, 26 May 42
General Information
- Maps in Play: All
- Game Length: 7 Turns
- Set Up First: Commonwealth
- Initiative Player: Axis
- First Turn: May 42
- Last Turn: Nov 42
- Air Strikes: Roll normally
- Rebuilds: As per the Turn Record Track
- Reinforcements: As per Orders of Arrival
Commonwealth Information
Rebuild Cup: 3-2-15 Lt Arm Bn (3 Hus/7 Arm)
Set Up:
- B50.16: Fort marker; 4-6-9 SA Inf Bde (3 SA/2 SA)
- B50.14: 2-1-15 SA Arm Car Bn (6 SA); 2-1-15 SA Arm Car Bn (7 SA)
- B49.16: Fort marker; 4-6-9 SA Inf Bde (2 SA/1 SA)
- B49.14: 3-4-9 Arm Bn (7 RTR)
- B48.16: Minefield marker
- B48.17: Minefield marker
- B47.14: 3-4-9 Arm Bn (42 RTR)
- B47.15: Fort marker; 4-6-11 Inf Bde (69/50)
- B47.16: Fort marker; 4-6-11 Inf Bde (151/50); 2-5-11 AT Bn (65 AT)
- B47.17: Fort marker; 4-6-9 SA Inf Bde (1 SA/1 SA)
- B47.18, B46.16, B46.17: Minefield marker, each
- B45.15: Fort marker; 4-6-11 Inf Bde (150/50); 3-4-9 Arm Bn (44 RTR)
- B45.16, B44.15, B44.13, B43.15, B43.13: Minefield marker, each
- B42.16: 1-1-15 SA Arm Car Bn (3 SA)
- B42.14: Minefield marker
- B42.13: Fort marker; 6-10-12 French Inf Bde (1 FF); 1-2-12 French Inf Bn (1 Leg)
- B40.16: 3-2-15 Arm Car Bn (KDG)
- B38.17: 2-1-15 SA Arm Car Bn (4 SA)
- B41.14, B41.13, B42.12: Minefield marker, each
- B39.13: 4-6-12 Ind Inf Bde (3 Ind)
- B50.12: Minefield marker
- B49.12: Minefield marker
- B48.11: Fort marker; 3-4-9 Arm Bn (8 RTR)
- B46.12: Fort marker; 2-1-15 Arm Car Bn (Royals); 4-6-11 Inf Bde (200 Gd)
Supply Units:
- B50.05 (Tobruk): 4 Supply Units
- C45.29 (Bardia): 2 Supply Units
- With any friendly unit(s): 4 Supply Units
Withdrawal Returns: Roll one die: On a 1-4: Roll one die again for the unit and the unit re-enters that number of turns later. On a 5-6: Put the unit in the Rebuild Cup. Units:
- 9-6-12 Arm Bde (7/7 Arm Div)
- 4-3-14 Aus Arm Recon Bn (9 Aus/9 Aus)
- 4-6-11 Aus Inf Bde (18 Aus/7 Aus)
- 4-6-11 Aus Inf Bde (21 Aus/7 Aus)
- 4-6-11 Aus Inf Bde (25 Aus/7 Aus)
- 6-9-11 Aus Inf Bde (20 Aus/9 Aus)
- 6-9-11 Aus Inf Bde (24 Aus/9 Aus)
- 6-9-11 Aus Inf Bde (26 Aus/9 Aus)
- 4-6-11 Ind Inf Bde (5 Ind/4 Ind)
- 4-6-11 Ind Inf Bde (7 Ind/4 Ind)
- 6-4-12 NZ Arm Recon Bn (2 NZ/2 NZ)
- 4-6-11 NZ Inf Bde (4 NZ/2 NZ)
- 4-6-11 NZ Inf Bde (5 NZ/2 NZ)
- 4-6-11 NZ Inf Bde (6 NZ/2 NZ)
- 3-3-11 NZ Inf Bn (28 Maori/2 NZ)
- 4-6-11 Inf Bde (14)
- 6-4-3 Inf Bde (16)
- 6-4-3 Inf Bde (23)
- 4-6-11 Ind Inf Bde (161 Ind)
Axis Information
Captured Enemy Leader: O'Connor
Italian Rebuild Cup:
- 5-3-11 Arm Bn (7 Med/Ariete)
- 5-3-11 Arm Bn (12 Med/Littorio)
- 8-12-3 Inf Div (Savona)
- 4-12-3 Inf Div (Cirene)
- 4-6-3 Inf Div (Ctnzro)
- 4-12-3 Inf Div (Marm)
- 4-12-3 Inf Div (Sirte)
- 3-8-3 Inf Div (2 Lib)
- 2-1-14 Motorcycle Bn (PAI)
- 2-1-15 Motorcycle Bn (ProvBrs)
- 3-2-9 Arm Bn (1 Med)
- 3-2-9 Arm Bn (2 Med)
- 4-3-9 Arm Bn (3 Med)
- 2-3-9 Arm Bn (5 Med)
- 2-3-9 Arm Bn (6 Med)
- 2-3-9 Arm Bn (21 Med)
- 3-4-12 Inf Rgt (1 Lib)
- 3-5-11 Inf Rgt (10 Brs)
- 0-6-14 AT Bn (1 Mil)
German Rebuild Cup: 3-6-12 AT Bn (605)
Tripoli Cup (All Italian):
- 4-3-11 Arm Bn (11 Med/Littorio)
- 3-5-12 Inf Rgt (12 Brs/Littorio)
- 1-2-3 Inf Rgt (350)
- 0-1-2 GAF Bn (35)
- 1-2-3 Eng Rgt (1 Spc)
- 1-2-3 Eng Rgt (7 Spc)
- 0-4-14 AT Bn (2 Mil)
Set Up:
- w/i 10 of the Via Balbia A19.35 through A48.20: 4-12-3 Italian Inf Div (Bologna) (Reduced-strength); 2-3-3 Italian Inf Rgt (GGFF/GGFF); 0-1-3 Italian Inf Bn (18 Lib); 0-1-3 Italian Inf Bn (36 Lib)
- B60.24: 0-3-6 Kor Bn (556); 2-2-15 Commando Co (v.Könen)
- B57.23: 3-3-5 LW FJ Bn (Lehr)
- B55.19: 6-7-5 Amphibious Bn (Hecker)
- B51.21: 3-3-4 Italian Assault Eng Bn (32)
- B52.17: 4-6-11 Inf Rgt (361/90 Le)
- B51.18: 4-6-11 Inf Rgt (200/90 Le); 2-4-12 Flak Bn (612)
- B50.18: 8-12-3 Italian Inf Div (Sabrtha)
- B49.19: 3-5-9 Italian Inf Rgt (7 Brs)
- B48.19: 3-5-3 Italian Inf Rgt (61/Trento); 3-5-3 Italian Inf Rgt (62/Trento)
- B47.20: 8-12-3 Italian Inf Div (Brescia)
- B47.21: 3-5-12 Italian Inf Rgt (9 Brs); 3-3-4 Italian Assault Eng Bn (31)
- B46.19: 8-12-3 Italian Inf Div (Pavia)
- w/i 1 B46.20: 3-2-14 Italian Arm Car Bn (Nizza/Ariete); 5-3-11 Italian Arm Bn (8 Med/Ariete); 5-3-11 Italian Arm Bn (9 Med/Ariete); 4-3-11 Italian Arm Bn (10 Med/Ariete); 5-3-12 Italian AG Bn (551/Ariete); 5-3-12 Italian AG Bn (552/Ariete); 3-5-14 Italian Inf Rgt (8 Brs/Ariete); 1-2-12 Italian AT Bn (AT/Ariete); 0-6-14 Italian AT Bn (501)
- B45.22: 3-2-14 Italian Arm Car Bn (8 Brs/Trieste); 3-5-11 Italian Inf Rgt (65/Trieste); 3-5-11 Italian Inf Rgt (66/Trieste)
- w/i 2 B45.24: Rommel Leader; 4-3-14 Pz Co (KStA); 1-2-3 Inf Bn (3-255); 1-2-3 Inf Bn (3-347); 1-3-12 Flak Bn (617)
- w/i 1 B45.23: 6-4-14 Pz Recon Bn (3/21 Pz); 4-3-15 Motorcycle Bn (15 Krd/21 Pz); 9-5-12 Pz Bn (1-5/21 Pz); 9-5-12 Pz Bn (2-5/21 Pz); 7-12-14 Inf Rgt (104/21 Pz); 4-7-14 MG Bn (8/21 Pz); 4-6-14 Pio Bn (200/21 Pz); 0-3-12 AT Bn (39 PJ/21 Pz); 3-10-14 LW Flak Bn (1-18)
- w/i 1 B44.23: 6-4-14 Pz Recon Bn (33/15 Pz); 9-5-12 Pz Bn (1-8/15 Pz); 9-5-12 Pz Bn (2-8/15 Pz); 4-7-14 MG Bn (2/15 Pz); 7-12-14 Inf Rgt (115/15 Pz); 4-6-14 Pio Bn (33/15 Pz); 0-3-12 AT Bn (33 PJ/15 Pz); 3-10-14 LW Flak Bn (1-33)
Supply Units: Any friendly stack(s) on...
- Map A: 1 Supply Unit
- Map B: 7 Supply Units
Victory
Use the Campaign Victory conditions.
5.10 1st Alamein Campaign Start, 1 July 42
General Information
- Maps in Play: All
- Game Length: 5 Turns
- Set Up First: Commonwealth
- Initiative Player: Axis
- First Turn: July 42
- Last Turn: Nov 42
- Air Strikes: Roll normally
- Rebuilds: As per the Turn Record Track
- Reinforcements: As per Orders of Arrival
Commonwealth Information
Rebuild Cup:
- 3-2-15 Lt Arm Bn (3 Hus/7 Arm)
- 3-4-9 Arm Bn (4 RTR)
- 3-4-9 Arm Bn (7 RTR)
- 7-4-12 Arm Bde (2/1 Arm)
- 9-6-11 Arm Bde (8/10 Arm)
- 9-6-11 Arm Bde (9/10 Arm)
- 4-6-11 Ind Inf Bde (11 Ind/4 Ind)
- 4-6-11 Ind Inf Bde (10 Ind/5 Ind)
- 4-6-11 Ind Inf Bde (29 Ind/5 Ind)
- 4-6-11 Ind Inf Bde (20 Ind/10 Ind)
- 4-6-11 Ind Inf Bde (21 Ind/10 Ind)
- 4-6-11 Inf Bde (150/50)
- 6-10-12 French Inf Bde (1 FF)
- 4-6-12 Ind Inf Bde (3 Ind)
- 4-6-14 Inf Bde (201 Gd)
- 2-5-11 AT Bn (149 AT)
Set Up:
- D26.19: 4-6-11 Ind Inf Bde (9 Ind/5 Ind) (Reduced-strength)
- D28.19: 2-1-15 SA Arm Car Bn (4 SA); 4-7-14 Inf Bde (7 Support/7 Arm)
- D29.19: 4-6-11 NZ Inf Bde (6 NZ/2 NZ)
- w/i 1 D26.16: Strafer Gott Leader; 6-4-12 NZ Arm Recon Bn (2 NZ/2 NZ); 4-6-11 NZ Inf Bde (4 NZ/2 NZ) (Reduced-strength); 4-6-11 NZ Inf Bde (5 NZ/2 NZ) (Reduced-strength); 3-3-11 NZ Inf Bn (28 Maori/2 NZ)
- D30.17: 2-1-15 Ind Arm Car Bn (Guides/10 Ind); 2-6-9 Ind Inf Bde (18 Ind)
- D30.16: 4-6-9 SA Inf Bde (1 SA/1 SA)
- D31.16: 7-5-12 Arm Bde (4/7 Arm Div); 4-6-9 SA Inf Bde (2 SA/1 SA); 3-4-9 Arm Bn (8 RTR)
- D32.16: Fort marker; 2-1-15 SA Arm Car Bn (6 SA); 4-6-9 SA Inf Bde (3 SA/2 SA)
- D28.14: 3-2-15 Arm Car Bn (12 Lcr/1 Arm)
- D30.14: 2-1-15 Arm Car Bn (Royals); 3-2-15 Arm Car Bn (KDG); 7-4-12 Arm Bde (22/1 Arm)
- D30.12: 2-5-11 AT Bn (95 AT)
- D33.11: 4-6-11 Ind Inf Bde (5 Ind/4 Ind); 4-6-11 Ind Inf Bde (25 Ind/10 Ind)
- D34.09: 4-6-11 Inf Bde (69/50) (Reduced-strength); 4-6-11 Inf Bde (151/50) (Reduced-strength)
- w/i 1 D39.05: 3-4-9 Arm Bn (42 RTR); 3-4-9 Arm Bn (44 RTR); 0-4-0 Fort Bde (Alex A); 0-4-0 Fort Bde (Alex B); 3-5-3 FF Inf Bde (2 FF); 1-2-3 Yugoslavian Inf Bn (Yugo Gd); 3-3-3 FF Marine Bn (BFM); 1-2-12 French Inf Bn (1 Leg); 4-4-5 Marine Bn (11 RM); 2-4-11 FF AT Bn (CAC); 2-3-3 Inf Bde (1 Sud)
- w/i 5 D39.05: 2-1-15 Arm Car Bn (Greys); 2-1-15 Ind Arm Car Bn (Skinner); 4-3-14 Aus Arm Recon Bn (9 Aus/9 Aus); 6-9-11 Aus Inf Bde (20 Aus/9 Aus); 2-5-11 AT Bn (65 AT)
- w/i 1 D36.06: 1-1-15 SA Arm Car Bn (3 SA); 6-9-11 Aus Inf Bde (24 Aus/9 Aus); 6-9-11 Aus Inf Bde (26 Aus/9 Aus)
Withdrawal Returns: Roll one die: On a 1-4: Roll one die again for the unit and the unit re-enters that number of turns later. On a 5-6: Put the unit in the Rebuild Cup. Units:
- 9-6-12 Arm Bde (7/7 Arm Div)
- 4-6-11 Aus Inf Bde (18 Aus/7 Aus)
- 4-6-11 Aus Inf Bde (21 Aus/7 Aus)
- 4-6-11 Aus Inf Bde (25 Aus/7 Aus)
- 4-6-11 Ind Inf Bde (7 Ind/4 Ind)
- 4-6-11 Inf Bde (14)
- 4-6-11 Inf Bde (16)
- 4-6-11 Inf Bde (23)
- 4-6-11 Ind Inf Bde (161 Ind)
Supply Units: Any friendly stack(s) on Map D: 5 Supply Units
Axis Information
Captured Enemy Leader: O'Connor
Italian Rebuild Cup (All Italian):
- 3-2-14 Arm Car Bn (Nizza/Ariete)
- 5-3-11 Arm Bn (7 Med/Ariete)
- 5-3-11 Arm Bn (8 Med/Ariete)
- 5-3-11 Arm Bn (9 Med/Ariete)
- 5-3-12 AG Bn (551/Ariete)
- 5-3-11 Arm Bn (12 Med/Littorio)
- 5-3-11 Arm Bn (51 Med/Littorio)
- 3-2-14 Arm Car Bn (8 Brs/Trieste)
- 3-5-11 Inf Rgt (66/Trieste)
- 8-12-3 Inf Div (Savona)
- 4-12-3 Inf Div (Cirene)
- 4-6-3 Inf Div (Ctnzro)
- 4-12-3 Inf Div (Marm)
- 4-12-3 Inf Div (Sirte)
- 3-8-3 Inf Div (2 Lib)
- 2-1-14 Motorcycle Bn (PAI)
- 2-1-15 Motorcycle Bn (ProvBrs)
- 3-2-9 Arm Bn (1 Med)
- 3-2-9 Arm Bn (2 Med)
- 4-3-9 Arm Bn (3 Med)
- 2-3-9 Arm Bn (5 Med)
- 2-3-9 Arm Bn (6 Med)
- 2-3-9 Arm Bn (21 Med)
- 3-4-12 Inf Rgt (1 Lib)
- 3-5-11 Inf Rgt (10 Brs)
- 0-6-14 AT Bn (1 Mil)
German Rebuild Cup:
- 9-5-12 Pz Bn (2-8/15 Pz)
- 7-12-14 Inf Rgt (115/15 Pz)
- 9-5-12 Pz Bn (2-5/21 Pz)
- 4-6-11 Inf Rgt (200/90 Le)
Tripoli Cup (All Italian):
- 0-4-14 AT Bn (2 Mil)
- 0-1-2 GAF Bn (35)
- 1-2-3 Inf Rgt (350)
- 1-2-3 Eng Rgt (1 Spc)
- 1-2-3 Eng Rgt (7 Spc)
Set Up:
- A26.18: 4-12-3 Italian Inf Div (Bologna) (Reduced-strength)
- A48.20: 0-1-3 Italian Inf Bn (18 Lib)
- B60.24: 0-1-3 Italian Inf Bn (36 Lib)
- w/i 2 B50.08: 2-3-3 Italian Inf Rgt (GGFF/GGFF); 1-2-3 Italian Inf Bn (4 Lib/GGFF); 1-2-3 Italian Inf Bn (9/GGFF); 0-3-6 Kor Bn (556); 2-2-15 Commando Co (v.Könen); 3-3-5 LW FJ Bn (Lehr)
- C45.29: 8-12-3 Italian Inf Div (Sabrtha)
- w/i 1 C39.03: 3-5-3 Italian Inf Rgt (61/Trento); 3-3-4 Italian Assault Eng Bn (32); 1-3-12 Flak Bn (617)
- D37.32: 3-3-4 Italian Assault Eng Bn (31)
- D35.29: 3-6-12 AT Bn (605)
- D34.24: 8-12-3 Italian Inf Div (Brescia) (Reduced-strength)
- D33.23: 8-12-3 Italian Inf Div (Pavia) (Reduced-strength); 3-5-12 Italian Inf Rgt (9 Brs)
- D35.24: 3-5-11 Italian Inf Rgt (65/Trieste)
- w/i 1 D35.23: 4-3-11 Italian Arm Bn (10 Med/Ariete); 5-3-12 Italian AG Bn (552/Ariete); 3-5-14 Italian Inf Rgt (8 Brs/Ariete); 1-2-12 Italian AT Bn (AT/Ariete); 0-7-12 Italian AT Bn (6); 0-6-14 Italian AT Bn (501); 0-6-14 Italian AT Bn (503)
- D35.21: 4-3-14 Pz Co (KStA); 1-3-12 AT Bn (305/21 Pz); 4-6-14 Pio Bn (200/21 Pz); 3-10-14 LW Flak Bn (1-18)
- D29.23: 4-3-14 Pz Recon Bn (580/90 Le); 3-5-12 Italian Inf Rgt (12 Brs/Littorio)
- D33.21: Rommel Leader; 6-4-14 Pz Recon Bn (3/21 Pz); 9-5-12 Pz Bn (1-5/21 Pz)
- w/i 1 D32.21: 6-4-14 Pz Recon Bn (33/15 Pz); 9-5-12 Pz Bn (1-8/15 Pz); 4-6-14 Pio Bn (33/15 Pz); 0-3-12 AT Bn (33 PJ/15 Pz); 7-12-14 Inf Rgt (104/21 Pz); 3-10-14 LW Flak Bn (1-33)
- w/i 1 D33.19: 4-7-11 Inf Rgt (155/90 Le); 4-6-11 Inf Rgt (361/90 Le); 4-6-11 Pio Bn (900/90 Le); 2-4-12 Flak Bn (612); 1-3-12 Flak Bn (606)
- D33.18: 3-5-3 Italian Inf Rgt (62/Trento)
Supply Units: Any friendly stack(s): 4 Supply Units
Victory
Use the Campaign Victory conditions.
Commonwealth Order of Arrival
Jan 41
- Reinforcements: 2-1-15 Arm Car (KDG/2 Arm); 7-4-12 Arm Bde (1/2 Arm) (Reduced); 3-5-12 Inf Bde (2 Support/2 Arm) (Reduced); 2-3-12 Arm Bn (3 RTR); 2-2-12 Arm Bn (5 RTR)
- In Training: 2 Arm Div
Feb 41
- Reinforcements: 2-1-9 Ind Cav Bn (18 Ind); 4-6-12 Ind Inf Bde (3 Ind); 4-6-4 Inf Bde (22)
- Removal: 4-6-14 Inf Bde (Selby)
- Greek Campaign Begins: 2.3c.
- New Arrivals for the Greek Campaign Box: 6-4-12 NZ Arm Recon Bn (2 NZ/2 NZ); 4-6-11 NZ Inf Bde (4 NZ/2 NZ); 4-6-11 NZ Inf Bde (5 NZ/2 NZ); 4-6-11 NZ Inf Bde (6 NZ/2 NZ); 3-3-11 NZ Inf Bn (28 Maori/2 NZ)
- On Map Units for the Greek Campaign Box: 3-2-14 Aus Arm Recon Bn (6 Aus/6 Aus); 4-6-11 Aus Inf Bde (16 Aus/6 Aus); 4-6-11 Aus Inf Bde (17 Aus/6 Aus); 4-6-11 Aus Inf Bde (19 Aus/6 Aus)
Mar 41
- Reinforcements: 4-6-11 Aus Inf Bde (18 Aus/7 Aus) (Reduced); 6-9-11 Aus Inf Bde (20 Aus/9 Aus) (Reduced); 6-9-11 Aus Inf Bde (24 Aus/9 Aus) (Reduced); 6-9-11 Aus Inf Bde (26 Aus/9 Aus) (Reduced); 3-4-9 Arm Bn (4 RTR)
- Removal: 2-3-12 Arm Bn (3 RTR); 1-2-11 Inf Bn (3 Cldst); 0-1-11 AT Bn (3 RHA); 0-1-11 AT Bn (106 RHA)
- Exchange: 2-1-15 Lt Arm Bn (3 Hus) with 3-2-15 Lt Arm Bn (3 Hus/7 Arm)
- In Training: 7 Aus Div, 9 Aus Div
Apr 41
- Reinforcements: 4-6-11 Aus Inf Bde (21 Aus/7 Aus) (Reduced); 4-6-11 Aus Inf Bde (25 Aus/7 Aus) (Reduced); 2-1-15 Arm Car Bn (Royals)
- Exchange: 4-6-4 Inf Bde (22) with 4-6-11 Inf Bde (22 Gd)
- Scenario 5.6 ONLY, Removal: 2-2-12 Arm Bn (5 RTR)
May 41
- Reinforcements: 2-2-12 Arm Bn (1 RTR); 2-1-15 SA Arm Car Bn (7 SA); 4-6-9 SA Inf Bde (5 SA/1 SA) (Reduced); 4-6-11 Inf Bde (23)
- In Training: 1 SA Div
- Training Completed (Flip to Full-strength): 2 Arm Div, 7 Aus Div
- Removal: 7-4-12 Arm Bde (1/2 Arm); 3-5-12 Inf Bde (2 Support/2 Arm)
- Exchange: 2-1-15 Arm Car (KDG/2 Arm) with 3-2-15 Arm Car (KDG)
- Tiger Convoy: Rebuild (for free) up to three (3) Arm units from the Rebuild Cup. The CW player selects the Arm units he wants from the Cup. Place them in Alexandria. If there are not enough Arm units, AC units may be selected.
Jun 41
- Removal: 3-2-15 Lt Arm Bn (1 RTR/7 Arm); 4-3-14 Arm Bn (2 RTR/7 Arm); 6-5-14 Arm Bn (6 RTR/7 Arm); 3-2-15 Lt Arm Bn (7 Hus/7 Arm); 6-4-14 Arm Bn (8 Hus/7 Arm); 2-2-14 Mot Inf Bn (1 KRRC/7 Arm); 2-2-14 Mot Inf Bn (2 Rifle/7 Arm)
- Reinforcements: 7-5-12 Arm Bde (4/7 Arm); 9-6-12 Arm Bde (7/7 Arm); 4-7-14 Inf Bde (7 Support/7 Arm); 4-3-14 Aus Arm Recon Bn (9 Aus/9 Aus) (Reduced); 4-6-9 SA Inf Bde (2 SA/1 SA) (Reduced); 4-6-11 Inf Bde (150/50); 2-1-15 SA Arm Car Bn (4 SA); 2-1-15 SA Arm Car Bn (6 SA); 1-2-3 Czech Inf Bn (11 Czech)
- Greek Campaign Ends: Roll two dice for each remaining NZ unit in the Greek Campaign Box and apply the results there. 6 Aus only returns via CW Rare Event.
- Scenario 5.6 ONLY: 4-6-11 Inf Bde (14)
Jul 41
- Reinforcements: 4-6-9 SA Inf Bde (1 SA/1 SA); 4-6-9 SA Inf Bde (3 SA/2 SA); 4-6-9 SA Inf Bde (6 SA/2 SA); 4-6-11 Ind Inf Bde (9 Ind/5 Ind); 4-6-11 Ind Inf Bde (10 Ind/5 Ind); 4-6-11 Inf Bde (151/50); 1-1-15 SA Arm Car Bn (3 SA); 4-4-5 Marine Bn (11 RM); 3-4-9 Arm Bn (8 RTR); 3-4-9 Arm Bn (42 RTR); 3-4-9 Arm Bn (44 RTR); 2-5-11 AT Bn (149 AT); 4-6-11 Inf Bde (161)
- Removal: 2-1-15 Arm Car Bn (Royals)
- Training Completed (Flip to Full-strength): 1 SA Div, 9 Aus Div
Aug 41
- Reinforcements: 4-6-9 SA Inf Bde (4 SA/2 SA); 4-6-11 Ind Inf Bde (29 Ind/5 Ind); 4-6-11 Inf Bde (69/50)
- Removal: 2-1-9 Ind Cav Bn (18 Ind)
Oct 41
- Reinforcement: 7-4-12 Arm Bde (22/1 Arm) (Reduced)
- In Training: 1 Arm Div
- Exchanges: 0-1-11 AT Bn (65) with 2-5-11 AT Bn (65 AT); 4-6-11 Inf Bde (161) with 4-6-11 Ind Inf Bde (161 Ind)
Dec 41
- Reinforcements: 3-2-15 Arm Car Bn (12 Lcr/1 Arm); 7-4-12 Arm Bde (2/1 Arm); 3-5-12 Inf Bde (1 Support/1 Arm); 2-1-15 Arm Car Bn (Royals) returning from removal Jul 41; 6-10-12 French Inf Bde (1 FF); 1-2-12 French Inf Bn (1 Leg); 2-5-11 AT Bn (95 AT)
- Training Completed (Flip to Full-strength): 1 Arm Div
Jan 42
- Reinforcement: 2-1-15 Arm Car Bn (Greys)
- Exchange: 4-6-11 Inf Bde (22 Gd) with 4-6-11 Inf Bde (200 Gd)
- Minefields are now available to CW player
Feb 42
- Reinforcement: 3-3-3 FF Marine Bn (BFM)
- Removal: 3-5-12 Inf Bde (1 Support/1 Arm); 2-2-12 Arm Bn (1 RTR)
March 42
- Reinforcement: 9-6-11 Arm Bde (8/10 Arm)
- Removal: 2-1-15 Ind Arm Car Bn (CIH/4 Ind); 2-1-9 Polish Cav Bn (Lancers); 4-6-4 Polish Inf Bde (Carp)
Apr 42
- Reinforcements: 2-1-15 Ind Arm Car Bn (Skinner); 1-2-3 Yugoslavian Inf Bn (Yugo Gd)
- Removal: 5-3-15 Arm Car Bn (11 Hus/7 Arm)
May 42
- Reinforcements: 9-6-11 Arm Bde (9/10 Arm); 3-5-3 FF Inf Bde (2 FF); 2-4-11 FF AT Bn (CAC)
- Exchange: 4-6-11 Inf Bde (200 Gd) with 4-6-14 Inf Bde (201 Gd)
Jun 42
- Reinforcements: 2-1-15 Ind Arm Car Bn (Guides/10 Ind); 4-6-11 Ind Inf Bde (20 Ind/10 Ind); 4-6-11 Ind Inf Bde (21 Ind/10 Ind); 4-6-11 Ind Inf Bde (25 Ind/10 Ind); 2-3-3 Sudanese Inf Bde (1 Sud)
Jul 42
- Reinforcements: 5-3-15 Arm Car Bn (11 Hus/7 Arm) returning from removal; 8-5-12 Arm Bde (24); 6-4-9 Arm Bn (40 RTR); 6-4-9 Arm Bn (46 RTR); 6-4-9 Arm Bn (50 RTR); 2-6-9 Ind Inf Bde (18 Ind); 2-6-11 Ind Inf Bde (26 Ind)
- Removal: 1-2-3 Czech Inf Bn (11 Czech)
Aug 42
- Reinforcements: 4-6-11 Inf Bde (131/44); 4-6-11 Inf Bde (132/44); 4-6-11 Inf Bde (133/44); 4-6-11 Inf Bde (152/51); 4-6-11 Inf Bde (153/51); 4-6-11 Inf Bde (154/51); 1-2-3 Greek Inf Bde (2 Greek)
Sep 42
- Reinforcements: 4-3-15 Arm Car Bn (1 HCR); 3-2-15 Arm Car Bn (2 Derby); 2-3-3 Greek Inf Bde (1 Greek)
- Removal: 2-1-15 Ind Arm Car Bn (Skinner)
- Exchange: 4-3-14 Aus Arm Recon Bn (9 Aus/9 Aus) with 5-4-12 Arm Bn (9 Aus/9 Aus)
Oct 42
- Reinforcement: 3-2-14 FF Arm Car Bn (1 Spahis)
- Exchanges: 2-1-15 Arm Car Bn (Greys) with 4-3-12 Arm Recon Bn (Greys); 4-6-11 NZ Inf Bde (4 NZ/2 NZ) with 3-2-14 NZ Arm Bde (4 NZ/2 NZ)
Note: Non-Rebuildable units that are dead are not listed in the set ups (since they are gone for good). Some might show up later to be removed. Those entries are for Campaign Games for units that start in play but somehow stay alive until removed. If your game starts at a later date and these units are already dead, or they were lost during play, they may not be on the map to be removed. In that case, ignore their removal.
Axis Order of Arrival
Dec 40
- Italian Reinforcements: 1-1-15 Motorcycle Co (201 Brs); 1-1-15 Motorcycle Co (202 Brs); 2-3-9 Arm Bn (5 Med); 1-2-3 Blackshirt Inf Bn (Vd.Lib); 3-5-11 Inf Rgt (10 Brs); 1-2-11 Inf Bn (34 Lib); 2-3-14 MG Bn (S.Maria); 0-2-3 MG Bn (27); 1-2-4 MG Bn (55)
Jan 41
- Italian Reinforcements: 3-5-14 Inf Rgt (8 Brs/Ariete); 2-3-9 Arm Bn (6 Med); 2-3-9 Arm Bn (21 Med); 3-3-4 Assault Eng Bn (32)
Feb 41
- Italian Reinforcements: 2-1-12 Lt Arm Bn (1 Lt/Ariete); 2-1-12 Lt Arm Bn (2 Lt/Ariete); 2-1-12 Lt Arm Bn (3 Lt/Ariete)
- Tripoli Cup (all Italian): 3-5-3 Inf Rgt (61/Trento); 3-5-3 Inf Rgt (62/Trento); 3-5-9 Inf Rgt (7 Brs); 1-2-4 MG Bn (551); 0-6-14 AT Bn (1 Mil); 0-4-14 AT Bn (2 Mil)
Mar 41
- Italian Reinforcements: 5-3-11 Arm Bn (7 Med/Ariete)
- German Reinforcements: Rommel Leader; 6-4-14 Pz Recon Bn (3/5.Le); 4-7-14 MG Bn (2/5.Le); 4-7-14 MG Bn (8/5.Le); 3-5-12 Pio Bn (200/5.Le); 0-3-12 AT Bn (39 PJ/5.Le); 0-3-6 Kor Bn (556); 2-2-15 Commando Co (v.Könen); 3-10-14 LW Flak Bn (1-33); 3-10-14 LW Flak Bn (1-18); 3-6-12 AT Bn (605)
- Add to German Rebuild Cup: 4-3-14 Pz Bn (KStA)
Apr 41
- German Reinforcements: 8-4-12 Pz Bn (1-5/5.Le); 8-4-12 Pz Bn (2-5/5.Le); 6-4-14 Pz Recon Bn (33/15.Pz); 4-3-15 Motorcycle Bn (15 Krd/15.Pz); 4-6-14 Pio Bn (33/15.Pz); 6-9-14 Inf Rgt (104/15.Pz); 7-12-14 Inf Rgt (115/15.Pz); 0-3-12 AT Bn (33 PJ/15.Pz); 1-3-12 Flak Bn (606)
May 41
- Italian Reinforcement: 0-3-14 AT Bn (551)
- German Reinforcement: 9-5-12 Pz Bn (1-8/15.Pz)
- Add to German Rebuild Cup: 9-5-12 Pz Bn (2-8/15.Pz)
Jun 41
- German Reinforcements: 1-2-3 Inf Bn (3-255); 1-2-3 Inf Bn (3-347)
July 41
- Italian Reinforcement: 3-3-4 Abn Bn (1 Cara)
- Removal: 2-3-14 MG Bn (S.Maria)
- German Reinforcement: 7-8-14 Commando Rgt (288.Snd)
Aug 41
- Italian Reinforcements: 5-3-11 Arm Bn (9 Med/Ariete); 1-2-12 AT Bn (AT/Ariete); 2-3-3 Inf Rgt (GGFF); 3-3-4 Assault Eng Bn (31)
- German Reinforcements: 2-1-14 Exp Co (580/Afrika); 3-4-9 Pio Bn (900/Afrika)
Sep 41
- Italian Reinforcements: 2-1-14 Motorcycle Bn (PAI); 1-3-12 MG Bn (101)
- German Reinforcements: 1-3-12 Flak Bn (617); 6-10-9 Inf Rgt (155/Afrika)
- German Exchange: 4-7-14 MG Bn (2/5.Le) with 4-7-14 MG Bn (2/15.Pz)
Oct 41
- Tobruk By-Pass Road becomes a Primary Road.
- Italian Reinforcements: 3-5-11 Inf Rgt (65/Trieste); 3-5-11 Inf Rgt (66/Trieste); 3-5-12 Inf Rgt (9 Brs); 3-2-10 Lt Arm Bn (52 Mx); 2-4-14 MG Bn (R.Gessi)
- German Reinforcement: 5-7-9 Inf Rgt (361/Afrika)
- German Exchanges:
- 4-3-15 Motorcycle Bn (15 Krd/15.Pz) with 4-3-15 Motorcycle Bn (15 Krd/21.Pz)
- 6-4-14 Pz Recon Bn (3/5.Le) with 6-4-14 Pz Recon Bn (3/21.Pz)
- 8-4-12 Pz Bn (1-5/5.Le) with 9-5-12 Pz Bn (1-5/21.Pz)
- 8-4-12 Pz Bn (2-5/5.Le) with 9-5-12 Pz Bn (2-5/21.Pz)
- 6-9-14 Inf Rgt (104/15.Pz) with 7-12-14 Inf Rgt (104/21.Pz)
- 4-7-14 MG Bn (8/5.Le) with 4-7-14 MG Bn (8/21.Pz)
- 3-5-12 Pio Bn (200/5.Le) with 4-6-14 Pio Bn (200/21.Pz)
- 0-3-12 AT Bn (39 PJ/5.Le) with 0-3-12 AT Bn (39 PJ/21.Pz)
Nov 41
- Italian Reinforcement: 3-3-4 Marine Bn (4-SM)
Dec 41
- Tripoli Cup (Italian): 1-2-3 Eng Rgt (1 Spc)
- German Reinforcements: 0-7-12 LW Flak Bn (1-43)
- German Exchanges:
- 2-1-14 Exp Co (580/Afrika) with 4-3-14 Pz Recon Bn (580/90.Le)
- 6-10-9 Inf Rgt (155/Afrika) with 4-7-11 Inf Rgt (155/90.Le)
- 5-7-9 Inf Rgt (361/Afrika) with 4-6-11 Inf Rgt (361/90.Le)
- 3-4-9 Pio Bn (900/Afrika) with 4-6-11 Pio Bn (900/90.Le)
Jan 42
- Italian Reinforcements: 5-3-12 AG Bn (551/Ariete); 5-3-12 AG Bn (552/Ariete)
- Italian Removal: 0-3-14 AT Bn (551)
- German Reinforcements: 1-2-5 Amphibious Co (778 Ldg); 0-7-12 LW Flak Bn (1-53)
Feb 42
- Italian Reinforcements: 4-3-11 Arm Bn (11 Med/Littorio); 0-6-14 AT Bn (501)
- Tripoli Cup (Italians): 1-2-3 Inf Rgt (350); 3-5-12 Inf Rgt (12 Brs/Littorio)
- German Reinforcements: 2-4-12 Flak Bn (612)
Mar 42
- Italian Reinforcements: 5-3-11 Arm Bn (8 Med/Ariete); 4-3-11 Arm Bn (10 Med/Ariete)**
- ** Optional: Bring on 4-3-11 Arm Bn (10 Med/Littorio) rather than the 10 Med in Ariete.
- Tripoli Cup (Italian): 1-2-3 Eng Rgt (7 Spc)
- Add to Italian Rebuild Cup: 5-3-11 Arm Bn (12 Med/Littorio)
- German Reinforcement: 0-7-12 LW Flak Bn (2-25)
Apr 42
- Italian Reinforcements: 3-2-14 Arm Car Bn (Nizza/Ariete); 3-2-14 Arm Car Bn (8 Brs/Trieste)
- Italian Exchanges: 2-3-3 Inf Rgt (GGFF) with 2-3-3 Inf Rgt (GGFF/GGFF)
- Italian Removal: All Italian MG units (make sure to check cups too); 3-3-4 Marine Bn (4-SM)
- German Reinforcements: Place in any friendly stack(s): 4-6-11 Inf Rgt (200/90.Le); 6-7-5 Amphibious Bn (Hecker)
- German Removal: 1-2-5 Amphibious Co (778 Ldg)
May 42
- Italian Reinforcements: 3-2-10 Lt Arm Bn (Novara/Ariete); 1-2-3 Inf Bn (9/GGFF); 1-2-3 Inf Bn (4 Lib/GGFF); 0-7-12 AT Bn (6)
- Tripoli Cup (Italian): 5-3-11 Arm Bn (51 Med/Littorio)
- German Reinforcements: 3-3-5 LW FJ Bn (Lehr)
June 42
- Italian Reinforcements: 0-6-14 AT Bn (503)
July 42
- Italian Reinforcements: 4-3-11 Arm Bn (4 Med/Littorio); 5-3-12 AG Bn (554/Littorio); 5-3-12 AG Bn (556/Littorio); 2-2-15 Commando Bn (Arditi)
- German Reinforcements: 6-9-12 Inf Rgt (125/164.Le)
Aug 42
- Italian Reinforcements: 4-7-4 Abn Rgt (186/Folgore); 4-7-4 Abn Rgt (187/Folgore); 4-5-5 Abn Assault Bn (8/Folgore); 5-3-9 Arm Bn (13 Med); 8-12-3 Inf Div (Pistoia); 3-5-12 Inf Bn (57 Brs); 0-7-12 AT Bn (3); 0-7-12 AT Bn (5)
- German Reinforcements: 3-2-14 Pz Recon Bn (220/164.Le); 6-9-6 Inf Rgt (382/164.Le); 6-9-6 Inf Rgt (433/164.Le); 2-3-9 Pio Bn (220/164.Le); 0-4-9 AT Bn (220/164.Le); 4-5-5 LW FJ Bn (Hüber/Ramcke); 4-5-5 LW FJ Bn (Kroh/Ramcke); 4-5-5 LW FJ Bn (vdH/Ramcke); 0-7-12 LW Flak Bn (1-6); 0-7-12 LW Flak Bn (1-46)
- German Exchanges: 0-3-12 AT Bn (39 PJ/21.Pz) with 1-3-12 AT Bn (305/21.Pz)
- Random Event Driven: 7-9-14 Commando Rgt (287.Snd)
Sept 42
- German Reinforcement: 0-6-9 AT Bn (190/90.Le)
Oct 42
- Italian Reinforcements: 0-1-3 Inf Bn (2-87); 1-2-3 Inf Rgt (336)
- German Reinforcement: 6-10-12 Inf Rgt (Buhse)
- German Removal: 1-2-3 Inf Bn (3-255)
- German Exchange: 7-8-14 Commando Rgt (288.Snd) with 7-12-14 PG Rgt (Afrika) (do not use in Scenario 5.10)
Nov 42
- Italian Reinforcements: 3-2-14 Arm Car Bn (Lodi/Centro); 5-3-9 Arm Bn (14 Med/Centro); 5-3-9 Arm Bn (17 Med/Centro); 3-5-11 Inf Rgt (5 Brs/Centro); 5-3-12 AG Bn (555/Centro); 2-1-14 Arm Car Bn (Mnfrto/GGFF); 8-12-3 Inf Div (L.Spez); 4-4-5 Assault Eng Bn (30)
- Germans, Random Event Driven: 6-4-12 Pz Bn (190/90.Le)
Designer's Notes
North Africa was a long time coming and wouldn't exist at all if not for the incredibly hard work of Lee Forester, the excellent table graphics of Gary Wright, and the stern cross-checks of Chris Gammon. But let's start at the beginning.
The concept was wonderfully simple: take an existing award-winning OCS game DAK, keep most of its map footprint (less the Nile Delta, which was a bit of a Germanic pipe dream, anyway), revamp its very deep OOB into an SCS format and go to town.
Nothing to it, right?
As Lee points out in his Developer's Notes, what should have been simple conversions from OCS to SCS turned into a very long and rocky road. I won't steal his thunder in what it took to change this designer's wild arm waving into the excellent package it became.
It is easy to fill in the blanks on the major conversions needed to make the Map/OOB switch series rules: The units can't be as small as they could be in the original as there would be too many, so various battalion (and smaller) units had to be combined. Some specialty units would not be included as they would have no job in the simpler game system, or (worse) be too effective. The OCS mainstay, the Action Rating, needed to have a conversion system into units with just a regular Combat Rating. Units had to have their MAs adjusted... and while we are thinking about it, what exactly is the time scale for this new game?
The OCS supply system had too much complexity and workload for SCS. A new way was needed of dealing with the fact that both sides spent much of their time storing up to prepare for each frantic mobile warfare session. The ability to freely "do it" every turn for 2+ years would eliminate the game's ability to resemble history.
At the end of these lulls, if the materials were on hand and the long-awaited reinforcements & new vehicles were issued and trained, the action ramped up to a breakneck pace until the hoarded material was expended. The battle might last only a few days or a few weeks, but the time scale had to allow players to execute those battles as well as the lulls where dozens of turns passed where, literally, little happened. OCS could handle both as the needed build up is a huge part of the game. That wouldn't work here in SCS.
Managing the two extremes while neither cheating the frantic tempo of one nor pointlessly burning up the player's time for the other, required the ideas beyond "Activity Points" and what (at first) was literally a design-it-yourself Sequence of Play. You'd spend your points to buy the phases you want to do. That evolved into what you see here as it confronted numerous issues that came up.
Just one as an example, activity needed to be localized. If all you had to do was "buy a Combat Phase," you'd certainly do that... but you'd attack along the entire front line possibly near El Alamein all the way back to the other corner of the map at the same time. That looked and felt wrong. Limits as to where you could do things (given where the resources were to do them, the Supply Units) provided much more local effects. If you wanted to attack at both ends of the map, you could do so, but you'd need to provide for each sector separately.
Some military activities are more expensive than others, for instance, massing the shells needed for a WWI-style artillery barrage requires a vast amount of material to be brought up to the battery positions and prepared for use and well-timed resupply. Air Forces are anything but cheap to operate. Doing both will strain the existing logistical network not only in the amount of "stuff" you'll need, but where to put it to properly keep your units running at top tempo.
Imagine the involved preparations for one of those artillery barrages. Just before you are ready to launch, the enemy backs up several hundred miles away from your millions of painfully accumulated artillery rounds. Maybe you now need to be equipped for a short intense barrage. Maybe the mixture of ammunition to fuel in your front-line units is wrong so you can't advance rapidly. You want to be ready for every eventuality. There isn't a one-size fits all answer. As they say... YOU are in command!
I hope you like the final package and have a lot of fun with it exploring your own North African glory on the side of your choice.
Developer's Notes
Some years ago, Dean and I were brainstorming on possible SCS game topics and the idea arose that a fast-moving game with the same map footprint of DAK might work very well. Dean immediately set to work on what turned out to be a multi-year long process of whittling down a DAK knock-off to fit into the SCS mindset. Initially dubbed "SCS-DAK", we knew it needed to be simpler than DAK but did not have a fully-fledged vision of HOW much simpler it would be and in what ways. It did need to follow DAK in a few key points: The same scale allowed operational and grand-tactical operations to flow together, and we wanted there to be the same periods of intensity followed by times of inactivity to gather supplies and reorganize. This was something that Afrika II (still a classic) does not really show with its monthly turn and generally constant action. Supply in Afrika II generally constrains the number of units in the theater, not their actual activity.
The first version of SCS DAK had nearly the same OOB and cast of minor units and was based on an "Activity Point" system. OCS Supply Points were translated into Activity Points which could then be spent for all game functions: movement, barrages, combat, air strikes, fortifications, minefields, and replacements. The fun innovation was to pay for the parts of the Sequence of Play you wanted. A Movement Phase costs one Activity Point (AP), two if mech units were being moved. A Combat Phase cost 2 APs, Exploitation Phase another AP, Barrages were extra etc. The hope was that this flexibility could lead to nice tactics arising organically from play.
First plays were very freewheeling, but the system showed itself subject to abuse: One could fund massive amounts of replacements and simply absorb and replace lost steps without really doing much, leading to a 'rope-a-dope' approach to play. Yawn as they say. It also made for massive swings between no Air Support to overwhelming Air Support in what were bi-weekly turns. Despite simplifications (such as removing APs from the map, eliminating Trucks, creating Depots), it still was too much bookkeeping and playtesters did not seem to enjoy it very much.
I began chipping away at this system by bringing back other sources of inputs to reign in the excesses in the free-flow AP system. Limits on numbers of Air Strikes were introduced, then a Replacement system that did not use APs. APs still felt fussy. They were similar to Supply Points in OCS and playtesters grew tired of them. They were just too much work! We tried out Depots while getting rid of the Trucks that moved APs, but it still didn't feel right. It was too much focus on 'supply point' management for an SCS game.
When we started considering dumping the AP (which were the game's original core), Dean thought we could revisit good old Afrika Korps and bring in Supply Units. This helped me see that we could get the ebb and flow of supply quite simply. This meant letting go of a la carte purchasing of game turn phases (sniff) but made for a better game. It also led to another simplification of getting rid of artillery units altogether, as there was rarely the opportunity to shoot them. OCS players know what I mean by this. Abstracting out artillery and merging it into a Supply Unit based activation system was exactly the right thing. While Artillery Barrages and Air Strikes are only available in Full Activations, they are present during Limited Activations as well, just at a scale that is 'under the hood'. Full Activations represent both major expenditures of artillery ammo and a very high tempo of air operations.
The "Admin Move" mechanism has been present from the very first iterations of North Africa. Currently it takes cooperation between players to agree on an Admin Turn, which allows reinforcements and supply to flow up to the front. If you want to accomplish something interesting in a turn, you need to save up and be willing to expend supply. However, players tend to get 'itchy' and will automatically spend supply as they get it. The thought of "not" doing something...anything...is just too much. Don't blame me if their turn ends up being less impactful than it could have been!
After the various stages of evolution listed above, game play became much more fluid and SCS-like. It is still an innovation for an SCS game to have to spend supply to do most game functions, but for anyone who has played games about North Africa (which means you dear reader) it should not seem too strange. The high movement rates and CRT that rewards attacking will make taking action the best option. Knowing that there are different play styles, we have also listed a number of optional rules that players can experiment with if they want to tweak their play experience.
Scenarios
We started with all the scenarios in DAK but reduced them to those we thought were the most interesting. The initial Italian campaign into Egypt isn't represented here. It was pretty boring and felt scripted as unless the Italians executed everything in lock step, the result was greatly out of control. For that reason, we decided to start at Brevity, which still gives the initial feeling of a major blow to the Axis yet offering different Italian strategies rather than simply getting kicked all the way back to El Agheila. We didn't choose to include 2nd or 3rd Alamein as they were very short and fairly static.
Player Notes
Think of this as a North Africa 'Sand Box' game. There are many possibilities for wide-ranging action, and we certainly expect new things to pop up with this game now in players' hands. There may be paralysis by analysis, just dive in. It plays fast and vicious, is based on excellent historical research, but simplifies (relative to DAK!) to give a faster and lighter experience. This is expressed in the campaign victory conditions: There are no VPs, no counting or scoring final hexes on the last turn. Your mission is to kick your opponent out of North Africa. You will know whether you achieved it or not. If you didn't, you'll be able to give a long list of reasons and excuses why you should not be relieved of command afterwards. Let the blame game begin; that is very historical, too!
Lack of supply is the driving force, and we encourage players to try the game in RAW before feeling the need to tweak it with any optional rules. Let yourself feel frustrated that you can't do everything you want to; that's how it should be! You will need to keep units in rear areas and be looking for hexes from which to conduct Activations and especially Reaction Activations. Think of ways to continue threatening your opponent so they don't have the opportunity to use a Reaction Activation to bring up new supplies and reinforcements. The Axis player must decide what to do with Rommel; having Rommel out of action simply to give extra combat shifts is perhaps a poor use; the ability to conduct overruns in a Reaction Activation can be VERY interesting.
Keep an eye on your operational tempo and the resulting losses. Units can melt away very quickly, and the replacement rate is slow. The Axis player will want to watch Italian vs. German losses; stacking units of both nationalities may help even out losses. Be very careful about the elimination of your best attack units; it is easier to flip steps back to full than to have to bring up units from rear areas back to the front.
Choosing between Full and Limited Activations can be difficult. Barrages and Air Strikes are fickle, and you can't guarantee a DG result. But they can also allow you to inflict extra losses (both steps and by higher odds on the CRT) and a brutal Exploitation Phase can totally unhinge your opponent's line, especially if your opponent does not have enough supply and reserves to counterattack. They also force your opponent to spend supply to un-DG stacks, the importance of which cannot be overstated...
CW Random Event Table
Roll two dice (11-66).
- 11-26: Air Surge. The RAF receives extra air support. Add one die to the total number of dice rolled for Air Strikes.
- 31-46: Royal Navy Bombards Coast. The CW receives a Naval Barrage, good for one Barrage on any coastal hex in any Limited or Full CW Activation this turn. Place it in the Naval Unit Box on Map A. This Barrage does not need a 'spotter' unit.
- 51-56: Churchill demands action! The CW must make at least two attacks (regular or Overrun) this turn. If the CW does not, they must remove 2 CW Supply Units anywhere on the map.
- 61-63: Abandoned Dump Found. Place one CW Supply Unit in any CW Combat Unit's hex.
- 64: Commando Raid. Choose one Axis-occupied hex. If it contains a Supply Unit, remove it. If there is more than one, they are unaffected.
- 65-66: Rare Event. Roll on the CW Rare Event Table.
CW Rare Event Table
- 11-26: No Event.
- 31-34: Human Torpedo Raid. Italian frogmen attack Alexandria impeding dock operations. Reinforcements or Supply Units cannot arrive at Alexandria. Anything unable to arrive this turn in Tobruk arrive the next turn.
- 35-41: Aussies Go Home. [Dec 41 or after, one time only] Because of Japan, the Australians find it ever more difficult to justify the use of so many Australian troops in the Middle East. Simply, remove all Australian troops except one Division (player's choice) from the game.
- 42-43: Aus 6 Div returns. [Jul 41 or after, one time only] Syria and the Pacific aren't in danger. 6 Aus returns as a reinforcement to the North African theater.
- 44-46: South Africans Go Home. [Jan 42 or after, one time only] Political tensions cause Field Marshal Smuts to demand his men from North Africa. Simply, remove all SA troops.
- 51-54: Offer of US Assistance. [May 42 or after, one time only] After a British fiasco, Roosevelt offers Churchill the fledgling 2nd US Armored Division OR a rather large cache of American tanks. Churchill chooses the tanks. Rebuild (for free) two dead CW armored units. Pick randomly from the Rebuild Cup until 2 pure armored units are selected (then return others drawn to the cup).
- 55-62: SAS Raid on Port. The Axis player receives no new Supply Units this turn.
- 63-66: LRDG Raid on Dumps. Choose TWO Axis-occupied hexes. Remove 1 Supply Unit from each hex, if present.
Axis Random Event Table
- 11-26: Air Surge. The Axis provide extra air support. Add one die to the number of dice rolled for Air Strikes.
- 31-34: Major Convoy Raid. [Malta not under Axis control] Receive HALF (round down) the Axis Supply Units scheduled this turn.
- 35-41: Major Italian Shipping Success. Roll one die and receive HALF (round up) the number rolled in additional Axis Supply Units.
- 42-43: Axis Finds Abandoned Dump. Place one Supply Unit in any Axis Combat Unit's hex.
- 44-45: Massive Convoy Raid. [Malta not under Axis control] Receive no Axis Supply Units this turn.
- 46: Coastal Transport Interdiction. Due to interdicted shipping the Axis cannot move Supply Units during this turn's Admin Movement Phase (if there is one).
- 51: Hitler Orders No Unit Shipping for One Turn. [Mar 41 and after] Hitler has a bad dream about drowning. Delay all Combat Unit reinforcements until next turn. Do not draw from the Tripoli Cup. Supply Units arrive normally.
- 52-53: Rommel Goes Off Half-Cocked. [Oct 41 or earlier, Rommel in play] The Axis places Rommel on any stack and it must conduct a Limited or Full Activation as the first Axis Activation this turn. The stack must make at least one Overrun attack with Rommel providing a shift to the left (yes, backwards). Rommel does not risk his own loss in this attack (you didn't think he'd go with them, did you?)
- 54-56: Rommel Goes to Berlin. [If Rommel is in play] Rommel goes to see Hitler, OKW, and his wife (not in that order). Rommel returns next turn.
- 61-62: Massive Italian Shipping Success. [Mar 41 or later] The Italians manage to sneak through a huge convoy. Double the Axis Supply Units received this turn.
Axis Rare Event Table
- 11-26: No event.
- 31-34: Malta Invasion. [Jan 42 or after, one time only] Hitler invades Malta. Place the Malta/Air Transport marker in the Malta box on Map A (Malta side up). Remove KG Buhse, all Ramcke Brigade units, and the Folgore Airborne Division. (If they have not yet arrived, they never do.) Starting the next turn, receive one additional Supply Unit each turn.
- 35-42: Rommel Brags to Mussolini. [June 42 or after, one time only, Rommel in play] Rommel proclaims to Il Duce that he will be in Cairo in a week (regardless of the actual situation). The Axis must make a minimum of three attacks (regular or overrun). If the Axis player fails to do so, he must remove three Axis Supply Units.
- 43-46: Hitler Lives up to his Promises. [One time only] Allow the 190 Pz Bn to arrive in Nov. 42.
- 51-54: Troops released. [One time only] Allow the 287 Sonderverband Rgt to arrive in August 42 as per the OOA. If this result is rolled after August 42, bring the unit on this turn.
- 55-66: Luftwaffe Transport Concentration. [May 41 or later, one time only] If Malta has not been invaded, place the Malta/Air Transport marker (Air Transport side up) in the German Air Transport Box on Map A. Receive one additional Supply Unit each turn. If the Malta Invasion has or later occurs, follow it instead.
Terrain Effects Chart
| Terrain Type | Movement MP cost | Combat Effect |
|---|---|---|
| Open | 2 | |
| Low Hills | 2 | Shift Left 1 |
| Rocky | 3 | Shift Left 1 |
| Rough | 3 | D x2 |
| Mountain | All | D x3 |
| Sand Desert | 5 | D x2 |
| Escarpment | P | A x1/3* |
| Slope (defender is UP) | +1 | A x1/2 |
| Slope (defender is DOWN) |
- ot = Use the other terrain in the hex to determine this
- "-" = No Effect
- P = Prohibited. Units cannot cross such a hexside and are destroyed if forced to retreat into one.
- A x1/2 means the attacker's combat strength is halved.
- * Attack allowed across Primary Road, Road, or Track only.
Combat Table
Rows are the die roll (2-12); columns are the odds.
| Roll | 1:3 | 1:2 | 1:1 | 2:1 | 3:1 | 4:1 | 5:1+ |
|---|---|---|---|---|---|---|---|
| 2 | A1r2 | A1r2 | A1r2 | A1r1 | A1r1 | A1 | A1 |
| 3 | A1r2 | A1r2 | A1r2 | A1r1 | A1r1 | A1 | A1D1 |
| 4 | A1r2 | A1r1 | A1r1 | A1 | A1 | A1D1 | D1r1 |
Combat results: A = Attacker Result; D = Defender Result; # = Number of Steps lost; r # = Retreat hexes required.
Errata (5-22, 5 Jan 22)
Rules:
- The Terrain Chart in the rules is missing "River". The Map version is correct, Rivers are P for Movement and Ax1/3 if the Attack comes via a Track.
- Supply Units: Can move as a part of a Reaction Activation. Can Advance after Combat with the Attacking units in their hex. But Cannot spot for Barrages or Air Strikes.
Map:
- Benghazi is an Axis Supply Source but NOT an Axis Entry Area.
- The Map's reference for Capture Awards is listed as 3.10. It s/b 3.09.
Scenarios:
- In Scenario 5.2, the CW Supply Source s/b only Mersa Matruh (C39.03).