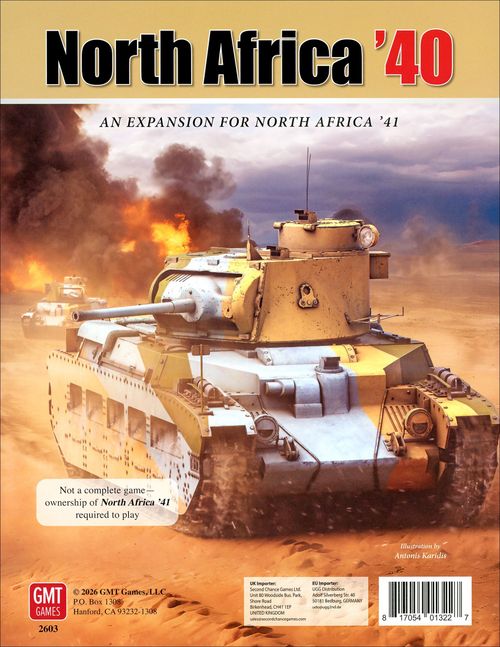
North Africa '40: The 1940 Expansion to North Africa '41
North Africa '40: The 1940 Expansion to North Africa '41 Rulebook
Table of Contents
Table of Contents
- 28.0 1940 Special Rules
- 28.1 The One Way Marker
- 28.2 Italian Camps
- 28.3 Italian Tank Units
- 28.4 LOS for Italian Units
- 28.5 Italian Demoralization and Collapse
- 28.6 O'Connor
- 28.7 Special Units for North Africa '40
- 28.8 Operation Compass (Surprise Attack)
- 28.9 British Naval Assets
- 28.10 Map Notations
- 28.11 Sollum Port
- 28.12 Reserves
- 28.13 Axis Troop Convoy Immunity
- 28.14 Asset Markers and Resources Not Used
- 29. Additional Optional Rules
- Scenarios
28.0 1940 Special Rules
28.1 The One Way Marker
(28.1.1) Purpose: This marker is placed in hex 1602 to signify that no Allied or Axis unit located east of the marker may move into or west of it until the marker is removed. The marker is immediately removed when the German DAK HQ unit enters hex 1602.
(28.1.2) Effects: While this marker is present the following applies:
- Hexes west of the One Way marker inclusive (which includes the Marble Arch and all hexes with hex codes ending in 00, 01, and 02) are off limits to both sides. Axis units may pass through this area from the Tripoli Box to enter the map but may not remain in that area.
- The Axis may not ship via Coastal Convoy from an on-map port to Tripoli (i.e. no evacuating units and SPs from the map to the safe haven of Tripoli).
- Italian Trucks may use the Truck Special Transfer (5.8.4) to return to the Tripoli box.
- The Italian LOS rule is in effect (28.4).
- The Italian Command and Control restrictions are in effect (28.3.1).
28.2 Italian Camps
(28.2.1) In General: The Axis player may not build Fortifications until Turn 14. Until then they may only build Camps. There are 10 Italian Camp markers in the counter mix and that is a strict limit. Italian units in a hex with a Camp marker are subject to the following rules:
- COMBAT: Receive a favorable CRT column shift left if attacked. Unlike Fortifications, Camps do not cancel Tank Shifts.
- Use the Other column on the Determined Defense Table.
- RETREAT: Can be used to stop a retreat after 1 hex in the same way as Fortifications (12.4).
- Provide the same +1 DRM to Isolation Attrition as Fortifications.
- RECOVERY: Provides a +2 DRM (13.5).
- LIMITED ZOC: all ZOCs extending into or out of a hex with a Camp marker are reduced to Limited ZOCs (7.3).
NOTE: This is a liability for the Italians—it means that Allied units do not have to stop moving if they move adjacent to a Camp hex. They can pay +1 MP to exit the Limited ZOC and keep moving.
(28.2.2) Camp Construction: Camp construction and removal use all the same rules as Fortification construction and removal except they are automatically completed in the owning player's next Initial Phase without a completion die roll if the Camp hex is in Full Supply. They cost 1 RP to build.
(28.2.3) Camp Removal: Remove all Italian Camp markers in the Preparation Phase of Turn 14—they are no longer used. The Axis player may now build Fortifications.
28.3 Italian Tank Units
(28.3.1) Italian Command & Control: Prior to the removal of the One Way marker (28.1), no more than three Italian Tank Units may participate in each attack.
DESIGN NOTE: This is the same restriction the Allied player is under in rule 8.4.2.
(28.3.2) Half (0.5) Tank Rating: Consider this a rating between 0 and 1. These units gain 1 CRT column shift right when attacking units with a 0 Tank Rating or no Tank Rating. When defending against Allied Tanks, the Allied player would gain one shift right if his best tank unit has a rating of 1, and 2 shifts right if his best tank unit has a Tank Rating of 2 or 3.
28.4 LOS for Italian Units
(28.4.1) Overland LOS: Prior to the removal of the One Way marker, Italian units may not use Tracks in the road portion of their LOS (16.3.1)—only Highway hexes that are connected to Tripoli or a friendly Port hex. Furthermore, the Overland portion of their LOS is only 4 hexes. The 4-hex Overland portion of an Italian LOS may count Track and Highway hexes as half a hex if the LOS follows the path of that road.
EXAMPLE: Numbers in the yellow circles indicate the cost in hexes of the LOS. Unit A does not have a 4-hex Overland LOS to a Highway hex so is Out of Supply. Units B and C can trace 4 hexes to the first available Highway hex, counting Track hexes as half of a hex, so are in supply.
(28.4.2) Italian MSUs: These units have a range of only 4 hexes which affects their ability to provide Attack Supply and Extend an Overland LOS (16.3.4). In all other regards, Italian Truck/MSUs operate per NA41 rules.
DESIGN NOTE: Except for the Italian made AS-37 light trucks utilized mostly by the Saharan and GaF units in North Africa, the Italian wheeled vehicles being used in North Africa in 1940 predominantly performed very poorly when not on a hard surface road. In 1941 new, more capable or upgraded model vehicles became more readily available and were utilized by the Axis forces in North Africa.
28.5 Italian Demoralization and Collapse
(28.5.1) Demoralization: On the Impulse after the first time the 7 RTR (Matilda) tank unit makes an attack that eliminates or causes an Italian unit to retreat, the Italian Army Demoralization occurs. When the Impulse arrives place the marker on the map in full view as a reminder. The effects of Italian Army Demoralization are as follows:
- Italian Determined Defense attempts incur a –1 DRM penalty.
- Italian units no longer receive the standard one turn grace period before Isolation Attrition occurs—they suffer Isolation Attrition on the first turn they become Isolated (16.5.1). In other words, they don't wait until the OOS marker turns red.
(28.5.2) Collapse: If at the end of an Axis Player Impulse both Tobruk and Mechili are controlled by the Allied player, then Italian Army Collapse occurs—flip the Demoralized marker to its Collapse side. Collapse has the following effects:
- Italian Determined Defense attempts incur a –2 DRM penalty.
- All Axis attacks incur a one column shift left penalty.
- Italian units out of supply in the Axis Supply Phase will surrender.
- Remove the Babini marker upon collapse.
(28.5.3) Ending Demoralization and Collapse: The effects above immediately end when the "One Way marker" is removed (28.1).
28.6 O'Connor
(28.6.1) Properties: The O'Connor marker has similar properties as the Rommel marker. It is not a Combat or Non-Combat Unit, so it is never adversely affected by supply or enemy units. Once per Game Turn the Allied player can use it for either its "Attack" or its "Delay" bonus. The O'Connor marker is removed in the Preparation Phase of Turn 12.
(28.6.2) Attack Bonus: A reroll on the CRT die roll as per Rommel when making attacks (only). The bonus may be used in Breakthrough Combat. If a reroll is done, the second result must be used.
(28.6.3) Delay Bonus: Before the die is rolled to resolve combat, the Allied player may use O'Connor to give a defending Allied stack the same special ability to ignore step losses on D1 and DS results as if it was a stack of reconnaissance units (18.1). The stack must consist only of Mechanized units and the ability applies for the duration of the player turn—even if the stack is not in Good Order and attacked again in Breakthrough Combat. Units using the Delay Bonus may not use Determined Defense (11.0) this impulse.
(28.6.4) Used Side: Upon use (for Attack or Delay) flip the O'Connor marker to its Used side and return it to the Allied Markers Display. It is flipped back to its Ready side in each Preparation Phase.
28.7 Special Units for North Africa '40
(28.7.1) The British 7 RTR: This unit was a critical element of O'Connor's Offensive. It was composed of Matilda tanks and their armor's near invulnerability to Italian anti-tank weapons was a shock to the Italians. An attack including the 7 RTR that eliminates or causes an Italian unit to retreat will trigger Italian Demoralization (28.5.1). After the 7 RTR participates in combat as either an attacker or a defender, the Allied player may no longer declare the Surprise Attack (28.8).
(28.7.2) The British 6 RTR: This unit was reequipped with captured Italian tanks. When at least two Italian M13/40 tank battalions (indicated with a green stripe) are eliminated the British 6 RTR M13/40-equipped tank battalion becomes available. It arrives at full strength at any friendly controlled Port that is in Full Supply during the Allied player's Initial Phase. Place a Replacement marker on the unit. In exchange, an Allied tank unit must be removed as per 20.4.1 steps 2 and 3. There is no additional effect when/if additional M13/40 battalions are eliminated.
(28.7.3) The Tobruk ASU: The Allies gain this unit two Game Turns after the following occurs: Tobruk is Allied controlled and in Full Supply and there are no Axis units within two hexes of Tobruk. Place this unit at Tobruk on its Ready side.
(28.7.4) Garrison Units: The Garrison units supplied on the NA40 counter sheet have their At Start hex in a blue box. The others (from the NA41 game) are indicated with a Garrison marker. Units identified as Garrisons may not move until released. They are released if an enemy unit moves within 3 hexes of the Garrison unit's location or moves past the Garrison (being closer to the Garrison unit's Base than the Garrison). Use the hex column (last two digits of the hex number) to determine if it is "closer". The three Italian Garrison units at Tobruk may freely move inside the four hexes of the Perimeter.
PLAY NOTE: Italian units with a blue NATO symbol box are actual garrison-type units. This is for informational purposes only.
The 7/4 Ind and the 4/2NZ brigades are Garrison units which usually never get into play, but through aggressive and successful Italian play they could be released. If they do, they may not operate west of Charing Cross (2459).
(28.7.5) The San Giorgio: This marker provides a –1 DRM to any Bombing raid against the Tobruk port (hex 3138). Remove this marker immediately if the Tobruk port hex becomes Allied controlled.
(28.7.6) Italian 10th Army HQ: Similar to the DAK HQ, this unit may not provide Artillery Shifts. Its Range is for Attack Supply only. Remove this unit on Turn 13 (MAR I 1941). If this HQ is on its Ready side when removed you do not drop off its SP (17.1.4).
(28.7.7) Italian Saharan Bn: This unit is Non-Mechanized and eligible for the Road Bonus (5.2.2). The Saharan Battalion has the special ability to remain in Supply as long as it can trace an Overland LOS to two different hexes that have a Source of Water (16.5.1).
28.8 Operation Compass (Surprise Attack)
Once per game the Allied player may declare a Surprise Attack. A Surprise Attack cannot be declared if the 7 RTR has already participated in combat as either an attacker or a defender. A Surprise Attack costs 4 Allied Resource Points and may only be declared on or after Turn 5 during an Allied Initial Phase. It does not need to be used on the turn of purchase. The benefits last for one full Impulse (Allied and Axis). When declared, the following occurs:
- The Allied Player receives a favorable one column shift right on all his attacks that Impulse—including Breakthrough Combat.
- The Allies have Air Superiority for that Impulse, after which it is Contested (18.6) until NA40 Turn 11.
- The six Allied units marked "Reserve Turn 7 Compass" are released. They are automatically released at no cost in RPs at the start of Turn 7 if a Surprise Attack has not yet been declared.
- In the Axis Player turn of that Impulse all Axis units that are not in Full Retreat (or voluntarily go into Full Retreat) are restricted to Tactical Movement or Naval Transport only.
28.9 British Naval Assets
(28.9.1) British Inshore Squadron and the Australian Destroyer Flotilla: This 2-sided marker begins both scenarios (Operazione E and Operation Compass) on its Inshore side as an Allied Available Asset. Once used place it back in the marker display—it may not be used again until repurchased, or received as an Event.
FLIP/REMOVE: On NA40 Turn 12 flip the British Inshore Squadron marker to its "Australian Destroyer Flotilla" side (due to the HMS Terror's 15-inch guns wearing out). The marker is removed on NA40 Turn 14.
PURCHASE COST: 1 RP.
EFFECTS: This naval asset may be used for any one of the purposes listed below, with the exception of bombarding a port which only the Inshore Squadron may do.
- Bombard any one on map Port using rule 21.4.3.
- To add Attack Strength to any attack on a coastal hex (+4 or +2). It may NOT be used in Breakthrough Combat.
- To transport one Supply Point from the Nile Delta Box or Mersa Matruh to Tobruk, Bardia, or Sollum Port (28.11) without having to roll on the Anti-Shipping Table (AST)
(28.9.2) The British Med. Fleet: This marker begins both scenarios (Operazione E and Operation Compass) as an Allied Available Asset. Once used place it back in the marker display—it may not be used again until purchased or received as an Event. The Med. Fleet is removed on Turn 14 (MAR II 1941).
PURCHASE COST: 2 RP.
EFFECTS: It adds a one column right CRT shift to an attack on a coastal hex. It may be used in combination with the "British Inshore Squadron /Australian Destroyer Flotilla". It may NOT be used in Breakthrough Combat.
DESIGN NOTE: This marker represents a task force including three battleships conducting a Naval Bombardment.
28.10 Map Notations
Disregard the map notations in hexes 2561 (Release Reserves 2SA) and 2751 (Release Reserves 2NZ) for the 1940 scenarios—those only apply to the NA41 game.
28.11 Sollum Port
If during an Allied Movement Phase, the town of Sollum (hex 2646) is Allied controlled, in Full Supply, and there are no Axis units adjacent to Sollum, then the Allied player may pay 1 RP to place in that hex the "Sollum Port" marker on its "Under Construction" side. In the following Allied Initial Phase it may be flipped to its completed side without a completion die roll. Sollum port has 1 Shipping Point capacity as long as there are no Axis Combat Units adjacent to it. (Sollum is easily observed from the top of the escarpment.) Use the Bardia column of the AST when resolving Convoy Attacks. The port may be reconstructed (1 RP cost) if successfully bombed. Permanently remove the port marker if it becomes Axis controlled or in the Preparation Phase of Turn 14 (MAR II 1941), whichever occurs first.
28.12 Reserves
(28.12.1) Reserves In General: The units outlined in black on the Setup cards are Reserves. These units may not move until released when indicated on the Setup cards. Units in Reserve may receive replacements. A Reserve can be released early if an enemy unit moves within 3 hexes of it, or past it (moving west of an Italian Reserve or east of an Allied Reserve). Once released the Reserve marker is removed and the unit no longer has that movement restriction.
(28.12.2) Reserve Turn 7 Compass: These units are released on Impulse 1 of Turn 7 or when Operation Compass is declared (28.8)—whichever occurs first. They are also released per 28.12.1.
(28.12.3) Forward to Reserves: Forward to Reserve reinforcements are placed (not moved) at the indicated map location where they are in Reserve until released.
28.13 Axis Troop Convoy Immunity
Axis Combat units sailing from Italy to North Africa (Tripoli or Benghazi) are immune to AST losses during Turns 1-12. Place the "Troop Convoy Immune" marker on the Malta Box as a reminder of this rule. The immunity does not apply to Supply Points and Replacements. This immunity ends at the start of Turn 13.
28.14 Asset Markers and Resources Not Used
The following are not available for purchase at scenario start (Operazione E or Operation Compass):
- Malta Reinforced
- U-Boats in the Med
- Axis Air Transport
- LRDG
- Comando Supremo
- German Air Support and Strafing
Those become available for purchase as follows:
- TURN 11 (FEB I 1941): Malta Reinforced.
- TURN 14 (MAR II 1941): All remaining items as listed on the NA41 Resource List.
29. Additional Optional Rules
29.1 Oasis Supply
The Oasis Supply rule is in effect (27.2) with the change that each Oasis hex can supply 2 Stacking Points.
29.2 Truck Carrying Capacity
A truck unit may carry two Non-Mechanized units if one of them is a battalion sized unit (II).
29.3 British Commando Raid
(29.3.1) The British MEC Commando Battalion becomes available on Turn 7. If in the Nile Delta Box it may attempt to conduct an amphibious raid during any Allied Movement Phase. The attempt costs 1 RP whether successful or aborted. Remove this unit on Turn 9 if still in play.
(29.3.2) Procedure: It must land at a coastal hex within EGYPT that is neither enemy occupied, contains a Camp, nor is in an EZOC. To determine if the MEC lands, roll on the table below. If a 4-6 is rolled the MEC lands and may then be moved inland one hex. It it was not Disrupted it may engage in combat in the Combat Phase per standard rules. It must trace Supply like any other Allied Combat Unit.
| Die Roll | Result |
|---|---|
| 1, 2 | Mission unsuccessful—remove MEC from game |
| 3 | Mission aborted—return to the Nile Delta Box |
| 4, 5 | MEC lands but is Disrupted |
| 6 | MEC lands in Good Order |
Scenarios
➤ Airfields no longer need to be in Supply to be counted. This applies to the NA 41 scenarios too.
(The ➤ marker is printed as a callout on the Scenarios page. It is transcribed here as printed.)
S1. Operazione E
S1.1 Set Up and Scenario Data
- Setup: Use the OPERAZIONE E Setup and Reinforcement Cards. Overstacking of Axis units is allowed at setup but must be corrected by the end of the first Axis Movement Phase.
- Set up the Replacement Pools and Remnant Displays per the NA41 Setup and Reinforcement Card.
- Malta Track: –3 with the Royal Navy side displayed and place the Axis Troop Convoy Immune marker (28.13) in the Malta Box.
- Air Superiority: Axis has Air Superiority.
- Crete: Neither side controls Crete, marker to be placed on Turn 6 (NA40).
- Ports that are Damaged: None.
- Victory Points: Starts in the 0 space (S1.3).
- Accumulated Resource Points: Axis = 1, Allies = 0
- Event Tables: Use the NA40 Event Tables.
- All 1940 Special Rules are in effect (28.1–28.14).
- Start and End Dates: This scenario starts at the beginning of the Axis Movement Phase of the 3rd Impulse of Turn 1 (there is no Allied 3rd Impulse on Turn 1) and ends at the completion of Turn 12 (NA40).
S1.2 Via Della Vittoria ("Victory Road")
The six Highway hexes marked with a Track marker at the start of this scenario represent the construction of the coastal highway and the building of a water pipeline to Sidi Barrani. Graziani was reluctant to move further into Egypt until this road was repaired. Treat these hexes as Track hexes for the purpose of movement and the Italian Line of Supply (28.4) until the Track marker is removed. Starting on Turn 2, each Preparation Phase the Axis player must remove one Track marker (his choice). Additionally, a Track marker may be removed due to an Axis Event.
PLAY NOTE: When moving along the highway, it costs Mechanized Units 1/2 MP to enter a hex with a Track marker and 1/4 MP to enter a hex without a Track marker.
S1.3 Victory Points (VPs) and Victory Conditions
(S1.3.1) Awarding VPs: In the bottom row of the Turn Track is a benchmark number indicating the number of Airfields the Axis Player should control on each turn. Count only the five Airfields on the map: Benina, Martuba, Gambut, Sidi Barrani, and Fuka. During the Victory Point Phase of each Game Turn if the Axis player controls more than the number he earns 1 VP for each Airfield above the benchmark; if he controls less than the number then he loses 1 VP for each Airfield he is short. The Airfield does not need to be in Full or Port Supply for the Axis player to count it.
(S1.3.2) Temporary Objective Hexes: On some turns in NA40 the VP benchmark also lists a town hex—these are bonus objectives. If the town name is printed in black ink, then the Axis player earns an extra VP if he occupies or was the last one to pass through the hex (regardless of supply status). If the town name is red, then the Allied player will earn an extra VP if he occupies or was the last one to pass through the hex (regardless of supply status). These bonus VPs are earned in the Victory Point Phase and apply to that turn only. The opposing player does not earn VPs if he controls his opponent's bonus objective.
(S1.3.3) Victory Conditions: If neither player has achieved an Automatic Victory (26.1) by the last turn of the game, then the Axis player is declared the winner if the VP count is positive, and the Allied player wins if the VP score is negative. If the VP score is 0, then the side that has more Tank Unit Defense Strength on map wins.
S2. Operation Compass
S2.1 Set Up and Scenario Data
- Setup: Use the OPERATION COMPASS Setup and Reinforcement Cards. Any assets listed as "Available" are placed on your Available Assets disk as they are already purchased. Set up the Allied Replacement Pool and Remnant Display per the NA41 Setup and Reinforcement Card.
- Malta Track: +1 with Royal Navy side displayed and place the Axis Troop Convoy Immune marker (28.13) in the Malta Box.
- Air Superiority: On the first Impulse of the scenario the Allies have Air Superiority due to the Operation Compass Surprise Attack rules (28.8). After that neither side has Air Superiority until Turn 11 (NA40).
- Crete: Allies control Crete Airfield.
- Ports that are Damaged: None.
- Victory Points: Starts in the 0 space (S1.3).
- Accumulated Resource Points: Axis = 0, Allied = 2
- Event Tables: Use the NA40 Event Tables.
- Start and End Dates: This scenario starts at the beginning of the Allied Movement Phase of the 2nd Impulse on Turn 7 (NA40) and ends at the completion of Turn 12 (NA40).
S2.2 Special Rules
(S2.2.1) All 1940 Special Rules are in effect (28.1–28.14).
(S2.2.2) Surprise Attack: Start the game with the Surprise Attack (28.8)—it has already been paid for so all Allied attacks receive one shift right and the Italians will be restricted to Tactical Movement or Naval Transport on their first Impulse (unless in Full Retreat).
S2.3 Victory Conditions
Same as in Scenario #1, Operazione E (S1.3).
S3. 1940-1941 Campaign Game
Important! The rules below are not necessary to play either of the two short scenarios (S1 and S2). They are only used if players would like to combine North Africa '40 with North Africa '41.
S3.1 Set Up and Scenario Data
- Setup: You may start a Campaign Game with either the Operazione E or Operation Compass scenario. A campaign game ends at the completion of the DEC II 1941 Turn. This entails 32 turns in total for a campaign game starting at Operazione E or 26 turns if starting at Operation Compass.
- Transition: In order to transition from NA40 to NA41, use Turn 13 and Turn 14 on the NA40 Turn Track.
- All of the Scenario data (for example the Malta Status Track, Air Superiority, Port Damage, accumulated Resource Points and VPs) carries over as is.
- At the beginning of Turn 14 (NA40) implement the Post Compass Refit (S3.2).
- Then for the next turn use Turn 2 on the NA41 Turn Track and start implementing the changes/additions as per S3.4.
S3.2 Post Compass Refit
At the start of Turn 14 (MAR II 1941) conduct the following procedure to transition from NA40 to NA41:
- Unless currently in the Allied Eliminated Box, Surrender Box, or Withdrawn Units Box, pick up these six counters and place them in the Nile Delta Box: 1RTR, 2RTR, 6RTR (cruiser), 11Hus/7, 1KRRC/7, and 2RB/7.
- Unless the 7 RTR is currently in the Allied Eliminated Box or Surrender Box, pick up that unit counter and place it in the Allied Eliminated Box.
- If a British machine gun battalion is in the Allied Eliminated Box, pick it up and place it in the Nile Delta Box.
- If any of the 3Hus, 7Hus, or 8Hus machine gun tank battalions are in the Allied Eliminated Box pick one of those units and place it in the Nile Delta Box at reduced strength.
- All Post Compass Refit units in the Nile Delta are placed in reserve and released on NA41 Turn 2. The 16/70 and 22 Gds Brigades currently in Reserve in the Delta are also released on NA41 Turn 2.
- Return any on map British heavy tank, Australian, and New Zealand infantry replacements to the Allied replacement pool.
- Remove all Italian units currently in the Axis Eliminated Box or the Surrendered Box; they are no longer used.
- All Italian 3-6-3/1-3-3 Infantry Regiment units and the Italian 10 Bers Motorized Infantry Regiment now become Non-replaceable, Non-rebuildable units.
- Remove all camps. Axis player can now build fortifications.
- See also 28.14 for Asset marker and Resource availability.
Figure caption (printed beside the unit illustration): "Transfer these six units to the Nile Delta Box."
S3.3 German Movement Restrictions
Prior to Impulse 3 of Turn 14 (MAR II 41), German Combat Units may not enter an enemy ZOC during movement and may not be shipped via Coastal Convoy.
DESIGN NOTE: The initial arriving elements of the German DAK were to reconnoiter the British forward positions and marshal their forces until 15th Panzer Division arrived in May. Rommel violated his orders and attacked early out of fear that the British would build impregnable fortifications at Mersa Brega.
S3.4 The 1941 Turn Track
The following changes/additions to the North Africa '41 Turn Track apply:
- NA41 Turn 1: Skip—use Turn 14 of NA40 instead.
- NA41 Turn 2:
- Ensure all Remnant Displays and Replacement pools are set up per NA41.
- NA41 Asset markers (28.14) are all now available for purchase.
- Begin utilizing the NA41 Event Tables.
- RELEASE all Allied units currently in the Nile Delta Box.
- RETURN one Allied Truck unit.
- NA41 Turn 3:
- Disregard the 2 RB/7 motorized infantry battalion reinforcement (as it is already in play).
- NA41 Turn 4: REMOVE the French "BIM" motorized infantry battalion.
- NA41 Turn 5: Add two Allied Heavy Tank Replacement units on the Turn Track.
- NA41 Turn 6:
- Disregard the 7RTR tank battalion reinforcement (as it is already in play).
- REMOVE the Italian 1L and NLib Airborne infantry battalions.
- NA41 Turn 8: REMOVE the Italian 21C Artillery Group.
- NA41 Turn 19:
- REMOVE Australian Destroyer Flotilla.
The booklet prints no section numbered S3.5; the numbering goes from S3.4 to S3.6 as printed.
S3.6 Victory Conditions
As per S2.3 in NA41. Note that both sides start the campaign game with 0 VPs.