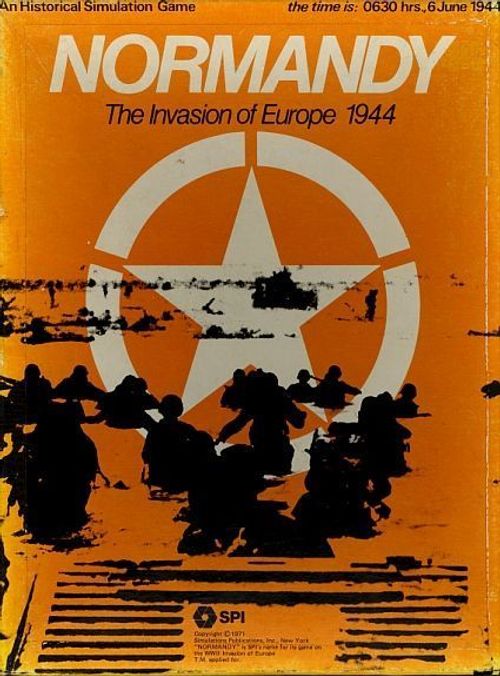
Normandy: The Invasion of Europe 1944
Normandy: The Invasion of Europe 1944 Rulebook
Table of Contents
Table of Contents
- Definition of Terms
- General Course of Play
- Game Length
- Movement
- Combat
- Naval Gunfire Support
- Zones of Control
- Stacking and Unit Breakdown
- Supply
- Entrenchment
- Parachute Infantry (Paratroops)
- How to Set Up and Play the Game: Game-Turn 1
- German Orders of Battle
- How to Win: Victory Conditions
- Allied Order of Battle / Normandy
- Combat Results Table
- Terrain Effects Chart
Definition of Terms
Combat Strength: the basic offensive and defensive power of a given unit, expressed in terms of Combat Strength Points.
Movement Allowance: The basic movement ability of a given unit, quantified in terms of Movement Points. Basically, a unit expends one movement point of its total Movement (point) Allowance for each hex it enters in the course of a given Movement Phase.
Armor Units: reference is made in various rules as to restrictions on armor units. This refers only to armor units, and not to other units with similar symbols, such as reconnaissance or armored infantry units.
Game Charts and Tables: various visual aids are provided for the Player to simplify and illustrate certain game functions. The Combat Results Table illustrates the resolution of combat and explains the possible results, as resolved by a die-roll. The Orders of Battle dictate each Player's forces; this varies for the Germans. The Turn Record Chart provides an easy method of keeping track of the progress of the game; this is presented on the mapsheet. The Terrain Effects Chart details the effect of terrain on combat and movement, and also illustrates all other movement costs. All charts are explained fully where presented.
General Course of Play
Normandy is basically a two-player game. Each player moves his units, and executes attacks in turn, with the objective being to destroy Enemy units and gain territory, while minimizing Friendly unit losses. Combat is resolved by comparing Combat Strengths of adjacent opposing units, and expressing the comparison as a simplified probability ratio (odds); a die is rolled, and the outcome indicated by cross-referencing the die-roll result, and the odds column, is applied to the unit being attacked. Normandy is played in turns. Each Game-Turn is composed of two Player Turns. Each Player Turn is composed of three or four Phases. A typical Game-Turn would proceed as follows:
1. Allied Player-Turn
A. First Movement Phase—Allied Player may move all of his units in any direction, up to their full Movement Allowance, within the restrictions imposed by the movement rules and the Terrain Effects Chart.
B. Combat Phase is composed of three segments, which must be followed in order:
(i) Attack Allocation Segment—Allied Player allocates Friendly units to attack adjacent Enemy units, at his option.
(ii) Naval Gunfire Support Allocation Segment—Allied Player allocates available naval gunfire support among his ground attacks.
(iii) Combat Resolution Segment—Allied Player resolves all combats which he has allocated; once allocated, they must be fought.
C. Reinforcement Phase—Allied Player places reinforcements to be brought into this Game-Turn on the numbered Invasion Beach boxes that he wishes. These units may move during the Second Movement Phase, with the beach hex being the first hex moved onto.
D. Second Movement Phase—Allied Player may move all of his units in the same manner, and with the same restrictions, as in the First Movement Phase. This movement is in addition to that allowed in the First Movement Phase. No Combat Phase occurs after this Movement Phase.
2. German Player-Turn
A. First Movement Phase—German Player may move all of his units in any direction, up to their full Movement Allowance, within the restrictions imposed by the movement rules and Terrain Effects Chart. German Reinforcements for this Game-Turn enter during this phase where indicated; the first hex at the edge of the mapsheet where they enter is the first hex they move onto.
B. Combat Phase is composed of three Segments:
(i) Attack Allocation Segment—German Player allocates Friendly units to attack adjacent Enemy units, at his option.
(ii) Allied Naval Gunfire Support Allocation Segment—Allied Player allocates available naval gunfire to support his defending units.
(iii) Combat Resolution Segment—German Player resolves all combats which he has allocated; once allocated, they must be fought.
C. Second Movement Phase—German Player may move all of his units in the same manner, and within the same restrictions, as in the First Movement Phase. No Combat Phase occurs after this Movement Phase. Reinforcements may not be brought in during this phase.
- Players indicate the passage of one Game-Turn on the Turn Record Chart by moving the marker forward one space. Each Game-Turn represents one day of real time.
Game Length
All of the Normandy games last six Game-Turns; at the end of the German Player's sixth Player-Turn, the performance of the Players is evaluated in terms of the Victory Conditions.
Movement
General Rule
During the Movement Phase of a Player's Turn, the Player may move as many or as few of his units as he wishes. Each unit may be moved as many hexes as desired within the limits of its Movement Allowance, the Terrain Effects Chart, and the Zone of Control Rules.
Procedure
Move each unit individually, tracing the path of its movement through the hexagonal grid.
Cases
(A) Movement is calculated in terms of hexagons. Basically, each unit expends one Movement Point of its total Movement (point) Allowance for each hex entered. To enter some types of hex more than one Movement Point is expended. See the movement section of the Terrain Effects Chart for a full list of these different "entry costs."
(B) Movement is never required; it is always voluntary.
(C) Units are moved individually, or in stacks, at the Player's discretion, in any direction or combination of directions. A unit may be moved as few or as many hexes as the Player wishes, as long as the Movement Allowance of a unit is not exceeded. Unused Movement Points are not accumulated from turn to turn, nor may they be transferred to another unit.
(D) No Enemy movement is permitted during a Player's Movement Phase.
(E) No combat (Enemy or Friendly) may take place during a Movement Phase.
(F) Friendly units may pass into or through a Friendly stack in violation of the stacking limit, if at the end of the Movement Phase the stacking limit is not violated.
(G) Units may never enter or pass through a hex containing Enemy units.
(H) In a given Movement Phase, once a unit has been moved and the Player's hand withdrawn from the piece, it may not be moved again, nor may it re-trace and change its move.
(I) Units may move over different types of terrain hexes in the same Movement Phase as long as they have enough Movement Points to expend each hex entered.
(J) Units which are out of supply have their Movement Allowance halved. (see Supply)
(K) Units may not move to an out-of-supply position if they began a Movement Phase in supply. They may pass through hexes which would leave them out of supply, but may not end the Movement Phase out of supply. (Exception: Supply, Case G)
(L) Units which begin a Movement Phase out of supply may only move to a position which is closer to the nearest source of supply (assuming that such units are moved at all). They may not move further out of supply, or even to a position which is equally as far from supply as their position at the beginning of the Movement Phase. Units which begin a Movement Phase out of supply may only move towards the nearest source of supply; the "nearest" is determined by a direct line to the source of supply, ignoring any terrain or Enemy Zones of Control.
(M) Allied parachute units that are dropped to an out-of-supply position on the Invasion Game-Turn (Game-Turn 1) may not move until they are brought into supply. Once having received supply at any time, they are moved and behave just as other units.
(N) All units except armor units may always move one hex, even if the movement cost of entering a particular hex exceeds a unit's Movement Allowance. Armor units may always move one hex if they are in supply, although on occasion they may not be able to move if they are out of supply. This ability does not override the dictates of Cases K & L.
Combat
General Rule
Combat occurs between adjacent opposing units at the discretion of the Player whose Combat Phase it is; this Player is considered to be the Attacker, while the other Player is considered to be the Defender, regardless of the overall strategic position of the two players.
Procedure
Total up the Combat Strengths of the attacking units involved in a specific attack, and compare it to the total Combat Strength of the defending unit(s) in the hex under attack. State the comparison as a probability ratio: Attacker's Strength to Defender's Strength. Round off the ratio downward to the nearest "whole" number, to yield one of the simplified odds found on the Combat Results Table; roll the die and read the result under the appropriate odds column for that die result. Apply the result of that combat immediately before going on to resolve any other combat.
Cases
(A) During the Combat Phase of his Turn, a Player may only attack those units to which Friendly units are adjacent. Only those Friendly units directly adjacent to a given Enemy unit may participate in the attack upon that Enemy unit.
(B) Units adjacent to Enemy units are not compelled to attack, nor does the attacking Player have to use every adjacent unit if he does decide to attack. Attacking is completely voluntary.
(C) No unit may attack more than once per Combat Phase. No Enemy unit may be attacked more than once per Combat Phase.
(D) More than one Enemy-occupied hex may be attacked by a given attacking unit (or group of attacking units); that is to say, different defending units on different hexes may be treated as objects of attacks which might be made by a one-hex group of attacking units if the attacking units happen to be adjacent to two or more Enemy-occupied hexes.
(E) An Enemy-occupied hex may be attacked by as many attacking units as can be brought to bear. Conceivably, as many as six small stacks of units could be brought to bear against a single Enemy-held hex.
(F) Defending units stacked in the same hex must be attacked as a single combined Combat Strength, i.e., you may not individually attack individual units which are stacked together.
(G) Combat odds are rounded off in favor of the Defender. For example an attack of 26 Combat Points against 9 Combat Points would round off to a two-to-one odds situation.
(H) If one unit in a stack is used in an attack, the other units in the stack need not participate in the same attack nor in any attack at all during that Combat Phase.
(I) Units which are out of supply may not attack, and have their Combat Strength (for defense) halved.
(J) Armor units may not attack any unit which is in a "Bocage" hex (see Terrain Effects Chart). Armor units may not attack, and have their Combat Strength (for defense) halved when not stacked with another type of unit. When stacked with a non-armor unit, they attack and defend normally.
(K) See the Naval Gunfire Support rules for other combat modifications.
Naval Gunfire Support
General Rule
The Allies have eight individual "gunfire support missions" available to them (per Combat Phase) from offshore ships, firing a varying number of Combat Strength Points. These ships are considered to be on any all-sea hex, and their gunfire has a certain range (in hexes) inland. This gunfire may be added to any Allied attack in range, and certain types may be used to assist Allied units defending.
Procedure
Trace the number of hexes, within the range of the particular fire support mission, from any all-sea hex to the defender's hex. This is so whether the firing mission is being used offensively or defensively. Each fire support mission may originate from a different hex, or from the same hex.
Cases
(A) Naval gunfire may only be used when an Allied unit is involved in a combat, i.e., it may not be used independently.
(B) These various missions may be used each Game-Turn, once offensively and once defensively. Unused missions may not be accumulated from Game-Turn to Game-Turn. As many missions may fire from a single hex as the Allied Player wishes.
(C) Only one mission may be applied to a single hex during a given Combat Phase, no matter how many units are involved in attacking and defending (see also Case F).
(D) Each Game-Turn, the Allies have available the number of Naval Gunfire Support Missions indicated on the Naval Gunfire Table.
(E) These Combat Strengths must be applied in total for each individual mission. You may not split a single mission into two parts; it must all be fired at a single hex, and the Total Combat Strength must be used.
(F) When a single-hex-group of Allied units is attacking more than one hex-group of German units, one naval support mission for each German occupied hex being attacked may support the combat. If the Allied hex-group of units is attacking more than one hex-group of German units (as one attack), the Allied Player may not be able to, nor wish to, add in more than one Naval Gunfire Support Mission; the Allied Player may still add the entire Combat Strength of the naval mission to his ground Combat Strength, and attack the total German Combat Strength with his total strength, even if the fire was directed against a single hex.
(G) Naval Gunfire Support Missions need not all originate from the same hex. They may fire from different all-sea hexes, or, if desired, all could fire from a single all-sea hex. The position of the mission in one Combat Phase may be changed to any other all-sea hex in the other Player's Combat Phase, even within the same Game-Turn.
Example (as printed): 26 Allied Combat Strength Points are attacking 9 German Combat Strength Points, at a distance of six hexes from the nearest all-sea hex. The Allied Player has the option of applying a Medium or Heavy Naval Gunfire Support Mission to the attack, and thus having an Attacking Strength Total of 39 or 54. The chosen mission may not be used for attack again on the same Game-Turn, although it may be used for defense during the German Player-Turn of the same Game-Turn.
Editor's note: the printed example's totals (39 or 54) do not follow from the Naval Gunfire table below, which lists 25 attack-support for a Medium mission and 10 for a Heavy mission (26+25 = 51; 26+10 = 36). The example is transcribed as printed; the table values govern.
Naval Gunfire Available per Combat Phase
| Mission type and number of missions available | Hex range | Combat Strength per Mission: attack-support | Combat Strength per Mission: defense-support |
|---|---|---|---|
| Light—four | 2 | 40 | 10 |
| Medium—one | 6 | 25 | 5 |
| Heavy—three | 10 | 10 | 0 |
Zones of Control
General Rule
The six hexagons immediately surrounding a given unit (or stack of units) constitute that unit's Zone of Control. These are semi-active Zones of Control which have an inhibiting effect upon Enemy movement but do not affect Enemy combat. Hexes upon which a unit is exerting its Semi-Active Zone of Control are called controlled hexes.
Cases
(A) All units expend additional Movement Points when entering Enemy-controlled hexes;
Allied units must expend additional Movement Points when leaving Enemy-controlled hexes. These movement costs are cumulative, and are in addition to the cost of the other terrain in the hex. Thus an Allied unit leaving an Enemy-controlled hex, and entering another such hex, which contained Bocage terrain, would be forced to pay a movement cost of eight Movement Points: three for leaving the controlled hex, two for entering another, and three for entering a Bocage terrain hex. See the Terrain Effects Chart for a complete summary of movement costs.
(B) If a hex is controlled by more than one Enemy unit, the movement cost for entering or leaving that hex is the same as if there were only one Enemy unit.
(C) Zones of Control extend into all adjacent squares for all purposes. There is no way to block or interrupt Zones of Control.
(D) Units may not trace supply through a hex that is also an Enemy controlled hex. This applies even if a Friendly unit is in that Enemy controlled hex. Supply may be traced into an Enemy controlled hex.
Stacking and Unit Breakdown
General Rule
German and Allied units stack in an identical manner. The limitations on stacking vary with terrain. In any non-Bocage hex, units may stack as many as three high, although only two regiments (or brigades) may be in a stack, i.e., maximum stacking in clear terrain is limited to three battalions, or one regiment and two battalions, or two regiments. In Bocage hexes, units may only be stacked to a limit of two battalions or one regiment.
Cases
(A) Stacking limitations apply only at the end of a Movement Phase.
(B) Units may break down into smaller units in the following fashion:
Diagram: a 7-4 regiment unit (III) equals three 2-4 battalion units (II).
Allied units
- one 7-4 = three 2-4
- one 5-4 = two 2-4
- one 20-10 = three 6-10
German units
- one 7-2 = three 2-2
- one 5-2 = two 2-2
- one 4-1 = two 2-1
- one 15-6 = one 7-6 and one 5-6
- one 16-6 = one 7-6 and one 5-6
- one 18-6 = one 8-6 and one 6-6
- one 10-6 = three 3-6
- one 7-6 = two 3-6
- one 14-6 = three 4-6
Other units not specifically detailed above may not break down into smaller units.
(C) Units may be broken down at any time during their Movement Phase. They may not be broken down during the Combat Phase.
(D) To replace the larger unit, simply remove it from the map, and replace it with its equivalent as given in Case B.
(E) Units may be rebuilt from constituent parts at any time during the Movement Phase if the smaller units are all in the same hex. These need not be the same units as were originally broken down, but may be any units of identical strength and type. Replace smaller units with the larger one.
Supply
General Rule
Units must be able to trace a supply line leading from their position to a road hex, which must then be connected to a supply area. Allied supply areas are those numbered invasion hexes specified by the Allied Player in the Invasion Game-Turn (see Special Invasion Rules). For the Germans, all supply areas are off the mapsheet, i.e., the supplying road must leave the edge of the mapsheet. Units which are unable to trace a line of supply are penalized with respect to movement and combat.
Procedure
Units are determined to be in supply for movement and combat at the beginning of those respective Phases. If in supply, units may move their full Movement Allowance, and may engage (or be engaged) in combat at their full Combat Strength. Supply lines are traced a maximum of three hexes from the unit to a road hex, which road must lead to a supply area. The road portion of the supply line may be as long and as devious as necessary to reach a supply area. Once a supply line is traced by road, it may not leave the road.
Cases
(A) Units out of supply have their Movement Allowance and Combat Strength halved, and may not attack.
(B) Units may remain out of supply indefinitely, i.e., units are never lost through lack of supply alone.
(C) Any number of Friendly units may be supplied through the same hex or path of hexes. This applies for both the first three hexes, and for the road portion of the supply line. One supply area or road may supply any number of units.
(D) Supply lines may be interrupted in either of the following ways:
- The presence of an intervening Enemy unit or units;
- The presence of an intervening Enemy controlled hex.
Enemy Zones of Control extend into all hexes, regardless of terrain or the presence of Friendly units. These two interrupting features prevent the tracing of supply through hexes thus influenced, whether the supply line is on or off the road.
(E) Units may not move out of supply, nor may they move further out of supply (see Movement, Cases K and L for more details).
(F) Allied parachute units which were not brought into supply (i.e., from the time they are dropped in the Invasion Game-Turn) may not move until they are brought into supply. They are destroyed at the end of Game-Turn 3 if they have not been brought into supply by that time. Once having been brought into supply (at any time), these units behave normally, even if subsequently put out of supply.
(G) German reconnaissance and Allied commando units may voluntarily move out of supply, in contravention of Case E. They are affected as other units by being out of supply, but may move without regard into and out of supply positions, and once out of supply, may move without regard to their distance from the nearest supply line.
(H) Allied supply areas may never be used for any purpose if a German unit has entered the supply area hex. It is no longer considered a supply area and reinforcements may not arrive there. It may never thereafter regain its supply-area status.
(I) Any German unit is considered in supply if it can trace through uninterrupted hexes a three-hex supply line to the edge of the mapsheet; this need not be a road.
(J) German units may not use as a supply line a road leading off the edge of the mapsheet if the Allies have exited any units off that road as a requirement of the Victory Conditions.
(K) All units, except Allied parachute units, are in supply during all of Game-Turn 1, regardless of their position on the mapsheet and the rules of supply.
(L) Allied units which are directly on a supply area hex are always in supply, even if an Enemy Zone of Control extends into that hex.
(M) After Game-Turn 1, the Allied Player is restricted as to the number of attacks he may make in a single Allied Combat Phase. He is limited to four attacks (i.e., separate combats) in each Allied Combat Phase. If he makes less than four attacks, he may not accumulate the unused number of attacks to be used in some future Combat Phase. This does not affect his ability to defend. The Allied Player may make as many attacks on Game-Turn 1 as he wishes. The German Player has no similar supply restriction.
Entrenchment
General Rule
Units are entrenched by placing a blank counter on top of them. This increases their defensive ability (see Terrain Effects Chart); however, entrenched units may not attack, and if they move, they lose their entrenched status. Units that are entrenched may not be examined by the Enemy Player without committing himself to attack them.
Procedure
At the end of a Friendly Player-Turn, a Player announces which units will attempt to entrench at the end of the next Friendly Player-Turn. The Enemy Player is aware of what units are attempting to entrench. If the unit which will attempt to entrench is retreated due to combat in the intervening Enemy Player-Turn, it may not entrench. In any case, the unit may not move or engage in combat in the next Friendly Player-Turn. If it has not been retreated by enemy action, it may attempt to entrench after this inactive Player-Turn (if it had been announced in the preceding Game-Turn). Units may only entrench if they are in supply. Units attempt to entrench by rolling a die. A regiment (or brigade) size unit must roll a "1," "2" or "3" on the die to successfully entrench; a battalion-size unit must roll a "1" or "2" on the die to entrench. Any other result yields no effect. Units may attempt to entrench on each Game-Turn, if they are in supply, have announced the attempt in the preceding Game-Turn, and have not been retreated. If more than one unit is in a hex, each may roll separately. When entrenchment is accomplished, place a blank marker (of the Player's color) on top of the entrenched unit.
Cases
(A) Entrenched units may not attack; when they are defending, the attacker must add four to his die roll before consulting the Combat Resolution Table. If entrenched units move, they lose their entrenched status. Entrenchments are completely immobile.
(B) Players may not look under Enemy entrenchment markers without committing themselves to attack that position.
(C) Units in a hex with an entrenchment are either all entrenched, or all not entrenched, i.e., entrenched and unentrenched units may not share the same hex. If units move into a position occupied by entrenched units, they automatically become entrenched. If a unit entrenches, all other units in that hex become entrenched at the same time. If a single unit attacks out of an entrenched hex, all units in that hex become disentrenched (remove the marker).
(D) Entrenchments do not affect movement into or through a hex.
(E) Units may disentrench at any time, without penalty, either by leaving the entrenched hex, or by removing the entrenchment marker.
(F) A single unit in an entrenched hex may move out in a Movement Phase, and another may move into the hex. However, entrenchment markers which are unoccupied at the end of a Movement Phase are destroyed (remove from map).
Parachute Infantry (Paratroops)
General Rule
Only the Allied Player receives functioning paratroop units; the German parachute infantry units are treated as normal infantry. The Allied Player receives seven paratroop units at the beginning of the game; these units may be dropped anywhere on the map.
Procedure
See "How to Set-up and Play the Game: Game-Turn 1."
Cases
(A) All paratroop units must be paradropped on Game-Turn 1, or they are lost for the remainder of the game.
(B) Paratroop units are destroyed if they land on German units, or are scattered onto a German unit.
(C) Paratroops may not attack in the Game-Turn that they are dropped.
(D) Paratroop units may not move until they are brought into supply, i.e., they are immobile if they have never been in supply since they were dropped. If they have not been in supply from the time they were dropped, they are destroyed at the end of Game-Turn 3 (i.e., at the end of the German Second Movement Phase). Once paratroop units are brought into supply, they function as ordinary infantry.
How to Set Up and Play the Game: Game-Turn 1
There are many specialized rules which apply to the Invasion Game-Turn (Game-Turn 1) only; rather than burden the standard rules, which apply for all game functions in Game-Turns 2 through 6, with unnecessary exceptions and additions for the special Invasion rules, it was decided to make a separate Sequence of Play for the Invasion Game-Turn.
Sequence of Play (for the Invasion Game-Turn 1 only!)
1. SECRET DEPLOYMENT OF FORCES
(A) Allied Secret Deployment
(i) Invasion force: There are seventeen numbered invasion beach hexes on the mapsheet, each of which has a box connected to it. The Allied Player should inspect the mapsheet; he then chooses up to eight of the invasion beach hexes that he wishes to land his units on, and writes the invasion beach number and the forces allocated to it on paper (the forces are chosen from the Order of Battle for the Allied Player). He also writes the beach number (five at most) of the beaches that will function as supply areas for the remainder of the game. (Reinforcements arrive at these beaches, and supply is derived from these areas.) These beaches must be chosen from the beach hexes to be invaded. The German Player is not told during the game which beaches are the supply areas.
(ii) Commandos and Paratroops: The Allied Player then allocates on which hex numbers the commandos and paratroops will arrive. Note that there are lettered rows of hexagons on the map, and that each row contains a series of numbers, one number (divisible by five) for every five hexes; thus each hex on the mapsheet is assigned a "hex number." Commandos may land on any partially-sea hex, and move in that phase.
See Parachute Infantry rules for limitations on the paratroops landing. The Allied Player writes down the hex numbers and forces for each separate paratroop and commando drop zone and landing point. Paratroops may only drop in regiment-size units.
(B) German Deployment and Unit Placement
(i) Choosing the German Order of Battle: After the Allied Player has deployed his forces (on paper, without German knowledge), the German Player secretly writes the numbers "one" through "six" on a piece of paper, and assigns each of these numbers randomly to one of his Orders of Battle (lettered A through F). The Allied Player then rolls the die, which, by reference to the above list, dictates to the German Player which Order of Battle he will use this game; the Allied Player should not be informed, until after the game is finished, which Order of Battle the German Player is using.
(ii) German Unit Placement: The Allied Player turns away from the map, and the German Player may place his units on the map as indicated by his Order of Battle. At the beginning of the game, all German units may be entrenched; thus the Allied Player is not precisely aware of the German defenses until he has committed himself to the attack. German units may not be deployed on partially-sea hexes.
(C) Allied Unit Placement
(i) Placement of invading units and Commandos: The Allied Player returns to the map. He places his invading units in the appropriate invasion beach boxes, and the commandos on their designated partially-sea-hexes.
(ii) Paradrop: The Allied Player places each of the Parachute Infantry units, one at a time, on their specified drop zones. As each unit is dropped, consult these tables (depending on the terrain of the drop zones) for the scattering effect during the drop:
Scatter Table
| Die-roll | Clear Terrain | Bocage or City |
|---|---|---|
| 1 | 0 | 0 |
| 2 | 0 | S |
| 3 | S | -1,S |
| 4 | S | -1,S |
| 5 | -1,S | -1,S |
| 6 | -1 | -2,S |
Explanation of Results
- 0: No effect; paratroops land safely.
- -1,-2: lose that number of battalions from the regiment.
- S: Scatter, roll die again, and move unit(s) one hex in direction shown by the Scatter Plan printed on the mapsheet. If units are scattered off the mapsheet or into the sea, they are lost.
2. ALLIED FIRST MOVEMENT PHASE
The units in the Invasion beach boxes land at the appropriate beach hexes. They may move no further if they are in an Enemy Zone of Control, but they may move their full Movement Allowance (counting the beach hex as the first hex entered) if they do not land in an Enemy controlled hex. The commando units may move their full Movement Allowance, but may not enter Enemy Zones of Control during this First Movement Phase; if they land in an Enemy controlled hex, they may move no further. The paratroop units may not move in this phase. The moving units must ignore any effects of the roads on movement, i.e., move at the cost of the other terrain.
3. ALLIED COMBAT PHASE
The Allied Player then allocates his land units and Naval Gunfire to attack, and resolves combat. Units in an Invasion beach hex adjacent to an Enemy unit(s) must attack all those Enemy unit(s).
4. ALLIED SECOND MOVEMENT PHASE
(i) Allocation of Reinforcements: After resolving all combat, the Allied Player should divide his Second Movement Phase Reinforcements among the supply areas; no more than thirty Combat Strength Points may arrive in any single supply area. The Allied Player may then land his Glider units. These units may land within four hexes of any paratroop unit, except that they may not land on or adjacent to a German unit.
(ii) Movement: During the Allied Player's Second Movement Phase, all Allied units' Movement Allowances are halved. In addition, the Allied units may not use roads; the units must pay the movement costs of the other terrain in that hex. The Allied Player may move all of his units except for the just-landed Glider units, and out-of-supply paratroop units.
This ends the Allied Player-Turn of Game-Turn 1.
5. GERMAN PLAYER-TURN
The German Player then proceeds with his Player-Turn; movement and combat are as usual, with no special rules, except for the fact that all units are considered in supply on Game-Turn 1, regardless of position.
German Orders of Battle
The Germans have several "Orders of Battle" (mixes of forces), each of which is identified by letter and title. The units in an Order of Battle are identified by Strength and Movement number. Refer to the "How to Set-Up and Play the Game: Game-Turn 1" on how to select the German forces.
The German Player may always withhold reinforcements, i.e., delay their arrival to some future Game-Turn. By doing this, he may be able to confuse the Allied Player as to which Order of Battle he is using.
All German Reinforcements arrive at the beginning of the First Movement Phase of the indicated Player-Turn. They arrive at the edge of the map indicated by the direction given. They may not enter the map directly into Allied controlled hexes. The units must be in supply on the first hex they enter on the map. The first hex moved onto is counted in calculating Movement Points.
German Order of Battle "A"
"The Armored Reserve Plan"
This plan would permit the Allies to come ashore and penetrate, before striking them with an armored reserve. It was favored by Runstedt, and ignored Allied air and materiel superiority.
At Start
- Anywhere on map: six 4-1's.
- Within ten hexes of Falaise: one 15-6, two 7-6's, one 8-8. South edge of map: one 8-4, one 2-6. Coutance: one 10-6.
- Directly in Caen or St. Lo: two 7-2's, one 4-1.
Reinforcements
- Player-Turn 1: North—three 4-1's; West—two 7-2's.
- Player-Turn 2: East—six 4-1's.
- Player-Turn 3: South or East—two 15-6's, one 18-6, one 16-6, four 7-6's, four 14-6's, four 8-8's.
- Player-Turn 4: South or East—one 18-6, four 14-6's, two 8-8's.
- Player-Turn 5: South or East—one 18-6, two 14-6's, one 8-8, three 10d6's, one 6d6. South—three 10-6's.
- Player-Turn 6: South—one 15-6, two 7-6's, one 8-8.
German Order of Battle "B"
"Historical Deployment"
This is what actually happened; it is a combination of several people's plans, and historical happenstance.
At Start
- Anywhere on map: seven 4-1's, two 7-2's.
- Within ten hexes of Falaise: one 15-6, two 7-6's, one 8-8. South edge of map: one 8-4, one 2-6. Coutance: one 10-6.
Reinforcements
- Player-Turn 1: North—three 4-1's; West—two 7-2's.
- Player-Turn 2: East—six 4-1's; South or East—one 18-6, two 14-6's, one 8-8, one 6d6.
- Player-Turn 3: South or East—three 10d6's.
- Player-Turn 4: South or East—one 16-6, two 14-6's, one 8-8.
- Player-Turn 5: None.
- Player-Turn 6: South or East—two 14-6's, one 8-8, three 5-2's.
German Order of Battle "C"
"Fast Response"
This OB assumes the Germans had more of their wits about them, i.e., someone was awake at the switch, and issued the necessary orders to move the reserves faster.
At Start
- Anywhere on map: seven 4-1's, four 7-2's.
- Within ten hexes of Falaise: one 15-6, two 7-6's, one 8-8. South edge of map: one 8-4, one 2-6. Coutance: one 10-6.
Reinforcements
- Player-Turn 1: South or East—one 15-6, two 7-6's, one 8-8.
- Player-Turn 2: North—three 4-1's; West—two 7-2's; East—six 4-1's; South or East—two 15-6's, four 7-6's, two 8-8's.
- Player-Turn 3: South or East—three 10d6's, one 6d6.
- Player-Turn 4: South—three 10-6's.
- Player-Turn 5: South or East—one 16-6, two 14-6's, one 8-8.
- Player-Turn 6: South—two 14-6's, one 8-8.
German Order of Battle "D"
"Strong Seventh Army"
This presumes a strengthening of the army guarding Normandy, probably as a compromise, since Hitler had an intuitive feeling that this would be the invasion area.
At Start
- Anywhere on map: seven 4-1's, four 7-2's.
- Within ten hexes of Falaise: one 15-6, two 7-6's, one 8-8. South edge of map: one 8-4, one 2-6. Coutance: one 10-6.
Reinforcements
- Player-Turn 1: North—three 4-1's; West—two 7-2's; South or East—one 15-6, two 7-6's, one 8-8.
- Player-Turn 2: East—six 4-1's; South or East—one 15-6, one 18-6, two 14-6's, two 7-6's, two 8-8's, one 6d6.
- Player-Turn 3: South or East—one 16-6, two 14-6's, one 8-8, three 10d6's.
- Player-Turn 4: South or East—one 15-6, two 7-6's, one 8-8. South—three 10-6's.
- Player-Turn 5: South or East—three 5-2's. South—two 14-6's, one 8-8.
- Player-Turn 6: South—two 7-2's.
German Order of Battle "E"
"OKW Plan"
This is what OKW would have liked to do in the event of an invasion; immobile troops on beaches, with a rapid motorized response. It represents about the best the Germans could have done with their original strategic deployment.
At Start
- Anywhere on map: nine 4-1's, four 7-2's.
- Within ten hexes of Falaise: one 15-6, two 7-6's, one 8-8. South edge of map: one 8-4, one 2-6. Coutance: one 10-6.
Reinforcements
- Player-Turn 1: South or East—one 15-6, one 18-6, two 14-6's, two 7-6's, two 8-8's; West—two 7-2's; North—one 4-1.
- Player-Turn 2: South or East—one 16-6, one 15-6, two 14-6's, two 7-6's, two 8-8's, six 4-1's, one 6d6, one 10d6.
- Player-Turn 3: South or East—two 10d6's.
- Player-Turn 4: East—one 15-6, two 7-6's, one 8-8; South—two 14-6's, one 8-8.
- Player-Turn 5: South—three 10-6's; South or East—three 5-2's.
- Player-Turn 6: South—two 7-2's.
German Order of Battle "F"
"Rommel Plan"
This is what Rommel would have done (or tried to) if he had been given a free hand in the West. It assumes massive redeployment on a strategic scale, as well as a commitment to put everything on the beaches as quickly as possible. It also assumes that the Allied air power was not diverted from bombing the Reich to break up France's transport systems.
At Start
- Anywhere on map: six 4-1's, two 7-2's, one 8-4, two 7-6's.
- Within ten hexes of Falaise: one 15-6, one 8-8. South edge of map: one 2-6. Coutance: one 10-6.
Reinforcements
- Player-Turn 1: North—three 4-1's; West—two 7-2's; South or East—one 18-6, one 16-6, four 14-6's, two 8-8's.
- Player-Turn 2: South or East—one 18-6, two 15-6's, two 14-6's, four 7-6's, three 8-8's.
- Player-Turn 3: South—two 14-6's, one 8-8; East—one 18-6, one 8-8, three 4-1's.
- Player-Turn 4: East—two 15-6's, four 7-6's, two 8-8's, three 5-2's.
- Player-Turn 5: South—three 10-6's; East—three 4-1's, two 7-2's.
- Player-Turn 6: South or West—three 5-2's.
How to Win: Victory Conditions
The winner of Normandy is determined by the number of Victory Points gained by the Allied Player by the end of Game-Turn 6. The Allied Player receives Victory Points for geographic gains and from the Victory Points added by the Order of Battle used by the German Player. As the German Order of Battle increases in strength, the Allies receive more Victory Points.
Thus victory is not awarded on the basis of the historical campaign, but on the efficiency with which each Player uses the forces available to him.
The Allies receive Victory Points for certain cities if they fulfill all three of the following conditions:
- the Allies must be able to trace a supply line to all hexes of a city at the end of Game-Turn 6;
- the Allies must occupy, or have been the last to pass through, all hexes in the city;
- the Germans must not have a unit in, or adjacent to, any hex of the city at the end of Game-Turn 6.
These cities are:
| City | Victory Points |
|---|---|
| St. Lo | 2 |
| Caen | 6 |
| Bayeux | 2 |
| Cartentan | 2 |
| Falaise | 2 |
The Allies also receive Victory Points for moving one division (three regiments or brigades, or their equivalent) off each of the mapsheet by road. At the end of the game, the Allied Player must be able to trace a supply line exiting off that road hex, or no Points are received for these exited units. The following Victory Points are received for this action:
| Edge of Map | Victory Points |
|---|---|
| East | 8 |
| West | 6 |
| South | 4 |
| North (a) | 12 |
(a) Points are received for moving off the North edge of the mapsheet only if this is done before the end of Game-Turn 3.
In addition, the Allied Player receives Victory Points for the depth of the beachhead. The furthest supplied unit-penetration from the nearest partially-sea-hex is measured in terms of hexes, and one-half of a Victory Point is awarded for each hex of penetration. This is modified if more than one beachhead exists, i.e., if all supply areas are not connected to each other by roads. If there are two beachheads, the number of Victory Points for penetration should be divided by two; if there are three beachheads, the number of points should be divided by three, etc. The furthest penetrating unit must be in supply.
At the completion of the game, the Allied Player adds up the Victory Points from all these sources, and adds (or subtracts) the Victory Points awarded to him by the Order of Battle used by the Germans. This is the final Victory Point total.
Levels of Victory
As we all know, victory comes in many varieties, and what may be claimed as a current victory may be a long-term defeat. In the game of Normandy, an "historical" victory is gained by the Allied Player if he achieves 25 Victory Points from geographic gains. However, Players may rate their personal victories (i.e., how well they handled their forces) by including the additional points given by the German Order of Battle. This then enables one to rate Player Victories on the following scale:
| Allied Victory Point total | Level of Victory |
|---|---|
| -5 to 9 | German Decisive Victory |
| 10 to 14 | German Provisional Victory |
| 15 to 22 | German Marginal Victory |
| 23 to 30 | Allied Marginal Victory |
| 30 to 39 | Allied Provisional Victory |
| 49 and over | Allied Decisive Victory |
The printed scale reads "30 to 39" for Allied Provisional Victory and "49 and over" for Allied Decisive Victory; the printed bands leave 40 to 48 unassigned. Transcribed as printed.
These are the Victory Point additions (or subtractions) that the Allied Player receives for the German Orders of Battle employed (see Victory Conditions):
| German Order of Battle Employed | Victory Point effect |
|---|---|
| A | -5 |
| B | 0 |
| C | +5 |
| D | +10 |
| E | +15 |
| F | +20 |
Allied Order of Battle / Normandy
The Allies have only one Order of Battle; this represents, in effect, the maximum effort of the Allies in putting troops ashore. The Order of Battle is divided into three sections: Invasion Force; Second Wave; and Follow-up Forces. The special Sequence of Play (how to set and play the game) will instruct the Allied Player on how to deploy the first two forces, which arrive on Game-Turn 1.
Invasion Force
These forces arrive at the beginning of the Allied First Movement Phase on Game-Turn 1.
- Invasion Beach Assault Forces: eight 7-4's, eight 6-10's. Any of these forces which are not landed may be landed after Game-Turn 1 (follow-up forces).
- Commandos: eight 2-4's.
- Parachute Infantry: eight 7-4's (not seven as stated in the rules).
If the Commandos or parachute infantry are not landed, in the beginning of first Movement Phase, they may never thereafter be brought into play.
Second Wave
These forces arrive at the beginning of the Allied Second Movement Phase on Game-Turn 1. They may be brought onto the map of the supply areas, at a maximum of 30 Combat Strength Points per supply area. See special Sequence of Play (Game-Turn 1) for landing of Glider units.
- Beach Landing Force: eight 7-4's, two 6-10's, two 8-12's, two 5-4's, one 20-10. Any of these forces which are not landed may be landed after Game-Turn 1.
- Gliders: one 7-4, one 5-4.
Follow-up Forces
These forces may arrive at the beginning of any Allied Second Movement Phase after Game-Turn 1. They may be brought onto the map at any of the supply areas, at a maximum of 15 Combat Points per supply area. As many or as few supply beaches may be used in a Player-Turn as the Allied Player wishes. To these Follow-up forces must be added any unlanded forces from the Invasion Beach Assault Forces and the Beach Landing Force.
- Follow-up Forces: eighteen 7-4's, two 6-10's, two 8-12's, two 12-10's, two 20-10's, one 22-10.
For the units which are larger than 15 Combat Strength Points, it is possible to land them on a supply area; to do this, do not bring any reinforcements in on one Game-Turn; in the following Game-Turn, 30 Combat Points may be brought in at that supply area. Thus, the landing capacity of a beach is cumulative. If you brought no reinforcements in for two Player-Turns, you would be able to lift 45 Combat Points through that beach on the third Player-Turn.
Combat Results Table
Die roll (1 to 10, left and right columns) against Combat Odds. Odds columns: 1-2, 1-1, 2-1, 3-1, 4-1, 5-1, 6-1, 7-1, 8-1, 9-1, 10-1.
| Die Roll | 1-2 | 1-1 | 2-1 | 3-1 | 4-1 | 5-1 | 6-1 | 7-1 | 8-1 | 9-1 | 10-1 |
|---|---|---|---|---|---|---|---|---|---|---|---|
| 1 | AR | AR | DR | DR | EX | EX | DX | DX | DX | DX | DX |
| 2 | AR | AR | DR | DR | DR | EX | EX |
Explanation of Results
- AX: Attacker Eliminated; all attacking units are removed from the map.
- DX: Defender Eliminated; all defending units are removed from the map.
- EX: Exchange; eliminate all of the defender's units, and eliminate an equal or greater number of the attacker's units, in terms of Combat Strength Points. The Attacker loses on the full Combat Strength basis of the Defender, before allowing for supply and terrain modifications of that value.
- DR/AR: Defender/Attacker Retreat; move Player's units back two hexes; units must end this retreat two hexes distant from the starting position of the retreat, and may not retreat across river, sea, or Flooded hexsides. Units may not retreat into all-sea hexes, or into Enemy occupied or controlled hexes. If units cannot meet these retreat requirements, they are destroyed (eliminated). The Enemy Player dictates the path of retreat.
Terrain Effects Chart
Movement Point cost to enter, for units with a Movement Allowance of four or less, and of six or more; and effect on combat as an addition to the attacker's die roll when the defender is in the terrain.
| Terrain | Movement (four or less) | Movement (six or more) | Effect on Combat |
|---|---|---|---|
| Clear | 1 | 1 | none |
| Bocage | 1 | 3 | add 4 (C) |
| City (A) | 1/3 | 1/3 | add 3 |
| Road (A) | 1/3 | 1/3 | depends on other terrain |
| Fortification | depends on other terrain | depends on other terrain | add 4 |
| Enter Enemy Zone of Control | 1 additional Movement Point, above ordinary movement cost | 3 additional Movement Points, above ordinary movement cost | must be in Enemy Zone of Control to attack |
Notes:
(A) This is Movement Point Cost when entered through a hexside with road passing through it; if entering through a non-road hexside, the unit must pay the movement cost of the other terrain in the hex.
(B) The cost for leaving an Enemy Zone of Control applies only to the Allied units; German units pay no additional movement cost for leaving Enemy Zones of Control.
(C) Armor units may not attack into Bocage hexes.
(D) Certain hexsides on the mapsheet are all-sea hexsides. Units may not move through these hexsides, nor may supply lines be traced through these hexsides.