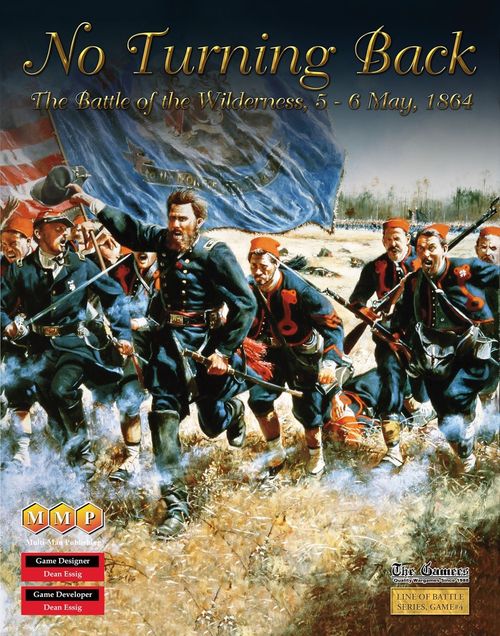
No Turning Back: The Battle of the Wilderness 5-6 May 1864
No Turning Back: The Battle of the Wilderness 5-6 May 1864 Rulebook
Table of Contents
Table of Contents
- 1.0 Common Special Rules
- 2.0 The Wilderness
- 3.0 Union Specific Rules
- 4.0 Confederate Specific Rules
- 5.0 Victory
- 6.0 Scenarios
- 6.1 The Battle of the Wilderness: Traditional Start
- 6.2 The Battle of the Wilderness: Early Start
- 6.3 A Weird, Uncanny Contest: Warren's Attack
- 6.4 The Earth Had Swallowed Them: Saunders Field
- 6.5 Death Was in Every Shot: Wright's Attack
- 6.6 Death Holds High Carnival: Hancock vs. Hill
- 6.7 Victory Without Triumph: Day 2 Start
- 6.8 Driving Them Most Beautifully: Southern Flank
- Seniority
- Order of Arrival
1.0 Common Special Rules
1.1 Game Specific Tables
With the introduction of the LoB series rules v3.0, the Terrain Effects table is specific to this game. (LoB 1.6)
1.2 Special Terrain
1.2a The Unfinished Railroad. The Unfinished Railroad bed was unknown to the Union at the time of the battle. It does not exist as a map feature for the Union player at all. That it is an LOC Trail does not alter this fact.
Follow the normal series rules regarding the pathway needed for each Move Order. Only the Confederates can include the Unfinished Railroad as part of it.
1.2b Line of Communication (LOC) Trails. Line of Communication Trails have a black dashed line following them on one side or the other. They are identical to all other Trails in the game except:
- HQs can move along LOC Trails.
- LOC Trails can also be used for Withdrawals. (1.4b)
Line of Battle (LoB) rules references cite series rules version 3.0.
1.2c Use of Advanced Road Columns [LoB 7.2 opt]. Due to the dense terrain, any Formation given Move Orders with a destination outside its current CR must follow the normally optional Advanced Road Column rule (LoB 7.2 opt) and Constricted Terrain Column Length Rounding (LoB 7.2c) as well as the usual (required) Road Column rule. (LoB 7.0e)
Play Note: Some of these Road Columns can be quite long, so to avoid using excessive numbers of Road Column markers, it is OK to merely leave these hexes empty—just maintain the space needed between units while moving. Remember that they are occupied if other units wish to move through them! Be ready to get a glimpse of just how time consuming and difficult it really is moving armies around in this terrain—it is not trivial!
To Take Washington Note: In the game's Game Specific Rules, Dean noted that he forgot to include the Turn markers. He noted that he would include them in the next LoB game. As much as it would be a gracious gesture, I decided to not include the turn markers for two reasons:
- As you are purchasing No Turning Back, the Turn markers in this game can be used for To Take Washington.
- In the years since To Take Washington's release, I haven't seen comments seeking a new LoB game for the Turn markers alone.
Anyone who is disappointed in this decision can direct any cussing out at me. Sorry.
1.3 Special Units and Unit Functions
1.3a Breastworks. These are exceptions to LoB 5.0.
- LoB 5.0a: There is no counter limit regarding Breastworks in this game. Those in the game can be augmented as desired (one marker every other hex, markers from other games, or pulling the Breastworks off unneeded parts of the line to reuse them).
- When rebuilding Breastworks, use the same process as was used to build them in the first place, merely re-Face the old Breastworks marker as needed when finishing.
1.3b Open Order Capable Units.
- In addition to Command Radius, Open Order Capable units may be no further than 3 hexes forward of the nearest Friendly Line Infantry. They can be in any location to the rear of that Infantry.
- In 1864, it is the owning player's choice to either Retire 2 hexes normally OR stand firm, deliver a normal Opening Volley, and take the enemy's Fire Combat. (LoB 4.4d)
- Sharpshooters need not be Open Order Capable to be a Guide. (2.2b)
- Apply normal Stacking Order (LoB 6.1b). Even though an R1 Guide is leading the way, it will not be on top of its Stack!
1.3c Specific Leader Replacements. Several Leaders have another named Leader on their counter's back, rather than a generic Repl.
Use the lists in 3.3 and 4.4 as the replacement order. If the first Leader is in play, replace him when needed with the second. If the second Leader is in play, replace him with a generic Repl Leader.
1.3d Artillery Supply. Unlimited Ammunition Refills are available in every Supply Wagon on both sides. Both Caisson and Battery Replenishments are available.
- Confederate:
- Longstreet's First Corps: Parker's Store (B41.13).
- Ewell's Second Corps: Entry Area G (A55.01).
- Hill's Third Corps: Either Entry Area G or Parker's Store.
- Union: Use the appropriate Corps Supply Wagon. If needed, Union Batteries can use Battery Replenishment via Entry Area C (D4.34).
Historical Note: The Federal Army was relocating its Grand Trains to Chancellorsville (just off map to the southeast) when the battle began, hence the rather odd-looking location shown. Note that the other roads further south than Entry Area C are not available. If you need to use the Brock Road to get Artillery resupply, you have already lost. Start over.
1.4 Leg Bail
The Wilderness heavily taxed troop morale due to unit isolation and confinement. They and their leaders were unable to know what was going on even a short distance away. Rumor would easily slip out of control without correlation to real events.
1.4a Leg Bail. If any non-Open Order Infantry Stack makes a Morale Table raw roll of 12, each unit of each Brigade represented in that Stack must teleport (not move) to w/i 3 hexes of the Corps HQ to which it is assigned. Ignore any Morale Table result that would have applied and remove any Morale States the units have. There is no Recovery needed; they begin moving back to their Division the next Game Turn under their original Orders.
Exception: Regardless of the above, if the rolling Stack is in a friendly-built Breastwork hex, no Leg Bail occurs. Use the actual Morale Table result.
A Leg Bail is NOT a Fluke Stoppage and is not affected by the Fluke Stoppage Grace Period. Leg Bails cannot be self-inflicted.
If a Division is required to Withdraw while any of its Brigades are suffering Leg Bails, the Brigade teleports to join the Division for Recovery, even if it is out of CR at that moment.
1.4b Withdrawals. In addition to the requirements of LoB 13.7a, a Division executing a Withdrawal must move so that none of its units are more than 3 hexes from a Road OR LOC Trail hex which leads directly to its Corps HQ. The Division's Leader must be placed in such a Road or LOC Trail hex.
2.0 The Wilderness
This Area of Operations was especially difficult for the armies of the mid-19th Century. The Wilderness terrain played havoc with the parade ground tactics of the time (even in areas generally free of the ever-present undergrowth) and the available command systems (mostly by sight or voice) couldn't begin to cope with it. They used rudimentary maps and did not rely on magnetic compasses.
2.0a Wilderness Hexes (Critical). Proper and precise "Wilderness Hex" classification is very important.
A "Wilderness hex" must:
- Contain either Woods and/or Marsh symbols in some amount.
- Have Wilderness "bars" on ALL six hexsides.
- Not contain a Road. *
* Ignore Trails and LOC Trails for this, only Roads matter.
2.1 Command & Communication Difficulties
2.1a HQs Location and Movement. Army & Corps HQs and Wagons can only move into or cease movement within the following types of hexes:
- Roads
- LOC Trails
- Clear
- Partially Clear, provided the hex is not Wilderness.
2.1b Brigade/Battalion Command Radius. No more than TWO Wilderness hexes can be used in each count of Brigade or Battalion Command Radius. So, a Brigade has its normal CR of 6 but can use no more than TWO Wilderness hexes when counting it out.
The CR is not reduced to 2; it merely cannot count more than 2 Wilderness hexes in any one check. The mixture of Wilderness hexes and non-Wilderness hexes can be arranged in any manner.
This rule has no effect on Divisional (or higher) CRs OR on the CRs to Open Order units (see 1.3b).
2.1c No Passing. A unit in Line that moves into a hex containing another unit in Line becomes Finished, regardless of terrain. This is an exception to LoB 6.1.
2.1d Breaking Contact. A friendly Stack in a Wilderness hex (which has not Fired or Moved in any way and contains no Unlimbered Artillery), can self-inflict a Morale result of DG and Retreat 2-6 hexes (player's choice) in its Activity Phase. Do not place a Cowardly Legs marker as a result. Zero Roll results (if any) do not affect Breaking Contact. Apply EZOCs and Retreats SP loss (LoB 6.4a) if retreating through an EZOC.
2.2 Lack of Tactical Finesse
2.2a Stumbling Forward. Several special cases occur if either the moving/Firing OR non-moving/Target Stack is in a Wilderness hex.
Remember these series rule effects apply:
- The Opening Volley trigger for entering a hex adjacent to the enemy. (LoB 9.2)
- It is the player's option (1864) to execute LoB 4.4d Retiring or Stand Fast and exchange fires.
Special Cases in Wilderness hexes:
- If a Firing Stack includes a Guide (who is also firing), Firing may not automatically trigger an Opening Volley. Apply the process in 2.2b below, instead.
- No Charging! Charges cannot be made into OR from any Wilderness hex.
- Artillery cannot Move to a new hex AND Unlimber in the same Phase.
- Destroy Artillery entering any Wilderness hex during a Retreat result.
2.2b Guides. Sharpshooter units can be dedicated to acting as Guides in Wilderness hexes. Posted Guides allow Line Infantry to Fire from their hex upon an Enemy Stack (which is also in a Wilderness hex) without undergoing an Opening Volley.
Process:
- Move the Sharpshooter into the desired hex—there is no Opening Volley trigger for entering this hex. It can be Posted as a Guide if:
- There is an Enemy occupied hex adjacent to it.
- Both that hex and the Enemy occupied hex are Wilderness hexes.
- The hex is currently unoccupied except for other Sharpshooters.
- The Sharpshooter ceases movement in that hex. There is no additional MP cost for being a Guide.
- Once a Guide is Posted, Line Infantry can move into the hex. When all desired units have entered the Guide's hex, the Stack (including the Guide) must Fire, BUT there is no Opening Volley trigger at all (either for the later stack of units or the initial Guide entry itself).
A Guide's Stack never ignores Opening Volley Triggers from Changing Formation or Facing while adjacent OR for Firing which does not follow the process above.
3.0 Union Specific Rules
3.1 Command
3.1a Army Commander Awareness. Army Commander Awareness level of these officers when promoted to Army Command is:
- On Fire: None
- Normal: Grant, Meade, Hancock
- Not so Sure: Warren, Sedgwick
- Comatose: Burnside
Note that Grant applies his Army Commander Awareness delay to Orders sent to Meade or Burnside. Meade only uses Army Commander Awareness after Grant becomes a casualty, even though he is technically still the Commander of the Army of the Potomac (AoP).
3.1b Grant and Meade. The Union command arrangement is unusual. Burnside, the IX Corps Leader, outranks Meade and is not part of the Army of the Potomac. As such, he requires his own orders from Grant and never from Meade.
As a result, there are two Chains of Command, depending on the forces involved. While Grant is the origin of all Union orders, there are two separate pathways.
The Army of the Potomac:
- Grant
- Meade
- II Corps, V Corps, or VI Corps
IX Corps:
- Grant
- Burnside (Leader, IX Corps)
Grant is restricted to one pathway (player's choice) per turn.
Grant's Army of the Potomac order must go to Meade first. Grant applies his delay from Army Commander's Awareness (2 turns) and distance to the AoP HQ (usually the 1 hex minimum) to send the order to Meade.
Grant's single AoP order may include orders for multiple AoP Commands in the same Order. Meade must accept the Order before he is able to reissue any orders to his subordinate Commands. He must be at or within 20 hexes of the AoP HQ to do so.
Regardless if Grant is stacked with the recipient when the order is sent, it must make the trip to Meade and back before that officer can accept it.
Once accepted, Meade can reissue one Command's order each succeeding turn (an exception to LoB 13.3c) based on Grant's instructions so that each Command obtains its own individual order. There is no Command Roll to reissue Grant's Orders—but Meade can only make one reissue per turn. The player can choose the order in which he wants Meade to do this. Meade's Orders are sent from the AoP HQ's location.
So, the timing is something like this:
- 1:00 p.m.: Grant issues an Order to Meade after making a successful Command Roll. Minimum transmission time: 3 turns.
- 1:45 p.m.: Meade receives Order from Grant and rolls to accept it and succeeds this turn. He can reissue the Order starting next turn.
- 2:00 p.m.: Meade issues a copy of Grant's Order to the first Corps Leader's HQ. (Player's choice of who's first).
- 2:15 p.m.: Meade issues a copy of Grant's Order to the next Corps Leader's HQ (and so on until all are sent).
If Grant becomes a casualty, both Meade and Burnside act as Army Commanders using their same Chains of Command. These separate Chains of Command never mix, regardless of what happens.
Meade can only issue his own orders after Grant becomes a casualty making Meade the full Army Commander. (But keep in mind he cannot issue orders to Burnside.)
Exception: Meade can always use Initiative to move the AoP HQ.
3.1c Night Orders and Grant. Grant follows LoB 13.5b (and can issue any number of orders at Midnight) and Meade's process is abbreviated such that Meade reissues all the orders at "some point thereafter" so that they are available for lower Leaders to begin their Order acceptance Command Rolls at Twilight.
3.1d Corps Leader Initiative.
- Hancock can self-issue any desired order (including Attack which are accepted immediately) using Initiative.
- Sedgwick can self-issue orders (restricted normally by LoB 13.4a) using Initiative.
- Warren can only use Initiative to release Reserves. (3.4d)
- Burnside (as well as all lower leaders of IX Corps) cannot use Initiative for any function and require all orders to come from Grant as per 3.1b.
3.2 Hancock
3.2a Orders. Hancock can reissue his orders (from Grant via Meade or his own Initiative) to Divisions of any Army of the Potomac Corps (but not IX Corps, of course) as if it were his own. No more than Four Divisions can have Attack Orders from Hancock at any one time. These Divisions are considered part of his Command for Fluke purposes.
3.2b The Ambulance. Due to his Gettysburg wound, Hancock is confined to an ambulance which moves as Limbered Artillery for movement rates. There is an ambulance on his counter to remind players of this. Remember the limitations of 2.1a.
3.3 Specific Leaders
3.3a Leonard/Lyle (1/2/5).
Historical Note: Leonard was not a casualty in the battle but was replaced for unknown reasons by Lyle on the second day of battle.
3.3b Burnside/Parke (9 Corps).
Historical Note: As Burnside put it, Parke "remained with me as chief of staff or in immediate command when occasion required."
3.4 Unit and Formation Rules
3.4a Wright's Advance. Wright's initial advance causes the 1 NC Cav to retreat 3 hexes whenever a Union unit moves adjacent to it as in 4.5c (even if the Union Division is in Road Column).
3.4b Getty (2/6). Getty's Division (2/6) is assigned to II Corps in all ways for the entire game. It cannot be re-assigned to VI Corps.
3.4c Neill's Brigade (3/2/6). This brigade is considered part of Wright's Division (1/6) for the entire game, and cannot be re-assigned to Getty.
3.4d Robinson: V Corps Reserve. Robinson's Division (2/5) has orders to be in Reserve as per LoB 13.2e. Until his division is released, the player can use Robinson as Reserve for Fluke Stoppage for all V Corps divisions. The Divisions do not need Reserves of their own.
While in Reserve, Robinson must stay within his set-up line or in the Breastworks to his immediate front. Robinson is only released by Initiative from Warren, and Warren obtains the +2 DRM for releasing Robinson from Reserve. All of Robinson's reserve capabilities disappear at that moment regardless if some or all brigades have been released.
3.4e 5th NY Cav. The 5 NY Cav, unlike the 1 NC Cav (4.5c), is a unit not a marker. The 5 NY Cav cannot:
- Leave the Orange Plank Road. It must always be in a hex of that Road.
- Move west from its starting point on any Union Player Turn. It can only move or retreat east.
- Unstack from McIntosh (1/3/Cav)—they must remain stacked.
Remove McIntosh and the 5 NY Cav from play when they retreat into (or through) hex B41.15.
3.5 Disbanded Corps Insignia
The corps emblems in the upper right of some units has no affect.
Historical Note: These emblems reflects the corps assignments prior to the March 1864 reorganization of the Army of the Potomac.
4.0 Confederate Specific Rules
4.1 Command
4.1a Army Commander Awareness. Army Commander Awareness level of these officers when promoted to Army Command is:
- On Fire: Longstreet
- Normal: Lee, Ewell
- Not so Sure: A.P. Hill
4.1b Hill's Initiative. A.P. Hill cannot use Initiative for any function and requires all orders to come from Lee.
4.2 Sorrel
Sorrel is a "spare" Division Leader. Only Longstreet can use Sorrel once during the game. Until given an order by Longstreet, Sorrel cannot do anything on his own and must always remain stacked with Longstreet.
Longstreet can issue ONE Order to Sorrel in the game. At the time he accepts it, Sorrel projects a Division-level CR. The Order must specify the following:
- Composition. The Infantry Brigades making up Sorrel's Division. Up to Four Brigades from any Division or Corps can be selected, but once assigned, they cannot be changed until the order ends.
- Assembly Location. This is the hex for Sorrel's Division to assemble. The Assembly Hex need not be in the CR of any Corps. All assigned Brigades must move within proper Command Radius of the Assembly Hex as quickly as possible (once the Order is accepted). Make no Fluke Stoppage Rolls for the Division until the assigned Brigades are w/i 6 of the Assembly Hex.
- Sorrel's Attack Order. The Order contains full (normal) Attack instructions (Sorrel cannot be used for other types of Orders). Sorrel does not need any actual Reserve; he always obtains the Fluke Stoppage Modifier, even without one.
When Sorrel's Order ends (regardless of the reason) remove him from play and return his Brigades to their own Divisions. Units in each Brigade must move to their parent Division.
4.3 Ewell
Ewell has two sides, one with a Command Value of 3 and the other as a 1. He begins the battle as a "3" Command Value and flips to a "1" at Midnight on 5 May.
Historical Notes: Ewell doesn't get much credit for his defense of Saunders Field, but he was in old form directing troops where they were needed to stop Warren's attack on the first day. On 6 May, however, his sector was quiet despite the prodding by Gordon to attack the vulnerable Union flank.
4.4 Specific Leaders
4.4a Kennedy/Henagan (Ker/Ker).
Historical Note: Kennedy was senior Colonel but was wounded in Longstreet's attack. Henagan immediately took over. Kennedy's wounding happened so soon in Longstreet's commitment that he's barely mentioned in history books.
4.4b Cooke/MacRae (Ck/Heth). Players can use the Cooke counter and apply the standard replacement scheme in LoB 4.3b with MacRae as Cooke's replacement.
Historical Note: There are conflicting sources regarding who was in command of Cooke's Brigade. Brigadier General Cooke was wounded at Bristoe Station in October 1863 and returned to duty in May 1864 (with some sources claiming it was immediately before the Battle of Spotsylvania). We have Colonel MacRae starting as Brigade Leader.
4.5 Unit and Formation Rules
4.5a Attack Orders. All Confederate Leaders can use Initiative to self-issue Attack Orders. Formations are required to be in Command Radius of higher leaders. These Attack Orders require Fluke Stoppage rolls and are eligible for the "Reserve Modifier." When these Attack Orders end, they follow the standard Attack Recovery procedure. Exception: A.P. Hill cannot, see 4.1b.
4.5b A.P. Hill's Tired Men. Units in Hill's Corps cannot create Breastworks at any time.
Historical Note: A.P. Hill was convinced that his men were too exhausted to build entrenchments and requested permission from Lee to not build any.
4.5c 1 NC Cav. The 1 NC Cav is effectively a marker (and not a real unit, unlike the 5 NY Cav in 3.4e). Its purpose is to set Wright's rate of advance.
The 1 NC Cav cannot:
- Fire
- Leave the Trail leading to hex A44.23.
- Move other than when "bumped" 3 hexes, as per the following:
Each time the lead unit of Wright's Division (in Column) moves adjacent to it, the Union unit ceases movement that Turn. (Following units must stop in the column behind it and cannot leapfrog.) Then the 1 NC must retreat 3 hexes (not MPs) down the Trail. There are no fires upon the Cav and the 1 NC Cav cannot Fire at all.
Remove the Cav from play when it retreats into (or through) A44.23.
5.0 Victory
At the most Strategic Level, the Union Army wins if they continue the Overland Richmond Campaign and its effort to destroy Lee's Army by locking down Lee's operational freedoms.
The Confederate Army wins if Grant and the Federal forces withdraws across the Rapidan to "try another day" leaving an intact Army of Northern Virginia in the field.
How each side does at these tasks is determined by control of the VP hexes (worth between 1 to 4 VPs each) within the scenario's play area at the end of play. Each side can only obtain VPs from VP hexes with their flag on them. There is no positive effect for controlling VP hexes belonging to the other side except to deny access.
A VP hex must be occupied by an Infantry unit in CR to be "controlled."
Count the total VPs controlled by each player and subtract the Confederate total from the Union total at the end of play. If the result is positive, the game is a Union Win. If it is negative, the game is a Confederate Win.
This rule (or the Victory Conditions explicitly specified in the scenario) determines the victor.
Note that there is victory or loss—but no "levels of victory"—as such meaning is really beyond each historical army's capabilities, no matter what happens in the battle.
6.0 Scenarios
6.1 The Battle of the Wilderness: Traditional Start
"I shall, if such is the case, punish him. If he is disposed to fight this side of Mine Run at once, he shall be accommodated."
Neither side had intended to fight in the Wilderness. The Union army planned to slip through it to displace the Confederates deploying from their winter encampments. Upon discovering Grant's movement, Lee had put in motion plans to intercept the Union troops while avoiding a general engagement until Longstreet could join him.
Caught off guard, Grant fought Lee where he was, inside the Wilderness. There would be no turning back from this day until the end of the war.
General Information
- Maps Needed: All
- First Turn: 1:00 p.m. May 5th
- Last Turn: 9:30 p.m. May 6th
- First Player: Union
Confederate Information
Set Up:
Army of Northern Virginia:
- D30.04: R.E. Lee, Army HQ (ANVa), A.P. Hill, Corps HQ (3 Corps), 5 Ala Bn (3 Corps)
Ewell's Second Corps:
- A55.12: Ewell, Corps HQ (2 Corps)
- A37.29: 1 NC Cav (2 Corps)
- A55.16: Rodes (Rodes/2), Blackford (SS/Rodes), Kirkpatrick Battery (2 Corps) Limbered
- A55.15: Massie Battery (2 Corps) Limbered
Jhnsn/2 Div:
- A47.17: Stnwl SS-b (Stnwl/Jhnsn)
- A48.15: 33 Va (Stnwl/Jhnsn)
- A48.16: 2 Va (Stnwl/Jhnsn)
- A49.19: Stnwl SS-a (Stnwl/Jhnsn)
- A49.17: J.A. Walker, 4 Va (Stnwl/Jhnsn)
- A50.17: 5 Va (Stnwl/Jhnsn)
- A51.20: Stafford SS (Stf/Jhnsn)
- A51.18: 1 La, 2 La (Stf/Jhnsn), 27 Va (Stnwl/Jhnsn)
- A52.18: Stafford, 10 La, 14 La, 15 La (Stf/Jhnsn)
- A53.19: Steuart SS-a (Strt/Jhnsn)
- A53.18: Steuart, 10 Va, 23 Va (Strt/Jhnsn)
- A54.18: Steuart SS-b (Strt/Jhnsn)
- A54.17: 3 NC (Strt, Jhnsn)
- A55.19: Jones SS-b (Jns/Jhnsn)
- A55.18: 1 NC (Strt, Jhnsn)
- A55.17: Johnson (Jhnsn/2), Milledge Battery (2 Corps) Unlimbered
- A56.19: Jones SS-a (Jns/Jhnsn)
- A56.18: J.M. Jones, 21 Va, 25 Va (Jns/Jhnsn)
- A57.19: 42 Va (Jns/Jhnsn)
- A57.20: 44 Va, 48 Va (Jns/Jhnsn)
- A58.20: 50 Va (Jns/Jhnsn)
Rodes/2 Div:
- A56.16: Rodes Div-c, Rodes Div-d (SS/Rodes)
- A57.16: Rodes Div-a, Rodes Div-b, Rodes Div-e (SS/Rodes)
- A53.14: 12 Ala (Btle/Rodes)
- A54.13: 61 Ala (Btle/Rodes)
- A55.14: Battle, 6 Ala (Btle/Rodes)
- A56.13: 3 Ala (Btle/Rodes)
- A57.14: 5 Ala (Btle/Rodes)
- A60.19: Doles, 4 Ga, 12 Ga (Dol/Rodes)
- A61.20: 44 Ga (Dol/Rodes)
- A62.19: Daniel, 2 NC Bn, 32 NC (Dan/Rodes)
- B1.20: 45 NC (Dan/Rodes)
- B2.19: 53 NC (Dan/Rodes)
Early/2 Div:
- A54.09: Hays SS (Hays/Early)
- A54.08: Hays, 5 La, 6 La, 7 La, 8 La, 9 La (Hays/Early)
- A55.10: Gordon SS-a (Grdn/Early)
- A55.09: Early (Early/2), Gordon, 31 Ga, 38 Ga (Grdn/Early)
- A55.08: 13 Ga, 26 Ga (Grdn/Early)
- A55.07: 60 Ga, 61 Ga (Grdn/Early)
- A55.06: Pegram, 13 Va, Pegram SS-a, Pegram SS-b (Peg/Early) Column
- A55.05: 31 Va (Peg/Early) Column
- A55.04: 49 Va (Peg/Early) Column
- A55.03: 52 Va (Peg/Early) Column
- A55.02: 58 Va (Peg/Early) Column
- A56.09: Gordon SS-b (Grdn/Early)
Hill's Third Corps:
- D26.05: Utterback Battery (3 Corps)
- D27.05: Wyatt Battery (3 Corps)
- D28.05: Poague, Williams Battery (3 Corps)
- D29.07: George Battery, Richards Battery (3 Corps) Limbered
Heth/3 Div:
- D24.16: Cooke SS (Ck/Heth)
- D23.14: 48 NC (Ck/Heth)
- D24.14: 27 NC (Ck/Heth)
- D25.15: MacRae, 46 NC (Ck/Heth)
- D26.15: 15 NC (Ck/Heth)
- D26.12: Heth (Heth/3), Stone, Davis SS (Dav/Heth)
- D27.12: 26 Miss (Dav/Heth) Column
- D27.11: Road Column
- D28.10: 42 Miss (Dav/Heth) Column
- D28.09: 11 Miss (Dav/Heth) Column
- D29.09: Road Column
- D29.08: 2 Miss (Dav/Heth) Column
- D30.07: 55 NC (Dav/Heth) Column
- D30.06: Road Column
- D31.06: 1 CS Bn (Dav/Heth) Column
- D31.05: Kirkland SS (Kirk/Heth)
- D32.04: Kirkland, 11 NC (Kirk/Heth) Column
- D32.03: Road Column
- D33.03: 26 NC (Kirk/Heth) Column
- D33.02: Road Column
- D34.01: Road Column
- B35.35: 44 NC (Kirk/Heth) Column
- B35.34: Road Column
- B36.33: Road Column
- B37.33: 47 NC (Kirk/Heth) Column
- B37.32: Road Column
- B37.31: Road Column
- B38.30: 52 NC (Kirk/Heth) Column
- B38.29: Road Column
- B38.28: H.H. Walker, Walker SS (Wlkr/Heth)
- B39.28: 40 Va (Wlkr/Heth) Column
- B39.27: 47 Va (Wlkr/Heth) Column
- B39.26: 55 Va (Wlkr/Heth) Column
- B40.25: 22 Va Bn (Wlkr/Heth) Column
- B40.24: 13 Ala (Wlkr/Heth) Column
- B41.24: 1 Tenn PA (Wlkr/Heth) Column
- B41.23: 7 Tenn (Wlkr/Heth) Column
- B41.22: 14 Tenn (Wlkr/Heth) Column
Confederate Breastworks:
- A48.15, A48.16, A49.17, A50.17, A51.18, A52.18, A53.18, A54.17, A55.18, A56.18, A57.19, A57.20, A58.20
Orders:
- Ewell's Corps (2 Corps) is to defend Saunders Field with its Defensive Position frontline in the existing Breastworks line. The northern and southern boundaries of the Position are due west from the two end points (A48.15, A58.20) running back to the map edge.
- 1 NC Cav is to delay Union movement along Culpeper Mine Road as per 4.5c.
- Hill's Corps (3 Corps) is to move towards Brock Road and defend the Orange Plank Road. As per 4.5b, no 3 Corps unit can create Breastworks.
- Heth's Div (Heth/3) is to move along the Orange Plank Road and deploy on both sides of Cooke's Bde to defend against an expected attack from the Brock Road. The Defensive Position follows the frontline of Cooke's current positions, extended left and right as able, and a rear at the west edge of Tapp Field. Heth's Sharpshooter units cannot be more than 3 hexes forward of this line of Infantry.
- George Arty (to post in D25.14) and Richards Arty (to post in D28.10) are assigned to Heth's Div.
Reinforcements: As per the Main Confederate Order of Arrival.
Union Information
Set Up:
US Army/Army of the Potomac:
- C53.08: U.S. Grant (US Army), Meade, Army HQ (A Potomac)
Fifth Corps:
- A54.28: Warren, Corps HQ, Shelton Battery (5 Corps) Limbered
- A54.29: Winslow Battery (5 Corps) Limbered
- C56.04: Cooper Battery (5 Corps)
- C57.04: Mink Battery (5 Corps)
- C57.05: 2/4 NY Hvy, Supply Wagon (5 Corps)
- C58.04: Rittenhouse Battery (5 Corps)
- C59.05: Phillips Battery (5 Corps)
- C59.07: Martin Battery (5 Corps) Limbered
- C59.08: Breck Battery (5 Corps) Limbered
- C58.08: Stewart Battery (5 Corps) Limbered
1/5 Div:
- A52.23: 14 US, 17 US (1/1/5)
- A53.24: 11 US, 12 US (1/1/5)
- A53.25: 91 Penn, 155 Penn (1/1/5)
- A54.23: C. Griffin (1/5), Ayres, 140 NY, 2 US (1/1/5)
- A54.24: 146 NY (1/1/5)
- A55.24: Bartlett (3/1/5), 44 NY (3/1/5)
- A55.25: 20 Maine (3/1/5)
- A56.24: 83 Penn (3/1/5)
- A56.25: 118 Penn (3/1/5)
- A57.25: 18 Mass (3/1/5)
- A56.22: 1 Mich (3/1/5)
- A53.27: 22 Mass, 32 Mass (2/1/5)
- A54.26: Sweitzer (2/1/5), 4 Mich, 9 Mass (2/1/5)
- A55.27: 62 Penn (2/1/5)
2/5 Div:
- A52.33: 104 NY, 39 Mass (1/2/5) Column
- A53.34: Leonard (1/2/5), 16 Maine (1/2/5) Column
- A54.33: Robinson (2/5), 13 Mass (1/2/5) Column
- A55.34: 11 Penn (2/2/5), 90 Penn (1/2/5) Column (errata: 11 Penn is 2/2/5, not 1/2/5; see the note after this scenario's Union orders)
- A56.34: Baxter (2/2/5), 83 NY (2/2/5) Column
- A57.34: 12 Mass, 97 NY (2/2/5) Column
- A58.34: Denison (3/2/5), 1 Md, 4 Md (3/2/5) Column
- A59.34: 7 Md, 8 Md (3/2/5) Column
3/5 Div:
- B19.24: 2 Penn Res (1/3/5)
- B20.23: 11 Penn Res (1/3/5)
- B21.23: 1 Penn Res, 7 Penn Res (1/3/5)
- B22.23: 6 Penn Res (1/3/5)
- B24.23: Crawford (3/5), McCandless (1/3/5), Fisher (3/3/5)
- B26.22: 12 Penn Res (3/3/5)
- B27.23: 10 Penn Res (3/3/5)
- B28.23: 8 Penn Res (3/3/5)
- B28.24: 5 Penn Res (3/3/5)
- B29.22: 13 Penn Res (1/3/5)
4/5 Div:
- A60.28: 2 Wisc, 6 Wisc (Iron/4/5)
- A61.28: 1 NY Bn SS (Iron/4/5)
- A61.29: 7 Ind (Iron/4/5)
- A61.30: 7 Wisc (Iron/4/5)
- A62.28: Cutler, 19 Ind, 24 Mich (Iron/4/5)
- B3.27: 150 Penn (3/4/5)
- B2.29: 121 Penn, 142 Penn (3/4/5)
- B3.29: Wadsworth (4/5), Stone, 143 Penn-a, 143 Penn-b (3/4/5)
- B4.29: 149 Penn-a, 149 Penn-b (3/4/5)
- B6.28: 95 NY (2/4/5)
- B7.29: Rice, 147 NY (2/4/5)
- B8.29: 76 NY, 56 Penn (2/4/5)
Sixth Corps:
- C11.14: Sedgwick, Corps HQ (6 Corps), Wright (1/6)
- A1.26: Supply Wagon (6 Corps), 10 Vt (1/3/6) Column
- C52.15: Harn Battery, Waterman Battery (6 Corps) Limbered
- C53.16: Adams Battery, Rhodes Battery (6 Corps) Limbered
- C54.16: Cowan Battery, Kimball Battery (6 Corps) Limbered
- C54.17: McCartney Battery, McKnight Battery (6 Corps) Limbered
- C54.15: 1/4 NY Hvy (6 Corps)
1/6 Div (with 3/2/6):
- C10.14: Upton (2/1/6), 95 Penn (2/1/6) Column
- C10.15: Road Column
- C10.16: Road Column
- C10.17: 96 Penn (2/1/6) Column
- C10.18: Road Column
- C9.19: Road Column
- C9.20: 121 NY (2/1/6) Column
- C9.21: Road Column
- C8.21: Road Column
- C8.22: 5 Maine (2/1/6) Column
- C8.23: Road Column
- C8.24: Brown (1/1/6), 15 NJ (1/1/6) Column
- C7.25: Road Column
- C7.26: Road Column
- C6.26: 2 NJ (1/1/6) Column
- C5.27: Road Column
- C6.27: Road Column
- C6.28: 3 NJ (1/1/6) Column
- C5.29: Road Column
- C4.29: 4 NJ (1/1/6) Column
- C3.29: Road Column
- C2.29: Road Column
2/6 Div (less 3/2/6):
- D19.21: 2 RI (4/2/6)
- D19.22: 37 Mass (4/2/6)
- D20.20: Eustis (4/2/6), 10 Mass, 62 NY (4/2/6)
- D20.21: 7 Mass (4/2/6)
- D21.21: 139 Penn (1/2/6)
- D22.20: Getty (2/6), Wheaton (1/2/6), 98 Penn, 102 Penn (1/2/6)
- D22.21: 93 Penn (1/2/6)
- D23.21: 4 Vt (Vt/2/6)
- D23.22: 2 Vt-a, 2 Vt-b (Vt/2/6)
- D24.20: L.A. Grant (Vt/2/6), 3 Vt (Vt/2/6)
- D24.21: 6 Vt (Vt/2/6)
- D24.22: 5 Vt (Vt/2/6)
3/6 Div:
- A4.26: Ricketts (3/6), Morris (1/3/6), 14 NJ (1/3/6) Column
- A3.26: 106 NY (1/3/6) Column
- A2.26: 151 NY, 87 Penn (1/3/6) Column
Union Breastworks:
- A50.31, A51.31, A52.30, A53.31, A54.30, A55.31, A56.30, A57.31, A58.31, A59.31, A60.31, B26.22, B27.23, B28.23, B28.24
Orders:
- V Corps. Attack along the Orange Turnpike, however only the following divisions have accepted Orders:
- Griffin's Div (1/5) and Wadsworth's Div (4/5) are to attack along Orange Turnpike without further delay, no further than 3 hexes north of the Orange Pike and no further south than the B7.xx hex row, without regard to flanks. If 1/5 suffers a Fluke Stoppage, withdraw to a destination hex south of the Orange Turnpike.
- Robinson's Div (2/5) is in Reserve (3.4d) (less Denison's Bde (3/2/5)).
- Denison's Bde (3/2/5) is to move to the right flank of Wadsworth's Div (4/5) at A58.27 to cover the gap between Wadsworth and Griffin.
- Crawford's Div (3/5) is to move along the trail towards Lacey's Farm and take a position in Command Radius of Warren. Once all the units of the Division are in Line and in Command Radius, Crawford may roll to attempt to accept the current V Corps orders. Crawford may not attempt Initiative for any purpose until he is back in Warren's CRs.
- VI Corps. The Corps HQ and Supply Trains are to move to A27.35 and its individual Divisions have the following accepted Orders, but there is no overall Corps Order.
- Sedgwick and the Corps HQ wait for Seymour's Bde (2/3/6) to get to the Germanna Plank Road at C27.03, then lead its way following Wright's Div (1/6). When the last of Wright's column passes C28.02, Sedgewick and the Corps HQ follow Wright's column to A46.26.
- Wright's Div (1/6) and Neill's Bde (3/2/6) are to move along Culpeper Mine Road to join the attack to Griffin's right, however they arrived too late to do so.
- Instead, Wright must move along the Culpeper Road in Road Column while pushing the 1 NC Cav to A45.23 as per 4.5c. Once the 1 NC Cav is removed, the column moves to the clearing around A46.26 and then due south from A44.25 to the Orange Turnpike at A54.25 forming their line of battle along and east of hexrow xx.25.
- When the head of the column hits a hex on the Orange Turnpike, its Move Order is finished. It closes up to form the north-south battle line above from A44.25 through A54.25. Wright has an Attack Order in his pocket that is instantly accepted when his marching column arrives at the Orange Turnpike and finishes forming this battle line with all regiments in position. (Make no Fluke Stoppage rolls before this acceptance occurs.) At that moment, identify one of Wright's Brigades (or the attached 3/2/6) as a Reserve and attack due West to destroy the Confederate line continuing to the map edge, if possible. Wright does not need to attack across Saunders Field's open ground.
- Getty's Div (2/6) (less 3/2/6) is assigned to II Corps and defends the Brock Road in its current position. Getty cannot roll for acceptance for an Attack Order before 4:00 p.m. but can use Initiative before then for other purposes.
- Ricketts' Div (3/6) has No Orders and waits at the Blacksmith's Shop (A4.26) until 4:00 p.m. and then reports to Warren for further orders and is under V Corps command until ordered to return to VI Corps. Cannot receive new orders until 4:00 p.m. (Exception: Seymour below.)
- Seymour's Bde (2/3/6): When Ricketts' Division is relieved at 4:00 p.m., Seymour is to Move via the Germanna Plank Road to C27.03, then with Sedgwick and the VI Corps HQ in the lead, follow the Culpeper Road to catch up to Wright's Division. At that point he is assigned to Wright's Division (and assigned Wright's current Orders) until ordered to return to Ricketts by Sedgwick. Cannot receive new orders until 4:00 p.m.
Reinforcements: As per the Main Union Order of Arrival
Victory: Use NTB 5.0.
Errata (LoB-04, 3 Aug 26), applied to this scenario: the errata sheet labels the Traditional Start scenario "Scenario 6.0"; it is 6.1 in this rulebook. The sheet makes two corrections:
- 11 Penn should be listed as 2/2/5, not 1/2/5 (the errata notes the counter is correct). Applied in the 2/5 Div list above.
- Crawford's orders are clarified as follows: "Crawford's Div (3/5) is to move along the trail towards Lacey's Farm and take a position in Command Radius of Warren. Once all the units of the Division are in Line and in Command Radius, Crawford may roll to attempt to accept the current V Corps orders. Crawford may not attempt Initiative for any purpose until he is back in Warren's CR." This restates the printed Crawford order above, changing only "CRs" to "CR".
6.2 The Battle of the Wilderness: Early Start
"Meade had just heard the bravery of his army questioned."
Contact had been made between the opposing cavalry screens early in the morning on May 5th. With both sides still not knowing the exact position and strength of the forces in the Wilderness, an eerie stillness settled in as both sides brought up their reinforcements and figured out what to do next.
Lee did not want to bring a general engagement in the Wilderness, but Grant—having found the enemy—was impelled to strike a deadly blow.
This scenario takes place in the morning before orders were accepted and the Battle of the Wilderness officially began with Warren's attack on Saunders Field. This allows players to see how they could fight the battle on their own terms and with a cleaner slate of orders.
General Information
- Maps Needed: All
- First Turn: 10:00 a.m. May 5th
- Last Turn: 9:30 p.m. May 6th
- Game Length: 128 turns
- First Player: Union
Confederate Information
Set Up:
Army of Northern Virginia:
- B42.00: R.E. Lee, Army HQ (ANVa), A.P. Hill, Corps HQ, 5 Ala Bn (3 Corps)
Ewell's Second Corps:
- A55.12: Ewell, Corps HQ (2 Corps)
- A37.29: 1 NC Cav (2 Corps)
- A55.15: Massie Battery (2 Corps) Limbered
- A55.16: Kirkpatrick Battery (2 Corps) Limbered
Jhnsn/2 Div:
- A47.17: Stnwl SS-b (Stnwl/Jhnsn)
- A48.15: 33 Va (Stnwl/Jhnsn)
- A48.16: 2 Va (Stnwl/Jhnsn)
- A49.17: J.A. Walker, 4 Va (Stnwl/Jhnsn)
- A49.19: Stnwl SS-a (Stnwl/Jhnsn)
- A50.17: 5 Va (Stnwl/Jhnsn)
- A51.20: Stafford SS (Stf/Jhnsn)
- A51.18: 1 La, 2 La (Stf/Jhnsn), 27 Va (Stnwl/Jhnsn)
- A52.18: Stafford, 10 La, 14 La, 15 La (Stf/Jhnsn)
- A53.19: Steuart SS-a (Strt/Jhnsn)
- A53.18: Steuart, 10 Va, 23 Va (Strt/Jhnsn)
- A54.18: Steuart SS-b (Strt/Jhnsn)
- A54.17: 3 NC (Strt, Jhnsn)
- A55.19: Jones SS-b (Jns/Jhnsn)
- A55.18: 1 NC (Strt, Jhnsn)
- A55.17: Johnson (Jhnsn/2), Milledge Battery (2 Corps)
- A56.19: Jones SS-a (Jns/Jhnsn)
- A56.18: J.M. Jones, 21 Va, 25 Va (Jns/Jhnsn)
- A57.19: 42 Va (Jns/Jhnsn)
- A57.20: 44 Va, 48 Va (Jns/Jhnsn)
- A58.20: 50 Va (Jns/Jhnsn)
Heth/3 Div:
- B41.10: Kirkland SS (Kirk/Heth)
- B40.08: 47 NC (Kirk/Heth)
- B41.08: Heth (Heth/3), Kirkland, 44 NC, 52 NC (Kirk/Heth)
- B41.07: 11 NC (Kirk/Heth)
- B42.08: 26 NC (Kirk/Heth)
Confederate Breastworks:
- A48.15, A48.16, A49.17, A50.17, A51.18, A52.18, A53.18, A54.17, A55.18, A56.18, A57.19, A57.20, A58.20
Orders:
- Ewell's Corps (2 Corps) is to defend Saunders Field with its Defensive Position frontline in the existing Breastworks line. The northern and southern boundaries of the Position are due west from the two end points (A48.15, A58.20) running back to the map edge.
- 1 NC Cav is to delay any Union movement along Culpeper Mine Road as per 4.5c.
- Hill's Corps (3 Corps) has no Corps Orders, but its divisions have the Orders below and on the OOA.
- Heth's Div (3 Corps) is to move to any hex on the Orange Plank Road no closer than 5 hexes to any Union Combat Unit and deploy to attack to take Brock's Crossroads (D22.20). The attack is to follow the Orange Plank Road. The attack cannot move further than 3 hexes from the road laterally. Identify any Reserve when Heth is deploying for the attack.
- Kirkland's Bde (Kirk/Heth) is to push the Union Cavalry until it disappears according to 3.4e. Before Kirkland drives away the 5 NY Cav, the remainder of Heth's Division cannot pass any of Kirkland's Brigade and must remain on the Orange Plank Road to Kirkland's rear. Once the 5 NY Cav disappears, Heth continues with his Orders. Kirk/Heth awaits the passing of Dav/Heth's Bde before re-joining the marching column.
- If Brock's Crossing is defended by Union troops when Heth arrives at D26.12, the player can opt to convert his Attack freely into a defense, if desired. This defense is not constrained by the lateral 3-hex limit of the attack, but no unit can be closer than 5 hexes to Brock's Crossing. The decision to either attack or not instantly occurs when Heth (himself) enters the deployment hex (which he must do with the first Combat Unit to get there)—make no Fluke Stoppage rolls for Heth until he enters that hex (an exception to LoB 13.1d).
Reinforcements: As per the Main Confederate Order of Arrival starting at 2:00 p.m.
Before 2:00 p.m., use the following:
- 10:00 a.m.
- at Entry Area G: Rodes/2 (less Ram/Rodes and Jhns/Rodes)
- Orders: Move to 2 Corps HQ.
- at Entry Area F: Heth/3 (less Kirk/Heth),
- Orders: See Heth's Orders above.
- at Entry Area F: Poague, George, Richards, Utterback, Williams, Wyatt
- Orders: Move to follow Heth's Division along Orange Plank Road. Stop at Widow Tapp D29.05 and await orders.
- at Entry Area G: Rodes/2 (less Ram/Rodes and Jhns/Rodes)
- 11:00 a.m.
- at Entry Area G: Early/2
- Orders: Move to 2 Corps HQ.
- at Entry Area G: Early/2
Union Information
Set Up:
US Army/Army of the Potomac:
- C53.08: U.S. Grant (US Army), Meade, Army HQ (A Potomac)
1/3/Cav:
- B41.12: McIntosh, 5 NY Cav (1/3/Cav)
Fifth Corps:
- A54.32: Warren, 5 Corps HQ, Shelton Battery Limbered (5 Corps)
- A54.33: Winslow Battery Limbered (5 Corps)
- C56.04: Cooper Battery (5 Corps)
- C57.04: Mink Battery (5 Corps)
- C58.04: Rittenhouse Battery (5 Corps)
- C59.05: Phillips Battery (5 Corps)
- C59.07: Martin Battery (5 Corps) Limbered
- C59.08: Breck Battery (5 Corps) Limbered
- C58.08: Stewart Battery (5 Corps) Limbered
- C57.05: 2/4 NY Hvy, Supply Wagon (5 Corps)
1/5 Div:
- A50.31: 17 US (1/1/5)
- A50.32: 12 US (1/1/5)
- A51.31: 14 US (1/1/5)
- A51.32: 155 Penn (1/1/5)
- A52.30: Ayres, 11 US (1/1/5)
- A52.31: 2 US (1/1/5)
- A53.31: 140 NY (1/1/5)
- A53.32: 91 Penn (1/1/5)
- A54.30: 1 Mich (3/1/5)
- A54.31: C. Griffin (1/5), 146 NY (1/1/5)
- A55.31: 118 Penn (3/1/5)
- A55.32: 44 NY (3/1/5)
- A56.30: Bartlett, 83 Penn (3/1/5)
- A56.31: 20 Maine (3/1/5)
- A57.31: 18 Mass (3/1/5)
- A58.31: 9 Mass (2/1/5)
- A58.32: 32 Mass (2/1/5)
- A59.31: Sweitzer, 4 Mich (2/1/5)
- A59.32: 22 Mass (2/1/5)
- A60.31: 62 Penn (2/1/5)
2/5 Div:
- A52.34: 39 Mass, 104 NY (1/2/5) Column
- A53.35: Leonard, 16 Maine (1/2/5) Column
- A54.34: Robinson (2/5), 13 Mass (1/2/5) Column
- A55.35: 11 Penn (2/2/5), 90 Penn (1/2/5) Column
- A56.34: Baxter, 83 NY (2/2/5) Column
- A57.34: 12 Mass, 97 NY (2/2/5) Column
- A58.34: Denison, 1 Md, 4 Md (3/2/5) Column
- A59.34: 7 Md, 8 Md (3/2/5) Column
3/5 Div:
- B29.22: 13 Penn Res (1/3/5)
- B26.22: 12 Penn Res (3/3/5)
- B27.23: 10 Penn Res (3/3/5)
- B28.23: Crawford (3/5), Fisher, 8 Penn Res (3/3/5)
- B28.24: 5 Penn Res (3/3/5)
- B24.23: 2 Penn Res, 11 Penn Res (1/3/5)
- B25.24: McCandless (1/3/5), 1 Penn Res, 7 Penn Res (1/3/5)
- B25.25: 6 Penn Res (1/3/5)
4/5 Div:
- A61.32: 2 Wisc, 6 Wisc (Iron/4/5)
- A62.30: 1 NY Bn SS (Iron/4/5)
- A62.32: 7 Ind (Iron/4/5)
- A62.33: 7 Wisc (Iron/4/5)
- B1.33: Cutler, 19 Ind, 24 Mich (Iron/4/5)
- B2.33: 121 Penn, 142 Penn (3/4/5)
- B1.34: 95 NY (2/4/5)
- B2.34: Rice, 147 NY (2/4/5)
- B3.32: 150 Penn (3/4/5)
- B3.34: Wadsworth (4/5), Stone, 143 Penn-a, 143 Penn-b (3/4/5)
- B3.35: 76 NY, 56 Penn (2/4/5)
- B4.34: 149 Penn-a, 149 Penn-b (3/4/5)
Sixth Corps:
- A1.26: 10 Vt (1/3/6) Column, Supply Wagon (6 Corps)
2/6 Div:
- C52.11: Getty (2/6), L.A. Grant, 6 Vt (Vt/2/6) Column
- C51.11: Road Column
- C50.10: Road Column
- C49.10: 3 Vt (Vt/2/6) Column
- C48.09: Road Column
- C47.09: Road Column
- C46.08: 4 Vt (Vt/2/6) Column
- C45.08: Road Column
- C44.07: Road Column
- C43.07: 5 Vt (Vt/2/6) Column
- C42.06: Road Column
- C41.06: Road Column
- C40.05: 2 Vt-a (Vt/2/6) Column
- C39.05: Road Column
- C38.05: 2 Vt-b (Vt/2/6) Column
- C37.05: Road Column
- C36.04: Wheaton, 102 Penn (1/2/6) Column
- C35.05: 139 Penn (1/2/6) Column
- C34.04: Road Column
- C33.05: Road Column
- C32.04: 98 Penn (1/2/6) Column
- C31.04: Road Column
- C30.04: 62 NY (1/2/6) Column
- C29.04: 93 Penn (1/2/6) Column
- C28.03: Road Column
- C27.03: Eustis, 10 Mass (4/2/6) Column
- C26.02: Road Column
- C25.02: 2 RI (4/2/6) Column
- C24.01: Road Column
- C23.01: Road Column
- A22.34: 7 Mass (4/2/6) Column
- A21.34: Road Column
- A20.33: 37 Mass (4/2/6) Column
- A19.33: Road Column
- A18.32: Road Column
3/6 Div:
- A4.26: Ricketts (3/6), Morris (1/3/6), 14 NJ (1/3/6) Column
- A3.26: 106 NY (1/3/6) Column
- A2.26: 151 NY, 87 Penn (1/3/6) Column
Union Breastworks:
- A50.31, A51.31, A52.30, A53.31, A54.30, A55.31, A56.30, A57.31, A58.31, A59.31, A60.31, B26.22, B27.23, B28.23, B28.24
Orders:
- 5 NY Cav is to delay any Confederate movement past Parker's Store according to 3.4e.
- V Corps has used Initiative to establish its current position as a defense and is awaiting Attack Orders.
- VI Corps has no Corps Orders, but the following Divisions have their own Orders to follow:
- Getty's Div (2/6, less 3/2/6) Moves to Brock's Crossing (D20.22) and can use Initiative to establish a defense along the Brock Road. Getty cannot roll acceptance for any Attack Order before 4:00pm.
- Ricketts' Div (3/6) has No Orders and waits at the Blacksmith's Shop (A4.26) until 4:00 p.m. and then reports to Warren for further orders and is under V Corps command until ordered to return to VI Corps.
Reinforcements: As per the Main Union Order of Arrival starting at 1:00 p.m.
Before 1:00 p.m., use the following:
- 10:30 a.m.
- at Entry Area A: 1/4 NY Hvy, Adams, Cowan, Harn, Kimball, McCartney, McKnight, Rhodes, and Waterman Batteries (6 Corps)
- Orders: Move to Wilderness Tavern C54.15 and await orders.
- at Entry Area A: 1/4 NY Hvy, Adams, Cowan, Harn, Kimball, McCartney, McKnight, Rhodes, and Waterman Batteries (6 Corps)
- 12:30 p.m.
- at Entry Area B: Sedgwick, HQ (6 Corps), 1/6 Div (less 1 NJ, 10 NJ-a, 10 NJ-b (1/1/6), 3/1/6, and 4/1/6)
- Orders: As per 6.1.
- at Entry Area B: Sedgwick, HQ (6 Corps), 1/6 Div (less 1 NJ, 10 NJ-a, 10 NJ-b (1/1/6), 3/1/6, and 4/1/6)
Victory: Use NTB 5.0.
6.3 A Weird, Uncanny Contest: Warren's Attack
"A weird, uncanny contest—a battle of invisibles with invisibles."
This scenario covers the Fifth Corps attack in the afternoon of the first day. After initial foot-dragging, Warren finally commits to the attack but does so with only half of his corps at first.
General Information
- Maps Needed: Maps A and B
- Map Area: South of A47.xx and North of B9.xx inclusive
- First Turn: 1:00 p.m. May 5th
- Last Turn: 2:45 p.m. May 5th
- Game Length: 8 Turns
- First Player: Union
- Special Rule: Ignore Fluke Stoppage checks for the entire scenario.
Confederate Information
Set Up:
Ewell's Second Corps:
- A55.12: Ewell, Corps HQ (2 Corps)
- A55.16: Rodes (Rodes/2), Blackford (SS/Rodes), Kirkpatrick Battery (2 Corps) Limbered
- A55.15: Massie Battery (2 Corps) Limbered
Jhnsn/2 Div:
- A47.17: Stnwl SS-b (Stnwl/Jhnsn)
- A48.15: 33 Va (Stnwl/Jhnsn)
- A48.16: 2 Va (Stnwl/Jhnsn)
- A49.19: Stnwl SS-a (Stnwl/Jhnsn)
- A49.17: J.A. Walker, 4 Va (Stnwl/Jhnsn)
- A50.17: 5 Va (Stnwl/Jhnsn)
- A51.20: Stafford SS (Stf/Jhnsn)
- A51.18: 1 La, 2 La (Stf/Jhnsn), 27 Va (Stnwl/Jhnsn)
- A52.18: Stafford, 10 La, 14 La, 15 La (Stf/Jhnsn)
- A53.19: Steuart SS-a (Strt/Jhnsn)
- A53.18: Steuart, 10 Va, 23 Va (Strt/Jhnsn)
- A54.18: Steuart SS-b (Strt/Jhnsn)
- A54.17: 3 NC (Strt, Jhnsn)
- A55.19: Jones SS-b (Jns/Jhnsn)
- A55.18: 1 NC (Strt, Jhnsn)
- A55.17: Johnson (Jhnsn/2), Milledge Battery (2 Corps) Unlimbered
- A56.19: Jones SS-a (Jns/Jhnsn)
- A56.18: J.M. Jones, 21 Va, 25 Va (Jns/Jhnsn)
- A57.19: 42 Va (Jns/Jhnsn)
- A57.20: 44 Va, 48 Va (Jns/Jhnsn)
- A58.20: 50 Va (Jns/Jhnsn)
Rodes/2 Div:
- A56.16: Rodes Div-c, Rodes Div-d (SS/Rodes)
- A57.16: Rodes Div-a, Rodes Div-b, Rodes Div-e (SS/Rodes)
- A53.14: 12 Ala (Btle/Rodes)
- A54.13: 61 Ala (Btle/Rodes)
- A55.14: Battle, 6 Ala (Btle/Rodes)
- A56.13: 3 Ala (Btle/Rodes)
- A57.14: 5 Ala (Btle/Rodes)
- A60.19: Doles, 4 Ga, 12 Ga (Dol/Rodes)
- A61.20: 44 Ga (Dol/Rodes)
- A62.19: Daniel, 2 NC Bn, 32 NC (Dan/Rodes)
- B1.20: 45 NC (Dan/Rodes)
- B2.19: 53 NC (Dan/Rodes)
Early/2 Div:
- A54.09: Hays SS (Hays/Early)
- A54.08: Hays, 5 La, 6 La, 7 La, 8 La, 9 La (Hays/Early)
- A55.10: Gordon SS-a (Grdn/Early)
- A55.09: Early (Early/2), Gordon, 31 Ga, 38 Ga (Grdn/Early)
- A55.08: 13 Ga, 26 Ga (Grdn/Early)
- A55.07: 60 Ga, 61 Ga (Grdn/Early)
- A55.06: Pegram, 13 Va, Pegram SS-a, Pegram SS-b (Peg/Early) Column
- A55.05: 31 Va (Peg/Early) Column
- A55.04: 49 Va (Peg/Early) Column
- A55.03: 52 Va (Peg/Early) Column
- A55.02: 58 Va (Peg/Early) Column
- A56.09: Gordon SS-b (Grdn/Early)
Confederate Breastworks:
- A48.15, A48.16, A49.17, A50.17, A51.18, A52.18, A53.18, A54.17, A55.18, A56.18, A57.19, A57.20, A58.20
Orders:
- Ewell's Corps (2 Corps) is to defend Saunders Field with its Defensive Position frontline in the existing Breastworks line. The northern and southern boundaries of the Position are due west from the two end points (A48.15, B2.19).
Errata (LoB-04, 3 Aug 26), Scenario 6.3: Ewell's Orders should extend to include the Doles and Daniel Brigades (A60.19 and A62.19 in the Rodes/2 Div list above). The end points are (A48.15, B2.19), as printed. The errata's other correction for this scenario (11 Penn should be 2/2/5, not 1/2/5) is already reflected in the 2/5 Div list above, which reads 11 Penn (2/2/5).
Reinforcements: None.
Union Information
Set Up:
Fifth Corps:
- A54.28: Warren, Corps HQ, Shelton Battery (5 Corps) Limbered
- A54.29: Winslow Battery (5 Corps) Limbered
1/5 Div:
- A52.23: 14 US, 17 US (1/1/5)
- A53.24: 11 US, 12 US (1/1/5)
- A53.25: 91 Penn, 155 Penn (1/1/5)
- A54.23: C. Griffin (1/5), Ayres, 140 NY, 2 US (1/1/5)
- A54.24: 146 NY (1/1/5)
- A55.24: Bartlett (3/1/5), 44 NY (3/1/5)
- A55.25: 20 Maine (3/1/5)
- A56.24: 83 Penn (3/1/5)
- A56.25: 118 Penn (3/1/5)
- A57.25: 18 Mass (3/1/5)
- A56.22: 1 Mich (3/1/5)
- A53.27: 22 Mass, 32 Mass (2/1/5)
- A54.26: Sweitzer (2/1/5), 4 Mich, 9 Mass (2/1/5)
- A55.27: 62 Penn (2/1/5)
2/5 Div:
- A52.33: 104 NY, 39 Mass (1/2/5) Column
- A53.34: Leonard (1/2/5), 16 Maine (1/2/5) Column
- A54.33: Robinson (2/5), 13 Mass (1/2/5) Column
- A55.34: 11 Penn (2/2/5), 90 Penn (1/2/5) Column
- A56.34: Baxter (2/2/5), 83 NY (2/2/5) Column
- A57.34: 12 Mass, 97 NY (2/2/5) Column
- A58.34: Denison (3/2/5), 1 Md, 4 Md (3/2/5) Column
- A59.34: 7 Md, 8 Md (3/2/5) Column
4/5 Div:
- A60.28: 2 Wisc, 6 Wisc (Iron/4/5)
- A61.28: 1 NY Bn SS (Iron/4/5)
- A61.29: 7 Ind (Iron/4/5)
- A61.30: 7 Wisc (Iron/4/5)
- A62.28: Cutler, 19 Ind, 24 Mich (Iron/4/5)
- B3.27: 150 Penn (3/4/5)
- B2.29: 121 Penn (3/4/5), 142 Penn (3/4/5)
- B3.29: Wadsworth (4/5), Stone, 143 Penn-a, 143 Penn-b (3/4/5)
- B4.29: 149 Penn-a, 149 Penn-b (3/4/5)
- B6.28: 95 NY (2/4/5)
- B7.29: Rice, 147 NY (2/4/5)
- B8.29: 76 NY, 56 Penn (2/4/5)
Union Breastworks:
- A50.31, A51.31, A52.30, A53.31, A54.30, A55.31, A56.30, A57.31, A58.31, A59.31, A60.31
Orders:
- V Corps. Attack along the Orange Turnpike; the following divisions have accepted Orders:
- Griffin's Div (1/5) and Wadsworth's Div (4/5) are to attack along Orange Turnpike without further delay, no further than 3 hexes north of the Orange Pike and no further south than the play area, without regard to flanks.
- Robinson's Div (2/5) is in Reserve (3.4d) (less Denison's Bde (3/2/5)).
- Denison's Bde (3/2/5) is to move to the right flank of Wadsworth's Div (4/5) at A58.27 to cover the gap between Wadsworth and Griffin.
Reinforcements: None.
Victory: The Union wins if it occupies at any time both A55.17 and A61.15. If the Union only occupies one of them during play, then it is a Draw. If the Union never occupies either hex, the Confederates win.
6.4 The Earth Had Swallowed Them: Saunders Field
"The regiment melted away like snow. Men disappeared as if the earth had swallowed them."
This scenario focuses on just the fighting at Saunders Field where the first major blows of the battle took place. After some initial progress, the Confederates counterattacked, and the open field became a deadly no man's land.
General Information
- Maps Needed: Map A
- Map Area: South of A51.xx and North of B9.xx, inclusive
- First Turn: 1:00 p.m. May 5th
- Last Turn: 2:30 p.m. May 5th
- Game Length: 7 Turns
- First Player: Union
- Special Rule: Ignore Fluke Stoppage checks for the entire scenario. Confederate Information
Set Up:
Ewell's Second Corps:
- A55.12: Ewell, Corps HQ (2 Corps)
- A55.16: Rodes (Rodes/2), Kirkpatrick Battery (2 Corps) Limbered
- A55.15: Massie Battery (2 Corps) Limbered
Jhnsn/2 Div:
- A51.18: 1 La, 2 La (Stf/Jhnsn)
- A51.20: Stafford SS (Stf/Jhnsn)
- A52.18: Stafford, 10 La, 14 La, 15 La (Stf/Jhnsn)
- A53.19: Steuart SS-a (Strt/Jhnsn)
- A53.18: Steuart, 10 Va, 23 Va (Strt/Jhnsn)
- A54.18: Steuart SS-b (Strt/Jhnsn)
- A54.17: 3 NC (Strt, Jhnsn)
- A55.19: Jones SS-b (Jns/Jhnsn)
- A55.18: 1 NC (Strt, Jhnsn)
- A55.17: Johnson (Jhnsn/2), Milledge Battery (2 Corps) Unlimbered
- A56.19: Jones SS-a (Jns/Jhnsn)
- A56.18: J.M. Jones, 21 Va, 25 Va (Jns/Jhnsn)
- A57.19: 42 Va (Jns/Jhnsn)
- A57.20: 44 Va, 48 Va (Jns/Jhnsn)
- A58.20: 50 Va (Jns/Jhnsn)
Rodes/2 Div (-):
Note the Victory Condition effect of moving Battle's units.
- A53.14: 12 Ala (Btle/Rodes)
- A54.13: 61 Ala (Btle/Rodes)
- A55.14: Battle, 6 Ala (Btle/Rodes)
- A56.13: 3 Ala (Btle/Rodes)
- A57.14: 5 Ala (Btle/Rodes)
Confederate Breastworks:
- A51.18, A52.18, A53.18, A54.17, A55.18, A56.18, A57.19, A57.20, A58.20
Orders:
- Ewell's Corps (2 Corps) is to defend Saunders Field with its Defensive Position frontline in the existing Breastworks line. The northern and southern boundaries of the Position are due west from the two end points (A51.18, A58.20).
Reinforcements: None.
Union Information
Set Up:
Fifth Corps:
- A54.28: Warren, Corps HQ, Shelton Battery (5 Corps) Limbered
- A54.29: Winslow Battery (5 Corps) Limbered
1/5 Div:
- A52.23: 14 US, 17 US (1/1/5)
- A53.24: 11 US, 12 US (1/1/5)
- A53.25: 91 Penn, 155 Penn (1/1/5)
- A54.23: C. Griffin (1/5), Ayres, 140 NY, 2 US (1/1/5)
- A54.24: 146 NY (1/1/5)
- A55.24: Bartlett (3/1/5), 44 NY (3/1/5)
- A55.25: 20 Maine (3/1/5)
- A56.24: 83 Penn (3/1/5)
- A56.25: 118 Penn (3/1/5)
- A57.25: 18 Mass (3/1/5)
- A56.22: 1 Mich (3/1/5)
- A53.27: 22 Mass, 32 Mass (2/1/5)
- A54.26: Sweitzer (2/1/5), 4 Mich, 9 Mass (2/1/5)
- A55.27: 62 Penn (2/1/5)
Breastworks: None.
Orders:
- V Corps. Attack along the Orange Turnpike, the following divisions have accepted Orders:
- Griffin's Div (1/5) is to attack along Orange Turnpike without further delay, no further than 3 hexes north of the Orange Pike and no further south than the play area, without regard to flanks.
Reinforcements: None.
Victory: There are two Victory Conditions: The occupation of A55.17 and the 'use' of Battle's Bde (Btle/Rodes).
- The Union wins A55.17 if they ever occupy the hex during play, no matter how briefly. Otherwise, Confederates win it.
- Battle's Brigade is "used" if any of its units (Rodes does not count for Battle's use) ever exit their starting hex for any purpose (even if they return). If Battle is used, Union wins; if not Confederates win.
A side wins the scenario if they 'win' both Victory conditions. If neither side wins both, it is a Draw.
6.5 Death Was in Every Shot: Wright's Attack
"Each one melted as did the first; death was in every shot and we held fast to our works."
This scenario follows Sedgwick's attack on Ewell's left flank. The hope was for a coordinated attack with Warren but delays coming down the Culpeper Mine Road did not allow this.
General Information
- Map Needed: Map A
- Map Area: South of A38.xx and North of A55.xx inclusive
- First Turn: 3:30 p.m. May 5th
- Last Turn: 7:45 p.m. May 5th
- Game Length: 17 Turns
- First Player: Union
Confederate Information
Set Up:
Ewell's Second Corps:
- A50.16: Kirkpatrick Battery (2 Corps)
- A55.16: Massie Battery (2 Corps)
Jhnsn/2 Div:
- A47.17: Stnwl SS-b (Stnwl/Jhnsn)
- A48.15: 33 Va (Stnwl/Jhnsn)
- A48.16: 2 Va (Stnwl/Jhnsn)
- A49.19: Stnwl SS-a (Stnwl/Jhnsn)
- A49.17: J.A. Walker, 4 Va (Stnwl/Jhnsn)
- A50.17: 5 Va (Stnwl/Jhnsn)
- A51.20: Stafford SS (Stf/Jhnsn)
- A51.18: 1 La, 2 La (Stf/Jhnsn), 27 Va (Stnwl/Jhnsn)
- A52.18: Stafford, 10 La [1], 14 La [2], 15 La (Stf/Jhnsn)
- A53.20: Steuart SS-a (Strt/Jhnsn)
- A53.18: Steuart, 10 Va [5], 23 Va [3] (Strt/Jhnsn)
- A54.20: Steuart SS-b (Strt/Jhnsn)
- A54.17: 3 NC [5] (Strt, Jhnsn)
- A55.18: 1 NC [7] (Strt, Jhnsn)
- A55.17: Johnson (Jhnsn/2)
Early/2 Div:
-
A55.14: Hays SS (Hays/Early)
-
A55.13: Ewell, Corps HQ (2 Corps), Early (Early/2), Hays, 5 La, 6 La, 7 La, 8 La, 9 La (Hays/Early)
-
A55.12: Pegram, 13 Va, Pegram SS-a, Pegram SS-b (Peg/Early) Column
-
A55.11: 31 Va, 49 Va (Peg/Early) Column
-
A55.10: 52 Va, 58 Va (Peg/Early) Column Breastworks:
-
A48.15, A48.16, A49.17, A50.17, A51.18, A52.18, A53.18, A54.17, A55.18
Orders:
- Ewell's Corps (2 Corps) is to defend in place using the parts of the Defensive Position listed in scenario 6.1 within the play area.
Reinforcements: None.
Victory: The Union wins if both Confederate Artillery Batteries are either destroyed or abandon their starting hexes (A50.16 and A55.16). If only one Confederate Artillery Battery does so, the game is a Draw. The Confederates win the scenario if neither Battery does so.
Union Information
Set Up:
1/6 Div:
- A46.26: Wright (1/6)
- A48.25: Russell, 49 Penn-a, 49 Penn-b (3/1/6)
- A48.27: 119 Penn (3/1/6)
- A49.25: 6 Maine, 5 Wisc (3/1/6)
- A50.25: 10 NJ-a, 10 NJ-b (1/1/6)
- A49.27: 4 NJ (1/1/6)
- A50.27: 1 NJ (1/1/6)
- A51.27: Brown (1/1/6), 2 NJ (1/1/6)
- A51.29: 3 NJ (1/1/6)
- A52.25: Upton (2/1/6), 5 Maine, 121 NY (2/1/6)
- A53.25: 96 Penn, (2/1/6)
- A53.27: 15 NJ (1/1/6)
- A54.25: 95 Penn, (2/1/6)
3/2/6 Bde:
- A45.26: 77 NY (3/2/6)
- A45.28: 61 Penn (3/2/6)
- A46.25: Neill (3/2/6), 49 NY (3/2/6)
- A46.28: 43 NY (3/2/6)
- A47.26: 7 Maine (3/2/6)
Breastworks: None.
Orders:
- Wright's Div (1/6), reinforced with Neill's Bde (3/2/6) and Seymour's Bde (2/3/6, below), is to attack directly west (forward) into the Confederate forces. Before the first turn, identify one of Wright's Brigades (or the attached 3/2/6, but not the late arriving 2/3/6) as a Reserve, and attack due West to destroy the Confederate line continuing to the map edge, if possible. Wright does need not to attack across Saunders Field's open ground.
Reinforcements:
- 6:00 p.m.
- at A38.28: Sedgwick (6 Corps), 2/3/6
- Orders: Move to left flank of the Wright's Division join their attack.
- at A38.28: Sedgwick (6 Corps), 2/3/6
6.6 Death Holds High Carnival: Hancock vs. Hill
"Brave men are falling like autumn leaves, and death holds high carnival in our ranks."
Heth was pursuing Federal cavalry down the Orange Plank Road in the morning of May 5th when he was beaten to the Brock Crossing by Getty's Second Division. Getty was ordered to attack in the late afternoon and was reinforced by parts of Hancock's II Corps coming back from Todd's Tavern. The fighting was intense but unresolved and required another day of fighting for the exhausted troops.
General Information
- Map Needed: Map D
- Map Area: South of D17.xx (inclusive)
- First Turn: 4:15 p.m. May 5th
- Last Turn: 9:30 p.m. May 5th
- Game Length: 18 Turns
- First Player: Union
Confederate Information
Set Up:
Hill's Third Corps:
- D30.04: R.E. Lee, Army HQ (ANVa), A.P. Hill, Corps HQ, 5 Ala Bn (3 Corps)
- D26.05: Poague (3 Corps), Utterback Battery (3 Corps)
- D27.05: Wyatt Battery (3 Corps)
- D28.05: Williams Battery (3 Corps)
- D25.14: George Battery (3 Corps)
- D28.10: Richards Battery (3 Corps)
Heth/3 Div:
- D26.12: Heth (Heth/3)
- D25.12: Kirkland, 44 NC, 52 NC (Kirk/Heth)
- D24.12: Kirkland SS (Kirk/Heth)
- D24.11: 26 NC (Kirk/Heth)
- D23.12: 47 NC (Kirk/Heth)
- D28.11: 11 NC (Kirk/Heth)
- D17.11: 26 Miss (Dav/Heth)
- D18.11: 42 Miss (Dav/Heth)
- D19.12: Stone, 11 Miss (Dav/Heth)
- D19.14: Davis SS (Dav/Heth)
- D20.12: 2 Miss (Dav/Heth)
- D21.13: 55 NC (Dav/Heth), 1 CS Bn (Dav/Heth)
- D22.13: 48 NC (Ck/Heth)
- D23.14: 27 NC (Ck/Heth)
- D24.16: Cooke SS (Ck/Heth)
- D24.14: MacRae, 46 NC (Ck/Heth)
- D26.14: 15 NC (Ck/Heth)
- D27.14: 13 Ala, 14 Tenn (Wlkr/Heth)
- D28.16: Walker SS (Wlkr/Heth)
- D28.14: 1 Tenn PA, 7 Tenn (Wlkr/Heth)
- D29.14: H.H. Walker, 47 Va, 55 Va (Wlkr/Heth)
- D30.13: 22 Va Bn, 40 Va (Wlkr/Heth)
Orders:
- Heth's Div (Heth/3) is to Defend with its Position's boundaries of 17.xx (north) to 37.xx (south). The frontal boundary is the line of infantry running from D17.11 to D30.13 and continuing along the xx.13 hexrow to D37.13. Sharpshooter units can move no further than 3 hexes east of this line.
Reinforcements:
- Available for orders at D29.01: Wcx/3 Div
- Orders: Wilcox has No Orders and will require Orders directly from Lee (no need to go through Hill) to leave his position and do something else. Wilcox cannot roll for acceptance of new orders before 5:00 pm. Each of Wilcox's regular Infantry units occupies one hex and the movement back onto the play area is conducted in a long conga line extending off D29.01. Each hex can only have one regular Infantry unit but can contain any number of Leaders or Open Order units.
Union Information
Set Up:
Second Corps:
- D22.20: Hancock (2 Corps)
- D22.21: Corps HQ (2 Corps)
3/2 Div:
- D26.20: Hays, 17 Maine (2/3/2)
- D26.21: 63 Penn (2/3/2)
- D27.20: 1 USSS-a, 1 USSS-b (2/3/2)
- D27.21: Birney (3/2), 4 Maine, 57 Penn (2/3/2)
- D27.22: 3 Mich, 105 Penn (2/3/2)
Breastworks:
- D18.21, D19.21, D20.20, D21.21, D22.20, D23.21, D24.20, D25.21
Breastworks in Construction:
- D26.20, D27.21, D28.20, D29.21, D30.21
3/2 Div (continued):
- D28.21: 5 Mich, 93 NY (2/3/2)
- D28.19: 2 USSS-a (1/3/2)
- D28.20: 20 Ind, 141 Penn (1/3/2)
- D29.20: 2 USSS-b (1/3/2)
- D29.21: Ward, 86 NY, 124 NY (1/3/2)
- D29.22: 3 Maine, 99 Penn (1/3/2)
- D30.21: 40 NY (1/3/2)
- D30.22: 110 Penn (1/3/2)
4/2 Div:
- D31.22: 5 NJ, 8 NJ, 26 Penn (1/4/2)
- D31.23: 6 NJ, 115 Penn (1/4/2)
- D32.22: McAllister, 7 NJ, 11 NJ (1/4/2)
- D32.23: Mott (4/2), 1 Mass, 16 Mass (1/4/2)
- D33.24: 11 Mass, 73 NY (Excl/4/2)
- D34.23: Brewster, 70 NY, 84 Penn (Excl/4/2)
- D34.24: 74 NY, 120 NY (Excl/4/2)
- D35.24: 71 NY, 72 NY (Excl/4/2)
2/6 Div:
- D20.18: 2 RI (4/2/6)
- D20.19: 37 Mass (4/2/6)
- D21.19: Eustis (4/2/6), 10 Mass (4/2/6), 62 NY (1/2/6)
- D21.20: 7 Mass (4/2/6)
- D22.18: Getty (2/6), Wheaton, 139 Penn (1/2/6)
- D22.19: 93 Penn (1/2/6)
- D23.19: 98 Penn, 102 Penn (1/2/6)
- D24.18: 4 Vt (Vt/2/6)
- D25.19: L.A. Grant (Vt/2/6), 6 Vt (Vt/2/6)
- D25.20: 2 Vt-a, 2 Vt-b (Vt/2/6)
- D26.18: 3 Vt (Vt/2/6)
- D26.19: 5 Vt (Vt/2/6)
Orders:
- II Corps: Hancock must use Initiative (3.2) to add additional Orders for this scenario. He commands all five divisions in the scenario, but only four divisions may be given Attack Orders at any one time (Getty's Division already has been).
- Getty's Div (2/6) is to Attack north of the Orange Plank Road (with Vt/2/6 south of the Orange Plank Road) from the line of departure along Brock Road with an Axis of Advance due west. Getty has no and cannot establish a reserve.
- Birney's Div (3/2) is to Defend using a Position with boundaries of 26.xx to the north and 30.xx to the south, and a frontline of xx.19, inclusive. It has been building Breastworks in this position for 2.5 hours (his Breastworks will be completed in each Brock Road hex at 4:45pm), but he can be given Attack Orders at any time.
- Mott's Div (4/2) has No Orders.
Reinforcements: Ignore all the normally entering II Corps batteries for this scenario.
- 4:30 p.m.
- at Entry Area D: Gibbons' Div (2/2)
- Orders: Move to left flank of the Corps, set up a Defensive Position (35.xx south to 40.xx) and entrench. They cannot roll for Attack orders before 5:30 pm.
- at Entry Area D: Gibbons' Div (2/2)
- 6:00 p.m.
- at Entry Area D: Barlow's Div (1/2)
- Orders: Move to left flank of the Corps, set up a Defensive Position (41.xx south to 43.xx) and entrench. They cannot roll for Attack orders before 5:30 pm.
- at Entry Area D: Barlow's Div (1/2)
- 7:00 p.m.
- at Entry Area D: Supply Wagon (2 Corps)
- Orders: Move to the 2 Corps HQ.
- at Entry Area D: Supply Wagon (2 Corps)
Victory: The player occupying D27.12 at the end of play wins the scenario.
6.7 Victory Without Triumph: Day 2 Start
"Everything in the army is to be put in."
The fighting on the first day had proven to be as inconclusive as it was unintended. Lee had parried Grant's thrusts while Grant was unable to coordinate his forces.
On the second day, Grant planned for a grand offensive using the full weight of his army. Lee was hanging on with five depleted divisions and ordered his Old War Horse (Longstreet) to quickly take his First Corps (augmented by Anderson's Division) to strengthen the army's exhausted right flank.
The battle would swing back and forth all day.
General Information
- Maps Needed: All
- First Turn: 5:00 a.m. May 6th
- Last Turn: 9:30 p.m. May 6th
- Game Length: 69 Turns
- First Player: Union
Confederate Information
Set Up:
Army of Northern Virginia:
- D30.04: R.E. Lee, Army HQ (ANVa), A.P. Hill, Corps HQ, 5 Ala Bn (3 Corps)
Ewell's Second Corps:
- A55.12: Ewell (1 Command side per 4.3), Corps HQ (2 Corps), Long (2 Corps Arty)
- A55.08: Jones Battery (2 Corps) Limbered
- A55.07: Griffin Battery (2 Corps) Limbered
- A55.06: Graham Battery (2 Corps) Limbered
- A55.05: Smith Battery (2 Corps) Limbered
- A55.04: Dance Battery (2 Corps) Limbered
- A55.03: Garber Battery (2 Corps) Limbered
- A55.02: Tanner Battery (2 Corps) Limbered
- A55.01: Carrington Battery (2 Corps) Limbered
- A38.13: Page Battery (2 Corps)
- A39.14: Reese Battery (2 Corps)
- A40.14: Fry Battery (2 Corps)
- A42.15: Carter Battery (2 Corps)
- A50.16: Kirkpatrick Battery (2 Corps)
- A55.17: Johnson (Jhnsn/2), Massie Battery (2 Corps)
- A57.18: Milledge Battery (2 Corps)
- B3.22: Cooper Battery (2 Corps)
- B7.21: Hardwicke Battery (2 Corps)
- B11.22: Ramseur (Ram/Rodes), Carpenter Battery (2 Corps)
Early/2 Div:
- A36.16: Gordon SS-b (Grdn/Early)
- A36.14: 26 Ga, 61 Ga (Grdn/Early)
- A37.15: 60 Ga (Grdn/Early)
- A38.16: Gordon SS-a (Grdn/Early)
- A38.14: Gordon, 13 Ga (Grdn/Early)
- A39.15: 38 Ga (Grdn/Early)
- A40.15: 31 Ga (Grdn/Early)
- A41.18: Pegram SS-b (Peg/Early)
- A41.16: 49 Va [4] (Peg/Early)
- A42.16: 13 Va [3], 52 Va [5] (Peg/Early)
- A43.19: Pegram SS-a (Peg/Early)
- A43.17: Early (Early/2), Repl, 31 Va [4], 58 Va [6] (Peg/Early)
- A44.17: 6 La [1], 8 La [2] (Hays/Early)
- A45.17: Hays, 9 La [3] (Hays/Early)
- A45.19: Hays SS (Hays/Early)
- A46.16: 5 La [2], 7 La [2] (Hays/Early)
Jhnsn/2 Div:
- A47.18: Stafford SS (Stf/Jhnsn)
- A47.16: 1 La, 2 La [2] (Stf/Jhnsn)
- A48.16: Stafford, 10 La [1], 14 La [2], 15 La (Stf/Jhnsn)
- A49.19: Stnwl SS-a (Stnwl/Jhnsn)
- A49.17: 33 Va [3] (Stnwl/Jhnsn)
- A50.17: J.A. Walker, 2 Va [4], 4 Va [4] (Stnwl/Jhnsn)
- A51.20: Stnwl SS-b (Stnwl/Jhnsn)
- A51.18: 5 Va [6], 27 Va [2] (Stnwl/Jhnsn)
- A52.18: 37 Va (Strt/Jhnsn)
- A53.20: Steuart SS-a (Strt/Jhnsn)
- A53.18: Steuart, 10 Va [5], 23 Va [3] (Strt/Jhnsn)
- A54.17: 3 NC [5] (Strt/Jhnsn)
- A55.19: Steuart SS-b (Strt/Jhnsn)
- A55.18: 1 NC [7] (Strt/Jhnsn)
- A56.17: Jones SS-a (Jns/Jhnsn)
- A56.16: Repl, 21 Va [4], 25 Va [1], 44 Va [3] (Jns/Jhnsn)
- A57.17: 42 Va [5], 48 Va [2], 50 Va [4] (Jns/Jhnsn)
- A58.17: Jones SS-b (Jns/Jhnsn)
Rodes/2 Div:
- A56.21: Rodes Div-b [1] (SS/Rodes)
- A56.20: Rodes Div-a (SS/Rodes)
- A56.18: 5 Ala [4] (Btle/Rodes)
- A57.20: 61 Ala [6] (Btle/Rodes)
- A57.19: 12 Ala (Btle/Rodes)
- A58.22: Blackford, Rodes Div-c (SS/Rodes)
- A58.20: Battle, 3 Ala [6], 6 Ala [4] (Btle/Rodes)
- A60.23: Rodes Div-d (SS/Rodes)
- A60.21: 44 Ga [8] (Dol/Rodes)
- A61.22: Doles, 12 Ga [6] (Dol/Rodes)
- A62.24: Rodes Div-e [1] (Rodes)
- A62.22: 4 Ga [5] (Dol/Rodes)
- B1.22: 32 NC (Dan/Rodes)
- B2.25: 45 NC [9] (Dan/Rodes)
- B2.22: Daniel, 2 NC Bn (Dan/Rodes)
- B4.21: Rodes (Rodes/2), 53 NC [7] (Dan/Rodes)
- B8.22: 30 NC (Ram/Rodes)
- B9.23: 14 NC (Ram/Rodes)
- B13.24: 4 NC (Ram/Rodes)
- B15.24: 2 NC (Ram/Rodes)
Hill's Third Corps:
- B40.13: R. Walker, Moore Battery (3 Corps)
- B40.12: Landry Battery (3 Corps)
- B40.11: Grandy Battery (3 Corps)
- B41.14: Penick Battery (3 Corps)
- B42.12: Price Battery, Zimmerman Battery (3 Corps) Limbered
- B42.11: Brander Battery, Cayce Battery, Clutter Battery (3 Corps) Limbered
- B43.12: Donald Battery, Ellet Battery, Hurt Battery, Marye Battery (3 Corps) Limbered
- D26.05: Utterback Battery (3 Corps)
- D27.05: Wyatt Battery (3 Corps)
- D28.05: Poague, Richards Battery (3 Corps)
- D29.05: George Battery (3 Corps)
- D30.05: Williams Battery (3 Corps)
Heth/3 Div:
- D16.07: Cooke SS (Ck/Heth)
- D17.09: 26 Miss [5], 1 CS Bn [2] (Dav/Heth)
- D19.08: MacRae, 15 NC [3], 27 NC [2], 46 NC [2], 48 NC [5] (Ck/Heth)
- D18.09: Stone, 11 Miss [5], 42 Miss [3] (Dav/Heth)
- D16.11: Davis SS (Dav/Heth)
- D18.10: 2 Miss [4], 55 NC [4] (Dav/Heth)
- D19.12: 47 NC [6] (Kirk/Heth)
- D20.13: Kirkland SS (Kirk/Heth)
- D20.12: Kirkland, 11 NC [7], 44 NC [6] (Kirk/Heth)
- D21.13: 26 NC [5], 52 NC [5] (Kirk/Heth)
Wilcox/3 Div:
- D22.13: McGowan, McGowan SS-a, 1 SC PA [3], 14 SC [6] (McGw/Wcx)
- D23.13: McGowan SS-b, 13 SC [6] (McGw/Wcx)
- D24.13: 1 SC Rifles [7], 12 SC [3] (McGw/Wcx)
- D25.13: 35 Ga [6], 45 Ga [3], 49 Ga [2] (Thm/Wcx)
- D25.11: Walker SS (Wlkr/Heth)
- D25.10: Heth (Heth/3), H. H. Walker, 1 Tenn PA [2], 7 Tenn [2], 40 Va [3], 47 Va [3] (Wlkr/Heth)
- D26.13: Thomas, Thomas SS-a, Thomas SS-b, 14 Ga [4] (Thm/Wcx)
- D26.10: 13 Ala [2], 14 Tenn [2], 22 Va Bn [3], 55 Va [4] (Wlkr/Heth)
- D27.13: Scales, Scales SS-b, 34 NC [5], 38 NC [4] (Scl/Wcx)
- D28.13: Scales SS-a (Scl/Wcx)
- D28.12: 13 NC [3], 16 NC [4] (Scl/Wcx)
- D28.10: Wilcox (Wcx/3), Lane, 33 NC [6], 37 NC [9] (Lane/Wcx)
- D28.09: 18 NC [6], 28 NC [7] (Lane/Wcx)
- D29.12: 22 NC [6] (Scl/Wcx)
- D29.11: 7 NC [5] (Lane/Wcx)
- D30.13: Lane SS-b (Lane/Wcx)
- D33.13: Lane SS-a (Lane/Wcx)
Confederate Breastworks:
- A36.14, A37.15, A38.14, A39.15, A40.15, A41.16, A42.16, A43.17, A44.17, A45.17, A46.16, A47.16, A48.16, A49.17, A50.17, A51.18, A52.18, A53.18, A54.17, A55.18, A56.18, A57.19, A57.20, A58.20, A59.21, A60.21, A61.22, A62.22, B1.22, B2.22, B3.22, B4.21, B8.22, B9.23, B13.24, B15.24
Orders:
- Ewell's Corps (2 Corps) is to Defend a Position with a frontline from A36.15 along xx.15 to the existing Breastworks, along those Breastworks hexes to A58.20 and extended south to B15.24. The northern and southern boundaries run from the ending frontline hexes west. The 45 NC (Dan/Rodes) in B2.25 can move up to three hexes outside the Position (like the Sharpshooters).
- Hill's Corps (3 Corps) is to Defend a Position with a front as per its infantry starting positions from D17.09 to D29.12 and then south to D34.12. The lateral boundaries are: north (D17.xx), south (D34.xx). Hill's Sharpshooters can move no further than 3 hexes beyond of these forward and lateral boundary lines.
Reinforcements: As per the Main Confederate Order of Arrival.
Union Information
Set Up:
US Army/Army of the Potomac:
- C53.08: U.S. Grant (US Army), Meade, Army HQ (A Potomac)
Second Corps:
- D22.21: Hancock, Corps HQ (2 Corps), Barlow (1/2), Gibbon (2/2), 14 Conn (Gib/2/2)
- D22.30: Supply Wagon (2 Corps)
- D18.21: Snider Battery (2 Corps)
- D22.20: Dow Battery (2 Corps)
- D23.21: Edgell Battery (2 Corps)
- D26.20: Brockway Battery (2 Corps)
- D28.20: Ricketts Battery (2 Corps)
- D46.33: Roder Battery, Sleeper Battery (2 Corps) Limbered
- D47.34: Brown Battery, Gilliss Battery (2 Corps) Limbered
- D48.34: 3/4 NY Hvy (2 Corps)
- D49.35: Ames Battery, Arnold Battery (2 Corps) Limbered
1/2 Div:
- D37.25: Frank, 39 NY, 57 NY (3/1/2)
- D37.26: 52 NY, 125 NY (3/1/2)
- D38.26: 111 NY, 126 NY (3/1/2)
- D39.27: 28 Mass [4], 63 NY [2] (Irish/1/2)
- D40.27: Smyth, 88 NY [4], 116 Penn [6] (Irish/1/2)
- D41.28: 69 NY [6] (Irish/1/2), 61 NY (1/1/2)
- D41.29: Miles, 26 Mich (1/1/2)
- D42.29: 183 Penn (1/1/2)
- D42.30: 81 Penn, 140 Penn (1/1/2)
- D43.31: 66 NY, 53 Penn (4/1/2)
- D44.31: Brooke, 2 Del, 145 Penn (4/1/2)
- D44.32: 148 Penn-a, 148 Penn-b (4/1/2)
- D45.33: 64 NY (4/1/2)
2/2 Div:
- D21.24: 15 Mass, 19 Mass, 2 NYSM (1/2/2) Column
- D22.23: Webb, 19 Maine, 7 Mich (1/2/2) Column
- D22.24: 59 NY (1/2/2) Column
- D23.24: 20 Mass, 42 NY (1/2/2) Column
- D20.20: 1 Del, 108 NY (Gib/2/2)
- D21.20: 14 Ind, 8 Ohio (Gib/2/2)
- D22.19: Carroll, 4 Ohio, 10 NY Bn (Gib/2/2)
- D23.20: 12 NJ, 7 WVa (Gib/2/2)
- D24.20: Owen, 72 Penn [5], 106 Penn [3] (Philly/2/2)
- D25.21: 152 NY [6] (Philly/2/2)
- D27.21: 69 Penn, 71 Penn [5] (Philly/2/2)
3/2 Div:
- D20.17: 17 Maine [5], 93 NY [4] (2/3/2)
- D21.17: 4 Maine [4], 1 US SS-a [1], 1 US SS-b (2/3/2)
- D22.16: Repl, 57 Penn (2/3/2)
- D23.17: 3 Mich [5], 105 Penn [3] (2/3/2)
- D24.15: 2 US SS-a [1], 2 US SS-b (1/3/2)
- D24.16: Birney (3/2), 5 Mich [5], 63 Penn [5] (2/3/2)
- D25.17: 40 NY [7], 141 Penn [4] (1/3/2)
- D26.16: Ward, 20 Ind [6], 3 Maine [6], 110 Penn [4] (1/3/2)
- D27.17: 86 NY [5], 124 NY [5], 99 Penn [4] (1/3/2)
4/2 Div:
- D28.17: 5 NJ [4], 6 NJ [3] (1/4/2)
- D28.18: 74 NY [3], 84 Penn [7] (Excl/4/2)
- D29.17: McAllister, 7 NJ, 11 NJ [4] (1/4/2)
- D29.18: Mott (4/2), 73 NY [3], 120 NY [4] (Excl/4/2)
- D29.19: Brewster, 70 NY [4], 71 NY (Excl/4/2)
- D30.17: 1 Mass, 115 Penn (1/4/2)
- D30.18: 11 Mass [5], 72 NY [5] (Excl/4/2)
- D30.21: 16 Mass [5] (1/4/2) *
- D31.22: 8 NJ [1], 26 Penn [6] (1/4/2) *
* These three 1/4/2 units begin out of CR and cannot move until their Brigade Leader (McAllister or his Replacement) enters one of their hexes. At that point, they operate normally.
2/6 Div (attached to Hancock, less 3/2/6):
- D20.19: 7 Mass [4], 37 Mass [6] (4/2/6)
- D21.19: Eustis, 10 Mass [2], 2 RI [7] (4/2/6)
- D22.18: Wheaton, 93 Penn [2], 139 Penn [6] (1/2/6)
- D23.18: Getty (2/6), 62 NY [1], 98 Penn [4], 102 Penn [1] (1/2/6)
- D24.18: L.A. Grant, 3 Vt [5], 4 Vt [3] (Vt/2/6)
- D25.19: 2 Vt-a [2], 2 Vt-b [2], 5 Vt [2], 6 Vt [3] (Vt/2/6)
Fifth Corps:
- A54.33: Warren, Corps HQ (5 Corps)
- A54.30: Winslow Battery (5 Corps)
- C56.04: Cooper Battery (5 Corps)
- C56.05: Martin Battery (5 Corps)
- C57.04: Mink Battery (5 Corps)
- C57.05: 2/4 NY Hvy, Supply Wagon (5 Corps)
- C58.04: Rittenhouse Battery (5 Corps)
- C58.05: Breck Battery (5 Corps)
- C58.06: Stewart Battery (5 Corps)
- C59.05: Phillips Battery (5 Corps)
Note: Shelton Battery is dead.
1/5 Div:
- A52.23: 18 Mass [6] (3/1/5)
- A53.23: Bartlett, 1 Mich [3], 118 Penn [9] (3/1/5)
- A53.24: 83 Penn [9] (3/1/5)
- A54.24: 44 NY [7] (3/1/5)
- A54.25: 20 Maine [5] (3/1/5)
- A56.25: 146 NY [2], 14 US [7] (1/1/5)
- A56.26: 32 Mass (2/1/5), 140 NY [3] (1/1/5)
- A57.26: C. Griffin (1/5), Ayres, 91 Penn, 17 US (1/1/5)
- A57.27: Sweitzer, 9 Mass [5], 22 Mass [5] (2/1/5)
- A58.26: 155 Penn [8], 11 US [4] (1/1/5)
- A58.27: 4 Mich [4], 62 Penn [11] (2/1/5)
- A59.27: 2 US, 12 US [6] (1/1/5)
2/5 Div:
- A50.31: 39 Mass (1/2/5)
- A51.31: 104 NY (1/2/5)
- A52.30: Lyle (see 3.3a), 16 Maine [8] (1/2/5)
- A53.31: 13 Mass (1/2/5)
- A55.31: Robinson (2/5), 90 Penn [3] (1/2/5)
- A56.30: 4 Md (3/2/5)
- A57.31: 1 Md [5] (3/2/5)
- A58.31: Denison, 8 Md [4] (3/2/5)
- A59.31: 7 Md [7] (3/2/5)
- D12.08: 97 NY [5] (2/2/5)
- D12.09: Baxter, 83 NY [7] (2/2/5)
- D12.10: 11 Penn [5] (2/2/5)
- D14.09: 12 Mass [4] (2/2/5)
3/5 Div:
- A60.31: 8 Penn Res (3/3/5)
- A60.32: Crawford (3/5), 11 Penn Res [4] (1/3/5)
- A61.30: 5 Penn Res (3/3/5)
- A61.32: Fisher, 12 Penn Res (3/3/5)
- A61.33: 2 Penn Res, 7 Penn Res [1] (1/3/5)
- A62.33: McCandless, 6 Penn Res [5] (1/3/5)
- B1.31: 10 Penn Res [8] (3/3/5)
- B5.32: 1 Penn Res [5] (1/3/5)
- B4.33: 13 Penn Res [5] (1/3/5)
4/5 Div (2/2/5, attached):
- D12.05: 56 Penn [4] (2/4/5)
- D11.05: 143 Penn-b [4] (3/4/5)
- D14.06: 95 NY [5] (2/4/5)
- D12.06: 76 NY [5] (2/4/5)
- D11.06: 143 Penn-a [5] (3/4/5)
- D12.07: Rice, 147 NY [7] (2/4/5)
- D11.07: 121 Penn [3] (2/4/5)
- D11.08: Repl, 142 Penn [5] (3/4/5)
- D11.09: 150 Penn [4] (3/4/5)
- D11.10: 149 Penn-a [4], 149 Penn-b [4] (3/4/5)
- D14.12: 1 NY Bn SS (Iron/4/5)
- D12.11: Wadsworth (4/5), 7 Wisc [6] (Iron/4/5)
- D12.12: 2 Wisc (Iron/4/5)
- D12.13: Cutler, 19 Ind [4] (Iron/4/5)
- D11.13: 7 Ind [7] (Iron/4/5)
- D12.14: 24 Mich [4] (Iron/4/5)
- D11.14: 6 Wisc [6] (Iron/4/5)
Sixth Corps:
- A46.27: Sedgwick, Corps HQ (6 Corps)
- C50.16: Adams Battery (6 Corps)
- C51.16: Rhodes Battery (6 Corps)
- C52.15: Waterman Battery (6 Corps)
- C52.16: 1/4 NY Hvy, Supply Wagon (6 Corps)
- C53.15: Harn Battery (6 Corps)
- C54.15: Cowan Battery (6 Corps)
- C54.16: Kimball Battery (6 Corps)
- C54.17: McCartney Battery (6 Corps)
- C54.18: McKnight Battery (6 Corps)
1/6 Div (3/2/6, attached):
- A43.23: 61 Penn [10] (3/2/6)
- A44.23: 7 Maine [8] (3/2/6)
- A45.23: Neill, 43 NY [6], 77 NY (3/2/6)
- A46.23: 49 NY [7] (3/2/6)
- A47.23: 4 NJ [5] (1/1/6)
- A47.25: 1 NJ [4], 2 NJ [7] (1/1/6)
- A48.23: Brown, 3 NJ (1/1/6)
- A49.23: 10 NJ-a [6], 10 NJ-b (1/1/6)
- A49.25: 6 Maine (3/1/6)
- A50.22: Russell, 119 Penn [7], 5 Wisc [5] (3/1/6)
- A50.24: Wright (1/6), 49 Penn-a [6], 49 Penn-b (3/1/6)
- A51.23: 15 NJ (1/1/6)
- A51.24: 121 NY [6], 95 Penn [8] (2/1/6)
- A52.22: Upton, 5 Maine, 96 Penn (2/1/6)
3/6 Div:
- A41.23: 122 Ohio [6] (2/3/6)
- A41.25: 110 Ohio [9] (2/3/6)
- A42.22: 126 Ohio [8], 138 Penn [8] (2/3/6)
- A42.24: Seymour, 6 Md [5] (2/3/6)
- A43.25: 67 Penn [3] (2/3/6)
- A48.26: Ricketts (3/6)
- A53.26: 10 Vt (1/3/6)
- A53.27: Morris, 106 NY (1/3/6)
- A53.28: 14 NJ (1/3/6)
- A54.26: 87 Penn (1/3/6)
- A54.27: 151 NY (1/3/6)
Ninth Corps:
- C54.14: Burnside, Corps HQ (9 Corps), Potter (2/9)
2/9 Div:
- C55.15: 45 Penn-a, 45 Penn-b (1/2/9)
- C55.14: Bliss (1/2/9). 51 NY, 48 Penn-b (1/2/9)
- C55.13: 48 Penn-a, (1/2/9)
- C54.13: 58 Mass (1/2/9)
- C54.12: 36 Mass (1/2/9)
- C52.11: S. Griffin, 6 NH (2/2/9)
- C51.11: 31 Maine (2/2/9)
- C50.10: 17 Vt (2/2/9)
- C49.10: 11 NH (2/2/9)
- C48.09: Jones Battery (2/9) Limbered
- C47.09: Rogers Battery (2/9) Limbered
3/9 Div:
- C43.07: Willcox (3/9), Hartranft, 51 Penn (1/3/9) Column
- C42.06: Road Column
- C41.06: Road Column
- C40.05: Road Column
- C39.05: 109 NY-a (1/3/9) Column
- C38.05: Road Column
- C37.05: 109 NY-b (1/3/9) Column
- C36.04: Road Column
- C35.05: 27 Mich-a (1/3/9) Column
- C34.04: Road Column
- C33.05: Road Column
- C32.04: 27 Mich-b (1/3/9) Column
- C31.04: 8 Mich (1/3/9) Column
- C30.04: Road Column
- C29.04: Road Column
- C28.03: 17 Mich (1/3/9) Column
- C27.03: Road Column
- C26.02: 2 Mich (1/3/9) Column
- C25.02: Road Column
- A24.35: Christ, 1 Mich SS-a (2/3/9) Column
- A23.35: Road Column
- A22.34: 1 Mich SS-b (2/3/9) Column
- A21.34: Road Column
- A20.33: 20 Mich (2/3/9) Column
- A19.33: Road Column
- A18.32: 50 Penn (2/3/9) Column
- A17.33: Road Column
- A16.32: Road Column
- A15.32: Roemer Battery (3/9) Limbered
- A14.31: Twitchell Battery (3/9) Limbered
Union Breastworks:
- A41.23, A42.22, A43.23, A44.23, A45.23, A46.23, A47.23, A48.23, A49.23, A50.22, A51.23, A52.22, A53.23, A50.31, A51.31, A52.30, A53.31, A54.30, A55.31, A56.30, A57.31, A58.31, A59.31, A60.31, A61.32, B26.22, B27.23, B28.23, B28.24, D17.22, D18.21, D19.21, D20.20, D21.21, D22.20, D23.21, D24.20, D25.21, D26.20, D27.21, D28.20, D29.21, D30.21, D31.22, D32.22, D32.23, D33.24, D34.23, D35.24, D36.24
Orders:
- II Corps is to Attack with boundaries of north (D20.xx), south (D30.xx) to take Tapp Field. All the Attacking Divisions allowed by 3.2 have been assigned. All Attacking Divisions have accepted their Attack Orders. Note that Webb's Brigade (1/2/2) is acting as Reserve for all attacking II Corps Divisions (including Getty's).
- Barlow's Div (1/2) has No Orders. It is to stay in place on the Brock Road even though Barlow has reported to Hancock for orders.
- Gibbon's Div (2/2) is to Attack as per the Corps Order above.
- Birney's Div (3/2) is to Attack as per the Corps Order above.
- Mott's Div (4/2) is to Attack as per the Corps Order above.
- Getty's Div (2/6) is assigned to II Corps for the duration (less Neill's Brigade, 3/2/6) and is to Attack as per the II Corps Order above.
- Special Rule: Any II Corps Division (including 2/6) suffers a -2 Base Check DRM on the Fluke Stoppage Table if any of its units are currently w/i 3 hexes of any Wadsworth's units (including Baxter).
- V Corps (except Wadsworth's Div (4/5) with Baxter's Brigade (2/2/5) attached) is to Defend with a Position using the frontal boundary from A41.23 to A53.23 and then through the hexrow to B8.31. Its other boundaries are north (A41.xx), south (B8.xx).
- Wadsworth's Div (4/5) (with Baxter's Brigade (2/2/5) attached) is to Attack. His boundaries are right (Dxx.03) and left (Dxx.15) with a direction of due south and Objective of the Tapp Field ending at hexes containing the Orange Plank Road. Wadsworth can assign a Reserve but has none at the beginning of the scenario.
Special Rule: Wadsworth suffers a -2 Base Check DRM on the Fluke Stoppage Table if any of his units are currently w/i 3 hexes of any II Corps unit.
- Baxter's Bde (2/2/5) can be released from 4/5 using Wadsworth's Initiative and when released must move directly to Robinson's (2/5) hex. When Baxter (himself) enters Robinson's hex, he can begin to follow 2/5's current orders.
- VI Corps is to Defend using the same Position as V Corps above.
- Getty's Div (2/6) is under II Corps and subject to its orders above, except 3/2/6 which is attached to Wright (1/6) for the scenario's duration.
- IX Corps has Move Orders to proceed to Wilderness Tavern (C54.15, with the HQ going to C54.14) and await further Orders. The HQ has arrived at C54.14 and 2/9 has (or is in the process of) closing up its Road Column into the area around C54.14. 3/9 will do the same in the vicinity of C48.09. The Corps Artillery will go into park around C53.10. Upon arrival and closing up, IX Corps enters No Orders.
Reinforcements: As per the Union Order of Arrival.
Victory: Use NTB 5.0.
6.8 Driving Them Most Beautifully: Southern Flank
"Tell General Meade we are driving them most beautifully."
Hancock's augmented command, with a division from Sedgwick, and a division from Warren strongly attacked A.P. Hill's defenses from two directions. The Confederates, having fought fiercely the day before, were exhausted and had failed to erect fortifications or post pickets when Hancock's early morning offensive caught them. Only Longstreet's timely arrival could help save Lee. The fate of the Army of Northern Virginia hung in the balance.
General Information
- Maps Needed: Maps B and D
- First Turn: 5:00 a.m. May 6th
- Last Turn: 5:45 p.m. May 6th
- Game Length: 53 Turns
- First Player: Union
Confederate Information
Set Up:
Army of Northern Virginia:
- D30.04: R.E. Lee, Army HQ (ANVa), A.P. Hill, Corps HQ, 5 Ala Bn (3 Corps)
Hill's Third Corps:
- B40.13: R. Walker, Moore Battery (3 Corps)
- B40.12: Landry Battery (3 Corps)
- B40.11: Grandy Battery (3 Corps)
- B41.14: Penick Battery (3 Corps)
- B42.12: Price Battery, Zimmerman Battery (3 Corps) Limbered
- B42.11: Brander Battery, Cayce Battery, Clutter Battery (3 Corps) Limbered
- B43.12: Donald Battery, Ellet Battery, Hurt Battery, Marye Battery (3 Corps) Limbered
- D26.05: Utterback Battery (3 Corps)
- D27.05: Wyatt Battery (3 Corps)
- D28.05: Poague, Richards Battery (3 Corps)
- D29.05: George Battery (3 Corps)
- D30.05: Williams Battery (3 Corps)
Heth/3 Div:
- D16.07: Cooke SS (Ck/Heth)
- D17.09: 26 Miss [5], 1 CS Bn [2] (Dav/Heth)
- D19.08: MacRae, 15 NC [3], 27 NC [2], 46 NC [2], 48 NC [5] (Ck/Heth)
- D18.09: Stone, 11 Miss [5], 42 Miss [3] (Dav/Heth)
- D16.11: Davis SS (Dav/Heth)
- D18.10: 2 Miss [4], 55 NC [4] (Dav/Heth)
- D19.12: 47 NC [6] (Kirk/Heth)
- D20.13: Kirkland SS (Kirk/Heth)
- D20.12: Kirkland, 11 NC [7], 44 NC [6] (Kirk/Heth)
- D21.13: 26 NC [5], 52 NC [5] (Kirk/Heth)
Wilcox/3 Div:
- D22.13: McGowan, McGowan SS-a, 1 SC PA [3], 14 SC [6] (McGw/Wcx)
- D23.13: McGowan SS-b, 13 SC [6] (McGw/Wcx)
- D24.13: 1 SC Rifles [7], 12 SC [3] (McGw/Wcx)
- D25.13: 35 Ga [6], 45 Ga [3], 49 Ga [2] (Thm/Wcx)
- D25.11: Walker SS (Wlkr/Heth)
- D25.10: Heth (Heth/3), H. H. Walker, 1 Tenn PA [2], 7 Tenn [2], 40 Va [3], 47 Va [3] (Wlkr/Heth)
- D26.13: Thomas, Thomas SS-a, Thomas SS-b, 14 Ga [4] (Thm/Wcx)
- D26.10: 13 Ala [2], 14 Tenn [2], 22 Va Bn [3], 55 Va [4] (Wlkr/Heth)
- D27.13: Scales, Scales SS-b, 34 NC [5], 38 NC [4] (Scl/Wcx)
- D28.13: Scales SS-a (Scl/Wcx)
- D28.12: 13 NC [3], 16 NC [4] (Scl/Wcx)
- D28.10: Wilcox (Wcx/3), Lane, 33 NC [6], 37 NC [9] (Lane/Wcx)
- D28.09: 18 NC [6], 28 NC [7] (Lane/Wcx)
- D29.12: 22 NC [6] (Scl/Wcx)
- D29.11: 7 NC [5] (Lane/Wcx)
- D30.13: Lane SS-b (Lane/Wcx)
- D33.13: Lane SS-a (Lane/Wcx)
Orders:
- Hill's Corps (3 Corps) is to Defend a Position with a front as per its infantry starting positions from D17.09 to D29.12 and then south to D34.12. The lateral boundaries are: north (D17.xx), south (D34.xx). Hill's Sharpshooters can move no further than 3 hexes in front of this forward and lateral boundary lines.
Breastworks: None.
Reinforcements: As per the Main Confederate Order of Arrival (ignore Jhns/Rodes).
Union Information
Set Up:
Second Corps:
-
D22.21: Hancock, Corps HQ (2 Corps), Barlow (1/2), Gibbon (2/2), 14 Conn (Gib/2/2)
-
D22.30: Supply Wagon (2 Corps)
-
D18.21: Snider Battery (2 Corps)
-
D22.20: Dow Battery (2 Corps)
-
D23.21: Edgell Battery (2 Corps)
-
D26.20: Brockway Battery (2 Corps)
-
D28.20: Ricketts Battery (2 Corps)
-
D46.33: Roder Battery, Sleeper Battery (2 Corps) Limbered
-
D47.34: Brown Battery, Gilliss Battery (2 Corps) Limbered
-
D48.34: 3/4 NY Hvy (2 Corps)
-
D49.35: Ames Battery, Arnold Battery (2 Corps) Limbered 1/2 Div:
-
D37.25: Frank, 39 NY, 57 NY (3/1/2)
-
D37.26: 52 NY, 125 NY (3/1/2)
-
D38.26: 111 NY, 126 NY (3/1/2)
-
D39.27: 28 Mass [4], 63 NY [2] (Irish/1/2)
-
D40.27: Smyth, 88 NY [4], 116 Penn [6] (Irish/1/2)
-
D41.28: 69 NY [6] (Irish/1/2), 61 NY (1/1/2)
-
D41.29: Miles, 26 Mich (1/1/2)
-
D42.29: 183 Penn (1/1/2)
-
D42.30: 81 Penn, 140 Penn (1/1/2)
-
D43.31: 66 NY, 53 Penn (4/1/2)
-
D44.31: Brooke, 2 Del, 145 Penn (4/1/2)
-
D44.32: 148 Penn-a, 148 Penn-b (4/1/2)
-
D45.33: 64 NY (4/1/2)
2/2 Div:
- D21.24: 15 Mass, 19 Mass, 2 NYSM (1/2/2) Column
- D22.23: Webb, 19 Maine, 7 Mich (1/2/2) Column
- D22.24: 59 NY (1/2/2) Column
- D23.24: 20 Mass, 42 NY (1/2/2) Column
- D20.20: 1 Del, 108 NY (Gib/2/2)
- D21.20: 14 Ind, 8 Ohio (Gib/2/2)
- D22.19: Carroll, 4 Ohio, 10 NY Bn (Gib/2/2)
- D23.20: 12 NJ, 7 WVa (Gib/2/2)
- D24.20: Owen, 72 Penn [5], 106 Penn [3] (Philly/2/2)
- D25.21: 152 NY [6] (Philly/2/2)
- D27.21: 69 Penn, 71 Penn [5] (Philly/2/2)
3/2 Div:
- D20.17: 17 Maine [5], 93 NY [4] (2/3/2)
- D21.17: 4 Maine [4], 1 US SS-a [1], 1 US SS-b (2/3/2)
- D22.16: Repl, 57 Penn (2/3/2)
- D23.17: 3 Mich [5], 105 Penn [3] (2/3/2)
- D24.15: 2 US SS-a [1], 2 US SS-b (1/3/2)
- D24.16: Birney (3/2), 5 Mich [5], 63 Penn [5] (2/3/2)
- D25.17: 40 NY [7], 141 Penn [4] (1/3/2)
- D26.16: Ward, 20 Ind [6], 3 Maine [6], 110 Penn [4] (1/3/2)
- D27.17: 86 NY [5], 124 NY [5], 99 Penn [4] (1/3/2)
4/2 Div:
- D28.17: 5 NJ [4], 6 NJ [3] (1/4/2)
- D28.18: 74 NY [3], 84 Penn [7] (Excl/4/2)
- D29.17: McAllister, 7 NJ, 11 NJ [4] (1/4/2)
- D29.18: Mott (4/2), 73 NY [3], 120 NY [4] (Excl/4/2)
- D29.19: Brewster, 70 NY [4], 71 NY (Excl/4/2)
- D30.17: 1 Mass, 115 Penn (1/4/2)
- D30.18: 11 Mass [5], 72 NY [5] (Excl/4/2)
- D30.21: 16 Mass [5] (1/4/2) *
- D31.22: 8 NJ [1], 26 Penn [6] (1/4/2) *
* These three 1/4/2 units begin out of CR and cannot move until their Brigade Leader (McAllister or his Replacement) enters one of their hexes. At that point, they operate normally.
Fifth Corps:
2/5 Div:
- D12.08: 97 NY [5] (2/2/5)
- D12.09: Baxter, 83 NY [7] (2/2/5)
- D12.10: 11 Penn [5] (2/2/5)
- D14.09: 12 Mass [4] (2/2/5)
4/5 Div (2/2/5, attached):
- D12.05: 56 Penn [4] (2/4/5)
- D11.05: 143 Penn-b [4] (3/4/5)
- D14.06: 95 NY [5] (2/4/5)
- D12.06: 76 NY [5] (2/4/5)
- D11.06: 143 Penn-a [5] (3/4/5)
- D12.07: Rice, 147 NY [7] (2/4/5)
- D11.07: 121 Penn [3] (2/4/5)
- D11.08: Repl, 142 Penn [5] (3/4/5)
- D11.09: 150 Penn [4] (3/4/5)
- D11.10: 149 Penn-a [4], 149 Penn-b [4] (3/4/5)
- D14.12: 1 NY Bn SS (Iron/4/5)
- D12.11: Wadsworth (4/5), 7 Wisc [6] (Iron/4/5)
- D12.12: 2 Wisc (Iron/4/5)
- D12.13: Cutler, 19 Ind [4] (Iron/4/5)
- D11.13: 7 Ind [7] (Iron/4/5)
- D12.14: 24 Mich [4] (Iron/4/5)
- D11.14: 6 Wisc [6] (Iron/4/5)
Sixth Corps:
2/6 Div (attached to Hancock, less 3/2/6):
- D20.19: 7 Mass [4], 37 Mass [6] (4/2/6)
- D21.19: Eustis, 10 Mass [2], 2 RI [7] (4/2/6)
- D22.18: Wheaton, 93 Penn [2], 139 Penn [6] (1/2/6)
- D23.18: Getty (2/6), 62 NY [1], 98 Penn [4], 102 Penn [1] (1/2/6)
- D24.18: L.A. Grant, 3 Vt [5], 4 Vt [3] (Vt/2/6)
- D25.19: 2 Vt-a [2], 2 Vt-b [2], 5 Vt [2], 6 Vt [3] (Vt/2/6)
Union Breastworks:
- B26.22, B27.23, B28.23, B28.24, D17.22, D18.21, D19.21, D20.20, D21.21, D22.20, D23.21, D24.20, D25.21, D26.20, D27.21, D28.20, D29.21, D30.21, D31.22, D32.22, D32.23, D33.24, D34.23, D35.24, D36.24
Orders:
- II Corps is to Attack with boundaries of north (D20.xx), south (D30.xx) to take Tapp Field. All the Attacking Divisions allowed by 3.2 have been assigned. All Attacking Divisions have accepted their Attack Orders. Note that Webb's Brigade (1/2/2) is acting as Reserve for all attacking II Corps Divisions (including Getty's).
- Barlow's Div (1/2) has No Orders. It is to stay in place on the Brock Road even though Barlow has reported to Hancock for orders.
- Gibbon's Div (2/2) is to Attack as per the Corps Order above.
- Birney's Div (3/2) is to Attack as per the Corps Order above.
- Mott's Div (4/2) is to Attack as per the Corps Order above.
- Getty's Div (2/6) is assigned to II Corps for the duration (less Neill's Brigade, 3/2/6) and is to Attack as per the II Corps Order above.
Special Rule: Any II Corps Division (including 2/6) suffers a -2 Base Check DRM on the Fluke Stoppage Table if any of its units are currently w/i 3 hexes of any Wadsworth's units (including Baxter).
- V Corps:
- Wadsworth's Div (4/5) (with Baxter's Brigade (2/2/5) attached) is to Attack. His boundaries are right (Dxx.03) and left (Dxx.15) with a direction of due south and Objective of the Tapp Field ending at hexes containing the Orange Plank Road. Wadsworth can assign a Reserve but has none at the beginning of the scenario.
Special Rule: Wadsworth suffers a -2 Base Check DRM on the Fluke Stoppage Table if any of his units are currently w/i 3 hexes of any II Corps unit.
- Baxter's Bde (2/2/5) is assigned to 4/5 for the duration of the scenario.
- VI Corps:
- Getty's Div (2/6) is under II Corps and subject to its orders above.
Reinforcements: None.
Victory: Use NTB 5.0.
Seniority
Union Seniority
| Unit | Commander | Rank | Date of Rank |
|---|---|---|---|
| Armies of the United States: Army | Grant | LTG | 2 Mar 64 |
| IX Corps | Burnside | MG | 18 Mar 62 |
| IX Corps | Parke | MG | 18 Jul 62 |
| 1/9 Division | Stevenson | BG | 14 Mar 63 |
| 1/9 Division | Carruth | Col | - |
| 1/9 Division | Leasure | Col | - |
| 2/9 Division | Potter | BG | 29 Nov 62 |
| 2/9 Division | Bliss | Col | - |
| 2/9 Division | S. Griffin | Col | - |
| 3/9 Division | Willcox | BG | 21 Jul 61 |
| 3/9 Division | Hartranft | Col | - |
| 3/9 Division | Christ | Col | - |
| Prov/9 | Marshall | Col | - |
| Army of the Potomac: Army | Meade | MG | 29 Nov 62 |
| II Corps | Hancock | MG | 29 Nov 62 |
| 1/2 Division | Barlow | BG | 19 Sep 62 |
| 1/2 Division | Miles | Col | - |
| 1/2 Division | Smyth | Col | - |
| 1/2 Division | Frank | Col | - |
| 1/2 Division | Brooke | Col | - |
| 2/2 Division | Gibbon | BG | 2 May 62 |
| 2/2 Division | Owen | BG | 30 Mar 63 |
| 2/2 Division | Webb | BG | 23 Jun 63 |
| 2/2 Division | Carroll | Col | - |
| 3/2 Division | Birney | MG | 20 May 63 |
| 3/2 Division | Hays | BG | 29 Sep 62 |
| 3/2 Division | Ward | BG | 4 Oct 62 |
| 4/2 Division | Mott | BG | 7 Sep 62 |
| 4/2 Division | McAllister | Col | - |
| 4/2 Division | Brewster | Col | - |
| V Corps | Warren | MG | 3 May 63 |
| 1/5 Division | C. Griffin | BG | 9 Jun 62 |
| 1/5 Division | Ayres | BG | 29 Nov 62 |
| 1/5 Division | Bartlett | BG | 30 Mar 63 |
| 1/5 Division | Sweitzer | Col | - |
| 2/5 Division | Robinson | BG | 28 Apr 62 |
| 2/5 Division | Baxter | BG | 12 Mar 63 |
| 2/5 Division | Leonard/Lyle | Col | - |
| 2/5 Division | Denison | Col | - |
| 3/5 Division | Crawford | BG | 25 Apr 62 |
| 3/5 Division | McCandless | Col | - |
| 3/5 Division | Fisher | Col | - |
| 4/5 Division | Wadsworth | BG | 9 Aug 61 |
| 4/5 Division | Cutler | BG | 29 Nov 62 |
| 4/5 Division | Rice | Col | - |
| 4/5 Division | Stone | Col | - |
| VI Corps | Sedgwick | MG | 4 Jul 62 |
| 1/6 Division | Wright | BG | 14 Sep 61 |
| 1/6 Division | Russell | BG | 29 Nov 62 |
| 1/6 Division | Shaler | BG | 26 May 63 |
| 1/6 Division | Brown | Col | - |
| 1/6 Division | Upton | Col | - |
| 2/6 Division | Getty | BG | 25 Sep 62 |
| 2/6 Division | Wheaton | BG | 29 Nov 62 |
| 2/6 Division | Neill | BG | 29 Nov 62 |
| 2/6 Division | Eustis | BG | 12 Sep 63 |
| 2/6 Division | L. Grant | Col | - |
| 3/6 Division | Ricketts | BG | 21 Jul 61 |
| 3/6 Division | Seymour | BG | 28 Apr 62 |
| 3/6 Division | Morris | BG | 29 Nov 62 |
Confederate Seniority
| Unit | Commander | Rank | Date of Rank |
|---|---|---|---|
| Army of Northern Virginia: Army | R.E. Lee | Gen | 14 Jun 61 |
| First Corps | Longstreet | LTG | 9 Oct 62 |
| First Corps | Sorrel | Lt Col | - |
| Field Division | Field | MG | 12 Feb 64 |
| Field Division | Jenkins | BG | 22 Jul 62 |
| Field Division | Gregg | BG | 29 Aug 62 |
| Field Division | G.T. Anderson | BG | 1 Nov 62 |
| Field Division | Benning | BG | 17 Jan 63 |
| Kershaw Division | Kershaw | BG | 13 Feb 62 |
| Kershaw Division | Wofford | BG | 17 Jan 63 |
| Kershaw Division | Humphreys | BG | 12 Aug 63 |
| Kershaw Division | Bryan | BG | 29 Aug 63 |
| Kershaw Division | Henegan | Col | - |
| Second Corps | Ewell | LTG | 23 May 63 |
| Johnson Division | Johnson | MG | 28 Feb 63 |
| Johnson Division | Steuart | BG | 6 Mar 62 |
| Johnson Division | J.A. Walker | BG | 15 May 63 |
| Johnson Division | J.M. Jones | BG | 15 May 63 |
| Johnson Division | Stafford | BG | 8 Oct 63 |
| Early Division | Early | MG | 17 Jan 63 |
| Early Division | Hays | BG | 25 Jul 62 |
| Early Division | Pegram | BG | 7 Nov 62 |
| Early Division | Gordon | BG | 7 May 63 |
| Rodes Division | Rodes | MG | 2 May 63 |
| Rodes Division | Daniel | BG | 1 Sep 62 |
| Rodes Division | Doles | BG | 1 Nov 62 |
| Rodes Division | Ramseur | BG | 1 Nov 62 |
| Rodes Division | Battle | BG | 20 Aug 63 |
| Rodes Division | Johnston | BG | 1 Sep 63 |
| Rodes Division | Blackford | Maj | - |
| Third Corps | A.P. Hill | LTG | 24 May 63 |
| Heth Division | Heth | MG | 24 May 63 |
| Heth Division | Cooke (if in play) | BG | 1 Nov 62 |
| Heth Division | H.H. Walker | BG | 1 Jul 63 |
| Heth Division | Kirkland | BG | 29 Aug 63 |
| Heth Division | Stone | Col | - |
| Heth Division | McRae | Col | - |
| Wilcox Division | Wilcox | MG | 3 Aug 63 |
| Wilcox Division | Lane | BG | 1 Nov 62 |
| Wilcox Division | Thomas | BG | 1 Nov 62 |
| Wilcox Division | McGowan | BG | 17 Jan 63 |
| Wilcox Division | Scales | BG | 13 Jun 63 |
| Anderson Division | R.H. Anderson | MG | 14 Jul 62 |
| Anderson Division | Mahone | BG | 16 Nov 61 |
| Anderson Division | Wright | BG | 3 Jun 62 |
| Anderson Division | E.A. Perry | BG | 28 Aug 62 |
| Anderson Division | Perrin | BG | 10 Sep 63 |
Order of Arrival
Union Order of Arrival
5 May 1864
| Time | Area / Order | Units |
|---|---|---|
| 1:00 p.m. | A / 1 | 2/3/6 Bde |
| B / 2 | 1 NJ, 10 NJ-a, 10 NJ-b (1/1/6), 3/1/6 Bde, and 3/2/6 Bde (6 Corps) | |
| D / 3 | Hancock, Corps HQ, 3 Div, Brockway Battery (2 Corps) | |
| 3:30 p.m. | D / 3 | 4 Div, Dow, Edgell, Ricketts, and Snider Batteries (2 Corps) |
| 4:30 p.m. | D / 4 | 2 Div (2 Corps) |
| 6:00 p.m. | D / 4 | 1 Div (2 Corps) |
| 7:00 p.m. | D / 5 | 3/4 NY Hvy, Ames, Arnold, Brown, Gilliss, Roder, and Sleeper Batteries, Supply Wagon (2 Corps) |
6 May 1864
| Time | Area / Order | Units |
|---|---|---|
| 4:00 a.m. | A / 6 | Burnside, Corps HQ, 2 Div (less 32 Maine and 9 NH) (9 Corps) |
| 4:30 a.m. | A / 6 | 3 Div (9 Corps) |
| 5:00 a.m. | A / 6 | 1 Div, Prov Bde (9 Corps) |
| C / 7 | Kitch Bde (5 Corps) | |
| 5:30 a.m. | A / 6 | Allen, Buckley, Dudley, Eaton, Gittings, and Pendleton Batteries, Supply Wagon (9 Corps) |
| C / 7 | Vol Eng Bde | |
| 6:00 a.m. | B / 8 | 4/1/6 Bde |
| 7:00 a.m. | A / 9 | 88 Penn (2/2/5) |
| A / 10 | 14 Brklyn (2/4/5) | |
| A / 11 | 16 Mich (3/1/5) | |
| 12 p.m. | A / 12 | 32 Maine, 9 NH (2/2/9) |
Union Orders:
- Report to Ricketts (3/6).
- Add to queue entering at Entry Area B, following orders to Wright (1/6) in the scenario.
- Move w/i 5 of Brock Crossroads (D22.20) with the 2 Corps HQ going to D22.21. These units already have Defensive Orders. Set up their Positiones along, or adjacent to, the Brock Road facing west and build Breastworks. The Artillery must deploy ON Brock Road or the Orange Plank Road and nowhere else. Neither can roll acceptance of an Attack Order prior to 4:30 pm.
- Move to left flank of 2 Corps. Follow the Defensive Orders in #3. They cannot roll acceptance of an Attack order prior to 5:30 pm.
- Move to 2 Corps HQ and await orders.
- Move to Wilderness Tavern and await orders.
- Move to 5 Corps HQ.
- Move to 6 Corps HQ.
- Move to Baxter (2/2/5).
- Move to Rice (2/4/5).
- Move to Bartlett (3/1/5).
- Move to S. Griffin (2/2/9).
Confederate Order of Arrival
5 May 1864
| Time | Area / Order | Units |
|---|---|---|
| 2:00 p.m. | G / 1 | 37 Va (Strt/Jhsn), Long Arty Leader, Carpenter, Carrington, Carter, Cooper, Dance, Fry, Garber, Graham, Griffin, Hardwicke, Jones, Page, Reese, Smith, and Tanner Batteries (2 Corps) |
| F / 2 | Wcx Div (3 Corps) | |
| 2:15 p.m. | F / 3 | R. Walker Arty Leader, Brander, Cayce, Clutter, Donald, Ellet, Grandy, Hurt, Landry, Marye, Moore, Penick, Price, and Zimmerman Batteries (3 Corps) |
| 7:00 p.m. | G / 1 | Ram Bde (Rodes Div) |
6 May 1864
| Time | Area / Order | Units |
|---|---|---|
| 5:00 a.m. | G / 1 | Jhns Bde (Rodes Div) |
| E / 4 | Longstreet, Alexander Arty Leader, Corps HQ, Lamkin Sharpshooter, Fld Div, Ker Div, Sorrel (Special Leader) (1 Corps) | |
| 5:30 a.m. | E / 3 | Callaway, Carlton, Fickling, Flanner, Garden, Manly, McCarthy, Moody, Parker, Ramsey, Smith, Taylor, and Woolfolk Batteries (1 Corps) |
| 5:45 a.m. | F / 5 | And Div (3 Corps) |
| 6:30 a.m. | F / 6 | Patterson, Ross, and Wingfield Batteries (3 Corps) |
Confederate Orders:
-
Move to 2 Corps HQ.
-
Move towards Jones Field (no further than the southern edge, B16.20) via the trail from Tapp Farm and establish a Defensive Position from Jones Field back to Tapp Field along the trail, unless, upon arrival, Union forces in Jones Field are in small arms range of Wilcox's advance; in that case, the Division will fall back out of small arms range towards Tapp Farm along the Jones – Chewning – Tapp Field path and establish a Defensive Position along the path. Regardless of the location of the Defensive Position, Wilcox will require Orders directly from Lee (no need to go through Hill) to leave this Defensive Position. New orders from Lee can be accepted no earlier than two turns after Hancock begins his orders to Attack. (Or at 5:00 p.m., if there is no Attack.)
Errata (LoB-04, 3 Aug 26) restates this order 2 with the same wording; the text is unchanged.
-
Move w/i 5 of Parker's Store.
-
Move through Parker's Store and then along the Orange Plank Road to Tapp Field.
-
Player's Choice:
- A) Move to 1 Corps HQ. The division is assigned to 1 Corps for the duration.
- OR
- B) Move to 3 Corps HQ. The division remains in 3 Corps for the duration.
-
Move to 3 Corps HQ.