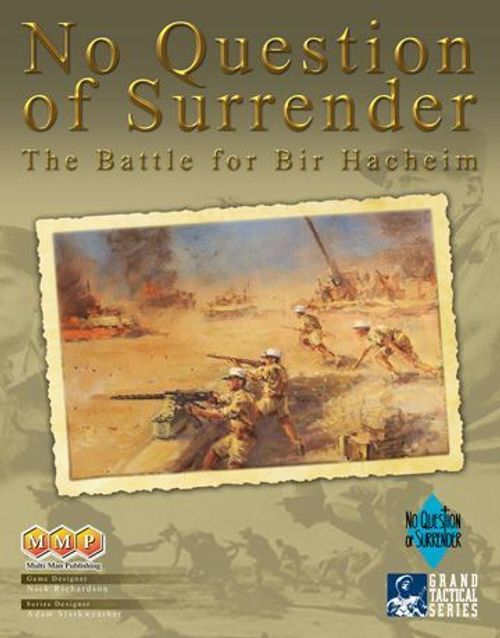
No Question of Surrender: The Battle for Bir Hacheim
No Question of Surrender: The Battle for Bir Hacheim Rulebook
Table of Contents
Table of Contents
- Components
- Grand Tactical Series Rules
- 1.0 Introduction
- 2.0 How to read the counters
- 3.0 The time scale
- 4.0 The sequence of play
- 5.0 The weather and airpower availability phase
- 6.0 Determine if the weather changes
- 7.0 Spend Dispatch Points to buy Formation Activation Chits
- 8.0 Place reinforcements and conduct air strikes
- 9.0 Put the eligible chits into the coffee mug
- 10.0 Perform the Activation Phase
- 11.0 Remove all barrage markers
- 12.0 Move the turn record marker up a box
- 13.0 Performing Actions with Units during the Activation Phase
- 14.0 Moving Units
- 15.0 Fire Combat
- 16.0 Indirect Fire, Mortar Units and Indirect High Explosive Units
- 17.0 Opportunity Fire
- 18.0 Assault
- 19.0 Combat results
- 20.0 Rally
- 21.0 Leaders and Command
- 22.0 Improved positions and entrenchments
- 23.0 Road block (or Sperre)
- 24.0 Rearguards
- 25.0 Special engineer rule (men at work)
- 26.0 Weather
- 27.0 Airpower
- 28.0 Night
- 29.0 Glossary
- No Question of Surrender Exclusive Rules
- Special Rules
- Scenarios
- Narrative of The Battle for Bir Hacheim
- Biographies
- Errata and Clarifications
Components
No Question of Surrender includes:
- Series Rulebook
- Series Rules Summary
- Exclusive Rulebook
- 4 Player Aid Cards
- 2 Charts and Tables Cards (identical)
- 1 Map Sheet
- 3 Counter Sheets
- 4 Ten-sided Dice
Counter Symbols
The Unit counter symbols are shown on page two. The only Unit counter symbol that has any effect on the game is the engineer symbol. All other symbols are for historical interest only because the values, the colors of the values, and the colors around the values define all the other game functions. Each Leg Unit is company size.
The background color of each Unit counter shows the Division the Unit belongs to. The colors are blue (French, 1re Brigade Française Libre), light green (Italian, 103 Ariete Divisione), dark green (Italian, 101 Trieste Divisione), grey (German, 90. leichte Afrika Division).
Grand Tactical Series Rules
1.0 Introduction
The Grand Tactical Series is a World War Two tactical company-level system with turns representing two hours of real time and hexes approximately 500 meters across. The series rules (which you are reading now) apply to all games in the series. Each game also has its own exclusive game rules booklet which tells you the components included in that game and the specific rules for that game. The exclusive rules always take precedence over the series rules should the two conflict (usually the exclusive rules will point out conflicts for you).
1.1. A note about the rules
There are two sets of rules. The one you are now reading is repetitive and written in a chatty style. It is repetitive because we have duplicated many rules throughout the sections, so you don't have to go flipping around the book to find the one place where a rule appears. It is in a chatty style because we hope that makes it easier to read. The trade off is that these rules are long. For those who prefer concise rules (or who find the chatty style irritating), we have included a set of short rules and also tried to put as much useful information as possible in the charts and tables. Experienced gamers should be able to start playing with the short rules and the charts and tables. We hope there are no discrepancies between the rules, but this rulebook governs should there be. Terms defined in the glossary (see Rule 29.0) are initial capitalized in the rules. Named game charts and tables are also initial capitalized, though they don't appear in the glossary.
Note that Division Activation Chits only allow the Units of that Division to perform a limited range of non-combat-related Actions; Formation Activation Chits allow the Units of the Formation to perform the full range of Actions.
Note also that it is possible, although improbable, that one player could draw all of his Activation Chits before his opponent draws any of his. That player would then get to activate all of his Units before his opponent could activate any of his Units.
Each player also gets a Direct Command Chit, which, when drawn, allows him to spend Command Points to activate any of his Units. These Direct Command Chits are sort of "wild cards" which allow a player greater options. Here is an outline of some major rules:
- You will be using a ten-sided die throughout the game. The "0" is a zero and not a ten. Unless specifically noted, a roll of nine always fails and a zero always succeeds.
- Movement is standard hex-to-hex, paying movement points for terrain, with Opportunity Fire and Fire Zones instead of ZOCs. All Units are divided into Movement Classes (e.g., Leg, Wheeled, Tracked) for movement, and the classes pay differently for terrain. There is a Column formation that allows fast Road movement.
- Terrain is by the color of the dot in the center of each hex. If there is no dot in a hex, it cannot be entered.
- For Line of Sight purposes, there are no "elevation levels" on the map. Rather, crest hexsides are used to denote differences in terrain height.
- The stacking limit per hex is four Units not in Column plus one Unit in Column, for a maximum of five Units in a hex. The two groups do not affect each other's stacking limit. Column stacking is enforced at all times (including and especially during movement). Steps have nothing to do with stacking. Leaders and markers do not count toward stacking.
- Combat is divided between ranged (which can be Direct or Indirect) and Assault, which is for Units adjacent to enemy Units.
- Combat results are Cohesion Hits, Possible Suppression, Suppression, Step Losses and outright elimination.
- There are command rules that affect activation, movement, combat and Rally.
1.2. A summary description of the game
The playing pieces represent mostly company-sized Units, which are grouped for game purposes into Formations. Formations correspond to real-life brigades or regiments and are themselves grouped into Divisions, which correspond to, well, divisions. Divisions in turn are grouped into Armies, which correspond to the nationalities involved in the game, e.g., British, German, and so on.
The heart of the game is a "random chit pull activation system" which determines when you get to do things with your Units. Every Division has an Activation Chit to represent it, as does every Formation. At the beginning of each turn, you and your opponent put an Activation Chit for each Division in play into a coffee mug. You also get to "buy" (using Dispatch Points) a limited number of Activation Chits for your Formations to put into the mug. Either player then blindly pulls an Activation Chit from the mug. The player who controls the Division or Formation whose chit is drawn gets to perform Actions with the Units in that Division or Formation. When he is done, the players draw another Activation Chit and repeat the process until the turn ends.
2.0 How to read the counters
Most Unit counters represent a company of infantry, tanks or engineers, or an artillery or mortar section. All the terms below are defined in the glossary (see Rule 29.0). The color box around a Unit's designation corresponds to the Formation it belongs to, and this matches the color of the stripes on the Leader counter for that Formation.
The color of the movement allowance shows the Movement Class, the color of the box around the Fire Rating and Assault Rating shows the Weapon Class and the color of the box around the Defense Rating shows if the Unit is Armored or Unarmored.
3.0 The time scale
Every daylight turn represents about two hours of real time. Night turns represent eight to twelve hours of real time.
The exclusive rules indicate the time when the night turn begins and ends.
4.0 The sequence of play
- Check weather (start of day only).
- Determine airpower availability (start of day only).
- Determine if the weather changes (if applicable).
- Spend Dispatch Points to buy Formation Activation Chits.
- Place reinforcements and conduct air strikes.
- Put the eligible chits into the coffee mug.
- Perform the Activation Phase.
- Remove all barrage markers.
- Move the turn record marker up a box.
5.0 The weather and airpower availability phase
Before the first daylight turn of each day the players conduct a special phase to determine the weather, and then airpower availability (see any special rules for this).
Just roll on the appropriate tables (if applicable) and apply the results.
6.0 Determine if the weather changes
Check the exclusive rules to see if there is a possibility for the weather to change during the course of the day.
7.0 Spend Dispatch Points to buy Formation Activation Chits
7.1. Generally
Just as each Division has its own Activation Chit, so too each Formation in the game has its own Activation Chit, which allows Units in that Formation to be activated.
Note that Division Activation Chits only allow the Units of the Division to perform a limited range of non-combat-related Actions; Formation Activation Chits allow the Units of the Formation to perform the full range of Actions.
Unlike Division Activation Chits, which (once in play) automatically go into the mug at the start of every turn, the only way a Formation Activation Chit gets into the mug (and therefore into play) is if you spend Dispatch Points to put it in play. And you have to spend Dispatch Points every turn to do this for your Formations. In other words, just because you spend a Dispatch Point to get a Formation Activation Chit into play for a turn doesn't mean it stays in play every turn after that; on the contrary—after it is played, it comes out and you must spend another Dispatch Point to get it back in for a later turn.
7.2. How do I spend Dispatch Points to buy Formation Activation Chits?
First look at your Formation Activation Chits and decide whether you want any of them in play this turn or next turn. If you don't, just move on to the next phase.
If you do want a particular Formation Activation Chit in play you now have a choice: you can purchase it and put it into the mug for use this turn, or you can purchase it for placement into the mug next turn. Those Activation Chits purchased for next turn are set face-down next to the mug as a reminder that they have been purchased. You do not have to reveal to your opponent which Formations you have purchased… they'll be revealed as they are drawn!
If you want the Formation Activation Chit for play this turn, it'll cost you two Dispatch Points; if you want the Formation Activation Chit for play next turn, it'll only cost you one Dispatch Point. You may also buy all of a Division's Formation Activation Chits at a discount. See the exclusive rules for the costs. All purchases should be done in secret if possible.
Now it's time to spend the Dispatch Points. Go to the Command/Dispatch Point Record Track and deduct the appropriate number of Dispatch Points from the Formation's Division. Later we'll look at how you actually get these Dispatch Points in the first place.
There are two limits on the number of Formation Activation Chits you can put into the mug for this turn (or hold out for next turn). One limit is the number of Dispatch Points you have. The other limit is that you can only buy one Formation Activation Chit at a time per Formation: once you buy it, you have to play it before you can buy it again. This prevents you from spending one Dispatch Point on Turn One to buy a Formation Activation Chit for Turn Two, and then buying the same chit on Turn Two for Turn Three. Or, if a particular Formation Activation Chit was the last one drawn during Turn One, it is saved for Turn Two (see Rule 10.0.6), and so you cannot spend one Dispatch Point on Turn Two to buy it for Turn Three.
Note that unless stated otherwise, a Formation Activation Chit is first eligible for purchase the turn after the Formation's Leader actually enters play as a reinforcement (i.e., just getting placed in an entry hex doesn't count).
This is a good place to stress that Dispatch Points are allocated by Division. A Division can only spend Dispatch Points on its own Formations. A Division cannot spend its Dispatch Points on some other Division's Formations.
8.0 Place reinforcements and conduct air strikes
Check the reinforcement schedule in the scenario rules to find out the who, where and when of your reinforcements.
Unless stated otherwise, place your reinforcements on any entry hex that is marked with the matching Divisional symbol. Just stack all of the reinforcements on the appropriate entry hex without regard to the stacking rules; when they get activated, they start there (no counting hexes off the map board for you veteran gamers). Entry hexes have unlimited stacking limits for Units. Reinforcement Units in reinforcement entry hexes they may not be targeted by any type of fire.
One important restriction on reinforcements: you may not spend Command Points on them until they actually enter play (when their Division Activation Chit is first drawn, see Rule 10.0.1—unless stated otherwise, a Formation Activation Chit is not eligible for purchase until the turn after the Formation's Leader enters play as a reinforcement). Reinforcement Units in entry hexes are considered Out of Command.
The reinforcements may start in Column or not, at the owning player's choice.
Now you and your opponent may conduct air strikes according to the airpower rules (see Rule 27.0).
9.0 Put the eligible chits into the coffee mug
If you are starting the game, the scenario rules will tell you what to put into the mug for the first turn.
After the first turn, each player will put the following into the mug:
- all his Division Activation Chits that are currently in play; plus
- any additional Division Activation Chits that the scenario rules tell him that he gets as reinforcements; plus
- his one Direct Command Chit; plus
- any Formation Activation Chits that he decided to "buy" with Dispatch Points this turn, or that he bought last turn and held out for this turn.
Note that unless stated otherwise, a Formation Activation Chit is eligible for purchase the turn after the Formation's Leader enters play as a reinforcement (i.e., just getting placed in an entry hex doesn't count).
10.0 Perform the Activation Phase
10.0.1. First, take a chit
If you are on the first turn, check the scenario rules: they will (almost) always say who is going first. If you are past the first turn, the player whose chit was the last in the mug on the previous turn has to play that chit now as the first chit of this turn (more on this in 10.0.6).
If the above has already been done, you or your opponent (it does not matter who) now draws a chit from the coffee mug.
If a Formation Activation Chit is drawn: all Units belonging to the Formation that was drawn become Active and may perform Actions. In addition, you may spend Command Points to have In Command Units of that Formation perform Second Actions (see Rule 10.0.2).
If a Division Activation Chit (DivAct on the chit) is drawn: the player who controls the Division first rolls to see how many Command Points and Dispatch Points the Division receives; next, all Units belonging to that Division become Active and may perform a limited number of non-combat Actions (this is explained in Rule 13.2, but generally they cannot: Assault; fire; or move into an enemy Fire Zone). In addition, you may spend Command Points to have In Command Units of that Division perform Second Actions (see below); these Second Actions are not bound by the Division activation restrictions. As a reminder of which Formations have completed their activation, you can flip the Leader counter for each Formation in the Division over to his "Active" side when the Division Activation Chit is drawn, and once the Formation has finished its activation, flip the Leader counter over to his other (non-active) side.
If a Direct Command Chit is drawn: the owning player may spend Command Points to move and fight with his In Command Units (see Rule 10.0.5).
10.0.2. What is a Second Action?
A Unit or stack of Units that has just completed an Action may immediately perform a Second Action if:
- the first Action was performed pursuant to either a Formation Activation Chit or a Division Activation Chit (but not a Direct Command Chit); and
- the Units are In Command; and
- the owning player pays a Command Point for each Unit to perform the Second Action; and
- the Second Action is different from the Action that the Unit (or stack) just performed (that is, a Unit can't use its Second Action to perform the same Action twice in a row); and
- the Second Action is not an Engineer Action; and
- the decision to perform the Second Action is made before the next Unit (or stack) performs an Action (and before the next chit is drawn).
If a stack performs a Second Action, every Unit in the stack must perform the same Action (and you must pay one Command Point for every Unit in the stack, i.e., if three Units in a stack perform a Second Action it costs three Command Points).
Also, as explained in Rule 13.2, a Second Action during a Division activation is not subject to the Division activation restrictions.
10.0.3. How can I get (or lose) Command Points and Dispatch Points?
Each time a Division Activation Chit is drawn, roll for that Division to see how many Command Points it gets and how many Dispatch Points it gets (or doesn't get, or loses—all these outcomes are possible for Dispatch Points).
For Command Points: roll a die and add half the die roll (rounding down) to the Division's Command Rating (found in the exclusive rules). The total is the number of Command Points the Division receives.
For Dispatch Points: roll a die against the Division's Dispatch Rating (found in the exclusive rules). If the die roll is . . .
- nine, the Division loses one Dispatch Point.
- zero, the Division gains one Dispatch Point.
- equal to or less than the Division's Dispatch Rating, the Division gains one Dispatch Point.
- less than (but not equal to) the current number of the Division's Dispatch Points, the Division gains one Dispatch Point.
Use as many of these Dispatch Point results as are applicable. For example, if the Dispatch Rating is six and the current number of Dispatch Points is two, a roll of one gives the Division two more Dispatch Points, whereas a roll of zero gives three Dispatch Points, and a roll of two gives one Dispatch Point.
If it is the turn before the night turn, you automatically add two Dispatch Points to the Division's total if the Division Activation Chit is drawn. That's right: after you perform the Dispatch Point die roll for a Division, it automatically gets an extra two Dispatch Points if it is the turn before the night turn. The chit must be actually drawn for the bonus.
10.0.4. Is there a maximum or minimum number of Command Points and Dispatch Points I can have?
A Division may never have fewer than zero or more than nineteen Command Points.
A Division may never have fewer than zero or more than nineteen Dispatch Points.
10.0.5. What if my Direct Command Chit is drawn?
If you draw your Direct Command Chit you now get to activate ANY of your In Command Units. All you have to do is spend one Command Point for each Unit that you activate. You may activate Units in any order. The definition of "In Command" is in the Command rules section (see Rule 21.4).
Note how powerful a Direct Command Chit is. This is the only time you will get to coordinate the activation of Units belonging to different Divisions.
Important points on Direct Command activations:
- You can activate as many or as few Units as you want (up to the limit of available Command Points, of course).
- A Division's Command Points can be used to activate Units of that Division only.
- You can perform only one activation per Unit, however. No Second Actions!
- Just as with a regular activation, a Unit must finish its activation before the next one starts. But see point 7 below for an exception.
- You always keep the Command Points that you don't spend and can use them later in the game. But remember that a Division can only accumulate a maximum of nineteen Command Points.
- You may only activate Units that are In Command (i.e., those within the Command Range of their Leaders). This is also explained in the Command rules section (see Rule 21.0).
- If you want to activate a stack for movement or Assault, you may pay all the necessary Command Points at once for the Units that will be acting together. This is an exception to point 4 above.
- You may not spend Command Points to perform an Engineer Action. The Action is what is important here—not the Unit performing the Action. Engineers can perform non-Engineer Actions (they may move, fire, Rally, etc.).
10.0.6. When does the Activation Phase end?
The Activation Phase ends after the second to last chit is drawn from the mug and played. The last chit in the mug is not drawn for this turn, it becomes the first chit to be played for the next turn. Note that if the last chit in the mug is a Formation Activation Chit, the player who owns it automatically gets it for the next turn without having to pay for it again.
11.0 Remove all barrage markers
Pick 'em up.
12.0 Move the turn record marker up a box
Do that and go on to the next turn. If it was the last turn, determine victory.
13.0 Performing Actions with Units during the Activation Phase
13.1. Which Units can I perform Actions with?
During the Activation Phase you can perform Actions with all of your Active Units, which can mean one of the following:
- all Units that belong to the Division whose Activation Chit you just drew (but remember that these Units are limited to non-combat Actions (see Rule 13.2), unless they are performing Second Actions (see 10.0.2)); or
- all Units that belong to the Formation whose Activation Chit you just drew; or
- if you drew the Direct Command Chit, any In Command Unit that you spend a Command Point for.
Note that the counters are color-coded (base color is the division, stripe color is the formation) so you can tell which Units belong to which Formation.
13.2. What can I do with my Active Units?
With one exception, while their Formation or Division is Active, Units can perform one of the following Actions. (The exception is the Second Action, explained in Rule 10.0.2.) In the list below, note the limitations for Division activations, Direct Command activations, and Second Actions:
- Movement Actions: move (also includes entering or exiting Column, and exiting Transport Mode); entering Transport Mode; entering or leaving an entrenchment (exception: a Unit activated with a Division Activation Chit may not move into an enemy Fire Zone (however, a Unit already in an enemy Fire Zone could get into or out of Column or Transport Mode)).
- Fire (exception: any Unit activated with a Division Activation Chit may not fire).
- Assault (exception: any Unit activated with a Division Activation Chit may not Assault).
- Rally.
- Engineer Actions: build an improved position; build an entrenchment; build a road block; remove a road block; create a Rearguard and any others permitted by the exclusive rules. None of these can be performed as a Second Action or during a Direct Command activation.
- Remove a Rearguard.
- Any other Actions permitted by the exclusive rules.
- Pass. (Why would you pass? For example, say you picked a Division Activation Chit, but really want to fire with one of your Units and not do anything else with it. You pass as its Action, then pay one Command Point to have it fire as a Second Action.)
Directions on how to perform these Actions and the restrictions on them follow in the rules sections below.
A Unit performing a Second Action may also perform one of the Actions listed above, with the following additional restrictions:
- the Second Action must be of a different type from the first Action the Unit performed; and
- the Second Action cannot be an Engineer Action.
This means a Unit cannot mount a vehicle and then move as a Second Action, as these are both Movement Actions.
A Second Action during a Division activation is not subject to the Division activation restrictions. The Unit can fire, Assault or enter a Fire Zone. It is only the initial, free activation that is limited.
Play note: A Unit can be activated more than once during a turn as part of a Formation activation, a Division activation, and a Direct Command activation. The number of times a Unit has been activated during a turn has no effect on what Actions it can perform (or how it can perform them) in successive activations. Put another way, each new activation is a fresh opportunity for a Unit to perform Actions.
13.3. In what order can my Units perform Actions?
With only a few, albeit very important, exceptions, you can perform Actions with your Units in any order you want to.
Here is the order in which you must do things in a Formation or Division activation:
- Perform all Actions with your Units. Any Second Action for a Unit (or stack of Units) must be performed immediately after the initial Action performed by that Unit (or stack of Units).
- After all units have moved, decide where you want the Formation's/Division's Leader(s) and then transfer him (or them) there (see Rule 21.2).
Note that during Actions performed by spending a Command Point, a Leader must stay stacked with the Units he is currently stacked with (see Rule 21.2).
Note also that Leaders transfer only after all other Units have performed all of their Actions. Command Range is determined for all Units from the hex the Leader started the Activation. Move too far and you might be out of range for a second Action.
13.4. What do all the Non-Active Units do during Activations?
If, for example, you are the Active player, your opponent's Non-Active Units may get to fire at your Active Units using Opportunity Fire (see Rule 17.0) or exchange fire during Assaults (see Rule 18.0). Your Non-Active Units do mostly nothing during assaults on other units; they might get to Opportunity fire at Units running away from Assaults.
14.0 Moving Units
14.1. General notes on the movement rules
Movement is wargame standard hex-to-hex, paying movement points for terrain. Each Unit belongs to one of four Movement Classes (Wheeled, Tracked, Leg, and Immobile; color-coded on the counter), which govern terrain costs. Each Unit also belongs to one of three Unit Classes (Infantry, Gun, and Vehicle; noted by the symbol on the counter), which affect how the Unit moves. Movement allowances are printed on the counters in the appropriate color for the Movement Class. You need to pay attention to the rules on stacking during movement. Also, there is Opportunity Fire, which can stop a moving Unit. Units may never use a Movement Action to enter a hex occupied by an enemy Unit. Units may never move within two hexes of an enemy reinforcement entry hex.
14.2. Which Units can move?
All those Active Units that are of the following Movement Classes:
- Wheeled (W) (black movement allowance)
- Tracked (T) (red movement allowance)
- Leg (L) (white movement allowance)
Each Movement Class pays different movement costs on the Terrain Effects Chart.
14.3. How do Units move?
Units move from hex to adjacent hex spending the necessary movement points as listed on the Terrain Effects Chart to cross hexsides and enter hexes.
14.4. Which Units cannot move?
Many Units do not have a movement allowance; these are Immobile Units and they are never allowed to move or retreat by themselves, but they can be transported if they have Organic Transport (see Rule 14.10).
14.5. What about terrain and movement?
See the Terrain Effects Chart for movement costs. Different Movement Classes pay different terrain costs. The exclusive rules contain descriptions of the terrain types.
14.6. How can my Units use Column movement?
For your Unit to use the Column movement rate, you just need to place a Column marker on the Unit. This costs the Unit one movement point when done as part of a Movement Action. Units have the option to receive a Column marker when they dismount from a vehicle (see Rule 14.10.3). You remove the Column marker by paying one movement point (which can trigger Opportunity Fire as normal from an enemy Unit) or by taking a Cohesion Hit, which would not trigger Opportunity Fire. You may not place a Unit in Column and then remove the marker in the same Action unless you have the Unit leave Column by taking a Cohesion Hit (you may not pay one movement point to get into Column and one movement point to get out of Column in the same action).
You don't have to keep a Unit with a Column marker on a Road. You can move it through or across any terrain by paying the Column movement terrain costs.
Note that you may find a hex through which two Roads run but do not connect. You may not move your Unit from one Road to the other without paying the cost for the terrain in the hex.
14.6.1. What's the bad part about being in Column?
A Unit with a Column marker is considered deployed for movement and, if fired at, will be getting negative fire combat and Assault modifiers: its Fire Rating and Assault Rating are each reduced by one, and its Defense Rating increased by two. (All this is noted on the Column marker.)
In addition, if fired upon, a Unit in Column never receives any beneficial (i.e., negative) terrain modifiers. All Modifiers that help your enemy's fire are all still in force.
Also, no more than one Unit in Column is ever allowed in a hex and Column stacking limits are in effect at all times in the game, including during movement.
14.6.2. Units in Column may not:
- Stack with other Units in Column
- Perform Engineer Actions (build an improved position, build an entrenchment, build or remove a road block, create a Rearguard, and any other additional Engineer Actions defined in the exclusive rules)
- create a Rearguard
Movement Example (including Forced March)
The In Command German Unit has been activated and will move. The movement into the first hex costs four movement points (two points to move into a polder hex, plus two to cross the stream). As the Unit's movement allowance is four, it cannot move any further. However, the Unit can now attempt a forced march to receive another two movement points for this Action. To do this, the Unit must pass a Troop Quality Check (a roll of three or less) or spend a Command Point (if the Unit were Out of Command it would subtract one from its Troop Quality Rating for the Troop Quality Check). The Unit rolls a one, giving it two more movement points. It moves one more hex for the cost of two movement points and then stops (it does not have any movement points left). If the Unit had failed the check, it would take a Cohesion Hit and end its Action.
14.7. What about stacking and movement?
Units that are stacked together (and not in Column—stacking more than one Unit in Column is illegal) can be moved together if activated together. They have to start the activation together—no picking up Units. You may drop Units off, but the dropped-off Unit is done for the Action (no going back and moving it somewhere else).
If a moving stack triggers Opportunity Fire (see Rule 17.0), any Unit firing gets to target only one of the stacked Units, but the Non-Active Player does get to choose which one. All the Units in the stack are taken into account when determining the mass modifier, though.
The stacking limit for a hex is four Units not in Column plus one Unit in Column, for a total of five Units. Leaders and informational markers do not count towards stacking.
The stacking limit for Units not in Column is enforced at the end of a Unit's activation (exception: Units running away from an Assault, see Rule 18.7(5E), 7th bullet). Stacking limits for Units in Column are in force at all times.
General Exceptions to the Stacking Rules
- Stacked Units that are moving together do not benefit from Roads.
- Units not in Column may not cross a bridge or a ferry (or, if you prefer, only Units in Column can cross a bridge or a ferry).
14.8. Forced march
Leg Units can gain two extra movement points if they perform a forced march. Units (or stacks of Units) that have already moved as far as they can may try to force march. To do so, each Unit must pass a Troop Quality Check. You may spend a Command Point to pass this check. Each Unit that passes its Check gains two extra movement points. If the Unit fails the check, its Action is over and it takes a Cohesion Hit.
14.9. Leg Infantry Units can (almost) always move at least one hex
When a Leg Infantry Unit is activated, it can move one hex regardless of movement allowance and terrain costs as long as it is not Suppressed, and it may not perform a Forced March after this movement. The movement uses all the movement allowance of the Unit.
However, the Unit may not move across a hexside or into a hex with terrain that is prohibited to it (e.g., across a bridge if it is not in Column).
14.10. Transport
14.10.1. Transport generally
In game terms, Infantry or Gun Units enter "Transport Mode" by "mounting up" on vehicles so they can move faster.
Some Infantry or Gun Units have Organic Transport, shown with a vehicle silhouette printed on the flip side of their counter and a black box around those dots on the front of the counter that tell you how many Steps the Unit has. These Units use the Transport Mode mechanic.
Column Movement Example
The British Unit is activated and will move out of the orchard hex. First it gets in Column for a cost of one movement point. It then moves into the polder hex, also for the cost of one movement point. As it started with a movement allowance of four, it has two movement points left. It now moves along the road at the Column movement rate for a cost of one-half movement point for each hex. It passes through the village, and comes to a stop after moving four hexes along the road. At this point it could attempt a forced march, giving it another two movement points, and travel another four hexes along the road.
At the end of this Action, the Column marker remains in place, showing all the effects of being in Column. In its next activation, the Unit may get out of Column for a cost of one movement point (and possibly trigger Opportunity Fire), or it may take a Cohesion Hit to get out of Column (and not trigger Opportunity Fire — it could also get out of Column by this method during this activation if it wished).
14.10.2. How do Units use Transport Mode?
Pick an Active Infantry or Gun Unit that has a vehicle silhouette on its flip side. Announce that the Unit is "mounting up" and flip it over to its Vehicle side. The Unit may be placed in Column for free at this time (some Terrain types may require the Unit to get into Column). This places the Unit in Transport Mode and finishes its Action. This is a Movement Action and does trigger Opportunity Fire. The Opportunity Firing player gets to decide when to shoot, i.e., before or after the mounting. If the unit began its activation in Column, it stays in Column. A Unit that mounts up retains all its markers.
In its next Action, the Unit gets to move as a Vehicle Unit, and uses all the values on the Vehicle side of its counter for all purposes. In effect, the Infantry Unit "becomes" the Vehicle Unit on the flip side of its counter.
14.10.3. How do Units exit Transport Mode?
In any Movement Action after it entered Transport Mode, a Unit can exit by paying half of its printed movement allowance (the one on the Vehicle side of its counter, rounded down). Just flip the Unit over to its non-Vehicle side; it may be placed in Column or not, at the owning player's choice, as long as stacking limits are observed. The Unit's Action is now over. Dismounting does trigger Opportunity Fire. The Opportunity Firing player gets to decide when to shoot, i.e., before or after the dismounting.
14.10.4. What if a Unit in Transport Mode is attacked?
Simply use the values on the Vehicle side of the counter.
If the Unit becomes Suppressed while in Transport Mode, it cannot exit Transport Mode until it Rallies.
All other combat results (i.e., Step Losses, Cohesion Hits) stay with the Unit after it exits Transport Mode.
Stacked Movement and Second Action Example
The three British Units all start together and, when they are activated, can move as a stack. If the stack triggers Opportunity Fire as it moves, only one of the Units can be targeted at a time, not all three of them. All three Units move one hex at a cost of two movement points, and the mortar Unit is dropped off, which ends its Action. The remaining two Units move one more hex for another two movement points, placing them adjacent to the German Unit. This uses up their entire movement allowance. At this point a Second Action may be performed by these two Units for the cost of two Command Points (one Command Point for each Unit). This Second Action must be different from the first Action, so it cannot be movement, but it could be either Direct Fire or Assault, for example. If a Second Action is performed, both Units must perform the same Action.
14.11. Retire by prolonge
Gun Units with a movement allowance of "*" rather than a number can move one hex if they pass a Troop Quality Check. If they fail the Troop Quality Check they take a Cohesion Hit and may not move. The one-hex move may not be into or across prohibited terrain or into an enemy Fire Zone. The Units are considered to be Leg Units for Movement Type.
These Units may enter or exit an Entrenchment by passing a Troop Quality Check, providing the Entrenchment is not in an enemy Fire Zone.
15.0 Fire Combat
15.1. Fire combat generally
Fire combat is either Direct Fire or Indirect Fire. For both types of fire your firing Unit needs to be within Fire Range of its target. Direct and Indirect Fire have different effects and use different lines on the Combat Results Table. Note that a Unit with no printed Fire Range has a Fire Range of one.
For Direct Fire, a Line of Sight between the firing Unit and its target is necessary.
For Indirect Fire, no Line of Sight between the firing Unit and its target is necessary, but if there is no Line of Sight, there must be a spotter Unit in radio contact with the firing Unit, and the spotter Unit must have a Line of Sight to the target.
These fire rules also govern how Opportunity Fire is resolved, but note that the Opportunity Fire rules govern how Opportunity Fire arises.
15.2. Which Units get to fire?
Any Active Unit with a Fire Rating may fire (exception: Non-Active Units with a Fire Rating can Opportunity Fire). The Fire Ratings are in the upper left of the Unit counters. Units without a Fire Rating have a "No" instead of a number. "0" is a valid Fire Rating.
15.3. Which Units can be fired at?
For Direct Fire:
A Unit can fire at any one enemy Unit that is:
- within Fire Range of the firing Unit; and
- in the Line of Sight of the firing Unit.
Note: If you are Direct Firing at a Unit in a stack, your fire only affects that Unit (this is different for some types of Indirect Fire, which may affect all the Units in a stack (see Rule 16.4.1)).
Note that a Unit's Fire Range is reduced to one hex if it is adjacent to an enemy Unit or if it is in a hex with a barrage marker.
For Indirect Fire:
A Unit can fire at any one enemy Unit that is within Fire Range of the firing Unit and either:
- in the Line of Sight of the firing Unit; or
- in the Line of Sight of a spotter Unit that has established radio contact with the firing Unit.
Note: Certain results of Indirect Fire may affect all Units in a stack, not just the target Unit (see Rule 16.4.1).
Remember that a Unit's Fire Range is reduced to one hex if it is adjacent to an enemy Unit or if it is in a hex with a barrage marker.
15.4. What is a Line of Sight?
A Line of Sight is a straight, unblocked line between the center dot of a hex containing a firing or spotting Unit and the center dot of the target hex. An "unblocked" line is one that does not pass through hexes with Blocking Terrain (Blocking Terrain is listed on the Terrain Effects Chart), crest hexsides, or hexes with barrage markers.
As long as it ends there, a Line of Sight may enter a hex containing Blocking Terrain. As long as it begins there, a Line of Sight may exit a hex containing Blocking Terrain. A Line of Sight may not pass through a hex containing Blocking Terrain or a barrage marker.
Once you have an unblocked Line of Sight, count the number of hexes along it (count the last hex but not the first) to determine the Line of Sight distance.
The maximum Line of Sight distance during a clear daylight turn is eight hexes.
The maximum Line of Sight distance during a daylight turn with fog or rain is two hexes.
The maximum Line of Sight distance during a night turn is two hexes.
Note that the observation post rule (see Rule 15.4.2) and strongpoint rule (see Rule 15.4.3) contain major exceptions to the Line of Sight rule.
15.4.1. What does and does not block Line of Sight?
Blocking Terrain blocks Line of Sight. The Terrain Effects Chart shows which terrain allows a Line of Sight and which does not.
Units and Leaders do not block Line of Sight.
A Line of Sight does exist along a hexside between two hexes, one with Blocking Terrain and the other without.
Dismount Example
The Tracked Unit (red movement allowance) starts in a clear hex, and moves into the adjacent clear hex for a cost of two movement points. As the Unit is not in Column, it does not get to use the road movement rate. The next hex it enters is also clear and this costs another two movement points. Upon entering this hex, the Unit dismounts, for a cost of eight movement points (half its printed movement allowance, sixteen divided by two), and this ends its Action. When the Unit dismounted it had a choice to be in Column or not, and decided not to be in Column.
The act of dismounting triggers Opportunity Fire, and an enemy Unit could decide to fire at the Unit when it is mounted or unmounted.
A Line of Sight can always be traced into a hex with Blocking Terrain, or out of a hex with Blocking Terrain; you just can't trace through (i.e., into and out of) a hex with Blocking Terrain.
Crest hexsides are a special case of Blocking Terrain. A crest hexside blocks a Line of Sight crossing it unless the crest hexside is part of either the firing Unit's hex or the target Unit's hex. Running along a crest hexside (not crossing it) has no effect on Line of Sight.
Barrage markers block Line of Sight in the same way as Blocking Terrain.
15.4.2. What are Observation posts?
Observation posts are those little triangles on the map. They are never removed and both sides can occupy and use them. They are the big exception to the Line of Sight rule for spotting, but for Indirect Fire only; observation posts have no effect on Direct Fire.
Any Unit in an observation post hex has a maximum daylight, non-fog, non-rain Line of Sight distance of thirteen hexes, rather than eight hexes. It also has the added ability to trace a Line of Sight through as many as three hexes or hexsides with Blocking Terrain, and into a fourth hex (which can contain Blocking Terrain, as usual). This Line of Sight can only be used by a Unit spotting for an Indirect Fire mission for another Unit (i.e., not for self-spotting).
Any Unit spotting for an Indirect HE Unit from an observation post also gets a plus one modifier on its contact die roll.
In rain, in fog, or at night, the maximum Line of Sight distance from an observation post is reduced to two hexes.
Note that Lines of Sight are not reciprocal between an observation post and a non-observation post hex. Just because a Unit in an observation post has a Line of Sight to a second Unit that is not in an observation post does not mean that the second Unit has a Line of Sight to the Unit in the observation post.
An observation post has no impact upon Direct Fire.
15.4.3. What are Strongpoints?
Strongpoints are the little star-like symbols on the map. Just like observation posts they are never removed and can be used by either side. These are the second exception to the Line of Sight rule.
A Unit in a strongpoint is able to trace a Line of Sight through as many as two hexes or hexsides with Blocking Terrain and into a third hex (which can contain Blocking Terrain, as usual). Unlike observation posts, strongpoints do not change the maximum range of a Line of Sight, and can be used for Direct Fire and spotting Indirect Fire.
Any Unit spotting for an Indirect HE Unit from a strongpoint also gets a plus one modifier on its contact die roll.
Note that the Lines of Sight are not reciprocal between a strongpoint hex and a non-strongpoint hex.
Direct Fire Example
The German flak Unit is within range of both British para Units, but only has a Line of Sight to A Company—the crestside blocks the Line of Sight to B Company because the crest is not part of the firer's or target's hex. The Fire Rating for the flak Unit is three (the yellow box shows that this is a Direct HE Weapons Class Unit), and this is modified by the range (minus one). As the flak Unit is not a two-Step Unit it cannot obtain the Company Bonus, the terrain is clear so it has no modifier, the Defense Rating of the target is zero, the target hex has only two Steps so there is no mass modifier, and there are no status markers on the target Unit. The modified Fire Rating of the flak Unit is two. A die is rolled and a result of two or less is a hit, three or more a miss. Even if the Fire Rating was modified to a negative value, the roll should be made, as a zero is always a hit.
The die roll is one, a hit. Cross referencing this on the Combat Results Table, for an Unarmored target (white box around the Defense Rating) this is an "S" result, a Suppression. The target Unit can either take the Suppression and receive a Suppression marker, or attempt to convert it into a Cohesion Hit by passing a Troop Quality Check. The para Unit attempts to convert the Suppression by rolling the die. If it is In Command, it needs a six or less to pass (or it may spend a Command Point). The roll is a zero, so it passes, and a Cohesion Hit marker is placed on the Unit.
15.5. How do I fire at a Unit?
Immediately below is a summary of the fire combat steps, followed by an expanded version that explains the steps in detail. Note that these are the complete steps for Direct Fire combat. You also use these steps to resolve Opportunity Fire when it arises. For Indirect Fire, you start with the Indirect Fire steps and then move back to the Direct Fire steps to complete the procedure.
- Say which Unit you want to fire with.
- Say which Unit you want to fire at.
- Determine the firing Unit's final Fire Rating by modifying its printed Fire Rating with any applicable Direct Fire modifiers (see Rule 15.6 or the Combat Results Table).
- Roll one die to determine whether there is a hit, and if so, whether there is damage.
- Check the Combat Results Table to determine the fire effects.
Here is an expanded version of the fire combat steps.
- Say which Unit you want to fire with. a. It must be Active (unless it is Opportunity Firing). b. It must have a Fire Rating of "0" or greater (look at the upper left of the counter). c. One Unit targets one Unit. Units may not combine fire, nor may more than one Unit be targeted.
- Say which Unit you want to fire at. a. The target must be within the Fire Range of the firing Unit. b. For Direct Fire the firing Unit must have a Line of Sight to the target; for Indirect Fire the firing Unit must have either: (i) a Line of Sight to the target; or (ii) radio contact with a spotter Unit that has a Line of Sight to the target. c. One Unit fires at one Unit. A Unit may not fire at more than one target. d. Remember, if your firing Unit is adjacent to an enemy Unit, or if it is in a hex with a barrage marker, its Fire Range is reduced to one hex.
- Determine the firing Unit's Fire Rating, including applicable modifiers. a. Start with the Fire Rating printed on the upper left of the Unit counter. b. Determine which modifiers apply to the firing Unit's Fire Rating (see the Combat Results Table and Rule 15.6 for descriptions of the fire combat modifiers). And remember, you never modify fire die rolls in this game. You modify Fire Ratings. This is very important!
- Roll one die. a. It's a hit if the die roll is equal to or less than the modified Fire Rating of the firing Unit (the number from step 3). No matter what the modified Fire Rating, a die roll of zero is always a hit. If it is a hit, go to step 5. b. It's a miss if the die roll is greater than the modified Fire Rating of the firing Unit (the number from step 3). No matter what the modified Fire Rating, a die roll of nine is always a miss. The firing Unit's Action is now over.
- Go to the Combat Results Table to determine target damage by cross indexing the number that you just rolled on the die with the Weapons Class (i.e., Direct HE, SA, DP, etc.) and target (i.e., Armored or Unarmored) and immediately apply the result to the target Unit (see Rule 19.0).
You only roll the die once for combat. You use the same die roll that determines whether there is a hit is also used to determine what damage the hit caused. Note also that Indirect HE Units that are performing Direct Fire use the yellow "Direct HE" Weapons Class on the Combat Results Table.
15.6. What are the fire modifiers?
These are also listed on the Combat Results Table.
Modifiers to the firing Unit's Fire Rating:
- Cohesion Hits and Step Losses taken by the firing Unit—modifier listed on the marker.
- Defense Rating of the target.
- Range to the target—modifier listed on the Combat Results Table.
- Target's mass (this includes all the Units in a stack, not just the target)—modifier listed on the Combat Results Table.
- Target's terrain—modifier listed on the Terrain Effects Chart.
- Company Bonus. If the firing Unit is a two-Step Unit that has taken no Step Losses, make a Troop Quality Check (a nine always fails and a zero always succeeds). If the Unit passes, it receives the Company Bonus modifier (plus two). If the Unit is In Command, a Command Point may be spent to automatically pass the Troop Quality Check. Units Opportunity Firing cannot receive the Company Bonus modifier.
- Improved position/entrenchment—modifier listed on the marker.
- Weather conditions and night—modifier listed on the Combat Results Table.
- Barrage marker in the firing Unit's hex—modifier listed on the marker.
16.0 Indirect Fire, Mortar Units and Indirect High Explosive Units
16.1. What are the Mortar and Indirect High Explosive ("HE") Weapons Classes?
Mortar and Indirect HE are subclasses of the HE Weapons Class with the following special attributes:
Mortar Units:
- Use Indirect Fire only (i.e., they may not Direct Fire);
- Use the green "Mortar" Weapons Class on the Combat Results Table; and
- May not Opportunity Fire.
Indirect HE Units:
- Use Indirect Fire or Direct Fire, depending upon range;
- Have a minimum Indirect Fire Range of four hexes (i.e., they can't Indirect Fire at Units closer than four hexes), and a maximum Direct Fire Range of three hexes;
- Use the orange "Indirect HE" Weapons Class on the Combat Results Table for Indirect Fire and the yellow "Direct HE" Weapons Class for Direct Fire; and
- May perform Opportunity Fire with their Direct Fire.
16.2. What is Indirect Fire?
In real life it is ordnance that goes up into the air and comes down on top of its target with gravity. Unlike Direct Fire, with Indirect Fire you don't necessarily have to have a Line of Sight to your target to hit it, but if the firing Unit doesn't have a Line of Sight to its target, it needs to be in contact with a Unit that does have a Line of Sight to the target. When an Indirect HE or Mortar Unit uses Indirect Fire against a target to which it has a Line of Sight, we say that it is "self-spotting".
Once issues of spotting are dealt with, the Indirect Fire procedure is the same as that for Direct Fire, except that there are no range modifiers, and certain results of Indirect Fire can affect all the other Units in the hex as well as the target Unit.
For spotting purposes each Indirect HE Unit has its own contact/contact pending marker. The contact/contact pending marker is used to show radio contact with a spotter. If there is radio contact, place the marker on its contact side, otherwise place it on its contact pending side.
- If no Unit is spotting for an Indirect HE Unit, place the marker on its contact pending side in the same hex as the Indirect HE Unit.
Self-Spotted Indirect Fire Example
The American Mortar Unit is within range and has a Line of Sight to the German Unit, which is in a woods hex, so it can perform self-spotted Indirect Fire. The Fire Rating of the Mortar Unit is three, and this is modified to three (no terrain modifier as the mortar is an HE weapon, range has no effect on Indirect Fire, the target has a Defense Rating of zero, there is no mass modifier, and there are no markers in effect) with a possible Company Bonus. The Mortar Unit rolls for the Company Bonus, a Troop Quality Check, and rolls a one, so it receives the Company Bonus, modifying the Fire Rating to five. A die roll of five or less will be a hit, six or more is a miss. The die roll is a one, the result when cross-referenced on the CRT is an "S?", a possible Suppression. The defending Unit needs to pass a Troop Quality Check or suffer a Suppression result. The German Unit rolls a three and passes the Troop Quality Check so it is not Suppressed. If it had failed this roll, it could still have attempted to convert the Suppression into a Cohesion Hit.
A light barrage marker is placed in the target hex, and it will be removed at the end of the turn. If the Fire Rating plus Company Bonus, if obtained, had been six or greater, a heavy barrage marker would have been placed instead of the light barrage marker.
- If the Indirect HE Unit has established radio contact (see Rule 16.3) with a Unit, we call that Unit's Formation a "spotter" Formation; place the contact/contact pending marker on its contact side in the same hex as the spotter Formation's Leader.
- If an Independent Formation Unit is spotting for the Indirect HE Unit and the Indirect HE Unit establishes contact, the contact/contact pending marker remains with the Indirect HE Unit on its contact pending side.
- If an Indirect HE Unit is in radio contact, and then self-spots a fire mission, the radio contact is lost.
- Also, if the Indirect HE Unit has a barrage marker placed upon it, or it takes any combat result due to enemy fire (including S?), radio contact is lost.
- If radio contact is lost, put the contact/contact pending marker back with its Indirect HE Unit, on its contact pending side.
Note: A single Formation can act as a spotter Formation for any number of Indirect HE Units at the same time (and thus a Formation's Leader can be marked with more than one contact marker).
Note: A spotter for a Mortar Unit must be from the same Formation as the Mortar Unit. Contact is automatic.
Note: A Unit in a reinforcement entry hex may not act as a spotter.
16.3. How do I carry out an Indirect Fire mission
Use this procedure any time you activate a Mortar Unit for a fire combat Action, or any time you activate an Indirect HE Unit for a fire combat Action against a target Unit or empty hex that is four or more hexes away. (If your Indirect HE Unit is firing at a target three or less hexes away, just use the Direct Fire procedure in Rule 15.5.)
If the Indirect Fire mission is self-spotted, i.e., the firing Unit has a Line of Sight to the target, start at step 9 below.
If the Indirect Fire mission needs a spotter, i.e., the firing Unit does not have a Line of Sight to the target, start at step 1 below.
-
First make sure that your firing Unit is in range of the target Unit or empty target hex and is In Command. Remember that adjacent enemy Units reduce the Fire Range to one hex. (Firing Units that are Out of Command may not use spotters.)
-
Find an Unsuppressed, In Command Unit to spot for the mission. If you can't find a Unit that is In Command and Unsuppressed, you can't fire the mission.
-
Make sure your spotter has a Line of Sight to the target Unit or target hex.
-
If it is a Mortar Unit that will be firing, make sure the spotter and Mortar Unit belong to the same Formation. If they aren't in the same Formation, you can't fire. If they are in the same Formation, go to step 9.
-
If it is an Indirect HE Unit that will be firing and the spotting Unit belongs to a Formation that is already in contact with the firing Indirect HE Unit, go to step 9.
-
If it is an Indirect HE Unit that will be firing and the spotting Unit does not belong to a Formation that is in contact with the firing Indirect HE Unit, now's the time to find the Indirect HE Unit's contact/contact pending marker.
If the Indirect HE Unit is not in radio contact with a Formation roll a die against the number on the contact pending side of the marker, making sure to modify the contact number with any appropriate numbers from the Radio Contact Modifiers list (including any modifiers in the exclusive rules) given in the charts. If the die roll is less than or equal to the contact number, the Indirect HE Unit is now in radio contact with the Formation; go to step 7. If the die roll is higher, there is no contact; go to step 8. No matter what the modified contact number, a die roll of zero is always "contact", and a nine is always "no contact".
If the Indirect HE Unit is in contact with a Formation other than the Formation of the Unit now trying to spot for the Indirect HE Unit, use the number on the contact side of the marker, making sure to modify the contact number with any appropriate numbers from the Radio Contact Modifiers list (also see the special rules for other modifiers). If the die roll is less than or equal to the modified contact number, the Indirect HE Unit and the new Formation are now in radio contact; go to step 7. If the die roll is higher, there is no new contact, and contact is retained with the original Formation; go to step 8. No matter what the modified contact number, a die roll of zero is always "contact", and a nine is always "no contact".
-
Place the contact marker, contact side up, on the Leader of the spotting Formation, unless the spotting Formation is an Independent Formation, in which case the marker is not placed. This is now the "spotter Formation". The Indirect HE Unit can now use any In Command Unit in the spotter Formation to spot for Indirect Fire until: (i) it loses contact by rolling a nine on a fire mission (step 9) (this includes the current mission); (ii) it establishes radio contact with a new spotter Formation; (iii) it self-spots for an Indirect Fire mission (spotted Direct Fire does not break radio contact); iv) it has a barrage marker placed on it; or v) it takes any combat result due to enemy fire. Now go to step 9.
If a nine is rolled during the Direct Fire procedure, radio contact is lost. Turn the marker to the contact pending side and place it back with its Indirect HE Unit. No Indirect Fire takes place, and the Action for the Indirect HE Unit is over.
16.4. Special effects of Indirect Fire
16.4.1. Stacking and Indirect Fire
All Units stacked in the same hex as a Unit that is the target of Indirect Fire from an Indirect HE Unit (not a Mortar Unit) suffer an "S?" result if:
- the target Unit receives an "S?" result and fails its Troop Quality Check, or
- the target Unit receives any other combat result.
16.4.2. Indirect Fire and barrage markers
There are two kinds of barrage markers: light barrage and heavy barrage.
16.4.2.1. When to place and remove barrage markers
Place a light barrage marker in a hex if:
- the printed Fire Rating (as modified by any Company Bonus modifier, and any modifiers due to markers on the Unit such as Column) of the Indirect Firing Unit is five or less; and
- the fire combat die roll is less than nine.
Spotted Indirect Fire Example
In the situation shown to the left, the artillery Unit has been activated and wishes to fire on the hex containing the two German Units. It does not have a Line of Sight to the hex, but there is an In Command Unit that does have a Line of Sight. The first thing the artillery Unit needs to do is make contact with the Leader of the Formation of the Unit that has the Line of Sight (the Leader happens to be in the same hex as the Unit). The artillery Unit is not currently in contact with any other Leader, and the contact number on the contact pending side of the marker is six (there are no modifiers in this example, as the Units are of the same Division). The die roll is two so the artillery Unit is in contact, with the marker placed on the Leader ("contact" side up).
The artillery Unit now selects a target Unit in the hex, and picks the zero-Step flak Unit. The Fire Rating is four, modified by the Defense Rating of the target, plus 2, and possibly the Company Bonus. Rolling for the Company Bonus, the die roll is one and this bonus is obtained, giving a final modified Fire Rating of eight, so any roll but a nine will be a hit (and if a nine is rolled, contact will be lost and no barrage marker is placed). The die roll is four; cross-referencing this on the CRT shows a "C", a Cohesion Hit. This eliminates the zero-Step Unit.
As the fire resulted in a hit, all other Units in the hex must suffer an "S?" result, possible Suppression. The German Unit rolls a Troop Quality Check, and rolls seven, so it fails the check. Instead of taking the Suppression, the player decides to spend a Command Point (assuming the Unit is In Command) to convert this to a Cohesion Hit.
Finally, as the Fire Rating with the Company Bonus was greater than five, a heavy barrage marker is placed on the hex. At the end of the spotted Indirect Fire, the situation is as shown.
Place a heavy barrage marker in a hex if:
- the printed Fire Rating (as modified by any Company Bonus modifier, and any modifiers due to markers on the Unit such as Column) of the Indirect Firing Unit is six or more; and
- the fire combat die roll is less than nine.
Note that you don't combine the Fire Ratings of different Units firing into the same hex—three twos are not a six.
Barrage markers are placed after the resolution of the Indirect Fire attack.
There can be only one barrage marker in a hex at one time. Heavy barrage markers replace light barrage markers (but not vice-versa).
You may fire on an empty hex just to place a barrage marker there (any die roll other than 9 will place the marker - light or heavy barrage per the strength of the firer).
All barrage markers are removed from the map after the Activation Phase and before the end of the turn.
16.4.2.2. Effects of barrage markers
Barrage markers affect Units of both sides regardless of which side placed the marker.
Any Unit in a hex with a barrage marker has its Fire Range reduced to one hex.
Barrage markers are treated as Blocking Terrain for Line of Sight.
An Indirect HE Unit loses contact if placed under a barrage marker. Place the Unit's contact/contact pending marker back with its Unit on the contact pending side.
Any Unit moving out of a hex with a light barrage marker pays an extra two movement points to do so.
Any Unit moving out of a hex with a heavy barrage marker pays an extra two movement points to do so, takes a Cohesion Hit, and must pass a Troop Quality Check before it can move. (If it fails the Troop Quality Check, it must stay in the hex but still takes the Cohesion Hit).
If you are trying to move a stack of Units out of a heavy barrage hex, you must first announce which Units are moving, then make the Troop Quality Check for each Unit, one at a time. Once all the Units have rolled, those that passed their Troop Quality Check must
Opportunity Fire Example
The German Unit has been activated and will move to the hex containing the entrenchment. The Unit moves one hex, and as it is leaving a hex in the Fire Zone of the American Unit, this triggers Opportunity Fire from the American Unit. The American Unit rolls to pass its Troop Quality Check and rolls nine, so it fails the check and the Opportunity Fire does not take place.
In a subsequent activation, the German Unit tries to enter the entrenchment. This also triggers Opportunity Fire from the American Unit, which passes its Troop Quality Check this time. The modified Fire Rating is seven (Fire Rating is four, plus three because the start and end of the Action triggering Opportunity Fire is in a Fire Zone, and there are no other modifiers). The Opportunity Fire can take place either before or after the Unit enters the entrenchment, and the shot is taken before the Unit enters. The die roll is three, meaning the Unit becomes Suppressed. The German player rolls to try and convert this to a Cohesion Hit and rolls a six, so the Unit becomes Suppressed and does not enter the entrenchment. The final situation at the end of this activation is shown.
leave the hex as a stack; you can't change your mind about whether to move the last Units to roll based on what happened to the first Units to roll. Once committed, all are committed.
A Unit in a hex with a light barrage marker suffers a minus one modifier to its Fire and Assault Ratings. A heavy barrage marker changes these modifiers to minus two.
A Unit under a light barrage marker has its Troop Quality Rating reduced by one, while a heavy barrage marker reduces the Troop Quality Rating by two.
17.0 Opportunity Fire
17.1. Opportunity Fire generally
Opportunity Fire is what a Non-Active Unit may do when an Active Unit does certain things near the Non-Active Unit. After Opportunity Fire is triggered it is the same as Direct Fire except for some special Opportunity Fire modifiers (see Rule 17.6).
17.2. When is Opportunity Fire triggered?
Opportunity Fire may occur whenever a Unit tries to do any of the following in a hex that is in an enemy Unit's Fire Zone (Fire Zones are explained in Rule 17.3):
- Any Movement Action. For movement, however, Opportunity Fire is triggered by leaving a hex in an enemy Fire Zone, but not by entering a hex in an Enemy Fire Zone. As a reminder, the other Movement Actions are: entering Transport Mode; entering or leaving an entrenchment. Entering or exiting Column by spending movement points and exiting Transport Mode are part of a move and thus also trigger Opportunity Fire.
- Assault (but Opportunity Fire is only permitted by the defending Units) or running away from an Assault (but Opportunity Fire is only permitted by Units not involved in the Assault) (see the Assault rule (Rule 18.0) for details).
- Run away from an Assault (but Opportunity Fire is only permitted by Units not involved in the Assault) (see the Assault rule (Rule 18.0) for details).
- Any Engineer Action.
- Other actions defined in the exclusive rules.
Generally, the Opportunity Fire happens—if it happens—before the Active Unit begins its Action. So the Active player would announce that such-and-such Unit will perform such-and-such Action and then give the Non-Active player the chance to Opportunity Fire with any eligible Units. That means the Opportunity Fire will occur in the hex the Active Unit is in when the Opportunity Fire is triggered. This is important for determining things like command status, range, terrain, and target mass.
Notwithstanding this, Units entering or leaving entrenchments or leaving improved positions never benefit from the entrenchment or improved position when taking Opportunity Fire. In addition, Opportunity Fire against a Unit that is entering or exiting Transport Mode can happen either before or after the mode change, at the Opportunity Firing player's discretion.
Finally, Units entering or exiting Column always take Opportunity Fire in Column; but remember that a Unit that leaves Column by taking a Cohesion Hit does not trigger Opportunity Fire.
17.3. What is a Fire Zone?
For any Unit that is not an Indirect HE Unit or a Mortar Unit, its Fire Zone includes any hex to which the Unit has a Line of Sight and that is within its Fire Range. Indirect HE Units have a Fire Zone range of up to three hexes within their Line of Sight. Mortar Units do not have a Fire Zone.
Remember: If a Unit has an enemy Unit adjacent to it, the Unit's Fire Range is reduced to one hex, and its Fire Zone is therefore limited to the hexes adjacent to it. Also, a Unit in the same hex as a barrage marker has its Fire Range reduced to one hex, and therefore its Fire Zone is limited to the hexes adjacent to it.
Play Note: You mean my Non-Active Unit can just blaze away at approaching Units as long as they are in its Fire Zone? You got it; every hex in a Fire Zone that a Unit leaves is another trigger for Opportunity Fire. If your Non-Active Unit has a range of five, that's four Opportunity Fire triggers as an Active Unit approaches.
Just to make sure this rule is remembered as it affects play and is prone to being overlooked, we'll repeat it:
If a Unit has an enemy Unit adjacent to it, or is in a hex with a barrage marker, the Unit's Fire Zone is limited to the hexes adjacent to it.
17.4. Which Units can Opportunity Fire?
Any Unit that can Direct Fire can Opportunity Fire. That means Mortar Units and Units with no Fire Rating may NOT Opportunity Fire. When an Indirect HE Unit uses Opportunity Fire it uses the yellow "Direct HE" Weapons Class, as it is using Direct Fire.
But . . . (here's the catch) . . .
Before a Unit can Opportunity Fire it has to pass a Troop Quality Check. You may NOT spend a Command Point to ensure that your Unit automatically passes this check.
Note: The trigger Actions for Opportunity Fire don't trigger the Opportunity Fire itself, they trigger—if you will—the opportunity for Opportunity Fire—call it the "Opportunity Fire process". This is because a player can always pass on Opportunity Fire, or he may want to Opportunity Fire but his Non-Active Unit fails its Troop Quality Check. In those cases, the Opportunity Fire process was triggered, but the Opportunity Fire did not actually occur.
17.5. Which Units cannot Opportunity Fire?
Those with "No" Fire Rating and Mortar Units.
17.6. What about those different modifiers for Opportunity Fire?
There are four specific situations and modifiers that apply only to Opportunity Fire:
-
If the target of Opportunity Fire is moving into a hex that is in the Fire Zone of any enemy Unit (including the Opportunity Firing Unit), the Opportunity Firing Unit's Fire Rating gets a plus three modifier. Remember, however, that the Opportunity Fire is conducted in the hex the Active Unit is leaving.
This plus three modifier also applies to the following trigger Actions: Assaulting; running away from an Assault; entering/exiting Transport Mode; entering/leaving an entrenchment; entering/exiting Column; any Engineer Action; and other Actions as defined in the exclusive rules.
-
If the target of Opportunity Fire is moving into a hex that is not in the Fire Zone of an enemy Unit, the Opportunity Firing Unit's Fire Rating gets a minus one modifier. Remember, however that the Opportunity Fire is conducted in the hex the Active Unit is leaving.
-
An Opportunity Firing Unit gets a plus two modifier to its Fire Rating when firing at a Unit running away from an Assault. This is in addition to the plus three given above for Fire Zone to Fire Zone movement.
-
There is no Company Bonus modifier possible for Opportunity Fire.
17.7. What happens to the Units that take Opportunity Fire?
Apply combat results from Opportunity Fire immediately, in the hex where the trigger Action occurred. Remember that for movement, this is leaving a hex, NOT entering a hex. The only results that would stop a Unit from continuing its movement are Suppression (if it is not converted to a Cohesion Hit) and, of course, elimination.
17.8. Opportunity Fire procedure
Once Opportunity Fire is triggered, the Non-Active Player must decide whether he wants to take a shot. If he does, he stops the Active Player, announces which Unit will attempt to Opportunity Fire, and makes a Troop Quality Check to see if the Unit can Opportunity Fire. If the Opportunity Fire happens, it follows the Direct Fire procedure but used the different Opportunity Fire modifiers.
The key thing to remember is that the same Unit can trigger Opportunity Fire from many different enemy Units at the same time: they just get in line and wait their turn to Opportunity Fire. And yes, the Non-Active Player does have to announce when he will perform Opportunity Fire, in order to pause the Active Player's actions.
Another important thing to keep in mind is that a Unit can also trigger consecutive Opportunity Fires from the same Non-Active Unit just by leaving several hexes in that Non-Active Unit's Fire Zone during a move.
And a last thing: If a group of two or more Units is moving as a stack and this triggers Opportunity Fire, the Opportunity Firing Unit can only fire at one of the Units in the stack (of the Opportunity Firing player's choice) (see Rule 14.7).
18.0 Assault
In real life, an assault is a force advancing to dislodge the enemy from his positions. In the game, it is a fire and morale contest that can either end early with the assault bogging down or can go on for up to three, possibly bloody, possibly inconclusive rounds.
Assault is an Action.
The Units performing the Assault Action are the Assaulting Units. The Units in the hex being Assaulted are the defending Units. The hex the defending Units are in is the defending hex.
18.1. Which Units can Assault?
Any Unit that has a numerical movement allowance (not "*") and an Assault Rating and does not occupy an entrenchment can Assault, provided it could legally move into the hex it is Assaulting—this means you must pay attention to terrain restrictions. For example, Vehicle Units can only enter city or town hexes if they are in Column, and Units in Column cannot stack together; therefore, only one Vehicle Unit could Assault into a city or town hex.
A Unit with a blank Assault Rating has no Assault Rating and it cannot Assault (or perform Assault Fire).
Zero-Step Units may not perform Assaults.
18.2. Which Units can be Assaulted?
Any Unit can be Assaulted.
18.3. Can Units Assault together?
Yes. If there is more than one eligible Unit in a hex, the Active Player can activate more than one of them at the same time to perform an Assault together. He does this either:
- during a Formation activation as a first Action by declaring that multiple Units in the same hex are now activated to Assault; or
- during a Formation or Division activation as a Second Action by spending one Command Point for each Unit in the hex that will be Assaulting; or
- pursuant to a Direct Command Chit, by spending one Command Point for each Unit in the hex that will be Assaulting.
18.4. Can Units from more than one hex Assault together?
No. Assault only takes place between two adjacent hexes. Units from more than one hex cannot combine to Assault.
18.5. Can Units in more than one hex be Assaulted at the same time?
No. Assault only takes place between two adjacent hexes. Units in more than one hex cannot be Assaulted together.
Assault Example 1
The American Units have been activated, and two Units (H and I Company) will perform an Assault on the hex occupied by the two German Units, one of which is entrenched. Due to the entrenched Unit, each of the Assaulting Units will need to pass a Bravery Check, with a modified Troop Quality Rating of six (minus two for the entrenchment). The rolls are three and five, so both Units pass the Bravery Check and both can continue the Assault.
The defending Units can now Opportunity Fire at the Assaulting Units. The German player rolls a Troop Quality Check for both, and the flak Unit fails the check, but the Infantry Unit passes. It elects to shoot at H Company. The Fire Rating is a four modified to a six (minus two for the woods terrain, minus one Defense Rating, plus one mass modifier [there are six Steps total in the hex being Opportunity Fired into], plus three Fire Zone to Fire Zone, plus one entrenchment). As this is an Opportunity Fire, no Company Bonus is allowed. The Final Fire Rating is six. The German play now rolls a die and rolls a 9. It's an automatic miss.
The first round of the Assault now starts, and the zero-Step flak Unit is automatically eliminated. The American Units decide to perform Assault Fire rather than charge. Each Unit will fire once with its Fire Rating and once with its Assault Rating. The results are applied after all the Assault Fire has been performed. For the American Units, the Fire Rating is modified from four to zero (minus two woods terrain, minus two Defense Rating) with a possible Company Bonus, and the Assault Rating is modified from five to one (minus two woods terrain, minus two Defense Rating) also with a possible Company Bonus. Both Units roll successfully for their Company Bonus with one and seven. Each of their modified Fire Ratings is two and modified Assault Ratings is three. Note that each Unit only rolls once for the Company Bonus, and the one roll applies to both the Fire Rating and Assault Rating. The die rolls are five, five, seven and nine, so they all miss. The German Unit will fire on I Company and has a Fire Rating of four modified to four (minus one Defense Rating, no terrain modifier, no mass modifier, plus one entrenchment) with a possible Company Bonus, and an Assault Rating also modified to four. The roll for the Company Bonus is two, so it applies, and this makes both the final Fire Rating and Assault Rating six. The Fire roll misses on seven, and the Assault roll hits with a one, a Suppression. This Suppression will end the Assault for I Company unless it can convert it to a Cohesion Hit. The player rolls for it, and gets a nine, automatic failure. I Company becomes Suppressed, and is no longer involved in the Assault. At this loss, the American player calls off the Assault, and it comes to an end. The final situation is shown.
18.6. Can a Unit be Assaulted more than once per Activation?
Yes.
18.7. How do I Assault?
- Announce an Assault.
- Pick a hex with one or more of your Units.
- Pick an adjacent hex with one or more enemy Units. You may wish to place the Assault marker in this hex to help indicate which hex is being assaulted.
- Announce which of your unentrenched Units are Assaulting.
- Check for Bravery.
-
If the defending Units include an Armored Unit or an entrenched Unit, or the Assault is over a bridge hexside, each Assaulting Unit must make a Bravery Check, which is a Troop Quality Check (a Command Point may not be spent to ensure a pass), applying the one modifier below that most favors the defending Units:
a) If there are any Armored Units in the defending hex, add to the Assaulting Unit's Troop Quality Rating the unmodified Defense Rating of the defending Armored Unit with the best Defense Rating (note that Defense Ratings are negative numbers so adding a Defense Rating means decreasing the Troop Quality Rating);
b) If there are any entrenched Units in the defending hex, subtract two from the Assaulting Unit's Troop Quality Rating;
c) If there are any entrenched Armored Units in the defending hex, the above modifiers are not cumulative, so the defender would pick either the Defense Rating of the Armored Unit with the best Defense Rating or subtract two from the Assaulting Unit's Troop Quality Rating;
-
If there are any Armored Units assaulting, subtract from all Assaulting Troop Quality Ratings the value of one Armored Unit's Defense Rating (owner's choice). Note that subtracting a negative number means increasing the Troop Quality Rating.
-
Any Assaulting Unit that fails the Bravery Check is no longer an Assaulting Unit, does not continue with the Assault, and is done for the Action.
-
The exclusive rules may give other events that provoke a Bravery Check before an Assault starts.
-
Example: if an Assaulting Armored Unit with a Troop Quality Rating of seven has to make a Bravery Check and its Defense Rating is minus two, while the Armored Unit triggering the check has a minus three Defense Rating, the Troop Quality Rating will be reduced by one to six (7 + (–3) – (–2)). If an Unarmored defending Unit is entrenched, a modifier of minus two is used to alter the Troop Quality Rating of the Assaulting Unit (with the possibility of subtracting the Defense Rating of the Assaulting Unit if it is Armored).
- Perform Opportunity Fire.
-
Each defending Unit may now attempt Opportunity Fire at the Assaulting Units.
-
This is treated as a normal Opportunity Fire except that the only Units that may fire at the Assaulting Units are the defending Units (remember if firing at a stack, each Unit can only fire at one other Unit).
Note: Make sure when you are determining the mass modifier for this Opportunity Fire to take into account the Steps of all the Units in the Assaulting Units' hex and not just the Assaulting Units.
-
Apply all the Opportunity Fire results and go to the next step. Any Assaulting Unit that is Suppressed as a result of the Opportunity Fire is no longer an Assaulting Unit, does not continue with the Assault, and is done for the Action.
- See if there are any Assaulting Units left.
- If there are no Assaulting Units left, the Assault is over.
- If there are Assaulting Units left, eliminate any zero-Step defending Units and proceed to the next step.
- Perform the first Assault round.
5A. Defending Units choose to stand or run away.
- The Non-Active Player now decides whether his defending Units will stand or run away. All defending Units must either stand or run away; if one stands, all stand; if one runs away, all run away.
- Defending Units running away do not run away just yet—they must wait until step 5E to actually run away.
- Note that if the decision is made to run away and one or more of the defending Units will be unable to do so (for whatever reason, e.g., Immobility, Suppression, or surrounded by prohibited terrain), then these Units will be eliminated, but not until step 5E. The other Units can still run away.
5B. Assaulting Units declare charge or Assault Fire.
- If the defending Units are running away, the Active Player must declare that his Units are Assault Firing.
- If the defending Units are standing, the Active Player declares whether his Units will charge or Assault Fire. All Assaulting Units must either charge or Assault Fire; if one Assault Fires, all Assault Fire; if one charges, all charge.
- A charge will end the Assault whether the charge is successful or not. Assault Fire may or may not end the Assault process.
- If the Assaulting Units are charging go to step 5C.
- If the Assaulting Units are Assault Firing go to step 5D.
5C. Resolve the charge.
- The Active Player now makes a Troop Quality Check for each Assaulting Unit (a Command Point may be spent to ensure a pass).
- If any Assaulting Unit fails the Troop Quality Check, the Assault is over for that Assaulting Unit, and that Unit is done for the Action. If there are no remaining Assaulting Units the Assault ends.
- If any Assaulting Units passed the charge Troop Quality Check, the Non-Active Player must now make a Troop Quality Check with ONE defending Unit of his choice (a Command Point may be spent to ensure a pass). (Hint: pick your best defending Unit.)
- If the defending Unit passes the Troop Quality Check go to step 5D.
Assault Example 2
A German Unit, with a TQ of 1, already under a heavy barrage marker is being Assaulted by H Company. There is no need for the American Unit to perform a Bravery Check, so the German Unit may now roll for Opportunity Fire. Due to the heavy barrage, the German's Troop Quality Rating has been reduced to -1, so it needs to roll a zero to fire. The Germans miss with a four. No Opportunity Fire.
The first round of Assault now starts and the Assaulting Unit decides to Assault Fire. The Fire Rating of the Assaulting Unit is modified from four to five and the Assault Rating from five to a six (German Unit has a +1 Defense Rating). Next, the US player checks for a Company Bonus. The player rolls a four on his Company Bonus Troop Quality Check, so he gets the Company Bonus, giving a final Fire Rating of seven and Assault Rating of eight. The roll for the Fire Rating is nine so a miss, and the roll for the Assault Rating four, a Cohesion Hit. The German Unit now performs Assault Fire. Its Fire Rating is two, modified to minus 1 (minus one Defense Rating, minus two heavy barrage) and its Assault Rating modified from two, -1 Defense Rating, and minus two heavy barrage to a final value of -1. Even though both Fire Ratings are less then zero, a roll of 0 would still hit. There is also a possible Company Bonus, but a seven is rolled. The German Unit rolls five for the Fire Rating and a two for the Assault Rating, and both are misses. The Cohesion Hit is now placed on the German Unit. Nothing happens to the Americans.
The next round of Assault now starts, and the Assaulting Unit decides to charge, thereby making this the last round of Assault, because after a charge is resolved, the Assault ends. In order to stand the defender needs to pass a Troop Quality Check, which it can roll for or spend a Command Point to pass. The Unit decides to roll and rolls a seven, so it fails the check. The Unit has to retreat one hex, and as it does so, this triggers Opportunity Fire. Note it does have to pass a Troop Quality Check in order to leave the hex due to the heavy barrage and take a Cohesion Hit. The roll is a zero, so it passes, and can leave the hex. I Company now rolls to pass the Troop Quality Check for Opportunity Fire, and rolls a three so it can Opportunity Fire. The Fire Rating is modified from four to ten (plus one Defense Rating, plus three Fire Zone to Fire Zone, plus two running away from Assault) with a possible Company Bonus, which in this case will have no effect. Anything but a nine will hit, and the roll is a nine, no effect. The German Unit moves to the adjacent hex, and automatically becomes Suppressed (and this Suppression may not be converted to a Cohesion Hit). H Company now advances into the vacated hex (and is under heavy barrage), and the situation is as shown.
- If the defending Unit fails the Troop Quality Check, all defending Units in the hex now run away as if they had chosen to run away in step 5A. Go to step 5E.
5D. Resolve Assault Fire.
-
Assault Fire takes place only during Assaults. Assault Fire is not an Action.
If the attacker declared Assault Fire in step 5B, then both Assaulting and defending Units now Assault Fire. If the attacker declared charge in step 5B, then only defending Units now Assault Fire.
Assault Fire follows the Direct Fire procedure with several important exceptions: (i) there are different Fire Rating modifiers; (ii) each eligible Unit fires twice at the same target (a Unit with a black Assault Rating number fires once using its Fire Rating and once using its Assault Rating; a Unit with a red Assault Rating number uses its Assault Rating both times), but Suppressed defending Units fire only once and use their Assault Rating to do so.
-
The Units that may Assault Fire in this step are:
a) Assaulting Units that declared Assault Fire in step 5B; and
b) defending Units (including Suppressed defending Units) that decided to stand and fight in step 5A and did not run away if there was a charge in step 5C.
-
The Units that may not Assault Fire in this step are:
a) Assaulting Units that declared a charge in step 5B; and
b) Defending Units that are running away.
Play Note: That's right, Suppressed defending Units can Assault Fire—Assault Fire is not an Action, but they only fire once and use their Assault Rating, not their Fire Rating.
-
Units with a blank (no value at all) Assault Rating may not perform Assault Fire. Typically these will be Units with a Fire Rating of "No".
-
Eligible targets are any Units in the defending hex and any Assaulting Units.
-
The players first declare which Units are firing at which Units. The Assaulting player declares first. The Assault Fire is then resolved simultaneously, i.e., each Unit gets to Assault Fire before any results are applied to it. Remember that each Unit Assault Fires twice at its target (remember a Unit with a black Assault Rating number fires once using its Fire Rating and once using its Assault Rating; a Unit with a red Assault Rating number uses its Assault Rating both times; and Suppressed defending Units fire only once and use their Assault Rating to do so).
-
Assault Fire uses the same modifiers as Direct Fire, with the following exceptions:
a) There are no range modifiers for either the Fire Rating or Assault Rating.
b) If an Assault Firing Unit is eligible for a Company Bonus the Unit only makes one Troop Quality Check each round and the result applies to both of the Unit's Assault Fires for this round.
c) The Assaulting Units do not receive any beneficial terrain modifiers when they receive Assault Fire (unless exceptions are noted on the Terrain Effects Chart). The defending Units receive all terrain modifiers.
d) The mass modifier only applies to the Assaulting Units in the active player's hex.
5E. Defending Units Run Away.
- Any defending Units in the hex that are Immobile or Suppressed are now eliminated. They do not get to run away.
- Any Unsuppressed defending Units that started running away in step 5A or step 5C must now finish running away.
- If the defending Units are under a heavy barrage marker they must pass the Troop Quality Check for attempting to leave a hex with a heavy barrage marker, and if they fail, the Units are eliminated.
- Units with a Movement Rating of "*" must pass a Troop Quality Check for attempting to leave a hex by prolonge, and if they fail, the Units is eliminated. They may not move into a hex containing an enemy Fire Zone.
- Units running away may trigger Opportunity Fire from nearby non-Assaulting Units. All Units that are friendly to the Assaulting Player and project a Fire Zone onto the hex the units are running away from now attempt to Opportunity Fire on the running away units. Note that the Assaulting unit does not Opportunity Fire as they have fired in the preceding Assault Fire.
- Units Opportunity Firing at defending Units running away receive a plus two fire modifier in addition to other applicable modifiers, and those Units running away from entrenchments or improved positions do not receive any modifiers from these improvements.
- Resolve the Opportunity Fire. Any defending Units that are Suppressed as a result of this Opportunity Fire are now eliminated.
- Surviving defending Units may now run away to any adjacent hex into which they could otherwise move and they must obey stacking restrictions once there (a Unit may only leave Column when running away by taking a Cohesion Hit in order to avoid overstacking). If they cannot do this, the Units are eliminated. Excess Units that would create overstacking in a hex are eliminated at the Non-Active Player's choice (though as always, a Unit in Column can remove its Column marker by taking a Cohesion Hit). All defending Units must run away to the same hex.
- After the defending Units finish running away, i.e., when they are in their new hex, they all become Suppressed (this cannot be converted to a Cohesion Hit).
- if the defending Units were stacked with a Leader, the Leader is moved with the Units that are running away.
- Advance all the remaining Assaulting Units into the defending hex, and the Assault is over.
5F. The Active Player may call off the Assault.
- If the Assaulting Units call off the Assault, it immediately ends. All the Assaulting Units must be called off at the same time. If one Unit stops Assaulting, they must all stop Assaulting.
- if the Assaulting Units charged, they must now call off the Assault.
- See if the Assault is over or if it continues. The Assault is over if:
a. there are no defending Units in the defending hex; or
b. there are no remaining Assaulting Units involved in the Assault; or
c. there have been three rounds of Assault.
- If the Assault is not over, it continues with another round (repeat step 5).
19.0 Combat results
19.1. The combat results are:
- "S?" Possible Suppression
- "S" Suppression
- "C" Cohesion Hit
- "1" Step Loss
- "E" Elimination
19.2. What the combat results mean:
19.2.1. S? Possible Suppression:
What does it simulate?
Your Unit is starting to crack under the strain of combat and its leaders are working hard to keep things under control. Will they succeed? It will depend on the quality of the Unit and, of course, some luck.
What do you do?
Make a Troop Quality Check. If the Unit passes the check, it is fine; there is no effect, and you can move on. If it fails, it is as if your Unit received a Suppression result. Follow the Suppression rules below. You may spend an available Command Point on In Command Unit to guarantee passing this check.
19.2.2. Suppression:
What does it simulate?
Suppression means your Unit is pinned and nervous. It doesn't want to do anything and has to be Rallied.
What do you do?
First, decide whether you want to try to convert the Suppression result into a Cohesion Hit. If you don't want to try to convert the Suppression result into a Cohesion Hit, just place a Suppressed marker on your Unit and move on.
If you think it is a good idea to convert the Suppression result to a Cohesion Hit, make a Troop Quality Check for the Unit. If it passes the check, give the Unit a Cohesion Hit instead of the Suppression result; if you fail the check, your Unit takes the Suppression result. You may spend an available Command Point on an In Command Unit to guarantee passing this check.
Play Note: Anytime a Unit takes a Suppression result, except as a result of running away from an Assault, you have the option to try to convert the Suppression result into a Cohesion Hit instead even if this eliminates the Unit.
What happens to your Unit?
A Suppressed Unit can do nothing except try to Rally itself out of the Suppression and defend in an Assault (including Assault Fire). The Unit's Assault Rating is reduced by two and its Troop Quality Rating is reduced by one.
Suppressed Units do not project any Fire Zones.
If a Suppressed Unit receives another Suppression, it takes a Cohesion Hit and remains Suppressed.
If a Suppressed Unit receives a Cohesion Hit or a Step Loss, it takes the Cohesion Hit or the Step Loss and remains Suppressed.
An Indirect Fire Unit loses any radio contact it has with a spotter Formation.
Rules Note: Let's emphasize that unless we say otherwise, a Suppressed Unit can't do anything other than what we just said above. Suppressed Units can only do two things - rally and defend in an Assault. Please assume in all the rules that follow that this holds true even if we don't say "an unsuppressed units can..." We will note any exceptions to this in the rules.
19.2.3. Cohesion Hit:
What does it simulate?
A Cohesion Hit represents casualties and the beginning of loss of unit cohesion or effectiveness. The Unit is still functioning, but it is fragile. It can be Rallied. More Cohesion Hits lead to a Step Loss.
What do you do?
If your Unit has no Cohesion Hit marker on it, put a one Cohesion Hit marker on the Unit. A zero-Step Unit is eliminated if it takes a Cohesion Hit.
If your Unit with a one Cohesion Hit marker takes another Cohesion Hit, you remove the one Cohesion Hit marker and replace it with a two Cohesion Hits marker.
If your Unit with a two Cohesion Hits marker takes another Cohesion Hit, it takes a Step Loss. So if it is a one-Step Unit, or a two-Step Unit that is down to its last Step, it is eliminated; if it is a two-Step Unit that has not already taken a Step Loss, flip it over, but don't remove the two Cohesion Hits marker. (Note: If it is a two-Step Unit whose reverse side is an Organic Transport side with a vehicle silhouette, you will have to use a Step Loss marker for the Unit.)
What happens to your Unit?
A Unit with one Cohesion Hit has its Assault Rating and Fire Rating each reduced by one.
A Unit with two Cohesion Hits has its Assault Rating and Fire Rating each reduced by two and its Troop Quality Rating reduced by one.
A Unit already marked with one or two Cohesion Hits that takes a Suppression can still try to convert the Suppression into another Cohesion Hit (see Rule 19.2.2).
A Unit with one or two Cohesion Hits that takes a Step Loss still keeps its Cohesion Hits.
A Unit with one or two Cohesion Hits can still perform Actions.
An Indirect Fire Unit loses any radio contact it has with a spotter Formation when the Indirect Fire Unit takes a Cohesion Hit.
19.2.4. Step Loss:
What does it simulate?
Fear and loss of combat effectiveness as well as dead, wounded, and missing.
What do you do?
Eliminate zero-Step and one-Step Units (including two-Step Units down to one Step).
Flip over two-Step Units or place a Step Loss marker on them if their flip side is an Organic Transport side with a vehicle silhouette.
What happens to your unit?
For two-Step Units that are now down to one Step, their Fire Rating, Assault Rating and Troop Quality Rating are reduced by one, and they can no longer receive the Company Bonus modifier.
An Indirect Fire Unit loses any radio contact it has with a spotter Formation when the Indirect Fire Unit takes a Step Loss.
19.2.5. Elimination:
What does it simulate?
High casualties and low morale have finished the Unit as an effective fighting force for this campaign.
What do you do?
Take your Unit off the map.
What happens to your Unit?
It goes to that great counter tray in the sky.
20.0 Rally
You can try to remove Suppressed or Cohesion Hit markers from your Units by Rallying them.
Rally is an Action.
Just make a Troop Quality Check for the Unit you want to Rally. Remember that Suppressed markers and two Cohesion Hit markers, as well as being Out of Command, reduce a Unit's Troop Quality Rating; you may spend an available Command Point for an In Command Unit to guarantee passing this check. A successful Rally allows the Unit to either recover from Suppression, or to recover from one Cohesion Hit.
If a Unit is Suppressed and has one or two Cohesion Hits, you must remove the Suppression first; that is, you must Rally from Suppression before you can Rally from a Cohesion Hit.
A Unit may never Rally to remove Cohesion Hits (but it may Rally from Suppression) if it is in an enemy Fire Zone during a daylight turn.
During night turns:
- a Unit that is not in an enemy Fire Zone may automatically Rally, but this still counts as the Unit's Action.
- a Unit that is in an enemy Fire Zone can Rally from Suppression or one Cohesion Hit by passing a Troop Quality Check. You may spend an available Command Point for an In Command Unit to guarantee passing this check.
21.0 Leaders and Command
21.1. What are Leaders and what do they do?
In the game, Leaders are those counters with someone's picture on them. We used the real portraits if available.
Leaders are not Units.
21.2. How do I move my Leaders?
Leaders don't have movement allowances, but they do transfer.
You get to transfer a Leader at the end of his Formation's activation and also at the end of his Division's activation. At the end of the activation, after the Active Units have finished activating, you may transfer the Leader from where he is to any hex that contains a Unit of his Formation.
If at the end of the activation the Leader is in a hex that does not contain a Unit of his Formation, you must transfer him to a hex that contains a Unit of his Formation. The transfer of Leaders of the Active Formation (or Division) is the last thing that happens in any activation.
Leaders never count against stacking limits.
If a Leader is stacked with a Unit that moves or Assaults with a Command Point as a Direct Command Chit is in play, or as a Second Action, the Leader must remain stacked with a Unit of his Formation. If stacked with multiple Units, some that move and some that remain in their current hex, the Leader may move with the activated Units that leave the hex, or he may remain behind but only if there is another Unit of his Formation still in the hex. Thus a Leader moves differently when a Direct Command Chit is in play, or when Second Actions are purchased. It must stay with a friendly Unit it is currently stacked with at all times during this chit play, and cannot transfer at the end of the activation during a Direct Command.
Leader Movement Example
In the situation shown below, the two German Units and their Leader have been activated by a Formation Activation Chit being drawn. Both Units are In Command as they are within five hexes of the Leader. The 10/3 Orpo. Unit gets into Column (one movement point) and then moves along the road a total of six hexes using up all its movement allowance. As it comes to a stop, it is now six hexes away from the Leader and is now Out of Command. This means the Unit cannot perform a Second Action.
The other German Unit gets into Column and moves along the road, stopping before it enters the same hex as the first Unit (stacking Units in Column is always forbidden). This Unit is five hexes from the Leader, so it is still In Command and can therefore perform a Second Action if it wishes. The situation is as shown.
Now that all the Units in the Formation have been activated, the Leader must transfer to be stacked with one of his Units. The Leader transfers to stack with the 10/3 Orpo. Unit, now placing both German Units back In Command. The final situation is shown.
Note that if a Leader is stacked with a Unit that moves due to a Command Point being spent (either by Direct Command or Second Action), the Leader moves with the Unit.
Note that command is always determined "at that instant" and proper sequencing to your benefit is not considered "gamey" and is encouraged.
If Units stacked with a Leader run away during an Assault, the Leader must run away with those Units.
The reverse side of each Leader counter is marked "Active". You can use this as a memory aid during a Division Activation to help remember which Formations have not yet completed their activation.
21.3. Can my Leaders die?
No.
If a Leader is ever in a hex with no Units of his Formation (other than during his Formation's or Division's activation), just move the Leader to the nearest Unit in his Formation (owner's choice if more than one Unit qualifies).
The Formation is wiped out? Remove him from play, since there is now no legal place to put him. If Units of the Formation come in as reinforcements, then the Leader returns and is placed with them.
21.4. How do I know if a Unit is In Command?
Every Leader has a Command Range printed on its counter. The Command Range is the maximum number of hexes (not movement points—we're talking radios here) that a Unit can be away from its Leader and still be In Command. Enemy Units and terrain do not interfere with this range in any way.
Command is checked for a Unit at the instant before the Unit does something: (i) that requires it to be In Command (e.g., perform a Second Action, spend a Command Point to pass a Troop Quality Check), or (ii) that would be affected if the Unit was Out of Command (e.g., pass a Troop Quality Check).
Independent Formations have no Leaders. Units from these Formations are In Command if they are within Command Range of any Leader from the same Division.
Reinforcement Units in reinforcement entry hexes are considered Out of Command. Leaders in reinforcement entry hexes may not command Units.
21.5. What happens to a Unit that is Out of Command?
If a Unit is Out of Command, you can't spend a Command Point on it.
Out of Command Units have their Troop Quality Rating reduced by one.
Out of Command Units cannot spot for an Indirect Fire mission.
Out of Command Indirect HE or Mortar Units cannot fire a spotted Indirect Fire Mission.
22.0 Improved positions and entrenchments
22.1. What are improved positions and entrenchments?
Foxholes, bunkers, interconnected fields of fire, you know. These do good things to the attack and defense capabilities of the Units in them. Improved positions represent an area that has been quickly set up as a defensive position, whereas an entrenchment has had more time spent upon it to set up greater camouflage and interlocking firelanes. Multiple improved positions and entrenchments can be built in a single hex but a Unit can only benefit from one of them.
22.2. Improved positions
22.2.1. Who can build an improved position and how?
Any Leg Infantry Unit not in Column may build an improved position for itself as an Action if it passes a Troop Quality Check (no Command Point for an automatic pass here). If it passes, just place an improved position marker on the Unit.
An engineer Unit not in Column can build an improved position for itself or any other Unit that is not in Column in the same hex. It just places an improved position marker as its Action (no Troop Quality Check needed).
Building an improved position is an Engineer Action and therefore triggers Opportunity Fire, and a Command Point cannot be spent to activate a Unit to perform the Action.
22.2.2. Who cannot build an improved position?
Gun and Vehicle Units may not build improved positions, but an engineer Unit not in Column in the same hex as a Gun or Vehicle Unit can build an improved position for that Unit if that Unit is also not in Column. An Immobile Unit cannot build an improved position, but an engineer Unit not in Column in the same hex can build an improved position for it.
22.2.3. Who benefits from an improved position?
An improved position only benefits the Unit that built it or for which it was built, i.e., a Unit cannot "take over" an improved position from another Unit. Place the Unit underneath the improved position marker to remind you of this.
A Unit leaving an improved position that receives Opportunity Fire does not benefit from the improved position, even though it takes the Opportunity Fire in the same hex as the improved position.
22.2.4. What Is the benefit of an improved position?
A Unit under an improved position marker receives a minus one modifier to its Defense Rating and a plus one modifier to its Troop Quality Rating.
22.2.5. How do you destroy an improved position?
As soon as a Unit in an improved position leaves the hex, gets in Column, mounts up (see Rule 14.10), or launches an Assault from the hex, the Unit leaves the improved position and the improved position marker is removed from the map.
22.3. Entrenchments
22.3.1. Who can build an entrenchment and how?
Only engineer Units not in Column can build entrenchments.
To build an entrenchment, an engineer Unit must begin its activation in the same hex as an improved position that is occupied by a Unit. The engineer Unit must pass a Troop Quality Check (no Command Point for an automatic pass here); a Men at Work marker may be placed in case of failure (see Rule 25.0). If it passes, replace the improved position marker with an entrenchment marker. The Unit that was in the improved position immediately benefits from the entrenchment (i.e., the Unit is in the entrenchment). Building an entrenchment is an Engineer Action and can trigger Opportunity Fire, and a Command Point cannot be spent to perform this Action.
Play Note: An engineer Unit that is alone in a hex can spend an Action to build an improved position for itself and spend a subsequent Action (not a Second Action, though) to convert the improved position into an entrenchment.
22.3.2. Who cannot build an entrenchment?
Non-engineer Units are not permitted to build entrenchments.
22.3.3. How do you enter or leave an entrenchment?
Entering or leaving an entrenchment counts as a Movement Action, and triggers Opportunity Fire. The Unit must start the action not in Column to enter an entrenchment. This means it takes an entire Action to enter or leave an entrenchment. The only exception to this is if a Unit in an entrenchment has to run away from an Assault, then it can leave the entrenchment immediately, and this does not trigger Opportunity Fire (though the running away may still trigger Opportunity Fire). A Unit in an entrenchment may not Assault.
22.3.4. Who benefits from an entrenchment?
Only the Unit in the entrenchment gets the benefit. And only one Unit, not in Column, can occupy an entrenchment. Place the Unit underneath the entrenchment marker to remind you of this. Only the side (German, Western Allied, etc.) that made the entrenchment may occupy it.
A Unit entering or leaving an entrenchment that receives Opportunity Fire does not benefit from the entrenchment, even though it takes the Opportunity Fire in the same hex as the entrenchment.
Note: An entrenchment must be "entered" by a Unit unless it was actually occupying the improved position that was "improved" by an engineer Unit. Entering an entrenchment requires an entire Action and may cause Opportunity Fire if done in a Fire Zone.
22.3.5. How do you destroy an entrenchment?
You don't; an entrenchment just stays where it is even if abandoned. It benefits any friendly Unit that moves into the hex and chooses to occupy it.
22.3.6. What is the benefit of an entrenchment?
A Unit under an entrenchment marker receives a plus one modifier to its Fire Rating and Assault Rating, a minus two modifier to its Defense Rating, and a plus two modifier to its Troop Quality Rating. If a defending hex with at least one occupied entrenchment is Assaulted, every Assaulting Unit must make a Bravery Check with a minus two modifier to its Troop Quality Rating.
When fired at, a Unit in an entrenchment uses the Armored Target part of the Combat Results Table.
23.0 Road block (or Sperre)
23.1. Who can build a road block and how?
Only engineer Units not in Column can build road blocks. Sperre is German for road block.
A road block can only be built in a hex that contains a Road (i.e., roads, railroads, trails, tracks and paths).
To build a road block as its Action an engineer Unit must pass a Troop Quality Check (no Command Point for an automatic pass here); a Men at Work marker may be placed in case of failure (see Rule 25.0). Building a road block is an Engineer Action and triggers Opportunity Fire, and a Command Point cannot be spent to perform this Action.
Each Army has a limit to the number of road blocks that it can have in play at any one time. This is given in the exclusive rules, and each counter indicates the Division that the road block belongs to.
Once a road block is removed, the counter is once again available to be placed.
23.2. What are the effects of a road block?
A road block negates all the Roads in that hex for all enemy Units and also for all friendly Units that do not belong to the same Division as the Unit that built the road block. Road block counters are color-coded to show which Army and Division placed them.
23.3. How do you remove a road block?
An engineer Unit not in Column can spend an Action to remove any road block in the same hex. The engineer Unit does not have to pass a Troop Quality Check: removal is automatic.
Leg Infantry Units not in Column in a hex with a road block can spend an Action to remove it if they also pass a Troop Quality Check.
Removing or attempting to remove a road block is an Engineer Action, so it triggers Opportunity Fire, and a Command Point cannot be spent to perform the Action or to pass the required Troop Quality Check.
24.0 Rearguards
24.1. What are Rearguards?
Rearguards are Units that break off from an Infantry Unit not in Column. They are represented by generic Rearguard counters.
All Rearguards have Fire and Defense Ratings of zero, zero Steps, no movement allowance (they are Immobile), and a Troop Quality Rating as given on the counter. They may not perform any Actions during the Activation in which they are created.
Rearguards belong to their Formation and may spot for Indirect Fire like other Units in the Formation.
24.2. How do I create a Rearguard?
Any Infantry Unit not in Column can create a Rearguard by spending an Action and passing a Troop Quality Check.
Creating a Rearguard is an Engineer Action. Therefore, a Command Point cannot be spent to perform this Action or to pass the required Troop Quality Check.
Each Army has a limit to the number of Rearguards that it can have in play at any one time. This is given in the exclusive rules.
Creating a Rearguard triggers Opportunity Fire against the Infantry Unit.
24.3. Where can I place Rearguards?
You can place a Rearguard in any empty hex that is: (i) not in an enemy Fire Zone, (ii) within two hexes of the Infantry Unit creating it, and (iii) not more than one activation's non-forced march move from the Infantry Unit creating it (calculated from the Unit to the Rearguard).
24.4. How are Rearguards removed?
Rearguards can be attacked by enemy Units and suffer combat results like any other Unit.
A Rearguard can be removed from the map as an Action.
Note that the Rearguard is not removed from the map simply because the Unit that created it moves away.
24.5. How many Rearguards can I build?
The exclusive rules provide limits on the number of Rearguards that you can create or have in play.
Once a Rearguard is removed or eliminated, the counter is once again available to be placed.
25.0 Special engineer rule (men at work)
Any time a Unit tries and fails to perform an Engineer Action (e.g., build a road block or an entrenchment), it receives a Men at Work plus one marker. The next time that Unit makes a Troop Quality Check to build the same thing in the same hex, each Men at Work marker adds one to the Unit's Troop Quality Rating. There is no limit to the number of these markers the Unit can accumulate. The markers are removed as soon as the Action is completed or the Unit performs a different Action.
26.0 Weather
Before the first daylight turn of each day, during the weather and airpower availability phase, one of the players rolls on the Weather Table to see what the weather is for the upcoming day; in subsequent daylight turns, one of the players rolls for changes in the weather, if necessary. The instructions on the table will tell you how to roll for the weather and also what effects the weather has.
There are four types of weather:
- Clear: No effect on play
- Fog: Minus one Fire Rating and Assault Rating modifier for all Units; maximum Line of Sight distance is two hexes; all movement costs are increased by one; no air strikes
- Overcast: No air strikes
- Rain: Minus two Fire Rating and Assault Rating modifier for all Units; maximum Line of Sight distance is two hexes; movement cost to enter a hex is increased by one if a Unit is not In Column and moving on a Road; no air strikes
Note: If the fog has not lifted after the weather roll of the 1100 turn, the weather in subsequent turns is overcast for the remainder of the day.
27.0 Airpower
Before the first daylight turn of each day, during the weather and airpower availability phase, both players check to see how much air support they get for the upcoming day (that is, until the end of the last daylight turn of that day).
The exclusive rules for each game will tell you how many air Units you get on each clear weather daylight turn of the day. You can only use air Units on clear weather turns. If there is no clear weather, you don't get any air Units.
Air strikes are launched following placement of reinforcements and in the same phase.
Air Units can be used to launch air strikes against enemy Units. Just place an air Unit on the enemy Unit you want to attack. Once all the air Units have been placed, you can start to resolve the attacks. You may attack the same Unit with multiple air Units, but must resolve each attack separately. When an air Unit attacks an enemy Unit, roll on the appropriate row on the Combat Results Table as determined by the color of the Fire Rating on the air Unit; the only modifiers considered are the Direct Fire modifiers with positive values (that's right––no negative modifiers, even for entrenchments or Defense Rating!). Do not place barrage markers, however, whatever the Fire Rating color.
28.0 Night
The following modifications are made during night turns:
- The maximum Line of Sight distance is reduced to two hexes.
- A Rally Action is automatically successful if the Unit is not in an enemy Fire Zone.
- A Unit in an enemy Fire Zone may Rally from a Suppression or Cohesion Hit if it passes a Troop Quality Check.
- All costs on the Terrain Effects Chart are doubled, after counting any weather effects.
- All Units receive a minus two modifier to their Fire Rating and Assault Rating.
29.0 Glossary
29.1. Action
Something that an Active Unit can perform. Depending on the type of Unit being activated, it can include moving, firing, Assaulting, Rallying, and performing an Engineer Action. See also Second Action.
29.2. Activation Chit
A counter you randomly draw to see what Division or Formation gets activated. Each Activation Chit represents one Division or one Formation.
29.3. Active Formation; Active Player; Active Unit
The Active Formation is the Division (and all its subordinate Formations) or the single Formation whose Activation Chit is the one currently in play. The Active Player is the player who controls the Active Formation. An Active Unit is a Unit in the Active Formation. If a Direct Command Chit is drawn, the player who owns it is considered the Active Player as is any Unit on which the Active Player spends a Command Point.
29.4. Armored Unit
A Unit that has its Defense Rating in a black box.
29.5. Army
The largest grouping of Units in the game, one above the Division, distinguishing the Units of each nation, e.g., British or German.
29.6. Assault
The game mechanism that represents an attacking force advancing on a defending force to dislodge the defenders from their position. Assault is an Action.
29.7. Assault Fire
A type of Direct Fire between Assaulting Units and Units defending against an Assault. Assault Fire only occurs during an Assault. With certain exceptions, including some of the modifiers, the Direct Fire rules govern Assault Fire. Assault Fire is not an Action.
29.8. Assault Rating
The number that appears in the upper left of the counter next to the Fire Rating in a colored box. The colored box shows the Weapons Class. The higher the number, the better the Assault Rating. Note that a rating of zero is a valid Assault Rating. If the Assault Rating is in red then the Unit uses this value twice when it Assault Fires; if the Assault Rating is in black, then the Unit Assault Fires once with its Assault Rating and once with its Fire Rating. A Unit with a blank Assault Rating has no Assault Rating and cannot Assault or Assault Fire.
29.9. Blocking Terrain
Terrain that blocks Line of Sight if the Line of Sight passes through it. Blocking Terrain is listed on the Terrain Effects Chart. A Line of Sight traced along the hexside of a hex with Blocking Terrain and another without it is not blocked.
29.10. Bravery Check
When a Unit has to perform an Assault that is especially difficult (i.e., against an Armored Unit, an entrenched Unit, or over a bridge/ferry), each Assaulting Unit must pass a Troop Quality Check as its Bravery Check. If a Unit fails its Bravery Check, the Unit does not perform the Assault. A Command Point cannot be used to pass a Bravery Check.
29.11. Cohesion Hit
A combat result that represents minor damage or casualties and disruption to a Unit.
29.12. Column
Units can pay movement points to enter Column formation and take advantage of faster Road movement rates, but suffer bad effects if attacked. Entering or exiting Column is part of a move and triggers Opportunity Fire, but a Unit can exit Column by taking a Cohesion Hit instead of expending movement points and thereby not trigger Opportunity Fire. A Unit in Column cannot stack or move through a hex with another Unit in Column.
Units in Column cannot perform Engineer Actions.
29.13. Command Points
Used:
- to activate Units after a Direct Command Chit is drawn;
- to activate Units to perform a Second Action;
- to allow a Unit to automatically pass certain Troop Quality Checks, but not for Bravery Checks, Engineer Actions and Opportunity Fire (and others defined by the exclusive rules).
Command Points for a Division are gained when the Division Activation Chit is drawn, and they may only be spent on Units of that Division.
Command Points can only be used on Units that are In Command.
29.14. Command Range
Printed on each Leader counter, this is the number of hexes a Unit can be from its Leader and still be In Command.
29.15. Command Rating
Used to determine how many Command Points a Division gets. Command Ratings are listed on the division player aids and are listed in the exclusive rules to each game.
29.16. Company Bonus
A positive Fire Rating and Assault Rating modifier available to full strength two-step Units that pass a Troop Quality Check prior to firing (a nine always fails and a zero always succeeds). The Unit is not eligible if it has taken a Step Loss. If the Unit is In Command, a Command Point may be spent to automatically pass the Troop Quality Check. Units Opportunity Firing cannot receive the Company Bonus.
29.17. Defense Rating
A measure of a Unit's vulnerability to firepower. The lower the number the better the protection. Unarmored Units such as infantry usually have Defense Ratings of zero or more. Armored Units such as tanks usually have Defense Ratings of minus one or less. A target Unit's Defense Rating is added to the Fire Rating of any Unit that fires on the target Unit. The Defense Rating of an Armored Unit is a white number in a black box, while that of an Unarmored Unit is a black number in a white box.
29.18. Direct Command Chit
Allows the activation of any and all of a player's Units, but only at the expense of Command Points. A Unit (or stack) may not perform a Second Action if it was activated pursuant to a Direct Command Chit.
29.19. Direct Fire
Ranged fire combat using the Direct Fire modifiers of the Combat Results Table; a Line of Sight is necessary for Direct Fire. Direct Fire is an Action.
29.20. Dispatch Points
Used to "buy" Formation Activation Chits at the beginning of a turn for use either that turn or the next turn (an Activation Chit costs fewer Dispatch Points if you buy it for the next turn). Dispatch Points for a Division are gained when the Division Activation Chit is drawn, and they may only be spent on Formations of that Division.
29.21. Dispatch Rating
Used to determine how many Dispatch Points a Division gets. Dispatch Ratings are printed on the division player aids and are also listed in the exclusive rules that come with each game.
29.22. Division
A Division is a grouping of Formations and is represented in the game by a Division Activation Chit. Command Points and Dispatch Points belong to Divisions and a Division's Command and Dispatch Points may only be spent on Units and Formations of that Division.
29.23. Engineer Action
Engineer Actions are: building an improved position, building an entrenchment, creating a Rearguard, building a road block, removing a road block, and other actions defined in the exclusive rules. Units in Column cannot perform Engineer Actions.
A player may not spend Command Points to perform an Engineer Action, and this restriction includes Troop Quality Checks for the completion of an Engineer Action. (This also means that Engineer Actions cannot be done as Second Actions.) Note that this restriction applies to all Engineer Actions, no matter what type of Unit is performing the Engineer Action. Engineer Actions are Actions, and thus trigger Opportunity Fire.
29.24. Fire Range
The maximum number of consecutive hexes that a target can be away from a firing Unit. The Fire Range is printed on the counter to the right of the Fire Rating. If no Fire Range appears, it means that a Unit has a Fire Range of one. Range is determined by counting the target hex but not the firing Unit's hex.
A Unit's Fire Range is reduced to one hex if it is adjacent to an enemy Unit, or if it is in a hex with a barrage marker.
29.25. Fire Rating
The number that appears in the upper left of the counter in a colored box. The color of the box shows the Weapons Class. The higher the number, the better the Fire Rating. Note that a rating of zero is a valid Fire Rating. A Unit with a "No" Fire Rating means that the Unit has no fire capability and cannot fire.
29.26. Fire Zone
A hex to which a Unit has a Line of Sight and that is within the Unit's Fire Range, except:
- if a Unit has one or more enemy Units adjacent to it, the Unit's Fire Range is reduced to one hex, and therefore its Fire Zone is reduced to its six surrounding hexes;
- if a Unit is in a hex with a barrage marker, its Fire Range is reduced to one hex and therefore its Fire Zone is reduced to its six surrounding hexes;
- Indirect HE Units have a Fire Zone with a range of three hexes; and
- Mortar Units do not have Fire Zones.
29.27. Formation; Independent Formation
A regimental- or brigade-sized military unit represented in the game by a Formation Activation Chit. Each Formation consists of a number of company-sized Units, each represented in the game by its own Unit counter. Several Formations are usually grouped together under a single command, which is represented in the game by a Division. A Formation is always part of a Division, and is color-coded on the counter. For example, the 1st, 2nd, and 3rd Regiments of the 5th Division would be the Formations, while the 5th Division would be their parent Division. Note that some Units—usually support-type Units such as reconnaissance or engineers—within a Division are designated as part of an "Independent" Formation within that Division. They are grouped together for activation purposes and have their own Activation Chit, which in the above example would be "Independent/5th Division".
29.28. In Command
Units within the Command Range of their Leader are considered to be In Command. Command is checked for a Unit at the instant before the Unit does something: (i) that requires it to be In Command (e.g., perform a Second Action, spend a Command Point to pass a Troop Quality Check), or (ii) that would be affected if the Unit was Out of Command (e.g., pass a Troop Quality Check). Independent Units are In Command if in range of any Leader of the same Division. Reinforcement Units in reinforcement entry hexes are considered Out of Command.
29.29. Independent Formation
See "Formation".
29.30. Indirect Fire
Ranged fire combat using the Indirect Fire modifiers of the Combat Results Table; a Line of Sight between the firing Unit and its target is not necessary for Indirect Fire. In order to perform Indirect Fire without a Line of Sight, another Unit must act as a spotter.
29.31. Leader
For each Formation (except Independent Formations) there is a Leader counter. A Leader is not a Unit, and does not count toward stacking limits. A Leader must always be stacked with a Unit of his Formation, and is removed if his entire Formation is eliminated. Leaders do not have movement allowances, nor do they have Fire Ratings. Leaders are used to determine if a Unit is In Command.
29.32. Line of Sight (LOS)
A Line of Sight is a straight, unblocked line between the center dot of a hex containing a firing or spotting Unit and the center dot of the target hex. A Line of Sight may enter or exit a hex containing Blocking Terrain as long as it does not pass through such a hex. The maximum Line of Sight distance during a clear daylight turn is eight hexes. The maximum Line of Sight distance during a daylight turn with fog or rain, or a night turn, is two hexes. Observation posts and strongpoints are exceptions to these Line of Sight rules.
29.33. Movement Action
The following actions are considered Movement Actions: moving from hex to hex (including entering/exiting Column and exiting Transport Mode), entering Transport Mode mounting, and entering or leaving an entrenchment. These Actions all trigger Opportunity Fire, except the option to take a Cohesion Hit to leave Column. If a Unit performs a Movement Action as its first Action, a Second Action may not also be a Movement Action.
29.34. Movement Class
There are four Movement Classes: Wheeled, Tracked, Leg, and Immobile.
Movement Class is shown on the Unit counters as follows:
- Movement allowance in black = Wheeled (W)
- Movement allowance in red = Tracked (T)
- Movement allowance in white = Leg (L)
- No movement allowance = Immobile (I)
29.35. Non-Active Player; Non-Active Unit
The Non-Active Player is the player who does not control the Active Formation. Any Unit that does not belong to the Non-Active Formation is a Non-Active Unit (this can include Units of both sides).
29.36. Opportunity Fire
Opportunity Fire is a type of Direct Fire from a Non-Active Unit that may be triggered, usually when an Active Unit performs an Action in the Non-Active Unit's Fire Zone. The Non-Active Unit must pass a Troop Quality Check to Opportunity Fire. With the exception of differences in some of the modifiers, the Direct Fire rules govern Opportunity Fire. Opportunity Fire is not an Action.
29.37. Organic Transport
An Infantry or Gun Unit that has a vehicle silhouette on its flip side has Organic Transport, representing the vehicles that this Unit possesses. The front of the counter has a black rectangle around the Step dots to indicate that the Unit has vehicles for Organic Transport.
29.38. Out of Command
A Unit is Out of Command when it is out of its Leader's Command Range. Units that are Out of Command may not have Command Points spent on them for any purpose and have their Troop Quality Rating reduced by one. Additionally, they cannot spot for Indirect Fire missions, or make use of spotters if they are Indirect HE or Mortar Units.
29.39. Rally
An Action that a Unit performs to recover from Suppression or Cohesion Hits. Step Losses may never be recovered.
29.40. Rearguard
A Unit, represented by a generic counter, that is broken off from an Infantry Unit.
Rearguards have Fire and Defense Ratings of zero, zero Steps, no movement allowance (they are Immobile) and no Assault Rating, and a Troop Quality Rating as given on the counter.
29.41. Road
Any terrain feature designated as a road, railroad, trail, track, or path.
29.42. Second Action
An In Command Unit (or stack of Units) that has just performed an Action pursuant to a Formation Activation Chit or a Division Activation Chit (but not pursuant to a Direct Command Chit) may perform a Second Action immediately by spending a Command Point (or, for a stack of Units, one Command Point for each Unit in the stack).
The Second Action must be of a different type from the Action that the Unit (or stack) just performed. The Second Action may not be an Engineer Action. All Units in a stack must perform the same Second Action.
The decision to perform a Second Action must be made before the next Unit performs an Action (and before the next chit is drawn).
A Second Action during a Division activation is not subject to the Division activation restrictions.
29.43. Step
A measure of a Unit's size. A Unit may have zero, one or two Steps. A zero-Step Unit has no dots in the top center of its counter, a one-Step Unit has a single dot, and a two-Step Unit has two dots. A black box around the Step dots indicates that the Unit has Organic Transport.
Steps do not count for stacking.
Steps are important in determining mass modifiers for fire combat, and the losses a Unit can absorb.
In some cases, the flip side of a two-Step Unit is its reduced (i.e., one-Step) side. But if a Unit has Organic Transport, the flip side of the counter is its Transport Mode side. If a two-Step Unit with Organic Transport loses a Step, you must put a generic Step Loss counter on the Unit to remind yourself that it has taken a Step Loss.
29.44. Suppression
A combat result that severely restricts a Unit's ability to function. All a Suppressed Unit can do is try to Rally or defend against an Assault. A Unit must Rally to recover from Suppression.
29.45. Transport Mode
The state of an Infantry or Gun Unit that has "mounted up" on vehicles. Units in Transport Mode move much faster and use the Transport Mode side to determine all game values.
29.46. Troop Quality Check
A test a Unit must pass before it can do various things such as Rally or Opportunity Fire. To make a Troop Quality Check, you roll a die for the Unit. The Unit passes if the die roll is equal to or less than its Troop Quality Rating (as modified by any applicable modifiers). A nine always fails and a zero always succeeds. A Unit may be able to spend a Command Point instead of rolling a die to pass a Troop Quality Check, but a player may not do both (roll, and then spend a Command Point).
29.47. Troop Quality Rating
The measure of a Unit's morale, supply and training. This number is used for Troop Quality Checks. A roll equal to or less than the modified Troop Quality Rating passes the check. So the higher the number, the better the Unit. A Unit's Troop Quality Rating is modified, amongst other things, if the Unit is Out of Command, is in Column, is Suppressed, has taken a Step Loss, is under a barrage marker, is in an improved position or an entrenchment, or has two Cohesion Hits. The exclusive rule may also specify other modifiers. A Command Point may not be spent to pass the Troop Quality Check required for a Bravery Check, Opportunity Fire and Engineer Actions.
29.48. Unarmored Unit
A Unit that has its Defense Rating in a white box.
29.49. Unit
An individual counter representing an actual unit that fought or could have fought in a scenario. Each Unit belongs to a Formation which in turn belongs to a Division. Most Units in the game are company-sized. Leaders are not Units.
29.50. Unit Class
Each Unit belongs to one of three Unit Classes:
Infantry: Counters use each nation's specific army symbology. The exclusive rules provide a list of symbols.
Gun: Counters use each nation's specific army symbology. The exclusive rules provide a list of symbols.
Vehicle: Counters have vehicle silhouettes along with a white stripe across the silhouette for easy identification. Note that the silhouettes may be different on the fronts and backs of some counters. The image on the fronts shows either the most powerful or most numerous vehicle a Unit has, and the back shows the second most powerful or second most numerous vehicle within the Unit.
All the Unit symbols are defined in the exclusive rules.
29.51. Unit Designation
Provided for historical interest, but the color of the box itself identifies the Formation that the Unit belongs to. A Unit is activated (and subject to the activation rules) when the Formation with this color is the Active Formation.
29.52. Weapons Class
There are six Weapons Classes and they are color-coded on the counters. Don't worry about memorizing the colors because the Combat Results Table is similarly color-coded for ease of use. The color codes make up the background for the Fire Rating.
- "DP" = Dual Purpose (AP and HE)—White (Direct Fire only)
- "SA" = Small Arms—Pink (Direct Fire only)
- "AP" = Armor Piercing—Blue (Direct Fire only)
- "HE" = High Explosive (three subclasses): (i) Mortar—Green (Mortar Units, Indirect Fire only, cannot use Opportunity Fire) (ii) Indirect HE—Orange (artillery Units, Direct or Indirect Fire (use Yellow for direct Fire)) (iii) Direct HE—Yellow (Direct Fire only) or Artillery using Direct Fire.
Note that the "SA", "AP" and "DP" classes can only use Direct Fire. Of the "HE" class, one subclass uses Direct Fire, and two subclasses use Indirect Fire.
No Question of Surrender Exclusive Rules
1.0 What Scale is This Game?
The scale for No Question of Surrender is 333m per hex. Due to this change from the series rules of 500m, the following modifications are in effect:
The maximum stacking in a hex is 4 Units, 3 not in Column and 1 in Column.
No Unit may move within 3 hexes of an enemy reinforcement hex.
The maximum Line of Sight is 12 hexes during a day turn, and 3 hexes during a night turn or when the weather is mist, and is reduced to 2 hexes during sand storms. For Units in an observation post, the maximum Line of Sight is 20 hexes during a day turn, is reduced to 3 hexes for night turns or when the weather is mist, and is reduced to 2 hexes during sand storms.
Indirect HE Units perform Direct Fire at a range of 4 hexes, and perform Indirect Fire with a minimum range of 5 hexes.
The range modifiers have changed, and are given on the Combat Results Table.
2.0 What Times Does Night Start and Day Begin?
The Night turn begins the turn after the 1900 turn. The first daylight turn is 0500.
3.0 How is Weather Determined?
On the 0500 turn of each day in the Special Weather and Airpower Phase, a roll is made on the weather table. The result determines the weather type for the day.
| Die Roll | Weather |
|---|---|
| 0 | Sand storm 4 |
| 1 | Sand storm 2 |
| 2 | Clear |
| 3 | Clear |
| 4 | Clear |
| 5 | Clear |
| 6 | Clear |
| 7 | Mist |
| 8 | Mist |
| 9 | Mist |
3.1 Mist
On any day where the weather is mist, roll a die at the start of each turn after the 0500 turn. If the result is a 4 or less, the mist lifts and the weather changes from mist to is clear for the rest of the day. If by the start of the 1100 turn the mist has not lifted, it lifts automatically and the weather is clear for the rest of the day. The effects of mist are the same as fog as detailed in the Series Rules, except the maximum Line of Sight is 3 hexes.
3.2 Sand Storms
On any day where the weather is determined to be sand storms, the weather will fluctuate between sand storms and clear. Roll a die at the start of every turn (including the 0500 turn) to determine the current weather for that turn. If the roll is less than or equal to the sand storm number (either 2 or 4), there are sand storms for that turn. If the roll is greater than the sand storm number, the weather is clear for that turn. Sand storms reduce the maximum Line of Sight to 2 hexes, Fire and Assault Ratings are reduced by 2, and terrain costs are doubled. No air strikes can be performed during a sand storm.
4.0 What Terrain Types Are There?
The types of terrain in the game are Desert, Trails, and Minefield.
4.1 Desert
Desert terrain is indicated by a brown circle in the center of its hex. A Leg Unit can enter the hex for 2 movement points if not in Column, or 1 movement point if in Column. Wheeled Units can enter the hex for 5 movement points if not in Column, 3 movement points if in Column. Tracked Units can enter the hex for 3 movement points if not in Column and 2 movement points if in Column.
Desert terrain hexes do not block Line of Sight, and do not modify the Fire Rating of Units firing into the hex.
4.2 Trail
Trail allow Tracked and Wheeled Units in Column to move at faster rates. Any Tracked or Wheeled Unit in Column that enters a hex along a trail does so for a cost of 1 movement point.
When leaving a hex on a trail, it must be the same trail that the Unit came in on, unless the trail connects to other trails in the hex, in which case the Unit can leave on one of those trails. The Unit cannot jump from one trail to another in the hex if they are not connected in the hex.
Trails have no effect on Line of Sight, and do not modify the Fire Rating of Units firing into the hex.
4.3 Minefield (Light or Heavy)
Any Wheeled or Tracked Unit that attempts to enter a minefield hex or attempts an Assault into a minefield hex will become Suppressed upon a die roll result that is equal to or less than the minefield number. For a light minefield (green center circle) the number is 1, and for a heavy minefield (red center circle) the number is 4. If Suppressed, the Unit does not enter the hex it was trying to move into and instead remains in its current hex. This Suppression cannot be converted into a Cohesion Hit.
Leg Units do not have to make a roll, as they cannot be Suppressed by a minefield.
If a Wheeled or Tracked Unit is leaving an enemy Fire Zone as it tries to enter the minefield hex, Opportunity Fire is performed before the Suppression die roll takes place. If the Unit becomes Suppressed due to Opportunity Fire, the Unit does not need to roll for minefield Suppression. For assaults into a minefield hex, the roll for possible Suppression due to the minefield takes place before Opportunity Fire is performed by the defending unit(s). All Opportunity Fire against Units entering or assaulting into a minefield applies an additional +1 modifier.
If a stack of Units is involved in the Assault, and some become Suppressed due to the minefield, the remaining Units must continue with the Assault.
The movement cost for all Units to enter a minefield is the same as desert terrain. Minefield hexes do not block Line of Sight, and do not modify the Fire Rating of Units firing into the hex.
When leaving a minefield, the costs for all Units (Leg, Wheeled or Tracked) to enter the next hex are doubled (and if the weather is mist, increase the movement cost by 1 before doubling the movement cost). A Unit in a minefield hex may perform any other Movement Actions (e.g. dismounting) as normal, with no additional penalty.
4.3.1 What Does a Minefield Door Do?
All French Units can ignore the effects of a minefield in the hex containing a minefield door, and can treat the hex as a desert hex. These hexes are 14.11, 15.18, and 27.13.
4.3.2 Minefield Removal/Addition
An Engineer Unit not in Column in a minefield hex can reduce the effectiveness of the minefield by passing a Troop Quality Check. This is an Engineer Action, and it provokes Opportunity Fire. If the check is successful, the minefield is reduced in quality. Heavy minefields become light minefields and light minefields are removed. Place either a "Light Minefield" or "Minefield Removed" marker in the hex. If the check is not successful, place a Men at Work marker on the Engineer Unit. A heavy minefield can be removed with two successful Engineer Actions, which can occur in the same Activation if two Engineer units both pass the required Troop Quality Check.
If a minefield has been reduced or removed, an Engineer Unit not in Column within the hex can attempt to add mines to the minefield by passing a Troop Quality Check. This is an Engineer Action, and it provokes Opportunity Fire. If the check is successful, increase the Minefield value of a desert hex to a light minefield and a light minefield to a heavy minefield. A minefield cannot be created where one does not exist at the start of the game, and a light minefield at game start cannot become a heavy minefield.
5.0 Dispatch Points
In No Question of Surrender, 2 additional Dispatch Points are received if the Divisional Activation Chit is drawn on the 1700 turn not on the 1900 turn as stated in the Series Rules.
Minefield Movement Example
In the example on the right, the Italian armored car has been activated under a Direct Command Activation. It first tries to move into the heavy minefield hex. This will first provoke Opportunity Fire from the French Unit, and then (if the armored car isn't Suppressed) a minefield Suppression roll will be performed. The French Unit rolls a Troop Quality Check, and with a die roll of "5" passes, so it will take the Opportunity Fire shot. The Fire Rating is a base 5, +3 for Fire Zone to Fire Zone movement, -2 for Range against an armored target, +1 for entering a minefield, giving a total Fire Rating of 7. The die roll is a "1", which is an "S?" result. The Italian player spends 1 Command Point to automatically pass the Troop Quality Check. The armored car now rolls for the minefield Suppression. If he rolls a "4" or lower, he will become Suppressed and stay in the current hex. The roll is a 6, so the minefield has no effect. It costs 5 MP to enter this hex (a wheeled Unit not in Column).
The armored car now tries to leave the minefield and enter the next hex. There is no minefield Suppression die roll, but it will trigger Opportunity Fire again, and the movement costs to enter the next hex are doubled (from 5 to 10). The French unit rolls his Troop Quality Check for the Opportunity Fire attempt and rolls a "1", so he takes the shot. The Fire Rating is a base 5, +3 for Fire Zone to Fire Zone movement, 0 for Range against an armored target, (there is no +1 for leaving a minefield, only entering), giving a total Fire Rating of 8. The roll is a "9", an automatic miss. The armored car now enters the hex, for a cost of 10MP (5 MP doubled for leaving a minefield).
Special Rules
S1.0 Airpower Determination
Both players have airpower available to them. For the French player, airpower is used to attack Axis Units, whereas the Axis player uses airpower to reduce the number of French Dispatch Points (and remember, the number of Dispatch Points cannot be less than zero).
During the Special Weather and Airpower Determination Phase at the start of each day, both players roll a die. The Axis result is subtracted from the French result to give a die roll differential. Use the Airpower Table below to determine the effect. If the French player is under Diminished or Emergency Supply, subtract 2 from the final differential.
| Die Roll Differential | Effect |
|---|---|
| -11 to -9 | French Lose 2 Dispatch Points |
| -8 to -4 | French Lose 1 Dispatch Point |
| -3 to +1 | No effect |
| +2 to +4 | 1 RAF Air Strike |
| +5 to +7 | 2 RAF Air Strikes |
| +8 to +9 | 3 RAF Air Strikes |
If the result is a number of RAF attacks, roll that number of dice. The numbers rolled correspond to the turn in which the airpower is available.
| Die Result | Turn Air Strike Available |
|---|---|
| 0 | 0500 |
| 1 | 0700 |
| 2 | 0900 |
| 3 | 1100 |
| 4 | 1300 |
| 5 | 1500 |
| 6 | 1700 |
| 7 | 1900 |
| 8, 9 | Night |
If the air strike cannot be performed due to weather or the turn being a night turn, then that air strike is lost for the day. Air strikes may target any Axis Unit except those in a Reinforcement entry hex or an Artillery Park.
Example: If The French player (under Full Supply) rolls a "7", and the Axis player rolls a "4", the differential is 3. This means the French player will receive 1 RAF air strike. He rolls a die and the result is "1", so the air strike will take place during the 0700 turn. The weather for the day is sand storm 2. Each turn that day a die is rolled to see if there are sand storms that turn or not. If the die roll on the 0700 turn is "2" or less, there will be sand storms that turn, and the air strike will be lost. If the die roll is "3" or more, the weather is clear that turn, and the air strike will take place.
S2.0 Counterbattery Fire
When an enemy Indirect HE Unit performs Indirect Fire, you may try to perform Counterbattery Fire. Once the enemy Unit has completed its Indirect Fire, announce that you wish to attempt Counterbattery Fire. Select one of your Indirect HE Units that does not currently have a Counterbattery Fired marker on it. In order to spot the enemy Unit it must pass a Troop Quality Check (no Command Point may be spent in order to pass this check). No Line of Sight is needed. If successful perform Indirect Fire against the spotted enemy Indirect HE Unit. The Company Bonus never applies to Counterbattery Fire, and no Barrage marker is placed.
Performing Counterbattery Fire does not cause the loss of an In Contact marker, unless a "9" is rolled on the Counterbattery Indirect Fire die roll (not the spotting Troop Quality Check die roll).
A Unit under a Counterbattery Fired marker may still perform Indirect or Direct Fire as normal.
Whether or not the Troop Quality Check was successful, place a Counterbattery Fired marker on the Indirect HE Unit. These markers are all removed at the end of the turn, when the Barrage markers are removed.
If the weather for the turn is sand storms or mist there is a +3 modifier to the die roll for the Troop Quality Check in order to spot the Indirect HE Unit.
S3.0 Random Events
For Scenario 4, each turn, place the Random Event chit into the mug, along with all the other chits. If it's the last one pulled for the turn, play it as the first chit next turn.
When the chit is played, roll a die. On a 1 through 9, there is no event. Nothing happens at all. On a roll of 0, roll the die again, and the numbered event below happens. Events will state if they can occur multiple times or not.
0. Rommel Arrives
Rommel is unhappy with the progress thus far, and wants to "assist" the Axis player. For the remainder of the day, the Rommel counter is stacked with any single Axis Leader (it may not be transferred to another Axis leader this day). All Units of that Formation can ignore the Axis Withdrawal rule (S5.3) if they lose a step. At the end of the night turn, remove the Rommel marker. This event may occur multiple times, but only once per day (if rolled for a second time on the same date, treat it as no event).
1. Ammo Dump Hit
The French ammunition dump has been hit by artillery fire! The Axis player selects a hex within Bir Hacheim. All Units in that hex take an "S?" result. This event may happen multiple times.
2. 7th Motorized Brigade Column Relief #1
The 7th Motorized Brigade attempts to help relieve the siege. Roll a die. The German player must withdraw enough Formations to give at least this many steps (see S5.3 for the withdrawal procedure). These Units return the next day at 0700. This event may occur only once in the game, and if this event is selected again, treat as no event.
3. 7th Motorized Brigade Column Relief #2
The 7th Motorized Brigade attempts to help relieve the siege. The German player must withdraw the KG Wolz Formation (see S5.3 for the withdrawal procedure). These Units return the next day at 0700. This event may occur only once in the game, and if this event is selected again, treat as no event.
If KG Wolz is not on the map, treat this as no event, and the event may still occur at a later time.
4. Wrong Ammo
The French artillery receives only AP ammo! Until the next time the French player receives supplies (see S4.2), the French Indirect HE Units are limited to Direct Fire only, and use the Blue line of the CRT for AP ammo. Place a "wrong ammo" marker on each French Indirect HE unit. French Indirect HE may not perform Counterbattery Fire until the French player receives supplies. When supplies are received, remove the "wrong ammo" markers. This event may only happen once and if this event is selected again, treat as no event.
5. Indian Gun Recovery
AT Guns have been recovered from the 3rd Indian Motor Brigade and put into commission. Place the Indian Gun Unit within any non-minefield Bir Hacheim hex that is not in an enemy Fire Zone. This event may only happen once and if this event is selected again, treat as no event.
6. Radio Lines Cut
Artillery fire cuts the radio lines used for keeping the French artillery Units in contact with their spotters. All the French Indirect HE units have lost contact. Turn the contact marker to the contact pending side and return it to its Indirect HE Unit. This event may happen multiple times.
7. Susan Travers Injured
Susan Travers (General Koenig's driver) is injured by shrapnel. Until the end of the night turn of the current day, the French Dispatch Rating is reduced to 1. Place the Travers Injured marker on the French division player aid chart, showing the "Dispatch Rating = 1" side for the rest of the day. This event may only happen once and if this event is selected again, treat as no event.
8. Italian Artillery Leader Killed
Colonnello Gallone, the Italian artillery Leader, is killed in combat. The Troop Quality Rating of the Italian Indirect HE Units is reduced by 2 until the end of the night turn of the current day. Place the Artillery Leader Killed marker on the 101 Trieste player aid chart for the rest of the day. This event may only happen once and if this event is selected again, treat as no event.
9. Surrender Requested
The Axis demands surrender! The French player rolls a die. If the roll is higher than the current French Morale Level, then all the Units of a French Formation, chosen by the French player, surrender, and are all removed from play: the French player immediately reduces his Morale Level to 0. If the roll is equal to or lower than the current French Morale Level, the French player haughtily responds that "there will be no question of surrender". This event may happen multiple times (and the French player should become more indignant each time).
S4.0 French Special Rules
S4.1 French Units Within Bir Hacheim
Bir Hacheim hexes are indicated on the map by the fortified hexes with a white ring around the terrain hex dot.
Due to these fortifications within Bir Hacheim, French Leg and Gun Units are considered to be in superior defensive positions except when performing Actions that provoke Opportunity Fire (such as moving, mounting or Engineer Actions) or Assaulting. These Units have their Defense Ratings lowered by 2 and are considered armored/entrenched targets for the CRT (though the range modification is still for an unarmored target), their Troop Quality Ratings are increased by 1, and both their Fire and Assault Ratings are increased by 1. French Units within Bir Hacheim are unable to build Improved Positions or Entrenchments. If Axis Units perform an Assault against French Units in Bir Hacheim, The Axis Units do not have to pass a Bravery Check.
French Units within Bir Hacheim do not need to perform an Action to leave or enter these defensive positions, they simply leave or enter them when they start or stop their Activation as need be.
Remember, when performing Actions that trigger Opportunity Fire, the French Units do not receive the benefits of the defensive positions and when Assaulting (but not being Assaulted), the French Units receive no benefits from the defensive positions at any point in the Assault procedure.
S4.2 French Supply Determination.
At the start of each night turn, the French player rolls a die to determine if any supplies arrive. On a roll of 3 or less, supplies do arrive, and the Supply marker is moved to the Full Supply status. On a roll of 4 or more no supplies arrive via the 7th Motorized Brigade move the Supply marker down one level (so if currently on Reduced Supply, move the marker down to Diminished Supply), and if already at Emergency Supply, leave the status unchanged.
The Supply marker has 4 stages: Full Supply, Reduced Supply, Diminished Supply, and Emergency Supply. Full Supply and Reduced Supply have no effect on gameplay.
If the supply is reduced to Diminished Supply, immediately reduce French Morale by 1. If the Supply is reduced to, or stays at, Emergency Supply, immediately reduce French Morale by 3.
While the French player is under Diminished supply, all Troop Quality Ratings are reduced by 1, and there is a -2 modifier to the Airpower Determination result.
If the French player is under Emergency Supply, all Troop Quality Ratings are reduced by 2, and there is a -2 modifier to the Airpower Determination result.
Hidden French AT Gun Example
In the example on the left, the Italian armored car has been activated under a Division Activation, and as his first Action it will move into an adjacent hex as indicated. At this point (during the middle of the armored car's Action) the French player flips over the Gun Unit marker, and reveals 1/1 Antichar. on the back. This Unit is now placed on the map in the hex the Gun Unit marker was in.
The French AT gun does not get to Opportunity Fire at the Italian armored car, as the Fire Zones that the AT gun projects did not exist until the AT gun was revealed. The armored car now has to end its Action at this point, as any additional movement it would make would now be into an enemy Fire Zone, which is not allowed during a Division Activation First Action. If it was in Command, a second action could be performed (for the cost of 1 Command Point), but a Movement Action could not be selected as the first Action was a Movement Action. The final situation is shown on the left.
S4.3 Hidden French AT Guns
There are 10 "Gun Unit" markers for the French AT Guns. Six of these are actual Gun Units, and 4 are Dummy Units. The French player places all 10 counters on the map with the "Gun Unit" side up. If a hidden Unit fires, or is assaulted or moves, then the Unit must be immediately flipped to reveal the Gun Unit identity, and is replaced by the appropriate counter (or if a dummy counter, simply remove it from play). A hidden AT Unit may be voluntarily flipped at any time by the French player, even during an enemy Unit's Action.
Until the Unit is flipped, it projects no Fire Zones onto the map. As soon as it is revealed it projects Fire Zones as normal. If the hidden AT Unit is revealed as an enemy Unit is moving towards it, it does not get to perform Opportunity Fire, as it was not projecting any Fire Zones before it was revealed.
"Gun Unit" markers may not be the target of Direct or Indirect fire, but should a "Gun Unit" marker be stacked in a hex with another Unit that is fired upon by Indirect Fire, the "Gun Unit" marker would take the normal "S?" result if the target Unit suffers a combat result, or takes an "S?" result and fails the Troop Quality Check (see Series Rules 16.4.1). Apply the result of the "S?" check to the "Gun Unit" markers as normal (and if the unit later becomes revealed, any markers are transferred to the revealed Unit). "Gun Unit" markers have a Troop Quality Rating of 5 (including the +1 for being in a Bir Hacheim hex) for this Troop Quality Check and for any Rally attempts.
The only restriction on setup is that no two "Gun Unit" markers can be adjacent to each other or in the same hex, and all "Gun Units" markers must setup within a Bir Hacheim hex.
S4.4 French Artillery Spotting
French Indirect HE Units may not self-spot for Indirect Fire missions, and must always used spotted fire.
For Direct Fire, the Indirect HE Unit must self-spot as usual.
S4.5 Jock Column
The French Jock Column Unit (Jock Colonne) can be freely deployed during any French Division Activation, French Direct Command, or the 13 DBLE Formation Activation for a cost of 1 Command Point. Simply place the Unit in one of the minefield door hexes or in hex 20.10, so long as the hex is not in an enemy Fire Zone.
This zero-step Unit is considered to always be In Command.
If the Unit ends an activation in one of the minefield door hexes or hex 20.10, it can be removed from the map. The Unit can come in and out of play as often as the French player wishes, even if it has been previously eliminated.
Jock Columns were used primarily to patrol and harass Axis vehicles, and were composed of a few Bren carriers and 75mm guns. Primarily "Region V" was patrolled most often.
S4.6 French Morale
At the start of the siege (scenario 4), the French Morale starts at 30 points, and can never go above this value. During the course of the siege, this value will decrease or increase (to a maximum of 30) based upon events:
- –5: Each French Step lost, or Jock Column eliminated
- –3: French Supply at Emergency Supply status
- –1: French Supply at Diminished Supply status
- +2: Each Axis Step lost
Should the number fall below 1 at any point in the game, the French will need to perform a withdrawal at the next night turn. If the current turn is a night turn, the withdrawal takes place immediately (see the Victory Conditions of Scenario 4 for details).
S5.0 Axis Special Rules
S5.1 Reinforcement Entry Hexes
German or Italian Units placed in a Reinforcement entry hex that do not leave their Reinforcement entry hex may be removed from the map at the end of the turn. Two turns later, they come back into the game and can be placed in any available Reinforcement entry hexes (the Units can be placed in the same or different Reinforcement entry hexes.)
Reinforcement entry hex G is only available for use starting on June 7th. Before that time, it is not in play.
S5.2 Artillery Parks
When Italian and German Indirect HE Units arrive as reinforcements, they will either be placed in Artillery Park A or Artillery Park B. All Units in these parks have a Fire Range that covers the entire map. Artillery Parks provide a -1 Terrain Modifier if a Unit in the park is targeted by Counterbattery Fire, and are considered armored/entrenched targets for the CRT.
Units in an Artillery Park Box may never perform Direct Fire. Units in an Artillery Park Box are always In Command. Units in an Artillery Park Box may never be targeted by either Direct Fire or Indirect Fire, but they can be targeted by Counterbattery Fire. French Indirect HE Units may always perform Counterbattery Fire on Indirect HE Units in Park A, but may only perform Counterbattery Fire on Indirect HE Units in Park B if they are:
- north of hexrow xx.15; and
- east of hexrow 25.xx; and
- not in a Bir Hacheim hex
S5.3 Axis Withdrawal
Whenever a non-Independent Unit of a German Formation loses a step, roll a die for each step that was lost. If the result is 0 or 1, all Units of that Formation, plus any German Independent Units in range of the Leader (and not in range of any other Leader of the same nationality) withdraw for the remainder of the day. These Units return at the 0700 turn of the next day as reinforcements. Any steps that have been lost by the Units withdrawing remain lost when the Units return. All other markers are discarded. The Axis player may spend 1 Command Point to add 1 to the die roll (so only a roll of 0 leads to a withdrawal).
Anytime a non-Independent Unit of a Trieste Italian Formation loses a step, roll a die for each step that was lost. If the result is 0, 1 or 2, all Units of that Formation, plus any Italian Independent Units in range of the Leader (and not in range of any other Leader of the same nationality) withdraw for the remainder of the day. These Units return at the 0700 turn of the next day as reinforcements. Any steps that have been lost by the Units withdrawing remain lost when the Units return. All other markers are discarded. The Axis player may spend 1 Command Point to add 1 to the die roll (so only a roll of 0 or 1 leads to a withdrawal).
S5.4 Trieste Division Formation Activation Chits
The cost of the Italian Trieste Division Formation Activation chits costs double the normal costs. To buy a Formation Activation chit for the next turn costs 2 Dispatch Points, and to buy a Formation Activation chit for the current turn costs 4 Dispatch Points.
S5.5 Axis Artillery Spotting
Italian 101 Trieste Division Units may not act as spotters for German 90. leichte Afrika Division indirect HE Units, and vice versa.
S5.6 Axis Direct Command Chit
There are two Axis Direct Command chits included in the game. Only one should be used, and the Axis player can decide to use either the Italian version ("Ordine Directo") or the German version ("Direkten Befehl"). It's recommended to use the Italian version for scenarios 1 and 2, and the German version for scenarios 3 and 4. Remember that when a Direct Command chit is drawn, all Units of that side may be activated; there is no nationality restriction.
Scenarios
General Comments
For the scenarios, please remember the following:
- All Units start at full strength, unless otherwise noted.
- Leaders stack with any of their Units at setup, unless otherwise noted.
- All Units may setup mounted or not, in Column or not (observing stacking limits) at the owning player's choice, except when otherwise noted.
- No Indirect HE contact markers are placed at setup, unless otherwise noted.
- Reinforcements may arrive overstacked.
- Leaders arrive with the first Unit of their Formation.
- The last chit drawn for a turn becomes the first chit in play the next turn, except when otherwise noted.
Scenario 1
"The Italians Attack"
Historical, May 27th
Description
This scenario is short, and is designed for those learning the rules of the game. It's the actual attack by the Ariete Division on the morning of May 27th 1942. Only one battalion of Italian tanks attacked Bir Hacheim, with predictable results. In order for the Italian player to be successful in winning this scenario, he will need to have luck on his side. To give the Italian player of the scenario a sporting chance, the number of French AT guns has been limited to a single Unit. If players wish to replay the actual attack, the 1/1 Antichar Unit can be added to the French setup. Once players have completed this scenario, and are comfortable with the game mechanics, it's suggested that they play scenario 2 in order to explore the possibility of the intended, coordinated, Italian attack.
Setup
Play begins with step 5 of the sequence of play, and steps 1 through 4 do not apply throughout this scenario. The weather is clear for the entire scenario.
Dispatch Points are not used in this scenario, only Command Points. No Activation chits will be purchased.
The 1re Brigade Française Libre has 2 Command Points. The 103 Ariete Divisione has 6 Command Points.
For the 1re Brigade Française Libre, the Command Rating is 3 and for the 103 Ariete Divisione, the Command Rating is 2.
Place the French and Italian Direct Command Chits and the 1re Brigade Française Libre and 103 Ariete Division Activation Chits in the mug. The 132 Corazzato Formation Activation Chit is the first chit in play. The first turn ends when the last chit is drawn (and it is the first chit in play on the second turn). No other Formation Activation chits, or the Random Event chit, are used in this scenario.
For the second turn, place the 4 chits played on the first turn back into the mug. Note that this will include the 132 Corazzato Formation Activation Chit.
Scenario Length
The scenario length is 2 turns (0900 to 1100), and ends when the last chit is drawn on turn 2 (this chit is not played).
French Setup
1re Brigade Française Libre, 13 DBLE: 5/2/13 DBLE; 6/2/13 DBLE; 7/2/13 DBLE; L/2/13 DBLE; M/2/13;DBLE (placed within the 2 BLE deployment area on the map).
1re Brigade Française Libre, Independent: 3/1 Antichar "Gun Unit" marker and one dummy "Gun Unit" marker are placed in any non-minefield Bir Hacheim hex, and must observe the S4.3 setup restrictions.
Leader Amilakvary stacks with any Unit of his command.
The French are in Full Supply.
Axis Setup
None
Reinforcements
French Reinforcements
None
Axis Reinforcements
0900
103 Ariete, 132˚ Reggimento Corazzato: 1/VIII/132; 2/VIII/132; 3/VIII/132 plus Leader (placed in Reinforcement entry hex B).
Special Scenario Rules
The Italian Units can not move north of hexrow XX.10 or south of hexrow XX.17.
Special Rules in Effect
- S4.1 French Units within Bir Hacheim
- S4.3 Hidden French AT Guns
Victory Conditions
If at the end of the scenario there is an unsuppressed Italian Unit within the setup area of the French Units, the Italian player wins. All other results are a French victory.
Scenario 2
"The Italians Really Attack"
Ahistorical, May 27th
Description
Suppose the Ariete Division had coordinated a complete attack on Bir Hacheim on the first day (as Rommel intended), rather than calling off the attack and bypassing the fortress to head north. This scenario examines this possible turn of events by allowing the full weight of the Ariete Division to be brought to bear on the Free French.
Setup
Play begins with step 4 of the sequence of play, and steps 1 through 3 do not apply throughout this scenario. The weather is clear for the entire scenario.
The 1re Brigade Française Libre has 4 Command Points and 0 Dispatch Points. The 103 Ariete Divisione has 8 Command Points and 3 Dispatch Points.
For the 1re Brigade Française Libre, the Command Rating is 5 and a Dispatch Rating of 2, and for the 103 Ariete Divisione, the Command Rating is 3 and a Dispatch Rating of 2.
Place the French and Italian Direct Command Chits and the 1re Brigade Française Libre Activation Chit in the mug. The 103 Ariete Division Activation Chit will be the first chit put into play. In addition, the Italian player selects one Formation Activation chit for free to be placed in the mug. The Italian player may also purchase additional Formation Activation Chits for the first or the second turn. The Random Event chit is not used in this scenario.
Scenario Length
The scenario starts on the 0900 turn of May 27th. The scenario ends when the last chit is drawn on the 1900 turn (this chit is not played).
French Setup
1re Brigade Française Libre, 13 DBLE: 5/2/13 DBLE; 6/2/13 DBLE; 7/2/13 DBLE; L/2/13 DBLE; M/2/13 DBLE (placed within the 2 BLE deployment area on the map).
1re Brigade Française Libre, 2nd DBS: 1/BP1; 2/BP1; 3/BP1; Mortier BP1; 1/BIM (placed within the BP 1 deployment area on the map).
1re Brigade Française Libre, 2nd DBS: 5/BM2; 6/BM2; 7/BM2; Mortier BM2 (placed within the BM 2 deployment area on the map)
1re Brigade Française Libre, Artillery: 1/1 RA FFL; 2/1 RA FFL; 3/1 RA FFL; 4/1 RA FFL (placed in any non-minefield Bir Hacheim hex).
1ere Division FFL, Independent: 22 CNA; 17 Sapeurs; 10 "Gun Unit" markers (all placed in any non-minefield Bir Hacheim hex, but the setup restrictions for the AT guns must be observed).
Leaders Amilakvary, de Roux, Champrosay stack with any Unit of their command.
The French are in Full Supply.
Axis Setup
None
Reinforcements
French Reinforcements
None
Axis Reinforcements
0900
103 Ariete, 132˚ Reggimento Corazzato: 1/VIII/132; 2/VIII/132; 3/VIII/132; 1/IX/132; 2/IX;132; 3/IX/132; 1/X/132; 2/X/132; 3/X/132 plus Leader (placed in Reinforcement entry hex A, B, C or D, and they do not have to be placed in the same Reinforcement entry hex).
103 Ariete, 8˚ Reggimento Bersaglieri: ca/III/8; mg/III/8; morta/III/8; 1/V/8; 2/V/8; cc/V/8; 1/XII/8; 2/XII/8; cc/XII/8 plus Leader (placed in Reinforcement entry hex A, B, C or D, and they do not have to be placed in the same Reinforcement entry hex).
103 Ariete, Independent: XXXII Mis. Gen.; 1/Lancieri; 2/Lancieri; 1/Cavalleria; 2/Cavalleria; Autocannoni; II/24 (placed in Reinforcement entry hex A, B, C or D, and they do not have to be placed in the same Reinforcement entry hex).
103 Ariete, Artillery: 1/132; 2/132; 3/132; DLI (placed in Artillery Park A).
The Italian player may withhold any of these Units (either individual Units or entire Formations) he wishes, and bring them in at any Reinforcement entry hex (except G) on the 1300 turn. The reinforcement hex does not need to be determined before the start of the 1300 turn.
Special Rules in Effect
- S2.0 Counterbattery Fire
- S4.1 French Units within Bir Hacheim
- S4.3 Hidden French AT Guns
- S4.4 French Artillery Spotting
- S4.5 Jock Column
- S5.1 Reinforcement Entry Hexes
- S5.2 Artillery Parks
Victory Conditions
At the end of the scenario, the Italian player receives 1 victory point for each French step eliminated, and each unsuppressed Italian Unit in a Bir Hacheim hex. If the Italian player has 14 or more points, the Italian player wins. All other results are a French victory.
Scenario 3
"Capture Point 186"
June 8–June 9
Description
A second mid-sized scenario. The Germans are trying to get a foothold within Bir Hacheim, in particular the pivotal Point 186 (hex 17.10).
Setup
Play begins with step 4 of the sequence of play. The weather is clear for the first day, and is rolled for on the second day (and treat a Sand Storm 4 weather result as a Sand Storm 2 result).
The 1re Brigade Française Libre has 10 Command Points and 2 Dispatch Points. The 90. leichte Afrika Division has 8 Command Points and 3 Dispatch Points.
For the 1re Brigade Française Libre, the Command Rating is 4 and a Dispatch Rating of 2, and for the 90. leichte Afrika Division the Command Rating is 3 and a Dispatch Rating of 2.
Place the French and German Direct Command Chits and the 1re Brigade Française Libre Division Activation Chit in the mug. Both players may purchase additional Formation Activation Chits for the first or second turn. The first chit in play is the 90. leichte Afrika Division Activation chit (this is not in the mug). The Random Event chit is not used in this scenario.
Scenario Length
The scenario starts on the 1900 turn of June 8th. The scenario ends when the last chit is drawn (this chit is not played) on the 1900 turn of June 9th.
French Setup
1re Brigade Française Libre, 13 DBLE: 9/3/13 DBLE; 10/3/13 DBLE; 11/3/13 DBLE; L/3/13 DBLE; M/3/13 DBLE (placed within the 3 BLE deployment area on the map).
1re Brigade Française Libre, 2nd DBS: 5/BM2; 6/BM2; 7/BM2; Mortier BM2 (placed within the BM 2 deployment area on the map or hexes 17.10 or 18.09).
1re Brigade Française Libre, Artillery: 1/1 RA FFL; 2/1 RA FFL (placed one in hex 19.17 and the other in 22.12).
1re Brigade Française Libre, Independent: 22 CNA (in hex 21.12); 3 randomly selected Antichar units (place one in each of the following hexes 16.12, 17.11, and 20.10. These Units may not setup hidden).
The French start the scenario in Reduced Supply.
Axis Setup
None
Reinforcements
French Reinforcements
None
Axis Reinforcements
June 8
1900:
-
leichte Afrika Division, KG Wolz: 1/I./Flak 43; 2./I./Flak 43; 3./I./Flak 43; 4./I./Flak 43; 5./I./Flak 43; 1./PzJg Abt. 33; 2./PzJg Abt. 33; 3./PzAufkl; 1/I./Flak 18; 2./I./Flak 18; 3./I./Flak 18; 4./I./Flak 18; 5./I./Flak 18, plus Leader (placed in Reinforcement entry hex G).
-
leichte Afrika Division, KG Hecker: 1./Pioneer 33; 2./Pioneer 33; 3./Pioneer 33; 1./Pioneer 200; 2./Pioneer 200; 3./Pioneer 200; 1./Pioneer 900; 2./Pioneer 900 plus Leader (placed in Reinforcement entry hex G).
-
leichte Afrika Division, Artillery: 1./Art.Abt. 361; 2./Art.Abt. 361; 3./Art.Abt. 361 (placed in Artillery Park A).
-
leichte Afrika Division, Artillery: 3./Küst.Art. 523; 1./Küst.Art. 533; 2./Küst.Art. 533; 3./Küst.Art. 533 (placed in Artillery Park B).
Night:
-
leichte Afrika Division, KG Hecker: 1/27 17˚ Pavia; 2/27 17˚ Pavia; 3/27 17˚ Pavia; 1/28 17˚ Pavia; 2/28 17˚ Pavia; 3/28 17˚ Pavia; 2./z.b.V.288; 5/z.b.V.288; StuG/z.b.V.288 (placed in Reinforcement entry hex F).
-
leichte Afrika Division, KG Kiehl: S. Flak Kiehl; Panzer Komp. plus Leader (placed in Reinforcement entry hex F).
June 9
1500:
- leichte Afrika Division, KG Baade: 1./I./115; 2./I./115; 3./I./115; 4./I./115; Gr. W./I./115; Pak/I./115; 5./II./115; 6./II./115; 7./II./115; 8./II./115; Gr. W./II./115; Pak/II./115; 14./Pioneer 115; 13./IG 115 plus Leader (placed in Reinforcement entry hex F or G, and they do not have to be placed in the same Reinforcement entry hex).
Special Rules In Effect
- S1.0 Airpower Determination
- S2.0 Counterbattery Fire
- S4.1 French Units within Bir Hacheim
- S4.2 French Supply Determination
- S4.4 French Artillery Spotting
- S4.5 Jock Column
- S5.2 Artillery Parks
- S5.3 Axis Withdrawal
Additionally, the French Units of 13 DBLE may not activate until a German Unit occupies the observation point (hex 17.10), but may Opportunity Fire and defend if Assaulted. The 13 DBLE Formation Activation Chit is not available for purchase until a German Unit occupies the observation point.
The German Units may not move south of row xx.12 or east of row 23.xx.
For special rule S5.3, the Axis player does not make a die roll for the first step lost for each formation in the scenario, but does make the withdrawal roll for each subsequent step lost. (Optional: inexperienced Axis players may wish to completely ignore rule S5.3.).
Victory Conditions
The side that occupies, or was the last to occupy, the observation point (hex 17.10) at the end of the game wins.
Scenario 4
"The Siege of Bir Hacheim"
June 2 to June 10
Description
The entire siege of Bir Hacheim. How long can the Free French hold out?
Setup
Play begins with step 4 of the sequence of play. The weather is clear for the scenario for the first day, and is rolled for on the subsequent days during the Special Weather and Airpower Phase.
The 1re Brigade Française Libre has 10 Command Points and 2 Dispatch Points. The 101 Trieste Divisione has 3 Command Points and 1 Dispatch Point. The 90. leichte Afrika Division has 4 Command Points and 2 Dispatch Points.
For the 1re Brigade Française Libre, the Command Rating is 5 and a Dispatch Rating of 2; for the 101 Trieste Divisione, the Command Rating is 3 and the Dispatch Rating is 0; and for the 90. leichte Afrika Division, the Command Rating is 4 and a Dispatch Rating of 2.
Place French and German Direct Command chits, the 1re Brigade Française Libre, 101 Trieste Division Activation chits, and the Random Event chit in the mug. Both players may purchase additional Formation Activation chits for the first turn or second turn. The first chit in play is the 90. leichte Afrika Division Activation.
Scenario Length
The scenario starts on the 1300 turn of June 2nd. The scenario ends when the last chit is drawn (this chit is not played) on the 1900 turn of June 10th (or earlier).
French Setup
1re Brigade Française Libre, 13 DBLE: 5/2/13 DBLE; 6/2/13 DBLE; 7/2/13 DBLE; L/2/13 DBLE; M/2/13 DBLE (placed within the 2 BLE deployment area on the map).
1re Brigade Française Libre, 13 DBLE: 9/3/13 DBLE; 10/3/13 DBLE; 11/3/13 DBLE; L/3/13 DBLE; M/3/13 DBLE (placed within the 3 BLE deployment area on the map).
1re Brigade Française Libre, 2nd DBS: 1/BP1; 2/BP1; 3/BP1; Mortier BP1; 1/BIM (placed within the BP 1 deployment area on the map).
1re Brigade Française Libre, 2nd DBS: 5/BM2; 6/BM2; 7/BM2; Mortier BM2 (placed within the BM 2 depoyment area on the map).
1re Brigade Française Libre, Artillery: 1/1 RA FFL; 2/1 RA FFL; 3/1 RA FFL; 4/1 RA FFL (placed in any non-minefield hex of Bir Hacheim hex).
1re Brigade Française Libre, Independent: 22 CNA; 17 Sapeurs; 10 "Gun Unit" markers (all placed in any non-minefield Bir Hacheim hex, but the setup restrictions for the AT guns must be observed).
Leaders Amilakvary, de Roux, Champrosay stack with any Unit of their command.
The French are in Full Supply.
Axis Setup
None
Reinforcements
French Reinforcements
None
Axis Reinforcements
June 2
1300:
101 Trieste, Reggimento Motorizzato 65: 1/I/65; 2/I/65; 3/I/65; Contracarri/65; Mortai/65 plus Leader (placed in Reinforcement entry hex A).
101 Trieste, Reggimento Motorizzato 66: 1/I/66; 2/I/66; 3/I/66; Contracarri/66; Mortai/66 plus Leader (placed in Reinforcement entry hex A).
101 Trieste, Independent: 1/XI; 2/XI; 3/XI; 1/VIII Bers.; 2/VIII Bers.; ca/21; LII Mis. Gen. (placed in Reinforcement entry hex A).
-
leichte Afrika Division, 155 Schützen: 1./I./155; 2./I./155; 3./I./155; 4./I./155; Gr. W./I.155; PaK/I./155; 5./II./155; 6./II./155; 7./II./155; 8./II./155; Gr. W./II./155; PaK/II./155; 707 SIG; I./PzJg Abt. 605; 2./PzJg Abt. 605; 3./PzJg Abt. 605; 1./Flak Abt. 606; 3./Flak Abt. 606; 580. PzAufkl plus Leader (placed in Reinforcement entry hex B, C or D, and they do not have to be placed in the same Reinforcement entry hex).
-
leichte Afrika Division, 200 Schützen: 1./I./200; 2./I./200; 3./I./200; 4./I./200; Gr. W./I.200; PaK/I./200; 5./II./200; 6./II./200; 7./II./200; 8./II./200; Gr. W./II./200; PaK/II./200; 708 SIG plus Leader (placed in Reinforcement entry hex B, C or D, and they do not have to be placed in the same Reinforcement entry hex).
-
leichte Afrika Division, 361 Schützen: 1./I./361; 2./I./361; 3./I./361; 4./I./361; Gr. W./I.361; PaK/I./361; 5./II./361; 6./II./361; 7./II./361; 8./II./361; Gr. W./II./361; PaK/II./361 plus Leader (placed in Reinforcement entry hex B, C or D, and they do not have to be placed in the same Reinforcement entry hex).
-
leichte Afrika Division, Independent: 1./PzJg Abt. 190; 2./PzJg Abt. 190; 1./Flak Abt. 612; 2./Flak Abt. 612; 3./Flak Abt. 612 (placed in Reinforcement entry hex B, C or D, and they do not have to be placed in the same Reinforcement entry hex).
1500:
101 Trieste, Artillery: I/21; II/21; III/2; IV/21; 131/8; 148/8 (placed in Artillery Park A).
- leichte Afrika Division, Artillery: 1./Art.Abt. 361; 2./Art.Abt. 361; 3./Art.Abt. 361 (placed in Artillery Park A).
June 3
0700:
- leichte Afrika Division, Artillery: 3./Küst.Art. 523; 1./Küst.Art. 533; 2./Küst.Art. 533; 3./Küst.Art. 533 (placed in Artillery Park B).
0900:
- leichte Afrika Division, KG Wolz:
1/I./Flak 43; 2./I./Flak 43; 3./I./Flak 43; 4./I./Flak 43; 5./I./Flak 43; 1./PzJg Abt. 33; 2./PzJg Abt. 33; 3./PzAufkl; 1/I./Flak 18; 2./I./Flak 18; 3./I./Flak 18; 4./I./Flak 18; 5./I./Flak 18 plus Leader (placed in Reinforcement entry hex B, C or D, and they do not have to be placed in the same Reinforcement entry hex).
June 6
1500:
- leichte Afrika Division, KG Hecker: 1./Pioneer 33; 2./Pioneer 33; 3./Pioneer 33; 1./Pioneer 200; 2./Pioneer 200; 3./Pioneer 200; 1./Pioneer 900; 2./Pioneer 900 plus Leader (placed in Reinforcement entry hex A, B or F, and they do not have to be placed in the same Reinforcement entry hex).
June 8
Night:
-
leichte Afrika Division, KG Hecker: 1/27 17˚ Pavia; 2/27 17˚ Pavia; 3/27 17˚ Pavia; 1/28 17˚ Pavia; 2/28 17˚ Pavia; 3/28 17˚ Pavia; 2./z.b.V.288; 5/z.b.V.288; StuG/z.b.V.288 (placed in Reinforcement entry hex A, B, F or G, and they do not have to be placed in the same Reinforcement entry hex).
-
leichte Afrika Division, KG Kiehl: S. Flak Kiehl; Panzer Komp. plus Leader (placed in Reinforcement entry hex A, B, F or G, and they do not have to be placed in the same Reinforcement entry hex).
June 9
1500:
- leichte Afrika Division, KG Baade: 1./I./115; 2./I./115; 3./I./115; 4./I./115; Gr. W./I./115; Pak/I./115; 5./II./115; 6./II./115; 7./II./115; 8./II./115; Gr. W./II./115; Pak/II./115; 14./Pioneer 115; 13./IG 115 plus Leader (placed in Reinforcement entry hex A, B, F or G, and they do not have to be placed in the same Reinforcement entry hex).
Special Rules in effect
All special rules are in effect.
Victory Conditions
Any day the French Morale falls below 1, or if the date is the 10th, the French must withdraw the upcoming night turn (or if the turn is currently a night turn, the withdrawal takes place immediately). The French player places the Susan Travers counter on one of the minefield door hexes, and then moves it, one hex at a time, to a German reinforcement hex, taking any route he wishes so long as the counter doesn't enter a hex with an Axis Unit. Count the number of hexes that are in Axis Fire Zones that the counter enters.
If the Withdrawal is taking place on June 7th or earlier, the game is an Axis victory.
If the Withdrawal take place on June 8th or 9th, and Susan Travers passes through 3 or fewer Axis Fire Zones, then it is a minor French victory. If Susan Travers cannot trace a route, or passes through 4 or more Axis Fire Zones, then it is a minor Axis victory.
If the Withdrawal takes place on June 10th, it is a French victory.
Narrative of The Battle for Bir Hacheim
Introduction
Bir Hacheim (or Bir Hakeim) is a remote oasis in the Libyan desert, and the former site of a Turkish fort. In fact it is not much more than a crossing of several tracks in an almost barren desert. During the Battle of Gazala, the Free French of General Marie-Pierre Koenig defended the site from 27th May to 10th June 1942 against attacking German and Italian forces directed by General Erwin Rommel.
Rommel devised a plan for a sweeping flank attack around Bir Hakeim in order to destroy the British armor held in reserve and cut off the Commonwealth divisions defending the Gazala Line. To execute this offensive, he intended the Italian 132nd Armored Division Ariete to assault Bir Hacheim while the 21. and 15. Panzer Divisions swung around the Allied flank to attack their rear. This maneuver would be supported by the 90. leichte Afrika Division which was to move around the Allied flank to El Adem to block reinforcements from joining the battle. Resisting for 16 days, the Free French gave the retreating British Eighth Army enough time to reorganize and subsequently halt the Axis advance.
The Free French, around 3,700 men, consisted of a mixed force of two Foreign Legion battalions of the 13th Demi-Brigade and 4 battalions containing colonials, naval troops and Marines. The famous Foreign Legion, well known as a safe haven for men from all walks of life, was well represented here. Armed with 75mm guns, smaller guns and mortars, antitank rifles, some anti-aircraft guns, machine-guns and small arms these men would have to stand up to the storm that would hit them. Temperatures of 50°C/122°F, shortages of both water and sleep, and an abundance of noise and shelling, would prove to be a stern test of endurance.
The French position was heavily mined all around and divided into sectors which would allow for an all-round defense. The minefields were extensive and could only be crossed in a couple of places, which were covered effectively in other ways. In the center of the positions a "mobile reserve" position would allow support in case of a breakthrough.
Failure
On the morning of 27th May the Italian General De Stefanis of the Ariete Division received the order to attack the French from the southeast, the rear of the position. The M13/40's of the 132nd Regiment, some infantry and artillery hit the French. The Italian infantry however ran into trouble, hit hard by French artillery fire, and so the tanks had to continue on their own. All too soon, they ran into the minefield and were decimated. As the Italians tried to gain access to the French positions from the north, the mines again took their toll on the attacking Italians. The few tanks that got close were dealt with by the 75 mm guns. The attack that started at 09:30 hours ground to a halt and at about 10:15 the retreat was sounded. 32 burning hulks were spread across the desert, a testament to Italian bravery.
In the meantime, further north, the Italians succeeded in decimating the neighboring British position, effectively isolating the French at Bir Hacheim.
The period of May 28th/29th saw only limited action, with the Italians trying to gain a foothold by small infiltration actions, all of which were repulsed. Rommel, in the meantime, had his hands full as the Allies counterattacked and isolated parts of his forces. With the Royal Air Force flying ground support missions they presented an unexpected danger to the French at Bir Hacheim. From the sky the Italian tanks destroyed during the first attack on Bir Hacheim looked like another armored column and were bombed. Some of these bombs hit the French positions and so General Koenig decided to set the wrecks on fire. This way they were more easily recognizable as being already destroyed, stopping the R.A.F. from maybe scoring an own goal.
The 29th presented a surprise to the French defenders in the form of about a hundred Indian soldiers who had been taken prisoner by the Germans at the start of their offensive. With their own supplies being low and a full offensive in progress, the Germans let the prisoners wander off, allowing them to turn up at Bir Hacheim. This "surprise" and the growing number of Axis prisoners stretched supplies in the French position to the limit.
The next two days, 30th/31st May were fairly quiet except for another attempt to infiltrate through the minefields. May 31st, however, did see a supply convoy with water reaching the positions, relieving some of the problems of water shortage. On their return trip the trucks took along the unexpected Indian visitors, the severely wounded and POWs, further relieving the supply pressure.
German intervention
With those pesky French still on his right flank, threatening his supply lines, Rommel decided to intervene. On 1st June he sent the 90. leichte Afrika Division to help the Italians and annihilate the Bir Hacheim hedgehog. To renew the attack the Luftwaffe was ordered to bomb the French position and Stukas started their attacks.
On 2nd June, at 08:00 hours, the attack resumed and the 90. leichte and Trieste attacked from two directions, supported by Stuka attacks from the air. Koenig's forces knew that they were isolated and could not count on support from any British units. The only support they could expect was from the R.A.F., which attacked the enemy positions around Bir Hacheim. This did boost the morale of the French, seeing Italian and German armor reduced to burning hulks.
This same day the Axis invited General Koenig to surrender his forces; they did this again on the 3rd and the 5th, but to Koenig there was no question of surrender.
Over the next two days the shelling and bombing was intensified and several attacks followed, but the French held their positions, although this became harder each day.
Starting on the 6th of June the German pressure on the French perimeter started to increase and German engineers breached the minefields and entered the French positions. With the perimeter slowly shrinking, but the fort still in French hands, the Germans were prevented from expanding their foothold. Even the R.A.F., whose support was much appreciated by the French, started to attack the German positions inside the perimeter. With one final convoy able to breach German lines to supply the fort, the French knew that the end was near.
Rommel assembled his forces for another attack from the north on 8th June. This time he would personally lead the attack, which would be supported by artillery and a large commitment by the Luftwaffe. More dive-bombing Stukas attacked the Bir Hacheim position, but despite this bombing and shelling the French held firm. That night Koenig addressed his men and told them that he wanted to try to hold out until the 10th and break out of the encirclement the following night.
Water, food, and ammunition were running critically low but the French had to hold out one more day. The R.A.F., which had made its presence felt over many days already, dropped 170 liters of water on the position so the wounded could be taken care of. Had Rommel known that ammunition was almost exhausted, he would surely have ordered another attack, but he decided to reorganize his forces instead, and so in fact helped the French to prepare for the breakout.
With sappers clearing a way through the minefields, Koenig headed southwest, but all too soon the French evacuation was spotted by the Germans. Instead of an organized evacuation, the whole thing turned into a mad dash to freedom. Bren carriers were sent out to neutralize machine gun positions, hand-to-hand combat took place, and many a vehicle ended up hitting a mine.
By around 08:00 hours on 11th June, the majority of the Free French forces had been evacuated, but during the day many stragglers turned up at the British position that had been appointed as the rendezvous.
That same day the Axis forces conquered the Bir Hacheim positions that had held out for many more days than Rommel had expected. They found around 500 French wounded and men who either were unable to evacuate or had chosen to stay behind to take care of the wounded. Around 2,600 men had been successfully evacuated from the Bir Hacheim hedgehog.
Despite being a hindrance to Rommel's supply lines, Bir Hacheim only delayed his conquest of Tobruk for a couple of days. It did not "rescue" the Commonwealth forces in Africa in the end. The time gained by the French was used by the British to take up heavily defended positions further north, but again, they surrendered the initiative to Rommel. With the southern part of the battlefield freed of opposition, he swooped north and decisively defeated the British armor.
What the battle for Bir Hacheim did show was that the French, and particularly the Foreign Legion, were not second-rate soldiers, a collection of no-goods who could not really fight and contribute to the Allied cause. They did more than just hold their ground against a well-trained foe, commanded by one of the top commanders of the German Reich. They fought gallantly in a position that had been surrounded, while running out of supplies and water, and even succeeded in breaking out of this situation.
Biographies
Susan Travers (09/23/1909–12/18/2003)
Being the only woman ever to have been inducted into the French Foreign Legion, Miss Travers found herself at Bir Hacheim after a trip as an ambulance driver. There she became General Koenig's driver and mistress. The daughter of a British Admiral, Susan Travers went to war in Finland serving as an ambulance driver, something she continued to do until the end of the war. After the successful German invasion of Scandinavia she returned to England to join the forces De Gaulle had been assembling there. Via the Syrian campaign she ended up at Bir Hacheim where she refused to leave with the other women. During the siege she drove General Koenig and Colonel Amilakvary around while shells came down all around the car and Stukas flew overhead. During the retreat she drove the car through the dark to get back to the British lines. The car was hit several times but they returned safely. Later in the war Susan Travers was wounded when the car she was driving hit a mine. She wrote her biography at the age of 91 after all the people involved had died. Miss Travers was awarded the Croix de Guerre.
General Pierre Koenig (10/10/1898–09/02/1970)
Marie-Pierre Koenig served with distinction during the First World War but would stake his claim to fame in the Second World War during the fighting at Bir Hacheim. After the evacuation of the French forces from Norway, Koenig saw action in France against the German Blitzkrieg. When France fell he escaped to England and joined De Gaulle and his Free French forces. In 1941 he was involved in the campaigns in Syria and Lebanon before being transferred to Egypt. With his stand at Bir Hacheim, during which he rejected a request to surrender by Rommel personally, the French made it possible for the British forces to make a more orderly retreat and regroup in order to strike back at Rommel. After his return to England he was attached to Eisenhower's Allied Headquarters and was involved in preparations for the D-Day invasion. In June 1944 he stopped the internal power struggle between the French maquis groups, strengthening their contribution to the support of the Allied forces during their battles in France. After the war he went on to hold a number of high ranking positions until his death in 1970.
Generale Arnaldo Azzi (12/23/1885–11.25/1957)
The 101st Motorized "Trieste" Division was commanded by Lieutenant-General Azzi from December 1941 until the end of July 1942. He next commanded an anti-partisan unit in the Balkans during 1944. He was removed from the ranks of the Italian army because he made some anti-monarchic speeches. Unfortunately little else is known about this commander.
Generale Guiseppe de Stefanis (1885-1965)
An artillery officer before the war Giuseppe de Stefanis went to war in France, 1940, and Greece, 1941, commanding an infantry division. During the Greek 'tragedy' he won the highest Italian award, the Ordine Militare di Savoia. He next commanded the Motorized "Trento" Division before he took over command of the Armored "Ariete" Division. At the end of June 1942 he was given the command of XX Corpo d'Armata Corazzato that consisted of the Ariete, Littorio and Trieste Divisions. In November 1942 Rommel assigned him the task of preparing the Mareth line for the Panzerarmee Afrika. After his return to Italy he commanded LI Corps for just a short time before becoming involved in peace delegations.
General der Panzertruppen Ulrich Kleeman (03/23/1892–03/01/1963)
Commanding the 90. leichte Afrika Division from April 10, 1942 to July 13, 1942 and during the period August 10, 1942 to November 1, 1942, Ulrich Kleemann was a daring commander leading this formation in some of the hardest battles in the desert campaign. He had been in the cavalry during the First World War and stayed with the colors after the war. This probably explains some of his daring exploits in the desert. First being engaged further north, Kleemann was directed south by Rommel to help the Italians deal with Bir Hacheim. In 1943 Kleemann commanded the Sturm Division Rhodos in the assault on his former Italian allies on the island Rhodes. In the latter stages of the war he became General der Panzertruppen and fought on the Eastern Front in Hungary.
Errata and Clarifications
No Question of Surrender Errata 9/16/12
Page 15: Setup
- leichte Afrika Division Dispatch Rating should be 1 not 2 (the setup chart is correct).
Map
The hexes 18.10; 24.13; 27.15; 27.16 should all have a white circle around them as they are within the Bir Hacheim perimeter.
Hex 37.22 is missing its center dot. It is a desert hex.
Counters
The "2 DBS" Formation Activation Chit is incorrectly labelled as "1 DBS".
The two zero-step Units Indian Guns (French Unit) and StuG/z.b.V.288 (German Unit) should have no Assault Rating, as they are immediately eliminated is assaulted.
Clarifications
References to the 103 Ariete Division should of course be the 132 Ariete Division.
Page 4: 4.3 Minfield
When leaving a minefield hex that contains a barrage marker the +2 to the movement for the barrage marker is applied before the movement costs are doubled for leaving the minefield hex.
Page 17: Victory Conditions
If the French are performing the withdrawal on June 10th, no path has to be traced by the Travers Counter.