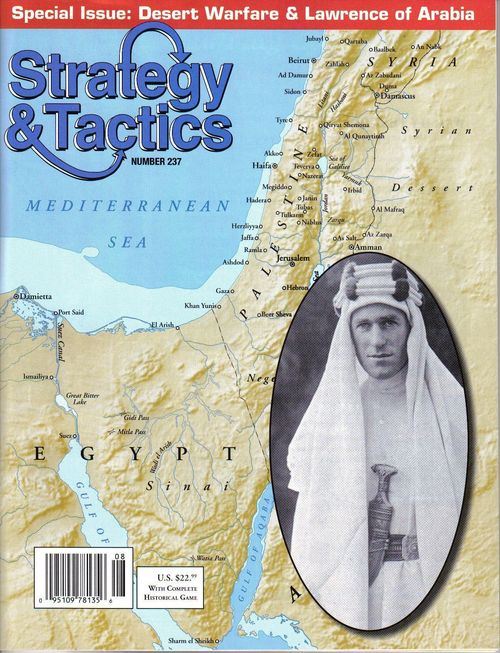
No Prisoners: The Campaigns of Lawrence of Arabia, 1915-1918
No Prisoners: The Campaigns of Lawrence of Arabia, 1915-1918 Rulebook
Table of Contents
Table of Contents
- 1.0 Introduction
- 2.0 Game Equipment
- 3.0 Setting Up
- 4.0 Sequence of Play
- 5.0 Random Events
- 6.0 Reinforcements and Withdrawals
- 7.0 Headquarters and Command
- 8.0 Movement
- 9.0 Stacking
- 10.0 Zones of Control
- 11.0 Combat
- 12.0 Retreat
- 13.0 Pursuit
- 14.0 Replacements
- 15.0 Supply
- 16.0 Railroad Operations
- 17.0 Sector Boundary
- 18.0 Arab Revolt
- 19.0 Special Units and Reinforcements
- 20.0 Allied Amphibious Operations
- 21.0 Special Cities
- 22.0 Weather
- 23.0 Victory Conditions
- 24.0 Alternative Command: Race for Damascus
- 25.0 Scenario 1: War in the Desert
- 26.0 Scenario 2: The Last Crusade
1.0 Introduction
1.1 Background
A. No Prisoners! (NP) is a wargame of the Suez-Palestine Arabian Theater of Operations during World War I. That theater saw two major campaigns: one in which the forces of the British Empire contested control of the vital Suez Canal and Jerusalem regions with the Ottoman Turks and their German allies; and the Arab Revolt, in which Thomas E. Lawrence took the lead role. Both campaigns saw several of the major mobile actions of the Great War. At stake was nothing less than control of the Middle East.
B. The game has two players: the Allies (British and Arab rebels) and Central Powers (Ottoman Turks and Germans). The objective is to control critical cities and thereby win the war in this theater. The game map is divided into two sectors, Western and Eastern, in which what amount to separate campaigns are conducted.
C. NP also includes an optional alternative command system, in which both players control opposing British and Central Powers units in the two map sectors, in the same manner as SPI's classic Battle for Germany game. Using that option, two Allied players race with each other for victory.
1.2 Abbreviations
| Abbr | Meaning | Abbr | Meaning |
|---|---|---|---|
| CP | Central Powers | OOS | Out of Supply |
| CRT | Combat Results Table | RCRT | Raid CRT |
| EZOC | Enemy ZOC | SOP | Sequence of Play |
| FSD | Forward Supply Depot | TEC | Terrain Effects Chart |
| HQ | Headquarters | TRT | Turn Record Track |
| MA | Movement Allowance | VP | Victory Point |
| MOCRT |
2.0 Game Equipment
2.1 The Map
The 34" by 22" map sheet shows the campaign area. A hexagonal grid (hexes) has been superimposed over the terrain features on the map in order to regularize movement and positioning of the playing pieces.
Addenda: The dotted red line running from Qantara to Ramlah is the path of the British railroad. On all turns, it may also be used as a road.
2.2 Sectors
The map is divided into two sectors, Western and Eastern. Generally, units may not cross that boundary line.
2.3 Playing Pieces
The cardboard pieces represent the actual military units that took part in the original campaigns. Those playing pieces are referred to as units for military forces, and markers for informational pieces.
2.4 How to Read Units
2.4.1 Sample Combat Unit
[Sample combat unit counter: illustrated in the PDF.]
2.4.2 Sample Leader Unit
[Sample leader unit counter: illustrated in the PDF.]
A. Several headquarters (HQs) are back-printed with increased values; they usually start a scenario on their weaker side and may be flipped to their stronger side in the course of play.
B. Certain units have an asterisk after their combat strength. That indicates they are support units, which means they may stack for free but they do not have a zone of control (ZOC).
C. The command radius is the small number next to the deployment code. The number in the lower left of the counters is the combat factor. Leaders can engage in normal combat.
2.5 Unit Types
The unit type symbols are: Infantry; Armored Cars; Assault Infantry; Tanks; Composite; Railroad Mobile; Garrison; Artillery* (*includes heavy weapons); Cavalry; Railhead; Camel Corps Leader; Forward Supply Depot; Air Group; Naval Squadron.
2.6 Unit Sizes
2.6.1 Unit Size Symbols
| Symbol | Size |
|---|---|
| XX | Division |
| X | Brigade or Group |
| III | Regiment |
| II | Battalion or Squadron |
| I | Company, Troop, or Battery |
2.6.2 Unit Size Abbreviations
| Abbr | Meaning | Abbr | Meaning |
|---|---|---|---|
| Bn | Battalion | Regt | Regiment |
| Bde | Brigade | ||
| Sqd | Squadron | ||
| Grp | Group |
2.7 Unit IDs
Units may be identified by a single number or a two part designation. In two part designations, the number to the right is the unit's superior formation.
2.8 Nationalities
2.8.1 Eastern Sector
| Nationality | Colors |
|---|---|
| Allied | Red on White |
| Turkish | Black on Blue |
| Austro-German | Black on Gray |
2.8.2 Western Sector
| Nationality | Colors |
|---|---|
| Allied | White on Red |
| Turkish | Black on Green |
| Austro-German | White on Black |
2.9 Unit Abbreviations
2.9.1 Allied
| Abbr | Name | Abbr | Name |
|---|---|---|---|
| A | Australian | Ind | Indian |
| AL | Arab Legion | ISCB | Imperial Service Cavalry Bde |
| ANZAC | Australia New Zealand Army Corps | JL | Jewish Legion |
| Bers | Bersaglieri (Italian) | LCP | Light Car Patrol |
| BCC | Bikanur Camel Corps | MGC | Machinegun Corps |
| CF | Chaytor Force | N | North |
| DFPS |
*later the Australian Mounted Div
2.9.2 Central Powers
| Abbr | Name | Abbr | Name |
|---|---|---|---|
| 8C | VIII Corps | HXF | Hejaz Expeditionary Force |
| 32AF | 32nd Austro-Hungarian Feld-Jaeger Bn | KB | Khairi Bey |
| AEF | Amman Expeditionary Force | P | Provisional |
| AK | Asien Korps | PSH | Pasha |
| AlpK | Alpen Korps | RJ | Reserve Jaeger |
| Cauc | Caucasian | Sturm | German trained assault troops |
2.9.3 Countersheet Errata
A. The German 2nd Cavalry Div is an optional reinforcement.
B. Turkish 16th Infantry Div should read Start 1915 West. Its deployment instructions are in [26.3].
C. The 1st Optional Australian 1st Div appears on Turn 1. The Optional Australian 2nd Div appears on Turn 5. 19.6 is correct.
D. The Allied Eastern FSD unit refers to rule 15.4. It should be 15.8.
2.10 Markers
A. Turn: indicates the current turn.
B. Victory Points (VPs): provide a running total of each player's VPs.
2.11 Scale
A. Each hex equals 30 miles (49 kilometers) from side to opposite side.
B. Each complete turn represents three months.
2.12 Inventory
A complete game of NP includes: a 34" x 22" mapsheet, these rules, and a set of 176 die-cut counters. Players will need to provide a six-sided die.
3.0 Setting Up
A. Place the map between the players. Then determine which side each will command.
B. Next, punch out the units from the countersheet.
C. Consult the specific scenario rules to determine which player sets up first. Units may be assigned specific setup hexes, or players may be instructed to choose setup hexes for their units.
D. After all units in the initial deployment have been set up, remaining units should be placed aside and brought into play according to the reinforcement schedule.
E. Play proceeds per the sequence of play (SOP) for the number of turns specified in the scenario instructions.
4.0 Sequence of Play
4.1 In General
A. NP is played in sequential game turns (or turns), each of which is composed of alternating player-turns. All actions must be made within the SOP outlined below.
B. Each turn is divided into two Central Powers player-turns and two Allied player-turns.
C. Each player-turn is further divided into a series of phases. The player (or side) whose turn is currently in progress is termed the phasing player (or phasing side); the other player (or side) is the non-phasing player (or non-phasing side), until the next player-turn begins, when those roles are reversed.
4.2 Turn Sequence
4.2.1 Western Central Powers Player-Turn
4.2.1.1 Random Events Phase
The Central Powers (CP) side rolls a die and cross indexes that result with the CP Western Random Events Table.
4.2.1.2 Reinforcement Phase
The CP side determines if any additional Western Sector units are received this turn. If so, place them according to the reinforcement rules.
4.2.1.3 Movement Phase
The CP side may move all, some, or none of its Western Sector units.
4.2.1.4 First Combat Phase
The CP side may use its Western Sector units to attack Allied Western Sector units.
4.2.1.5 Second Combat Phase
Same as the First Combat Phase, except there is no Second Combat Phase during summer (III) turns.
4.2.1.6 Replacement Phase
The CP side initiates the replacement procedure for any of its qualified eliminated Western sector units.
Play Note: In 4.2.2-4.2.4, the Western Allied, Eastern Allied, and Eastern CP commanders follow the same steps as given in the outline above, only using their own units and within their own sectors.
4.2.2 Western Allied Player-Turn
4.2.3 Eastern Allied Player-Turn
4.2.4 Eastern Central Powers Player-Turn
4.2.5 Game Turn Interphase
4.2.5.1 Victory Point Check Phase
If this is an end of a year turn (IV), total VPs and add them to the current Victory Point Index. Otherwise, skip to the Turn Advancement Phase.
4.2.5.2 Turn Advancement Phase
Advance the turn marker to the next box on the TRT.
4.2.5.3 End of Game
If this is the last turn of the scenario, the game ends and victory is determined.
5.0 Random Events
A. During each Random Events Phase, the phasing side rolls a die and consults the pertinent Random Events Table (Central Powers or Allied, Western or Eastern).
B. Cross index the roll with the results on the table.
C. Apply the result immediately.
D. Unless otherwise specified, each event may occur more than once per game.
6.0 Reinforcements and Withdrawals
6.1 In General
Players may receive additional units over the course of a game. Such units are called reinforcements. Reinforcements appear in the owner's reinforcement phase on the turns indicated on the backs of their counters.
6.2 Procedure
A. During the friendly Reinforcement Phase, the phasing side places reinforcement units, either in hexes designated on the map or along a map edge.
B. Reinforcements perform normally during their turn of arrival.
C. Units must be placed in the sector indicated on their counter (W = Western; E = Eastern).
6.3 Placement of Reinforcements
A. Allied Western Sector: western map edge in Egypt.
B. Allied Eastern Sector: See the Arab Revolt rules (section 18.0).
C. Central Powers Western Sector: northern map edge west of the sector boundary.
D. Central Powers Eastern Sector: northern map edge east of the sector boundary, plus the hex just south of Damascus.
6.4 Enemy-Occupied Hexes and ZOCs
A. Units may not be placed in a hex containing enemy units.
B. They may be placed in an enemy ZOC (EZOC).
C. Placement is not considered part of movement.
6.5 Blocked Entry Hexes
A. If all scheduled entry hexes are occupied by enemy units, the arrival of the blocked reinforcement unit(s) is delayed until a friendly Reinforcement Phase in which an unblocked hex is available.
B. A player may not otherwise delay the arrival of reinforcements.
6.6 Withdrawals
A. Some random events require units to be withdrawn from play on the map. Simply pick up the designated units from the map, placing them in the permanently eliminated pile.
B. Units to be withdrawn must be in supply at the time of withdrawal. If there are insufficient supplied units to meet a withdrawal requirement, then unsupplied units may be withdrawn. In such cases, however, the opposing sector commander can choose which units are to be withdrawn.
C. If there are insufficient units of any supply status in play of the type designated for withdrawal, that portion of the withdrawal is ignored without penalty.
7.0 Headquarters and Command
7.1 In Command Status
A. Units within the command radius of a friendly HQ are said to be in command.
B. Units in command receive bonuses when attacking and conducting pursuit movement (11.0, 13.0).
7.2 Measuring Command Radius
A. Command radius is measured from the HQ outward. Example: An HQ with a command radius of 2 could provide command to all friendly units in its hex, in all hexes immediately adjacent to it, and in all hexes two hexes away from it.
B. All units within the command radius are considered to be in command.
C. Command radius may be traced through any type of terrain, friendly and enemy units, and ZOCs.
D. It may not be traced across the sector boundary.
7.3 HQ Supply Status and Movement
A. An HQ does not have to be in supply in order to provide command.
B. An HQ may move and conduct combat in the same phase it provides command.
7.4 When to Judge Command Status
Units are judged to be in or out of command the instant they check for combat or pursuit bonuses.
8.0 Movement
8.1 In General
A. During each friendly movement phase, the phasing side may move as many or as few of its units as desired.
B. Units may be moved in any direction or combination of directions within the hex field.
C. There are two types of movement, and a unit may perform only one type in any one friendly Movement Phase:
- Normal movement, governed by a unit's printed movement allowance (MA); and
- Strategic movement, double the unit's printed MA.
D. Units using strategic movement must be in supply and may not begin, enter, or end their movement in an EZOC. While a unit meeting those qualifications may use strategic movement, it is not required to do so. It might move using only normal movement to be able to enter an EZOC.
Clarification: Units using strategic movement must start their move in supply. They may move to an out of supply (OOS) position in the course of their movement.
8.2 Movement Procedure
A. Move units one at a time, tracing a path of contiguous hexes through the hex grid. As each unit enters a hex, the unit expends one or more movement points (MPs) from its MA.
B. Different types of units have different movement rates and are affected differently by terrain. Consult the Terrain Effects Chart (TEC) printed on the mapsheet for details.
8.3 Movement Restrictions and Prohibitions
A. Each side's units may move only during a friendly Movement Phase. Once a unit has been moved and the player's hand removed, it may not be moved again.
B. Retreat and pursuit after combat are not movement per se and therefore do not consume MPs (12.0, 13.0).
C. A unit may expend all, some, or none of its MA in a single Movement Phase, but unused MPs may not be accumulated from turn to turn or transferred to another unit.
8.4 Minimum Movement Capability
All units may always move a guaranteed minimum of one hex per friendly movement phase no matter the nominal MP costs involved.
Exceptions: Units may never move directly from one EZOC to another, move into an enemy-occupied hex, enter prohibited terrain, nor cross the sector boundary line.
8.5 Zone of Control
Moving units must end their movement for that phase upon entering the first EZOC they encounter.
8.6 Terrain Effects
A. A unit expends 1 MP to enter a clear terrain hex. To enter other types of hexes, units expend more than 1 MP.
B. When the TEC calls for a MP expenditure in order to cross a hexside, that cost is in addition to the cost for entering the in-hex terrain.
8.7 Road Movement
A. All railroads also have roads running along them. Units may move along roads, not by rail movement but using normal movement, expending ½ MP per hex entered.
B. Roads paralleling railroads may be used by all units regardless of the side that actually controls the railroad.
8.8 Railroad Movement
A. Both sides may move units by rail. Units moving by rail may move an unlimited number of hexes, as long as they move entirely by rail along a friendly controlled rail line. They ignore normal terrain costs. Units must start in supply to use rail movement.
Clarification: A unit does not expend MPs to move by rail.
B. Rail and non-rail movement may be combined in the same phase by the same unit, but a unit may make only one rail move per turn. Units may start or move adjacent to enemy units while using rail movement, subject only to normal ZOC rules.
8.9 Western Sector Rail Restrictions
A. Allied units in the Western Sector may use rail movement only west of the hex containing the Allied Railhead marker.
B. Central Powers units in the Western Sector may use the rail movement only up to east of the hex adjacent to the Allied Railhead marker.
C. See 16.0 for more details on railroads.
8.10 Rail Move Capacity
The number of rail moves that be made per phase is limited according to the data given on the TRT. One unit moving any distance by rail constitutes one rail move.
9.0 Stacking
9.1 In General
Having more than one friendly unit in the same hex at the same time is called stacking. The maximum number of units a player may have in a hex is set by the TEC. Each type of terrain has its own stacking limit.
9.2 Applicability
A. Stacking limitations apply at the end of each phase and at the end of the resolution of each separate combat.
B. Friendly units may move through hexes occupied by other friendly units at no extra cost. There is no limit on the number of friendly units that may pass through a single hex, or cross a hexside, in a single phase.
C. If a hex is overstacked at the end of any phase or after combat resolution, the owner eliminates the excess units.
9.3 Enemy-Occupied Hexes
A friendly unit may never enter a hex containing an enemy unit.
9.4 Free-Stacking Units
A. Units that have an asterisk on them (support units) may stack for free; there is no limit to the number of those units that may stack in a hex, and they do not count against the stacking limit of non-support units in any way.
B. Air groups, naval squadrons and the railhead marker stack for free.
9.5 Initial Setup
Units must obey stacking limits during initial setup.
9.6 Fog of War
A player may examine enemy stacks only during combat. Once an attack has been declared and an enemy stack examined, that attack may no longer be called off.
10.0 Zones of Control
10.1 In General
A. The six hexes immediately surrounding a unit's location constitute that unit's ZOC. Hexes into which a unit exerts its ZOC are called controlled hexes.
B. Units must cease their movement for that phase when first entering an EZOC, but are not also obligated to attack.
10.2 Units Exerting a ZOC
A. All units without an asterisk printed on them exert a ZOC at all times, regardless of the phase or player-turn.
B. The projection of ZOC is never negated by other units, enemy or friendly.
10.3 Terrain Effects on ZOCs
A. ZOCs extend into all types of terrain and across hexsides except all-sea or all-lake.
B. ZOCs never extend across the sector boundary line, regardless of terrain and water barriers that are present.
10.4 Multiple ZOCs
Both friendly and enemy units may exert ZOCs into the same hex at the same time. There are no additional effects or penalties if that occurs. If a given non-support unit is in an EZOC hex, that ZOC-projecting enemy unit is also in an EZOC hex. In such situations, the two units are equally and mutually affected.
10.5 Leaving EZOCs
Units that start a phase already in an EZOC may exit that hex in one of three ways:
- Due to combat results that call for retreat or pursuit; or
- If all enemy units exerting ZOC into its hex are removed; or
- Via disengagement (10.6).
10.6 Disengagement
A. Disengagement is the act of moving a friendly unit out of an EZOC. To do so, the friendly unit must enter, as the very first hex of its move, a hex not in an EZOC. It may enter another EZOC later, as long as the first hex entered does not contain an EZOC.
B. Units that disengage may move no more than half their MA during that phase.
10.7 ZOC Effects on Combat
A. Attacking is always voluntary; a unit does not have to attack simply because it is in an EZOC.
B. Units that retreat after combat into an EZOC are eliminated.
C. Units may pursue into and/or through EZOCs; EZOCs never block pursuit.
10.8 ZOC Effects on Supply
Supply lines may be traced into, but never through, EZOCs.
10.9 No ZOC Negation
ZOCs are never negated for any reason or by any circumstances, other than by terrain (10.3).
11.0 Combat
11.1 In General
A. Combat is always voluntary; units are never forced to attack. The phasing side is termed the attacker, and the non-phasing side is the defender, regardless of the overall strategic situation.
B. There are two different combat results tables (CRTs): Raid (RCRT) and Major Offensive (MOCRT). Each reflects a separate approach to battle and each therefore has different outcomes.
- The MOCRT may be used only if all attacking units are in supply.
- The RCRT may be used regardless of attacker supply state.
11.2 Combat Phases
There are two Combat Phases per player-turn. All phasing units may potentially attack once in both of their combat phases as long as certain prerequisites are met.
11.3 Combat Procedure
For each combat, follow the sequence below.
- The attacker specifies the attacking units and the defending units in each combat, and the CRT to be used.
- Total the combat strength of all involved attacking units.
- Total the combat strength of all involved defending units. Apply effects for defensive terrain and entrenchments.
- Divide the attacker's strength by the defender's strength, rounding down to the nearest whole number. If less than 1:1, use ½:1 column.
- Consult the appropriate CRT under the appropriate percentage column.
- Make any necessary shifts to the column to account for air and/or naval support.
- Roll a die, cross-indexing the result under the odds column.
- Apply combat results immediately, including retreats and pursuits.
- If units are to be eliminated, the owner selects which to eliminate. If a results calls for half, round up.
- Air and naval units are not affected by combat results.
- HQs providing support are not affected by results unless adjacent and adding combat factors.
11.4 Restrictions
A. The attacker may resolve combat in any order desired. The phasing side does not need to declare all attacks for a turn before beginning any.
B. A defending unit may be attacked from as many as all six adjacent hexes.
C. No unit may attack more than once per Combat Phase.
D. A unit may be attacked more than once per Combat Phase as long as no single attacking unit attacks it more than once.
11.5 Multi-Unit and Multi-Hex Combat
A. If a phasing unit is adjacent to more than one hex containing enemy units, it may attack only one of those hexes.
B. Units in two or more hexes may combine their combat strengths and attack a single hex if all the attacking units are adjacent to that hex.
11.6 CRT Odds Column
The attacker may never reduce the odds column of any attack.
11.7 Combat Strength Unity
A. A unit's attack and defense strengths are always unitary and may not be divided among different combats, on attack or defense.
B. Units in the same hex may be combined for an attack, or they may attack separately or in small groups.
C. Units defending in the same hex must be attacked as a single combined total; they may not be attacked separately.
11.8 Air Groups
A. The attacker may add one air group per combat. This shifts the combat odds one column to the right. The defending hex must be within six hexes of a city or town occupied by a friendly, supplied land unit in the same sector.
B. Air units may be used only in their own sectors.
11.9 Allied Naval Squadrons
A. The attacker may add one naval squadron per combat. This shifts the combat odds one column to the right. The defending hex must be on a coastal hex, or be adjacent to the Suez Canal (The British had a flotilla in the Canal.).
B. Naval units may be used only in their own sectors.
11.10 Command Bonus
A. If all attacking units in a given combat are in the command radius of the same friendly HQ, the attacker may declare a command bonus. That shifts the combat odds one column to the right.
B. No more than one attack per friendly Combat Phase may receive a command bonus from the same HQ.
11.11 Limit on Column Shifts
A. The attacker may add a maximum of one air group and one naval squadron to a single combat, and make a maximum of one command shift.
B. The defender is never entitled to any of those.
C. Each air unit, naval squadron, and HQ may potentially be used twice per player-turn: once in the first Combat Phase and once again in the second.
Example: Seven factors attack three: divide attacker's by defender's to get 2.33, drop the decimal, so use the 2:1 column on the CRT. If adding a bonus for air, one for naval, and one for command, the percentage column would be shifted three columns to the right to 5:1.
11.12 Defensive Terrain Bonuses
A. Defending units benefit from the terrain in their hex and their hex's hexsides.
B. Terrain in hexes occupied by the attacker has no effect on combat.
C. The effect of terrain on combat can be reflected by multiplying the defender's printed strength by a value specified in the TEC.
D. Terrain benefits are not cumulative. If there is more than one type of terrain in the hex, the defender receives only one modification (the best single one).
E. A force receives the benefit for defending behind a hexside only if all attacking units are attacking across that type of hexside.
Example: Defending behind the Suez Canal.
11.13 Choice of CRT
A. The attacker always chooses which CRT to use (RCRT or MOCRT) on a combat by combat basis, declaring which one at the start of each combat's resolution.
B. The attacker may always choose the RCRT. The MOCRT may be chosen only if all attacking units involved in a given battle are in supply.
11.14 Odds Column Limits
Even if the starting odds are less than ½:1 or greater than 6:1, use the ½:1 and 6:1 columns as the base line column against which any applicable shifts are applied.
Example: If the attacker had just one combat factor and the defender 10, that would normally give odds of 1:10; however, since that figure is less than ½:1, the ½:1 column is the one initially referenced on the CRT. Then if the attacker has two shifts to the right for air and naval participation, the final percentage column used would be 1:1.
12.0 Retreat
12.1 In General
A. When a combat result requires units to retreat, their owner must immediately move those units the indicated number of hexes away from their combat position.
B. Retreat is not normal movement and is counted in terms of hexes, not MPs.
C. Units always retreat the number of hexes indicated regardless of their printed MA.
12.2 Restrictions
A. If a unit is unable to retreat within the restrictions below, it is eliminated instead.
- Units may never retreat into hexes containing enemy units.
- Units forced to retreat into hexes containing an EZOC are eliminated.
- Units may not retreat off the map, or into terrain or across hexsides they could not normally enter. Units may not retreat across the sector boundary.
- Units may retreat into and through hexes containing friendly units, without affecting the stationary units being retreated through. However, units must obey stacking restrictions at the end of the combat resolution or the excess is eliminated.
- A retreating unit must terminate its retreat the indicated number of hexes away from its former combat position. If it cannot, and can retreat only a portion of the number of hexes called for, it is eliminated in the last hex in which it was able to retreat in the last allowable hex of its retreat path (or in its original location if no retreat at all was possible). The retreat path terminates in the hex in which a unit as eliminated. [Printed text as in the source.]
- A unit may not retreat into a hex that would cause it to be eliminated or overstacked if other retreat paths are available.
B. Within the restrictions above, units may be retreated together or separately, as the owner desires.
12.3 Subsequent Attacks
Units which retreat into a hex that are then attacked later during that same Combat Phase defend normally and contribute their defense strength normally.
13.0 Pursuit
13.1 In General
Pursuit is a special form of movement that may occur after combat. It's more or less what other wargames often term advance after combat.
13.2 Pursuit Procedure
A. If a combat result calls for a pursuit, that side may immediately move some, none, or all of its qualified units involved in that combat the number of hexes indicated.
B. The first hex must be the hex the just-defeated enemy units formerly occupied. The second and third hex (if allowed) may be in any direction(s).
13.3 Length of Pursuit
Unit types may move the following number of hexes via Pursuit:
| Hexes | Unit Type(s) |
|---|---|
| 2 | Cavalry, camel corps, armored cars, Lawrence HQ |
| 1 | Infantry, assault infantry, composite, tank |
| 0 | All other units |
13.4 Requirements
A. Pursuit movement does not expend MPs.
B. If a pursuit is more than one hex, then some units may stop in the first hex, and others in the second hex.
C. Pursuing units may ignore EZOCs but may not enter hexes containing enemy units.
D. Pursuit may be conducted only into hexes into which the pursuing units could normally enter.
E. Pursuing units may not exit the map.
13.5 In Command Pursuit Bonus
If pursuing units received a command bonus in their attack, they may increase their pursuit by an additional hex. Units that cannot normally pursue and to the Lawrence HQ may not receive the extra hex of pursuit.
14.0 Replacements
14.1 Eliminated Units
Units eliminated for any reason may be returned to play as replacements. All unit types may be replaced, including HQs and units eliminated while OOS.
14.2 Replacement Procedure
A. When a unit is eliminated, place it in the Replaceable Units Holding Box on the mapsheet. During the friendly Replacement Phase, select from that box the number of eliminated units equal to the current replacement check rate for each sector.
B. Next, roll a die for each selected unit.
- On a 1-5, place the unit on the TRT that number of turns later. It appears during that turn as if it were a reinforcement.
- On a 6, that unit is permanently eliminated.
Example: On Turn 6, the Allies have a replacement check rate of two. There are three eliminated units in the Allied dead pile. Two of those units are chosen. The roll for the first is a 3, so that unit reenters play on Turn 9 as a reinforcement. The roll for the second unit is a 2; so it will be received on Turn 8.
14.3 Replacement Entry After Scenario End
A. If a replacement check die roll causes a unit to be replaced after the last turn of a scenario, that unit is permanently lost.
B. Units that are otherwise not replaced in a given turn may be rolled for on subsequent turns; however, the replacement check rate may not itself be accumulated.
Example: If there was only one unit in the Allied Western Sector dead pile on Turn 6 (when the rate is two), the Allies could not attempt to replace three units on Turn 7 (also when the rate is two).
14.4 Replacements From Random Events
Certain random events award extra replacements. They are taken immediately, and there is no need to roll a die for them. Using those event replacement bonuses, units may be replaced that had previously been determined to be permanently eliminated.
15.0 Supply
15.1 In General
A. Units must be in supply to use strategic movement and to use the MOCRT.
B. Units become supplied by tracing a supply line to a friendly supply source hex. Units that cannot trace a complete supply line are OOS.
C. Supply is judged for movement the instant a unit begins its movement.
D. Supply is judged for combat at the instant of combat.
15.2 Allied Supply
A. An Allied supply line may be up to five hexes in length, traced from a unit or stack to:
- An Allied depot hex occupied by at least one Allied unit at that time; or
- A railroad hex in the Allied rail net from which can also be traced a path of rail hexes of any length back to an Allied depot occupied by at least one Allied unit at that time.
B. There are several Allied depots printed on the Central Powers side of the front line (such as Aqaba). Allied units may use these if they are occupied by Allied units. These represent ports which the Allies historically employed for supply once they were captured.
15.3 Central Powers Supply
A. An CP supply line may be up to four hexes in length, traced from a unit or stack to:
- A CP depot hex occupied by at least one CP unit at that time; or
- A railroad hex in the CP rail net from which can also be traced a path of rail hexes of any length back to a CP depot occupied by at least one CP unit at that time.
15.4 Requirements
A. The five or four hexes traced to a rail or depot is counted in hexes, not MPs.
B. Depot hexes must be occupied in order to provide supply, which represents the need to garrison rear areas against local insurgents.
15.5 Units Not Requiring Supply
The following units are always in supply:
- The Lawrence HQ and any Eastern Sector Allied tribal units stacked with Lawrence at the start of a phase; and
- All air and naval units.
15.6 Blocking Supply Lines
A. A supply line is blocked by enemy units, ZOCs, terrain prohibited to land units, and sector boundaries.
B. A unit in an EZOC may trace supply into its hex, but not into any other EZOC hex.
C. A supply source hex in an EZOC may provide supply to units in that hex but not to units in other hexes.
15.7 OOS Effects
A. An OOS unit may not use strategic movement. If one or more units involved in an attack are OOS, that attack may not be resolved on the MOCRT.
B. While supply has no direct effect on defenders, the nature of the combat results means units cut off by enemy units or EZOCs stand a good chance of being destroyed owing to their lack of retreat paths.
C. OOS units may use road movement.
15.8 Arab Revolt Forward Supply Depot
A. The Eastern Sector FSD marker may be placed on any city or town occupied by one or more Allied eastern units during any Allied Eastern Reinforcement Phase.
B. The hex must be able to trace a line of no more than 12 hexes to any printed Allied depot at the time of placing. The hex then becomes an Allied depot for all purposes; it does not have to trace a supply line to be used thereafter. The printed Allied depot must be on the eastern map and must be currently occupied by an Allied unit (i.e., it must be one of the Red Sea ports).
C. The marker itself is not a unit and is not eliminated if an enemy unit occupies its hex.
15.9 Captured and Recaptured Depots
A. An Allied depot may be used to supply only Allied units.
B. A CP depot may be used to supply only Central Powers units.
C. If an enemy-occupied depot is recaptured, then the original owner may use it again.
D. The CP begin the game occupying several Allied depots on the Red Sea. They were ports the British eventually used to supply the Arab army.
E. If the Allies capture Haifa, they can use its port as a depot.
15.10 Voluntary Movement OOS; HQs
A. Units of both sides are allowed to move to hexes in which causes them to be OOS, except when it comes to crossing the sector boundary line.
B. HQs have nothing directly to do with supply (7.0).
16.0 Railroad Operations
16.1 In General
A. There are two rail nets on the map: the Allied (in red) and the CP (in black). In general, units may use only friendly rail net rail hexes.
B. The Allies may extend their rail net by advancing the railhead marker. At the start, a section of the Allied rail net is initially located in Ottoman territory. That represents the railroad the British built during the campaign, and it comes into play only through use of the Allied Railhead marker.
16.2 Allied Railhead Marker
A. The Allied Railhead marker represents the forward point of the British-built railroad and water pipeline used to provide logistical support to the front. The marker is received as a reinforcement during Turn 1916-I. It may be placed in any Allied rail hex west of the Suez Canal empty of CP units and their ZOCs.
B. It may be moved only along rail hexes. If in supply, it may move two hexes; if OOS, it may not move.
C. It may never enter an enemy-occupied hex, nor an EZOC.
D. Rail hexes between the railhead marker, including its location hex, and those on the western map edge that are linked to the latter by a contiguous path of rail hexes is considered part of the Allied rail net. All other rail hexes are part of the CP rail net.
16.3 Use of Rail Net
A. Each side may use its own rail net hexes for rail movement and supply. Neither may use the enemy rail net for any purpose.
B. Any railroad hexes the Allies have taken over via the railhead marker are no longer considered part of the CP rail net, even if recaptured.
C. The railhead marker is not affected by combat. If its hex becomes enemy-occupied, it is not eliminated or moved.
17.0 Sector Boundary
17.1 In General
Operations are restricted by the Sector Boundary line on the map. The boundary represents a variety of command-control, logistical and political restrictions. Units assigned to one sector may not cross the boundary line for any reason.
17.2 Supply
A. Supply lines may not be traced across the sector boundary.
B. Units in one sector may not draw supply from the other sector's sources.
17.3 Combat and ZOCs
A. ZOCs do not extend across the sector boundary.
B. Units may not attack across the sector boundary.
17.4 Replacements
Units eliminated in one sector may not be replaced in the other sector.
17.5 Command Radius
Command radius may not be traced across the sector boundary.
18.0 Arab Revolt
18.1 Random Event
A. The Allies do not receive units in the Eastern Sector until the random event Arab Revolt has been triggered.
B. At the start of play, all Arab units marked Tribal on their reverse sides should be placed in a large-mouth opaque container. They will be picked at random throughout the course of play.
18.2 Arab Revolt Effects
A. When the Arab Revolt event is rolled, the Allies roll two dice, sum them, and pick that number of Tribal units at random. The units are deployed in the Eastern Sector during that turn's friendly Reinforcement Phase.
B. The Allies receive the following non-Tribal units as reinforcements in the Eastern Sector as follows:
| Designation | Enter |
|---|---|
| AR+1 | one turn following the turn of triggering |
| AR+2 | two turns following the turn of triggering |
| AR+3 | three turns following the turn of triggering |
| AR+4 | four turns following the turn of triggering |
| AR+5 | five turns following the turn of triggering |
18.3 Additional Reinforcements
In each Allied Reinforcement Phase of turns II, III, and IV following the turn of triggering, the Allies roll a die and again pick at random that number of tribal units from the container, deploying them as reinforcements.
18.4 Deployment
- Tribal units may be deployed anywhere in the Eastern Sector in hexes not containing enemy units or EZOCs.
- They must be placed either within six hexes of the south map edge or within six hexes of another Allied Eastern Sector unit.
- Deploy AR+# in any Allied-occupied ports in the Eastern Sector.
18.5 Eliminated Tribal Units
Eliminated tribal units are replaced according to normal rules. After the designated number of turns, they are placed back in the pool (not the map). They may be picked again later per 18.3.
18.6 Tribal Units Returning Home
Also see the Winter rule (22.3) about tribal units going home on I turns.
19.0 Special Units and Reinforcements
19.1 Headquarters
HQs are treated as any other unit, except that they give units in their command radius a one column attack bonus and a one hex pursuit bonus. HQs are replaced in the same manner as other units if eliminated.
19.2 Leader Upgrades
(Numbered 19.2 in the printed rules, as is the next subsection.)
A. The Allied Murray leader is flipped so its Allenby side shows thereafter during the 1917-III Allied Reinforcement Phase.
B. The Central Powers SXF leader is flipped so its Yildirim side shows thereafter during the 1917-III Central Powers Reinforcement Phase.
C. Those HQs upgrade regardless of their location or supply status, and even if in the dead pile (and would be available if the HQ is returned to play as a reinforcement).
19.2 Air Groups and Naval Squadrons
A. These counters are not units as such; rather, they represent hexes that are the target of aerial and naval bombardment operations. Thus, air and naval units do not count for stacking, are always in supply, and do not block enemy retreats.
B. They are held off-map and are deployed onto it only when used to support combat.
C. They have no ZOC, and otherwise have no effects while on the map.
D. Each air and naval marker may be used only once per Combat Phase.
19.3 Infiltration Tactics
Starting in 1918-I, German infantry (not composite) and the Turkish Sturm unit may advance after combat two hexes whenever victorious on the attack (the defender's hex is vacated for any reason), and even if pursuit is not otherwise allowed by the combat result. The first hex advanced into must be the just-vacated defender's hex.
19.4 Armored Trains
A. Armored trains are treated the same as other land units, except they may move only along the friendly rail net. They ignore EZOCs, but they never advance after combat.
B. Armored trains do not count against rail capacity (8.10).
19.5 Optional Units
Units marked OPT on their reverse sides represent forces that might have been assigned to the campaign. The owner may bring in any, some, or all of those units during designated friendly Reinforcement Phases. Each such arrival awards VPs to the opponent at the end of the game.
19.6 Allied Optional Units
Each unit may enter on or after its listed turn below. The CP receive the VPs at the end of the game.
| Turn | Unit | Sector | CP VPs |
|---|---|---|---|
| 1915-I | 1st Australian Div | Western | 3 |
| 1916-I | 2nd Australian Div | Western | 3 |
| 1918-I | Chaytor Force Div | Eastern | 3 |
19.7 Central Powers Optional Units
Each unit may enter on or after its listed turn below. The Allies receive the VPs at the end of the game.
| Turn | Unit | Sector | Allied VPs |
|---|---|---|---|
| 1916-II | Alpen Korps | Western | 3 |
| 1916-II | 2nd Cavalry Div | Western | 3 |
| 1918-I | 111th Div | Western | 3 |
| 1916-II | Armored Car Bn | Eastern | 1 |
| 1917-III | 11th RJ Bn | Eastern | 1 |
19.8 Awarding of VPs for Optional Units
These VPs are awarded only once, even if an optional unit is eliminated and later replaced.
19.9 Arab Revolt
If using this rule, players must choose 19.9.1 or 19.9.2.
19.9.1 Historic Arab Revolt
Players may agree to ignore the Arab Revolt random event and instead use its historic trigger time of Game Turn 6 (1916-II).
19.9.2 Alternate Variable Date
Drop the random event phases and table rolls for all four Allied and Ottoman turns but add a single Arab Revolt Table roll at the beginning of each Eastern Allied Player Reinforcement Phase.
| Turn | Die Roll Required |
|---|---|
| 1915-I | 6 |
| 1915-II | 5-6 |
| 1915-III | 4-6 |
| 1915-IV | 3-6 |
| 1916-I | Automatic |
19.10 Historic Troop Withdrawals
A. At the start of the game, players may, at their option, declare they will use the historic withdrawal schedule. If they do so, ignore the Troop Withdrawal random event, but not the Troop Reassignment event.
B. Instead, the following units must be withdrawn on the designated turns.
| Turn | Side | Units |
|---|---|---|
| 1915-III | CP | 2 x 4-5 div, 1 x 3-5 div |
| 1918-II | Allies | 1 x 6-6 div, 1 x 5-6 div, 1 x 4-8 div |
20.0 Allied Amphibious Operations
20.1 In General
The Allies may move units from a coastal hex to any other coastal hex in the same sector.
20.2 Procedure
A. The Allies may move up to one unit per sector per calendar year via amphibious operations. The unit must begin its movement in a coastal city or town or a coastal clear hex. Pick it up and place it in any other coast city, coastal town or coastal clear hex in the same sector and that is not enemy-occupied at that time. The presence of EZOCs does not affect this.
B. The move consumes all the unit's MA for the turn.
C. The unit may attack normally.
D. Supply status is irrelevant for amphibious movement.
20.3 Amphibious Allied Reinforcement Arrival
A. The landing unit may be an Allied reinforcement scheduled to appear that turn. Just place it on the map during the Movement Phase per 20.2.
B. This counts against the one unit per year amphibious movement limit; however, units otherwise scheduled to appear in Allied-occupied ports do not count against that total.
20.4 Tribal Units
Tribal units may never use amphibious movement, nor may an amphibious move ever go ashore into an enemy-occupied hex.
21.0 Special Cities
21.1 In General
Medina, Jerusalem and Damascus have special rules reflecting their religious and political importance.
21.2 Medina and Jerusalem
Neither side may utilize the MOCRT when attacking into either of these hexes.
21.3 Damascus
A. Damascus is considered to lie exactly on the sector boundary. No CP unit may ever enter Damascus and, if forced to do so by retreat, it is eliminated instead.
B. Allied units from either sector may enter Damascus, but may not otherwise cross into the other sector. The first unit to do so gains the VPs for that action for its own sector.
C. Allied units from different sectors may not stack together into Damascus. If for some reason all Allied units from one sector move out of Damascus, units from the other sector may then enter it.
D. CP units may attack Allied units in Damascus, but may not pursue into the hex.
E. If CP units from both the Western and Eastern Sectors are adjacent to Damascus, they must attack separately and may not combine HQ bonuses and air support. CP ZOCs extend into Damascus. Also see Victory Conditions (23.7).
22.0 Weather
22.1 Seasons
Each turn corresponds to a season.
| Turn | Season |
|---|---|
| I | Winter |
| II | Spring |
| III | Summer |
| IV | Fall |
22.2 Winter
See the TEC for winter effects on sand hexes and dry lakes/wadis.
22.3 Tribes Going Home
A. During the Allied Reinforcement Phase of each winter turn, starting with the one following the triggering of the Arab Revolt, the Allies must roll a die. The result is the number of tribal units to immediately remove from the map (regardless of location) and put back into their pool.
B. If the total is greater than the number of tribal units currently on the map, put all tribal units back into their pool (but no other types).
C. If the Arab Revolt occurs on a winter turn, ignore this provision for that turn. In that case, the Allies still get their normal turn of triggering die roll of tribal units.
22.4 Summer
There are no Second Combat Phase in any player-turns during summer turns.
23.0 Victory Conditions
Historically, the Western Sector saw an Allied operational victory; the Eastern Sector was a draw.
23.1 In General
A. At the end of each calendar year, during the Victory Check Phase after the IV game turn, total VPs separately in each sector for each side.
B. Add the total for the current year to the previous years' totals.
C. At the end of the game (1918-IV), compare the totals to see who has won the game in each sector.
23.2 City VPs
A. Each city a side occupies with its units is worth the number of VPs printed in its hex.
B. Occupation means a land unit physically occupies the hex during a VP check.
23.3 Victory Determination
At the end of the game, players check each sector separately to determine who won or lost in it. Subtract the lesser player total from the greater player total and consult the table below.
| VP Difference | Victory Level |
|---|---|
| 0-9 | Draw |
| 10-19 | Marginal |
| 20-29 | Operational |
| 30+ | Strategic (highest) |
23.4 Sector Victory
A player may win a victory in one sector but be defeated in the other, so both players have a chance to claim victory once or twice.
23.5 VPs for Optional Reinforcements
Choosing optional reinforcements may give the enemy player VP. Those VPs are evaluated at the end the game for each optional unit brought into play, even if it has been eliminated.
23.6 Arab Revolt
Do not total VPs in the Eastern Sector for either side unless the Arab Revolt has been triggered.
23.7 Damascus
The CP never receive VPs for Damascus. Allied VPs are awarded for Damascus based on the sector of the Allied units occupying it, if any.
24.0 Alternative Command: Race for Damascus
24.1 In General
A. When using this rule, each player chooses to be the commander of one of the two Allied commands in the game: the western and the eastern, while simultaneously also commanding the CP eastern or Western Sectors. Thus the Allied Western Sector commander also commands the CP Eastern Sector, while the Allied Eastern Sector command also commands the CP Western Sector.
B. The objective is for each player to rack up as many VPs as possible for the Allied sector under her/his command while simultaneously using the CP forces s/he commands in the other sector to thwart the efforts of her/his opponent.
24.2 Alternative Sequence of Play
Follow the SOP with the following modifications:
24.2.1 Western Central Powers Player-Turn
The Allied Eastern Sector commander conducts the Random Events Phase, Reinforcement Phase, Movement Phase, First Combat Phase, Second Combat Phase and Replacement Phase for all CP Western Sector units.
24.2.2 Western Allied Player-Turn
The Allied Western Sector commander conducts the Random Events Phase, Reinforcement Phase, Movement Phase, First Combat Phase, Second Combat Phase, and Replacement Phase for all Allied Western Sector units.
24.2.3 Eastern Allied Player-Turn
The Allied Eastern Sector commander conducts the Random Events Phase, Reinforcement Phase, Movement Phase, First Combat Phase, Second Combat Phase, and Replacement Phase for all eastern Allied units.
24.2.4 Eastern Central Powers Player-Turn
The Allied Western Sector commander conducts the Random Events Phase, Reinforcement Phase, Movement Phase, First Combat Phase, Second Combat Phase, and Replacement Phase for all CP Eastern Sector units.
24.2.5 Game Turn Inter-Phase
This is the same as 4.2.5.
24.3 Victory
Each Allied player checks her/his level of victory against the CP in the same sector. The Allied player with the higher level of victory wins the game.
25.0 Scenario 1: War in the Desert
This is the short scenario.
25.1 Game Length
1916 II to 1918 IV (11 turns total).
25.2 Starting Victory Points
| Side | Sector | VPs |
|---|---|---|
| CP | W | 9 |
| CP | E | 0 |
| Allies | W | 6 |
| Allies | E | 0 |
25.3 Central Powers Order of Battle
CP deploy first.
25.3.1 Western Sector
Air Available: Pasha I Grp (German).
Replaceable Units Pool: 3rd Infantry Div.
Permanently Eliminated Units: 8th, 10th and 25th Infantry Divs.
| Location | Units |
|---|---|
| On or adjacent to El Arish, Kalaat and/or Audja | SXF HQ; 27th Infantry Div; DF Composite Grp; Arab Cavalry Grp; Syrian Camel Corps Grp |
| On or adjacent to Beersheba, Gaza, Jerusalem, Jaffa, Haifa and/or Tyre | 16th, 23rd, 24th, 26th, 44th Infantry Divs; VIII Cavalry Grp; 13th, 17th Garrison Regts; Pasha I Grp (German) |
25.3.2 Eastern Sector
Air Available: none.
Replaceable Units Pool: none.
Permanently Eliminated Units: none.
| Location | Units |
|---|---|
| On any cities or towns on the Tabuk to Medina railroad (inclusive) | HXF HQ; 42nd, 55th, 160th Regts; HXF Camel Corps; KB Composite Grp |
| Kiswe, Dera, Amman, Ma'an, Aqaba, Wejh, Yenbo, and Medina | One garrison regt each (eight total) |
| Any desert hex | Rashid Camel Corps |
| Ma'an or Tabuk | 1P Composite Grp |
25.4 Allied Deployment
Allies deploy second.
25.4.1 Western Sector
Air Available: 5 Grp.
Naval Available: EMED Sqd.
Railhead: Qantara.
Replaceable Units: none.
Permanently Eliminated Units: 10th and 11th Indian Divs; ANZAC Infantry Bde.
| Location | Units |
|---|---|
| Anywhere west of the Suez Canal | Murray HQ; ANZAC and Yeo Cavalry Divs; 29th Indian Infantry Bde; ISCB Cavalry Bde; BCC Camel Corps; A and B Garrison Bdes |
| One hex east of the Suez Canal* | 42nd, 52nd, 53rd, 54th Infantry Divs |
*no more than one unit per hex.
25.4.2 Eastern Sector
None. Place units in the Allied Reinforcement Phase as per the Arab Revolt schedule, with 1916-II being the turn of the Arab Revolt.
25.5 Scenario 1 Special Rules
A. The turn begins with the Allied Western player-turn.
B. The Western Allied random event Senussi Revolt is automatically triggered on the first turn (1916-II); do not otherwise roll for Allied Western events on this turn. If rolled later in the scenario, this event is ignored (i.e., 1916-II is considered its second and final triggering).
C. The Western CP event Allied Major Offensive Elsewhere is ignored in this scenario.
26.0 Scenario 2: The Last Crusade
This is the long scenario.
26.1 Game Length
1915-I to 1918-IV (sixteen turns total).
26.2 Starting Victory Points
| Side | Sector | VPs |
|---|---|---|
| CP | W | 0 |
| CP | E | 0 |
| Allies | W | 0 |
| Allies | E | 0 |
26.3 Central Powers Order of Battle
CP deploy first.
26.3.1 Western Sector
Air Available: None.
Replaceable Units Pool: None.
Permanently Eliminated Units: None.
| Location | Units |
|---|---|
| On or adjacent to Gaza and/or Beersheba | SXF HQ; 23rd, 25th, 27th Infantry Divs; VIII and Arab Cavalry Grps; Syrian Camel Corps |
| On or adjacent to Jerusalem, Jaffa, Haifa or Tyre | 8th, 16th, 24th, 26th Infantry Divs; 13th and 17th Garrison Regts |
26.3.2 Eastern Sector
Air Available: None.
Replaceable Units Pool: None.
Permanently Eliminated Units: None.
| Location | Units |
|---|---|
| On any cities or towns on the Maan to Medina railroad (inclusive) | HXF HQ; 42nd, 55th, and 160th Infantry Regts; HFX Camel Corps |
| Ma'an or Tabuk | 1P Composite Grp |
| Kiswe, Dera, Amman, Ma'an, Aqaba, Wejh, Yenbo and Medina | One garrison regt each (eight total) |
| Any Desert Hex | Rashid Camel Corps |
26.4 Allied Deployment
Allies deploy second.
26.4.1 Western Sector
Air Available: None.
Naval Available: Med Sqd.
Replaceable Units Pool: None.
Permanently Eliminated Units: None.
| Location | Units |
|---|---|
| Cairo | 42nd Infantry Div |
| Anywhere west of the Suez Canal | 10th and 11th Indian Infantry Divs; 29th Infantry Bde; ISCB Cavalry Bde; BCC Camel Corps; A & B Garrison Bdes |
26.4.2 Eastern Sector
None (Arab Revolt not yet started).
26.5 Scenario 2 Special Rules
A. Do not roll for random events on 1915-I player-turns.
B. During the CP 1915-I Movement Phase, all supplied CP western units set up on or adjacent to Gaza and Beersheba may enter EZOC even when using strategic movement (they must still cease movement).
C. Reinforcements marked 1915-I are received during the Reinforcement Phases of Turn 1, not during initial setup.