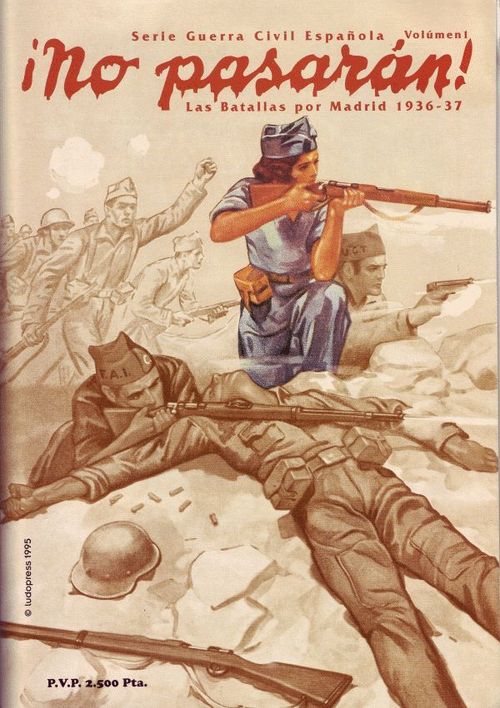
¡No Pasaran!: Las Batallas por Madrid 1936-37
¡No Pasaran!: Las Batallas por Madrid 1936-37 Rulebook
Table of Contents
Table of Contents
- 1. Introduction
- 2. Game Equipment
- 3. Basic Terminology
- 4. Step Losses and Rounding Off
- 5. Sequence of Play
- 6. Command
- 7. Aviation
- 8. Stacking
- 9. Zone of Control (ZOC)
- 10. Movement
- 11. Artillery
- 12. Combat
- 13. Losses
- 14. Retreats from Combat
- 15. Retreat Conditions
- 16. Demoralization
- 17. Disorganization
- 18. Forces
- 19. Reinforcements
- 20. Engineers
- 21. Land Reconnaissance
- 22. Glossaries
- Charts and Tables
1. Introduction
The Spanish Civil War Series of rules simulates the battles and campaigns which occurred during the Spanish Civil War. Each scenario represents a specific battle between Nationalist (Rebel) troops and the Republicans (Government) and their respective allies.
2. Game Equipment
2.1 Maps
Each map represents the geographic area of action. A hexagonal grid has been superimposed to regulate movement and facilitate set-up. The grid uses an alpha-numeric system, with lettering for the hexrow and numbering for the exact hex. Each map has a notation in the upper left corner to differentiate it from other maps, in case there are more than one.
2.2 Turn Track and Terrain Key
Imprinted on the maps will be a turn track to record the passage of time and the turn number. The turn marker is advanced when both players have rolled to end the turn.
Each map also has a Terrain key for identifying the various terrain types.
2.3 Tables
Each scenario has a set of tables and charts for combat, weather, movement costs, etc. The standard charts are reproduced in the Charts and Tables section at the end of this rulebook.
2.4 Rules
The rules contain all of the standard systems necessary to simulate the particular battle or campaign. Set-up instruction, victory conditions, special rules, and variants for each scenario are included in the specific scenario and special rules.
2.5 Counters and Markers (status and control)
The game includes different types of counters which are used to represent the combat units that took part in the action. Each unit is marked with a symbol and identification markings. These are explained on the Unit Diagrams chart.
Each player will also use status markers to indicate effects on units such as supply, losses, demoralization, and disorganization. Markers are also used on the map to indicate destruction, damage, fortifications, and positions. These are explained on the Unit Diagrams chart.
Players will also use markers to indicate control of objectives, weather, and the turn progression. These are also explained on the Unit Diagrams chart.
2.6 Limited Intelligence and Force Markers
The combat units have no numerical factors on their fronts - this information is always on the reverse of the counter. The reverse contains the information such as historical I.D., type of movement and strength. In this way the players are unsure of the exact capabilities of the opposing forces.
All status markers that apply to a given unit are placed beneath the affected unit.
Neither player may examine the reverse side of the other player's units, nor have more information about a stack other than to what formation it belongs. Only at the instant of combat are units revealed, and the strengths and losses made known.
The rules for reconnaissance permit other cases in which information about a unit or stack may be obtained.
2.6.1 Force Markers
Commanders often took other measures to camouflage their forces and strategies. Force markers are a similar mechanism. Force markers are deployed on a specific map hex, and may be substituted for all the units in that hex. The units from that hex are placed on the corresponding place on the Force Card.
2.7 Die
In the game a 10-sided die is always used, with a roll of "0" always treated as a "10."
3. Basic Terminology
The rules contain numerous abbreviations for terms and concepts. A glossary is contained in rule 22. Players should especially familiarize themselves with the following:
3.1 Combat Formations and Superior Units
The combat formation is the basic unit for movement and combat in the game. This term is always used, and the unit equivalent is the Brigade or Column. This term also applies to units with no corresponding Nucleus of Division Troops (NTD) or Nucleus of Corps Troops (NTC).
Superior units encompass various combat formations and Nucleus of Troops. This term is always used, and is equivalent to a Division, Group, or Army Corps.
3.2 Nucleus of Division Troops (NTD)
The Nucleus of Division Troops (NTD) is used to describe different types of support and reserve troops from a Division. These counters are temporarily transferred to combat formations of the same Division. This temporary transfer is called assignment, and is covered by Rule 6.6.
Assigned NTD units are activated and perform with the combat formation that they are assigned to.
NTD units that are not assigned are considered to be combat formations, and are activated and move as such. The effects of supply and command depend directly on the headquarters (CG) of the respective division.
3.3 Nucleus of Corps Troops (NTC)
The Nucleus of Corps Troops (NTC) are used in conjunction with combat formations, and represent the support and reserve troops of the Army Corps. These units and combat formations are assigned as per the rules in section 6.6.
3.4 Battalion Equivalent
Several places in the rules, and in the scenario victory conditions, there are mentions of "battalion or equivalent." This is interpreted as 4 infantry companies. For tanks and armor, 4 Nationalist companies or 3 Republican companies count as one battalion.
4. Step Losses and Rounding Off
4.1 Rounding Off
All of the mathematical calculations involving divisions may involve rounding off. Whenever a decimal result is equal to or greater than 0.5 it is rounded up to the next whole number. So, a combat ratio of 2.7 to 1 is rounded up to 3 to 1, and a defense factor of 7 that is halved (7/2 = 3.5) is considered a 4.
4.2 Reduction
At different moments in the game it is necessary to reduce numerical factors of units by .25, .50, or .75. The calculation is resolved using the following procedure: Base factor x value of reduction. So, 8 times 0.75 = 6. The Reduction Table is in the Charts and Tables section.
5. Sequence of Play
The game is played in turns, each of which represents 1 day of real time. Each turn is divided into different phases and sub phases during which each player executes specific actions. When both players have completed their turn, it is noted and the next turn is begun.
5.1 Command Phase
Both players note secretly on their Assignment Sheet the headquarters (CG) assignments and that of the combat formations they wish to assign, within the limits of Rule 6.6.
Both sides may automatically reorganize the headquarters (CG) that are disorganized and attempt to reorganize those units that are disorganized.
5.2 Air Phase
5.2.1 Planning
During this phase the players plan their aerial battle, and determine the missions for each air unit. As this is decided, players place the air units in the appropriate boxes on the Air Mission diagram of the battle area.
5.2.2 Deployment
Air missions are performed in the following order: Reconnaissance, Interdiction, Close Air Support, and Bombardment.
Both players secretly note the hexes to be Interdicted with the notation INT. Air units then enter from their deployment hexes, fly hex-by-hex to the target hex, and resolve antiaircraft fire while enroute. A successfully interdicted hex has a marker placed on it to note that it has been interdicted.
Air units allocated to Close Air Support (noted as CAS) should be placed on top of the headquarters (CG) of the formation that they will be supporting. There is no limit to the number allocated.
Both players secretly note the hexes to be targets of Reconnaissance missions (RECO). Air units then enter from their deployment hexes, fly hex-by-hex to the target hex, and resolve antiaircraft fire while enroute. Once at the target hex, the reconnaissance is resolved as per the reconnaissance rules. The air units are then placed in the finished box of the Air Battle Diagram.
Air units allocated to Bombardment (BOMB) are placed in the corresponding box on the Planned Air Missions box of the Air Battle Diagram until the player wishes to activate them. Both players secretly note the hexes to be targets of Bombing missions. Air units then enter from their deployment hexes, fly hex-by-hex to the target hex, and resolve antiaircraft fire while en route. Once at the target hex, the bombardment is resolved as per the bombing rules. The air units are then placed in the finished box of the Air Battle Diagram.
5.3 Initiative Phase
The die is rolled to determine which player will have the first activation and the first Action Cycle of the turn. The higher die roll wins, and that player decides what level of activation to employ (Divisions or Combat Formations).
After performing the activation, the die is again rolled to determine which player has the initiative and the next activation. Players must keep track of the combat results during an action phase, as these modifiers are applied to the next roll for initiative. This process of initiative and activation is constantly repeated until both players have activated all of their Superior Units and Combat Formations, or decide to pursue no further activations for the current turn.
5.3.1 Modifications to the Initiative Roll
Each player keeps track of successful combat results during an activation phase (the initiative player records successful attacks, the non-initiative player records successful defenses). Each successful combat adds +1 to the next initiative die roll for that player.
Successful combats are defined as:
- Results of SR and A1D1 are considered draws and are not recorded.
- Results of A4, A3, and A2D1 are considered successful defenses.
- Results of A1D2, D1, D1R1, D1R2, D3R2, and D4R2 are considered successful attacks.
The results for the activation phase are cumulative for the next die roll for the appropriate player.
5.4 Activation Phase
5.4.1 Activation
The forces of both sides are activated by Combat Formation and Division. The forces are activated when the player has the initiative, without regard to previous activations by their opponent. The Divisions and Combat Formations chosen are activated during the Action Cycle. The process is repeated during a turn until all of both players' Divisions and Combat Formations have been activated, or both players no longer wish to activate any further units.
5.4.1.1 Division Activation
The chosen Division is activated with all of the units under its command that can trace a line of command. If a player has already activated a Division, and later in the turn wishes to activate the Division again, only those units which have not performed an action may be activated.
5.4.1.2 Combat Formation Activation
The chosen Combat Formation is activated with all of the units under its command that can trace a line of command. The units and stacks of a Combat Formation carry out actions in the same manner as all other units.
5.5 Action Phase
During this phase the units of each activated Combat Formation carry out their Action Cycle. The Action Cycle is a combination of movement and combat performed by a unit, a group of units, or a stack. The possible actions performed during an Action Cycle are carried out with the proper movement and combat rules.
The selected units may perform their action during the Action Cycle whether as part of their permanent or temporary command assignment. The Action Cycle ends when all of the participating units have finished their desired action. All results (like combat results) are applied immediately during the Action Cycle. Units that have participated in an Action Cycle are finished for the remainder of the turn (they may not perform further actions). Units continue to be selected and activated in subsequent Action Cycles, until both players have either activated all possible units, or no longer wish to activate units.
In cases involving activation of more than one Combat Formation, units that are part of these formations may perform their actions either as part of the larger group during the current Action Cycle, or independently during a subsequent Action Cycle, at the choice of the owning player.
During the Action Cycle, the owning player must pay attention to the actual status of the units regarding command, supply, and disorganization. Status for units may change during the Action Cycle, and these changes (like going out of command, for example) are immediately applied.
Air units that are designated as Ground Support (CAS) missions carry out their missions while the units they are supporting are activated, as if they were part of the assigned formation.
When Combat Formations and Superior Formations have completed their actions, note this with a circle on the Assignment Sheet. This will identify and differentiate them from the units that have not yet been activated.
5.6 Administrative Phase
After both players have finished all desired Action Cycles, the turn is complete. The turn marker is advanced one space on the turn record track. The specific circumstances for the upcoming turn are then resolved (weather, reinforcements, replacement, victory points, etc.). Status and control markers are adjusted to reflect changes. At the end of the last turn of each scenario, the winner is determined by counting victory points.
5.6.1 Defensive Works Construction Subphase
Engineer units, and infantry units meeting certain requirements, place Position and Fortification markers in the hexes they occupy.
5.6.2 Artillery Marker Removal Subphase
All markers noting fire and movement located underneath artillery units of both players are removed from the map.
5.6.3 Weather Determination Subphase
Consult the scenario rules for determining weather conditions for the upcoming and subsequent turns. Rules will vary by scenario.
5.6.4 Reinforcement Subphase
Both sides receive reinforcements as per the specific scenario rules. These are placed within the appropriate formation according to Rule 19.
5.6.5 Air Unit Removal Subphase
All assigned Air units are removed from the Completed Air Mission boxes and placed in the Air Mission Planning boxes.
5.6.6 Victory Point Calculation Subphase
After completing the final turn of a scenario, both players calculate their victory points and determine the winner. The specific scenario rules should be consulted. The Victory Determination Table is in the Charts and Tables section.
6. Command
6.1 Headquarters
There are three types of headquarters (CG's): Corps headquarters, Division headquarters, and Combat Formation headquarters. The subordinate units of each headquarters are listed in the historical order of battle, and may change depending on the scenario. A Corps headquarters commands all NTC's and Divisions assigned to that Corps. A division headquarters commands all NTD's and Combat Formations assigned to that Division. A Combat Formation headquarters commands all the units assigned to it.
6.2 Line of Command
In order to command units, a headquarters must comply with two requirements:
- a) It must be within command range of its superior headquarters. The superior headquarters must comply with condition b).
- b) There must be a road within command range that leads off map to a rear area (friendly map edge).
Each headquarters has a command range (of 6) which indicates the maximum distance in motorized and/or foot movement points that may be traced in order to still remain within command. The distance is counted from the subordinate unit to the headquarters, from the headquarters to its superior headquarters, and from a headquarters to a road that leads off a rear area map edge. Both types of movement points (motorized and/or foot) may be combined in any desired way when tracing the line of command. (Example: a unit traces 6 mp's to its headquarters, the headquarters traces 6 mp's to its headquarters, and that headquarters traces 6 mp's to a road that leads off map).
The road leading off map may not be occupied by an enemy unit of its zone of control (ZOC). Rear area map edges are listed in each scenario. Units not within command range are called out of command; those within the command range are called in command. Units may only trace command to headquarters of their own side. The command status of any unit or stack is judged at the beginning of its movement, and at the instant of combat.
6.3 Effects of Being Out of Command
Units may not reorganize automatically. Units may not receive Close Air Support (CAS). They may use available Combat Formation artillery that is within range. Their supply status is immediately reduced if out of command:
- Units with an effectiveness of 2-4 lose 2 levels of supply
- Units with an effectiveness of 5-7 lose 1 level of supply
- Units with an effectiveness of 8 are not affected
6.4 Effects on Headquarters of Being Out of Command
Headquarters that are out of command may not receive nor assign units. Combat Formation headquarters may still activate Combat Formation units. Corps headquarters may not perform a Corps activation. Division headquarters may not perform a Division activation. Corps and Division headquarters may not assign Combat Formations, or NTC/NTD units that were assigned to them.
6.5 Supply Levels
There are four supply levels: Normal, Reduced, Minimum, and Without Supply:
- Normal supply: Attack, defense, and movement factors are normal.
- Reduced supply: Attack and defense factors are reduced to 75%. Mechanized movement is reduced to 75%. Other types of movement are normal.
- Minimum supply: Attack and defense factors are reduced to 50%. Mechanized movement is reduced to 50%. Other types of movement are normal.
- Without Supply: No attacks are allowed. Defense factors are reduced to 50%. Mechanized movement is not allowed. Other types of movement are reduced to 50%.
6.6 Assignment of Units
The Army headquarters may command any units of a side, but usually in a campaign there were other levels of headquarters present, and units may be assigned to them.
6.6.1 Army Corps Assignments
A Corps headquarters may assign its NTC's only to a Combat Formation of the same corps. A Corps headquarters may assign one Combat Formation of its NTC's only to Divisions of the same Corps. A Corps headquarters may assign one complete Division to another Corps. A Corps headquarters may receive one complete Division assigned from another Corps.
6.6.2 Division Assignments
A Division headquarters may assign its NTD's only to a Combat Formation of the same Division. A Division headquarters may assign one Combat Formation to another Division of the same Corps. A Division headquarters may receive one Combat Formation from another Division of the same Corps. A Division headquarters may receive one complete Combat Formation with NTC's from a Corps within the same command line (the Division must be subordinate to that Corps).
6.6.3 Combat Formation Assignments
A Combat Formation may assign one battalion or units worth 4 troop points to another Combat Formation of the same Division. A Combat Formation may receive one battalion or units worth 4 troop points from another Combat Formation of the same Division. A Combat Formation may additionally receive one battalion or units worth 4 troop points of NTD's from its Division, or NTC's from its superior Corps. A Combat Formation may receive a total maximum of 2 battalions or units worth 8 troop points simultaneous from the actions described above.
6.6.4 Assignment Notations
Combat Formations receiving assigned units must note this on the Assignment Sheet by writing the appropriate unit identification under the parent (assigned) unit. Division and Corps receiving assigned units must note this by writing the appropriate units identifications under the parent (assigned) unit. The notations should include the name of the formation or which units have been assigned.
6.6.5 Assignment Sheets
[Make multiple copies before attempting to play the game!] The Assignment Sheet has two functions:
- To record Combat Formations and Superior Units that have been activated.
- To record which units, Combat Formations, or Divisions have detached or attached units.
Under normal circumstances, each scenario has an Assignment Sheet which is specific to each side, located in the center of the magazine. The exceptions are scenarios 1 and 2, because the structure of the formations is not necessary to note.
6.6.6 Flexible Assignment Sheets
Scenarios 7 and 9 have players using flexible orders of battle, and the units may vary from the historical compositions. Flexible Assignment Sheets are included (these are the blank ones). Players must decide and then record the Corps/Division/Combat Formation structure and then record it on a sheet.
7. Aviation
7.1 Types and Capacities of Air Units
There are different types of air units, each with different capacities:
- Fighter-bombers: The generic term given to these includes bombers dedicated to attack missions and to special assault aircraft. This type may carry out Interdiction missions and Close Air Support.
- Bombers: Light and medium bombers. This type may carry out Close Air Support and Bombing missions.
- Reconnaissance: Includes observation and reconnaissance aircraft, as well as light bombers, medium bombers, and assault aircraft historically assigned to reconnaissance missions. This type may only carry out reconnaissance missions, even though they may be capable of other missions. In Volume 1, these types include the He-70, Do-17, He-45, Ro-37, and R-5.
7.2 Air Unit Entry Areas
Each scenario specifies the air unit entry areas for each side. The first hex of movement for each air unit should be marked as the entry area.
7.3 Air Missions
7.3.1 Interdiction (INT)
Air units assigned to the INT mission enter the map and fly to the target hex. Antiaircraft fire is resolved while moving to the target hex. Any type of hex may be the target hex. The air unit is placed on the target hex, and the effects of interdiction apply to all the road hexes within 3 hexes of the target hex. Each air unit capable of interdiction has a factor printed on the reverse of the counter, indicating the number of additional movement points that ground units must expend while using road movement through the interdicted hexes. Units using other types of movement (not on the road) expend additional movement points equal to the air unit's interdiction number only when moving through the hex actually occupied by the air unit (the target hex).
7.3.2 Close Air Support (CAS)
Air units assigned to this mission are placed with the headquarters of the Combat Formation they are to support. The headquarters may select any assigned air units for use in resolving its attacks at the moment of combat declaration. The air units are deployed from the headquarters to the target hex, and are subject to antiaircraft fire during this movement.
Each air unit capable of Close Air Support has an CAS factor on its reverse; this factor, modified by antiaircraft fire, is added to the attacking ground factors. The attack is resolved normally, after adding in the factors. Close Air Support may be assigned defensively, and is resolved in the same manner (fly the air units to the hex, take antiaircraft fire, add in their factors, etc.).
There is no limit to the number of air units that may be assigned to a headquarters. Neither is there a limit to the number of air units that may be used in any attack or any defense.
When a headquarters which has been assigned air units moves, the air units move along with the headquarters. When air units have participated in a Close Air Support mission, place the used air units in the finished box on the Air Battle Diagram.
7.3.3 Bombardment (BOMB)
Air units assigned to a BOMB mission enter the map and move to the target hex, resolving antiaircraft fire along the way. Any type of hex may be a target hex. The air unit may attack ground units, or installations (roads, bridges, fortifications, ports, cities, or towns). When the air unit reaches the target hex, resolve the attack using the air unit's Bombardment factor. An air unit's bombardment factor may be used independently or in conjunction with artillery bombardment.
7.3.4 Reconnaissance (RECO)
Air units assigned to this mission enter the map and move to the target hex, resolving antiaircraft fire along the way. Only one air unit may target a specific hex for reconnaissance. Any hex may be the target, but some terrain will modify the reconnaissance roll. The target hex and the 6 adjacent hexes (a total of 7 hexes) are affected by the RECO mission. One die is rolled for the 7-hex area. The die roll is modified by the terrain of each individual hex, and the result affects that particular hex only (this means one die roll, but up to seven possible results if the terrain is different in each hex). Different types of terrain may generate different levels of information.
The player carrying out the RECO mission decides which units are revealed within a hex when the result is 50% revealed.
The Air Reconnaissance Table is in the Charts and Tables section.
7.3.4.1 Modifications to Reconnaissance Missions
- Town means -2 to the die roll
- City means -6 to the die roll
- Fortification means -3 to the die roll
- Woods means -2 to the die roll
- Heavy Woods means -6 to the die roll
7.4 Antiaircraft Fire
All of the following rules apply only to air units flying CAS or INT missions. Other missions may not be fired at.
Air units over a target hex are subject to antiaircraft fire from the defending units in the hex. Antiaircraft artillery units may fire at air units in the same hex, or in the 6 hexes directly adjacent. Other ground units only fire at air units in the same hex.
Antiaircraft artillery units may also fire at air units that "fly by" them (again, same hex or adjacent) on the way to a target hex. Other ground units only fire at air units that pass directly over them (again, same hex).
Procedure: Ground units may be backprinted with an antiaircraft factor. Total all of the firing factors and roll one die on the Antiaircraft Defense Table. Apply all relevant modifiers, and obtain the result. After the antiaircraft fire is resolved, the attacking player totals his bombardment factors, rolls one die on the Bombardment table, applies all relevant modifiers, and applies the results.
The Antiair Defense Table and the Bombardment Table are in the Charts and Tables section.
7.4.1 Modifications to Antiaircraft Fire
Bombers on a Close Air Support mission (CAS) have 3 subtracted from the die roll.
8. Stacking
A stack is produced when a hex contains more than one unit. Stacking limits apply at the end of each phase in which units have moved, and at the moment of a mobile attack declaration. During a Mobile Attack the number of attacking and defending units are counted. The combined stacking may not exceed the stacking limit of the hex being attacked.
The entry of reinforcements may temporarily exceed the stacking limits, as long as the stacking problem is resolved by the end of movement.
When a stack exceeds the limit of troop points, the owning player must correct the situation by displacing the excess into an adjacent hex that is free of enemy zones of control in order to comply with the legal stacking limits. This movement to adjust stacking is carried out following the retreat after combat rules.
Friendly and enemy units may not stack in the same hex. Only during a Mobile Attack is there temporary stacking within the same hex, until the resolution of the combat.
A player may never examine the contents of an enemy stack, except to resolve a combat (and as a result of an air RECO mission). A player may arrange the units within a stack in any way he wishes, except that the top unit must be a combat unit of 1 attack combat factor or greater (if possible).
Each hex has a stacking limit (a maximum) of 10 troop points. Exception: Madrid hexes may stack up to 20 troop points.
9. Zone of Control (ZOC)
Only units with an attack combat factor of 1 or greater have a zone of control (ZOC). A unit or stack with 2 troop points or less does not exert a ZOC. A ZOC extends into the six adjacent hexes immediately surrounding the hex occupied by a unit. The ZOC extends only into hexes that the unit could enter normally during movement.
A unit may only attack units that are in its ZOC. ZOC's block lines of supply. Enemy ZOC's do not prevent advance after combat. A unit may enter or exit enemy ZOC's during movement, at a cost of one additional movement point to enter or exit. Friendly ZOC's do not negate enemy ZOC's. Friendly units negate enemy ZOC's for purposes of tracing lines of supply.
Units that must retreat through enemy ZOC's after combat may do so, but become Disorganized (unless the hex retreated into/through is occupied by friendly units).
Only infantry units (of any type) and cavalry exert ZOC's into Thick Woods and Town hexes. ZOC's never extend into City hexes, or upslope across steep slope hexsides. ZOC's extend normally out of City hexes, as well as down steep slope hexsides.
10. Movement
A player moves his units individually or by stacks. A player may move all, some, or none of his units (his choice). The movement of a unit or stack must be completed before another may be begun.
Each unit has a movement capacity printed on its reverse side. A unit may not expend more movement points than its movement capacity (during any one turn). The player consults the Terrain Effects Chart (TEC) for the cost of individual hexes and hexsides, and expends this amount of movement points for each hex entered. When a unit has expended all of its movement allowance, it ceases movement for that turn. A unit may move in any direction, or combination of directions, as desired by the owning player. Costs listed for hexsides are added to the cost of entering the next hex.
A unit may use the benefits of roads (they cost less than other terrain) only when the unit moves continuously along the road hexes for the majority or for all of its movement. These units may pay the road costs for a hex, and ignore the regular costs for entering terrain or crossing hexsides.
Units may not enter or cross prohibited terrain types (unless they are negated by a road). See also rule 10.1 below.
Enemy units may not move during a friendly player phase, except for retreat after combat. Retreat after combat does not cost movement points, and is conducted immediately when called for.
Units may not leave the map. Units forced to retreat off the map are considered destroyed. Only those hexes that have at least half a hex printed on the map are considered playable.
It costs movement points to move through large stacks. The costs to enter a friendly hex containing 3 or 4 troop points costs an additional 1 movement point for the moving unit(s). It costs 2 additional movement points to move into a stack containing more than 4 troop points. Units that total only 1 troop point never pay to enter a friendly stack, regardless of how many are in the hex. Units moving with the benefit of roads may not move into or through a friendly unit or stack of units.
The Terrain Effects Chart is in the Charts and Tables section.
10.1 Minimum Movement
A unit or stack of units may always move one hex, regardless of the total movement point cost. Supply and enemy ZOC's do not matter when moving this minimum of one hex. This movement costs the unit or stack all of its movement allowance, and it may not move further.
11. Artillery
11.1 Fire and Movement Capacity
Artillery units movement and fire actions are based on the values printed on the reverse of the counter. This movement and fire capacity is expressed in a number of points, usually 6 for light and medium artillery and 4 for heavy artillery. Each unit may expend this number of points as it wishes. An artillery bombardment costs 2 of these points. Otherwise these points are expended as movement points.
Note on the source: the rule text above gives "6 for light and medium artillery and 4 for heavy artillery", while the Artillery Movement and Fire Capacity chart in the Charts and Tables section gives Heavy 6, Medium 6, Light 4. The two disagree on heavy and light artillery. Both are kept as printed; the source does not say which governs.
An artillery unit spends the points in any combination, so long as the allowance is not exceeded. When all of the points are expended, the unit is finished for the turn. When an artillery unit uses these points, place a marker underneath the artillery unit to indicate how many points it has expended. Artillery units move during a friendly action phase, but may fire either during any action cycle of the turn - including an enemy action cycle.
Artillery never exert ZOC's. Artillery units that are attacked by enemy units (in any combat that is not at a distance) defend with their defense factor, not their bombardment factor.
Artillery units become disorganized in the same way as other units. They half their attack and defense factors in the same way.
11.2 Artillery Attack
Artillery bombardments are resolved as soon as they are declared. Artillery units may fire consecutively, even at the same target.
Artillery may fire at a range of more than one hex. The range of an artillery unit is printed on the reverse of the counter. Count the number of hexes from the firing unit to the target hex, including the target hex itself (but not the hex of the firing unit). Multiple artillery units may combine their values to fire at the same target.
Artillery units may fire at:
- Enemy ground units, including enemy artillery, that are within their range, during a friendly action cycle.
- Enemy units that are within range and attack friendly units, during an enemy action cycle.
- Enemy artillery units that fire bombardment against friendly units during an enemy action cycle. This is called counterbattery fire.
- Road, rail, and bridge hexes within their range.
11.3 Counterbattery Fire
Counterbattery fire is resolved and results applied after the attack by enemy artillery is resolved. Counterbattery fire affects only enemy artillery, even if they are stacked with other units.
11.4 Modifiers to Artillery Fire
Artillery fire is modified by terrain. Consult the TEC. Bombardment against a hex that is not adjacent to a friendly unit receives a column shift to the left (spotting). Fire against a target hex containing 2 or fewer troop points receives a column shift to the left. Fire against a target hex containing 7 to 9 troop points receives a column shift to the right. Fire against a target hex containing more than 9 troop points receives 2 column shifts to the right.
The Bombardment Table is in the Charts and Tables section.
11.5 Effects of Bombardment
11.5.1 Damage (DND) Result
A damage marker is placed on the hex. Roads may not be used by mechanized or motorized units in this hex. The terrain cost is that of the other terrain in the hex. Infantry units may move through the hex without additional cost, but use the other terrain in the hex. Railroad movement may not be used into or through a damaged hex. Damaged bridges may not be used by mechanized or motorized units. Infantry units may still cross the hexside, but pay an additional 1 mp if the bridge is damaged. Artillery units of any type may not use a damaged bridge across a river.
11.5.2 Destroyed (DST) Result
A destroyed marker is placed on the hex. The road, railroad, or bridge is permanently destroyed and may not be used until repaired.
11.5.3 Losses in Troop Points
Losses of 1 or 2 troop points are marked with the proper loss markers. If more than one unit occupies the hex, choose randomly which unit is affected. All troop point losses apply to one unit, and only to one unit.
12. Combat
Combat is not mandatory between adjacent units.
12.1 Combat Routine
Each combat is resolved completely before proceeding to the next, in the following phases:
- The defender decides whether or not to retreat before combat
- The attacker announces the type of attack
- The attacker assigns air units and rolls for Close Air Support missions
- The attacker announces artillery support
- The defender announces defensive artillery and air support
- The attacker and defender roll for antiaircraft fire
- The attacker and defender designate the ??? (the source leaves this step unfinished; the word is printed as "???" and is not guessed at here)
- Both attacker and defender total their combat factors, and apply all relevant modifiers.
- The attacking and defending forces are compared as a ratio (1-1, 2-1, etc.) and the appropriate column is found, then all shifts are applied.
- Combat is resolved and the results applied.
12.2 Retreat before Combat
The only units that may retreat before combat are cavalry and those with mechanized movement capacity. Retreats are possible if one or more of the following requirements are met:
- Between the attacking units there are no units with antitank points
- The defending units have armor superiority over the attacking units by more than 2 antitank points
- The defending units have a superiority of 2 or more cavalry troop points over the attacking units
The decision to retreat before combat must meet the requirements, and is carried out immediately by the unit or stack. Units may retreat before combat more than once during a turn. The owning player moves the retreating units. The retreating stack must include all units within the stack, although they may retreat into different hexes. The retreating units must be able to move into the hexes that they are retreating into (as if it were a regular movement). Armor and tank units may not retreat into the ZOC's of enemy units that possess antitank factors, unless the armor or tank units would have armor superiority.
Mechanized units that are out of supply may not retreat before combat. Retreats are conducted as if they were retreats after combat (Rule 15). Units may retreat up to their full movement allowance, as if it were normal movement. The defender's vacated hex must be advanced into by the attacking units, and those units may continue moving (and declare further combats) provided they have sufficient movement points remaining.
12.3 Types of Attacks
The attacking player has five different types of attacks, each with different characteristics.
12.3.1 Mobile Attack
This type of attack is available only to motorized and mechanized troop types. In addition:
- All of the attacking units must have begun the turn stacked together
- They may not have begun their move in an enemy ZOC
- The attacker moves the attacking units into the defender's hex, paying all terrain and ZOC costs for that hex
- City hexes may not be attacked in this manner
- Attacking units may not use road benefits, but rather the normal terrain costs to enter the hex
- The attack is immediately resolved
- The stacking limits apply, so that the total of the attacker and defenders added together cannot exceed the stacking limits for that hex
Calculate the odds for the combat, roll the die, and apply the results as per the CRT. All combat modifiers apply normally. If the combat result does not dislodge the defenders from the hex, the attacker may declare another mobile attack at a cost of 3 movement points. This may be repeated any number of times, as long as the attacker has sufficient movement points. Each new mobile attack is calculated as if it were a new combat, with possible support from artillery and air units.
Attacking units may conduct mobile attacks against other hexes during the course of their movement, so long as they have sufficient movement points to do so. If the attackers are ever repulsed, or suffer losses or disorganization, their movement is finished for the action cycle.
If the attackers fail to dislodge the defenders, and lack sufficient movement points to continue, or do not wish to continue, they must retreat into the hex from which they entered the defender's hex. This retreat does not consume movement points, and ends the action cycle for those attacking units.
12.3.2 Regular Attack
The attacking units must be adjacent to the defending units that they wish to attack, and have paid all regular terrain and ZOC costs to get there. Attacking units receive no multipliers to their attack factors. This type of attack may use support from supporting artillery and air units. These factors are not multiplied, either. Attacking units may advance after combat, if the defender's hex has been vacated, and may occupy that hex.
12.3.3 Prepared Attack
Attacking units must begin their activation adjacent to the defending units, and expend all of their movement allowance to conduct a prepared attack. All attacking units multiply their attack factors by two. Air and artillery support allocated to the attack is also doubled.
If one or more engineer units participate in the attack then the attacker may add +1 to the die roll, and the attacking units must advance into the defender's vacated hex after combat (if possible). If the combat results in the defender's retreating more than 2 hexes, then the attacking units must advance a number of hexes equal to the defender's retreat less one, with the first hex being the vacated defender's hex. This is referred to as exploitation movement.
If, during a prepared attack, other units have been displaced into an adjacent hex, the attack is no longer considered a prepared attack, but rather a regular attack. However, it is still considered a prepared attack if the displaced units were as the result of another prepared attack.
12.3.4 Improvised Attack
The attacking units must be adjacent to the defenders. The attacking units have their combat factors reduced by 50%. No artillery or air support may be used in the attack. Attacking units may not advance after combat, even if the defender's hex is vacated. Only if the attacking units have used this type of attack as a result of advance after combat is it considered the end of their action for the cycle.
12.3.5 Armored Attack
When armor or tank units that possess antitank points attack, whether by themselves or with other armor or tank units, without the participation of units that possess no antitank points, it is considered an armored attack (in other words, all attacking units are armor and/or tank). Only the antitank points of the involved units are used for combat calculation, not the regular combat factors. All combat modifiers listed in Rule 12.4 apply, except for Armor Efficiency. Armored attacks may be Mobile attacks, Prepared attacks, Regular attacks, or Improvised attacks.
12.4 Defensive Support
Defending units may receive defensive support from artillery units and air units assigned to Close Air Support. If the attack is a Mobile Attack, then the defender must roll against their effectiveness number in order to receive support. In all other attacks, support is automatic.
In a Mobile Attack, the defender rolls one die and compares it to the modified effectiveness of the primary defending unit. If the die roll is less than or equal to the effectiveness factor, then support may be allocated. If the die roll is greater, then no defensive support is allowed.
Any artillery unit that has remaining movement/fire points, belongs to the same formation as at least one of the defending units, and is within range of at least one of the attacking units, may provide artillery support with its bombardment factors.
Any air unit that has been assigned to a Close Air Support mission, and the headquarters it is assigned to controls at least one of the defending units, then the air unit(s) may be used to support the defending hex. This is treated as per the rules for normal Close Air Support.
In a case where the attackers occupy more than one hex, an artillery unit firing in defensive support must specify which of the attacking hexes is the target of the artillery fire. If more than one artillery unit fires in defensive support, then each must specify a different attacking hex to fire at (if at all possible).
12.5 Primary Units
Prior to resolving each attack, both the attacker and defender must specify which unit will "direct" the combat (referred to as the primary unit). Any unit may be chosen, except for artillery and headquarters. The primary units modify the combat with their effectiveness rating, so players should usually choose the unit with the highest rating.
12.6 Combat Modifiers
12.6.1 Effectiveness Factor
Each unit has an effectiveness rating printed on the reverse side. This factor is variable from unit to unit, and ranges from a low of 2 to a high of 8. The primary attacking unit compares its rating to that of the primary defending unit, ignoring all other units' effectiveness ratings. The difference between the attacker and defender is found on the Effectiveness Difference Table, and a die is rolled. The result is either a positive or a negative combat die roll modifier, used when resolving the combat.
12.6.2 Armor Superiority
Some units have a printed antitank factor, which represents armored vehicles and/or antitank weapons. All antitank factors of both the attacking units and defending units are counted. The modifiers are only counted if the attacker or the defender have employed tanks or armor in the combat. Combat involving only infantry and artillery do not count their antitank factors.
If all defending units total 0 antitank factors, treat them as a minimum of 1 factor for calculation purposes. The total factors are compared on the Armor Superiority Table. This table indicates whether the attacker or the defender will have a combat modifier.
12.6.3 Armor Efficiency
Armor units have limitations and advantages in certain terrain. Consult the Terrain Effects Chart (TEC).
12.6.4 Supply
Supply effects for combat are calculated as per the supply rules.
12.6.5 Terrain
The Terrain Effects Chart (TEC) indicates the effects of the various types of terrain on combat and bombardment.
12.6.6 Disorganization
Disorganization effects are applied as per the Disorganization rules.
12.6.7 Concentric Attack
If a unit or stack is attacked by units situated in opposite hexes (see the example on original page 29), the combat is shifted one column in favor of the attacker (one column to the right). The example diagram referred to is not reproduced in the source text.
13. Losses
The Combat Results Table (CRT) indicates the number of troop points lost by a unit or stack. The primary attacking and defending units must take the first loss (if any). The remainder of the losses are distributed randomly among the player's units that participated in the combat, according to the Random Loss Assignment Table (RLAT). The RLAT takes into account the stacking order of the units involved in the combat (which unit is the first, the second, etc.). In the case of units attacking from multiple hexes, all losses are taken from the stack containing the primary attacking unit.
13.1 Reduction of Factors by Losses
Units of more than 1 troop point will receive losses during combat, which reduces their other factors. If a unit of 2 or more troop points is reduced to half or less of its original strength, it has its:
- Attack factor reduced by half
- Defense factor reduced by half
- Antiair factor reduced by half
- Antitank factor reduced by half
- Effectiveness factor reduced by 1
If a unit has 3 troop points, the above effects occur only when it is reduced to 1 troop point. All calculations are made following the Reduction and rounding rules.
14. Retreats from Combat
The Combat Results Table may indicate that a unit or stack must retreat after combat. The results are expressed in the number of hexes that must be retreated, not in movement points. The CRT lists results in the total number of units affected for a side. The owning player always retreats his own units.
Units retreating must move normally (according to the terrain restrictions). They may not retreat into or through hexes that they could not enter during normal movement. If unable to retreat, the units must lose troop points equal to the number of unretreated hexes (owning player choice as to distribution of losses). This may result in the elimination of a unit or units.
Retreating units may retreat as a stack or as individual units. The owning player may exercise the option to take the retreats in the form of troop point losses, if he desires. Losses are taken on the same one-for-one basis described above.
A unit or stack retreating into an enemy ZOC receives a Disorganized marker. A unit or stack or mechanized units that is out of supply may never retreat, but is eliminated instead.
Only units of infantry, cavalry, and headquarters may cross a slope hexside during a retreat. Other units may cross only if a road is present. No units may retreat across a River hexside, unless crossed by a bridge.
15. Retreat Conditions
A. Each hex retreated into must be further away from the original hex. B. The direction must be towards a supply source. C. The retreat may not violate stacking limits for an individual hex. D. The retreat must not be into enemy ZOC's unless there is no other way to satisfy conditions A and B above.
16. Demoralization
Units that are not headquarters, artillery, or engineers that have taken a certain number of losses in troop points will become demoralized and lose the ability to fight. Units must compare their morale state on the Demoralization Table (DT) when they have lost a number of troop points equal to or greater than listed on the table.
The table compares the effectiveness factor of a unit with the number of troop points lost by that unit and determines its morale state. During a morale check, the player rolls one die for each such unit. Apply all modifiers and apply the result immediately.
The Demoralization Table is in the Charts and Tables section.
16.1 Modifiers to a Morale Check
Units in fortifications, city, or town have a -2 die roll modifier to a morale check. Units in woods (any type) receive a -1 modifier to the roll. Units that are in minimal supply or are out of supply receive a +2 to the die roll.
16.2 Effects of Demoralization
Units have a demoralized marker placed on them, and suffer the following effects:
- May not attack, but defend normally
- May not be assigned to another Combat Formation, Division, or Corps other than their own
- They may move during an action cycle. But if they do move, they must end their move at a greater distance to enemy units than when they began their move.
17. Disorganization
Units affected by disorganization receive a disorganization marker.
17.1 Disorganization Effects
- Attack and defense factors are halved, rounding up
- Movement factors are halved, rounding up
- Do not exert a ZOC
- Effectiveness factors are reduced by 1
- May not conduct a Mobile Attack
17.2 Disorganization Effects on Headquarters
Headquarters are never eliminated. They instead receive disorganization results and immediately retreat two hexes. Headquarters automatically recover from disorganization during the command phase of the following turn. While disorganized, their defense and movement factors are halved, rounded up. Their effectiveness is reduced by 1.
17.3 Recovery from Disorganization
All units adjacent to their Corps, Division, or Combat Formation headquarters automatically recover. All other units may attempt to recover. Roll one die and compare the roll to the unmodified effectiveness factor of the unit. If the roll is less than or equal to the number, the unit recovers. If the roll is higher, it does not and retains the disorganization marker.
Units attempting to recover must add +1 to the die roll if in an enemy ZOC. Units that are out of command must add +1 to the die roll.
18. Forces
Force markers are created during the corresponding phase. They may not be created in an enemy ZOC. The owning player simply picks up the units in a hex and replaces them with a force marker. The units are placed on the proper box of the Force marker card. Force markers must contain units of at least 1 troop point (no dummies allowed).
Force cards should be placed out of sight of the opposing player. Force creation and maintenance is limited by the stacking limits (usually 10 troop points). The number of force markers is limited by the countermix, a maximum of 12 per player. When units leave a force marker, place the units on the map and move them normally, without using another force marker. Units may move into a hex occupied by a force marker, and are simply placed in the appropriate box (thus becoming part of the force). Units may also remain on the map, underneath the force marker, so long as the stacking limit is not exceeded for the hex.
19. Reinforcements
19.1 Reinforcements
The special rules of each scenario stipulate which units or combat formations enter the game as reinforcements, including their turn of entry and historical designation. Combat formations or units enter the map under the same rules of activation as units already on the map; their first activity is to enter the map.
Reinforcements must enter the map on their hex and turn of entry, unless blocked by enemy units. If the entry hex is occupied by enemy units or their ZOC's, the reinforcements may either:
- Enter on the closest available hex free of enemy units and ZOC's
- Wait a turn and enter at another entry point within their territory
19.2 Unit Consolidation
Units of the same Combat formation that begin an activation stacked together, may transfer troop points between them, so as to consolidate. The troop types must be the same, and the unit giving up the points must be at half strength or less. The unit absorbing the points remains on the map, and the unit giving up the points is removed from the game (and is considered eliminated). A unit that gives up points may not receive points from other units in the stack. A unit receiving points may receive them from only one unit in the stack.
The unit giving up the points must have an effectiveness rating equal to or higher than the unit receiving them. Consolidation is done during an action phase, and is done prior to any movement or combat by the involved units.
20. Engineers
Engineer units have special capabilities:
- May destroy bridges
- May destroy roads and rail lines
- May repair bridges and roads
- May repair rail lines, but only if railroad engineers
- May build pontoon bridges, but only if pontoon engineers
- May build positions and fortifications
- May support in attack and defense
- May support in a river crossing
Engineer units may only conduct one such action at a time.
20.1 Bridge Destruction
If an engineer unit begins its activation adjacent to a bridge, is not disorganized, and does not move or participate in combat, it may attempt to destroy a bridge. If no enemy units are adjacent to the bridge, then destruction is automatic. If an enemy unit is adjacent to the bridge a die roll is made. A +1 is added to the roll for any enemy unit on the opposite side of the bridge. A +3 is added to the roll if the opposite side of the bridge is occupied by enemy engineers. A die roll of 8 or less is needed to destroy the bridge.
20.2 Road and Rail Line Destruction
Road and rail line destruction is automatic in the hex occupied by the engineer unit. The engineer unit may not participate in combat, nor may it be disorganized. The engineer unit may not destroy roads and rail lines while in an enemy ZOC.
20.3 Rail Line Destruction by Other Units
Infantry and cavalry units may damage rail lines in hexes they move into by expending an additional 1 movement point in addition to the cost of entering the hex. Infantry and cavalry units may destroy rail lines in hexes they move into by expending an additional 2 movement points in addition to the cost of entering the hex.
20.4 Repair of Bridges and Roads
Engineer units may repair a destroyed road in a hex by remaining in the hex for the entire turn. The road is considered repaired at the beginning of the following turn. Engineer units may repair a damaged road by expending 2 additional movement points in the hex (additional to the cost for them to enter the hex).
Engineers may repair damaged or destroyed bridges by remaining adjacent to the bridge for one or two turns. A damaged bridge is repaired after one full turn of remaining adjacent. It may be used without penalty at the beginning of the next turn. A destroyed bridge is repaired to damaged after one full turn of remaining adjacent. If the engineer then spends the following turn adjacent as well, the bridge is changed from damaged to functional. It may be used without penalty at the beginning of the third turn. Engineers repairing bridges may not participate in combat, nor be disorganized.
20.5 Rail Line Repair
This capability is only available if detailed in the scenario rules.
20.6 Pontoon Bridges
Pontoon units have the capacity to build pontoon bridges across river hexsides. In order to construct a pontoon bridge, the unit must begin a turn adjacent to the river hexside. The owning player turns the unit, showing which river hexside the pontoon bridge is being constructed across. The pontoon unit actually becomes the bridge, and remains in place only as long as the pontoon unit is present.
Disorganized pontoon units may not construct a pontoon bridge. Supply does not affect the capacity to construct a pontoon bridge, but would affect the unit in all circumstances (movement, etc.). The pontoon may not move while its capacity as a bridge is being used. Movement across a pontoon is considered the same as if an actual bridge were present, including all applicable modifiers.
20.7 Positions and Fortifications
Infantry units that do not move or participate in combat as an attacker during a turn, may construct position markers. Engineer units that do not move or participate in an attack during a turn may construct fortification markers. The markers are placed in the hex occupied by the constructing unit. Only one marker (of either type) may be placed in a single hex - so if both unit types are present only one may be chosen. The markers are placed on the map during the defensive works subphase.
Once placed in a hex, positions and fortifications are never removed, even if the units in them are eliminated. They may be used by either side once built.
20.8 Attack and Defense Support
Engineer units that are not pontoon or rail engineers may support in combat, as per Rule 12.
20.9 Support in River Crossing
All engineer units that are not rail engineers may support in a river crossing. Crossing is different than crossing at a pontoon bridge.
The engineer unit must be adjacent to the river hexside that will be crossed. Disorganized engineer units may not be used. Engineer units may not move during the turn. Engineers support river crossings across all river hexsides that they are adjacent to. The movement cost is given on the River line of the TEC, with the ENG notation.
21. Land Reconnaissance
Cavalry, tanks, and armor may conduct land reconnaissance. The purpose is to obtain information about opposing enemy units within a hex. The unit moves adjacent to the target hex, and pays the movement point cost as if it were entering the target hex, but does not actually enter it. This may be done any number of times, limited only by the unit's movement allowance and the costs of terrain.
The recon unit rolls one die. If the roll is less than or equal to its Effectiveness factor, then they have obtained information and consult the Reconnaissance Table (RT). If the roll is higher, then the attempt has failed. The number rolled is compared to the results, which are applied immediately. The player controlling the units reveals the information called for by the result.
If the result is 50% revealed, then the player conducting the reconnaissance decides which units have information revealed about them. Follow the rules for rounding in case of fractions.
Fortification, position, damage, and destruction markers are considered part of the terrain of a hex, are always known to both players, and do not count for a reconnaissance result.
Cavalry, tank, and armor units may not recon into a hex that they could not actually move into during normal movement. Tanks and armor may not recon across a slope hexside that does not contain a road.
The Ground Reconnaissance Table is in the Charts and Tables section.
21.1 Reconnaissance Modifiers
- Woods hexes add +1 to the roll
- Dense woods add +2 to the roll
- Town and city add +3 to the roll
21.2 Reaction to Reconnaissance
When a reconnaissance fails, the units in the target hex may attack the recon units. This is considered a unique type of regular attack. This attack does not impede a unit's ability to further move or attack. The units that attempted the failed reconnaissance may opt to retreat before combat.
22. Glossaries
22.1 Game Term Abbreviations
- CG: Headquarters
- DSG: Disorganized
- DND: Damaged
- DST: Destroyed
- NTC: Nucleus of Corps Troops
- NTD: Nucleus of Division Troops
- PM: Movement points
- ZDC: Zone of control (printed as "ZDC" in the source; the rules use ZOC)
- PT: Troop points
- CDM: Capacity to move and fire
22.2 Unit Denominations
Many units have abbreviations, usually for reasons of limited space on the counter. The historical designations include many with picturesque names. The Nationalist troops included Tabores - Moroccan units within the Spanish Army, several of which used the Arabic notation Mehal.la. The Banderas were units of the Legions, and battalions were regular army units. Examples of how to read the units include:
- "5Leg/1" is the 5th Legion Bandera (flag) of the 1st Regiment
- "2Ce/10" is the 2nd Tabor de Ceuta (Moroccans from Ceuta) of the 10th Regiment
- "1MhR/3" is the 1st Mehal.la from the Rif (mountainous region) of the 3rd Regiment
The Republican organized infantry units into battalions, so that 5/21 would be the 5th Battalion of the 21st Brigade. The headquarters units used alphabetical and numeric designations:
- "3B" is the 3rd Brigade
- "11BI" is the 11th International Brigade
- "Duran" is the Duran Brigade
- "B Dv" is the Brigade Division (a Brigade comprised of foreign battalions of the Divisional Front of the Madrileña mountains)
- "1 bis B" is the 1 bis Brigade
Other abbreviations:
- Agr: Group
- Bon: Battalion
- Bat: Battery
- C: Company
- Dv and Div: Division
- E and Esc: Squadron
- Grp: Group
- A Ceu: Battalion A from Ceuta
- Alczr: El Alcázar Carlist Tercio
- Alh: Alhucemas
- Argl: Argel
- Art Blncs: Artes Blancas
- Asen: Asensio
- Aslto: Assault
- AT: Antitank
- AufK: Aufklärung Company
- Bnd Cat: Catholic Bandera
- Bail: Bailén
- B.Dv: Brigade Division
- B.E.: Brigade E
- B.I.: International Brigade
- Blind: Armor
- Bon Ej: Battalion of the Army
- Brtnco: Británico (British)
- Burua: Buruaga
- C Ceut: C Battalion of Ceuta
- Cab: Cavalry
- Campsn: El Campesino ("The peasant"), battalion commander, later commander of the 46th Division
- Cnrs: Canary Islands
Charts and Tables
The standard charts of the series, transcribed from the source's chart sheet (the "tables" companion). Where a chart cell is blank in the source, it is shown as blank.
Terrain Effects Chart (TEC)
| Terrain | Mech movement | Motorized movement | Foot movement | Combat | Artillery Fire/CAS | Mech modifiers | Notes |
|---|---|---|---|---|---|---|---|
| Clear | 1 | 1 | 1 | - | - | x2 | |
| Secondary road | .5 | .5 | .5 | - | +1 Col | OT | |
| Primary Road | .25 | .25 | .33 | - | +1 Col | OT |
Explanations, as printed in the source:
- Eng means with the help of engineers units may cross hexside at the listed cost.
- -1 Col means shift one column to the left; +1 Col means shift one column to the right.
- -2 Col means shift two columns to the left; +2 Col means shift two columns to the right.
- att refers to the attacker; def refers to the defender.
- x.25 means to multiply the factor by 1/4.
- x.5 means to multiply the factor by 1/2.
- x.75 means multiply the factor by 3/4.
- Note A: only those units actually attacking across a river suffer the penalties.
- Note B: only those units actually attacking across the hexside (and uphill) suffer the penalties.
Movement Capacity
| Unit type | Movement points |
|---|---|
| Infantry | 6 |
| Engineers | 6 |
| Pontoons | 6 |
| Cavalry | 10 |
| Armor | 14 |
| Tanks | 12 |
| AT Artillery | 6 |
| AA Artillery | 6 |
| Armored Train | unlimited |
| Headquarters | 6 |
These numbers may be modified by the TEC.
Artillery Movement and Fire Capacity
| Artillery type | Points |
|---|---|
| Heavy Artillery | 6 |
| Medium Artillery | 6 |
| Light Artillery | 4 |
See the note in rule 11.1: the rule text gives 4 for heavy and 6 for light and medium artillery, which this chart does not match.
Reduction Table
Reduce a factor by the given value and round as in rule 4.1. Example from the source: a 9 factor reduced by half is treated as a 5 factor.
| Factor | .25 | .50 | .75 |
|---|---|---|---|
| 1 | 1 | 1 | 1 |
| 2 | 1 | 1 | 2 |
| 3 | 1 | 2 | 2 |
| 4 | 1 | 2 | 3 |
| 5 | 1 | 3 | 4 |
| 6 | 2 | 3 | 5 |
| 7 | 2 | 4 |
Demoralization Table
Columns give the unit's effectiveness number and the number of losses (as printed: "1", "1+", "2", "2+", "3").
| Unit effectiveness number | 4 | 4 | 5 | 6 | 7 |
|---|---|---|---|---|---|
| Number of losses | 1 | 1+ | 2 | 2+ | 3 |
| Result (die roll) | 1-4 = NE, 5-6 = R, 7-10 = D | 1-6 = R, 7-10 = D | 1-7 = R, 8-10 = D | 1-8 = R, 9-10 = D | 1-9 = R, 10 = D |
NE means No Effect. R means Retreat one additional hex. D means Demoralized.
Air Reconnaissance Table
| Die roll | Result |
|---|---|
| 1-2 | Number of units and total Troop points present |
| 3-4 | Number of units, total Troop points, and types of units |
| 5-6 | Number of units, total Troop points, and show the reverse sides of 50% of the counters |
| 7-8 | Number of units, total Troop points, and show the reverse sides of all of the counters |
| 9-10 | Adverse atmospheric conditions prevent the mission; No effect |
Ground Reconnaissance Table
| Die roll | Information obtained |
|---|---|
| 1-2 | The owning player reveals the fronts of all units in the hex, as well as their state of command, supply, morale, and disorganization. |
| 3-5 | The owning player reveals the fronts of 50% of the units in the hex, but conceals their state of command, supply, morale, and disorganization. The player conducting the recon chooses the units he wishes to see. (For determining 50%, see the rules for rounding.) |
| 6-7 | The owning player reveals the fronts of all units in the hex, but conceals their state of command, supply, morale, and disorganization. |
| 8-10 | The recon has failed, and the defending units may immediately counterattack. |
Bombardment Table
Columns give the number of bombardment points. Rows give the die roll.
| Die roll | 1 | 2 | 3-4 | 5-7 | 8-10 | 11-16 | 17-22 | 23+ |
|---|---|---|---|---|---|---|---|---|
| 1 | 0 | 0 | 0 | 0 | 0 | 0 | 0 | dsg/dmd |
| 2 | 0 | 0 | 0 | 0 | 0 | 0 | 0 | dsg/dmd |
| 3 | 0 | 0 | 0 | 0 |
0 = no effect. dsg = Combat units disorganized. dmd = Damage to roads, railroads, and bridges. dst = Destruction of roads, railroads, and bridges. 1 dsg = 1 point lost and disorganized. 2 dsg = 2 points lost and disorganized. Two dmd results means destroyed for roads, railroads, and bridges.
Antiair Defense Table
Columns give the total AA factors firing. Rows give the die roll.
| Die roll | 1-2 | 3-4 | 5-6 | 7-8 | 9-10 | 11+ |
|---|---|---|---|---|---|---|
| 1 | FB/CAS x .75 | FB/CAS x .75 | FB/CAS x .5 | FB/CAS x .5 | A | A |
| 2 | 0 | FB/CAS x .75 | FB/CAS x .75 | FB/CAS x .5 | FB/CAS x .5 | A |
| 3 | 0 | FB/CAS x .75 | FB/CAS x .75 | FB/CAS x .5 | FB/CAS x .5 | A |
| 4 | 0 | 0 |
0 = No effect. FB/CAS x.75 = FB and Close Air Support is reduced to 75%. FB/CAS x.5 = FB and Close Air Support is reduced to 50%. A = Mission aborted.
Armor Superiority Table
| Ratio of AT points (Attacker to Defender) | Modifier |
|---|---|
| 1-1 | 0 columns |
| 2-1 | 1 column |
| 3-1 | 1 column |
| 4-1 | 2 columns |
| 5-1 | 2 columns |
| 6-1+ | 3 columns |
Combat Results Table (CRT)
Columns give the combat ratio. Rows give the die roll.
| Die roll | 1-3+ | 1-2 | 1-1 | 2-1 | 3-1 | 4-1 | 5-1 | 6-1 | 7-1 | 8-1+ |
|---|---|---|---|---|---|---|---|---|---|---|
| 1 | A4 | A3 | NE | A2D1 | A1D1 | A1D1 | D1 | D1R1 | D1R1 | D1R2 |
| 2 | A3 | NE | NE | A1D1 | A1D1 | A1D2 | D1R1 | D1R1 | D1R2 |
A4 = Attacker losses 4 Troop points. A3 = Attacker losses 3 Troop points. NE = No effect. A1D1 = Attacker and defender each lose 1 Troop point. D2R1 = Defender loses 2 Troop points and must retreat 1 hex. D3R2 = Defender loses 3 Troop points and must retreat 2 hexes. Etc.
Note: rule 5.3.1 mentions a result "SR", which does not appear on this chart and is not defined in the source. It is kept as printed in rule 5.3.1.
Effectiveness Difference Table
The result is the combat die roll modifier (rule 12.6.1). Rows are the die roll and columns the difference in effectiveness numbers, as the source lays the chart out. The source gives this chart without signs; the source says the result is "either a positive or a negative combat die roll modifier", and the values printed here are all non-negative.
| Die roll | 1 | 2 | 3 | 4 | 5 | 6 |
|---|---|---|---|---|---|---|
| 1 | 1 | 2 | 3 | 4 | 5 | 6 |
| 2 | 1 | 2 | 3 | 4 | 5 | 6 |
| 3 | 1 | 2 | 3 | 4 | 5 | 6 |
| 4 | 1 | 2 | 3 |
Random Loss Assignment Table (RLAT)
Rows give the number of units in the hex. Columns give the unit's place in the stacking order. Each cell is the die-roll range that assigns the loss to that unit.
| Units in hex | 1st unit | 2nd unit | 3rd unit | 4th unit | 5th unit | 6th unit | 7th unit | 8th unit | 9th unit | 10th unit | Any unit |
|---|---|---|---|---|---|---|---|---|---|---|---|
| 1 | 1-10 | ||||||||||
| 2 | 1-5 | 6-10 |
Victory Determination Table
Used for all scenarios, as printed in the source.
| Result | If |
|---|---|
| Total Victory | 51% or more VP's |
| Limited Victory | 21 to 50% more VP's |
| Draw | Equal to 20% more VP's |
Note: the source's wording is kept as printed. It gives no value between 20% and 21%, and it does not say how a 50.5% result is read.