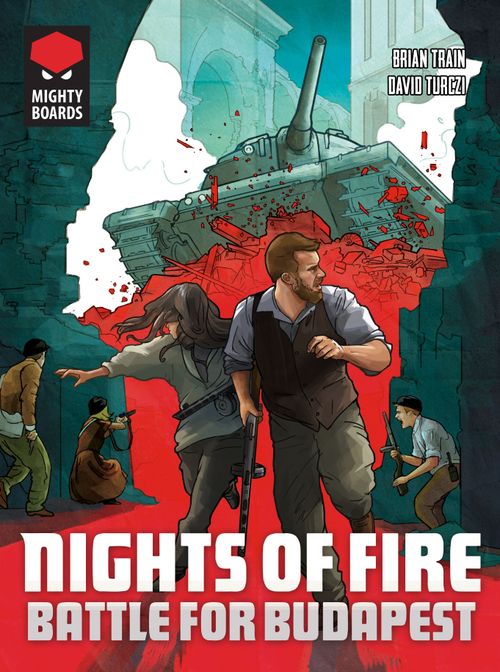
Nights of Fire: Battle for Budapest
Nights of Fire: Battle for Budapest Rulebook
Table of Contents
Table of Contents
Components
Cards: Soviet Tactics cards, Konev cards, Revolutionary cards, Headline cards.
Blocks: Hungarian Fighters, Hungarian Locals.
Tokens: Soviet Regiment, Soviet Garrison, Rubble / Barricade, Momentum / Wound, Hungarian Civilians, Konev Targeting, Headline Target, Permanently Blocked.
- 1x game board, showing a map of central Budapest, split into 3 divisional sectors (by thick grey/blue lines), and further split into 13 districts (by light grey lines).
83x Cards
- 12x Soviet Tactics cards
- 12x Marshal Konev cards
- 45x Revolutionary cards
- 14x Headline cards
30x Hungarian insurgents
- 10x locals (insurgents with two icons) – green wooden blocks with stickers
- 20x fighters (insurgents with one icon and white border) – green wooden blocks with stickers
59x Tokens
- 10x Hungarian civilians (with values of 0, 1, or 2)
- 9x Soviet Regiments (grouped in 3 Divisions of 3 Regiments each)
- 10x Soviet Garrisons
- 15x Wound/Momentum tokens – double-sided tokens
- 10x Barricade/Rubble tokens – double-sided tokens
- 5x Konev targeting tokens, on the back side: 2x Headline target tokens, 2x permanently blocked marker
- Transparent glass markers for: Morale (green), Prestige (red), Round (transparent), Readiness (transparent)
- 1x 6-sided die
Note: Wound/Momentum tokens are not meant to be limited. If they run out, use a proxy as necessary. Other components are limited; if there are no more to be placed, ignore any effect placing them.
Setup
Before setting up the game, decide if you want to play with the Conflict ruleset for 2-3 players or the Konev ruleset for 1-2 players, and decide if you want to play with the Basic or the Advanced version. We recommend using the Basic version for your first one or two games, and then moving to the Advanced version, which is the "full" game.
Conflict ruleset: Select one player to play as the Soviet commander – a player can demand to do so by banging their shoe on the table. The other players will be the Revolutionary team.
Konev ruleset: All players are in the Revolutionary team.
Setting up the board
- Place the board in the middle of the table.
- In Konev mode we recommend all players sit on the same side of the board.
- In Conflict mode we recommend the Soviet commander sits on the Eastern side of the board, while the Revolutionary players sit on the Western side.
- Place the Round marker on the "November 4th AM" space of the calendar on the board.
- Place the Morale marker on the 25 space of the main track.
- Place the Prestige marker on the 20 space of the main track if playing the Basic Konev version; or the 23 space of the main track if playing Conflict mode (either version); or the 26 space of the main track if playing the Advanced Konev version.
- Place the Readiness marker on the 3 space of the Readiness track.
- Take all 10 locals (insurgents with two icons) and randomly place one in each district marked with an objective icon, with the stickered side facing towards the Hungarian side (that is, not visible to the Soviet player if playing the Conflict ruleset).
- Take all 10 civilians and randomly place one in each district marked with an objective icon. When playing Conflict, place them face down. When playing the Konev ruleset, place them face up.
- Randomly select 13 fighter insurgents and randomly place one in each district, with the stickered side facing towards the Hungarian side. Place the remaining 7 fighters in the area marked "Reinforcements", also with the stickered side facing towards the Hungarian side, to form the reinforcement pool.
- Place the 3 Regiments of each Soviet Division (2nd Guards, 33rd Guards, and 128th Guards) in their respective divisional sectors: Place 2 Soviet Regiments in each staging area (marked with a staging area icon) and 1 Soviet Regiment into each district adjacent to a staging area (Districts 9, 13, and 11; marked with a border icon).
- If playing with 2 Revolutionaries, separate the Revolutionary cards into two decks based on the presence of the night icon and shuffle the two decks separately. Give one deck to each Revolutionary player. If playing with 1 Revolutionary, shuffle all Revolutionary cards to form one deck.
For Freedom! For Victory!
Setup reminder
| Mode | Prestige | Morale | Readiness |
|---|---|---|---|
| Basic Konev | 20 | 25 | 3 |
| Advanced Konev | 26 | 25 | 3 |
| Basic Conflict | 23 | 25 | 3 |
| Advanced Conflict | 23 | 25 | 3 |
Random Revolutionary unit distribution: In objective Districts: 1 local, 1 fighter, 1 civilian. In non-objective Districts: 1 fighter. Insurgent reinforcements: 7 random fighters.
Adjusting Difficulty
Once you have played the game a few times with the above setup, it is possible to change the balance in small ways, to adjust the difficulty of playing either side. Changes in order of increasing impact:
- Increase/decrease starting Readiness by 1.
- Decrease starting hand size for Revolutionary players by 1 or 2.
- Perform a Tactics Adjustment at the beginning of the game as if 3 Soviet units have been damaged (see later for explanation).
- Increase/decrease starting Morale by 2.
- When adding units in the Reinforcements Phase pick randomly which units to add.
- Increase/decrease starting Prestige by 1 or 2.
Historical note: Following the Soviet intervention replayed in Nights of Fire, a new Soviet-backed leadership was formed led by János Kádár. He wanted to break away from the legacy of his hard-liner predecessors whose iron grip ultimately led to the revolution itself: this was most visible in the visuals and the semantics of the new system, an example of which would be the change in the official Hungarian coat of arms. The coat of arms used by the Rákosi system and his followers (1949-1956) is shown on the left, while the new one established in 1957 (and lasted until 1990) is shown on the right.
Flow of the Game
The game is played over a maximum of 10 rounds, each representing roughly 8 hours of activities during the Soviet assault of Budapest. Every third round is marked as a Night round, which has an effect on some combat-related actions (to be explained later, pages 14-15).
Each round has the following phases:
- Draw Phase
- Tactics Phase
- Reinforcement Phase
- Operations Phase
- Adjustment Phase
- Clean-up Phase
Draw Phase
In the Draw Phase (including the first round), the Revolutionary players receive new cards.
When playing with 1 Revolutionary player:
- If Morale is 19 or more, draw 12 cards from the draw deck. Otherwise, draw 8 cards from the draw deck.
- The hand limit is 12 cards. If after drawing the player has more than 12 cards in hand, discard down to 12 cards.
- If during drawing the draw deck runs out, reshuffle the discard pile and continue drawing.
When playing with 2 Revolutionary players:
- If Morale is 19 or more, both Revolutionaries draw 7 cards each from their own draw deck. Otherwise, they both draw 5 cards each from their own draw deck.
- The hand limit is 8 cards. If after drawing a player has more than 8 cards in hand, discard down to 8 cards.
- If during drawing the draw deck of either player runs out, reshuffle that player's discard pile and continue drawing.
Tactics Phase - Conflict mode
At the beginning of this Phase, the Soviet commander collects all Tactics cards, wherever they are, except unavailable ones (see Tactics adjustment on page 19 for how cards become unavailable). The commander examines them (up to all 12 cards), and selects a maximum of 6 of them to keep. Each unavailable card counts against the limit of 6, so for example if there is 1 unavailable card, the commander selects 5 out of 11.
Kept cards remain in the commander's hand as available Tactics, while the unselected cards are shuffled together and placed face down on the board position marked "Combat deck". This deck will be referred to as the Combat deck, and the cards in it are referred to as Combat cards. Neither player is allowed to inspect the content of the Combat deck.
On later rounds, the Soviet commander might have 1 card in their hand left over from the previous round. This card is kept separate during the Tactics selection, does not count against the limit of 6 cards, and then after selection is added back to the commander's hand (not to the Combat deck) – thus the commander will start with a maximum of 7 available Tactics in their hand, and with 4-6 cards in the Combat deck.
If playing the Advanced version, once the Soviet player has finished selecting Tactics, flip the top card of the Headline deck face up to reveal which political event sets the objective for the current round. If the Headline names one or two districts to be targeted, use the provided Headline target tokens to bring attention to the districts in question.
Hint: in the first turn of the game, the Soviet player will likely want to concentrate on moving into the city and arresting targets. We suggest including at least 2 or 3 Encounter or Mobile cards in your first turn selection. If this is your absolute first time playing as the Soviet, one possible "sensible" opening hand would be M1, M2, E2, E3, S1, R2.
Example: The last round was not a good one for the Soviet player and after having 6 disabled units on board at the end of the round, now 2 (random) Tactics cards are unavailable. The player foresaw this and chose to keep a card. Now it is the next Tactics Phase and the Soviet player has a total of 9 Tactics cards to choose from (12 minus the 2 unavailable and the 1 they kept). The player may choose 4 Tactics cards (6 minus the 2 unavailable cards) to add to the 1 they kept from last round, for a total of 5 in hand.
Tactics Phase - Konev Mode
Deal out the cards for the Konev AI:
- In the first round deal 5 cards from the Konev deck in a row. Flip the first, third, and fifth face up. Place the targeting tokens (in ascending order: 1, 2, 3, 4, 5/6) on these cards.
- In later rounds:
- From the Konev draw deck deal 3 cards in a row. Flip the first and the third face up. Place the 1, 2, and 3 targeting tokens on these cards in order.
- Shuffle the discarded cards from the previous round (if any) into the Konev draw deck. Note: Any cards that were removed during the Tactics adjustment at the end of the previous round (see page 19) do not get shuffled in; place them directly into the discard pile instead.
- From the deck deal 2 cards in a row after the previous three (first one face down, last one face up). Place the 4 and the 5/6 targeting token on these cards in order.
Example Marshal Konev cards dealt in this sequence:
MOBILIZE Increase Readiness by 1. Select the highest threat district in each sector. Move all active Regiments towards the selected district. If any Regiments are now in the selected district, do all that apply:
- If it is a Day round: Recon the district.
- If no Barricade present: Inflict 1 damage.
ACTIVATE 128th GUARDS RIFLE DIVISION Rally one disabled Regiment in the sector if possible. Then for each previously active Regiment in the sector (in increasing order of their district's number, then in staging areas) perform the first option possible:
- If Arrest possible: Arrest, then decrease Readiness by -1.
- If no Garrison present and district has objective icon: place Garrison.
- If insurgent units present but no Barricade present: Inflict 1 damage, +1 if Readiness is 4 or higher.
- Otherwise: Move to highest threat adjacent district.
REGROUP Rally a disabled Garrison if possible. Rally a disabled Regiment if possible. If there are now 3 or more disabled units on the board, Rally an additional unit (Regiment if possible). Increase Readiness by 1.
Reinforcement Phase
Skip the Reinforcement Phase in the first round.
In the Reinforcement Phase, the Revolutionary player(s) may play one card to add some of the available fighters from the reinforcement pool to their forces. If playing with two Revolutionary players, only one card is played in total, and the players should discuss which of them should play the one card, if any.
To play a card for reinforcement, it must have a reinforcement icon on it. Move up to as many fighters as the number on the card from the reinforcement pool to the board and then discard the card.
Each fighter is placed in a district that matches at least one of the following conditions:
- Does not have a Soviet Garrison and/or
- Contains at least one other insurgent.
If placing multiple fighters, they can be placed in the same or in different districts in any combination as long as each selected district meets at least one of the above requirements.
Example: The Revolutionary player plays a card with a Recruit icon and a value of "3". The player picks 3 fighters from the reinforcement pool and discards the card. They cannot place any fighters in District 1 because a Soviet Garrison is there, and no other insurgents are there. They can place fighters in District 11 even though a Soviet Garrison is there, because there is an insurgent there. They can also place fighters in Districts 5A, 12, or 9, because none of them have a Garrison.
Operations Phase
The Operations Phase is the main section of the game where the players resolve their actions. Each Operations Phase consists of multiple turns.
The first turn is always taken by a Revolutionary player. When playing with two Revolutionary players, they should discuss and choose which of them acts on the first turn.
Conflict mode
The turns alternate between one Revolutionary and one Soviet turn. Additionally, when playing with two Revolutionary players, their turns alternate on either side of the Soviet turn. For example, if Alice and Bob (Revolutionaries) are playing against Sergei (Soviet) and they agree that Alice starts, then the turns will be: Alice, Sergei, Bob, Sergei, Alice, Sergei, etc.
The Operations Phase is over once both sides have passed – if only one side passes, the other can keep playing. If playing with two Revolutionary players, when one player passes the other is considered to have passed as well.
When the Soviet commander passes, they must choose up to one of the Tactics cards in their hand to keep (if they have any left) and discard the rest to the discarded Tactics pile (where it will be collected from in the next Tactics Phase). Revolutionary players never discard when passing (but note the hand limit at the end of the Draw Phase).
The details of the actions the players can take are explained on the following pages.
Konev mode
The turns alternate between one Revolutionary and one Soviet turn, on which the Konev automated opponent performs one card. Additionally, when playing with two Revolutionary players, their turns alternate on either side of the Konev turn. For example, if Alice and Bob are fighting against Konev and they agreed that Alice starts, the turns will be: Alice, Konev, Bob, Konev, Alice, Konev, etc.
The Operations Phase is over once the Hungarian side has passed AND the Konev automated opponent has performed all five of its cards. If playing with two Revolutionary players, when one player passes the other is considered to have passed as well.
The details of the actions the Revolutionary players can take and the finer details of how to execute a Konev turn are explained on the following pages.
Units on the board
Hungarian insurgents can have one or two of six possible icons on them:
- Ambush,
- Counterattack (explained during Soviet Probe action, page 14 for Conflict, page 17 for Konev),
- Build Barricade,
- Medic (Advanced version only),
- Blocker (see Morale Adjustment, Advanced version only, page 19),
- Bystanders to be used as a tool of propaganda (see Defy and Soviet Assault action, Advanced version only, page 12 and page 15).
Hungarian insurgents can be hidden or revealed: they're hidden if their stickered side is only visible to the Revolutionary players, and they're revealed if the block is face up, available for all to see. To hide a unit, stand it up and mix it in with any other insurgents in the same district. To reveal it, lay it face up on the board.
Also, insurgents can be wounded (independently of whether they're hidden or revealed), which is shown using a Wound token. Wounded insurgents function normally during play but will be removed when they receive a second Wound token.
Civilians are also Hungarian units, but they're not insurgents.
When Hungarian units are removed, they usually go to the "Killed/arrested units" area, until the next Morale Adjustment Phase. Wounds on removed insurgents are returned to the pool of available tokens.
Soviet units are Garrisons and Regiments. They can be active or disabled. The latter is shown by flipping the unit to the disabled side. Soviet units are never removed from the board.
Some effects will also instruct the Revolutionary players to gain Momentum. Do this by placing a Wound/Momentum token, with the Momentum token side face up on the Hungarian Momentum area on the board (below the "On the way to the Austrian border" area).
Revolutionary Turn
On a Revolutionary player's turn they must play 1 to 3 cards (or pass). Each card is valued 1-3. Multiple cards can be added together for performing one action, but a card's value cannot be split between two actions. Overpaying is allowed, but is best avoided (as no change is given). Example: A player can play a 1 and a 2 to perform two actions (with 1 and 2 operations each) or one action (with 3 operations). Playing a 2 and a 2 cannot be used for an operation of 3 and 1, only for two operations of 2 and 2, or one operation of 4 (or less).
The total value of the cards used to perform one action will be referred to as ops (short for operation points) in the following paragraphs.
Played cards are placed in the player's discard pile.
Hungarian cards can have one or two of four possible icons on them:
- Ambush,
- Counterattack (explained during Soviet Probe action, page 14 for Conflict, page 17 for Konev),
- Build Barricade,
- Recruit (as mentioned in the Reinforcement Phase, page 7).
The icons only matter for specific actions where it is mentioned. For other actions, only the value counts, icons are ignored. (For example, there is no "Move" icon, any card will do.)
The following actions are available to the Revolutionary players on their turn:
Move (costs 1 ops per movement)
For each ops, the Revolutionary player may move one group of fighters from one district to an adjacent district. Any number of fighters can form a group, as long as they start and end the move together. Multiple ops can be spent on the same and/or different groups of fighters, allowing for longer moves on a single action.
Locals (and civilians) can never be moved using the Move action.
For the purposes of a Revolutionary move, a district is adjacent to another district if they share a border. That border may be the Danube river itself or the grey divisional border separating North Pest from South Pest. Moving does not hide nor reveal the fighters in question, and both hidden and revealed fighters can move.
Example: District 13 is adjacent to Districts 14, 6, and 5B because they share a border, and to Districts 3 and 2 because they are opposite to each other by the Danube. District 5A and 11 are not adjacent to each other.
Example: A Revolutionary player plays a card of value "3" to move. For one ops they move two fighters from District 11 to 1, where they meet up with a third fighter. For the second ops all three of the fighters move from District 1 to 5A (remember, moving across the river is valid). Finally, for the third ops the player makes an unrelated move: a single fighter from District 2 to 12. Note how the locals in Districts 11 and 1 couldn't be and weren't moved.
Help Civilians Flee (costs up to 6 ops)
One of the main goals of the Revolutionary player is to make sure many civilians flee from the Soviet terror. This action has a base cost of 6 ops; however, that cost is decreased by 1 for each insurgent (fighters and/or locals, hidden, revealed, or even wounded) present in the civilian's district, to a minimum of 1. No insurgents need to be present in the district for this action to be available, but the cost is then 6 ops. The fled civilian is placed in the area marked "On the way to the Austrian border" on the board, but is not revealed.
Important note (for Conflict mode): even though the civilians are face down, the Revolutionary player(s) can always look at their face-down value before or during any of their actions.
Build Barricade (costs 1 more ops than number of active Soviet Regiments present in district)
To build a Barricade in a district, there must be a hidden insurgent (fighter or local) with a Build Barricade icon present in that district. When performing the Build Barricade action, reveal that hidden insurgent. The cost of the action is 1 more ops than the number of active Soviet Regiments present in the district (0-3). At least one of the cards used to perform this action must also have the Build Barricade icon on it.
Mark the Barricade built using a Barricade token. Each district can have a maximum of 1 Barricade token. If every Barricade token is on the board, this action cannot be taken.
In the Conflict mode's Advanced version, if a district has at least one Rubble token present, the player may flip one Rubble token to build the Barricade instead. In this case, building the Barricade is 1 ops cheaper: 1 per Regiment present, to a minimum of 1 ops (if no Regiments are present).
Ambush (cost 3 ops)
To ambush, there must be a hidden insurgent (fighter or local) with an Ambush icon present in a district with an active Garrison or Regiment. When performing the Ambush action, reveal that hidden insurgent. The cost of the action is always 3 ops. At least one of the cards used to perform the action must also have the Ambush icon on it.
Any active Garrison or Regiment can be targeted in the same district as the insurgent being revealed. Flip the target Garrison or Regiment to show that it has been disabled.
Gain Momentum.
Open Attack (cost 3 ops)
To attack, select an armed insurgent (fighter or local, hidden or revealed) present. In the Basic version, every insurgent is armed. In the Advanced version, insurgents with the Medic icon are not armed, and cannot be used to attack. When performing the Open Attack action, reveal the selected insurgent if it was hidden. The cost of the action is always 3 ops.
Any active Garrison or Regiment can be targeted in the same district as the selected insurgent. Flip the target Garrison or Regiment to show that it has been disabled.
Gain Momentum.
Then roll the die for the Soviet counterattack:
- If the roll is 3 less than the current Readiness level, the result is KILL! Immediately move the attacking insurgent into the area marked "Killed/arrested units" instead, regardless of whether it was wounded before or not. Decrease Readiness by one.
- If the roll is equal to, or 1 or 2 less than the current Readiness level, the result is WOUNDED. If the attacking insurgent already had a Wound token, the insurgent is moved into the area marked "Killed/arrested units", otherwise place a Wound token on it. Decrease Readiness by one.
- If the roll was greater than the current Readiness level, the result is a MISS! Increase Readiness by one.
Note: Readiness cannot go below 1 or above 7.
Historical note: Meet some of the faces that (probably) left Hungary for good during the last days. People had to travel light, to escape the chaos of the fighting and the dread of retribution. Photos like this are rare, as they could've been easily used by the authorities during the many trials starting after 1956. Institutions like the Historical Archives of the Hungarian State Security (https://www.abtl.hu/english-information) were created after 1990 to preserve images like this.
Medic (Advanced version only) (Ops cost is variable)
Reveal one or more hidden insurgents (fighter or local) with a Medic icon on them in one or multiple districts. Then, for each ops spent on this action either:
- Remove a Wound from another insurgent in the same district as one of the just revealed medics.
- OR Hide another insurgent in the same district as one of the just revealed medics.
The medics cannot heal or hide themselves, but one medic can be used to heal/hide another. One just revealed medic may do multiple things as long as the ops allow it.
Defy (Advanced version only) (costs 1-3 ops)
For a cost of 1 or more ops, reveal one hidden insurgent (fighter or local) in any district. Decrease Readiness by 1 (to a minimum of 1).
Additionally, Gain Momentum equal to the ops spent minus 1 (to a maximum of 2 Momentum) if all of the conditions below are true:
- The revealed insurgent has a Bystanders icon,
- There is a Barricade (or Rubble) in the district,
- There is at least one active Regiment in the district.
Note: besides for using insurgents with a Bystanders icon, this action is mostly used to reveal an insurgent with a Blocker icon to block a Garrison from decreasing Morale. (See Morale adjustment on page 19.) In Conflict mode it can also be used to create a chokepoint by exploiting the Pinning rule (see Soviet move action).
Strategizing (2 Revolutionary players game only) (costs 0 ops)
In games with 2 Revolutionaries, a player can play one card face down (as one of their maximum 3 cards) per turn. That card doesn't contribute any ops, but is given to the other player instead.
Strategizing cannot be the only action taken on a turn.
Soviet Turn - Conflict mode
On the Soviet turn, the commander must play 1 or 2 Tactics cards, or pass. Each Tactics card describes a number of actions, each with a multiplier. The commander performs all actions written on the chosen card(s), in any order they wish, as many times as the total multiplier on the two cards. It is allowed to jump back and forth between the two cards to perform actions. The only restriction is, all actions must be spent in the same divisional sector.
Performing each action is optional, but anything that is not performed/cannot be performed is wasted; nothing carries over to the next turn. It is legal to play a card, start resolving its actions, and due to some outcomes choose to play another card and add its actions to the mix.
The played Tactics cards are placed in the Tactics discard pile (do not mix with the discarded Combat cards, see Tactics Phase for detailed explanation).
Example: The Soviet player plays Tactics Cards Mobile-2 (which says "Move x 1, Probe x 2, Arrest x 1") and Encounter-2 (which says "Move x 2, Recon x 2"). Therefore, they can make a total of up to 3 Moves, up to 2 Probes, up to 2 Recons, and up to 1 Arrest during their turn.
The player does not need to perform all of these actions (and may not be able to, if circumstances do not allow), and they may be performed in any order (including mixing different actions), but all actions are performed using the Regiments in one divisional sector.
Example: The Soviet player plays Tactics Card Mobile-2, which says "Move x 1, Probe x 2, Arrest x 1". They play the card in the 2nd Guards Mechanized Division sector. The 4th and 5th Regiments are in District 13 and the 6th Regiment is still in the staging area. The Soviet player Probes with the 4th Regiment in District 13 against the insurgents there, then Moves the 4th Regiment into District 5B where the Regiment Arrests a civilian (possible because there are no revealed insurgents in the district). Finally, the 5th Regiment Probes against the remaining insurgents in District 13.
Move
For each move action, the Soviet commander may move an active Regiment to an adjacent district, as long as that move doesn't cross divisional sector borders! For purposes of a Soviet move, a district is adjacent to another district if they share a border, except for divisional sector borders.
Moving from the staging area to the adjacent district also counts as one move. The staging area counts as part of the divisional sector, but Regiments may not move back into the staging area. One Regiment may be moved multiple times on a turn.
The only restriction is the pinning rule: as long as a district contains a revealed insurgent, a Barricade, or a Rubble token (Advanced version only), a Regiment cannot enter and exit that district on the same turn. It may leave such a district if it started the turn there.
Probe
Probe is the basic attack action of the Soviet commander. For each probe action, select an active Regiment and flip the top card of the Combat deck. For each point of the probe value on the revealed card (see example below), select an insurgent in the same district as the attacking Regiment:
- Either place a Wound on an insurgent (revealed or hidden)
- Or move an insurgent that already has a Wound (can be freshly wounded) to the "Killed/arrested units" area of the board. Killed units are automatically revealed.
Important: on night turns, use the revealed card's night probe value instead of its normal probe value.
If there is a Barricade in the district, the commander cannot probe there.
In Advanced version only: If there is a Rubble in the district, subtract 1 point from the revealed probe value.
In Advanced version only: if the revealed probe value is 3 (before subtracting for Rubble), place a Rubble token (if any is available) in that district. There is no limit to Rubble tokens in a particular district, but it's possible for all Rubble tokens to run out.
Hungarian Counterattack
If the district had an insurgent with a Counterattack icon, the Revolutionary players are eligible for a counterattack, even if the insurgent in question was wounded or killed in the Soviet attack. (Thematically they have a heroic last stand before dying.) If eligible, one of the Revolutionary players may discard one or more cards totaling 3 or more ops, with at least one of the discarded cards having the Counterattack icon on it. If they choose to do so, flip the attacking Regiment to show that it has been disabled. The counterattacking Revolutionary player then immediately draws one replacement card from their deck. If the counter-attacking insurgent is still alive and hidden, reveal them.
Note that the counterattack does not gain Momentum.
Resolve counterattacks after each and every probe attempt separately.
Example: the 257th Regiment of the 33rd Guards Mechanized Division Probes against three hidden, unwounded insurgents in District 8. The top card of the Combat deck is flipped and its probe value is "3". The Soviet commander places a Wound on one insurgent and removes another to the "Killed/arrested units" area of the board (they could also have placed one Wound on each insurgent). Because the Probe value is "3", and they are playing the Advanced version of the game, they place a Rubble token in the district.
Assault
Assault is the stronger attack action of the Soviet commander. For each assault action, select an active Regiment and flip the top card of the Combat deck. For each point of the assault value on the revealed card, select an insurgent in the same district as the attacking Regiment:
- Either place a Wound on an insurgent (revealed or hidden)
- Or move an insurgent that already has a Wound (can be freshly wounded) to the "Killed/arrested units" area of the board. Killed units are automatically revealed.
Important: Assault action cannot be taken on night turns.
Important: Once a Regiment has taken an assault action it cannot take any more actions that turn. (If the players have trouble remembering this, they can "crank" the unit's token 90 degrees.)
If there is a Barricade in the district, subtract 1 point from the revealed assault value.
Resolve a Hungarian counterattack after each and every assault attempt separately, using the same procedures described above in the Probe action.
In Advanced version only: If there is a Rubble in the district, subtract 1 point from the revealed assault value.
In Advanced version only: If the revealed assault value is 3 or more (before subtracting for Barricade and Rubble), place a Rubble token (if any is available) in that district.
In Advanced version only: If an insurgent with a Bystanders icon is killed as part of an assault action, the horrifying pictures in the world press cause additional outrage. As a result immediately decrease Soviet Prestige by one for each killed Bystanders insurgent.
Recon
For each Recon action, the commander may reveal one hidden insurgent in a district with an active Soviet Regiment. At the end of a turn where at least one insurgent was revealed, increase Readiness by one (max 7).
Important: Recon action cannot be taken on night turns.
Arrest
For each Arrest action, the commander selects a civilian in a district with an active Soviet Regiment. The district must not have a revealed insurgent in it. Move the selected civilian (without revealing it) to the "Killed/arrested units" area on the board, but do not reveal it. At the end of a turn where at least one civilian was removed due to an arrest, decrease Readiness by one, if able (Readiness may not go below 1).
Clear
For each Clear action, the commander selects a Barricade (a Barricade or a Rubble in Advanced version) in a district with an active Soviet Regiment and removes it.
Garrison
For each Garrison action, the commander selects a district that:
- Has at least one active Regiment
- Has an objective icon on it
- Does NOT already have a Garrison in it.
Place an active Garrison in the selected district.
Rally
For each Rally action, the commander selects a disabled Garrison OR disabled Regiment. Flip it back to the active side. Note: It is not required to have an active Regiment in the district to do this.
Important: Rally action cannot be taken after the Hungarian side has passed.
Resolve Headline (Advanced version only)
In Advanced version games there is a Headline revealed at the end of the Tactics Phase. This Headline shows a temporary objective for the Soviet commander for this round only. If anytime during a Soviet turn the conditions listed on the Headline card are true, the commander may do the following:
- Discard a card from their hand that has the Headline icon on it. This does not count towards the maximum of 2 cards played per turn.
- Discard the current Headline. Do not reveal a new one this round.
- Increase Soviet Prestige by one.
- Optionally select an action that has already been performed at least once this turn, and perform it again (as if one of the played cards had a one higher action multiplier on it).
Note the commander still has to play a minimum of 1 card per turn for its actions, and the card discarded for Headline Resolution does not count towards that.
Soviet Turn - Konev mode
Turn procedure
When it's Konev's turn to act, do the following:
- Roll the die. Select the card that has the targeting token matching the rolled number. If that card is face down, turn it face up.
- Execute all text on the card, then discard the card to the Konev discard pile.
- Move all targeting tokens that were on that card to one of its neighboring cards, left if possible, right otherwise.
Note: If Konev ever has a choice to make that is not covered by the rules, you should choose randomly (coin flip, die roll, etc.). For example, if a card says move one adjacent Regiment and there are two in two different districts, that needs to be determined randomly.
Moving & Adjacency
Some cards refer to adjacencies between Regiments and districts.
For purposes of Konev cards, a district is adjacent to another district if they share a border, as long as it's not a divisional sector border. A Regiment is adjacent to another district if the district (or the staging area) it is currently in is adjacent to the other one and the two districts in question are in the same divisional sector! The staging area is a separate location in the same sector as the district it is adjacent to; Regiments in the staging area are NOT in their neighboring district.
During gameplay, Regiments will never cross from one sector to another, and Regiments in different divisions should not be considered for purposes of adjacency.
Some cards say "move an adjacent Regiment if necessary". This means that if there is already an active Regiment in the district in question, no movement is made.
Highest threat districts
Districts can be ranked by their threat level as considered by Marshal Konev:
- A district with a higher value civilian is considered higher threat than one with a lower one. (A district with a value 0 civilian is still considered higher threat than one without a civilian.)
- If equal, then the district with more insurgents (including wounded) is considered higher threat.
- If equal, then the district that has an objective icon, but no Garrison present, is considered higher threat.
- If equal, then the district with fewer active Regiments is considered higher threat.
- If still undecided, pick randomly.
Don't worry, you won't have to rank all districts all the time. A card will ask for the "highest threat district within this sector", or "highest threat district with an active Regiment". You'll need to quickly look for the highest valued civilian amongst those qualified; if more than one, count the insurgents, etc.
Example: The 2nd Guards Mechanized Division has been activated and the Konev card directs to move a Regiment in District 13 to the "highest-threat adjacent district". Districts 14, 6, and 5B are possibilities. There are no civilians left in the sector. District 14 is empty. There are two insurgents in each of 6 and 5B, but there is a Garrison in 6 already so the Regiment moves to 5B.
Inflicting damage
Whenever a Konev card instructs you to deal damage on a particular district, do the following for each point of damage:
- First deal damage to insurgents already wounded, before wounding further insurgents.
- Deal damage to revealed insurgents, before dealing damage to hidden insurgents.
- If there are multiple revealed insurgents to pick from to deal damage to, Konev uses the following priorities: insurgents with the Ambush icon; insurgents with the Counterattack icon; insurgents with the Build Barricade icon (ignored in Basic mode); insurgents with the Medic icon (ignored in Basic mode); insurgents with the Blocker icon; insurgents with the Bystanders icon (ignored in Basic mode).
- A Local's priority is determined by its higher priority icon.
- If there are multiple hidden insurgents to pick from to deal damage to, you may pick the target.
- If dealing damage to a healthy insurgent, place a Wound token on them.
- If dealing damage to a wounded insurgent, move them to the "Killed/arrested units" area of the board.
Hungarian Counterattack (3 ops. Optional if eligible)
Every time a Konev card dealt at least 1 damage to insurgents, you are eligible to Counterattack if the district had an insurgent with a Counterattack icon, including if the insurgent in question was wounded or killed in the Soviet attack. (Thematically they have a heroic last stand before dying.) If eligible, one of the Revolutionary players may discard one or more cards totaling to 3 or more ops, with at least one of the cards discarded having the Counterattack icon on them. If you choose to do so, flip (one of) the attacking Regiment(s) to show that it has been disabled. The counterattacking player then immediately draws a replacement card. If the counterattacking insurgent is still alive and hidden, reveal them.
Note, the counterattack does not gain Momentum.
If a Konev card deals damage in multiple steps, a separate counterattack may be done after each of them.
Example: "Assault" can cause 3 to 6 damage in a single district, but as it is done in a single step, the Revolutionary player is only eligible for one Counterattack.
In contrast with this, the "Hunt" card causes 2 to 3 damage each in two separate steps, allowing the Revolutionary player to interrupt after each for a Counterattack.
To give an example as to when it would matter: The two highest-threat districts on the map are currently District 2 and District 11. The 327th Regiment moves to District 2, but cannot Arrest (as there is a revealed insurgent there). The Regiment deals 3 damage (assuming Readiness is 4 or higher) which will kill the wounded local and the revealed fighter. If the dying local doesn't counterattack, the highest-threat district will still be District 2 (due to the presence of a high value civilian) and on the second iteration of the Hunt the 327th Regiment will arrest it. If, however, it is counterattacked, District 2 is no longer a valid target (as there are no active Regiments in it or adjacent to it), so it will attack in District 11 instead, thus sparing the civilian.
The No Effect rule
If the only effects of a card were moves and/or changes in Readiness, that card is considered a No Effect. When that happens one insurgent runs away from the fighting instead: you must select one insurgent on the board (if able), and return it to the box. No Morale is lost for this.
Miscellaneous keywords
There are a few more words that appear on Konev cards as a shorthand for a procedure.
Arrest
An arrest is possible in a district with a civilian and an active Soviet Regiment, except if there is a revealed insurgent in the district. If Arrested, move the civilian to the "Killed/arrested units" area on the board.
Recon
When a card says, "Recon the district", reveal all hidden insurgents in it.
Clear
When a district is Cleared, remove the Barricade from it, if present.
Rally
When a disabled Regiment or Garrison is Rallied, flip it back to the active side.
Note: Some Division activation Konev cards Rally one Regiment as their first step. These Regiments are NOT activated on the rest of the card (as highlighted by the word "previously active").
Increase/decrease Readiness
Readiness can never go below 1 or above 7.
Historical note: Makeshift barricades made out of overturned tram carriages were a common sight during the days of the fighting. This picture was taken on Blaha Lujza Square; as a point of interest the building in the background, the National Theatre, was destroyed in 1963 when the government claimed that the building was structurally weakened during the construction of the second underground line running under the city.
Adjustment Phase
Once the Operations Phase finishes, score the progress of the two sides, as follows:
-
Headline Adjustment
Only in Conflict mode's Advanced version.
If the current round's Headline has not yet been removed (see Resolution Action on page 15), perform its penalty. If it is an immediate effect, perform it now, then remove the card from play. If it is a permanent effect, place it in front of the Revolutionary team as a reminder of its effect; it cannot be removed in later rounds.
-
Prestige / Readiness Adjustment & Hungarian Surrender
a. Decrease Soviet Prestige by one for every 2nd token on the Hungarian Momentum area of the board. If playing Conflict mode, decrease Readiness by one.
b. If this causes Prestige to drop to (or below) zero OR if this is the end of the 10th round (marked Nov 7th AM) and there is at least 1 insurgent left on the board: Proceed to Game End immediately.
c. Otherwise, at this point the Hungarian side may choose to surrender if they have 6 or fewer armed insurgents left on the board (note that in the Advanced version, insurgents with the Medic icon don't count as surviving armed insurgents, but in Basic all insurgents are armed). Note that the Revolutionary players can still win the game despite surrendering in battle. It is beneficial to willingly surrender if there are more armed insurgents left on the board than the number of successful attacks the Revolutionary player(s) can carry out until the end of the game.
If there are no armed insurgents AND no civilians left on the board after Prestige / Readiness adjustment, the Hungarian Surrender is automatic.
If the Hungarians surrender, proceed to Game End, otherwise continue with the next Phase.
-
Morale Adjustment
a. Increase Revolutionary Morale by one for every 3rd disabled Garrison. b. Decrease Revolutionary Morale by one for every 3rd Garrison that: i. Is not disabled AND ii. In Advanced version: is not blocked (by a revealed Blocker icon or a Headline's penalty effect). c. Decrease Revolutionary Morale by one for every 2nd unit (insurgent or civilian) in the "Killed/arrested units" area of the board.
Clean-up Phase
- Flip all Soviet units (Regiments and Garrisons) to show that they're no longer disabled but active again.
- The Revolutionary player(s) may hide any number of insurgents (Wounds are not removed, however).
- If there is an odd number of units in the "Killed/arrested units" area of the board, remove all but one of them (doesn't matter which one remains), and return the removed units to the box.
- If there is an even number of units there, remove all of them and return them to the box.
- If there is an odd number of tokens in the "Hungarian Momentum" area of the board, return all but one of them to the pool of available tokens.
- If there is an even number of tokens there, return all of them to the pool of available tokens.
- Advance the Round marker to the next round.
Historical note: Some photos taken in Budapest became iconic, as they captured the somehow specific, ironic sense of humor that was linked to the capital's citizens. Two pictures depict this: In the photo above, the text on the wall is part of an ad "[Let's drink brown] ale!", and the photo below shows a fictional comedy entitled "Russian, go home" on the billboard of a movie theatre.
Game End
There can be 4 end game scenarios:
- Grand Revolutionary Victory - If either time runs out (there is at least one insurgent remaining after 10 rounds) or Soviet Prestige reaches zero before Hungarian Surrender: Even though the Red Army eventually takes the city, the Soviet commander is recalled in shame to Moscow. It's a huge moment in the spotlight for the revolutionary boys and girls of Budapest, and a fairly unlikely thing to happen in the game.
If Grand Revolutionary Victory does not happen, the game will end via Hungarian Surrender (due to: player's choice, armed insurgents running out, or Morale reaching zero). In this case:
- Decrease the Soviet Prestige by an amount equal to the half of the armed insurgents left on the board (round up) – thematically they are presumed to fight the Soviet forces as they're apprehended.
- Reveal the civilians in the "On the way to Austrian border" area of the board, and reduce the Soviet Prestige by the amount shown on them (0-2 each) as they made it across the border to Austria and the Western world.
Then, based on this final Soviet Prestige, there are three possible outcomes:
-
Normal Revolutionary Victory - If Prestige is zero or less: The Revolution has been stopped, but too late. The thoughts of dissenting and the stories of the survivors will be enough to spark uprisings for decades to come.
-
Normal Soviet Victory - If Prestige is 1-3: The campaign of retribution and restoration was successful.
-
Grand Soviet Victory - If Prestige is 4 or higher: The campaign of retribution and restoration was swift, ruthless, and successful.
Using these victory conditions, the historical outcome was an extremely tight normal Soviet victory (corresponding to roughly 1-2 Prestige remaining). Can you do better than that, and beat the forces of history itself?
Historical Essay
By Zsombor Zeöld
Soviet Intervention
The decision to solve the Hungarian situation by military means was made in late October 1956, a result of which Soviet troops stationed in the SU, in Hungary, and in Romania were mobilised and used.
During and after the Revolution, ill-founded opinions have persisted that NATO (and particularly the USA) would intervene militarily in case of a Soviet attack. Imre Nagy's early November speech (in which he unilaterally announced Hungary's exit from the Warsaw Pact and the neutrality of the country) paved the way towards this legend that was later fueled by Radio Free Europe's irresponsible broadcasts that called for the continuation of the armed fighting). Chances for Western intervention always close to zero; even if the major actors in NATO had not been distracted by the Suez Crisis, they were hardly likely to further aggravate an incident that could have led to WW3.
Countryside centers of resistance were swiftly pacified by Soviet troops (especially in the middle and Eastern part of the country where the landscape is flat), eg. by surrounding barracks or blocking troop movements of the Hungarian Army. In the face of the overwhelming Soviet force, the Hungarian military command did not order resistance that would only cause unnecessary bloodshed. Where the terrain allowed, resistance prevailed after the second half of November. But even so, this did not alter the situation unfurling in the country: The revolution had been suppressed.
Taking control of the capital and pacifying the locals was a key priority for the advancing Soviet troops, and also demonstrating that the intervention was welcomed by Hungarian political actors. In parallel to the military solution, the process of selecting and keeping the political leaders of the post-1956 era in power started, together with enforcing societal support for them.
One of the main preconditions to attack Budapest was ensuring that the railroad connecting the Soviet Union to Budapest is in the hands of the Soviets. Soviet troops entering the country were equipped with the most advanced weaponry of the time (Ak-47s, T-54/55 MBTs) that raised the attention of NATO countries' military intelligence as well. According to some sources, a damaged T-54/55 MBT was just pulled out of the city in the last moment before Western military intelligence could have inspected it more.
Material damage done to buildings could be compared to damages suffered in WW2. Given the height of the buildings and the coverage of built-up areas in Budapest, the most damage was caused by artillery and mortar shelling and not by tank fire.
The morale of the city defenders was constantly high, but the civilian population continuously fled the city, mainly towards the Hungarian-Austrian border.
In 2016, as a tribute to the revolution, the British Embassy in Budapest published some declassified diplomatic cables that were sent during the days of the revolution. These show interesting details about the state of the fighting, the morale of the Soviet troops, and about the state of the city (http://1956nezopontok.hu/en):
5 November: "There is no doubt that in this second assault on the city, the Russian 'steam-roller' is well at work. Points of resistance are being reduced to rubble by heavy bombardment. Fighters are standing their ground, contesting every attack and are only giving up when the buildings around them are smashed to pieces. If ever there was a fight to the finish this is it, but against what odds and with what desperation?"
3 November: "The captain commanding a detachment of Soviet tanks, which our visitors had encountered some days ago, had asked them where he might find a responsible Nationalist Commander to whom to surrender what was left of his unit. He explained that three small Hungarian boys had put some of his tanks out of action with bottles of lighted petrol, though each in turn was shot down in the act of throwing these primitive weapons. This had convinced him that Hungarian resistance sprang from something so fundamental that he and his men would not go on fighting it. [...] Russian wounded were refusing to return to their units and even to go to hospitals in Russian hands, since they knew that they would be shot for having left their tanks; Russian orders were that in no circumstances was a man to get out of his vehicle."
9 November: "The Russian suppression of a revolt, begun without organisation and without arms has cost Budapest almost as much damage as would have been caused by a major battle between opposing armies. Many areas of the city have been devastated, and few have been untouched. Glass lies everywhere and now, with the onset of winter, what remains of the population faces hardship not only from hunger, but from cold. Since so many industrial areas have been badly affected the task of reconstruction cannot be quick."
Repression, Setting up the new Regime
Although János Kádár and others had plans to make an agreement with Nagy, in the end Nagy fled to the neutral Yugoslav embassy where he requested political asylum.
On 22 November 1956, believing in the promise that he and his followers would not be harmed, the group left the embassy—and was immediately taken into custody by the Soviets. On the next day Nagy was deported to Snagov, Romania where he was held until his show trial started on 14 April 1957, and on 16 June 1957 he was executed. His body, alongside with the body of four of his fellows (including Colonel Pál Maléter's), was moved to an unmarked grave in a graveyard in the outskirts of the capital in 1961. According to available information, the decision to execute Nagy was not made in Moscow but in Budapest.
The main reason behind conducting show trials after the fall of the revolution was to present visible proof that the intelligentsia, part of the political elite, and also the working class had worked together in attempting to destroy the Communist system, and to restore the pre-1945 system. Besides Nagy, the propaganda of the Kádár regime extensively addressed the issue of Archbishop József Mindszenty (who fled to the US Embassy in November 1956, where he lived for 14 years), and the issue of the medical student Ilona Tóth who was accused of killing an SPA officer. (Not all circumstances are known about the death of the man, but the story is a clear example of the uncertainty of the situation in the days of the revolution: In a hospital a photograph was found in his pocket, portraying him in the typical coat of the SPA. It turned out later that he just borrowed the coat from one of his family members who was, indeed, a member of the service. Based on the suspicion of him being SPA, he was killed—but by whom, opinions differ.) The trial of Ilona Tóth was so important to the propaganda that it was aired by the national radio.
Repression affected the general public, the armed forces, and the working class as well: More than four hundred people executed, the last of them in 1961. This constituted about 3-5% of the roughly 10,000 convicted. About 46% of the convicted were imprisoned for 1-5 years. Repression fell heaviest on the personnel of armed forces, mainly soldiers were affected (policemen and border guards in much smaller numbers). Repression did not concentrate on Budapest or on other cities. Newer research (and oral history) showed that in rural communities the same happened as in larger settlements. Anyone who had played any public role during 1956 was liable to suffer personal revenge, imprisonment or worse; the goal was to eradicate even the seeds of a possible future movement.
The regime used other methods to affect the lives of the imprisoned and others. Breaking them physically and mentally was as common as blackmailing. After 1956 the SPA was abolished, but the ("new") state security agency forced people into becoming informants based on their (alleged) behaviour during the revolution. Personal, family pictures of the revolution are rare, as—if found—these were regularly used during trials as evidence in underpinning the role the accused played in the events. Also, life was made hard for the younger generations: In cases, the reason for not getting admitted to university was the (alleged) role the applicant played in the 1956 revolution.
Symbolically dealing with the remedies was also important. A new coat of arms was created in 1957 that was not a blind copy of the USSR's and used the Hungarian national colours. The Party was also renamed as the Hungarian Socialist Workers' Party (HSWP) in November 1956. 1956 was referred to as "the sorrowful events of 1956", or "counterrevolution", and censorship enforced that no reference would be made to 1956 in films or in literature.
The creation of a new armed force, under direct Party control and independent from the Hungarian People's Army, was of crucial importance to reinforce and defend the power of the Kádár regime. Created in January 1957, the initial strength of the Worker's Militia reached 30,000 personnel. Later on the Militia doubled its numbers, and it continued to exist until 1989-1990.
As Kádár had been placed in power by the Soviets, and without internal support from the society, Kádár himself and his policies were influenced by the policy of Moscow. This was shown in 1968, when (alongside other Warsaw Pact members' armies) the Hungarian Army took part in the invasion of Czechoslovakia following the Prague Spring.
Societal Consequences
From November 1956 one of the Kádár regime's goals was to get rid of the visual consequences of the revolution (eg. rubble in the streets, non-working transport infrastructure)—the reconstruction in Budapest started as early as December 1956. Although for a short while a hope lived that a new revolution will break out in March 1957, not only this did not happen but Kádár showed himself on 1 May 1957 in front of tens of thousands on Heroes' Square. In the forthcoming decades his regime conditioned the Hungarian population to restrain themselves from shaping politics in general. In return, they would get (the promise of) a living standard uniquely high in the Eastern Bloc that was provided by an economic policy that indebted the country heavily. The fact that the Hungarian society accepted this deal meant that the society gave up its own ability to create fora that could stand against the misuse of power from any governing body. This has consequences to this very day and makes the legacy of the revolution unfinished.
Epilogue—The Polish connection of DoI
Poland was not a destination for those who fled Hungary in 1956. After the introduction of the martial law in Poland, Polish opposition groups saw parallels between the Hungarian and Polish events of 1956 and 1981, respectively. In 1986 near the capital Warsaw the first plaque was unveiled in the memory of the Hungarian revolution—by the morning of the next day, the plaque had been destroyed.
Designer's Notes
By Brian Train
Introduction
I have been designing board wargames for over 25 years. The majority of the 50 or so designs I have published during that time have dealt with highly asymmetric conflicts. Back in 2002 I designed Operation Whirlwind, a small board wargame for the Microgame Design Contest held that year for users of Boardgamegeek.com. It won the contest (yay) and for a while was a free print-and-play giveaway; later it was published, with increasing quality of art and physical components, by the Microgame Design Group, Fiery Dragon Productions, and One Small Step Games. As far as I could discover it was the first published game on the November 1956 street fighting in Budapest, in any language. It was also one of a number of games I had designed on urban guerrilla warfare, a long-standing particular interest of mine.
It was also one of the most lop-sided conflicts anyone could have chosen, in military terms. A conventionally defined Hungarian military victory was impossible, so the question was, how to make an acceptably interesting and absorbing contest out of this mismatch? I decided to set a number of obstacles in the Soviet path:
- hiding information about the nature of each insurgent unit so he would consider probing an area carefully instead of all-out bloody assaults (with the risk of massacring civilians);
- limiting the ability of Soviet units to work together – units from different divisions cannot cooperate in attacks;
- putting time pressure on the Soviets – the harder and longer the Hungarians fight, the more Arms Points they gather and so can convert their units from low-power Recruits into Militia and Sappers;
- adding some material help to the Hungarians in the form of different degrees of Western support – from arms drops to clandestine insertions of early Green Berets to the entire 101st Airborne Division, jumping into battle (this was also the first wargame to show a US division in the weird and quickly abandoned "Pentomic" configuration of five battlegroups). All of these options were ahistorical, and the last was frankly impossible without starting World War III, but they do make for a wild game.
- And finally, some psychological pressure: as an optional rule, the Hungarian player may play a recording of Beethoven's Egmont Overture over and over again, very loudly, whenever the Soviet player does not control the "Free Kossuth Radio Budapest" objective area. This radio station was formerly Radio Budapest, the state radio station that usually broadcast only news and speeches. When the rebels seized it, a record of the Overture was the only music they could find on the premises, and in between their own speeches and announcements they kept playing it until the Soviets captured the building. I ran across mention of it in my reading and thought this was a fun way to give the game some atmosphere, and hopefully rattle the Soviet player a bit: the entire Overture is almost nine minutes long, so he might have to listen to it eight or nine times before the Radio Station finally falls.
All of these things (except the last) combined to whittle away at the initially quite high level of Soviet Victory Points – if the Soviet player lost too many of these, his intervention "in the name of restoring order" would be seen as the cruel repression that it was, and it would be only a matter of time before another Warsaw Pact member decided to resist rule from Moscow.
The game got a modest amount of attention, and I carried on with designing other games. Then, in the summer of 2016, I discovered the Kickstarter campaign for Days of Ire. I signed up right away – I think I was pledge #126. Later I wrote in a comment on the site about the Kickstarter video's use of the Egmont Overture as soundtrack music, and how I had included a Musical Accompaniment optional rule in Operation Whirlwind using the Overture. Within hours David Turczi wrote me, proposing that we work on the sequel to Days of Ire!
During the development of this game, David and I batted many mechanisms and processes back and forth. I would say in general terms it steadily evolved away from "numbers-heavy wargame" and towards something we could call "militarized Eurogame". We began with agreement that, in order to make the game interesting, it should contain the same basic pressures and limitations on the Soviets as in Operation Whirlwind: hidden Insurgent units, limited coordination between units, and tremendous time pressure. (We ditched the idea of Western intervention early on, as it was historically very improbable and the extra rules weight required wasn't justified – though I suppose players of this game could still adopt the Egmont Overture optional rule!) David was full of ideas for adding further layers of suspense and variety to the game that we fleshed out together: the varied menus of operations with narrative-inducing mechanisms like fleeing Civilians and Defy; the Heroes and Scenarios deck, and ultimately the Konev (solo) version of the game. This last is only 12 simple cards, played randomly, but it behaves almost like a rational opponent!
As I said, I am primarily a wargame designer. David has a background in designing Eurogames, and I can say I learned a lot from him about how wargames can be designed differently. Now the result of our labours is in your hands. We hope you enjoy this game and find it as deep and replayable as we did.
The factions
The Soviets
For the second intervention in November, the Soviet troops in Hungary were given a new commander, Marshal I.S. Konev, and reinforced with the addition of the 8th Mechanized Army (composed of three mechanized and one Guards Motor Rifle divisions) and the 38th Army (composed of three mechanized and one Guards Airborne infantry divisions). The "Special Corps" under the command of Lieutenant General P. N. Lashchenko was detailed to take and occupy Budapest and the immediate area. The 7th Guards Airborne division held Tököl airport, while three divisions – the 2nd Guards Mechanized, 33rd Guards Mechanized and 128th Guards Motor Rifle – entered the city. Each of these three divisions was composed of three mechanized or motorized infantry regiments, a tank regiment, and smaller units of artillery, engineers, signal troops and so forth. As the fighting continued these three divisions would be further reinforced by troops coming under Special Corps command, including three regiments of paratroopers (the 80th and 108th detached from the 7th Guards Airborne, and the 381st from the 31st Guards Airborne), heavy armour units such as the 100th Tank Regiment and the 87th Assault Gun Regiment, and the 12th Motorized Unit, a brigade of MVD (Ministry of Internal Affairs) troops.
These units are not shown directly in the game because they, and the other battalions of supporting arms within the divisions such as engineers and artillery, have been broken up into detachments to form small all-arms task forces. This was standard Soviet tactics for fighting in an urban area. Hence in the game, a Regiment moving into or operating in a given area should be understood to be working as a headquarters controlling the movements of 12 or more smaller groups. Each combat group would be roughly the size of a reinforced company or about 150-200 troops, containing mostly infantry and small detachments of armoured vehicles (tanks and assault guns), engineers to demolish and clear barricades and rubble, artillery for extra firepower, and so on. Similarly, a Garrison unit in the game represents an assortment of infantry, military policemen and other troops organized to occupy and control the critical points of an area through roadblocks and intensive patrols.
The Hungarians
Details of the numbers and organization of the defenders of Budapest in the November fighting are difficult to confirm. In the chaos of the revolution in October, and the swift Soviet retribution and the exodus from Hungary that followed, few people were keeping detailed records.
What is known is that after October 28th, an organization called the National Guard was formed to replace the hated State Protection Authority and keep order, secure public buildings and infrastructure, and distribute food to civilians. It was commanded by General Béla Király, and his deputy was Colonel Sándor Kopácsi, formerly the chief of police in Budapest. The insurgents who had participated in the street fighting were incorporated into the National Guard to give them status as legal combatants. The Guard was to be equal in stature to the army and police, and would be a paid, armed and uniformed service organized in distinct units but the Soviet invasion happened before these measures could be acted on. Many soldiers and officers from the Hungarian National Army joined the National Guard as advisors and trainers.
There were at least 15,000 insurgents in Budapest and its immediate area. One estimate of the strength of the organized insurgents in Budapest gives a total of about 18,500 under arms on November 3, 1956, classified into roughly six types of combatant:
- October Insurgents (5,500). These were street fighters from the revolution who had kept their weapons. These were probably the most effective civilian fighters but they were often committed to defending only their own districts.
- Students (2,500). Groups of these committed young people proved to be quite mobile and effective.
- Workers (2,000). Most of these were factory workers committed to defending their own workplaces or neighbourhoods.
- Police or Army (2,000). These were the best trained, armed and disciplined combatants the Revolution had but were often tied to the defence of their own barracks or military installation.
- District public safety guardsmen (5,100). These were the most numerous but of doubtful combat value; they also were tied to defending only their own district.
- "Other" (1,400?). Some people spontaneously took up arms or formed their own insurgent groups, either after the Revolution or in the midst of the Soviet crackdown.
(source: Miklós Horváth, "General Characteristics of Freedom Fighters", in 1956: The Hungarian Revolution and War for Independence, ed. Lee Congdon, Béla Király, Károly Nagy. Columbia University Press, 2006)
In the game, these combatants are shown as a combination of locals and fighters. Locals are tied to the district they set up in, and represent a much larger number of people than fighters, hence they are able to undertake a larger range of tasks (which is why they have two icons). Meanwhile, fighter units represent a small number of people; they are mobile but less able to perform multiple tasks (so they have one icon).
What of the Hungarian National Army? There were considerable garrison forces, training academies and headquarters organizations in and around Budapest, but these forces began to disintegrate at the beginning of the Revolution. By the time of the second Soviet intervention they were almost completely disorganized and whole units were easily disarmed by Soviet forces. Soldiers and officers, where they did choose to fight, resisted individually and in small groups when and where they could.
Game as History
Operation Whirlwind's historical outcome was certain and swift. The Soviet Army deployed overwhelming force and did not spare the firepower; the Hungarian National Army did not resist on any organized basis; and the insurgents were taken by surprise in many districts. The fighting was essentially over within 100 hours (10 game-turns), even though some resistance continued in Csepel Island (off the map to the south) as late as November 11th.
So in the game, the Soviet player has no time to waste! Speed, shock and cruelty are the ingredients of his inevitable victory, which he must secure as quickly as possible. He must stamp out the virus of revolt, not in anticipation of any meaningful Western intervention or censure but to underline to the other satellite nations the cost of deviationism. Meanwhile, the Hungarian player must defend tenaciously but not stupidly in order to stave off defeat for as long as possible.
Appendix: Yuri and Noel — Promo for Days of Ire
This promo insert appears in the printed rulebook but describes optional characters for the related game Days of Ire: Budapest 1956, not for Nights of Fire: Battle for Budapest itself. Reproduced here as it appears in the official document.
You might have an additional small punchboard with two tiles not listed in the components section, if you backed this game through Kickstarter or otherwise acquired it separately. These tiles give additional options when playing Days of Ire: Budapest 1956, and the other game is required to play them. Yuri and Noel are designed by Mihály Vincze and Dávid Turczi.
Noel the journalist was inspired by real-life British journalist and writer Noel Barber, who got shot in the head (but survived) during the Revolution while relaying first-hand accounts from Budapest to the Western media. Yuri the spy was inspired by the stories about covert agents of the KGB and the SPA operating on the streets of Budapest, constantly writing and relaying reports about any seditious activity.
Changes at setup:
- Do not mix Yuri or Noel in with the 22 original fighters in Days of Ire.
- Place Yuri face up and active on Blaha Lujza Square.
- Place Noel face up and active on Astoria.
During gameplay:
- Both Yuri and Noel count towards the limit of 2 fighters when moving, or 4 active fighters in a location.
- Neither Yuri nor Noel can be the target of a hit (treat them as not present when attacked), nor can they be removed by any card's effect.
- If a player starts the round in the same location as Yuri, they MUST take Yuri with them when moving OR choose to discard 1 card.
- When a player takes an action in Yuri's location, they must move 2 adjacent militia into the player's location if possible. (Player's choice if multiple valid targets are available.)
- Noel provides 1 icon, in a similar way to normal fighters.
- Noel has a once-per-game ability that can be used by a player sharing a location with him (it is not an action):
- If playing the Conflict rules: Remove Noel from play. Go through the discard of Headline cards, and select a green one. This card will be resolved at the beginning of the next day, immediately before the Soviet player's turn. The Soviet player collects the CP of the card as if they played it themselves, and the effect of the text is resolved.
- If playing the Zhukov rules: Place 2 militia in Noel's location, then remove Noel from play. Go through the discard pile of Zhukov cards, and select a green one. This card will be resolved at the beginning of the next day. As part of Zhukov's Headline step, Zhukov will still draw and resolve 4 additional cards, and this card resolves even if the support is on a red space. Ignore the event placement icon of this card when resolving.
- Once removed from the game via his ability, Noel may not be retrieved through any means.
Overview and Goal of the Game
The game plays through the first four days of the Soviet retribution following the Hungarian Revolution. This is a fight the Revolutionaries can't win using conventional means, as the full force of the Red Army will crush them.
The Revolutionaries have to try and save as much as they can, and to cause the Soviet side to lose Prestige by:
- Helping as many civilians to escape as possible.
- Delaying the onslaught of the Soviet Regiments.
- Disabling the Soviet units as often as possible.
The Soviet side must concentrate on reducing the Morale of the insurgency by:
- Arresting the civilians before they can escape.
- Eliminating the Hungarian insurgents.
- Placing occupying Garrisons throughout key locations of the city.
The game ends when all Hungarian fighting units are eliminated or surrender, or when Morale reaches zero. At this time, if the value of the fled civilians is less than the remaining Soviet Prestige, then the Soviet victory is absolute, and the iron grip of Moscow will be tighter than ever. If, however, the Hungarians managed to save civilians totaling more value than the remaining Soviet Prestige, the Soviet's military victory is hollow: the whole world has seen how a band of lightly armed youngsters can hold back the greatest army in the world for days on end, and hundreds of thousands of refugees will tell the Western world of the atrocities, causing severe loss of face to the Soviet side – for gameplay purposes this counts as a Hungarian victory, even though military victory is literally impossible.