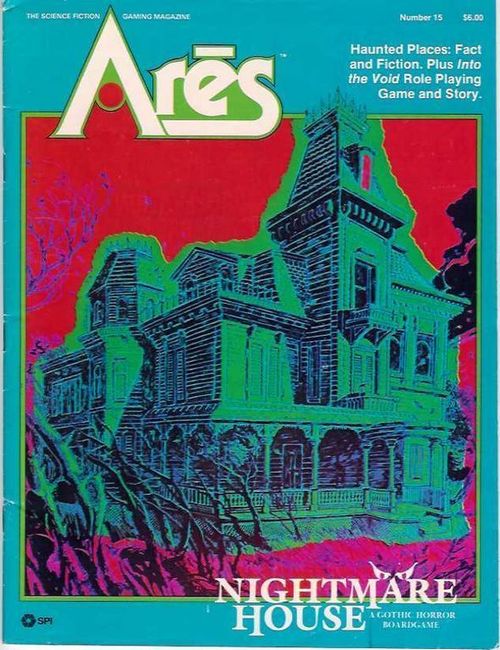
Nightmare House
Nightmare House Rulebook
Table of Contents
Table of Contents
Part 1: Introduction
NIGHTMARE HOUSE is a two to five-player game of ghost hunting and exorcism. One player (the House) takes the role of the evil Entity that has spun its web of power over the Darkholm Manor. The other players (called the Hunters) each represent a ghost hunter who has entered the house one dark night to confront and banish its evil.
The battle against the House takes place on two planes. On the Astral Plane, the Hunters try to reach and exorcise the Entity hidden in the heart of darkness of the House. The Hunters must advance along the 12 Axes of Power, weakening the House and destroying its web of evil by exorcising the Entity's power from individual rooms in the Manor. The House tries to trap the Hunter's Psyches and cast their Astral Bodies adrift on this plane.
On the Material Plane, the physical manifestation of the House, the Hunters search for discoveries to help them on the Astral Plane, as the House materializes Physical and Psychic Haunts against them through its Foci of Evil. The House tries to take possession of the Hunter's physical bodies, destroy them and absorb their souls. The Hunters use various tools and strengths to defend themselves against Haunts.
The Characters
Twelve characters are included in the game. Each is tied to the house in some way and has certain strengths and weaknesses when used in play. It is strongly suggested that Kate, Potter or Lorenzo be used in two-player or solitaire games.
Kate Darkholm, the last of the Darkholms, is a conscious medium. Raised by distant relatives far from Darkholm Manor from the age of 6, her mediumistic and psychic abilities became active on her 12th birthday. Since then, Kate has been obsessed with the Darkholm curse. She is determined to return to the Manor and rid it of its evil, banishing the lingering ghosts of her great-grandfather, grandfather and mother. The House has been waiting for her to rekindle its power.
Ted Holt, now a famous photojournalist with credits in scores of prestigious magazines, is a local boy who grew to manhood in the shadow of the Manor. Holt is haunted by the memory of one black night spent in the house when, on a childish dare, he entered the darkened tower to confront the spirit of Alistair Darkholm. The House can't wait for Teddy to come back and play again.
Dr. Opal Devlin, noted professor of psychology, spends her sabbaticals investigating reports of psychic phenomena. She is drawn to Darkholm Manor because of the evil she feels growing there. It is an evil she thinks she can destroy. The House thinks otherwise.
Lorenzo Lane is quite possibly the most famous stage magician and escape artist in history. Having started in show business as a mentalist, he has made a lucrative hobby of debunking mediums, psychics and haunted houses. Nonetheless, Lorenzo believes in the evil of Darkholm Manor... and the House is waiting to embrace him.
Jim Chase, private investigator. He believes only in what he can hold in his hand and see with his eyes. Business draws him to Darkholm Manor, an investigation into the mysterious disappearance of a writer who was researching the Darkholm curse. Chase looks forward to cracking the case. The House looks forward to cracking Chase.
Father Eamonn Doran, newly-arrived from Ireland, is the parish priest of Lake Berne. Since coming to the village, he has felt a growing wrongness, almost a challenge, emanating from the house, reaching out to grip his parish in icy, twisted fingers of evil. The inexplicable suicide of a parishioner has prompted him to accept the challenge.
Eliot Evans, professor emeritus of anthropology at Old Salem University, has made a lifework out of proving that ghosts and psychic phenomena are mundane realities. Of late, his nights have been filled with dreams of Lilith Darkholm, a woman he has never met and knows only by reputation. Now he has come to meet her.
Jason Rivers-Smythe, Captain in the Howards, has come in search of his beloved twin sister missing 14 years since the night of Lilith Darkholm's death. Sweet Janet Rivers-Smythe had travelled to America to earn a modest dowry as personal secretary to a gentlewoman. She found instead a life of small horrors and black secrets behind a door called Darkholm. Jason thinks that he has come to learn the truth about his sister that will ease his dying mother's mind. The House knows that he has come instead to hear a ghost story.
Hal Roarke, the young, iconoclastic founder of the Functionalist School of Architecture, has made a study of old houses reputed to be haunted. Hal also dabbles in the occult and considers Darkholm Manor to be the ultimate challenge to those who study other planes of existence. He is sure that he will be the first person to master the house and unravel its secrets. The House is eager to touch his soul.
Lemuel Jakes, a lonely aged widower, has been caretaker of the Manor since the family solicitors closed it up 14 years ago. He has never put much stock in the stories about the house but has steadfastly avoided staying on the property after sunset. The death of his only daughter by her own hand has kindled his suspicions and goaded him to action. If anyone can find the heart of its darkness, it will be Lemuel. The only requirement is that he enter the house when its power is strongest... at night.
Dr. Ben Addams, the village doctor, was always amused by the tales the locals told about Darkholm Manor. But Nora Jakes was his patient... and, perhaps, in the heart of the shy, middle-aged physician, much more than that. Addams can't forget that Nora died with the name of Darkholm on her lips. The house welcomes his hate.
John Potter, one of the most famous antique dealers in the United States and Europe, has an uncanny ability to read the history of objects by touching them. This talent has led him to study the occult and he is an acknowledged expert on psychic phenomena. This night, he will try to uncover the secret of Darkholm Manor... if only he can open himself to the emanations of the house without becoming part of it.
Solitaire Play
Playing the game solitaire is a good way to become familiar with the rules. If you choose this option, you should only use one Character of your choice and seek to beat the House with that Character. Follow all rules with these changes: During set up, choose the Character you will play instead of drawing it randomly; place the Discovery Markers on the map without looking at their faces. Place the Entity in the Seventh Circle to start. Whenever the House plays a Power Marker, draw it randomly from the POWER WHEEL.
Part 2: Game Parts
A. Parts List
Each game contains...
- one 22" x 34" mapsheet
- one sheet of 200 cardboard playing pieces
- one 16-page rules booklet
- three 6-sided dice (not included in magazine)
- one game box (not included in magazine)
- one plastic tray (not included in magazine)
B. The Rules
All information needed to play the game is explained in these rules. Read them carefully before beginning play. Don't try to memorize the entire booklet — just read everything! Then set up the game by following the steps in PART 3 and play it through by following the Steps in PART 4. Refer to the other rule sections during play to clarify anything you don't understand. A number of special terms are used in the rules. These include:
-
Astral Plane: The plane of existence inhabited by the Soul. In the game, the portion of the Astral Plane in and around the House is represented by the ASTRAL MAP. A Character can affect the Astral Plane through his Psyche (the structure of his mind). He can also use his Astral Body (the manifestation of his Psyche as energy) to move around the Astral Plane. A Character can build a Lifeline of Power Markers between his Psyche and his Astral Body so as to ease the return of his Astral Body to his Psyche. In some cases, despite this precaution, a Character's Astral Body will become disassociated from his Psyche and he will become Lost on the Astral Plane.
-
Entity: The other-dimensional being whose evil is manifested in Darkholm Manor. The House is actually representing the Entity in the game. In order to dispel the evil that controls the House, the Characters must exorcise (drive out) the Entity. Before they can do this, however, they must first weaken the Entity by driving it from the various Rooms in the House and destroying the various Power Axes that the Entity uses to control the House. This process of weakening the Entity is also called exorcism.
-
Focus of Evil: A pool of other-dimensional energy that the House can gather into a sort of "portal" into its own dimension. The House can then cause Haunts to materialize in this pool of energy. The Hunters can keep the House from using a Focus of Evil for this purpose by Warding (creating a protective atmosphere in) the Space containing the Focus of Evil. A Focus of Evil is represented in the game by a Focus Marker which can be front face up (Intact) or back face up (Dispersed by a Ward). The Graveyard, Cellar, Crypt and Tower are also considered to be Foci of Evil, but they cannot be Warded.
-
Haunt: A manifestation on the Material Plane of the Entity's evil. Haunts can be Physical (having their primary effect on the bodies of their victims) or (having their primary effect on the minds of their victims). All Physical Haunts are (can move around the HOUSE MAP). Psychic Haunts can be or (existing only at a particular point in space). For a Haunt to have an effect on the Characters in the game, the House must it by placing 1 or 2 Power Markers under the Haunt. The Haunt then takes several Hours to (enter the Material Plane). A occurs whenever a Haunt starts a in the same Space with a Character or enters a Space with a Character during the Phase.
C. The Mapsheet
The mapsheet includes two maps:
THE HOUSE MAP, showing the three floors of the Nightmare House. This map consists of a number of separate rooms and areas called Spaces through which the players move the pieces during play. The First Floor includes the attached Verandas, Garden, Toolshed and Graveyard. The Second Floor is reached by a pair of Stairways from the First Floor. The Third Floor is reached by a Stairway from the Second Floor. The Attic is reached by a Stairway from the Third Floor Storeroom. The Tower is reached by a Stairway from the Third Floor Main Hall. The Cellar is reached by a Stairway from the Main Storeroom. Most Spaces have matching Room Markers that are used on the ASTRAL MAP to show where each Space fits in the web of evil that surrounds the House.
THE ASTRAL MAP, showing the web of energy that the Entity has woven through the house. This web consists of a number of Power Points connected by Power Lines. Twelve Axes of Power formed by the Power Lines radiate from the center of the web to form 4 Circles of Energy. At the heart of the web are three Circles of Darkness (the Fifth, Sixth, and Seventh), the lair of the Entity. These 7 Circles connected by the 12 Axes form the ASTRAL MAP. The Circles are numbered from 7 (the innermost circle) to 1 (the outermost circle). The Axes are numbered from 1 to 12. There are 4 Power Points in each Axis. The Fourth Circle of 12 Power Points is the Axis Control Circle and each Power Point in that Circle is an Axis Control Point. The other 36 Power Points on the 3 outer Circles are Room Control Points. The status of each Power Point is indicated by which side of the marker occupying that Point is showing. Room Markers and Control Markers each have a Controlled Side indicating that the House controls the Room or Axis represented by the marker and a Dispersed Side indicating that the Room or Axis represented by the marker has been Exorcised and is no longer Controlled by the House.
Also printed on mapsheet are the...
- Abbreviated Course of Play, showing the Phases that must be performed each Hour.
- Clock, showing what Hour it is.
- Note: The numbered hours on the clock do not contain AM or PM designations. The Hours from 6 to 12 are always PM. The numbers from 1 to 5 are always AM.
- Map Key, showing what the symbols and colors on the Maps mean.
- Power Wheel, where the players keep the Power Markers they get each Hour.
- Soul Track, used to keep track of how close each Character's Soul is to Possession by the House.
D. The Playing Pieces
The sheet of die-cut cardboard pieces contains a variety of different markers. Samples of each are shown below:
- Sample Character (Front Face, Normal): Name Chase; Physical Strength 5; Psychic Strength 4.
- Sample Character (Back Face, Possessed): Name Chase; Haunt Strength 5.
- Sample Tool (Front Face): A blank (unidentified) Tool marker, shown with its question-mark face.
- Sample Tool (Back Face): Name Bible; Physical Strength Modifier 0; Psychic Strength Modifier 2.
- Sample Haunt (Front Face): The Haunt's face is shown with its eyes marking, unrevealed.
- Sample Haunt (Back Face): Name Bats; Haunt Strength 5.
The sample markers are explained as follows:
- NAME: The name of the Character, Haunt or Tool. The named Character Markers represent the Hunters' Physical Bodies on the HOUSE MAP. The front of each Character Marker is the side that is normally showing. The back side is used when the Character's Physical Body is Possessed by the House.
- PHYSICAL STRENGTH: The amount of physical energy the Character has at his disposal. This number is used to determine how far the Character can move on the HOUSE MAP, how effectively he can combat Physical Haunts and what the Character's own Haunt Strength is when his Physical Body is Possessed by the House.
- PSYCHIC STRENGTH: The amount of psychic energy the Character has at his disposal. This number is used to determine how far the Character can safely move on the ASTRAL MAP, how effectively he can combat Psychic Haunts and perform Exorcisms, how easily he panics and how many Power Markers he gets each Hour.
- HAUNT STRENGTH: The power of the Haunt when it engages in a Haunting of one or more Characters. If the Haunt Strength is surrounded by a triangle, the Haunt is a Mobile Physical Haunt. If the Haunt Strength is surrounded by a square, the Haunt is a Mobile Psychic Haunt. If the Haunt Strength is surrounded by a circle, the Haunt is an Immobile Psychic Haunt.
- PHYSICAL STRENGTH MODIFIER: The number that modifies the die roll of the Character who possesses the Tool whenever that Character is haunted by a Physical Haunt.
- PSYCHIC STRENGTH MODIFIER: The number that modifies the die roll of the Character who possesses the Tool whenever the Character is haunted by a Psychic Haunt.
E. Sample Markers
The front faces of the Control, Room and Focus Markers are the Intact Sides (showing that the Entity's control of these elements is complete). The back faces of these markers are the Dispersed Sides (showing that the Entity's control of these elements has been dispersed by Warding or Exorcism). The front faces of the Psyche and Soul Markers are the Intact Sides (showing that the Character's psychic defenses are intact). The back faces of these markers are the Vulnerable Sides (showing that the Character's psychic defenses have been overcome). The front face of the Astral Body Marker is its Normal Side (showing that the Astral Body is under the Character's control). The back face is the Lost Side (showing that the Character is Lost on the Astral Plane). The front faces of the Status Markers are used to show that Characters are Panicked. The back faces are used to show that Characters are Unconscious. The front faces of the Lights Markers are used to indicate that Floor Lights are On. The back faces are used to indicate that Floor Lights are Off.
| Marker | Front Face | Back Face |
|---|---|---|
| Discovery Marker | Discovery symbol (exclamation mark) | "Bloodstains" |
| The Entity | The Entity symbol | (blank) |
| Control Marker | Solid black square | Cracked/dispersed symbol |
| Room Marker | Room name (example: Kitchen) | Room name (example: Kitchen) |
| Psyche Marker | Ankh symbol, "4th Hunter" | "4th Hunter" |
| Soul Marker | Figure symbol, "4th Hunter" | "4th Hunter" |
| Astral Body Marker | Figure symbol, "4th Hunter" | "4th Hunter" |
| Power Marker | Lightning-stroke symbol |
Part 3: How to Set Up
- Choose which player will be the House. By gaming convention, the game's owner plays the House and performs Steps 2 through 12 below before the other players arrive to start play.
- Cut out the playing pieces and sort them by color and type.
- Unfold the mapsheet, bend it back against the creases to make it lie flat, and place it on a flat surface.
- The House places the Entity front face up in the Fifth, Sixth or Seventh Circle of the ASTRAL MAP (House's choice). Generally, the farther the Entity is from the center of the web, the more powerful it is on the Physical Plane.
- The House places one Control Marker front face up in each Axis Control Point on the ASTRAL MAP to indicate that all Axes are Controlled at the start of the game.
- The House places one Room Marker of his choice front face up in each Room Control Point on the ASTRAL MAP to indicate that the named Rooms are part of the Entity's web of evil at the start of the game.
- The House places his 2 Focus Markers front face up on the ASTRAL MAP, one each on any Room Marker. Each Focus Marker indicates a Focus of Evil where the House can materialize Haunts during play.
- The House places all of the Power Markers in a tea cup or other opaque container. This cup is called the POWER CUP.
- The House places one Immobile Haunt Marker of his choice front face up in the Crypt, Graveyard, Cellar, and Tower Spaces on the HOUSE MAP. The House then blindly draws 4 Power Markers from the POWER CUP, looks at them, and places 1 Power Marker front face up under each Immobile Haunt.
- The House places the remaining Haunt Markers in a tea cup or other container from which they are drawn during play. This cup is called the HAUNT CUP.
- The House secretly looks at the Discovery Markers and places one marker front face up in each Space of his choice on the HOUSE MAP that has a Room Marker on the ASTRAL MAP. All Discovery Markers must be placed on the HOUSE MAP at the start of the game.
He then places the markers he drew front face down in front of him for use in the game.
-
Each player selects a set of markers for his Character. NIGHTMARE HOUSE contains four sets of markers, one for each of the 4 possible players. Each set includes a Psyche Marker, Soul Marker, Astral Body Marker and Status Marker. The player to the left of the House is always the First Hunter and uses the markers labelled "First Hunter." The player to his left is the Second Hunter and uses the markers labelled "Second Hunter" and so on around the table. When the Hunters are instructed to perform a Step "in turn," the First Hunter (if eligible) always performs the Step first; the Second Hunter second, and so on.
-
Each Hunter's Soul Marker is placed with the Intact Side showing in the box containing his Character's name on the SOUL TRACK.
-
If Ted Holt is not in the game, skip this Step and go to Step 18. If Holt is in the game, the Hunter who controls him picks 2 of the 4 Immobile Haunt Markers that were placed on the map in Step 9 and flips them over to reveal their identity. These markers stay flipped over for the rest of the game (or until the Haunts they represent are Exorcised).
-
The Astral Body Markers, and the 2 Pentagrams are set aside until used in play.
-
Each Hunter places his Character front face up on the Front Veranda. He places his Psyche Marker with its Intact Side showing under his Character.
-
Set the Hour Marker at 6 PM on the CLOCK and begin play.
Part 4: How to Play
The game consists of 12 Hours. Each Hour is divided into a number of Phases, that are further divided into Steps. Each Hour, the players must perform all game activities in the order given below, completing each Phase before going on to the next. When all the Phases have been performed, the Hour is over. Advance the Hour Marker one Hour on the CLOCK and go to the next Hour, repeating the sequence below each Hour until the game is over.
A. Power Phase
- The House blindly draws from the POWER CUP a number of Power Markers equal to the number of Axes he controls plus the number of Hunters in the game minus the number of Power Markers currently being used to energize Mobile Haunts. After looking at them, he places them front face up in the House section of the POWER WHEEL until they are used during play.
- If it is 3 AM or 4 AM, the House blindly draws 2 additional Power Markers from the POWER CUP, looks at them and places them front face up in the House section of the POWER WHEEL until they are used during play.
- If it is Midnight, 1 AM or 2 AM, the House blindly draws 1 additional Power Marker from the POWER CUP, looks at it and places it front face up in the House section of the POWER WHEEL until it is used during play.
- Each Hunter who is not Lost, in turn, blindly draws from the POWER CUP a number of Power Markers equal to his Character's Psychic Strength, looks at them and places them front face up in his section of the POWER WHEEL until they are used during play. Add 1 to this number if the Hunter's Character occupies the Crypt, Cellar, Graveyard, or Tower Spaces on the HOUSE MAP. Hunters can't show each other which markers they draw. They can't "lend" Power Markers to each other or trade them among themselves.
- If it is 6 PM or if Chase, Addams or Doran are not in the game, skip this Step. Otherwise, the Hunter controlling each of these Characters states in turn whether his Character will try to heal one other Character of his choice who occupies the same Space and performs the following procedure. The Hunter rolls a die. If either Addams or Doran is doing the Healing, he subtracts 1 from the die roll. If the modified result is less than the Psychic Strength of the Character performing the Healing, the subject of the attempt is Healed (has his defenses partially restored) and his Soul Marker is moved 1 box further away from the "0" box of the SOUL TRACK. The Character who did the Healing replaces one of the Power Markers from his section of the POWER WHEEL in the POWER CUP. If the modified result is equal to or greater than the Psychic Strength of the Character performing the Healing, then no Healing takes place, but the Character who made the attempt still puts 1 Power Marker in the POWER CUP. A Character whose Soul Marker is on the "0" box of the SOUL TRACK can't be Healed. A Character's Soul Marker can never be moved above the box on the SOUL TRACK in which it started the game. A Character who is Possessed or Unconscious or whose Psyche is Vulnerable can't heal another Character. The same Character can be healed by different Characters during this Step.
B. Light Phase
- If all lights are On or if no Character occupies a Space with a Fuse Box, skip this Step and go to Step 2. Otherwise, each Hunter whose Character is Conscious, is not Possessed and occupies a Space with a Fuse Box on a Floor where the Lights are Off rolls two dice. If he rolls a number equal to or greater than the number of Controlled Axes on the ASTRAL MAP, then the Lights on that Floor are turned On. The House flips that Floor's Lights Marker over to the On side to show that the Lights are On. If he rolls less than the number of Controlled Axes on the ASTRAL MAP, the lights stay Off.
- If all lights are Off or if it is earlier than 8 PM, skip this Step and go to the next Phase. Otherwise, the House determines whether any Lights are turned Off by rolling two dice for each Floor on which the Lights are On. If he rolls a number less than the number of Controlled Axes on the ASTRAL MAP, then the Lights on that Floor are turned Off. The House flips that Floor's Lights Marker over to its Off Side to show that the Lights are Off. If he rolls a number greater than or equal to the number of Controlled Axes on the ASTRAL MAP, the lights stay On.
C. Movement Phase
- Each Hunter whose Character is not Possessed or Unconscious in turn states which Tools (if any) he will drop in the Space he occupies on the HOUSE MAP and places the appropriate Tool Marker(s) in that Space. All Tool Markers in the possession of any Hunters who are Unconscious are then placed on the Space occupied by the Hunter's Physical Body. If there is a Pentagram on the map at this point, the Hunter whose character drew it states whether or not he will destroy the Pentagram. If he chooses to destroy it, both Pentagram Markers are immediately removed from the map and set aside. They can be reused to represent another Pentagram at some future time in the game.
- Each Hunter whose Character is not Possessed or Unconscious in turn looks at and/or picks up any Tools of his choice in the Space he occupies. Characters can't have more than 3 Tools in their possession at any one time. Tools in a Hunter's possession are kept off-map unless that Hunter is Unconscious.
- Each Hunter whose Character is not Possessed or Unconscious in turn moves his Character between connected Spaces on the HOUSE MAP, spending Movement Points (MP's) to enter each Space as described below. Each Character has a number of MP's equal to his Physical Strength to use each Hour. These MP's can't be saved from Hour to Hour or "loaned" to another Character. Any MP's not used are lost. It costs 1 MP to enter most Spaces. It costs 2 MP's to enter the Crypt, Graveyard, Cellar, or Tower. The entry cost for all Spaces is doubled for all Characters except Lemuel and Roarke if the Space is Dark and the Character does not have a Candle or Flashlight.
NOTE: The Garden, Graveyard, Attic, Cellar, Verandas, Crypt, and Tower are always Dark; other Spaces are Dark if the Lights on the Floor are Off. Characters can only enter Spaces through Doors or (if moving between Floors) the Stairways. Lemuel and any Characters who begin the Phase in the same Space with him can use any Secret Passage to move directly from the Space in which they start the Phase to that Passage's destination Space. The windows of Darkholm Manor are, for the most part, bricked up and cannot be used as entrances or exits. Characters are considered trapped by the Entity in the house and can't leave the house or grounds until the game is over. Characters must stop moving upon entering a Space containing a Haunt. If a Character moves out of a Space containing a Pentagram he previously drew, the Pentagram is destroyed. Remove both Pentagram Markers from the map and set them aside. They can be reused to represent a new Pentagram at some future time.
-
If Opal, Father Doran, Dr. Evans and Roarke are not in the game or if all these Characters who are in the game moved during this Phase or if there is already a Pentagram on the map, skip this Step and go to Step 1 of the WARDING PHASE. Otherwise, the Hunter controlling each of these Characters states in turn whether his Character will attempt to draw a Pentagram this Hour. As soon as one Hunter states his intention to draw a Pentagram, the rest of this Step is skipped and play goes to Step 5. Only Characters who occupy a Lighted Space (or who have a Candle or Flashlight) that has a Room Marker on the ASTRAL MAP, who are not Unconscious or Possessed and who did not move during Step 3 can draw a Pentagram.
-
If no Character is drawing a Pentagram, skip this Step and go to Step 1 of the WARDING PHASE. Otherwise, the Hunter who announced in Step 4 that his Character was drawing a Pentagram, takes possession of the two Pentagram Markers. He places one in the Space he occupies on the HOUSE MAP and one on the Room Marker for that Space on the ASTRAL MAP.
D. Warding Phase
- Each Hunter whose Character is not Unconscious or Possessed and who occupies a Space whose matching Room Marker on the ASTRAL MAP is stacked with a Focus Marker states in turn whether his Character will try to disperse that Focus of Evil and create a Ward.
- Each Hunter trying to create a Ward rolls two dice. If the modified result is less than the strength of the Focus of Evil within the Room, there is no effect. If the modified result is greater than or equal to the strength of the Focus of Evil within the Room, the Ward is created. The strength of the Focus of Evil is equal to the number of Controlled Axes plus the number of the Circle on which the Focus Marker is located. The dice roll is modified by adding 2 if the Character creating the Ward is Kate, Potter or Addams and by adding 3 if the Character creating the Ward is Opal, Roarke or Dr. Evans. If the Warding is successful, the Hunter flips the Focus Marker over to its Dispersed Side. No Haunt can materialize in the Room this Hour.
E. Haunt Phase
- The House removes from the CLOCK all Haunt Markers occupying the same box as the Hour Marker. These Haunts now materialize on the HOUSE MAP. Each Haunt is placed front face up on the HOUSE MAP in any Space that has an Intact Focus Marker on its matching Room Marker on the ASTRAL MAP or in the Crypt, Cellar, Graveyard or Tower. Haunts can't appear in the Crypt, Graveyard, Cellar or Tower if the Immobile Haunts in each of these Spaces have been destroyed (Exorcised). Only one Mobile Haunt can occupy a Space at any given time. Note that the House could place a Mobile Haunt in the Crypt, Graveyard, Cellar or Tower while it is occupied by an Immobile Haunt, attacking any Characters in that Space twice. If all Spaces in which a Haunt could materialize are Warded or (in the case of the Crypt, Graveyard, Cellar and Tower) no longer contain an Immobile Haunt, the Haunt does not materialize. Instead, the Haunt Marker is replaced in the HAUNT CUP and any Power Markers used to energize it are replaced in the POWER CUP.
- The House moves any or all of his Mobile Haunts on the HOUSE MAP one at a time according to the procedure explained below. Haunts move on the HOUSE MAP by spending MP's to enter each Space on the Map. Each Haunt has 6 MP's per Hour. These MP's can't be saved from Hour to Hour or "loaned" between Haunts. Psychic Haunts can move through Walls, Floors and Ceilings; they don't require Doors and Stairways. For vertical movement purposes, the names of the Spaces above and below each Space are printed on the HOUSE MAP to show which can be entered from that Space by Haunts. Physical Haunts must move through Doors and Stairways like Hunters. Physical and Psychic Haunts can also use any and all Secret Passages. Haunts pay 1 MP to enter all Spaces (including Dark Spaces). A Haunt can't move into a Space containing a Pentagram, Rosary or Host Marker. A Haunt can freely enter an Exorcised Space. When a Haunt enters a Space containing one or more Characters or occupies such a Space at the beginning of this Step, the Haunt Marker is flipped over and the Haunt's identity is revealed. The House then finds the name of the Haunt in the HAUNT SUMMARY and reads the description aloud to the Hunters. The Haunting is then resolved according to the procedure in PART 6. If two Haunts begin the Step in the same Space, the House chooses the order in which their Hauntings are resolved.
- The House removes any Haunts of his choice from the HOUSE MAP, replacing the Haunt Marker in the HAUNT CUP and the Power Marker used to energize it in the POWER CUP.
F. Search Phase
- Each Hunter whose Character is not Unconscious or Possessed and who occupies a Space with a Discovery Marker whose front face is showing states in turn whether his Character will search the Space he occupies. If the Room is Dark, no Character other than Potter can search unless the Character has a Candle or Flashlight.
- Each Hunter who is conducting a Search rolls one die in turn. If the resulting number is less than either his Character's Physical or Psychic Strength (whichever is higher), he flips over the Discovery Marker in the same Space. If the result is equal to or greater than the Character's highest strength, there is no effect. Subtract 2 from the die roll if the Character performing the Search is Potter, Chase, or Kate.
- The House checks the DISCOVERY SUMMARY in these rules and reads aloud the description of each Discovery flipped over during Step 2. The instructions in the DISCOVERY SUMMARY are followed immediately. NOTE: In many cases, the Hunters will be instructed to permanently remove a Haunt from play as a result of a Discovery. In instances where such Haunts are in the HAUNT CUP, these instructions are ignored until the Haunt is actually drawn, at which time it is permanently removed from play.
- If Kate and Lorenzo are not in the game, skip this Step and go to Step 1 of the FIRST PANIC PHASE. Otherwise, the Hunters controlling Kate and Lorenzo state in turn whether their Characters will conduct a Psychic Search of the House. If neither Hunter is conducting a Psychic Search, skip the rest of this Phase and go to Step 1 of the FIRST PANIC PHASE. If either or are conducting a Psychic Search, go to . Characters who are Unconscious or Possessed can't conduct Psychic Searches.
G. First Panic Phase
- Each Panicked Character with an Intact Psyche flips his Psyche Marker so that its Vulnerable Side is showing.
- Each Hunter whose Character is Panicked rolls one die. If the modified result is less than the Character's Psychic Strength, he immediately removes the Panic Marker. If the modified result is equal to or greater than the Character's Psychic Strength, the House immediately moves the Panicked Character via Doors and/or Stairways to any Space of the House's choice up to 3 connected Spaces distant. The Character stays Panicked. He modifies the die roll by subtracting 1 from the die roll if the Character has a Bible and 2 if the Character is Jason. He adds 1 if the Space the Character occupies is Dark; 1 if his Soul is Vulnerable, and 1 if the Character being checked is Holt.
H. Astral Phase
- If a Hunter's Character is Panicked or if he does not occupy the Cellar, Crypt, Tower, Graveyard or a Space with a Room Marker, he skips this Phase and goes to Step 1 of the POSSESSION PHASE. If a Hunter's Character is Lost, he skips this Step and goes to Step 15. Otherwise, he places the Character's Psyche Marker on the ASTRAL MAP on the Room Marker matching the Space he occupies on the HOUSE MAP. If the Character occupies the Cellar, Graveyard, Tower or Crypt, he places his Psyche Marker on any Axis Control Point on the ASTRAL MAP.
- Each Hunter, in turn, states whether his Character will move on the ASTRAL MAP this Phase. If the Hunter does not want to move on the ASTRAL MAP, he skips this Step and goes to Step 8. Otherwise, he goes to Step 3.
- If a Hunter's Character is Kate, Father Doran, Dr. Evans, Opal, or Roarke, he skips this Step and goes to Step 4. The other Hunters, in turn, each roll one die. In each case, if the resulting number is less than his Character's Psychic Strength, the Hunter places his Astral Body Marker on top of his Psyche marker on the ASTRAL MAP and places a Status Marker with its Unconscious Side showing on that Character's Marker on the HOUSE MAP. If the number is equal to or greater than his Character's Psychic Strength, the Character immediately becomes Lost as described in PART 5 and must give the House one Power Marker (and move his Soul Marker one box closer to the "0" box on the SOUL TRACK). Upon becoming Lost, his Psyche is flipped over to its Vulnerable side if it is not already there.
- Hunters controlling Characters other than Kate, Father Doran, , , or skip this Step and go to . Each Hunter controlling one of these Characters places his Astral Body Marker on his Psyche Marker on the ASTRAL MAP and places a Status Marker with its Unconscious Side showing on that Character's Marker on the HOUSE MAP.
I. Possession Phase
-
If any Character with a Vulnerable Psyche is in a Space on the HOUSE MAP matching a Room Marker on the ASTRAL MAP that doesn't contain a Pentagram, the Hunter places his Psyche Marker on that matching Room Marker on the ASTRAL MAP if it is not already there. In addition, the Hunter controlling any Character in the Crypt, Graveyard, Cellar, or Tower places that Character's Psyche Marker in any Axis Control Point of his choice.
-
The House moves either or both of the Focus Markers that he wants along the Power Lines on the ASTRAL MAP. Each Focus Marker can be moved through a connected path of Room Control Points equal in length to the number of Hunters who started the game. A Focus Marker can move even if it is Dispersed. If it ends its movement in a Power Point containing an Exorcised Room Marker or occupied by another Focus Marker, the Focus Marker being moved is immediately and permanently removed from play.
-
The House states which Psyche Markers occupying the ASTRAL MAP he will attack. He can attack all, some or none of the Psyche Markers on the ASTRAL MAP during this Step. For each attack, the House selects a number of Power Markers of his choice from his section of the POWER WHEEL equal to or less than the number of Hunters who started the game. He places these markers on the Power Point containing the Psyche Marker.
-
Each Hunter whose Psyche Marker was designated in Step 3 states in turn how many Power Markers he is moving from his section of the POWER WHEEL to the Power Point occupied by his Psyche. There is no limit to the number of Power Markers each Hunter may commit to the defense of his Psyche.
-
Everyone who moved Power Markers to a Power Point during Steps 3 and 4 flips the markers over to show the numbers on the back.
-
The House rolls a die for each Psyche he is attacking and adds to each result the numbers on the Power Markers he moved to the Power Point the Psyche occupies. He further modifies this result by adding the number of the Circle occupied by the Psyche in each case.
J. Second Panic Phase
- Each Hunter whose Character is Panicked rolls one die. If the modified result is less than the Character's Psychic Strength, he removes the Panic Marker. If the modified result is equal to or greater than the Character's Psychic Strength, he removes 1 Power Marker from his section of the POWER WHEEL, places it in the House section of the POWER WHEEL and moves his Character's Soul Marker one box closer to the "0" box of the SOUL TRACK. He then removes the Panic Marker. Subtract 1 from the die roll if the Character has a Bible, and 2 if the Character is Jason. Add 1 if the Space the Character occupies is Dark; 1 if his Soul is Vulnerable, and 1 if the Character being checked is Holt.
- The Psyche Markers of all Characters whose Souls are Intact are flipped over to their Intact side.
K. Hour Phase
- If it is 5 AM the game is over and the House is the winner. Otherwise, go to Step 2.
- If there are no Hunters left in the game who are not Dead or whose Souls are not Possessed by the House, the game is over and the House is the winner. Otherwise, go to Step 3.
[Transcriber's note: Step 2 is transcribed as printed in the magazine. Read literally, "who are not Dead or whose Souls are not Possessed" does not match the evident intent (the House wins when no Hunter remains free of Death or Possession). It is left unchanged here pending confirmation against the original printing.]
- Replace all unused Power Markers in the POWER WHEEL in the POWER CUP.
- Flip any Dispersed Focus Markers over to their Intact side.
- Advance the Hour Marker 1 Hour on the CLOCK and begin a new Hour.
Part 5: Lost on the Astral
A Character can become Lost on the Astral due to a faulty entry of the Astral Plane, a failed Exorcism, or a failed Recovery of his Astral Body. When a Character becomes Lost, flip over his Astral Body Marker to its Lost side and his Psyche to its Vulnerable Side. Place a Status Marker on his Physical Body on the HOUSE MAP with the Unconscious Side showing, if there is not already such a Marker present. Any Power Markers in his Lifeline are returned to the POWER CUP. He then rolls 3 dice. The first die determines the Circle to which he moves: 1,2 = First Circle; 3,4 = Second Circle; 5,6 = Third Circle. The other two dice determine the number of the Axis to which he moves.
When a Character is Lost, his body is Unconscious on the HOUSE MAP. Place a Status Marker on it with the Unconscious Side showing. He can't move on the HOUSE MAP until he returns to his Body. While he is Lost, the House can possess his Body. It then becomes a Physical Haunt that the House can move and use to attack other Characters on the HOUSE MAP. A Hunter's Character stops being Lost as described in Steps 5 and 15 of the ASTRAL PHASE. When a Character returns to his Body, he immediately takes control of it, even if it is Possessed by the House. Remove the Unconscious Marker. The Character now functions normally.
Part 6: Haunting
Haunts are the manifestations of the Entity's evil. During the HAUNT PHASE, the House creates Haunts. During succeeding Hours, these Haunts materialize in the house where they try to attack and weaken the Characters, making them more susceptible to Possession. When a Haunt begins the HAUNT PHASE or enters a Space containing one or more Hunters, a Haunting takes place. The Haunt Marker and the Power Marker(s) energizing it are flipped over, showing the true nature of the Haunt. Two or more Haunts can't combine their Haunt Strengths. They must attack sequentially in whatever order the House determines.
If the House possesses the Physical Body of a Character who is Lost, he moves and uses that body as if it were a Physical Haunt to attack other Characters. Its Haunt Strength is equal to its Physical Strength. The Possessed Character does not need to be Energized. If a Hunter's Soul is Possessed, the Hunter moves his Physical Body during the HAUNT PHASE only and uses it as a Physical Haunt. It doesn't need to be Energized. Its Haunt Strength is equal to its Physical Strength plus the Physical Strength of any Tool the Hunter possesses. Whenever a Hunter whose Soul is Possessed conducts a Haunting, the Hunter rolls the die and applies the same modifiers listed in Step 1 below exactly as if he were the House. The players determine the outcome of a Haunting by performing the following Steps:
- The House rolls one die and adds to it the numbers on the Power Marker(s) used to energize the Haunt and the Haunt Strength found on the Haunt Marker. If it is Midnight, 1 AM, or 2 AM, he adds 1 to this number. If it is 3 AM or 4 AM, he adds 2. If the Haunt is a Psychic Haunt and the Haunting occurs in the Crypt, Graveyard, Cellar, or Tower, he adds 1 to the die roll.
- Each Hunter occupying the same room with the Haunt rolls one die and modifies the result by adding the Physical Strength Modifier of any Tool in his possession if the Haunt is Physical and the Psychic Strength Modifier of any Tool in his possession if the Haunt is Psychic. He then adds his Character's Psychic Strength if the Haunt is Psychic and his Physical Strength if the Haunt is Physical. He adds 2 for each Character in the Space with his Character and 3 if it is 5 AM. He subtracts 1 if his Psyche is Vulnerable.
- Each Hunter compares the total found in Step 1 with the total he found for his Character in Step 2. If the House total is greater than the Hunter's total, that Hunter must immediately give the House 1 Power Marker from his section of the POWER WHEEL if the Haunt was Psychic and 2 Power Markers if the Haunt was Physical. The Hunter then moves his Soul Marker a number of boxes closer to the "0" box on the SOUL TRACK equal to the number of Power Markers he gave to the House. If a Hunter does not have enough Power Markers in his section of the POWER WHEEL to give the House all of the Power Markers due him, the Hunter's Soul Marker is moved 2 boxes closer to the "0" box on the SOUL TRACK for each Power Marker that is due the House and is not actually turned over to him. If the Hunter's total is equal to or greater than the House's total, the House immediately gives the Hunter 1 Power Marker from his section of the POWER WHEEL. There is no effect if the House does not have enough Power Markers to give the Hunters what they are due, but all available Power Markers must be used to pay the penalty. If some, but not all of the Hunters can be paid the Power Markers due them, the House gives Power Markers to the victorious Hunters in the order in which they move. If a Character's Soul is Vulnerable and he loses a Haunting and doesn't have enough Power Markers to pay the House, he dies, and the House automatically gains immediate permanent possession of the Character's Soul with the consequences described in of the .
Part 7: Exorcism
Exorcism is the way in which the Hunters defeat the House and win the game. Four things can be Exorcised: Rooms, Axes, Immobile Haunts and the Entity itself. The following results can occur during Exorcisms.
- If a Room Marker was being Exorcised and the Hunter wins, the Room is Exorcised. Flip the Room Marker over to its Exorcised side. The players replace in the POWER CUP any Power Markers used in the Exorcism. If a Focus Marker was on the Room Marker that was Exorcised, the House moves it to the nearest House-controlled Room Marker of his choice that doesn't have a Focus Marker. If there are no House-controlled Room Markers without a Focus Marker left on the map, the Focus Marker is permanently removed from play. If the Exorcised Room contained a Mobile Haunt, the Haunt Marker is replaced in the HAUNT CUP and any Power Markers used to energize it are replaced in the POWER CUP.
- If an Axis Control Marker was being Exorcised and the Hunter wins, the Axis is Exorcised. Flip the Axis Control Marker and all the Room Markers on that Axis over to their Exorcised Sides to indicate that the House no longer controls that Axis. The players replace in the POWER CUP any Power Markers used in the Exorcism. If a Focus Marker was on a Room Marker on the Axis, the House moves it to the nearest House-controlled Room Marker of his choice that doesn't have a Focus Marker. If there are no House-controlled Room Markers without a Focus Marker left on the map, the Focus Marker is permanently removed from play. All Mobile Haunts whose Room Markers are flipped over as a result of the Exorcism of an Axis Control Marker are destroyed. Replace the Haunt in the HAUNT CUP and replace any Power Markers used to energize it in the POWER CUP. Whenever a Character successfully Exorcises an Axis Control Point which his Psyche occupies, the Space occupied by his Physical Body is also Exorcised. Any Immobile Haunts in that Space are Exorcised immediately and permanently removed from play. Any Power Markers used to energize those Haunts are replaced in the POWER CUP. Thereafter, the Space from which the Immobile Haunt was removed (Cellar, Crypt, Graveyard or Tower) can't be used for Haunts to materialize. Otherwise, there is no change in the status of the Space.
- If the Entity was being Exorcised and the Hunter wins, the game is immediately over and the Hunter who exorcised the Entity wins. EXCEPTION: If the House loses an Exorcism directed against the Entity and the Entity occupies the Fifth or Sixth Circle, the Entity is not exorcised. Instead, the Entity is moved into the next highest numbered Circle of Darkness and one Controlled Axis of the House's choice is immediately exorcised instead. If all Axes have been exorcised, there is no further effect. The Entity can never be moved except as a result of an Exorcism directed against it and it can only be moved from the Fifth to the Sixth Circle or from the Sixth to the Seventh Circle.
- If a Hunter loses any Exorcism, his Psyche becomes Vulnerable (flip the Psyche Marker over to the Vulnerable Side if it is not already there) and the Hunter's Soul is moved one box closer to the "0" box on the SOUL TRACK. If the Entity was being Exorcised and the House wins, the Hunter's Soul is immediately Possessed. Remove his Soul from the SOUL TRACK and place it in the Seventh Circle of the ASTRAL MAP. See of the for the other consequences of Possession.
Exorcising the Entity — Example. Father Doran occupies Axis Control Point 4/6 and is attempting to Exorcise the Entity in the Fifth Circle of Darkness. Doran's attempt is successful and the Entity should be Exorcised... but since the Entity is in the Fifth Circle, it is automatically moved into the Sixth Circle instead. The House chooses to lose control of Axis 4.
Part 8: Possession
The House can try to possess the Character's Physical Bodies and their Souls. Vulnerability is a state of being in which a Character is more susceptible to the influences and energies of the Entity Haunting the house. A Character's Psyche is normally Intact, as shown by his Psyche Marker being placed face up on the Map. Panic, certain Discoveries, and the failure of an Exorcism can render a Character temporarily Vulnerable, in which case his Psyche Marker is flipped over to show its Vulnerable side. If the Soul is Vulnerable, the Psyche is also Vulnerable. The Soul becomes Vulnerable when it is moved into the "0" box on the SOUL TRACK. It can then be possessed if the House successfully attacks the Character during the POSSESSION PHASE or kills the Character during the HAUNT PHASE.
The House can possess the Unconscious Body of a Hunter who is Lost. If the House successfully attacks a Character's Psyche, he can declare that he is going to take over the Body of that Character instead of moving his Soul Marker. Flip the Body Marker over to its Possessed Side. The House stays in control of the Character's Body until he uses it in combat as a Physical Haunt and the Character is no longer Lost and his Astral Body returns to reclaim its Physical Body or until the Character's Soul is Possessed. A Character whose body is in a Room with a Pentagram can't be attacked or Possessed, even if he is Lost.
Part 9: Haunt Summary
- Animated Corpse: The pallid, embalmed corpse of Marcus Fuller, Lilith's last husband, lurches at you from out of a dim corner. The dead man's lips are still tinged blue from the potent poison with which his scheming wife laced his sherry and his presence fills the room with the sweet smell of bitter almonds.
- Animated Shadow: Your shadow leaps from the floor and takes on a life of its own under the control of the House. As you struggle to combat it, the shadow anticipates your every move, striking and choking you before you can block its attacks.
- Animated Skeleton: A mouldering skeleton approaches. It is the mortal remains of one of Lilith's many victims, animated by the House and thrown into battle. Though the dry, powdery bones are easily broken, the skeleton continues to pull itself toward you until it is pounded to dust.
- Arcane Force: You experience the presence of a powerful force that is not of this world. Shortly, you are seized by an unbearable choking sensation accompanied by an intense desire to abase yourself in the presence of one of "His" many faces.
- Alistair's Death: Alistair Darkholm appears before you. He is a darkly handsome man with pale, aristocratic features. He wears clothing that was fashionable about 20 years ago. As you stand transfixed in horror, he smiles and raises a gleaming razor to his throat. With a single stroke, he traces a fine red wound from ear to ear.
- Bats: Hundreds of large filthy bats suddenly materialize out of thin air and begin diving on you.
- Blood: Gouts of bright red blood well up at your feet, filling the air with an awful coppery scent.
- Cold Spot: A mysterious spot of arctic cold appears in the air and begins to swell, causing the temperature in the vicinity to drop precipitously and coating everything with a pale, glittering rime.
Part 10: Discovery Summary
- Bloodstains: Blood begins to flow from a nearby wall, spelling out the nature and location of one other Discovery of the House's choice. This Discovery is immediately flipped over and the first Hunter to enter the same Space with that Discovery is immediately affected by it (stopping play to determine the effect). As soon as the Bloodstains are read, this Discovery marker is permanently removed from play.
- Book of Shadows: You find a dusty tome of spells and rituals written in blood and bound in what appears to be human skin. This is Lilith's Book of Shadows, the repository of all the learning of a ceremonial magician. Each Hunter who makes a successful Search of the Space is considered to have read a part of it and gained valuable knowledge of the House's evil. Those who have gained this knowledge each move 1 Power Marker from the House section of the POWER WHEEL to their own section of the POWER WHEEL. If the House does not have sufficient Power Markers in its section of the POWER WHEEL for each eligible Hunter to take a Power Marker, then the available markers are transferred to the Hunters in the order in which they move and transfers above the number of Power Markers available are ignored. As soon as the Power Markers have been transferred, the Book of Shadows is destroyed (disintegrated by the wrath of the Entity) and is permanently removed from play.
- Chandelier: You find a Chandelier that rattles and shakes as if animated. A noose hangs from it. It is pulled taut as if it still held a body. This is the Chandelier from which Josiah hung himself and is the focal point of his presence in the House. Anyone who discovers the Chandelier is assumed to smash it, thus freeing Josiah from the metaphysical chains that bind him to the House. Immediately and permanently remove this Discovery and the Haunt, Josiah's Wraith, from play.
- Cold Wind: An icy wind sweeps through the room, blowing out all of the Candles and causing everyone present to make an immediate Panic Check. Each Hunter rolls one die and adds 1 if the Character's Soul is Vulnerable, 1 if the Space is Dark and 1 if the Character is Holt. For purposes of this Panic Check, the Space is Dark if the Lights on the Floor are Off and no Character in the Space has a Flashlight. All Candles are considered to be temporarily extinguished. Subtract 1 from the die roll if the Character has a Bible and 2 if the Character is Jason. If the modified result is less than the Character's Psychic Strength, nothing happens. If the modified result is equal to or greater than the Character's Psychic Strength, the Character panics, a Panic Marker is placed on him and his Psyche Marker is flipped over to its Vulnerable side. Regardless of the outcome of any Panic Check(s), this Discovery Marker is immediately and permanently removed from play as soon as anyone finds it during a Search.
Counter Faces
The rules' final page is a counter-face reference chart (image only in the magazine). Its values are transcribed below.
Characters
Front face: Physical Strength, then Psychic Strength. Back face (Possessed): Haunt Strength.
| Character | Physical Strength | Psychic Strength | Haunt Strength (Possessed) |
|---|---|---|---|
| Kate | 5 | 6 | 5 |
| Ted Holt | 6 | 4 | 6 |
| Dr. Opal Devlin | 3 | 5 | 3 |
| Lorenzo Lane | 6 | 6 | 6 |
| Jim Chase | 5 | 4 | 5 |
| Father Eamonn Doran | 5 | 5 | 5 |
| Dr. Eliot Evans |
Haunts
Haunt Strength shown on the back of each Haunt marker.
| Haunt | Strength | Haunt | Strength |
|---|---|---|---|
| Creeping Hand | 4 | Floating Weapon | 4 |
| Animated Shadow | 5 | Animated Skeleton | 4 |
| Hand of Glory | 4 | Creeping Mist | 3 |
| Dust Golem | 6 | Poltergeist | 4 |
| Bats | 5 | Spectre | 3 |
| Rats | 5 | Deadly Vision | 6 |
| Animated Corpse |
Tools
Each Tool shows its Physical Strength Modifier, then its Psychic Strength Modifier.
| Tool | Physical | Psychic |
|---|---|---|
| Bible | 0 | 2 |
| Candle (two markers) | 0 | 0 |
| Flashlight (two markers) | 0 | 0 |
| Pistol | 3 | 0 |
| Talisman (two markers) | 0 | 1 / 2 |
| Rosary | 0 | 3 |
| Host | 0 | 2 |
| Bell | 0 | 0 |
| Dagger | 2 |
Rooms
The Room Markers shown on the counter sheet: Kitchen, Laundry, Master Bedroom, Library, Nanny's Room, Garden, Guest Room, Scullery, Portrait Gallery, Chapel, Sitting Room, Dining Room, Conservatory, Tool Shed, Tea Room, Music Room, Attic, Housekeeper's Room, Parlor, Reception Room, Sewing Room, Main Storeroom, Suite Parlor, Suite Living Room, Butler's Room, Cook's Room, Playroom, Nursery, Guest Bedroom A, Guest Bedroom B, Guest Bedroom C, Guest Bedroom D, Guest Bedroom E, Servants' Sitting Room, Upstairs Study, Private Study.