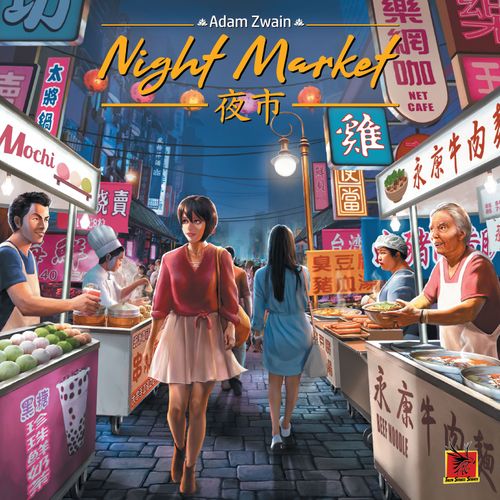
Night Market
Night Market Rulebook
Table of Contents
Table of Contents
Components
- 1 City Board
- 4 Player Boards
- 20 Districts (5 each of Stinky Tofu, Bubble Tea, Chicken-Steak, Sausage; City Park background)
- 16 Lantern Districts (4 of each type)
- 132 Goods (33 of each: Stinky Tofu, Bubble Tea, Chicken-Steak, Sausage)
- 48 Signature Dishes (12 of each: Soup Dumplings, Shaved Ice, Mochi, Beef Noodle)
- 44 Stalls, double-sided (18 Regular-blue, 5 Signature-yellow, 5 Signature-green, 5 Signature-purple, 5 Signature-red)
- 40 Seasonal Customers (8 Starter Spring, 8 Spring, 8 Summer, 8 Fall, 8 Winter)
- 16 Seasonal Attractions (4 of each season)
- 151 Money (51 1s, 36 5s, 30 10s, 24 20s, 10 50s)
- 8 Loyalty Customer Tokens
- 28 Marker Cubes
- 13 Seasonal Goals (7 Spring/Summer-silver, 6 Fall/Winter-gold)
- 20 After Hours Tiles (4 of each)
- 8 Delivery Trucks
- 4 Signature Price Tokens (double-sided)
- First Player Marker
- 32 Meeples (in four player colors)
- 8 Starting Configuration Cards
- 4 Tutorial Cards
Game Setup
- Place the City Board in the center of the play area.
- Place the Goods, Signature Dishes, & Money in reach of all players. Depending on player count, gather Districts and red Lantern Districts:
- 2 players: 12 Districts (3 of each type), 8 red Lantern Districts (2 of each type)
- 3 players: 16 Districts (4 of each type), 12 red Lantern Districts (3 of each type)
- 4 players: 20 Districts (5 of each type), 16 red Lantern Districts (4 of each type)
- Set 4 of the red Lantern Districts (one of each type) off to the side of the City Board. These tiles will be added to the board later in the game.
- Shuffle the remainder of the district tiles together and place them randomly in the highlighted zone for your player count.
- Shuffle the 6 Spring/Summer Seasonal Goals and randomly place one on the Spring-pink and one on the Summer-green sections of the Seasonal Goals Track. Return the remaining 4 to the box. They will not be used this game. Repeat for the Fall/Winter Seasonal Goals. For your first game we recommend using the "Most Items Sold Tonight" as your Seasonal Goal in Spring and "Money Earned Tonight" as your Seasonal Goal in Summer.
- Take the 16 Seasonal Attractions and place them in their respective columns on the Attractions section of the City Board. The Spring Attractions are in the leftmost column, Summer in the next column, then Fall, & Winter in the rightmost column.
- Sort the Seasonal Customers by type: Spring-pink, Summer-green, Fall-orange & Winter-blue. Shuffle each type separately. Form a single Seasonal Customer deck with the Winter Customers on the bottom, then Fall, Summer, then Spring Customers on the top of the deck. Deal 3 Spring Customers from the deck to show a display of 4 cards total (including the topmost card on the deck). This is the Customer display.
- Place the 24 Regular-blue Stalls into a pile next to the play area front side up. Sort the 20 Signature Stalls by color and by 1, 2, or 3 slots on the tiles. Organize them into a grid with the 1-slot stalls on the top row, 2-slot stalls in the middle, & 3-slot stalls at the bottom. All Stalls should have their front side facing up. This is the Stall display.
Player Setup
Give each player the components below and refer to the diagram for player setup. If this is your first game, set up the components A-H below, then go to the Tutorial Setup.
- A: 1 Player Board
- B: 5 Worker Meeples (in player color)
- C: 3 Chef Meeples (in player color)
- D: 5 After Hours Tiles (1 of each type)
- E: 7 Marker Cubes (in player color)
- F: 1 Signature Price Token
- G: 2 Delivery Trucks
- H: 2 Loyalty Customer Tokens
- I: 2 Starting Configuration Cards (selected randomly)
Each player will now simultaneously choose one of their Starting Configuration Cards and follow the setup instructions on the card.
- Place your last remaining Marker Cube on the turn order track on the City Board according to the number on your Starting Configuration Card, placing the cube of the player with the lowest number first and so on.
- Take this Starting Customer and place in the leftmost spot on the bottom of your Player Board. (Customers are identified by the good icons on the bottom left of the card. You would take the purple Bubble Tea Starting Customer).
- Take this Money from the supply and place them next to your Player Board.
- Take these Stalls from the supply and place on your Player Board following the diagram on the card.
Tutorial Setup
Shuffle the four Tutorial Cards and give one to each player keeping the front of the cards face-up on the table. Return any unused Tutorial Cards to the box. They will not be used this game.
- Place your last remaining Marker Cube on the turn order track on the City Board according to the number on your Tutorial Card, placing the cube of the player with the lowest number, first and so on.
- Take this Starting Customer and place in the leftmost spot on the bottom of your Player Board. (Customers are identified by the Good icons on the bottom left of each Customer. You would take the purple Bubble Tea Starting Customer).
- Take this After Hours Tile and place it in the top slot under "Cold Storage" on your Player Board.
- Take these Goods and Money from the supply and place them next to your Player Board.
- Take these Stalls from the supply and place on your Player Board following the diagram on the card.
- These are your goals to complete by the end of the first Night Phase. If you are unsure how to complete these goals, you may flip the card over for the answers.
Tutorial Overview
The tutorial begins with a Night Phase instead of the usual Day Phase as in a standard game. The purpose of the tutorial is to familiarize players with the Night Phase (the main way to earn points). The Night Phase is a simultaneous phase where players sell their Goods to their Customers to earn money. In the tutorial, each player has specific goals to meet during the first Night Phase shown at the bottom of their Tutorial Card. After this initial Night Phase, the tutorial is over and players will transition to the standard game by starting the spring Day Phase. After reading the Game Overview below, proceed to learning about the Night Phase.
Game Overview
Night Market is turn-based game played over 4 rounds represented by seasons (Spring, Summer, Fall, Winter). Each season has three phases: Day Phase, Night Phase, and Upkeep. During the Day Phase, players will be placing workers to gather goods and take special Lantern actions. Lantern actions allow players to gain more workers, build more market stalls, & attract more customers. During the Night Phase, players will simultaneously place their collected goods in strategic locations within their night market in order to make sales, please their customers, & compete in the public seasonal goal. At the end of each season, players will get to choose a powerful Attraction to be added to their market. At the end of the fourth season, the game ends. The player with the most reputation points from their satisfied customers, upgraded market areas, and money wins!
Day Phase
During the Day Phase players will be placing Worker Meeples onto Districts and Lantern Districts to collect Goods and perform Lantern Actions.
Placing Meeples
Following the turn order track on the City Board, the first player will place a Worker Meeple onto an open District or Lantern District on the City Board and evaluate the tile. Then the next player on the turn order track will do the same until each player has taken five turns and placed all five of their workers. Each player will always place all 5 of their Worker Meeples every season. Meeples may only be placed on District and Lantern Districts that contain no other meeples.
Districts
When you place a worker on a District, take one Good of the matching type (Tofu, Chicken-Steak, Bubble Tea, Sausage) and place it near your Player Board.
Lantern Districts
When you place a worker on a Lantern District (noted by a red or yellow band), pay the cost, if any, and either take 1 Good of the matching type OR perform one Lantern Action. The first Lantern District you go to is free. The second Lantern District you go to will cost you 5 dollars, third 10 dollars, fourth 15 dollars and so on (Chef Meeples count toward this number). You must be able to pay the cost to place a worker. You must pay the cost no matter which action you perform.
Lantern Districts have a red side and a yellow side.
Meeple Combos
When placing workers, combos may be triggered.
Double Worker Combo
When you place a Worker Meeple or Chef Meeple exactly one space away from one or more of your other meeples (orthogonally and/or diagonally) you trigger one or more combos. Take an action on the tile you just placed a meeple on, then for each of your other meeples that are exactly one space away, gain the good on the tile between them.
Example: The green player places a Worker Meeple onto a Lantern District. They have no other workers on Lantern Districts so they don't need to pay any Money. Then they choose to take a Lantern Action instead of the Chicken-Steak. Two combos have been triggered: The meeple they placed is one diagonal space away from their meeple in the top left corner so they receive a Sausage. They are also one orthogonal space away from their meeple in the top right so they receive a tofu. (Note: The green player still collects the tofu even though the yellow player's meeple is already in the district).
Triple Worker Combo
When you place a Worker Meeple or Chef Meeple that creates a line of three of your workers (orthogonally and/or diagonally), a combo is triggered. All three meeples in the line are activated. If the worker you placed is on a Lantern District, you may take a Lantern action or the good as usual. The other meeples in the line that have been activated must collect a good even if they are on a Lantern District.
Example: The blue player places a Worker Meeple onto a Lantern District. This is the second worker they have placed onto a Lantern District this season so they pay 5 dollars. Then they choose to take a Lantern action instead of the Chicken-Steak. Two combos have been triggered. The meeple they placed has created a diagonal line of three so they collect a Sausage and a tofu for their other two meeples in the line. They are also one orthogonal space away from their meeple in the top right so they receive a tofu. (Note: When creating a line longer than 3 meeples, only the closest meeples to the one placed activate in the combo, either the two directly adjacent or the two closest in a line).
Lantern Actions
When you place a Worker Meeple on a Lantern District, choose one of the three lantern actions below.
Hire Chef
To hire a chef, pay the cost under the left-most available Chef Meeple on your Player Board. Then immediately place the Chef Meeple onto any District or Lantern District and take the matching Good along with any other Goods triggered by combos. If placed on a Lantern District pay the cost as usual. Chef Meeples DO NOT perform Lantern Actions. They can only collect Goods. Once placed, the Chef Meeple will now function like a Worker Meeple when making combos.
Build Stalls
To build Stalls, pay the amount shown under the Marker Cube on your Player Board in the "Build Stalls" row, then move the cube one space to the right. Next, choose any two Stalls from the stall display and place each one onto any open space on your Player Board. Once placed, Stalls and Signature Stalls may not be moved. This action may be performed four times total throughout the game gaining the player 8 Stalls.
Attract Customer
To attract a Customer, take any one Customer from the display. Then place that Customer on the left-most available customer space on the bottom of your Player Board, paying the cost that is covered up. If you have no available space, pay 15 dollars, then remove a Customer of your choice and put the new one in its place. If the Customer you removed has been satisfied (see Customer Satisfaction), place them in a score pile near your Player Board for end game scoring. Otherwise, place them in a discard pile. Refill the customer display at the end of your turn.
Night Phase
During the Night Phase, players will be simultaneously placing their Goods onto Stalls, Signature Stalls, and After Hours Tiles. They will also be making and placing Signature Dishes onto their Signature Stalls and selling as many of these and Goods as they are able to their Customers.
Placing Goods
Begin by removing any Goods stored on snowflake spaces on your After Hours Tiles and placing them in your supply of Goods. Before you can sell to your Customers you must place your Goods. Goods may be placed onto regular Stalls, Signature Stalls, & After Hours Tiles. Any Goods not placed at this time, keep to the side of your Player Board.
Stalls
- Regular Stalls are blue and can hold up to 4 Goods of any type as noted by the 4 round spaces on the Stall.
- Signature Stalls come in 4 colors (yellow, green, purple, red) and can hold 1-3 Goods of any type depending on how many spaces are on the Signature Stall. A 2-space Signature Stall (example) can hold any 2 Goods or 1 Mochi Signature Dish & 1 Good. A 3-space Signature Stall (example) can hold any 3 Goods or 1 Soup Dumplings Signature Dish & any 2 Goods.
- After Hours Tiles either hold 1 Good of any type or 1-2 specific Goods, respectively.
Making Signature Dishes
As you place Goods you may be able to create Signature Dishes depending on which Signature Stalls you have in your market. Each Signature Stall shows a number and Good type in the top left corner of the tile. If you have placed at least this number of Goods, you gain a Signature Dish of the type shown.
Example: If there are at least 4 Bubble Tea placed anywhere in your market, you may gain a Mochi from the supply and place it on this space (After Hours Tiles are considered part of your market). Each Signature Stall can only make 1 Signature Dish during a Night Phase. To make a second Mochi during a Night Phase, you would need a second Mochi Signature Stall and 4 more Bubble Tea. Each Good can only be counted once when making Signature Dishes.
Example: If there are at least 2 Stinky Tofu placed anywhere in your market, you may gain a Soup Dumplings from the supply and place it on this space.
Selling Goods & Signature Dishes
After you have placed as many of your Goods and Signature Dishes as you like, you may begin selling. Once you begin selling you may not place any more Goods. You may sell to your Customers in any order but you must finish selling to a Customer before moving on to another one.
Customers will buy specific Goods in specific locations within your night market. Each Customer shows a miniature map of a market along with the Goods and the locations where they will make purchases.
When you sell to a Customer, take the Goods and Signature Dish(es) they purchased off the Stalls in your market, place them on the Customer, take the earned Money from the supply, and move up on the "Signature Dish Popularity" track on your Player Board if you sold a Signature Dish.
Keep the Money earned during the current Night Phase separate from previously earned Money for the purpose of breaking ties when evaluating the Seasonal Goals.
Example Customer: This Customer will buy Chicken-Steak if it is present in your market in the areas shown on the card. They will buy a maximum of 4 Chicken-Steak. They will also buy the Shaved Ice Signature Dish if you have one, as noted in the top right of the card. The Signature Dish can be anywhere in your market and the Customer will buy it. Note: Customers will only buy 1 Good on a Stall even if there are more of the type they want. To sell 4 Chicken-Steak to this Customer you would need a Chicken-Steak on 4 different Stalls in the third column of your market.
Using the Customer above as an example, you would want to place a Chicken-Steak onto these 3 Stalls. Since you have placed at least 3 Chicken-Steak into your market you would now gain the Shaved Ice Signature Dish as shown on your Signature Stall. Take a Shaved Ice from the supply and place it onto your Signature Stall. When you start selling, the Customer above would buy the 3 Chicken-Steak you placed and also the Shaved Ice.
Signature Dish Track
At the beginning of the game, each Signature Dish sold will earn you 10 dollars as shown on your Player Board. Over the course of the game it can increase to 12 and 15 dollars for each Signature Dish sold. See Signature Dish Track Rewards below.
Signature Dish Track Rewards
After selling a Signature Dish and taking Money from the supply, move a Marker Cube in the row of the dish that was sold a number of spaces to the right and collect any reward the cube stops on or moves past. The number of spaces you move a Marker Cube is equal to the number of hearts shown on the Customer near their Signature Dish preference in the top right.
The rewards on the track are numbered 1 through 8:
- Place your Signature Price Token showing "12" over the "10" on the "Price" section of your Player Board. Starting in the next season you will gain 12 dollars for each Signature Dish sold.
- Flip over your Signature Price Token from the "12" to the "15" side. Starting in the next season you will gain 15 dollars for each Signature Dish sold.
- End game points. You will gain the number of points your cube is on at the end of the game.
- Take one of your Loyalty Customer Tokens and place it on any of your Customers immediately or in a future season. That Customer will stay until the end of the game or until you choose you discard them. Take 5 dollars from the supply.
- Same as above but take 10 dollars instead of 5.
- Place your first Delivery Truck on the truck section at the top of your Player Board. During the Upkeep phase you will gain 1 Good of your choice.
- Place your second Delivery Truck on the truck section at the top of your Player Board. During the Upkeep phase you will gain 2 Goods of your choice.
- Upgrade one of your Stalls by flipping it to the opposite side. Upgraded Stalls are worth 1 point at the end of the game.
An upgraded Signature Stall makes it easier to make the Signature Dish. Once upgraded, you only need 2 Bubble Tea to make this Mochi instead of 3.
An upgraded Stall gains you an After Hours Tile noted by the snowflake icon. When you gain an After Hours Tile, choose one of the five you haven't chosen yet and place it under the "Cold Storage" section on your Player Board. It will be available to use during the next Night Phase.
After Hours Tiles
- One After Hours Tile allows you to place 1 Good of any type on this tile during the Night Phase and then sell it for 1 Coin. Thematically you are making a delivery on a scooter to a customer outside the night market.
- The other After Hours Tiles allow you to place the matching Goods on the tile during the Night Phase. If you place on the snowflake space, the Good will be saved (refrigerated) for use during the next Night Phase. You will also gain 1 additional Good of that type during Upkeep. If you place a Good on the scooter space, you will sell that Good for 1 Coin.
Customer Types
- Stinky Tofu Customers will cover a large area of the Market, buying Stinky Tofu from several areas and any Good (including Stinky Tofu) from other areas. They pay a higher price for Stinky Tofu and a reduced price for any other Good. The Signature Dish they prefer is Soup Dumplings. When this Customer buys a Soup Dumplings, Beef Noodle, or both, advance twice on the signature dish track for each dish sold.
- Sausage Customers do not pay much for Sausages but when buying a Signature Dish, the player advances an extra space on the Signature Dish Track. Sausage Customers always want Beef Noodle as their Signature Dish but some will buy Mochi and/or Soup Dumplings as well. When this Customer buys a Beef Noodle, advance twice on the signature dish track.
- Chicken Steak Customers prefer to buy a specific range of Goods. These Customers can have a high or low payout depending on the amount of Goods purchased. If these Customers buy Goods past a certain threshold, they will buy all the goods purchased at the indicated price. The Signature Dish they prefer is Shaved Ice. When this Customer buys a Shaved Ice, Mochi, or both, advance once on the signature dish track for each dish sold.
- Bubble Tea Customers prefer to buy pairs of Goods. These Customers will always buy Bubble Tea, but if they pair the Bubble Tea with a secondary good (either Chicken-Steak or Sausage), the Customers will pay more for the completed pair. These Customers will never buy the secondary Good by itself; it must be paired with a Bubble Tea. Bubble Tea Customers always want Mochi as their Signature Dish, but they may also want Shaved Ice or Beef Noodle (depending on their preferred secondary Good).
Customer Satisfaction
After you have finished selling Goods and Signature Dishes, check to see if you have reached the satisfaction level of any of your Customers. A Customer's satisfaction level is shown by a number of icons on the bottom right of the card. The Customers shown in the Customer Types section all have a satisfaction level of 2. This means if they buy at least 2 Goods during the Night Phase, they are satisfied and will return next season. Flip the Customer over to the opposite side if you meet or exceed their satisfaction level.
Satisfied Customers pay more when buying Goods and are worth points at the end of the game. (Example: the satisfied Customer will now pay 4 dollars for each Stinky Tofu and 3 dollars for any other Good. They are worth 1 reputation point at the end of the game.)
Sold-Out Bonus
After you have finished selling Goods and Signature Dishes, check to see if you have achieved the sold-out bonus. If you have no Goods and/or Signature Dishes left in your market, on After Hours Tiles, or in your personal supply, you gain the sold-out bonus. Move your Marker Cube 1 space down on the "Sold-Out Bonus" track on the bottom right of your Player Board and gain the reward you cover up:
- Upgrade one Stall or Signature Stall (see reward 8 under Signature Dish Track Rewards).
- Advance 1 or 2 spaces, respectively, on any signature dish track and gain the reward if any.
- 2 points at the end of the game.
At this point discard any remaining Goods and/or Signature Dishes from your market and personal supply. Any Goods on a snowflake space in your cold storage area are saved until the next Night Phase.
Seasonal Goals & Attractions
Seasonal Goals are objectives to aim for each season. The player who did the best on the season's goal will get first choice of the Seasonal Attractions.
After all players have finished selling and checking for satisfied Customers and the sold-out bonus, they check the Seasonal Goal for the current season. The player who did the best on the goal will choose a Seasonal Attraction from the current season, place it on any open space in their market, then move their Marker Cube on the turn order track to the lowest position. Then the player who did next best on the Seasonal Goal will do the same thing, choosing an attraction and placing it in their market, moving their Marker Cube one space higher than the previous player. Repeat until all players have a Seasonal Attraction and have positioned their Marker Cube on the turn order track. The last player to choose an attraction will be the start player in the next season.
Ties for the Seasonal Goal are broken in the following order: the player who earned the most Money in the current season, the player who sold the most Goods in the current season, the player further up on the turn order track for the current season.
Seasonal Goals
Note: the goal icons are not in the text layer; the list below follows the printed order, and the silver/gold grouping is inferred from the column layout.
Spring/Summer (silver) goals:
- Sell the most Goods this season.
- Earn the most money this season.
- Sell the most Bubble Tea, Stinky Tofu, Chicken-Steak, or Sausage this season.
- Be the furthest along on the signature dish tracks (combined total of all tracks).
Fall/Winter (gold) goals:
- Earn the most money this season.
- Be the furthest on the Soup Dumplings, Shaved Ice, Beef Noodle, or Mochi signature dish track.
Seasonal Attractions
Each player will get four Seasonal Attractions over the course of the game (one at the end of each season). After choosing your attraction you must place it in any open space in your market, then take any necessary rewards. Once placed, Seasonal Attractions can not be moved.
- Claw Machine. Upgrade one Stall or Signature Stall (see reward 8 under Signature Dish Track Rewards).
- Gate. 2 points at the end of the game.
- Wild Signature Stall. This attraction is a duplicate of one of your other Signature Stalls. Each Night Phase you may duplicate a different Signature Stall.
- Delivery Truck. Gain any one Good at the beginning of each season.
- Claw Machine. Upgrade two Stalls and/or Signature Stalls.
- Delivery Truck. Gain any two Goods at the beginning of each season.
- Claw Machine. Upgrade three Stalls and/or Signature Stalls.
- Wild Signature Stall. This attraction is a duplicate of one of your other Signature Stalls. Each Night Phase you may duplicate a different Signature Stall.
- Delivery Truck. Gain any three Goods at the beginning of each season.
Upkeep
If you have completed the Winter Night Phase, go through step 1 only, then proceed to End Game & Scoring.
If you have completed your first Night Phase in tutorial mode, complete steps 1A, & 4. Then begin your first Day Phase.
Complete steps 1-4 to prepare for next season. Then proceed to the Day Phase of the next season.
1. Customers
A. Remove all Goods and Signature Dishes from your Customers and place the tokens back in the supply.
B. Remove any Customers on your Player Board that do not show the upcoming season and do not have a Loyalty Customer Token. At the end of Spring you may only keep the green Summer customers. At the end of Summer you may only keep the orange Fall Customers. If the Customer has a Loyalty Customer Token they break the rules and may stay indefinitely.
When removing a Customer from your Player Board, place them next to your board if they show a reputation point icon. They will be scored at the end of the game. If they don't show a point icon, place them in a general discard pile out of the game. Then slide any remaining Customers left to fill any open spots.
C. Discard all Customers in the display who show the previous season. Reveal 4 new Customers who show the upcoming season.
2. Worker & Chef Meeples
Remove all your Worker Meeples from the City Board and place them back on your Player Board. Leave your Chef Meeples on the City Board. You may relocate your Chef Meeples to any District or Lantern District occupied by one of your workers or leave them where they are. (Note: Chef Meeples must collect a Good at their location at the end of the Upkeep Phase).
Deciding which Districts to leave your Chef Meeples on can be done simultaneously but if a turn order is needed, go in reverse turn order of the current turn order track.
3. Lantern Districts
A. Flip all Lantern Districts on the City Board to their opposite side.
B. Randomly choose two of the Lantern Districts that were set aside during setup and place them on the City Board. Reference the season chart on the City Board for the location to place them and the color they should be showing (red or yellow).
Example: If you were starting Summer (green) in a 3-player game, you would place two Lantern Districts yellow side up on the "A" locations on the City Board.
4. Goods Income
Collect Goods from the sources below and place them in your supply for use during the next Night Phase.
A. Chef Meeples. Collect 1 Good from each Chef Meeple from the District where they are present.
B. After Hours Tiles. For each Good on the snowflake space of an After Hours Tile, take a matching Good from the supply.
C. Delivery Trucks. If the delivery truck area on your Player Board shows a 1 or 2, collect that many Goods of your choice from the supply.
D. Truck Seasonal Attractions. Take Goods of your choice from the supply equal to the sum of your trucks on Seasonal Attractions.
End Game & Scoring
The game ends after step 1 of the Upkeep phase in the Winter season. Calculate reputation points for the following:
- Every 10 dollars is 1 point.
- Customers who have been flipped and show reputation points. Leave the Customers from the last season on your Player Board.
- Upgraded Stalls and Seasonal Attractions in your market that show reputation points.
- From your Player Board:
- 2 points for placing all Chef Meeples
- 2 points for placing the maximum number of Stalls
- 2 points for having 4 satisfied Customers at the end of the game
- 2 points for maxing out the "Cold Storage" track
- 2 points for maxing out the "Sold-Out Bonus" track
- Points from the signature dish track
The Player with the most reputation points is the winner of Night Market!
Ties are broken by the player who did better on the Winter Seasonal Goal.
Upkeep Summary
- Customers: Remove Customers showing the previous season from Player Boards. Refresh Customer display with upcoming season.
- Worker and Chef Meeples: Take back Worker Meeples. Leave Chef Meeples.
- Lantern Districts: Flip Lantern Districts. Place 2 new Lantern Districts.
- Goods Income: Collect Goods from Chef Meeples, After Hours Tile, Delivery Trucks, Seasonal Attraction Delivery Trucks.
Solo Experience
The overwhelming success of night markets has attracted the attention of an up-and-coming convenience store, AI Mart. Even though convenience stores have the benefit of selling 24-hours a day to as many customers as possible, you now must give it your all to prove the superiority of the traditional night market experience!
Additional Components
- 1 AI Board
- 1 Pricing Board
- 14 AI Action Cards (5 Starting, 4 High Demand, 5 Advanced)
- 1 AI Lantern Action Aid
- 1 Gate Tile
- 6 Lantern Action Tokens (3 'X' tokens, 3 Lantern tokens)
- 4 Top Seller Tokens (1 Bubble Tea, 1 Stinky Tofu, 1 Sausage, 1 Chicken-Steak)
Solo Setup
1. Play Area Setup
Set up the City Board in the same manner as a 2-player game, and then place the Gate Tile in the upper-left corner of the City Board. Set up your Player Board in the same manner as a regular game, randomly choosing 1 Customer Card. Place your Turn Marker in the left-most position, indicating that you will go first in Spring. Place the AI's turn marker after yours.
Customers: Remove one of each Customer card type in each season (for a total of 4 cards per season).
Stalls: Remove one of each 2-slot Stall and 3-slot Stall. Only use four 4-slot Stalls.
Season Goals: Remove Most Money Earned, Most Items Sold, and Most Popularity goals from both sets. Then randomly select the goals for each season from the remainder. Set up the Seasonal Attractions as usual.
2. AI Board Setup
Components: A. 1 AI Board; B. 1 Starting Customer Card (chosen randomly); C. 4 Signature Markers (AI color); D. 1 Lantern Action Marker; E. 5 Worker Meeples (AI color); F. 3 Chef Meeples (AI color); G. 1 AI Lantern Action Aid.
- Place the Pricing Board so it is showing the 5 cheapest prices in each row.
- Shuffle the 6 Starting AI Action Cards and place 5 randomly face down above the card slots on the AI Board.
- Take 3 'X' Lantern Action Tokens and 2 Lantern Action Tokens and flip them face down (to their '?' side). Shuffle them, and place them randomly above each AI Action card.
- Place the remaining 1 Lantern Action Token (to be used in Fall/Winter), 4 Top Seller Tokens and 4 High Demand Action Cards beside the AI board.
AI Turn
On the AI's Turn
The AI resolves its turn as follows:
- Flip the left-most '?' Lantern Action Token:
- A. If it is an 'X', proceed to step 2.
- B. If it is a Lantern, place the AI's worker according to the AI Lantern Action Aid card.
- Flip the AI Action Card beneath the flipped Lantern Action Token and resolve the AI's worker placement.
AI Action Cards
The AI uses the AI Action Cards to search for a non-Lantern district to place its workers. The AI will follow the steps listed on the card in order until it finds a district that satisfies the condition. The AI will start its search from the Gate Token on the City Board, moving vertically to the opposite side of the city until it reaches the end of the column, and then moving to the next column until it finds a district. Here is an example with a Sausage AI Action Card:
- The first district from which the AI will make a combo that earns the AI a Sausage.
- The first district from which the AI will make a combo (that earns any goods).
- The first Sausage District (if no combos are available).
Note: If the AI cannot find a Sausage District after following these 3 steps, the AI will place a worker on the first empty district starting from the Gate Token.
Example 1: The AI starts its search from the Gate Token in the top left corner until it reaches a Chicken Steak District, since it is able to combo with its other worker AND that combo is the first combo that earns the AI a Sausage.
Example 2: This is the AI's first worker placement this season and therefore cannot make any combos. The AI searches for the first non-Lantern Sausage District starting from the Gate Token in the upper left corner. Note: The AI must skip the Sausage Lantern District in the bottom left corner.
AI Lantern Action
When a flipped Lantern Action Token reveals a Lantern icon, the AI searches for an available Lantern District following the AI Lantern Action Aid. This is the only time the AI can land on a Lantern District. The AI resolves its search in the following order:
- Move the Gate Token clockwise to the next corner of the City Board.
- The first Lantern District from which the AI can form a combo.
- The first Lantern District.
- If no Lantern Districts are available (they are all occupied), conduct the AI's turn following the AI Action Card beneath the recently flipped Lantern Action Token.
Example 1: First, the player moves the Gate Token clockwise to the next corner of the City Board. Then, the AI starts its normal search pattern until it reaches the first Lantern District from which it forms a combo with its previously placed worker.
Example 2: The player first moves the Gate Token clockwise and begins the AI search from that corner. Since the AI cannot form a combo from any unoccupied Lantern Districts, the AI places its worker on the first Lantern District it passes.
Performing AI Lantern Actions
When the AI lands on a Lantern District, it performs the action at the current location of its Lantern Action Marker (the AI starts with the marker on the Attract Customers location). After it performs the action, it moves the marker up one space. After the AI has performed the Lantern Action of the top-most space (Hire Chef), the marker returns to the location beside the Attract Customers action to repeat the cycle.
The AI performs its Lantern Actions in the following manner:
Attract Customers. The AI will obtain the Customer whose primary Good/Signature Dish matches that of the current Season Goal. If that Customer has been taken, the AI simply obtains the left most Customer in the display. Like the player, the AI places the Customer in its left-most, empty Customer slot.
Build Stalls. The AI will obtain 1 Stall, with the fewest slots available, that matches the Good/Signature Dish of the current Round goal, and 1 Regular 4-slot Stall. If the given Stall(s) are no longer available, the AI will not obtain the Stall.
Hire Chefs. The AI hires a Chef, placing it in the first non-Lantern district where the AI achieves a combo starting from the Gate Token.
AI Night Phase
1. Selling Goods
When the AI obtains goods, it immediately places the good(s) on the left-most available slot of the good's row on the Pricing Board. The AI does not sell goods individually. Rather, the AI sells all its goods for the total price indicated above its right-most good in each row.
Example: The AI would earn a total of $8 for the 3 Bubble Teas sold. It would also satisfy 1 of its Customer for passing the checkmark icon.
The AI can also unlock additional bonuses the further it has progressed down each row:
- Checkmark, Satisfy Customer: The AI automatically satisfies its right-most customer for each checkmark earned.
- Heart, Increase Popularity: The AI gains 1 Signature Dish Popularity on the track for the respective dish.
Additionally, the AI can earn extra bonuses if it has progressed to the further spot on each row:
- Sell each Bubble Tea in this slot for $10 (any number of times).
- Place a Stinky Tofu in the row with the fewest goods and sell as if it was that good (any number of times).
- Immediately gain $20 (only once).
- Gain 2 popularity on the Signature Popularity track that matches the current round goal Good/Signature Dish (only once).
2. Gain Signature Popularity
The AI does not sell Signature Dishes and thus does not earn any money for Signature Dishes. Consequently, the AI gains different bonuses than the player when advancing on the Signature Popularity tracks:
- Top Seller: Affix token so it is covering the left-most goods slot of the respective row. The AI cannot sell this good for money, but all goods in this row start at a higher price. The token remains in that slot for the rest of the game.
- High Demand Cards: Take the corresponding High Demand card and shuffle it into the AI Action Card deck. These cards will remain a part of the AI Action Card deck for the remainder of the game.
- Increase Pricing: Slide the Pricing Board one additional space to the right at the end of the season.
3. Cleanup
Season Goal: The AI evaluates the seasonal in the same manner as the player. However, the AI will always take the points tile or the upgrade tile, prioritizing which one earns the AI more Points. The AI cannot use Upgrades but instead gains points for each Upgrade icon earned.
Increase Prices: After selling and discarding goods, the AI must move the Pricing Board one space to the right. The AI moves additional spaces for any Increase Pricing bonuses earned from its Signature Dish track.
Move Chefs: Like the player, the AI will move its Chefs at the end of the Season. The AI swaps the Chef meeple with the first worker(s) encountered on a non-Lantern District following the normal search pattern from the current location of the Gate Token. The AI will conduct this search until all Chefs its Chefs have moved. If the first worker encountered is a Chef, then the AI does not move that Chef for that Season.
Shuffle and Deal 5 AI Action Cards: Clear the played AI Action Cards, shuffle them and deal them face down into the 5 slots above the AI Board (be sure to shuffle in any High Demand Cards earned).
Shuffle and Deal 5 Lantern Action Tokens: Clear the flipped Lantern Action Tokens, shuffle them, and place them face down above each AI Action Card.
Starting in Fall: Shuffle in the last remaining Lantern Action Token so there are a total of 6 (you still only place a total of 5 above the AI Action Cards). This will allow the AI to perform up to 3 Lantern Actions in a single season.