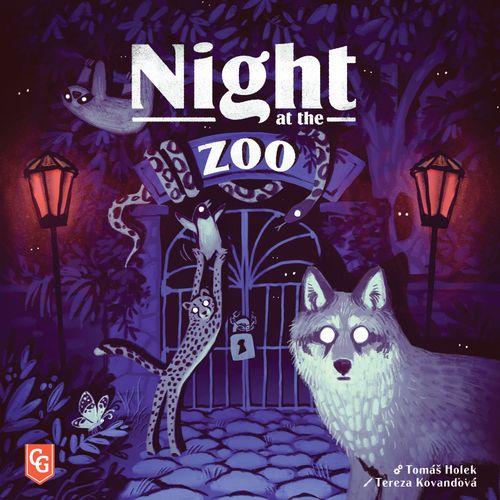
Night at the Zoo
Night at the Zoo Rulebook
Table of Contents
Table of Contents
Components
- 1 Game board
- 4 Player boards
- 6 Animal tiles
- 72 Animal figures (12 figures of each type)
- 48 Pollen tokens
- 75 Action tiles
- 42 Bonus tiles
- 9 Setup tiles
- 1 First Player token
- 6 Solo game tiles
- 4 Score multipliers
- 4 Score trackers
Any components missing or damaged? Contact us at [email protected], and we will send you a replacement free of charge!
Component Description
Animal tile – Shows the animal type, the Victory points scored for animals of this type that are in the Zoo at game end, the level of difficulty, and its special abilities and scoring conditions.
Game board – Shows slots for the drawn Animal tiles, the Draft market, the Leftover zone, the VP score track, endgame scoring reminders, and the Neighborhood.
Player board – Shows the Entrance space, the Zoo, spaces for undiscovered animals, and the Warehouse.
Goal of the Game
The goal of the game is to guide your animals back to the Zoo most effectively. Draft tiles, then place them on your Player board to trigger actions and create a path for your animals. The game ends after 3 rounds (each round with 5 drafts), and the player with the most Victory points (VPs) wins.
Game Setup
- Place the Game board in the center of the table.
- Each player takes a Player board and chooses a color. Place your Player board in front of you and put the Score tracker in your color on the "0" space of the score track on the Game board.
- Sort all Bonus tiles, which have no icons, by terrain type: Grass, Rocks, and Sand. Place each type in a separate face-up supply pile next to the game board.
- Shuffle the Animal tiles and draw 3 at random. Their combined difficulty level, shown by moon icons, must be 6 or higher. If the total is less than 6, reshuffle and draw 3 new Animal tiles. Place the 3 drawn Animal tiles face up in slots A, B, and C above the game board. Each player takes 3 Animal figures of each drawn animal type.
- Shuffle the Action tiles (showing a draft icon on the back) into a face-down pile and place it next to the Game board.
- Draw a number of Action tiles equal to the number of players plus one. Place these tiles face-up on the light blue spaces (top row) of the Game board. This area is called Draft market.
- Each player randomly takes one Setup tile and places their Animal figures on their player boards as shown by their Setup tile as follows:
- Each Animal type corresponds to a letter as determined by the Animal tiles above the game board.
- Place each Animal marked with the letter's icon on the corresponding Entrance space of your player board.
- Place each Animal marked only by a letter on the corresponding Undiscovered Animal space of your player board.
- Example: Place all Sloths on spots for undiscovered animals with the letter A on your Setup tile. The Sloth figure on the left side of the Player board starts on an Entrance space.
- Flip the Setup tile to its back side. You will use this tile to store your animals that have already arrived at your Zoo.
- Choose a first player. This can be the person who most recently saw or helped an animal. If you can't decide, choose randomly. The first player takes the First Player token.
Gameplay
The game is played over 3 rounds. Each round has 5 drafts, each with the following three phases:
- Drafting Phase
- Tile Placement Phase
- Maintenance Phase
1. Drafting Phase
Starting with the first player, in clockwise order, take an Action tile from the top row of the Game board. Once all players take a tile, move the remaining tile to the leftmost empty space in the row below.
About the Tiles
There are two types of tiles:
- Action tiles: Obtained during the Drafting Phase. They may display action or food symbols. Action symbols are resolved during the Tile Placement Phase, while food symbols are used for endgame scoring. If a tile shows two action symbols, you must choose and resolve only one.
- Bonus tiles: Obtained through actions. These tiles do not contain any action symbols, but they can still trigger actions on the Player board.
A tile can show one of three terrain types: Rocks, Grass, or Sand.
2. Tile Placement Phase
Simultaneously, all players use the tile they drafted, and those in their Warehouse, in any order to:
- Place the tile in your Neighborhood; OR
- Place the tile in your Warehouse; OR
- Discard a tile to make a special move.
You don't have to use all tiles in your Warehouse, but you must use the drafted tile. Choose the same or different option for each tile you use. Fully resolve an option before using another tile.
Place the tile in your Neighborhood
Place a tile to cover any empty space (without a tile) of your Neighborhood (the inner 5×5 area of your Player board). Do not cover the Zoo center space.
Immediately resolve the action on the tile you placed and the space you cover, in any order.
Some spaces show a condition: Do not resolve the action of a space showing a condition unless you meet the condition of that space (see Conditions below).
Conditions
- Place a tile with a Discover icon on this space to resolve the space's action.
- Place a tile with terrain matching the condition terrain to resolve the space's action.
- Cover both darker spaces with tiles of the same terrain type to resolve the circled bonus between them once: 5 VPs, 2 movements, or 2 Bonus tiles.
Example: John places a Grass tile. He meets the condition of the selected space, so he is granted an Animal movement action.
Action symbols
-
Discover a new animal: Place one of your undiscovered Animal figures on its Entrance space on your Player board. You may now move it using movement actions.
Example: As shown in the rulebook, a red tile with the Discover icon is placed, and a Wolf is selected to move onto its Entrance space.
-
Take a Bonus tile: Take 1 Bonus tile of any terrain type from the supply. Place it immediately in your Neighborhood or Warehouse, or discard it to make a special move.
Note that a line between actions means you choose ONE side to resolve (not both). For example, if you play this tile, choose to Discover a new animal OR Take a Bonus tile.
-
Immediate Victory points: Gain the number of Victory points shown by the symbol and immediately move your Score tracker forward on the score track.
-
Animal movement: By default, 1 arrow allows you to move 1 Animal figure 1 tile, but many Animals have modified movement. Animals can only move onto orthogonally adjacent (sharing a side) spaces that have a tile, or the Zoo.
Example: By placing a tile with a double arrow, John may perform up to two movements, which he decides to split between Wolf and Cheetah.
-
Zoo space: How to get an animal home safely! If you move an Animal onto your Zoo (the middle space), immediately place it on your Setup tile for endgame scoring. Any unused movement for that animal is lost.
Clarifications: Multiple Animal figures may share the same tile. Animal figures cannot move onto Entrance spaces or spaces for undiscovered animals. You cannot move an animal that is on an undiscovered space! Double arrows may be used as 2 movements by 1 animal OR as 1 movement by 2 animals.
Place the tile in your Warehouse
Place the tile in an empty space of your Warehouse (2 tiles max).
Discard a tile to make a special move
Discard a tile to give 1 movement to all of your animals on terrain matching the terrain of the tile you discarded. Follow normal movement rules.
Example: Charles discards a Grass tile from his Warehouse to make a special move. He moves each of his animals on Grass. His Cheetah moves 2 tiles because of its special movement ability when a tile is discarded. His Sloth goes to sleep, following its own movement ability. His Wolf would also move, but cannot because there is no adjacent tile or Zoo space it can move onto.
3. Maintenance Phase
After all players have finished the Tile Placement Phase, the final phase of the draft begins – the Maintenance Phase.
Refresh the Market
Draw a number of new Action tiles equal to the number of players plus one. Place them face-up in the Draft market spaces on the Game board.
First Player Token
Pass the First Player token to the next player in clockwise order. This player then starts the next draft by choosing an Action tile from the refreshed market.
End of Round Movement
At the end of each round (after the 5th, 10th, and 15th drafts), an end of round movement occurs. This movement is granted to all players and can be resolved simultaneously.
At the end of a round, determine which terrain type appears most frequently in the Leftover zone (bottom row). In case of a tie, the terrain type on the leftmost space among those tied wins the tie. All discovered animals currently standing on that terrain type (including Entrance spaces) perform one movement, following the standard movement rules for each type of moved animal. Then you discard all tiles from the Leftover zone and place them into a stack face-up next to the Game board to count how many rounds have passed.
Example: The tiles in the Leftover zone are Rocks – Sand – Rocks – Sand – Grass. There is a tie between Rocks and Sand (two of each). Since the Rocks tile is the leftmost, it wins the tie, so all animals standing on a Rocks tile perform one movement.
End of the Game
The game ends after the 3rd round. You score points based on the following criteria:
- Animals in the Zoo: You score points for each animal that has successfully reached your Zoo, according to the unique scoring rules shown on its Animal tile.
- Discovered animals: You score 1 VP for each discovered animal that did not reach the Zoo (including animals on the Entrance spaces).
Food Symbols
Each tile may contain one unique food (out of 7). Score points based on the number of different food types you have in your Neighborhood on tiles (0–1 different food symbols score 0 VPs). Tiles with a food symbol in your Warehouse do not count. You score only once for your best set of different symbols:
| Different food symbols | 2 | 3 | 4 | 5 | 6 | 7 |
|---|---|---|---|---|---|---|
| VPs | 6 | 8 | 11 | 16 | 22 | 30 |
To track a score past 50/100, take the matching score multiplier and continue counting from 0.
The player with the most Victory points wins the game! In case of a tie, the player with more animals in their Zoo wins. Still tied? Then all tied players share victory.
Example: At the end of the game, Charles scores 43 VPs for animals that have returned to his Zoo. Then he scores 3 VPs for discovered animals not in his Zoo. Finally he scores 8 VPs for his collection of 3 different food symbols (meat, carrot, and apple) bringing his total score to 54 VPs.
Solo Game
In the solo game, test your skills against a Zookeeper called Leo. Leo drafts tiles from the Draft market just like an opponent would in a 2-player game.
Setup
The setup follows the standard rules, with the following exceptions:
- Prepare only one Player board (for yourself).
- Take the 6 Solo game tiles, shuffle them, and place them face-down next to the game board to form a draw pile.
- While drawing Action tiles, draw 3 of them (as for the 2-player game).
Gameplay
The game starts with the First Player token assigned to Leo. The game then proceeds according to the standard rules. Leo acts as a regular player; however, he does not have a Player board. Between the tile drafts, the First Player token alternates between you and Leo.
Drafting Phase: At the start of the Drafting Phase, reveal the top tile of the Solo pile. The first player takes their turn first.
On his turn, Leo selects the tile from the position marked with 1 on the currently revealed Solo Game tile. If there is no tile on that position, Leo takes the tile from position 2. Remove the tile chosen by Leo from the game.
Example: Leo is playing first. He prioritizes the leftmost tile. He takes it and removes it from the game. Ann chooses to take the rightmost tile. The middle tile is then moved to the Leftover zone.
You take your turn as in a multiplayer game. After you and Leo both take a tile, move the remaining tile to the Leftover zone under the Draft market, placing it on the leftmost empty space.
Reshuffling Solo Game tiles: After resolving the draft shown on a Solo Game tile, if it shows the Shuffle symbol, take all Solo Game tiles (both revealed and the remaining ones in the draw pile), shuffle them together, and form a new draw pile.
Continue playing in this manner until the game ends.
Scoring
Calculate your Victory points according to the standard rules. Then, compare your score with the table below to determine your animal skills.
| Score | Animal skill |
|---|---|
| 90+ | Zoo Ghost |
| 80–89 | Runaway Tiger |
| 65–79 | Clever Chimp |
| 50–64 | Sneaky Weasel |
| 0–49 | Lost Lemur |
Special Animal Rules
No animal can move onto an empty space (one without a tile), except the Zoo. You must always follow this rule despite the following unique animal movement rules.
Penguin (5)
Each movement, choose an orthogonal direction and move the Penguin as far as possible in that straight line. When the Penguin reaches the Zoo, it immediately stops its movement there.
At game end, score 5 VPs for each Penguin at the Zoo (on your Setup tile).
Cheetah (6)
When performing a special move (by discarding a tile), the Cheetah can move one additional tile.
At game end, score 6 VPs for each Cheetah at the Zoo (on your Setup tile).
Wolf
When moving, the Wolf performs the default 1-space move.
At the end of the game, score VPs based on how many Wolves have reached your Zoo (on your Setup tile): 7 VPs for one Wolf, 16 VPs for two Wolves, and 27 VPs for three Wolves.
Snake (10)
For each movement, choose one option:
- Move the Snake 1 space in the direction it is facing (you cannot turn left or right during its movement); OR
- Change the Snake to face any orthogonal direction.
The Snake starts the game facing the Neighborhood when discovered.
At game end, score 10 VPs for each Snake at the Zoo (on your Setup tile).
Butterfly
During the Game Setup, place all Pollen tokens in the supply.
During a special move only (when discarding a tile), place a Pollen token on each Butterfly that moved, up to a maximum of 4 Pollen per figure. If a Butterfly cannot move to a new space, it does not gain Pollen.
At game end, score VPs for each Butterfly at the Zoo (on your Setup tile) based on how much Pollen it has: 0 VP for 0 Pollen, 5 VPs for 1 Pollen, 7 VPs for 2 Pollen, 9 VPs for 3 Pollen, and 11 VPs for 4 Pollen.
Sloth (15)
For each movement, the Sloth resolves differently if it is asleep (lying down) or awake.
- If awake: Move it 1 space, then it falls asleep (place it lying down "sleeping").
- If asleep: The Sloth awakens (place the figure upright). The Sloth doesn't move in this case.
At the start of the game, all Sloths start awake.
At game end, score 15 VPs for each Sloth at the Zoo (on your Setup tile).