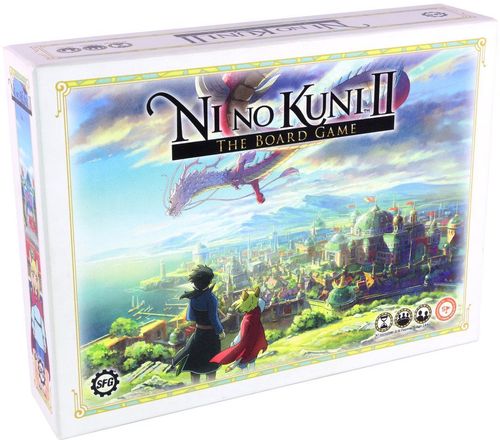
Ni no Kuni II: The Board Game
Ni no Kuni II: The Board Game Rulebook
Table of Contents
Table of Contents
Game Contents
This box contains everything needed to play Ni no Kuni II: The Board Game with one to four players.
Characters
Each character has a card with their rules, and a miniature to represent them in the game. In addition, your party will contain Higgledies, little elementals that will help you out on your quests. These are represented by tokens.
- 4 Character miniatures
- 4 Character cards
- 6 Higgledy tokens
Kingdom Cards
These cards represent the buildings you'll construct around your castle to create the most beautiful kingdom possible. Basic Kingdom cards are the very first buildings you can create, while Upgraded Kingdom cards are built over Basic Kingdom cards to improve and enhance them.
- 19 Basic Kingdom cards
- 9 Upgraded Kingdom cards
Quest Cards
These cards detail the quests you must complete to gather the resources you'll need to build your kingdom.
- 40 Quest cards
Enemy Cards
Your quests won't always be easy! Cruel enemies and bandits will try to thwart you at every turn. And watch out for the scheming boss, who'll be doing their best to destroy Evermore!
- 34 Enemy cards
- 2 Boss cards
Playing Board
This board shows your castle of Evermore at the centre, surrounded by open places to build. It also shows where the Quest cards will appear.
- 1 Evermore board
Tokens
Use these tokens to track the resources you gain from quests as well as any consumables you find on your travels. These tokens also help you keep track of the current turn.
- 10 Experience tokens
- 10 Kingsguilder tokens
- 10 Supply tokens
- 5 Angel's Tears
- 5 Soreaway Sweets
- 5 Turn tokens
Choosing a Character
There are four characters to choose from when playing Ni no Kuni II: The Board Game: Evan Tildrum, Roland Crane, Tani, and Bracken Meadows. Each character has three Fight values that reflect their skills, plus a special rule they can use every turn.
Each player should pick one of the character cards, take the miniature that goes with it, and put both in front of them. In a one- or two-player game, each player should put two Higgledy tokens with their character. In a three- or four-player game, each player should put one Higgledy token with their character. All models and Higgledies make up your party.
Character Card (example: Tani)
- Name: This is the character's name.
- Physical Fight Value: This is how many dice you'll roll when this character fights a Physical type enemy during a quest.
- Ranged Fight Value: This is how many dice you'll roll when this character fights a Ranged type enemy during a quest.
- Magical Fight Value: This is how many dice you'll roll when this character fights a Magical type enemy during a quest.
- Special Rule: This shows each character's unique special ability.
Example card text: Tani, Sky Pirate: Once per turn Tani can add 1 Supply or Kingsguilder to the inventory.
Higgledy / Player Card Reverse
The back of your player card has an icon reference, as well as being your Higgledy's stat card.
- Name: Higgledies don't have individual names in this game, but feel free to name your Higgledies whatever you want!
- Physical Fight Value: This is how many dice you'll roll when this Higgledy fights a Physical type enemy during a quest.
- Ranged Fight Value: This is how many dice you'll roll when this Higgledy fights a Ranged type enemy during a quest.
- Magical Fight Value: This is how many dice you'll roll when this Higgledy fights a Magical type enemy during a quest.
Rules Reference on the card: Attack & Defence (Melee, Ranged, Magic). Consumables: Soreaway Sweets: Add 1 die to a single dice roll before you roll it. Angel's Tear: Reroll 1 die on a single dice roll. Resources: Experience, Kingsguilder, Supply. Higgledies have Fight values of 1 Physical, 1 Ranged and 1 Magical.
Setup
Place the Evermore board in the middle of the playing area. The Kingdom cards with the purple border are Upgraded cards, place these to one side in a separate deck from the Basic Kingdom cards.
Then separate out the Quest deck, the Basic Kingdom deck, and the Enemies deck. Shuffle each of these decks one by one and place them face down next to the Evermore board.
In a single-player game, draw four Quest cards from the top of the Quest deck, flip them over, and place them in any four of the Quest slots on the board. After this, draw four Enemy cards from the top of the Enemy deck and place one of them face up on each face-up Quest card. In a two-player game, draw and place six Quest and six Enemy cards. In a three- or four-player game, draw and place eight Quest and eight Enemy cards.
Next draw five cards from the top of the Kingdom deck and place them face up next to the deck where all players can see them.
Then separate out each type of token and set them to one side of the playing area, in easy reach of all players. Place the turn tokens in the middle of the board, ordered from 1-5, with 1 at the top.
Choose which boss you want to fight - Doloran or The Horned One - and place that Boss card face up above the board.
Player Area
Each player should have their chosen Character card, model, and Higgledies in front of them.
The playing group will need space for their inventory, where they'll keep the Resource and Consumable tokens they accumulate during the game.
(Setup diagram layout: Upgraded Kingdom Cards, Quest Deck, Enemy Deck, Basic Kingdom Deck, Basic Kingdom Cards, Tokens, Boss Card above the Evermore Board, Player Area.)
Consumables
You'll gain consumables by defeating enemies and completing quests. These consumables can be used during quests to gain a one-off benefit to help make things a little easier! When you gain consumables, put them into the inventory with your resources. The two consumables in the game have the following effects:
- Soreaway Sweet: Add 1 die to a single dice roll before you roll it.
- Angel's Tear: Reroll 1 die on a single dice roll.
To use a consumable, remove the appropriate token from the inventory and apply the effect. Only one consumable can be used on each die roll.
Dice
Ni No Kuni 2: The Board Game uses normal six-sided dice. Whenever you have to roll dice, simply gather the correct number of dice together and roll them. Add up the number of pips shown on the top faces of the dice to get the result of the roll. Rolling a symbol on the dice in this set is treated as rolling a 6.
The Turn
This game takes place over five turns. Each turn is broken down into three phases.
- Adventure: Players choose which quests to go on and which enemies to fight.
- Resource: Players gain resources from the quests they've completed.
- Kingdom: Players spend resources in the inventory to buy Kingdom cards and build the kingdom of Evermore.
Adventure Phase
In the Adventure Phase, players place their characters on quests in order to complete them and gain their resources. Each quest has an enemy that must be defeated before the quest can be completed.
In order to complete a quest, you have to place at least as many party members on the Quest card as there are slots on it. You can, however, place more than the minimum required party members on the quest if you want.
In the example, the Quest card has two slots, which means that for the players to complete the quest, at least two party members (characters, Higgledies, or any combination of the two) need to be placed on the card.
Resources
Each Quest card provides a number of resources, which can be one of three types: Experience, Kingsguilder, Supply.
You'll spend these resources to purchase Kingdom cards and build the kingdom of Evermore.
Quest Card
- Name: This is the name of the quest.
- Resources: These are the resources players will gain if they complete this quest.
- Slots: These slots show the minimum number of models which have to be placed on this quest in order to complete it. This will be 1, 2, or 3.
- Special Rule: Some quests have special rules which impact how you interact with them.
(Example card: High Speed Hot Streaks! - "When you complete this quest, you may move one model from this quest to an adjacent quest.")
Enemies
- Name: This is the name of the enemy.
- Fight Value: This shows the type and number of the Fight value the players will need to beat in order to defeat this enemy.
- Influence Value: This shows how much Influence the enemy adds to the number needed to beat the boss if the enemy is still alive at the end of the game.
- Special Rule: Some enemies have special rules which may impact your interactions with them.
- Resources gained: You may also gain additional resources or consumables if you defeat certain enemies, so be sure to read this section of the card carefully! Any extra resources or consumables will be shown here.
(Example card: Abnormal ... "While this monster is on a quest, every Kingdom card costs +1 Supply." The icon is not legible in the source text.)
Fighting
Party members that are on a quest must fight the enemy on that quest. To fight the enemy, look at the type and number of their Fight value. Then look at the party members on that quest, add up their Fight values of that type, and roll that number of dice. If the total of the die roll is higher than the enemy's Fight value, then the enemy is defeated and the quest has been completed! Remove the Enemy card and place it in a discard pile next to the Enemy deck. If the total of the die roll is equal to or lower than the enemy's Fight value, the players lose and must remove their models from the Quest card. Fight and resolve Quests one at a time before moving on to the next one.
Once you've fought enemies on every quest where you've placed party members, move on to the Resource Phase.
Example: The Helena the Hearty Hunter quest has two slots for models, so Roland and one Higgledy have been placed on the card. The enemy on this quest is a Grimchilla Pranger, which has a Fight value type of Physical and a value of 9. To fight this enemy, Roland and the Higgledy add together their Physical Fight values - 3 for Roland and 1 for the Higgledy. This gives a total of 4. Roland's player now rolls 4 dice and gets a total of 11, which is higher than the Grimchilla Pranger's Fight value, so Roland's party defeats the enemy! The enemy is placed in the discard pile and Roland and the Higgledy can now complete the Helena the Hearty Hunter quest.
Resource Phase
In the Resource Phase, players claim the resources on the quests they've completed. Then complete the following steps.
- Move all party members back in front of their player.
- Pick up every quest card that was completed in the previous phase and look at the resources listed on them. Take that many tokens of each type and place them in the inventory.
- Put the cards next to the Quest deck in a discard pile.
- Take any resources listed on defeated enemy cards.
- Use any player abilities which can modify the resources, and take any resources you get from previously built Kingdom cards.
Example: The Helena the Hearty Hunter quest provides 1 Experience resource and 3 Kingsguilder resources, so once it's completed, the players take one Experience token and three Kingsguilder tokens and add them to the inventory.
Kingdom Phase
In the Kingdom Phase, you can use your hard-won resources to expand the kingdom of Evermore. To buy a Kingdom card, remove the resources shown on the Kingdom card you want to buy from the inventory. Then place the Kingdom card in an open slot on the board.
Kingdom Card
- Name: This is the name of the card.
- Resource Cost: This is how many resources this card costs to build. For example, the Mining Camp shown has a cost of 2 Experience, 2 Kingsguilders, and 3 Supply.
- Influence Value: This is how much Influence the card provides to help you win the game.
- Upgrade Symbol: This shows that this card can be upgraded, and what card it can be upgraded with.
- Effect: Any effect the building has will be shown here. This might be additional resources each turn, or a buff to your characters.
(Example card: Sleepy Ranch - "Provides 1 Supply each turn.")
Once you've selected the Kingdom cards you want and added them to your kingdom, draw an equal number of Kingdom cards from the deck and replace them so there are five face-up Kingdom cards again.
If all the slots on the board are full, you can still add to your kingdom, but you'll have to discard a card from the board first. Choose buildings to be removed for expansion carefully - you never know what you might need later!
Upgraded Kingdom Cards
Some Basic Buildings in your kingdom can be expanded upon and improved as your kingdom grows. During the Kingdom Phase you can always build the five Basic Kingdom cards which are laid out. There are also nine Upgraded Kingdom cards which stay in a separate deck, and are always available to build. Each of these cards is an upgrade for an existing Basic Kingdom card. You must have built the corresponding Basic Kingdom card before building the Upgraded card. Upgraded cards have symbols which correspond to the basic card you have to replace with them.
Buy the Upgraded Kingdom card exactly as you would buy a Basic Kingdom card, but instead of placing it on a new space on the board, replace the appropriate Basic Kingdom card with the Upgraded version. Discard the replaced card.
Upgrade pairs (Basic card -> Upgraded card):
- Evermore Barracks -> Evermore Elite Barracks
- Institute of Innovation -> Institute of Higher Innovation
- Basic Training Ground -> Officer's Training Ground
- Verdant Farm -> Full Fledged Farm
- Sleepy Ranch -> Raucous Ranch
- Humble Bazaar -> Wondrous Bazaar
- Mining Camp No.1 -> Mining Camp No.5
- Fresh Fish Market -> Fabulous Fish Market
- Budding Lumberyard -> Towering Lumberyard
End of the Turn
After completing all three phases, you've finished the first turn and need to refresh the board for the next turn.
For each quest you completed that turn, draw a Quest card from the Quest deck and place that card face up on the empty slot on the board. Then, just like during setup, draw the same number of enemies from the Enemy deck and place them over the newly drawn quests.
Then draw Kingdom cards from the Kingdom deck equal to the number of Basic Kingdom cards you bought and place them face up next to the other Kingdom cards.
After all this, there should be the same number of Quest and Enemy cards around the board as after setup at the start of the game, and 5 Kingdom cards available to buy.
At the end of each turn, remove the top turn token from the middle of the board to help you keep track of which turn you're on.
The game goes on for five turns in total. Once you've completed the first turn, you should have a good grasp on how the game flows. Repeat what you did in the first turn for each of the following turns.
Bosses
This game has two bosses, Doloran and The Horned One. During setup, pick which boss you want to play against during this game and place that boss's card face up above the board.
Each boss has a series of Influence numbers. The number you use in each game depends on the number of players in the game. Bosses also have a special rule that modifies how you play the game.
Doloran
Doloran is a man on a mission - a mission to bring down the burgeoning kingdom of Evermore by any means necessary! No tactic is beneath him in his efforts to destroy everything you're building.
Doloran is more underhanded than The Horned One, relying on twisting tricks and cunning ruses to thwart your rise to power. If Doloran is the boss you're fighting, when you replace completed Quest cards at the end of each turn, you must place them face down. Place an Enemy card over the new Quest cards as normal. You must guess which quests are the most valuable, think on your feet, and build on opportunities to triumph!
The Horned One
The Horned One is a brutal, powerful foe. A twisted spirit, it uses Doloran as a pawn, but ultimately it's not afraid to come after you itself! Crushing Evermore and taking your kingdom for its own is its only purpose.
The Horned One will interfere more directly than Doloran. If The Horned One is the boss you're fighting, before replacing completed Quest cards at the end of each turn except the fifth, remove the Quest card on the board that has the highest remaining total resources. (If there's a tie, choose which one you want to remove.) The Enemy card on the removed Quest card is discarded. Replace the removed Quest card at the same time and in the same way you replace the completed Quest cards. The Horned One doesn't have this special effect on the last turn of the game.
Winning the Game
At the end of the fifth turn, the game ends. Don't replace Kingdom and Quest cards.
Look at the card for the boss you're fighting and note the Influence number next to the number of players that are in your game. Remove all of the enemy cards from the board and add their Influence values to the boss's Influence number to get the total Enemy Influence.
Next, add up the Influence scores on all the Kingdom cards on the board to get your Kingdom Influence score. If the Kingdom Influence score is higher than the Enemy Influence score, then you've won the game! Evermore is firmly established in the hearts and minds of the world, and the evil powers of your enemies cannot topple it.
If the Kingdom Influence score is equal to or lower than the Enemy Influence score, then you couldn't build your kingdom fast enough to compete with the dark powers unleashed by the Horned One. Evermore falls, just like your previous kingdom did, and once more you must seek a new home.
Example: Jack and Abby are playing a two-player game against The Horned One. They claimed two Quest cards on the final turn, so there are four Enemy cards left on the board. They add the Influence scores on the four Enemy cards (0, 1, 1, and 2) to The Horned One's two-player Influence score (11). This gives a total Enemy Influence score of 15. They then add up the Influence scores on all the cards they built in their kingdom (7, 4, 3, 1, and 1) to get a total score of 16. Their kingdom has a higher Influence score than the enemy score, so they win the game!
Gameplay Reference
Resources
Each Quest card provides a number of resources, which you'll spend to purchase Kingdom cards: Experience, Kingsguilders, Supplies.
Fight Values
This shows the type and number of dice a party member rolls, or the Fight value the players will need to beat in order to defeat this enemy: Physical Fight value, Ranged Fight value, Magical Fight value.
Influence
At the end of the game, add up the Influence scores on all the Kingdom cards on the board to get your Kingdom Influence score. Then remove all the enemy cards from the board and add their Influence values to the boss's Influence number to get the total Enemy Influence. If the Kingdom Influence score is higher than the Enemy Influence score, then you've won the game!
Consumables
These consumables can be used during quests to gain a one-off benefit. Only one consumable can be used on each die roll.
- Soreaway Sweet: Add 1 die to a single dice roll before you roll it.
- Angel's Tear: Reroll 1 die on a single dice roll.