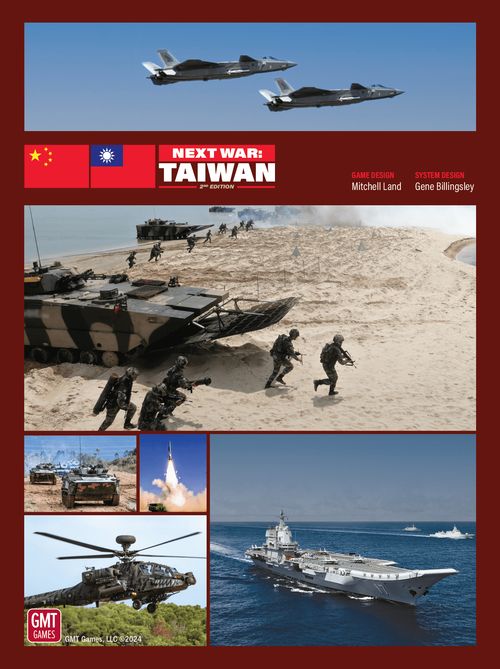
Next War: Taiwan
Next War: Taiwan Rulebook
Table of Contents
Table of Contents
- 1.0 Introduction
- 2.0 Terrain
- 3.0 Units
- 4.0 Weather Conditions
- 5.0 Naval Rules
- 6.0 Movement & Stacking
- 7.0 Combat
- 8.0 Reinforcements
- 9.0 Subordination
- 10.0 Supply & Isolation
- 11.0 SOF Detection
- 12.0 Detection
- 13.0 Air Power
- 14.0 Hardened Targets
- 15.0 Theater-Specific Weapons
- 16.0 UN Resolution Veto
- 17.0 Optional Rules
- 18.0 SCENARIOS
- 19.0 Order of Battle – Air Units in the Advanced Game
- 20.0 Integrating Next War: Korea
- 21.0 Examples of Play
- 21.1 Attacks Against Boxes [GSR 6.5.3]
- 21.2 Initiative [5.0]
- 21.3 Clearing Operations [8.4.1]
- 21.4 Naval Movement [8.5.6]
- 21.5 Destruction of Installations [12.1.2]
- 21.6 Air Superiority [22.10]
- 21.7 Wild Weasel [23.3]
- 21.8 Interception [24.4]
- 21.9 Air Attacks [23.4.1]
- 21.10 Tactical Support [23.5]
- 21.13 UN Resolutions [28.0]
- Counter Notes
1.0 Introduction
These rules extend both the Standard and Advanced Game rules and add other rules particular to the situation at Taiwan. They also cover how to combine Next War: Taiwan with Next War: Korea. Unless otherwise specified, Game Specific Rules take precedence over any other rules of that type with which they may conflict. Most rules are tagged [Standard] or [Advanced] where necessary. Any rule tagged [NWK] should be applied only to Next War: Korea.
1.1 Components
Next War: Taiwan contains:
- One map
- 3 counter sheets
- 1 Standard & Advanced Game Rules booklet
- 1 Game Specific Rules booklet
- 9 charts
- One 10-sided die
1.2 Nationality Colors
Counters of the various nationalities are colored as follows:
- Republic of China – Taiwan (ROC)
- People's Republic of China (PRC)
- Japan (JPN)
- U.S. Marine Corps (USMC)
- U.S. Air Force (USAF)
- U.S. Navy (USN)
- U.S. Army (U.S.A)
- Commonwealth (CW)
- Philippines (PH)
- Vietnam (VN)
- Malaysia (MA)
1.3 Replacement Counters [NWK]
There are six replacement counters for Next War: Korea: four AH-64s and two F-35As. The AH-64s are optional and replace the ROK's AH-64 counters. The F-35s likewise replace all four of the ROK's F-4Ds. The Allied player may choose the optional counters, and doing so gives the opponent 10 VP per option chosen.
1.3.1 U.S. Order of Battle [NWK]
We have also included a fully updated U.S. order of battle. Owners of Next War: Korea should use this game's counters in either the standalone or the combined game [but see special rule 17.11].
1.4 Restrictions on U.S. Ground Units
The only U.S. ground Formations used in Next War: Taiwan are the USMC (Marines), the 82nd Airborne Division, and the 101st Air Assault Division, as well as the 4th/25th Airborne BCT. Ignore references to other U.S. Army units on the Reinforcement Chart.
1.5 Allied and non-Allied
The rules refer frequently to the terms Allied and non-Allied. The Allies are the Republic of China (Taiwan) and any nation aligned with it (the United States and Japan and, at times, Vietnam and the Philippines). The non-Allies are the People's Republic of China (China) and any nation aligned with it (usually Malaysia). When the rules specify a particular nation, that rule applies only to that nation.
2.0 Terrain
[8.0 Standard/Advanced]
2.1 Beaches [8.3.1.7]
Beaches usable for Amphibious Assault are marked in light blue. Open-sea hexes that AMPH units may use to conduct an Amphibious Assault are outlined in blue.
2.2 Installations
The following are considered Installations: Ports, Airbases (but not Airfields), and Factories [GSR 2.5].
2.3 Friendly Map Edge
Because of the nature of the terrain, "friendly map edge" for retreat purposes needs a special definition:
- ROC: toward any friendly Supply Source, City, or Installation hex.
- All others: toward any friendly Supply Source on Taiwan.
2.4 The Hsuehshan Tunnel
This "snow mountain" tunnel passes between hexes 4711 and 4712; it has a -2 DRM for all Interdiction attempts against either of these hexes.
2.5 Formosa Plastics Industrial Complex
This complex is located in hex 2807. Defenders in this hex receive a column shift on the CRT and ignore retreat results. In addition, both players must conduct a Clearing Operation to take control of this hex from the opponent.
2.6 Amphibious Assault of Taiwan and Port Restrictions
There are many possible invasion zones marked on the map [GSR 2.1]. The PRC may always use the Western Ports and Beach zones, but may use the Eastern Ports and Beach zones only in turns in which it has Air Supremacy. Similarly, the Allies may always use the Eastern Ports and Beach zones, while they may use the Western Ports and Beach zones only in turns in which they have Air Supremacy.
2.6.1 Beach Locations
The four invasion zones running from near Kaohsiung (1513) north along the coast to Hsinchu (4207) are considered Western. The other three are considered Eastern.
2.6.2 Port Locations
The following ports are considered Eastern: Taitung (2118), Hualien (3616), Su-ao (4415), and Toucheng (4713). Keelung (5011) is the only Northern Port. All other Ports are considered Western.
2.7 Port Limits on Sea Transport
The Sea Transport Unloading Limitations [8.5.7.4] for certain Ports on Taiwan are higher than the standard (2 Stacking Points), as follows:
- Kaohsiung (1513) is 4
- Shengang (3306) is 3
- Keelung (5011) is 3
These are marked on the map with a white number next to the Port.
2.8 Unplayable Hexes
Some hexes on the map contain areas colored dark blue [4808, 4315, 3716, 1121, 1021 & 4006]. These hexes are considered inaccessible to ground units. Hex 4809 is a special case. Units are considered to be in the playable portion of the hex. They may move and attack through the unplayable part using the secondary road. They may not move directly between 4809 and 4709.
3.0 Units
[2.0 Standard/Advanced]
3.1 "Marine" Units [8.5.8]
All USMC units and any Marine, Naval Infantry, or Amphibious unit are considered Marine and may conduct Amphibious Assaults and/or Naval Landings.
3.1.1 PRC Mechanized Infantry Divisions
[Standard/Advanced]
These units may embark only on an AMPH in the PRC Box.
3.2 U.S. Marines
[Advanced]
The I Marine Expeditionary Force (I MEF), when available, generally appears at different times and includes 4 additional HQ units: I MEB, 11 MEU, 13 MEU & 15 MEU. These HQs are considered subordinate to the I MEF HQ. Thus, when a Marine unit arrives, it will be organized by assigning it to one of I MEF's subordinate HQs.
These HQs function as normal HQs in all respects except that they may use their combat capability only once during a turn (i.e., they are rotated 180° when used). These HQs also have only a single strength level.
Once I MEF arrives on the map, the U.S. player must remove a subordinate HQ from the map when it is within range of the I MEF HQ and can trace an LOC to it.
After removal, the player may also bring it back onto the map during an Amphibious Assault involving U.S. Marines. In this case, simply place the HQ in a hex containing a unit that made a successful assault. HQs are removed whenever they still meet the requirements noted above.
Note: The MEUs are Battalion Landing Force HQs. They exist, in game turn terms, to give the Marines HQ support while they are conducting amphibious landings, either when the main HQ (MEF) is not present, or as a raid or diversion.
3.2.1 Subordination
Marine units are considered subordinate to any Marine HQ.
3.2.2 Task Forces
USMC forces in the game are represented as battalions so that the USMC player can use them as flexibly as desired. In operational reality, however, the Marines are often grouped as "task forces." The two USMC Task Force counters, I TF and III TF, are provided to represent this capability. They may be formed in the Reorganization Phase when USMC units in the following configurations are stacked together:
- I TF: 2 infantry battalions, one armor battalion, one LAR battalion.
- III TF: 3 infantry battalions and one LAR battalion.
Once a TF is formed, it may not be split back into its constituent units.
3.3 Airborne Units
The following are considered Airborne units: the brigades and HQ of the U.S. 82nd, the 4th BCT (4/25) of the U.S. 25th, the Japanese 1st Airborne Brigade, the brigades and HQ of the PRC's 3 airborne divisions (43rd, 44th, 45th), and the three Malaysian airborne battalions (8 Para, 9 Para, 17 Para).
3.4 Naval Air Units
[Advanced]
For attack rules and charts, all USN air units and the PRC's J-15s [GSR 17.12] are considered Naval Air Units.
3.4.1 U.S. Carrier Air Wings
[Advanced]
A U.S. carrier air wing is composed of 1 x F/A-18E, 2 x F/A-18F, and 1 x EA-18G [GSR 17.5].
3.5 U.S. Army Brigade Combat Teams (BCT)
[Advanced]
Per BCT organizational doctrine, U.S. Army units are considered subordinate to any U.S. Army HQ and, in turn, to any U.S. Army HQ that can act as the Formation HQ, for any purpose, for any U.S. Army unit regardless of the color within the unit-type box.
4.0 Weather Conditions
[4.0 Standard/Advanced]
4.1 Seasons
Before a scenario begins, the PRC player may choose the Season in which the game starts. Seasonal choices affect the die roll for Weather Conditions [4.0].
Weather Condition DRM:
- Summer: -1
- Spring/Autumn: 0
- Winter: +1
4.2 Effects of Weather Conditions
Weather Conditions affect only the Taiwan Strait Sea Box, the Taiwan Strait Inshore Box, and the map area itself. If Weather Conditions are Storm, both sides may retreat their naval units to a friendly port on Taiwan or to any friendly and adjacent Sea Box. PRC naval units may retreat to the PRC Box. Allied naval units in an affected area may retreat to Japan [GSR 17.14/.15].
5.0 Naval Rules
[7.0 Standard/17.0 Advanced]
The game has a much more complete version of the naval rules, which includes considerably greater detail regarding movement into some Sea and Inshore Boxes. The following rules are in addition to, and at times replace, the standard series rules.
5.1 Naval Display
The Naval Display depicts a portion of the Pacific Ocean. This display contains four types of locations: Boxes, Sea Boxes, Inshore Boxes, and Land Areas.
Boxes abstractly represent national areas of the main participants. Sea Boxes are represented as areas or zones, and may contain Inshore Boxes and/or Land Areas.
Inshore Boxes are square and represent the coastline of specific parts of the Sea Box. Land Areas are hexagonal and represent an abstraction of some significant piece of land (or group of islands) that is not depicted with an actual map.
5.1.1 Boxes
Boxes always contain Ports and, in most cases, Airbases.
Boxes have special rules [GSR 6.5]. Ports and Airbases in Boxes may be attacked (follow special rule 6.5.3).
Exception: The U.S. Box may not be attacked.
The PRC and Japan Boxes on the main map represent the same locations as those shown on the Naval Display.
5.1.2 Sea Boxes/Areas
Sea Boxes on the Naval Display are represented as areas. All rules that apply to Sea Boxes also apply to those areas.
5.1.3 Inshore Boxes
Inshore Boxes are contained within Sea Boxes and, unless otherwise specified, are accessible only after first entering the associated Sea Box [8.5.6]. Naval units in an Inshore Box may give Tactical Support to ground Combat occurring in the associated Land Area (see below) when no enemy Naval units are present. Marine ground units in a Land Area [GSR 5.1.4] may embark on AMPH in the associated Inshore Box. Two boxes are included to relieve counter density; they are the same location. The Taiwan Strait Inshore Boxes on the main map and on the Naval Display represent the same location.
5.1.4 Land Areas
Note: Penghu also represents the islands of Quemoy (Kinmen) and Matsu; the latter was declared strategically indefensible by then-Senator Kennedy in the 1960 presidential debates against Vice President Nixon.
Some Sea Boxes also contain Land Areas depicted with single two-colored hexes. Although there are two halves to the hex, this is only to ease counter placement; both halves represent a single location.
Ground units may use Air or Sea Transport or Airmobile Movement to enter or leave a friendly-controlled Land Area. One may enter enemy-controlled Land Areas by Airmobile Movement, with the restrictions noted below. One may enter Land Areas by Amphibious Assault from the associated Inshore Box under the normal rules. The special capabilities for Land Areas are as follows.
5.1.4.1 Senkakus: Airmobile Movement and Helicopter Attacks/Tactical Support are permitted to/from the Japan Box and to/from any hex on or north of the 41xx hex row on Taiwan.
5.1.4.2 Paracels: Airmobile Movement and Helicopter Attacks/Tactical Support are permitted to/from the PRC Box and Vietnam.
5.1.4.3 Spratlys: Airmobile Movement and Helicopter Attacks/Tactical Support are permitted to/from the Malaysia, Vietnam, and Philippines Boxes.
5.1.4.4 Penghu: Airmobile Movement and Helicopter Attacks/Tactical Support are permitted to/from the PRC Box and any hex on Taiwan. Airmobile Movement/Paratroop Drop is permitted from the PRC Box, the Japan Box, and Taiwan.
Note: Airmobile/Helicopter movement is shown on the Naval Display, as is Airmobile Movement to Penghu.
5.1.4.5 Stacking in Land Areas: Both sides may stack in the same Land Area. The Stacking Limit, per side, is three Stacking Points.
Note: Remember that this is, in general, an abstraction representing the presence of many battalions or even companies and platoons scattered across many islands in an area.
5.1.4.6 Combat in Land Areas: When opposing sides occupy a Land Area (via Airmobile or Airborne Movement or Amphibious Assault), combat is conducted normally in each appropriate Combat Segment, except that Retreat results are ignored. Treat the terrain as Difficult. Opposing units may coexist in the Land Area until one side is eliminated or retreats.
5.1.4.7 Air Defense Fire: Use the ADF values of any friendly Naval Unit in the associated Inshore Box whenever ADF is usable. For Penghu or Senkakus, if a friendly HQ is present, the Allies may use the ADF values of Taiwan or Japan, whichever is appropriate. If none of the above conditions apply, use the Local ADF values.
5.1.4.8 Control of Land Areas: To control a Land Area, one must successfully conduct a Clearing Operation [8.4.1]. A Clearing marker is drawn at random and placed when a player's forces are the only ones occupying the Land Area. If the enemy later places units in the Land Area, the Clearing marker is removed. The Minimum Safe Stacking Points are (2).
Exception: The Allies need not conduct a Clearing Operation to retake Penghu or the Senkakus.
5.1.4.8.1 Effects of Control of Land Areas: When a Land Area is controlled by the enemy, entering its Sea Box, Inshore Box, or Open Sea hexes is always considered Contested Sea Movement and suffers an additional +1 DRM to movement.
Exception: Penghu affects Sea Transport only when moving between the PRC Box and Taiwan. It affects Naval Movement in the Sea/Inshore Boxes as above.
5.1.4.9 Land Areas and Supply: Units in a Land Area are considered in supply if the associated Inshore Box is friendly controlled or Contested.
5.2 Sea Control
[7.2]
"Maritime strategy normally consists of two main phases. The first, and it must be the first, is to establish control of the sea…"
— Rear Admiral J.C. Wylie
Note: This game's premise requires a small variation to the normal Sea Control rules.
5.2.1 Inshore Boxes
If the associated Sea Box is controlled, roll for Sea Control for any Inshore Box that is Contested or controlled by the side that does not control the associated Sea Box.
5.2.2 Sea Boxes
If there are Sea Boxes controlled by the Allies, roll for any Sea Box controlled by the PRC or Contested that is connected to them. If the Northern Approaches, Marianas, or Ryukyu Islands zones are controlled by the PRC or Contested, always roll for these. In all cases, always roll for the Spratly Islands Sea Box. If any Sea Box becomes or remains controlled by the PRC, roll for any adjacent Sea Box that was controlled by the Allies before the Sea Control phase.
The PRC player may influence Sea Control die rolls by spending Cruise Missile Points [GSR 15.1.3].
Note: The intent is to represent variation in control and the importance of both the presence of naval units and the ability of air units and cruise missiles to influence control.
Example: In GT2, the PRC player rolls for the Taiwan Strait Inshore Box (since it controls the associated Sea Box and generated a Contested result in GT1). The Allied player (who took control of the Northern Approaches and the Marianas in GT1) rolls for the Central Approaches, the Philippine Sea, and the Ryukyu Islands. The Ryukyus become Allied-controlled with the help of the Japanese SAG, the Philippine Sea remains Contested, but the Central Approaches become PRC-controlled. For this last result, the PRC player rolls for the adjacent Marianas and Northern Approaches. Finally, the players roll for the Spratlys Sea Box.
5.2.2.1 Japanese Intervention: If Japan intervenes at Level 2 or higher, the Sea of Japan and East Sea Inshore Sea Boxes are considered permanently Allied Controlled and are not rolled for during the Sea Control phase.
5.3 PRC Movement Restrictions
PRC Naval units may move only in the East China Sea, Taiwan Strait, South China Sea, Ryukyu Islands, and Spratly Islands Sea Boxes (including the associated Inshore Boxes) and all open-sea hexes on the Operational Map. If the PRC takes control of the Senkakus Land Area, it may move into the Central Approaches Sea Box.
Note: The PRC must still demonstrate a full at-sea resupply capability, so it is limited to areas from which it can be easily supplied.
5.4 Return of Naval Units [27.4]
As an exception, ROC, VN, MA & PH Naval Units are permanently removed when they suffer an "X" result.
6.0 Movement & Stacking
[8.0 Standard/25.0 Advanced]
6.1 Multinational Stacking
Ground units of different nationalities stacked together reduce their Efficiency Rating by one for all purposes.
Note: These units do not train together and their commands are not integrated; we do not believe they would have the ability to work effectively together within the same command network.
6.2 Air Transport Limitations
In any permitted Movement Segment, the Allies may air-transport 3 Stacking Points; the PRC only 1.
6.3 Airborne Movement Limitations
The PRC player may use Airborne Movement for 4 Stacking Points of Airborne units [GSR 3.3] in each available Movement Segment. The Allied player may drop any of his U.S., Japanese, or Commonwealth Airborne units in each available Movement Segment. All other nations may use Airborne Movement for only one battalion per Game Turn.
6.4 Sea Transport Limitations
The PRC player may sea-transport 5 Stacking Points of units per available Movement Segment. The Allied player may sea-transport 3 Stacking Points of units per available Movement Segment.
The Allied player's limit is increased as indicated by the arrival of reinforcements for each scenario. Vietnam, Malaysia, and the Philippines may each sea-transport one Stacking Point per Game Turn.
6.5 The Boxes
There are two Boxes shown on the main map: PRC and Japan. These correspond to the same areas on the Naval Display. In addition, there are Boxes on the Naval Display for the U.S., Malaysia, Vietnam, and the Philippines. The entire lettered area is considered to be the Box in all cases.
6.5.1 PRC Box
Only PRC units are allowed in the PRC Box. The Box may also be used to receive and hold reinforcements. Ground units must use some other mode of movement to enter or leave the Box, i.e., Air or Sea Transport, Airborne Movement, etc.
6.5.1.1 Airmobile Movement & Attack Helicopters: To conduct Airmobile Movement or Attack Helicopter Tactical Support from the PRC Box to Taiwan, count hexes from the western map edge, with the moving units having already spent 8 movement hexes, i.e., with 16 movement hexes remaining.
Attack Helicopters may Rebase from the PRC Box to a friendly Airbase/Airfield on Taiwan and vice versa.
6.5.1.2 Naval Units: Naval Units may move from the PRC Box directly into any open-sea hex, friendly-controlled Port on Taiwan, the Taiwan Strait Inshore Box, or the East China Sea, Taiwan Strait, or South China Sea Sea Boxes, and vice versa. Note that this counts as "one Sea Box" for the unit's movement limitations.
6.5.1.3 Destruction of Ports in the PRC Box: Whenever a Destroyed result is obtained against a Port in the PRC Box, the PRC player must remove one AMPH from the game and place it on the General Track two turns later. In addition, the PRC's Sea Transport limit is reduced by one for as long as such a unit remains on the General Track. If all of the PRC's AMPH have been converted to SAG [7.3.2.1], only the Sea Transport limit is reduced, for two turns.
Note: This means Sea Transport returns to normal once the AMPH return. This effect represents the diversion of naval units to other ports along the coast.
6.5.2 Japan Box and Base Boxes [NWK]
Only U.S. and Japanese units may enter the Japan Box.
6.5.2.1 Japanese Activation: The first Cruise Missile or Air Attack against the Japan Box/Base immediately brings Japan into the war at Intervention Level 4 (and increases the U.S. Intervention Level by 2).
6.5.2.2 Naval Units: Units may enter the Northern Approaches, Ryukyus, Sea of Japan, or East China Sea Sea Boxes from the Japan Box. They may also move directly to or from the Senkakus, Yellow Sea, or East Sea Inshore Box.
6.5.2.3 Attack Helicopters: Helicopters in the Japan Box may Rebase to any friendly-controlled Airfield/Airbase on Taiwan.
6.5.3 Attacks Against Installations in Boxes [Advanced]
The Airbase and Port icons in a Box represent a series of such installations. As such, they may be the target of Attacks and SOF Raids and receive Attack markers. After an Attack/Raid against such an Installation, place the appropriate Strike markers. If a Destroyed result is obtained from the Attack/Raid, simply record the VP and roll for Collateral Damage when appropriate; further attacks may be conducted.
Once the Collateral Damage Phase is resolved, for every 3 points of Attack damage, record the appropriate Victory Points and remove the Attack damage markers from the Box in question. Reduce Strike markers during the Reorganization Phase.
6.5.3.1 Attacks Against Airbases: An Airbase in a Box is considered to be in Difficult terrain. For every Destroyed result obtained per GSR 6.5.3 above, advance the appropriate Airbase Captured/Destroyed marker on the General Track. Strike markers in a Box count for the Air Superiority Sortie Phase of the Air/Naval Phase.
6.5.3.2 Attacks Against Ports: A Port in a Box is considered to be in Open terrain. For every Destroyed result accumulated, the appropriate Submarine or ASW Threat Level is reduced by one in the Reinforcement/Replacement Phase.
6.6 Clearing Operations in the Republic of China
[9.0 Standard/Advanced]
Owing to the ROC's numerous reserve and paramilitary organizations, all Clearing Operations suffer an additional "-1" DRM.
7.0 Combat
[9.0 Standard/Advanced]
7.1 Mixed Nationalities in Combat
When units of different nationalities attack together, they suffer a +1 DRM for every nationality beyond the first.
8.0 Reinforcements
[10.0 Standard/Advanced]
8.1 Standard Game
Both sides receive additional units or other points, i.e., Airmobile Points, as indicated by each scenario. Unless otherwise specified, these Reinforcement rules also apply to the Advanced Game.
8.1.1 Reinforcements
In the game, Reinforcements allow for the activation of ROC reserves and for the introduction of U.S. and other forces into the theater. The Allied Reinforcement Charts and the Allied General Reinforcement Chart group these reinforcements into "groups" that arrive as indicated by the scenario. Also specified are Replacements, Supply, Airmobile Points, Cruise Missile Points, and others.
Note that Reinforcements are listed for the turn on which they arrive. In other words, if a given reinforcement is listed for GT2, then in the Reinforcement Phase of GT2 it is taken from the counter mix and placed on the map, or the point markers are increased, per the rules below.
8.1.2 ROC Reserves
ROC Reserve units are marked with an "R" in the upper right corner of the counter. Except in the "Extended Reinforcements" scenario, when some of these units start on the map, they arrive in the Reinforcement/Replacement Phase of the game turn indicated by the scenario. They are chosen at random as indicated on the scenario-specific reinforcement card and are placed in any friendly-controlled Urban, City, or Installation hex within their Corps' Placement Area [GSR 18.1.2.1] or, in the Advanced Game, within range of and with an LOC to their higher HQ. The hex may not be in an EZOC. If none of these hexes is available, the unit may not be placed and is considered eliminated for all game purposes.
8.1.3 PRC Reinforcements
PRC reinforcements are placed in the PRC Box (or Base Box for Air Units) as indicated by each scenario. If the PRC had any level of Air Superiority in the turn in which they arrive, PRC Attack Helicopters may be placed in any friendly-controlled Airbase/Airfield on Taiwan; otherwise, they are placed in the PRC Box and may later Rebase to any friendly-controlled Airbase/Airfield on Taiwan.
8.1.4 Allied Reinforcements
Reinforcements may arrive in the ROC by air or by sea.
8.1.4.1 USMC Arrival: USMC units that arrive during the Reinforcement Phase are placed in the U.S. Box or Indian Ocean Box [8.1.4.4] (see the Naval Display). The Allied player may voluntarily delay them for one turn and instead have them arrive in the Japan Box.
Exception: Reinforcements marked with a "B" may go to the Japan Box in the turn of their arrival.
Units placed before the start of the game, i.e., in the Tactical Surprise or Extended Reinforcements scenarios, may be placed in the Japan Box.
8.1.4.2 U.S. Army Arrival [Standard]: All U.S. Army units arrive in the ROC by Air Transport. Units are placed at any friendly Airbase (not Airfield) not in an EZOC (Exception: delays for Storms). If no Airbases are available, these reinforcements may instead arrive in Japan or be delayed one turn, at the player's discretion. U.S. units arriving by Air Transport do not count against the Allied Air Transport Limit.
Helicopter units may arrive at any friendly Airbase/Airfield. Units placed before the start of the game, i.e., in the Tactical Surprise or Extended Reinforcements scenarios, may be placed in the Japan Box.
This rule is superseded by GSR 8.2.2 in the Advanced Game.
8.1.4.3 USN Arrival: Reinforcing U.S. Naval Units arrive in the U.S. Box or the Indian Ocean Box [8.1.4.4]. The Allied player may voluntarily delay them for one turn and instead have them arrive in the Japan Box.
Units placed before the start of the game, i.e., in the Tactical Surprise or Extended Reinforcements scenarios, may be placed in the Japan Box or the Sea of Japan, Northern Approaches, or Central Approaches Sea Boxes.
8.1.4.4 Arrival in the Indian Ocean Box: The Allied player rolls a die for arriving USN CVNBG, SAG, AMPH, and USMC units that are part of the same Reinforcement group. If the die roll is lower than the R# number listed on the Allied General Reinforcement Chart, they arrive in the Indian Ocean Box instead of the U.S. Box.
Exception: USMC Reinforcements marked with a "B" always arrive in the Japan Box.
8.2 Advanced Game
These reinforcement rules are in addition to those for Reserves and Reinforcements from the Standard Game.
8.2.1 Reinforcing Air Units
During the Reinforcement and Replacement Phase of each game turn, a player may receive reinforcing air units. Place these reinforcements as follows.
8.2.1.1 USAF Arrival: USAF units may reinforce in the ROC if the Allies had any level of Air Superiority for that turn. If they do not, then air units may be placed in Japan, or in the Philippines if the Philippines has entered the war [GSR 18.3.3.3]. In either case, they are placed in the "Ready" box.
8.2.1.2 Arrival of USMC Air Units: USMC Air Force units are placed the same way as Air Force units, except that USMC AV-8Bs (or F-35Bs [GSR 17.4]) may opt to arrive in a U.S. Carrier box if a CVN BG is also arriving. If they are based on a CVN, they may operate from that carrier as usual, and may later Rebase to an available Base Box.
8.2.1.3 USN Air Unit Arrival: U.S. Carrier Air Wings [GSR 3.4] are placed in the appropriately numbered carrier box, or on the CVN BG unit if the carrier is in a Box.
8.2.1.4 Japanese Air Units: If Japan has intervened at Level 2 or higher [GSR 18.3.2.3], and an Air Unit arrives as a reinforcement, the Allied player may place that unit type at full strength (if it was eliminated) or bring that unit type up to full strength (if it was damaged).
8.2.2 U.S. Army Reinforcements
[Advanced: supersedes GSR 8.1.4.2]
If the Allied player has had any level of Air Superiority during the turn, these units may arrive at any friendly-controlled Airfield (Helicopters only) or Airbase (any unit) in the ROC that is not Destroyed nor carries a Strike 2 marker. If the PRC has had any level of Air Superiority, or no Airfield/Airbase is available, they instead arrive in the Japan Box [GSR 6.5.2]. U.S. units arriving by Air Transport do not count against the Allied Air Transport Limit and must suffer ADF only if, in the Advanced Game, they arrive at any hex within 2 of an enemy HQ.
8.3 Effects of Weather Conditions
In "Storm" turns no unit may arrive in the ROC. Units that must go to the ROC may instead arrive in Japan or, for those able to do so, in the U.S. Box.
8.4 Replacement of Air Units and Helicopters
[27.9.3.1]
The procedure may be used only for the following unit types:
- U.S.: F-15C, F-15E, F-16, A-10, F-18, and AH-64.
- PRC: J-7, J-8, J-10, Q-5, H-6, & Zhi-10.
9.0 Subordination
[18.1 Advanced]
9.1 HQ
This rule establishes the subordination of the higher HQ units: the I MEB, 11 MEU, 13 MEU & 15 MEU USMC are subordinate to I MEF.
10.0 Supply & Isolation
[19.0 Advanced]
Owing to the nature of the theater, special rules are needed to determine supply and isolation. Units in Boxes are always in supply and are never Isolated.
10.1 Ports as Supply Sources
In general, Ports are Supply Sources for both players' units. They have a Supply Range of 6 MP [19.1]. To be used as Supply Sources, they must be friendly controlled and may not be in an EZOC. The rules below define which Ports may be used under certain circumstances, based on Air Superiority Level and control of the Taiwan Strait Inshore Box.
10.2 Establishing a PRC Supply Depot
To establish a Supply Depot on Taiwan, the PRC must first Sea Transport 2 MSU from the PRC Box to Taiwan. Once on the island, during any Supply Phase in which both MSU are in the same hex, the PRC may spend 2 Supply Points and replace the MSU with a Supply Depot. This is the only method of placing a PRC Supply Depot.
10.3 PRC Supply LOC
The Western and Northern Ports and Beachheads are Supply Sources. The Eastern Ports and Beachheads may be Supply Sources if the PRC player has Air Supremacy. In addition, once a Supply Depot has been established, it functions as a Supply Source as long as a 6 MP LOC can be traced to it from an available friendly Port [see GSR 2.6.2 for Port Locations].
In all cases above, the Taiwan Strait Inshore Box must not be Allied controlled for these Supply Sources to function.
10.4 Allied Supply Sources
ROC forces trace supply normally. Non-ROC Allied forces trace supply as follows.
10.4.1 Beachheads and Ports
Friendly Eastern and Northern Ports and Beachheads are Supply Sources as long as the Taiwan Strait Inshore Box is Allied controlled or Contested. Friendly Western Ports and Beachheads are Supply Sources if the Taiwan Strait Inshore Box is Allied controlled [see GSR 2.6.2 for Port Locations].
In both cases above, the Allies must have some level of Air Superiority.
10.4.2 U.S. MSU and Supply Depots
Instead of receiving a Supply Point from the Allied General Reinforcement Chart, the Allied player may create a U.S. MSU at a Beachhead. Thereafter, the MSU follows all normal Supply rules [19.4]. The MSU and any U.S. Supply Depot created from it may supply only U.S. units.
10.4.3 Supply from USMC HQ
A USMC HQ in any coastal hex may be considered a Supply Source only for USMC units.
10.5 Isolation
There is no Supreme HQ in the game.
10.5.1 Isolation for the PRC
If the Taiwan Strait Inshore Box is Allied controlled, all PRC units are Isolated regardless of their ability to trace supply to a Supply Source.
10.5.2 Isolation in Land Areas
A unit in a Land Area is never Isolated.
11.0 SOF Detection
[20.0 Advanced]
When a unit is successfully detected by Special Forces, place a "Target -2" marker on it if it is a U.S. or Commonwealth SOF mission [GSR 17.13]; otherwise, place a "Target -1" marker.
12.0 Detection
[21.0 Advanced]
12.1 Electronic Detection
Both players may make Electronic Detection attempts [21.3] against specific enemy HQ during the Electronic Detection Phase. Intervention Levels and weather conditions determine the total number of attempts per side [see the Electronic Detection Chart].
Exception: The Philippines, Vietnam, and Malaysia add zero attempts for their respective sides.
Example: The PRC has 3 attempts. If the U.S. has intervened at Level +1, the Allies have 4 attempts. If Japan has also intervened, the Allies have 5 attempts.
12.2 Detection by Air Reconnaissance
Until the PRC captures an Airbase/Airfield, it traces distance from the map edge having already spent 8 hexes of range, i.e., if the Air Superiority Level is Contested, the PRC does not arrive on the map. If it had the Advantage, then it is able to use 7 of its 15 hexes of range from the map edge hexes.
Note: The landing force's second priority should be the capture of an Airbase/Airfield, if possible intact.
13.0 Air Power
[6.0 Standard/22.0 Advanced]
13.1 All-Weather Capability
[Standard]
When determining Air Points in the Standard Game, both sides are considered to have All-Weather Capability (i.e., for Overcast or Storm Weather Conditions).
13.2 Air Unit Range
[Advanced]
Each air unit's range (the letter in the upper left of the counter: S = Short, M = Medium, L = Long, U = Unlimited) determines the distance an air unit, across Sea Boxes, can travel to conduct missions from its Base Box:
- S: 0 (same area only)
- M: 1
- L: 2
- U: Unlimited
Exception: Short-range air units may conduct missions between the PRC Box and the Taiwan Strait Inshore Box, Penghu, the ROC Base Box, and any hex on the main map.
Unlimited-range air units may conduct missions anywhere.
13.2.1 Air Superiority
Air units may conduct Air Superiority missions as long as their range lets them reach the South China Sea, Taiwan Strait, or East China Sea Sea Boxes.
13.2.2 Interception/Escort
Air Units may Intercept and/or Escort only those missions for which they have the appropriate range, i.e., a Medium-range unit from Japan is able to Escort and/or Intercept in the Sea of Japan, East China Sea, Ryukyu Islands, or Northern Approaches.
13.3 Attack Coordination
[Advanced]
U.S. units may freely coordinate missions with any nationality. No other Allied coordination is permitted. Units starting in different "Ready" boxes MAY be part of the same Attack or Tactical Support mission, provided all units have the Range to do so. No non-Allied coordination is permitted.
13.4 Air Unit Basing Limits
[Advanced]
Unless otherwise specified, units may base only in their own country. Air units have limits on where they may base, as follows:
- USAF units may base in Japan or the ROC.
- USN air units may base only in U.S. Carrier boxes.
- USMC air units may base in Japan, the ROC, or U.S. Carrier boxes.
- Commonwealth units [GSR 17.13] may base in Japan or the ROC.
- If the Philippines enters the war, USAF, USMC, and CW Air Units may base there.
13.4.1 SOP Designated Bases
[Advanced]
For Phases 1a and 1b of the Air/Naval Phase, the designated bases are those in the ROC and any Airbase in Boxes with Strike or Destroyed markers.
13.4.2 Lack of Airbases/Airfields
[Advanced]
If, through a run of bad luck, there are no friendly-controlled, non-Destroyed Airbases or Airfields in the ROC, all Air Units currently based in the ROC must immediately Rebase to Japan (U.S. units may Rebase to the Philippines if it has entered the war). ROC Air Units may conduct missions from Japan only if Japan has intervened at Level +2. Units may Rebase to the ROC as soon as Airbases/Airfields become available.
13.5 PRC Tactical Support Values
[Advanced]
Some PRC air units have a Tactical Support Value of ½. These units may conduct Tactical Support missions even though this value is less than 1; this means it takes two such units to produce one DRM (assuming no effect from ADF).
13.6 Air Defenses in Boxes
The various Boxes, except for the PRC, have permanent, non-reducible Air Defenses as shown in the Box.
14.0 Hardened Targets
[23.0 Advanced]
These represent targets, in addition to those identified by the series rules [23.4.3], that are underground, specially protected and reinforced, or simply hard to hit.
The ROC has two Hardened Airbases: 2219 and 3616. These also give a +1 DRM on the Collateral Damage Table.
15.0 Theater-Specific Weapons
[26.0 Cruise Missiles - Advanced]
15.1 U.S. and Chinese Cruise Missiles
The U.S. and PRC have a certain number of Cruise Missile Points at the start of the scenario and/or receive them as reinforcements. Use the appropriate marker to track them on the General Track. Whenever a Cruise Missile attack is conducted, reduce the appropriate Cruise Missile points by one. Once all points are used, no further Cruise Missile attacks may be conducted until more points arrive as reinforcements.
Each U.S. and PRC CV/CVN or SAG unit not in Port has the capacity to launch one Cruise Missile Attack per Attack Phase.
Each U.S. AMPH unit in an open-sea hex on the map has the capacity to launch one Cruise Missile Attack per game turn.
Each H-6, H-10, Tu-22, B-52, B-1, and B-2 unit in the game has the capacity to launch one Cruise Missile Attack per game turn. Move the unit immediately to the Flown box (or Recovery [17.3]); no Interception or ADF is permitted.
Note: These attacks represent roughly 10 missiles, each individually programmed to take a different route to the target. They fly at very low altitude with terrain-following capability, which gives them high protection from detection or attack.
Given the relative scarcity of AWACS and of aircraft equipped with suitable missiles, it is difficult to imagine a situation where even half the missiles might fail to reach the target. Therefore, in game terms, Cruise Missiles are virtually invulnerable except to CIWS. The adverse DRM assigned to non-U.S. attacks represents both onboard targeting systems and, depending on the target, superior detection and missile-defense capability. Cruise Missiles and Theater Weapons are generally interchangeable and represent a wide variety of weapons, from ballistic missiles to cruise missiles to other types of surface-to-surface missiles.
15.1.1 Allocation
The attacking player announces all targets, reduces the points on the General Track, then resolves the Attacks using the Cruise Missile column on the Attack Table with the appropriate DRM. Players must assign all Cruise Missile Attacks before resolving them.
15.1.1.1 PRC Cruise Missile Range: The PRC may allocate Cruise Missile Attacks only against targets in the East China Sea, Taiwan Strait, South China Sea, Spratlys, Central Approaches, and Ryukyu Sea Boxes (and associated Inshore Boxes and open-sea hexes).
If the PRC Controls the Senkakus Land Area, this range increases to include the Philippine Sea, Marianas, and Northern Approaches Sea Boxes and the Guam Base Box.
15.1.2 Site Hunting [NWK]
The PRC has ground-based Theater Weapons, which allows the Allies to attack the PRC's Cruise Missile marker per 26.1.3.
15.1.3 PRC A2/AD (Anti-Access/Area Denial)
The PRC player may choose to spend 1 CM Point to give an additional DRM to a given die roll for Contested Sea Movement or Sea Control.
15.1.3.1 For Naval Movement: When the Allies attempt to move a Naval Unit or use Sea Transport, the PRC player may reduce the CM Points marker by one. If he does, he obtains two effects: (1) the movement attempt is automatically resolved as Contested Sea Movement, and (2) the Allies suffer an additional +1 DRM to the Contested Sea Movement die roll. This can only affect movement into or out of areas within Cruise Missile range [15.1.1.1].
15.1.3.2 For Sea Control: The PRC player may spend a CM Point to influence the Sea Control DRM (both Sea Boxes and associated Inshore Boxes). For each die roll for which a CM Point is spent, apply a DRM as follows:
- -2 in the East China Sea, Taiwan Strait, South China Sea.
- -1 in the Northern Approaches, Central Approaches, Ryukyu Islands, and Spratly Islands.
- If the Senkakus Land Area is PRC controlled, -2 in the Northern Approaches, Central Approaches, or Ryukyu Islands.
16.0 UN Resolution Veto
[28.0 Advanced]
The PRC may always veto Resolutions. If that player chooses not to, then the Allies may veto the Resolution regardless of the U.S. Intervention Level [see also GSR 17.16].
17.0 Optional Rules
17.1 F-22 Deployment [NWK]
[Advanced; +10 VP to the non-Ally]
The F-22 Raptor counters included in the game are marked as optional units. For availability and operational reasons, the Air Force decided it would mix F-22 elements with F-15s as a force-multiplier mechanism. The F-15 counters show enhanced capability in the non-optional version. Recent information, however, indicates the USAF may deploy F-22s as full operational squadrons. This optional rule allows the Allies to deploy entire squadrons of F-22s.
Replace the non-optional F-15 counters (5**-0-0) with the optional ones (5*-0-0) and include the F-22 counters. These arrive as reinforcements when the first reinforcing F-15 arrives. In the Tactical Surprise and Extended Mobilization scenarios, both have already arrived.
17.2 Early Deployment [NWK]
[Advanced; +10 VP to the non-Ally]
The USAF has shown a tendency, within Pacific strategy, to deploy F-22s and B-2s early. The Allied player may use this option to start with one B-2 (and one F-22 if using GSR 17.1) in Japan in all scenarios. Ignore the "R" reinforcement row for the B-2A on the Allied Reinforcement Chart. When using this rule together with GSR 17.3, the B-2 bases per that option but starts in the Ready box.
17.3 U.S. Long-Range Bombers
[Advanced; +15 VP to the non-Ally]
To more accurately represent the availability and operational cycle of these air units, the Allied player may receive all long-range bombers (3 x B-52, 4 if playing with GSR 17.11, 2 x B-2, and 2 x B-1) in the Recovery area of the U.S./Guam Base Box during the Reinforcement Phase of GT1. They may not Rebase. Ignore any reference to these Air Unit types on the Allied Reinforcement Chart.
After a mission, if the air unit has not Aborted, place it in the "Recovery" area rather than "Flown" of the Base Box [22.7].
17.4 USMC F-35B [NWK]
[Advanced; +7 VP to the non-Ally]
With this option, the Allied player may replace both USMC AV-8Bs with USMC F-35s.
17.5 USN F-35C
[Advanced; +10 VP to the non-Ally]
With this option, the Allied player may replace any carrier F/A-18E/F with one of the optional F-35Cs.
17.6 Optional Wild Weasels
17.6.1 USMC AH-1Z
[Advanced; +3 VP to the non-Ally]
USMC AH-1Zs can carry ARM (Anti-Radiation Missiles). The Allied player may use this option to allow AH-1Zs to conduct Wild Weasel Attacks against the Detection and SAM tables. They may be used for this only if the PRC has an HQ in any hex on Taiwan, or if the AMPH they are based on is in the eastern (shaded) hex row of the map or in the Taiwan Strait Inshore Box.
17.6.2 U.S. F-22 and F-35
[Advanced]
U.S. F-22s and F-35s are considered Wild Weasels when conducting Attacks against the Air Defense Table.
17.7 Tactical Support Restrictions
[Advanced; +10 VP to the Ally]
Both players may agree that Tactical Support missions [23.5] may be conducted only by air, helicopter, and naval units of the same nationality as at least one of the attacking and/or defending units.
17.7.1 PRC Restrictions
[Advanced; +5 VP to the non-Ally]
As an additional optional rule (usable alone or together with the above), both players may agree that the PRC may commit only a single air unit to CS (Tactical Support) missions.
17.8 Japanese Ground Forces
[Standard/Advanced; +3 VP to the non-Ally]
While Japanese ground forces are listed on the Allied Reinforcement Chart as part of the International Posture Matrix, they are available only if the Allied player requests this rule. When Japanese ground forces become available, they are placed in the Japan Box.
Exception: They are automatically available if Japan is attacked with Cruise Missiles [GSR 6.5.2.1] or Air Attack, or if the Senkakus are invaded. In this game this applies only to the Japanese Airborne Brigade; no other Japanese units are available. Unless Japan is attacked as described above, Japanese ground units may be located only in the Japan Box or the Senkakus Land Area.
17.9 Refugees
[Standard/Advanced]
If both players agree to use this rule, the road network in the ROC is clogged by the population fleeing combat zones in and around the landing sites. The effects are as follows:
- GT 1: Secondary Roads are treated as the hex's terrain. Primary Roads are treated as Secondary. Highways are treated as Primary.
- GT 2 & 3: Secondary Roads are normal. Primary Roads are treated as Secondary. Highways function normally.
- GT 4: All roads are normal.
17.10 U.S. Preparedness
[Standard/Advanced]
If both players agree, reduce the Efficiency Rating of U.S. Army units by one for the entire scenario.
Note: This represents U.S. forces having focused on COIN (counterinsurgency) operations at the expense of force readiness and training.
17.11 Reversal of U.S. Defense Budget Cuts
[Advanced; +10 VP to the non-Ally]
Congress reverses the Budget Control Act of 2011, which cut the national defense budget by a trillion dollars. If the Allies choose this option, the following U.S. reinforcements are available:
- D: 4/82nd BCT
- H: 4/101st BCT; 1 x A-10C
- I: 4/2nd BCT; 1 x A-10C
- L: 1 x B-52H
- N: 1 x A-10C
- O: 4/1st Cav BCT
- P: 1 x B-52H
- R: 4/3rd BCT
- T: 4/1st BCT; 1 x F-16D
- V: 4/10th BCT; 1 x B-52H
When using this option together with GSR 17.3, no reinforcing B-52 is received, since they all start on the Air Superiority Track.
Players who own Next War: Korea should simply use the U.S. ground units provided in that game when using this rule, since Next War: Taiwan assumes each division has lost its fourth brigade and gained an additional battalion per BCT. Players who don't own the Korea title receive two U.S. Replacement Points when the last BCT of a given division becomes available as a Reinforcement, or, of course, may purchase Next War: Korea.
17.12 PRC Air Power
17.12.1 PRC Carrier Air Units
[Advanced; +3 VP to the Allies] [NWK]
Since the PRC does not operate its carriers the way the U.S. does and is using them for trials and training, its CVs do not act as a base for any air unit. This option allows the PRC to simulate having a "fully operational" carrier instead of a SAG. When using this option, the PRC player may base one of the optional J-15 units on each CV.
17.12.2 PRC Stealth Air Units
[Advanced; +15 VP to the Allies]
PRC stealth platforms have an expected in-service date of around 2020. The PRC player may choose this option to include the two J-20 air units and one J-31 among his starting forces.
17.13 Commonwealth (CW) Involvement
[Advanced; +5 VP to the non-Ally]
The Allied player may choose to allow Commonwealth forces to be involved. In every case, Commonwealth posture follows the U.S. Intervention Level. CW ground units are available if the USMC is available. This option requires a copy of Next War: Korea for most of the counters.
17.14 Weather Satellites
One Storm turn will dampen the PRC's powder; two consecutive Storm turns will likely doom the invasion to failure. Both players may agree to apply a -1 DRM to any die roll to determine Weather Conditions if the previous turn was Storm.
17.15 Pacific Typhoon
[Standard; Advanced]
Both players may agree to roll for weather conditions for each Sea Box. Roll in order for: South China Sea, Spratlys, Taiwan Strait (main map), Philippine Sea, East China Sea, Central Approaches, Northern Approaches, Celebes, and Marianas.
If a Storm result is obtained for any Sea Box, naval units in that box may retreat to an adjacent friendly-controlled Sea Box, or may do so before rolling for the next Sea Box:
- If Allied – retreat to the Japan or U.S. Box.
- If PRC – retreat to the PRC Box.
17.15.1 Riding Out the Storm
[Advanced]
In the Advanced Game, Naval Units may remain in the Sea Box by taking a 1 Strike marker.
17.16 UN Mandate
[+10 VP non-Ally]
The Allied player may choose to use this option. Whenever the non-Ally player Vetoes [28.1] a UN Resolution or Refuses to Comply with a Ceasefire [28.2], increase the U.S. Intervention Level by one. The non-Ally player earns VP only each time this option is triggered.
17.17 Scenario-Opening Coup de Main
[Advanced; +x VP non-Ally; +x VP Ally]
As an alternate opening for all Advanced Game scenarios, the non-Ally player may choose to use this option to automatically take control of Penghu, the Paracels, the Senkakus, and/or the Spratlys. Distribute units of the PRC's 1st Marine Brigade (6 counters) among any of the Land Areas chosen for this option. Place one PRC AMPH in each Inshore Box associated with the Land Area. Remove the ROC's 77th Marine Brigade from the game if Penghu is chosen.
All the usual game effects, such as entry into the war and increases in Intervention Levels, are implemented as normal, i.e., if the PRC chooses to occupy Penghu and the Senkakus, then Japan enters the war at Intervention Level 4 and the U.S. Intervention Level increases by 2.
The non-Ally player receives the pregame VP per the on-map VP table for control of the Land Areas, and, if Penghu is chosen, an additional VP for eliminating the ROC's 77th. The Allied player receives 5 VP for the chosen Land Area.
17.18 Naval Bombardment [NWK]
[Advanced]
Both players may agree that Naval Units may conduct a single Naval Bombardment against any chosen target [per 23.4] (Exception: not the ADF Tables) within range, as the last action within each Attack Phase, using their Tactical Support value as their Attack value. Cross-index the Naval Unit's Tactical Support value with the appropriate terrain and roll the die. There is no ADF, and the only applicable DRM is if the target hex exceeds the stacking limit.
18.0 SCENARIOS
The scenarios are divided into two types: Standard and Advanced.
Standard Scenarios generally depict more limited actions within only part of the map, use fewer counters, and are shorter, although there is also a full-map scenario. All of these are played using the Standard Rules. Advanced Scenarios involve the entire map, the Naval Display, potentially use all the counters, and take longer to play.
18.1 Scenario Setup
Unless otherwise specified in a scenario, the Allies set up first, followed by the non-Allies. Use the following guidelines for both Standard and Advanced scenarios.
18.1.1 PRC Setup
Unless otherwise specified, all of a scenario's forces must set up in the PRC Box or the PRC Base Box, as appropriate.
18.1.2 ROC Setup
Within the restrictions of the Corps' setup areas, non-HQ Infantry ground units set up, one per hex, in any Urban, City, or Installation hex; non-Infantry ground units set up, one per hex, in any Urban hex. HQs may set up in any Urban hex in Taipei, Taichung, or Kaohsiung. Air units set up in the ROC Base Box.
18.1.2.1 Corps Setup Areas: Within the guidelines above, ROC units must set up within the areas below:
- 6th Corps: On or north of the 40xx hex row
- 8th Corps: On or south of the 25xx hex row
- 10th Corps: Between the 26xx and 39xx hex rows (inclusive)
18.1.2.2 Attack Helicopters: The ROC's AH-64s may set up at any friendly Airbase or Airfield on Taiwan.
18.1.2.3 Surface Action Groups: Unless otherwise indicated, ROC SAG may set up in any ROC Port, open-sea hex, or the Taiwan Strait Inshore Box. If they start in the Inshore Box, they automatically have Area Detection in Advanced Game scenarios, and the pregame Detection roll cannot cause loss of Detection of the PRC, i.e., it can only improve.
18.1.2.4 ROC Marines: The ROC Marine brigades set up as indicated on their counters. Note that the 77th Brigade (Penghu) is used only when the Naval Display is in play.
18.1.2.5 ROC Movement Restrictions: In all scenarios, no Allied ground unit may move from its starting hex until a PRC ground unit has either attempted to land in a hex on Taiwan by Airmobile or Airborne Movement, or has made a successful Amphibious Assault against a hex on Taiwan.
18.1.3 Sea Control
Place control markers as follows:
- PRC Control: Taiwan Strait, South China Sea, and East China Sea Sea Boxes; Yellow Sea Inshore Box.
- Allied Control: None.
- Contested: Northern & Central Approaches, Marianas, Sea of Japan, Philippine Sea, Celebes Sea, and Spratly Islands Sea Boxes; East Sea, Spratly Islands, Paracels, and Taiwan Inshore Boxes (the absence of a Control marker indicates a Contested status).
18.1.3.1 Control of Land Areas: Place Allied control markers at Penghu and the Senkakus. All other Land Areas start uncontrolled.
18.1.4 Other Nations
[Advanced]
18.1.4.1 U.S.: If the U.S. Intervention Level is 2+ in any Advanced Game scenario, place 1 x F-15C, 2 x F-16D, and 1 x A-10C in the Japan Base Box.
18.1.4.2 Japan: If Japan begins the game having already intervened at Level 2+, its SAG starts in the Japan Box and half of each Air Unit type is placed in the Japan Base Box [see also GSR 8.2.1.4].
18.1.4.3 Philippines, Vietnam, and Malaysia: These forces are available only in Advanced scenarios and do not start in play. When they enter play, all Naval and Ground units are placed in their respective Boxes on the Naval Display. Air units are placed in their respective Base Boxes on the Air Superiority Track. Each nation has a single Airmobile Point.
18.2 Standard Scenarios
Standard Scenarios are designed to be played with the Standard Rules except where noted in the scenario's Special Scenario Rules (SSR).
18.2.1 Attack on Kaohsiung
This scenario depicts a PRC landing in the south and its attempt to capture Kaohsiung. It uses only part of the map and some of the units, and has special Victory Conditions.
Game Length: 4 Turns (2 weeks)
Play Area: Use only the southern part of the map. No movement is permitted north of the 24xx hex row.
Exception: Units that start outside the Play Area may move into it; Helicopter units may base in areas outside the Play Area.
Initial Setup:
- PRC: All Marine units; 43rd Airborne Division; 1st Amphibious Mechanized Infantry Division; 1 x Zhi-10; 1 x CVBG; 1 x SAG; 4 x AMPH; 4 x Airmobile Points; Submarine Threat Level: 4.
- ROC: 8th Corps; 99th Marines; 1 x AH-64; 2 x Mine Density 1 markers; ASW Level: 2.
Reinforcements:
PRC:
- GT1: 124th Amphibious Mechanized Infantry Division
- GT2: 1 x SAG; 127th Motorized Infantry Division
- GT3: 1 x CVBG; 44th Airborne Division
ROC:
- GT1 (Reaction Movement Segment of the Initiative Phase): 200/10th Corps (arrives at any hex on the northern edge of the Play Area with 3 MP remaining).
- GT1 (during the Second Movement Segment of the Base Movement/Combat Phase): 586/10th Corps (arrives at any hex on the northern edge of the Play Area with 3 MP remaining)
- GT1: 1/82nd BCT
- GT2: 2 x 8th Corps Reinforcement Brigades; 373/10th (at any hex on the northern edge of the Play Area).
- GT3: 2 x 8th Corps Reinforcement Brigades
Special Scenario Rules (SSR):
- Naval: Submarine and ASW Threat Levels do not change in this scenario.
- Sea Control: Do not roll for Sea Control in this scenario. The PRC controls both the Taiwan Strait Sea Box and the Taiwan Inshore Box for the entire scenario. Penghu is also PRC controlled.
- Initiative: The PRC player has the Initiative for GT 1, 2, and 3. In GT4 it is Contested.
- Surprise: All PRC attacks in GT1 receive a one-column shift right.
- Weather Conditions: PRC player's choice in GT 1 & 2. Optionally, players may have Clear Weather Conditions for the entire scenario. If Storm results, halve the available Air Points, rounding up.
- Replacements: PRC – 1 in odd turns; ROC – 1 in turns 1-3.
- Air Points (Air Superiority in parentheses):
| GT | PRC | ROC |
|---|---|---|
| 1 | 12 [Sup.] | 4 |
| 2 | 12 [Adv.] | 8 |
| 3 | 12 | 9 |
| 4 | 12 | 10 |
Optional: Roll normally for Air Points using 1/3 of the value obtained, rounding up, but use the actual values obtained to determine Air Superiority.
Note: Record Air Point losses as permanent losses as normal, including recalculating the Air Superiority Level.
- Interdiction: The PRC player may, immediately after determining Air Points, spend 6 Air Points to delay 10th Corps Reinforcements arriving that turn. A given unit may be delayed only once. If delayed, the Reinforcement arrives in the current turn's Reinforcement Phase.
- Movement Restriction: No ROC unit in an Urban hex may move in the Base Movement/Combat Phase of GT 4.
Victory Conditions:
- PRC Major Victory: Control 5 Ports and/or Urban hexes on Taiwan
- PRC Minor Victory: Control 3 Ports and/or Urban hexes on Taiwan
- Draw: No other Victory Condition is met
- ROC Minor Victory: No Urban hex and no more than 1 Port under PRC control
- ROC Major Victory: No Urban hex or Port under PRC control
The fortified Airbase at 2219 counts as an Urban hex for Victory Conditions.
The destruction of all ROC units shifts the Victory level by one in the PRC's favor. ROC control of any Beachhead hex shifts the Victory level by one in the ROC's favor.
18.2.2 Attack on Taichung
This scenario depicts an invasion in the middle of Taiwan. It uses only part of the map and some of the units, and has special Victory Conditions.
Game Length: 4 Turns (2 weeks)
Play Area: Use only the central part of the map. No movement is permitted north of the 25xx hex row or north of the 42xx hex row.
Exception: Units that start outside the Play Area may move into it; Helicopter units may base in areas outside the Play Area.
Initial Setup:
- PRC: All Marine units; 43rd Airborne Division; 1st Amphibious Mechanized Infantry Division; 1 x Zhi-10; 1 x CVBG; 1 x SAG; 4 x AMPH; 4 x Airmobile Points; Submarine Threat Level: 4.
- ROC: 10th Corps; 1 x AH-64; 2 x Mine Density 1 markers; ASW Level: 2.
Reinforcements:
PRC:
- GT1: 124th Amphibious Mechanized Infantry Division
- GT2: 1 x SAG; 127th Motorized Infantry Division
- GT3: 1 x CVBG; 44th Airborne Division
ROC:
- GT1 (Reaction Movement Segment of the Initiative Phase): 298/8th Corps (arrives at any hex on the northern edge of the Play Area with 0 MP remaining); 269/6th Corps (arrives at any hex on the northern edge of the Play Area with 2.5 MP remaining).
- GT1 (during the Second Movement Segment of the Base Movement/Combat Phase): 564/8th Corps (arrives at any hex on the southern edge of the Play Area with 3 MP remaining); 542/6th Corps (arrives at any hex on the northern edge of the Play Area with 3.5 MP remaining);
- GT1: 1/82nd BCT
- GT2: 2 x 10th Corps Reinforcement Brigades
- GT3: 2 x 10th Corps Reinforcement Brigades
Special Scenario Rules (SSR):
- Naval: Submarine and ASW Threat Levels do not change in this scenario.
- Sea Control: Do not roll for Sea Control in this scenario. The PRC controls both the Taiwan Strait Sea Box and the Taiwan Inshore Box for the entire scenario. Penghu is also PRC controlled.
- Initiative: The PRC player has the Initiative for GT 1, 2, and 3. In GT4 it is Contested.
- Surprise: All PRC attacks in GT1 receive a one-column shift right.
- Weather Conditions: PRC player's choice in GT 1 & 2. Optionally, players may have Clear Weather Conditions for the entire scenario. If Storm results, halve the available Air Points, rounding up.
- Replacements: PRC – 1 in odd turns; ROC – 1 in turns 1-3.
- Air Points (Air Superiority in parentheses):
| GT | PRC | ROC |
|---|---|---|
| 1 | 12 [Sup.] | 4 |
| 2 | 12 [Adv.] | 8 |
| 3 | 12 | 9 |
| 4 | 12 | 10 |
Optional: Roll normally for Air Points using 1/3 of the value obtained, rounding up, but use the actual values obtained to determine Air Superiority.
Note: Record Air Point losses as permanent losses as normal, including recalculating the Air Superiority Level.
- Interdiction: The PRC player may, immediately after determining Air Points, spend 6 Air Points to delay 6th or 8th Corps Reinforcements arriving that turn. A given unit may be delayed only once. If delayed, the Reinforcement arrives in the current turn's Reinforcement Phase.
- Movement Restriction: No ROC unit in an Urban hex may move in the Base Movement/Combat Phase of GT 4.
Victory Conditions:
- PRC Major Victory: Control 5 Ports and/or Urban hexes on Taiwan
- PRC Minor Victory: Control 3 Ports and/or Urban hexes on Taiwan
- Draw: No other Victory Condition is met
- ROC Minor Victory: No Urban hex and no more than 1 Port under PRC control
- ROC Major Victory: No Urban hex or Port under PRC control
Hualien, 3616, counts for Victory Conditions.
The destruction of all ROC units shifts the Victory level by one in the PRC's favor. ROC control of any Beachhead hex shifts the Victory level by one in the ROC's favor.
18.2.3 Attack on Taipei
This scenario depicts an invasion further north on Taiwan, targeting Taipei. It uses only part of the map and some of the units, and has special Victory Conditions.
Game Length: 4 Turns (2 weeks)
Play Area: Use only the northern part of the map. No movement is permitted south of the 40xx hex row.
Exception: Units that start outside the Play Area may move into it; Helicopter units may base in areas outside the Play Area.
Initial Setup:
- PRC: All Marine units; 43rd Airborne Division; 1st Amphibious Mechanized Infantry Division; 1 x Zhi-10; 1 x CVBG; 1 x SAG; 4 x AMPH; 4 x Airmobile Points; Submarine Threat Level: 4.
- ROC: 6th Corps; 66th Marines; 1 x AH-64; 2 x Mine Density 1 markers; ASW Level: 2.
Reinforcements:
PRC:
- GT1: 124th Amphibious Mechanized Infantry Division
- GT2: 1 x SAG; 127th Motorized Infantry Division
- GT3: 1 x CVBG; 44th Airborne Division
ROC:
- GT1 (Reaction Movement Segment of the Initiative Phase): 200/10th Corps (arrives at any hex on the southern edge of the Play Area with 5 MP remaining).
- GT1 (Second Movement Segment of the Base Movement/Combat Phase): 586/10th Corps (arrives at any hex on the southern edge of the Play Area with 2 MP remaining).
- GT1: 1/82nd BCT
- GT2: 2 x 6th Corps Reinforcement Brigades; 373/10th (at any hex on the southern edge of the Play Area)
- GT3: 2 x 6th Corps Reinforcement Brigades
Special Scenario Rules (SSR):
- Naval: Submarine and ASW Threat Levels do not change in this scenario.
- Sea Control: Do not roll for Sea Control in this scenario. The PRC controls both the Taiwan Strait Sea Box and the Taiwan Inshore Box for the entire scenario. Penghu is also PRC controlled.
- Initiative: The PRC player has the Initiative for GT 1, 2, and 3. In GT4 it is Contested.
- Surprise: All PRC attacks in GT1 receive a one-column shift right.
- Weather Conditions: PRC player's choice in GT 1 & 2. Optionally, players may have Clear Weather Conditions for the entire scenario. If Storm results, halve the available Air Points, rounding up.
- Replacements: PRC – 1 in odd turns; ROC – 1 in turns 1-3.
- Air Points (Air Superiority in parentheses):
| GT | PRC | ROC |
|---|---|---|
| 1 | 12 [Sup.] | 4 |
| 2 | 12 [Adv.] | 8 |
| 3 | 12 | 9 |
| 4 | 12 | 10 |
Optional: Roll normally for Air Points using 1/3 of the value obtained, rounding up, but use the actual values obtained to determine Air Superiority.
Note: Record Air Point losses as permanent losses as normal, including recalculating the Air Superiority Level.
- Interdiction: The PRC player may, immediately after determining Air Points, spend 6 Air Points to delay 10th Corps Reinforcements arriving that turn. A given unit may be delayed only once. If delayed, the Reinforcement arrives in the current turn's Reinforcement Phase.
- Movement Restriction: No ROC unit in an Urban hex may move in the Base Movement/Combat Phase of GT 4.
Victory Conditions:
- PRC Major Victory: Control 4 Ports and/or Urban hexes on Taiwan
- PRC Minor Victory: Control 3 Ports and/or Urban hexes on Taiwan
- Draw: No other Victory Condition is met
- ROC Minor Victory: No Urban hex and no more than 1 Port under PRC control
- ROC Major Victory: No Urban hex or Port under PRC control
Control of any two, or all three, of the Ports on the northern and eastern side of the island – 5011, 4713, and 4415 – counts as controlling one Port for Victory Conditions.
The destruction of all ROC units shifts the Victory level by one in the PRC's favor. ROC control of any Beachhead hex shifts the Victory level by one in the ROC's favor.
18.2.4 Advent of the Red Dragon
This scenario is simply the Standard Game's campaign scenario. Players use the entire map, all Standard Game units (i.e., no HQ or Air Units), in their normal setup areas, and all Victory Conditions [12.0].
Initial Setup:
- PRC: All Marine units; 3 x Airborne Divisions; 1st/1GA Amphibious Mechanized Infantry Division; 1 x Zhi-10; 1 x CVBG; 2 x SAG; 4 x AMPH, placed in the PRC Box or the Taiwan Strait Inshore Box. Submarine Threat Level: 3. Airmobile Points: 4.
- ROC: All non-reinforcing ROC units set up as indicated in 18.1.2. 2 x Mine Density 1 markers; ASW Level: 2.
Special Scenario Rules (SSR):
- International Involvement: The Allied player may use the Japanese SAG, U.S. Marines, U.S. Navy, and the U.S. Army's 101st and 82nd Divisions and 4/25th BCT when they arrive.
- Sea Control: Roll for Sea Control per GSR 5.2.
- Initiative: The PRC player automatically has the Initiative for GT 1 and 2.
- Initiative VP: 11.
- Automatic Victory VP: +75 or more
- Surprise: All PRC attacks in GT1 receive a one-column shift right.
- Weather Conditions: PRC player's choice in GT 1 & 2.
- Air Points: Roll for Air Points normally.
- Japan Intervenes: Japan is considered to have intervened. GSR 5.2.2.1 is in effect.
Reinforcement Chart
PRC: Replacements: 2 per turn from GT 3+
- GT1: 124th/42GA AMID; 34th Infantry Brigade; 1 x Zhi-10
- GT2: 1 x CVBG; 1 x division; 3rd Infantry Brigade
- GT3: 1 x division; 92nd Infantry Brigade
- GT5: 1 x division; 179th Infantry Brigade
- GT7: 1 x division; 36th Infantry Brigade
- GT8: 1 x division; 1 x Zhi-10
- GT10: 1 x division
- GT11: 1 x division
- GT12: 1 x division
Ally: Replacements: ROC – 1 per turn in GT 2-5, 2 per turn from GT6+; U.S. – 1 per turn in GT 3-6 and 2 per turn from GT7+
- GT2: B & C; 2 x random reserve Brigades
- GT3: A; 3 x random reserve Brigades
- GT4: D & E; 3 x random reserve Brigades
- GT5: F; 4 x random reserve Brigades
- GT6: G & H; 4 x random reserve Brigades
- GT7: I & J; 4 x random reserve Brigades
- GT8: K & L
- GT9: M & N
- GT10: O
- GT11: P
- GT12: Q & R
- GT13: S & T
- GT14: U & V
18.3 Advanced Scenarios
Advanced Scenarios are played with the Advanced Rules. To set up such a scenario, players must perform the following steps in the order given:
a. Choose a level of Surprise: Strategic, Tactical, or Extended Reinforcements. b. Determine the Intervention Levels for the U.S. and Japan using the International Posture Matrix [18.3.1]. c. Agree on or choose Optional Rules [17.0] and adjust VP accordingly. d. Set up all available units. e. Follow any pregame Special Scenario Rules (SSR). f. Begin the game with the Weather Conditions Phase.
18.3.1 International Posture Matrix
The International Posture Matrix determines the international posture in which a scenario is played, as a function of the political positions of the main actors in and around Taiwan: the U.S. and Japan. The level of involvement is determined by the posture, though the manner of that involvement is determined by the scenario. Players may simply choose to set the Intervention Level of their choosing to try out alternate situations.
18.3.1.1 Determining International Posture: Consult the Posture Table. For each nation, the U.S. and Japan, roll a die and determine the attitude of each "faction" – Administration, Military, and Popular Vote. Each die roll indicates that particular faction's leaning and gives an associated numeric value, e.g., Doves (-1). Sum these three values and consult the Posture Results Table to determine whether a nation is Passive, Moderate, or Aggressive. The PRC is considered Aggressive for the UN Resolutions DRM.
18.3.1.2 Determining International Intervention Level and the UN Resolutions DRM: For each nation, the U.S. and Japan, cross-index the Posture determined above with the scenario being played on the International Posture Matrix to determine the Intervention Level in the war and the DRM (keep only the larger resulting DRM) that will be applied to the UN Ceasefire die roll.
The Philippines, Malaysia, and Vietnam enter play only under certain conditions. When they do, they are automatically at Level 4.
18.3.2 Intervention Levels
The various Intervention Levels correspond to the amount of force each nation intends to risk in the conflict, as determined by their posture and Surprise (i.e., the scenario). Each level includes its forces plus those of the lower levels.
18.3.2.1 Level 0 – No Intervention: No forces may be involved.
18.3.2.2 Level 1 – Supply, Intelligence, Special Operations Forces: The nation provides the number of Supply Points per turn indicated by the scenario. If no amount is specified, it provides 1 Supply Point per turn. These SP are in addition to those specified by the Allied General Reinforcement Chart. In addition, that side may use the intervening nation's Electronic Detection attempts [GSR 12.1]. The nation may use any SOF marker for all missions valid for Special Forces.
18.3.2.3 Level 2 – Naval & Air: Naval and Air units may be used. U.S. air units may base only in Japan. Only USN CVNBG and SAG, and USAF Air Units, are available for the U.S. [see GSR 18.1.4.2 for Japan]. AMPH may enter on their SAG side if desired but may not thereafter be converted to AMPH.
18.3.2.4 Level 3 – USMC, Airborne, Basing Rights, and U.S. Theater Weapons: The nation's Theater Weapons are available for use. For the U.S., all USMC units (including Air Units), the 82nd Airborne, and the 4th/205th Airborne BCT may be used. U.S. air units may base in Japan, the ROC, and the Philippines (if the Philippines enters the war). Japan may use its Airborne brigade [GSR 17.8].
18.3.2.5 Level 4 – Full Intervention: All of a nation's forces, markers, etc. are available for use as indicated by the rules and any Special Scenario Rule. For the U.S., this means adding the 101st Air Assault Division. The Japanese Airborne Brigade may enter Taiwan [if released, GSR 17.8].
18.3.3 Extension of the Conflict
Various actions by the PRC player can widen the conflict.
18.3.3.1 The Second Korean War: The PRC player may, at his discretion, widen the conflict before the game begins by encouraging and assisting a North Korean invasion of South Korea. Doing so affects the arrival of U.S. Reinforcements. Each Reinforcement box on the Allied General Reinforcement Chart has a number. If the Allies roll a die result equal to or less than this number, the indicated Reinforcements are diverted to Korea. Otherwise, they may be used on Taiwan within the limits noted in these rules. This applies only to U.S. and Japanese forces (Commonwealth units are not used on Taiwan [GSR 17.13]). If this option is chosen, GSR 1.4 is ignored, and all U.S. units are available for use on Taiwan.
The Allied player may modify the result of this die roll by spending Victory Points. For every 3 VP spent this way, modify the die roll by +1. The Allied player may decide to spend VP this way after seeing the die roll result.
If the PRC's total VP is equal to or greater than double the Allied total VP, or if the PRC player controls an Urban hex in Taipei, the Allied player automatically receives the Reinforcements for that turn.
18.3.3.2 Sino-Japanese War: If the PRC chooses to occupy the Senkakus Land Area or to attack the Japan Box, Japan automatically intervenes at Level 4 and the U.S. Intervention Level increases by +2. Place all Japanese forces in the Japan Box during the current turn's Reinforcement Phase.
18.3.3.3 South China Sea War: At the end of the first Combat Segment in which the PRC enters the Spratly Islands or Paracels Land Areas with ground units, the Philippines and/or Vietnam may enter the conflict on the Allied side. Roll a die for each nation. A 0-3 remains neutral; any other result enters the war on the Allied side. This can happen once for each Land Area.
If the PRC enters the Senkakus with ground units while one of the above Land Areas is also occupied (or vice versa), both Vietnam and the Philippines automatically enter the war. In this case Malaysia enters the war on the PRC side. If only one enters the war, the PRC player rolls a die for Malaysia. On a 0 or 9, it remains neutral; on a 1, it enters the war on the Allied side; and on any other result, it enters the war on the PRC side.
18.3.3.4 Entry into the War: Nations that enter the war after the game begins place all their initial forces [GSR 18.1.4] as appropriate during the current turn's Reinforcement Phase. The turn of entry is considered GT1 for the arrival of Reinforcements (note this applies only to the U.S. and Japan). A marker is provided to track this. Simply place the marker in the "1" space of the General Track to indicate the turn of entry, and advance it as the GT marker is advanced.
18.3.3.4.1 Vietnamese Kilos: If Vietnam enters the War, increase the ASW Level by one.
18.3.3.5 Orders of Battle
18.3.3.5.1 Vietnam: 2 x Su-30, 1 x Su-27, 1 x SAG, 1 x AMPH, 2 x Marine infantry battalions, 1 x Marine armor battalion, 1 x SOF Mission.
18.3.3.5.2 Philippines: 1 x SAG, 1 x AMPH, 1 x Marine HQ, 3 x Marine infantry battalions, 1 x Marine armor battalion, 1 x SOF Mission.
18.3.3.5.3 Malaysia: 1 x F/A-18D, 1 x MiG-29, 1 x Su-30, 1 x SAG, 1 x HQ, 3 x Airborne infantry battalions, 1 x SOF Mission.
18.3.3.5.4 Japan: 2 x F-15J, 2 x F-4E, 2 x F-2A, 1 x SAG, 1 x Airborne infantry brigade, 2 x SOF Missions.
18.3.4 Strategic Surprise
This scenario assumes the PRC uses the units at its disposal in an attempt to take the island with an amphibious/airborne coup de main, followed by second-wave reinforcing forces.
PRC Scenario Specifics
Allocations: 35 Supply Points; 2 Airmobile Points; all Special Forces markers; 2 Mobile Supply Units (MSU); 38 Cruise Missile Points; Submarine Threat Level: 2
Air Defenses: Detection – 6; SAM – 7; AAA – 2; AWAC Advantage – 0
Setup: All Marine units; 3 x Airborne Divisions; 1 x Zhi-10; 1 x CVBG; 2 x SAG; and 4 x AMPH are placed in the PRC Box. All PRC air units start in the PRC Ready box.
Reinforcements:
Replacements: 1 per turn from GT3+. Supply Points: 1 per turn from GT4+. Cruise Missile Points: 2 per turn from GT5+.
- GT2: 1st/1GA Amphibious Mech. Infantry Div. (AMID); 34th Infantry Brig.; 2 x Airmobile Points; 1 x SOF marker
- GT3: 1 x CVBG; 124th/42GA AMID; 3rd Infantry Brig.; 1 x Zhi-10
- GT4: 1 x division; 92nd Infantry Brigade; 1 x SOF marker
- GT6: 1 x division; 179th Infantry Brigade; 1 x Airmobile Point
- GT7: 1 x division; 36th Infantry Brigade; 1 x SOF marker
- GT9: 1 x division; 1 x Airmobile Point
- GT10: 1 x division; 1 x SOF marker
- GT12: 1 x division; 1 x Airmobile Point
- GT13: 1 x division; 1 x SOF marker
- GT14: 1 x division
- GT15: 1 x SOF marker
Allied Scenario Specifics
Allocations: 15 Supply Points; all ROC Special Forces markers; 1 U.S. Special Forces marker; 1 Supply Depot; 0 x Mine Density markers; ASW Level: 1 (+1 each if the U.S. or Japan intervenes at Level 2+); 1 ROC SAG may set up in the Inshore Box, the other may set up at any friendly Port on Taiwan or in an open-sea hex.
Air Defenses: Detection – 7; SAM – 5; AAA – 2
Setup: All non-reinforcing ROC units set up as defined [GSR 18.1.2]. ROC air units set up in the ROC Base Box.
Reinforcements:
Replacements: ROC – 1 per turn GT3+; U.S. – if Posture is Aggressive, 1 per turn GT5+
- GT2: B
- GT3: A
- GT4: C; 2 x random reserve Brigades
- GT5: D; 2 x random reserve Brigades
- GT6: E; 2 x random reserve Brigades
- GT7: F & I; 4 x random reserve Brigades
- GT8: G; 4 x random reserve Brigades
- GT9: H; 4 x random reserve Brigades
- GT10: J; 4 x random reserve Brigades
- GT11: K & L; 2 x random reserve Brigades
- GT12: M
- GT13: N & O
- GT14: P & Q & R
- GT15: S & T
- GT16: U & V
Special Scenario Rules (SSR):
- Allied Aircraft: Before the game begins, the Allied player must randomly choose half (rounding up) of each aircraft type (i.e., F-16, FCK-1, F-15, etc.) in the ROC Base Box and place them in the Flown box. These are not available in GT 1. No Air Unit based in Japan may conduct any mission in GT 1.
- Naval Detection: Before the game begins, both players may attempt to detect enemy Naval units set up in the Taiwan Strait Inshore Box or in any open-sea hex.
- PRC Cruise Missile Attacks: Before the game begins, the PRC may conduct 10 Cruise Missile attacks against any eligible target. Damage to Airbases/Airfields counts for Phases a. and b. of GT 1's Air Superiority Sortie Phase, and Collateral Damage is resolved immediately.
- PRC SOF: In GT1, during the Special Forces Phase, the PRC player may conduct two SOF Phases and assign his Special Forces markers twice. Assign all available markers, resolve the missions (do not roll for survival, all survive automatically), then reassign and resolve again. Roll for survival as normal.
- Allied SOF GT1: Allied SOF may conduct only Raids against the Air Defense Table in GT 1.
- Surprise: All PRC attacks in GT 1 & 2 receive a one-column shift right.
- Weather Conditions: PRC player's choice in GT 1 & 2.
- Initiative: The PRC automatically has the Initiative in GT 1 & 2.
- Initiative VP: 11
- VP to Roll for Automatic Victory: +120 or more.
- Victory Levels:
| Level | VP |
|---|---|
| Overwhelming | 130+ |
| Decisive | 110-129 |
| Substantial | 80-109 |
| Marginal | 46-79 |
| Draw | 0-45 |
18.3.5 Tactical Surprise
This scenario assumes a middle ground between complete strategic surprise and a long buildup. The Allies are aware that the PRC is maneuvering its forces, though this could just be an unscheduled exercise….
PRC Scenario Specifics
Allocations: 40 Supply Points; 3 Airmobile Points; all Special Forces markers; 2 Mobile Supply Units (MSU); 42 Cruise Missile Points; Submarine Threat Level: 3
Air Defenses: Detection – 7; SAM – 7; AAA – 2; AWAC Advantage – 1
Setup: All Marine units; 3 x Airborne Divisions; 1st/1GA (AMID); 2 x Zhi-10; 1 x CVBG; 2 x SAG; and 4 x AMPH. All PRC air units start in the PRC Ready box. PRC Marine and Naval units may set up in the Taiwan Strait Inshore Box; all other ground units must set up in the China Box.
Reinforcements:
Supply Points: 1 per turn from GT 2+. Replacement Points: 2 per turn from GT 3+. Cruise Missile Points: 2 per turn from GT 3+.
- GT2: 124th/42GA AMID; 34th Infantry Brigade
- GT3: 1 x division; 3rd Infantry Brigade; 1 x SOF marker
- GT4: 1 x CVBG; 1 x division; 92nd Infantry Brigade; 1 x SOF marker
- GT5: 1 x division; 179th Infantry Brigade; 1 x Airmobile Point
- GT6: 1 x division; 36th Infantry Brigade; 1 x SOF marker
- GT8: 1 x division; 1 x Airmobile Point
- GT10: 1 x division; 1 x SOF marker
- GT12: 1 x division; 1 x Airmobile Point
- GT13: 1 x division; 1 x SOF marker
- GT14: 1 x SOF marker
Allied Scenario Specifics
Allocations: 20 Supply Points; all ROC Special Forces markers; 1 U.S. Special Forces marker; 2 Supply Depots; 2 x Mine Density markers; ASW Level: 1 (+1 each if the U.S. or Japan intervenes at Level 2+).
Air Defenses: Detection – 8; SAM – 6; AAA – 2
Setup: All non-reinforcing ROC units set up as defined [GSR 18.1.2]. ROC air units set up in the ROC Base Box. The Allies have already received Reinforcements with ID A-C. Place them per the Reinforcement rules [GSR 8.0] and apply the received Supply Points, etc. to the General Track.
Reinforcements:
Replacements: ROC – 1 per turn GT 3-5, 2 per turn from GT 6+; U.S. – if Posture is Aggressive, 1 per turn GT 4-7 and 2 per turn GT 8+.
- GT2: D; 2 x random reserve Brigades
- GT3: E; 2 x random reserve Brigades
- GT4: I; 3 x random reserve Brigades
- GT5: F & G; 3 x random reserve Brigades
- GT6: H; 4 x random reserve Brigades
- GT7: J; 4 x random reserve Brigades
- GT8: K & L; 4 x random reserve Brigades
- GT9: M; 2 x random reserve Brigades
- GT10: N & O
- GT11: P & Q & R
- GT13: S & T
- GT14: U & V
Special Scenario Rules (SSR):
- Naval Detection: Allied units that set up in the Taiwan Strait Inshore Box or in any open-sea hex are automatically Area Detected. Before the game begins, both players may attempt to detect enemy Naval units set up in the Taiwan Strait Inshore Box or in any open-sea hex. This detection attempt cannot result in No Detection for Allied units.
- PRC Cruise Missile Attacks: Before the game begins, the PRC may conduct 10 Cruise Missile attacks against any eligible target. Damage to Airbases/Airfields counts for Phases a. and b. of GT 1's Air Superiority Sortie Phase, and Collateral Damage is resolved immediately.
- Allied Aircraft: Before the game begins, the Allied player must randomly choose half (rounding up) of each aircraft type (i.e., F-16, FCK-1, F-15, etc.) in the ROC Base Box and place them in the Flown box. These are not available in GT 1. No Air Unit based in Japan may conduct any mission in GT 1.
- PRC SOF: In GT1, during the Special Forces Phase, the PRC player may conduct two SOF Phases and assign his Special Forces markers twice. Assign all available markers, resolve the missions (do not roll for survival, all survive automatically), then reassign and resolve again. Roll for survival as normal.
- Surprise: All PRC attacks in GT 1 & 2 receive a one-column shift right.
- Weather Conditions: PRC player's choice in GT 1 & 2.
- Initiative: The PRC automatically has the Initiative in GT 1 & 2.
- Initiative VP: 12
- VP to Roll for Automatic Victory: +100 or more.
- Victory Levels:
| Level | VP |
|---|---|
| Overwhelming | 110+ |
| Decisive | 90-109 |
| Substantial | 60-89 |
| Marginal | 41-59 |
| Draw | 0-40 |
18.3.6 Extended Reinforcements Scenario
This scenario depicts the situation following a rise in tensions between the PRC and the ROC. The U.S. and Japan will very likely intervene with air and naval forces, and the U.S. will likely send ground troops to defend Taiwan. This scenario is difficult, perhaps impossible, for the PRC if the U.S. intervenes.
PRC Scenario Specifics
Allocations: 45 Supply Points; 4 Airmobile Points; all Special Forces markers; 2 Mobile Supply Units (MSU); 46 Cruise Missile Points; Submarine Threat Level: 4
Air Defenses: Detection – 8; SAM – 8; AAA – 2; AWAC Advantage – 2
Setup: All Marine units; 3 x Airborne Divisions; 1st/1GA (AMID); 124th/42GA AMID; 2 x Zhi-10; 2 x CVBG; 2 x SAG; and 4 x AMPH. All PRC air units start in the PRC Ready box. PRC ground and Naval units may set up in the Taiwan Strait Inshore Box.
Reinforcements:
Replacement, Cruise Missile, and Supply Points: 2 per turn from GT 2+.
- GT1: 34th Infantry Brigade; 1 x SOF marker
- GT2: 1 x division; 4th Infantry Brigade; 1 x SOF marker
- GT3: 1 x division; 92nd Infantry Brigade; 1 x SOF marker
- GT4: 1 x division; 179th Infantry Brigade; 1 x Airmobile Point
- GT5: 1 x division; 36th Infantry Brigade; 1 x Zhi-10
- GT6: 1 x division; 1 x SOF marker
- GT7: 1 x division
- GT8: 1 x division; 1 x Airmobile Point; 1 x SOF marker
- GT9: 1 x division; 1 x Airmobile Point; 1 x SOF marker
- GT10: 1 x SOF marker
- GT11: 1 x SOF marker
- GT13: 1 x SOF marker
- GT15: 1 x SOF marker
Allied Scenario Specifics
Allocations: 20 Supply Points; all ROC Special Forces markers; 1 U.S. Special Forces marker; 2 Supply Depots; 4 x Mine Density markers; ASW Level: 2 (+1 each if the U.S. or Japan intervenes at Level 2+).
Air Defenses: Detection – 8; SAM – 7; AAA – 2
Setup: All non-reinforcing ROC units set up as defined [GSR 18.1.2]. The ROC sets up 4 x random reserve Brigades. ROC air units set up in the ROC Base Box. The Allies have already received Reinforcements with ID A-K. Place them per the Reinforcement rules [GSR 8.0] and apply the received Supply Points, etc. to the General Track.
Reinforcements:
Replacements: ROC – 1 per turn GT 1 & 2, 2 per turn from GT 3+; U.S. – if Posture is Aggressive, 1 per turn GT 2-6 and 2 per turn GT 7+.
- GT2: L; 3 x random reserve Brigades
- GT3: M; 3 x random reserve Brigades
- GT5: N & O; 3 x random reserve Brigades
- GT6: P; 3 x random reserve Brigades
- GT8: Q & R; 4 x random reserve Brigades
- GT10: S & T
- GT11: U & V
Special Scenario Rules (SSR):
- Naval Detection: Allied units that set up in the Taiwan Strait Inshore Box or in any open-sea hex are automatically Area Detected. Before the game begins, both players may attempt to detect enemy Naval units set up in the Taiwan Strait Inshore Box or in any open-sea hex. This detection attempt cannot result in No Detection for Allied units.
- PRC Cruise Missile Attacks: Before the game begins, the PRC may conduct 10 Cruise Missile attacks against any eligible target. Damage to Airbases/Airfields counts for Phases a. and b. of GT 1's Air Superiority Sortie Phase, and Collateral Damage is resolved immediately.
- Surprise: All PRC attacks in GT 1 receive a one-column shift right.
- Initiative: The PRC automatically has the Initiative in GT 1 & 2.
- Weather Conditions: PRC player's choice in GT 1 & 2.
- Initiative VP: 14
- VP to Roll for Automatic Victory: +80 or more.
- Victory Levels:
| Level | VP |
|---|---|
| Overwhelming | 90+ |
| Decisive | 70-89 |
| Substantial | 50-69 |
| Marginal | 30-49 |
| Draw | 0-29 |
18.3.7 Air/Naval Battle Scenario – "Res Nullius"
This scenario lets players play using only the Advanced Air/Naval rules. There are ground units, but they do not fight; they exist to be transported to the island.
Scenario Specifics
Players choose one of the Advanced Scenario setups detailed above as a base for the scenario. They then set up Air and Naval units as specified by that scenario. In addition, U.S. Posture is automatically Aggressive with Intervention Level 4 (allowing the use of all U.S. units). Roll normally for Japan's Posture. Only Marine units, with Marine, Airborne, and Airmobile capability, are used.
Special Scenario Rules (SSR)
- Maps: Use only the Naval Display, the Air Superiority Track, and the Air/Naval Battle Scenario Chart.
- Special Rules: Follow any special scenario rule concerning moving air units to the Flown box or conducting Cruise Missile attacks. U.S. Naval Unit Reinforcements, as an exception to the normal rules, always start in the U.S. Port Box on the Naval Display. SOF Missions are treated as specified below.
- SOP (Sequence of Play): Only the following parts of the Sequence of Play are used: a. Weather Conditions Phase b. Initiative Phase [SSR #8] c. First Special Operations Phase d. Air/Naval Phase e. Second Special Operations Phase f. First Attack Phase g. Initiative Movement Segment h. Exploitation Movement Segment i. Reaction Movement Segment j. Second Attack Phase k. Base Movement Segment l. Base Reaction Movement Segment m. Reorganization Phase (2, 3, 4, 5, 6) n. Reinforcement and Replacement Phase (2) o. Victory Determination Phase p. Turn Record Phase
- Taiwan Box: Players may send units to Taiwan by successfully moving from the Taiwan Inshore Box to the Taiwan Box via Amphibious Landing or by AMPH. In addition, units may be moved by Airmobile Movement and Paratroop Drop following all normal rules. ROC Marines 66th and 99th set up in the Box and may not leave it.
- Attacks/Raids Against Installations: Attacks may be conducted against the Taiwan Box [GSR 6.5.3]. Use the tables on the Air/Naval Battle Scenario Card to track damage.
- SOF Missions: Ignore any other scenario-specific SSR for SOF markers. Instead, both sides may use all of their own SOF markers once in GT 1 normally, i.e., roll for survival. In GT 2 and thereafter, roll a die for each marker. On an odd result, move the marker to the Used box. On an even result, the marker is Available for normal use.
- Sortie Restrictions: Because of the ongoing ground conflict, not every air unit capable of Attack/Tactical Support is available for use in Attacks against Naval Units or Installations. To represent this, whenever a player wishes to use an Air Unit with a Tactical Support value in an Attack Mission, he must roll a die. On an odd result, move the Air Unit to the Flown box; the Air Unit is not available.
Exception: Carrier-based Air Units are always available for Attack Missions against Naval Units.
- Initiative: Use the starting scenario's Initiative until otherwise indicated. Thereafter, Initiative goes to the player who scored the most VP in the previous turn. In case of a tie, it is a Contested Turn.
- ADF Repair: Both sides may repair their Air Defense Tables in each Reorganization Phase if they have spent 4 Supply Points. Do not record the Supply Point expenditure.
- Ports and Submarine Threat Level Changes: Modify the Submarine Threat Level normally for Destroyed Ports. However, since Repair does not apply in this scenario, for each Destroyed PRC Port, the PRC player may automatically increase the Submarine Threat Level two turns later. Once the Submarine Threat Level reaches zero, it cannot be increased [7.4.3.1].
- Control of Land Areas: Since there is no ground combat, control of Land Areas goes to whoever has at least double the strength levels of the opponent in the Land Area. Stacking limits in Land Areas, for this scenario, are unlimited. For GSR 18.3.3.3's South China Sea War DRM, the PRC may count a maximum of 4 units per Land Area.
- Victory Points: In addition to earning VP for inflicting damage on enemy units and Installations as usual, the Allies earn 2 VP for each Allied strength level on Taiwan at the end of the scenario. The PRC earns 1 VP for each strength level on Taiwan at the end of the scenario.
- Victory Conditions: The player with the most Victory Points at the end of GT 10 wins.
19.0 Order of Battle – Air Units in the Advanced Game
What follows is the detailed list of the Air Unit Orders of Battle available to the players. Pilot Skill composition, where it varies, is listed in parentheses.
19.1 PRC
All are available at start.
4 x J-7 (3x0, 1x+1), 3 x JH-7 (2x0, 1x-1), 4 x J-8 (2x0, 1x+1, 1x–1), 4 x J-10 (2x0, 2x–1), 4 x J-11 (2x0, 2x–1), 2 x J-16, 1 x Q-5, 5 x H-6 (2x–1, 2x0, 1x+1), 2 x Su-27, 3 x Su-30 (2x0, 1x-1)
19.1.1 Optional Units [17.12]
2 x J-20, 1 x J-31, 2 x J-15
19.2 ROC
All are available at start.
6 x F-16 (2x–1, 3x0, 1x+1), 5 x F-CK-1 (1x–1, 2x0, 2x+1), 2 x Mirage (1x0, 1x–1)
19.3 U.S.
At-start status is determined by the scenario; the rest arrive as Reinforcements:
- USAF: 4 x B-52H, 2 x F-35A, 4 x F-15C (2x–2, 2x–1), 4 x F-15E (3x–2, 1x–1), 6 x F-16D (2x–2, 2x–1, 2x0), 2 x B-1B, 2 x B-2A, 6 x A-10C (1x–2, 3x–1, 2x0), 4 x F-16DJ
- USN: 4 x F/A-18E (2x–2, 2x–1), 8 x F/A-18F (3x–2, 4x–1, 1x0), 4 x EA-18G
- USMC: 4 x F/A-18 (2x–2, 2x–1), 2 x AV-8B (1x–2, 1x–1)
19.3.1 Optional Units
- USAF: 2 x F-22A, 4 x F-15C (1x–2, 2x–1, 1x0) [GSR 17.1]
- USN: 3 x F-35C [GSR 17.5]
- USMC: 2 x F-35B [GSR 17.5]
19.4 Japan
At-start status is determined by the scenario; the rest arrive as Reinforcements:
2 x F-15J (1x–1, 1x0), 2 x F-4EJ (1x–1, 1x0), 2 x F-2A (1x–1, 1x0)
20.0 Integrating Next War: Korea
The following rules explain how to integrate the games Next War: Korea and Next War: Taiwan together.
It is assumed that players play both games at the same time. There are, however, some ramifications concerning movement between the two games, which are explained in this chapter. For convenience, each game will be called a theater (of operations). You'll need a large table…
20.1 SOF Markers
U.S. (and Commonwealth [GSR 17.12]) markers may freely set up or move between the games' Information Tables. When a marker is moved from "Used" to "Available," its owner simply places it on whichever Information Table he wishes. SOF markers may conduct missions only in the theater associated with their Information Table.
20.2 Japan Box
This box exists in both theaters and refers to the same location; all rules apply to both games. Units are free to move from either box to either theater.
20.2.1 Japanese Air Self-Defense Force
Use the Japanese air unit counters from both games (12 counters total). They may conduct missions in either theater, subject to the restrictions specific to each game.
20.3 Broadened Conflict
Instead of rolling to determine where Allied Reinforcements arrive, the Allied player may place them in either theater, subject to the current Posture restrictions and each game's specific reinforcement rules. Reinforcements are no longer delayed, nor does the Allied player need to roll to determine their arrival.
20.4 Employment of PRC Units
Both games call for the use of certain units: PRC Marines, the 1st Amphibious Mechanized Infantry Division, AMPH, SAG, CVBG, and air units. In a combined game, use only the Taiwan units. They may operate in either theater and arrive according to whichever game they arrive in first. As an exception, all Air Units from both games are used. Their initial Base Boxes are for setup in each theater, i.e., Korea's units set up on that game's Air Superiority Track and Taiwan's units on its own Air Superiority Track.
20.5 Air Units and Base Boxes
This applies mainly to the PRC and the Allies. Air units must occupy the Base Box for the theater in which they are to be used. They are subject to the range limits and rules associated with that particular Base Box. Units may transfer to the other theater by Rebasing. As an exception, units in the Japan Box may conduct missions in either theater and are governed by the range restrictions of whichever theater they operate in.
20.6 Sea Control
Use GSR 18.1.3 to determine initial Sea Control, except that the East Sea Inshore Box should be marked DPRK controlled, and the Sea of Japan Sea Box is Contested. Use the Sea Control rules from Taiwan when playing together with Korea.
Exception: Ignore GSR 5.2.2.1 in the combined game.
20.7 Victory
Record Victory Points normally in each Theater. If one side wins in one theater and loses in the other, the final result is a draw.
21.0 Examples of Play
21.1 Attacks Against Boxes [GSR 6.5.3]
In the SOF Phase of a given turn, the Allies Raid against the Airbase and Port in the PRC Box. Each raid scores a 1 Strike result. Roll immediately for Collateral Damage against the Airbase.
In the following First Attack Phase, the Allies launch a Cruise Missile attack against the Airbase in the Box, which results in a 2 Strike marker being placed. In addition, in the Second Attack Phase, the Allies conduct 2 Attacks with 2 Air Units each; one against the Airbase and the other against the Port in the PRC Box. The attack on the Airbase results in two 1 Strike markers (which becomes a single 2 Strike marker), for a total of one 1 Strike and two 2 Strike markers. The attack on the Port results in two 1 Strike markers (for a total of one 1 Strike and one 2 Strike marker). After the Collateral Damage Phase is resolved, the Allies remove a 2 Strike and a 1 Strike marker from the Airbase (total 3), earn 2 VP, and advance the Airbase Captured/Destroyed marker one space forward on the General Track. The Allies remove both Strike markers from the Port and earn 2 VP. During the Reorganization Phase, the Submarine Threat Level is reduced by one (for the destruction of a Port), and the remaining 2 Strike marker on the Airbase is reduced to a 1 Strike marker and will affect the determination of Air Superiority in the following turn.
21.2 Initiative [5.0]
Say a given scenario indicates that side A is the player with the Initiative in GT 1 & 2, and the Initiative VP is 20. The players' performance in the first eight GT is as follows:
| Turn | Initiative goes to: | A's VP this turn | B's VP this turn |
|---|---|---|---|
| 1 | A (special scenario rule) | 19 | 4 |
| 2 | A (special scenario rule) | 23 | 16 |
| 3 | A (VP from previous turn) | 17 | 18 |
| 4 | Contested; A is First Player | 11 | 14 |
| 5 | B (VP from previous turn) | 21 | 22 |
| 6 | Contested; B is First Player | 14 | 19 |
| 7 |
Examining the table, we have the following Initiative shifts over the course of the game:
In GT 1 & 2, side A automatically has the Initiative. The fact that side A did not earn the necessary VP (20) during GT 1 would normally produce a Contested GT 2, except that the scenario rule states side A automatically has the Initiative in GT 1 & 2.
In GT 2, side A earned more than enough VP to keep the Initiative, while side B did not. So, GT 3 will still see the Initiative held by side A.
In GT 3, neither player earns the necessary VP for the Initiative, so GT 4 is a Contested turn, with side A as First Player.
In GT 4, side B earns more VP than side A. Since the previous turn was Contested, side B gains the Initiative for GT 5.
In GT 5, both players earn enough VP for the Initiative, so GT 6 is Contested, with player B as First Player. In GT 6, side B earns more VP, so GT 7 belongs to side B's Initiative.
In GT 7 and 8, side B earns enough VP to keep the Initiative.
21.3 Clearing Operations [8.4.1]
In the Base Movement Segment, a reduced PRC Mechanized Infantry Regiment and a reduced PRC Airborne Brigade (3 SP total) move into an Urban hex with a Port. The minimum SP required for Clearing is 4, so the non-Ally knows this will be a tough fight and would like to reinforce, but has no other units available and desperately wants to control the Port.
The non-Ally player draws a Clearing marker at random from those available. He places it on the units and continues the turn. During the Clearing Operations segment of the Reorganization Phase, the non-Ally player resolves all Clearing Operations. He reveals that the marker is a 5 and proceeds to determine the DRM. He chooses the Mechanized Infantry (ER 5) as the lead unit, since it's easier to replace should it fail and suffer a loss, and compares it against the Clearing Number (which is also 5). There are no DRM. He then determines whether he has the minimum SP required and finds he is short by one. This becomes a -1 DRM. He has Mechanized Infantry present, which gives a +1. There is also a Port (Installation) in the hex, for which he takes a further -1 DRM. Finally, since he is Clearing in the ROC, he takes another -1. The non-Ally rolls a die, gets a 6 modified to 4, and just misses the Clearing Number. In addition, having fewer SP than required, he suffers a loss. The Airborne brigade remains under the Clearing marker. In the following turn, the non-Ally realizes he must reinforce in order to clear the hex, and sends another Mechanized Infantry brigade and a full-strength Airborne brigade into the hex, bringing SP to 4. In the Clearing Operations segment, he rolls an 8 and takes control of the hex, earning the associated VP.
21.4 Naval Movement [8.5.6]
For this example, refer to the Naval Display.
The Japan Box is adjacent to the East China Sea Sea Box, which is in turn adjacent to the Taiwan Strait Sea Box. The Taiwan Strait Inshore Box is contained within the Taiwan Strait Sea Box and connects all the open-sea hexes and Ports surrounding the island of Taiwan. It is a non-Ally Initiative turn.
In the Reaction Movement Segment of the Initiative Movement and Combat Phase, the Allied player moves a U.S. AMPH (with Marines embarked) from the Japan Box into the East China Sea Sea Box, which is non-Ally controlled. The Allies pass a die roll for Contested Sea Movement. In the Reaction Movement Segment of the Base Movement and Combat Phase, the Allied player moves the AMPH through the Taiwan Strait Sea Box, through the associated Inshore Box, and finally to a Port in the ROC. Since the Taiwan Strait Sea and Inshore Boxes are non-Ally controlled, the Allies make another die roll for Contested Sea Movement. They fail it and suffer an "Abort or 1 Strike" result. They have the choice of returning to their starting point, the East China Sea Sea Box, or continuing to the Port, but if they do, they place a 1 Strike marker on the AMPH and must suffer a loss from one of the embarked units.
21.5 Destruction of Installations [12.1.2]
The non-Ally player earns 2 VP for the Destruction of a Port in GT 1 and reduces the ASW Level by one. The Allied player spends two Supply Points to begin the repair process and places a "2 Strike" marker. If the non-Ally player attacks the Port in GT 2 and Destroys it again, he earns no VP and does not reduce the ASW Level. If, instead, the non-Ally waits until GT 4 (after the Port has been fully repaired and the ASW Level increased by one) and Destroys it again, he earns another 2 VP and the ASW Level is again reduced by one. Players must track this separately.
21.6 Air Superiority [22.10]
Air Superiority Combat Example: For clarity, this example uses very few units to illustrate the entire process.
Assume it is turn 3 of a given scenario. The U.S. AWACS Advantage is "2". The non-Ally player assigns 4 air units (3 DPRK and 1 PRC) to the Air Superiority Box. The Allied player assigns 5 units (2 U.S. and 3 ROK) to the Air Superiority Box. The units are these:
Since the Allied AWACS Advantage is "2", the Allied player chooses the first two engagements. He engages the PRC J-11B with his F-22, and the enemy MiG-29 with his F-15.
Now the non-Ally chooses an engagement: he engages the ROK F-5 with the MiG-23.
The Allied player would normally choose two more engagements, but the enemy has only one unit left to engage. So he engages the remaining MiG-21 with the ROK KF-16.
The Allied player decides to allocate the excess F-4D to combat, pairing it against the MiG-23 alongside the ROK F-5.
The combat is resolved as follows: the U.S. F-22, the only unit with Long-range capability, fires against the J-11B. The die roll is "5". There are no modifiers for Long-range combat, so the result is looked up on the "+1" column (the F-22's combat strength of 6 minus the J-11B's 5 gives +1). The result is "Ad/D". Since only "Ad" applies during Long-range and Standoff combat, the F-22 will have the Advantage over the J-11B. The non-Ally player rotates the J-11B to indicate this.
Now both players attack with their air units capable of Standoff combat. Combat is simultaneous, except for the F-22 against the J-11B. The F-22 has the Advantage, so it will fire and assign losses before the J-11B fires (which it cannot do anyway, since Stealth aircraft can only be attacked in Close Combat).
The die rolls and DRM for Standoff combat are as follows:
F-22 vs. J-11B: The F-22's die roll is 3, with no modifier, on the +1 column, giving an "A" result. The J-11B immediately Aborts its mission (the F-22 has the Advantage) and is placed in the PRC's "Aborted" box.
F-15 vs. MiG-29: The F-15's die roll is a 7. The MiG-29's die roll is 1. The F-15 rolls on the +1 column. This results in no effect against the MiG-29. The MiG's die roll is modified by +1 (DPRK Standoff attack) for a final 2. On the -1 column, this gives "A". The F-15 immediately Aborts its mission and is placed in Japan's "Aborted" box.
F-5 and F-4D vs. MiG-23: The F-5 cannot fire, having no Standoff value. The F-4D's die roll is "7", which on the "0" column gives no effect. The MiG-23 fires against the F-5 (it could choose either opponent, but not both). The die roll is 5, modified by +1 (DPRK Standoff combat) for a final "6". On the +1 column, this gives "Ad/D". The Allied player rotates the F-5 to indicate the Advantage situation for the MiG-23.
KF-16 vs. MiG-21: The MiG-21 cannot fire, having no Standoff capability. The KF-16's die roll is an 8. On the "+2" column this results in no effect.
Close Combat is now resolved for all units, sequentially, from the highest Air Combat Value to the lowest, assigning losses after each group of air units with the same combat value has fired.
The KF-16, with a value of "4", fires against the MiG-21. The die roll is "1" modified by "-1" (Pilot Skill) for a final "0" on the "+2" column. The "X" result eliminates the MiG-21. Since the KF-16 was the only unit with a value of "4", losses are now assigned. The MiG-21 is removed from the game (and the Allied player earns VP).
Now, all units with an Air Combat Value of "3" fire. The MiG-23's die roll is zero, which on the "+1" column eliminates the ROK F-5. The ROK F-4D also rolls a zero, modified by -1 (Pilot Skill), which on the 0 column gives "X", thereby eliminating the MiG-23. All units with value 3 have finished firing, so losses are assigned. The F-5 and the MiG-23 are removed from the game (earning VP).
With no engaged units remaining, the Air Superiority combat ends.
Since the Allied player has a 3:1 Advantage in air units remaining in the Air Superiority Box, the Allied player has Air Superiority this turn. Because of this, the Allied AWACS Advantage increases by one to "3".
21.7 Wild Weasel [23.3]
In a given turn, the Allied player assigns a Wild Weasel mission. The non-Ally Air Defense Tables are currently: Detection = 8, SAM = 8, AAA = 3.
The Allied player assigns the following units to the mission: an Attack unit, a Defense Suppression unit, and an Escort Fighter.
The non-Ally player now attempts to detect the mission. He rolls a die and consults the Detection Table on the "8" column (his current Detection Value). The die roll is 4, modified by +3 (+1 for each of the three Wild Weasel units on the mission) to 7, which gives a "D". The mission is Detected and will suffer ADF but cannot be Intercepted. The F-15C returns to the "Flown" box, since no escort is needed and it cannot be attacked by SAM or AAA.
To resolve SAM fire, the non-Ally player rolls once against each of the three remaining units (Wild Weasel units accompanying an Attack or Wild Weasel Mission are subject to SAM and AAA fire), consulting the "8" column of the Advanced Game Air Defense Table for each unit. The results are as follows (DR = die roll).
Each of these die rolls is modified by +6 (+2 per Wild Weasel unit on the mission). Therefore, fire against the two F-16DJ WW has no effect, and fire against the F-4E WW gives a "+1". Since Defense Suppression aircraft ignore all "+#" results, this result also has no effect.
Since the mission was Detected, local AAA fire now engages each unit. The DPRK player's die rolls, one for each unit, on the "AAA 3" column of the Advanced Game Air Defense Table, are as follows:
There are no modifiers applicable to these attacks (weather conditions are Clear). The fire against the F-16DJ WW gives a "+1" DRM on the following Wild Weasel attack. The second F-16 is missed instead, while the F-4E WW suffers an "A" result, is removed immediately, and placed in the ROK Aborted box.
Now the F-16DJ WW conduct their attacks. The Allied player announces that F-16DJ WW #1 will attack the enemy Detection Table, while #2 will attack the SAM Table (they could have both attacked the same table). He rolls a die for each unit and consults the Attack Table. F-16DJ WW #1 rolls a "2", modified by +1 for the AAA result and by -2 for Pilot Skill, for a final result of "1". The combat result is "2", which causes two hits against the enemy Detection Table (which is immediately reduced to "6"). F-16DJ WW #2 rolls a "7", modified by -2 for Pilot Skill, to a final result of 5. The result is "1", which causes one hit on the enemy SAM Table (which is immediately reduced to "7"). The Wild Weasel Mission is now complete and the two aircraft return to the Flown box.
21.8 Interception [24.4]
In turn 1 of a given game, the Allies assign an attack mission as follows: an Escort, a Defense Suppression unit, and an Attack unit.
This attack is detected with an "ED" result. The non-Ally intercepts with a MiG-29 and a MiG-23. The Attacking units and the Interceptors are as follows: Interceptors; Escorts.
Since the intercepting player may choose the engagements, the non-Ally player assigns his MiG-29 against the ROK KF-16C and the MiG-23 against the escorting F-4D.
Neither side has units with Long-range firing capability, so we move to Standoff combat.
All units with Standoff capability fire (simultaneously). Their die rolls are as follows:
We resolve the MiG-29's attack first. The column on the Air Combat Table is zero (the MiG's ACR of 4 minus the F-16C's 4). The die roll is "2" modified by +1 (DPRK Standoff attack) for a final "3", which results in "A". The F-16C, after it fires, will go to the Aborted box. The F-16C's die roll of 6 misses.
In the other engagement, the MiG-23's roll of 7 (also on the zero column) modified by +1 (DPRK Standoff attack) has no effect. The F-4D's roll of 5 gives "Ad" (Advantage) for the Allied air unit in the next phase of air combat. The non-Ally player rotates the unit 180° to indicate the disadvantaged situation. Standoff combat is now complete.
The MiG-29 is now unengaged, so it may choose another unit to attack. It chooses the F-4E WW (because it does not return fire), ignoring the Attacking aircraft.
We now resolve Close Combat; units with the better ACR fire first. The MiG-29's die roll is 8, modified by -1 (Pilot Skill) and by another -1 for firing against an aircraft with a () value, for a final result of 6, which on the +1 column of the Air Combat Table gives "D". The F-4E is damaged and, having only one strength level, is eliminated (awarding VP to the DPRK player).
In the other Close Combat, the F-4D fires first, even though it has the same ACR as its opponent, because it has the Advantage. The die roll of 2 is modified by -1 (Pilot Skill) for a final 1, which is "DA" on the zero column. The MiG-23 is flipped to reduced strength and immediately Aborts its mission. Note that if the F-4D had not had the Advantage, the MiG-23 could have fired before suffering the loss and aborting the mission.
21.9 Air Attacks [23.4.1]
Attack Example: (for the beginning of this example, see the Interception example). The Allied player is left with one Attacking unit, an F-4D 3*-2-2, with Pilot Skill -1. Since the Detection result was "ED", and the unit survived Interception, it now suffers SAM fire. The non-Ally player, with a SAM value of "6", rolls once on the Advanced Game Air Defense Table. The result is "5" and, with no applicable DRM (the Wild Weasel that accompanied the mission was destroyed, so the +2 DRM for the mission is lost), the result on the "6-7" column gives "+1". The air unit will be able to attack the target (an enemy "-2" MSU detected in Woods and Rough terrain), but will suffer an adverse +1 DRM.
Since the Attack was Detected, and the F-4D has no Standoff Attack capability, it must suffer AAA fire before its attack. The DPRK AAA Value (fortunately for the Allies) is "1". The AAA die roll is "2", which results, on the "AAA 1" column, in a "+1". Therefore, the F-4D will have another DRM, for a total of +2.
Finally, the F-4D can drop its bombs. The Allied player rolls on the Attack Table, using the column where his Attack Value (2) crosses the target's terrain (Rough and Woods). In this case, it is the third column from the left. The die roll is 3, modified by +2 for the SAM and AAA results and by -2 because the target has a "-2" Detection marker, and another -1 for Pilot Skill. The final die result is 2, which gives a "1" result, indicating a "1 Strike" hit on the MSU.
A "1 Strike" marker is placed on the MSU (which keeps its "-2" Detection marker until the turn's Reorganization Phase), and the Attack ends. The F-4D is placed in the Flown box.
21.10 Tactical Support [23.5]
This example assumes "Local Detection" is used for the mission. After a certain ground combat has been declared, the U.S./ROK player assigns Tactical Support missions to his attack. He assigns two U.S. A-10Cs accompanied by a U.S. F-16DJ Wild Weasel for Defense Suppression. In addition, he assigns one AH-64 Apache attack helicopter (he could have assigned up to 2 helicopters to the attack).
Tactical Support; Defense Suppression; Tactical Support.
The non-Ally player does not employ Tactical Support and proceeds with the attempt to detect the missions, rolling once to detect the air mission ("2") and once against the helicopter ("5"). The +1 DRM for the Wild Weasel makes the first die roll "3", giving a "D" result (the mission is detected). The "5" against the helicopter does not detect it, so the helicopter will subtract its full CSR from the combat die roll without suffering SAM or AAA fire.
Since the air units were detected, local SAM fire attacks each unit. The SAM die rolls are as follows:
All SAM attacks have a +2 DRM for the presence of the Wild Weasel unit on the mission. Therefore, consulting the "Local" column of the Advanced Game Air Defense Table, we find that all the SAM shots miss.
Now, each unit is attacked by AAA fire using the "Local" column. The die rolls for the AAA attacks are:
There are no applicable DRM. Fire against the F-16DJ WW and A-10C #2 misses. The "0" against A-10C #1 results in an "A", which causes that unit to Abort its mission; it is placed in the Aborted box.
Both the AH-64, which was not detected, and A-10 #2, having survived SAM and AAA fire, contribute their CSR to the combat. Since they are attacking, this gives a "-6" [the maximum possible DRM for Tactical Support] (-2 for the AH-64 and -4 for the A-10) as the DRM to Tactical Support.
21.13 UN Resolutions [28.0]
We are in GT4 of a given scenario, and a UN Resolution has passed. The non-Ally player (as the PRC) chooses not to Veto. The Allied player (as the U.S.) chooses not to Veto the Resolution because the current VP situation is a Draw. The non-Ally, as the Initiative/First Player of the scenario, immediately declares that it will Refuse to Comply with the Ceasefire, and the Allies immediately earn 10 VP this turn and in every subsequent Initiative Phase in which the non-Ally player continues to Refuse Compliance, until the end of the game. If the UN Mandate optional rule is used, then the U.S. Intervention Level increases by one.
If instead the Allies choose to Veto the Resolution, they lose 5 VP and the game continues normally, including rolling for another UN Resolution the following turn.
Counter Notes
Unfortunately, the PRC's 45th Airborne Division was misprinted on counter sheet #3. Fortunately, we were able to correct the error in time, so the correct counter is on sheet #1.