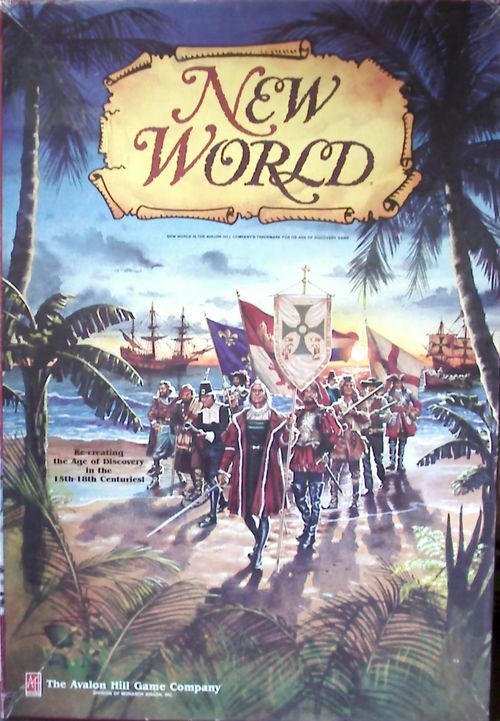
New World
New World Rulebook
Table of Contents
Table of Contents
- 1. Introduction
- 2. Components
- 3. Prepare for Play
- 4. Sequence of Play
- 5. Planning Stage
- 6. Outbound Naval Movement
- 7. Gold Phase
- 8. Land Movement Phase
- 9. Native Uprisings
- 10. Survival
- 11. Political Control Phase
- 12. Homebound Naval Movement Phase
- 13. Income Phase
- 14. How to Win
- 15. Alliances
- 16. The Exploration Version
- 17. Alternate World Version
- Optional Rules
- 18. Perils of the Deep
- 19. Reduced Political Control Benefits
- 20. Extended Political Control Benefits
- 21. Two Player Version
- 22. Piracy
- Transcription notes
1. Introduction
NEW WORLD is a multi-player game for two to six players based on the discovery, colonization, and exploitation of the Americas. Each player assumes the role of a European power exploring and exploiting the New World. In the Standard Game, the geography (and potential rewards) of each Area is visible and known to the players so that they can plot their strategy knowing what lies ahead. However, in the Exploration version, geographic liberties are taken to vary and hide the contents of each Area so that players face a degree of the same uncertainty experienced by the great explorers. Although the borders of the two continents remain unchanged, their contents vary dramatically from game to game so that players will truly face a NEW WORLD every time they play.
2. Components
2.1 Inventory
The game consists of the following equipment:
- one 22" x 16" gameboard
- 26 Area Hex Tiles (used only in the Exploration Version)
- three sheets of die-cut playing pieces
- one pad of Planning Sheets
- four six-sided dice
- six Fleet & Sequence of Play cards
- Play Money (40 each in 100, 20, 10, 5, and 1 denominations)
2.2 Mapboard
The mapboard depicts North and South America with hexagonal cells overlaid to determine land movement and Area boundaries. Each hexagonal cell is hereafter called an Area. Land depictions outside these Areas are considered unplayable, although each player is considered to have a Home Country "offboard" from which he sends new forces and returns his Fleet each turn. Land movement between Areas is limited to adjacent Areas sharing a common hexside with a land depiction across that hexside.
Example: Land Movement is not possible between hexes J and M.
2.21 Survival Climate
The hexsides of each Area are color-coded to correspond to one of five different Climate ratings printed in the upper left hand corner of the board reflecting the general survivability of that Area. The higher the rating, the better the chances for survival.
2.22 Identification
Coastal Areas are identified by a white letter inside a black Anchorage dot in an adjoining Sea Zone connected to that Area by white dashes. Players recording their landings in the coming turn always do so by writing down the Area Letter of the Area they wish to land in. Every hex contains an alphanumeric ID in the top corner. The number is its Area Climate Level and the letter is its exclusive hex identity.
2.23 Natives
In the center of each Area is a number beneath a Bow & Arrow symbol which indicates the number of Natives in that Area at game start.
2.24 Resources
Some Areas contain a Resource symbol depicting two barrels, which reflects the doubled monetary value of all Resources in that Area.
2.25 Gold
Some Areas contain one or two black triangles which represent the existence of mineable Gold ore in that Area.
2.26 Cities
Three Areas contain a City symbol which represents a rich Native civilization. Beneath each City symbol is a number reflecting its value in Gold Bars received for every turn it is looted (either "x2", "x3", or "x4").
2.27 Sea Zones
Ocean Areas are divided into separate Sea Areas by thick white lines and identified by their distance from "offboard" by the large white numeral inside that Sea Zone.
3. Prepare for Play
3.1 Standard Game
Set the Area hex tiles aside. They are not used in the Standard Game except to mark unplayable Areas in games with less than six players. Consult the Unplayable Areas Display printed on the map to determine which Areas should be in play. Use a black hex tile to cover each unplayable Area in accordance with the map diagram. [These are only suggestions. Once players have become familiar with the game, they may experiment with different combinations of playable Areas as they see fit.]
3.2 Natives
In each playable Area, place a number of Native pieces equal to the number beneath its Native symbol.
3.3 Gold
In each playable Area that contains a triangle, place a number of Gold Site triangular pieces (white side up) equal to the number of black triangles in that Area.
3.4 Turn
Place the Turn marker on the Turn 1 space of the Turn Record Track and give each player a Planning Sheet, a Fleet card, and all of his Political Control markers except one which is placed in an opaque "Initiative" cup suitable for random draws.
3.5 Banker
Elect one player to serve as Banker throughout the game. He will dole out income as earned from the game's stock while keeping his own funds separate. All transactions are made in units of international currency which, for the sake of simplicity, we will refer to as dollars. The Banker now gives each player $160 to start the game in the following denominations:
- one $100
- two $20
- one $10
- one $5
- five $1
Should there be a shortage of big bills in long, six-player games, use the "No Gold" triangular blanks as $500 pieces. The Banker also separates and maintains the piles of available Soldiers and Colonists which each player may purchase or build as the game progresses, giving the appropriate number to each player as they acquire them.
3.6 Game Leader
All players roll the dice to determine a High Roller who will start play as Game Leader. He is given possession of an extra Fleet card which he flips to the Sequence of Play side and recites the order of play as each turn unfolds. He also makes all the common die rolls and chit draws which affect all players in a given turn. At the end of each Game Turn, the Game Leader passes the Sequence of Play card to the player on his left who becomes the new Game Leader.
4. Sequence of Play
4.1 Planning Stage
Having determined the number of new Colonists he will receive that turn, and having paid for his Turn 1 Exclusive Landfall (5.41), each player secretly records on his Planning Sheet his builds for that turn (5.2-5.3) and where he will land his Outbound Convoy (5.4). Once all players have finished recording their move for that turn, each announces his builds, pays the Banker their cost, receives his newly purchased units from the Banker, and places them on his Fleet card.
4.2 Outbound Naval Movement
Each player simultaneously moves his Fleet marker to his recorded initial Anchorage Dot and rolls for any Naval losses (6.1-6.22). After required disembarkation of any scheduled passengers onto the Anchorage Dot, coastal naval movement is then carried out to all recorded secondary Anchorages (5.4; 6.3). The appropriate number of dice are again rolled to determine any naval losses incurred.
4.3 Gold Stage
The Game Leader places gold and determines depletions and new discoveries.
4.31 Depletions
The Game Leader places a gold bar(s) on each working Mine/Conquered City on which there is a Miner/Soldier, and makes a Depletion die roll for each Mine/City as he does so. A die roll of "1" depletes that site and removes the Mine/City marker from the board.
4.32 Discoveries
The Game Leader rolls a die for each Gold Site marker containing a Prospector. A die roll of "5" or "6" discovers Gold and flips that Gold Site marker to its "Mine" side.
4.4 Initiative Determination
The Game Leader draws the Political Control markers out of the Initiative Cup one at a time to determine the order of movement and combat resolution in the coming turn and places them in descending order in the Initiative Display.
4.41 Land Movement
If the moving player has Personnel units or Gold in Coastal Areas which wish to embark on ships, he places them out to sea on that Area's Anchorage dot (8.21). Next, any/all of his units in any Areas and not on a ship may move overland one hex. Finally, he may move any Personnel unit(s) offshore on the Anchorage dot onto their landing Areas. Then the next player on the Initiative Display may move his Personnel units.
4.42 Combat vs Players
After all players have finished movement, each (in the order of the Initiative Display) declares and resolves any battle that he will fight in each Area against opposing players.
4.43 Combat vs Natives
After all players have finished combat vs opposing players (8.3-8.32), each (in the order of the Initiative Display) declares and resolves any battle that he will fight in each Area against Natives.
4.5 Native Uprisings
The Game Leader makes a single die roll to determine the Uprising Climate for the entire gameboard. Each Area with an Uprising has that combat resolved with a single die roll by each player whose Personnel are being attacked (8.33).
4.6 Survival
The Game Leader makes a single die roll to determine Survival losses for all players over the entire mapboard (10.1-10.2).
4.7 Political Control
A player with at least four Colonists/Miners in an Area and a majority of the Colonists/Miners in that Area may place a Political Control marker there. However, if there are any Soldiers/Prospectors in that Area, he must also own the majority of those present in that Area in order to maintain that Political Control. Players who cannot fulfill these qualifications must remove their Political Control marker from the Area.
4.8 Homebound Naval Movement
All players now move their Fleet marker along Coastal waters to pick up any Personnel/Gold on Anchorage Dots they wish to take offboard; making the normal dice rolls for Naval losses exacted along the way. Having completed all of their pickups, the remaining ships of the Fleet return offboard, once again chancing Naval Loss dice rolls (12.1-12.2).
4.9 Income
The Banker pays each player for Political Control and Resources established in the New World plus payment for all Gold delivered offboard. This concludes one Game Turn. Pass the Game Leader card to the player to the left, move the Game Turn marker to the next turn space of the Turn Record Track and return any Soldiers in the new turn's Replacement Box to the Banker as allowable builds.
5. Planning Stage
5.1 Colonists
Each player, at his option, either collects four Colonists from the Banker or rolls a die to determine how many new Colonists he will receive that turn. He is entitled to a minimum of three new Colonists regardless of the die roll. Any Colonist returned from the New World, or received but not sent to the New World, must be returned to the Banker.
5.2 Soldiers
Each player secretly records the number of Soldiers he will buy for $10 each on the proper line of his Planning Sheet for that Game Turn. No more than ten Soldiers may be bought in each turn by each player, and even that number is subject to the amount available in the player's Soldier pool as maintained by the Banker (which can never exceed 24). Existing forces plus casualties on the Turn Record Track (8.315) will reduce each player's available Soldier pool accordingly.
5.3 Ships
Each player secretly records how many Ships he wishes to Maintain from the previous turn and how many new Ships he wishes to build on the proper line of his Planning Sheet for that Game Turn. It costs $4 to Maintain an existing Ship and $12 to build a new one. No more than six new Ships may be built by a player per turn, and no more than twelve Ships may exist per player. Each Ship may carry up to two Personnel units and two Gold Bars. It may not carry more Personnel by not carrying Gold, and vice versa. All Ships maintained must sail with the Fleet to the New World; they may not remain behind.
5.4 Landings
Each player secretly records where in the New World he will send his Fleet to land his Colonists and Soldiers, and records that Area Letter and the number of Soldiers and Colonists he will land there on his Planning Sheet for that turn. If he wishes to land Personnel in more than one Area, he records the subsequent Area(s) and the Personnel which will land there on the secondary and tertiary Landing lines of his Planning Sheet for that Turn as needed. No more than two subsequent landings may be made per turn. Each written move must be carried out unless Naval Losses eliminate the required Personnel first. The player may choose which of his Multiple Landing Areas will receive any shortfall of scheduled Personnel landings due to Naval losses. However, a player may never land more of either type of Personnel in an Area than is specified on his Planning Sheet for that Area.
5.41 Exclusive Landfalls
At game start, before recording his Landing instructions but after determining his new Colonists, each player secretly records a bid for the right to choose his initial Anchorage. When all bids have been recorded, they are revealed and the highest bidder wins the right to choose his initial Landfall, indicating his choice by placement of his Fleet marker there. No other player may land there on Turn 1. The next-highest bidder may then select his initial Landfall from the remaining Coastal Areas and so on until all players have selected their exclusive Turn 1 Anchorage. Tie bids are resolved with a random die roll, the high roller selecting first.
5.411 Exclusivity
Players may land only at their Exclusive Area on Turn 1; they may not make secondary or tertiary landings. Players may make up to three landings per turn on any playable Areas after Turn 1.
5.412 Handicap
The money from the highest bid is given to the lowest bidder. All players pay their bid to the player at the opposite end of the bidding scale; the second-highest bidder in a six-player game paying the fifth-highest bidder and vice versa, the third paying the fourth, etc. In games with an odd number of players, the player in the middle of the bidding scale does not exchange bids with anyone.
5.42 Fleets
All ships of a player form a single Fleet and must stay together at all times on the player's Fleet card. If the player wishes to move some Ships on to another Area they must all go. Ships never leave a player's Fleet Display card which is kept in front of him at all times. The actual location of the Fleet on the gameboard is marked by that player's Fleet marker.
5.5 Payment
Once all players have finished their written Planning for the current turn, their builds are purchased and announced with the Banker collecting the required funds and dispensing the purchased units. Previously built ships that have not been Maintained are returned to the Banker.
6. Outbound Naval Movement
6.1 Initial Landfall
Each player simultaneously moves his Fleet marker to the initial Anchorage Dot he has noted on his Planning Sheet for that turn and determines if any ships or Personnel were lost in the crossing by rolling a number of dice equal to the Sea Zone Number to which he has moved.
6.2 Naval Losses
For each "1" rolled in his Initial Landfall die roll, the player must make an additional die roll, consult the Naval Losses Table, and take all required losses prior to resolving the next Naval Losses die roll.
6.21 Naval Personnel Losses
Whenever a player suffers both Ship and Personnel losses, he must remove the Personnel before determining which Ships are lost. He need not arrange the Personnel or Gold on specific rows of his Fleet card unless he loses a Ship, in which case he must arrange the contents of each Ship on its own row of that Fleet card corresponding to a particular Ship. A lost Ship is removed with all of its contents and is separate from any other required Personnel losses.
6.22 Ship Losses
Whenever a Ship is lost from a multi-Ship Fleet, the Ship lost is determined by rolling a die and removing the Ship corresponding to the die roll. If the die roll is higher than the number of Ships available, the die roll is repeated until a ship is selected. If a Ship is lost from a Fleet having more than six Ships, the player must determine which Ships will be subject to the Ship-loss die roll by reducing the eligible number to six or less. He does this by dividing his Ships as equally as possible between an "odd" flotilla and an "even" flotilla. He then rolls a single die to determine whether his "odd" or his "even" flotilla will be susceptible to loss. The group rolled is then subject to another single die roll to determine the actual ship lost.
Example: Player 1 makes his Initial Landfall in Area C in Sea Zone 4, so he must roll four dice. He rolls a "3", "4", "6" and "6", and consequently suffers no losses. Player 2 makes his Initial Landfall in Area H in Sea Zone 3 and therefore rolls only three dice. However, his die rolls are "1", "3" and "1", so he must roll twice on the Naval Losses Table. His first Naval Loss die roll is a "4" causing the loss of one Soldier which he immediately removes from his Fleet card. His next Naval Loss die roll is a "1" causing the loss of another Soldier and a Ship. He now removes another Soldier from his Fleet card. At this point, because he is about to lose a Ship, Player 2 must take the time to arrange the Personnel contents of his Fleet card by placing each Personnel unit on the row that corresponds to a particular Ship. If that Ship is sunk, any Personnel unit(s) on it is lost as well. Player 2 has seven ships in his Fleet so he must determine which are eligible for loss. The ships on his Fleet Card are divided into two groups: four in the "Even" flotilla and three in the "Odd" flotilla. He rolls a die to determine whether the Even- or Odd-numbered flotilla is subject to loss and rolls a "2", thus subjecting the Even-numbered flotilla to loss. There is no need to rearrange the Ships on the Fleet Card. Player 2 now rolls a single die until he rolls a "1", "2", "3" or "4" to determine which ship of the "Even" flotilla (and its contents) is lost.
6.3 Coastal Movement
Whenever Ships move from one Anchorage to the next, they must again roll to see if they incur any Naval losses. All such coastal naval movement ignores the numbers printed in the Sea Zones and instead requires the rolling of one die for setting sail and one additional die for each Sea Zone line crossed. Each "1" rolled requires a further die roll on the Naval Losses Table.
Example: Player 2 made his Initial Landfall in Area H after rolling three dice for the crossing. After landing six of his ten Personnel there, he sets sail to land his remaining four Soldiers in Area M. He must roll two additional dice to determine if he has suffered any Naval Losses for Coastal Movement (one for setting sail and one for crossing into Sea Zone 4). Had he gone to Area O instead he would have had to roll only one die because he would not have crossed a Sea Zone. Had he gone to Area V he would have had to roll seven additional dice; one for setting sail and six for crossing six Sea Zone lines (note the triple lines between Zones 6 and 9).
6.4 Anchorage
Any Personnel still with the Fleet at its final Destination remain on board and do not disembark until the Land Movement Phase. While on board they are considered part of the Area in which the Fleet is anchored. The player may, if he wishes, refrain from landing them in the Land Movement Phase, and instead may sail them offboard with his Fleet at the end of his turn. Colonists remaining on board cannot be carried forward to the next turn but any Soldiers returned offboard can be retained and sent Outbound later.
6.23 Gold Losses
During Homebound Naval Movement, Ships may also carry Gold. Unlike Personnel, Gold may be apportioned equally between all Ships in a Fleet by dividing each Gold Bar's $40 value equally among those ships. A player wishing to apportion his Gold cargo equally among his vessels merely places it in the "Average" box on his Fleet card rather than in an individual ship row.
6.24 Personnel Losses
Losses of Soldiers and Colonists to any cause other than Native Uprisings are interchangeable if the specified Personnel type is not available; i.e., a Fleet required to lose a Soldier but which has only Colonists remaining, must lose a Colonist instead. Colonists/Miners (as well as Soldiers/Prospectors) are considered equivalent for purposes of fulfilling losses. In the case of Native Uprisings, any specified Colonist losses are met as far as possible, but all excess losses are ignored.
7. Gold Phase
7.1 Overview
There is no Gold Phase during Turn 1 since only those players with Personnel already actively prospecting, looting, or mining for Gold can participate in this phase.
7.2 Depletion
The Game Leader places a Gold Bar on each Mine marker that contains a Miner and places Gold Bars equal to the city's value on any City marker that contains a Soldier. While doing this, he rolls one die for each such Mine or City. If he rolls a "1", the Mine/City has been depleted and is removed. The Gold Bar(s) remain and may be moved normally (8.223).
7.3 Discoveries
The Game Leader rolls a die for each Gold Site marker that contains a Prospector. If he rolls a "5" or "6", Gold has been discovered and the Gold Site marker is flipped over to become a Mine marker. If a Miner is placed on the Mine marker in the upcoming Movement Phase, it will produce a Gold Bar in the next turn. The Prospector, its job done, is flipped back to its Soldier side.
8. Land Movement Phase
8.1 Initiative Determination
The Game Leader draws a Political Control marker out of the Initiative cup and places it in the "1" space of the Initiative Display on the gameboard. He then draws the remaining Political Control markers from the Initiative Cup one at a time, arranging them in descending order on the Initiative Display for all to see. This sequence determines the order of all land movement and combat in the coming turn. For the remainder of the turn, no player may move or resolve combat until the preceding player in the Initiative Display has finished his movement or combat resolution.
8.2 Player Turn
Each player, in the order shown by the Initiative Display, takes his turn moving his Personnel and Gold in the following order. Having completed all of his movement, the turn passes to the next player on the Initiative Display, and so on until all players have moved.
8.21 Embarkations
Personnel already present in an Area may embark upon a Fleet marker standing offshore. Although embarked, they are still considered as being part of the Area and take part in combat and are subject to Land Attrition. Personnel intending to embark even though there is no Fleet offshore may be picked up by the Fleet on its return journey by being placed offshore on the Anchorage dot for that Area. Should the Fleet suffer Ship losses so severe as not to be able to pick them up, the Personnel are merely returned to the Area from which they came.
8.22 Land Movement
Each moving player may move each of his Personnel one Area to any adjacent Area(s) provided there is a direct land connection between the two hexes. The only limitation to this movement is that a force of Soldiers and/or Colonists may not enter an Area from which a larger force of opposing Soldiers has just entered their own Area during that Game Turn.
Example: Land Movement between J and M, or between K and M, is not allowed because there is no land connection directly between the two hexes. If France moves six Soldiers from D to H, England could not move any Personnel from H to D subsequently during that turn unless it had at least six Soldiers in the moving force.
8.221 Gold Sites
Any Soldier ending its movement in an Area that contains an unoccupied Gold Site marker may be placed directly on the marker with the Prospector side face up to indicate that he is Prospecting. Only a Soldier can prospect. Similarly, any Colonist ending his movement in an Area that contains a Mine marker not already occupied by an opposing player may be placed on that Mine marker with the Miner side face up to indicate that he is working that Mine. Only a Colonist can mine.
8.222 Cities
Each of the three Cities on the board yield Gold if all of the Natives in its Area have been eliminated. Once a player has eliminated all the Natives in that Area or moved into an Area where all the Natives have already been eliminated but no opposing Soldier is present on the City marker, he places one of his Soldiers on that City marker to indicate that he is entitled to loot that City. This right can only be taken away from him by force or persuasion. He also loses the right if for any reason he removes his Soldier from the City marker. Only a Soldier can loot.
8.223 Gold Movement
A player in possession of Gold Bars may move them one Area per Player Turn along a line of his Personnel. Gold cannot move into an Area and out to sea in the same turn. If he wishes to move Gold into an Area where he has no Personnel, at least one Personnel unit must accompany the Gold Bar(s) as part of their normal move. An opponent can steal the Gold if all Personnel belonging to the player who owns the Gold Bars are eliminated from the Area that Gold occupies. Should only one survive in the face of a larger force, that one unit still possesses the Gold. Agreements to share the Gold or pay for safe passage can be reached as alternatives to combat.
If Gold is loaded onto an offshore Fleet, it is still considered in the Area and if all defending units are eliminated before the Fleet sets sail, it can be captured and returned to the Area, or shipped home by its new owner on his own Fleet. However, offshore Gold ready for loading when all of the owner's Personnel in an Area are eliminated due to Attrition can still be shipped home if there are no opposing Personnel in the Area. If there are opposing Personnel in the Area, it can be shipped only with that opponent's permission (probably secured in exchange for a tidy sum). At this point, the opponent does not actually own the Gold because it can be captured only during the Combat or Land Movement phase, which will have already passed, but the presence of his Personnel prevents the ship's crew from leaving with the Gold.
Any Gold that is lying unattended (due to death in the Survival Phase or a Native Uprising) is owned by the first player to reach it in the following Land Movement phase (even if another player already has units in the same Area). Units already in the Area claiming that Gold may move out of the Area with the Gold in the same turn they claim it.
8.23 Disembarkation
Having finished his Land Movement, the moving player may now land his newly arrived offshore Personnel, thus ending his portion of the Land Movement phase and beginning the turn of the next player on the Initiative Display. The disembarking units may move directly onto unoccupied Mines/Cities in that Area.
8.3 Combat vs Players
After all players have moved, each player, in the order of the Initiative Display, may engage in combat against Personnel of other players currently in the same Area. Only Soldiers may attack; see 8.31. Colonists/Miners and Prospectors never attack but do defend themselves if attacked. Prospectors defend as if they were Soldiers.
8.31 Resolution
The attacking player specifies how many of his Soldiers are participating. If he wants any Prospectors in the Area to attack also, he must flip them to their Soldier side. Regardless of the outcome of the battle, they may not prospect in the next Discovery Phase (4.32), although they may still take possession of a captured mine. Soldiers of the attacking player in the same Area who were not part of the attacking force may move onto any vacated mines as Prospectors. He then rolls a die for the first attacking Soldier. If he rolls an ODD number, the attacking Soldier is eliminated. If he rolls an EVEN number, a defending Soldier is eliminated. If he rolls a "6", not only is a defender eliminated but that attacking Soldier may immediately roll again, this time ignoring any ODD die rolls. If the attacker again rolls a "6", he may attack yet again, and so on until he fails to roll a "6". The battle continues until each attacking unit has rolled or all defending units have been eliminated. The attacker cannot cancel an attack prior to its conclusion, no matter how badly it goes, unless the defender agrees.
8.311 Multiple Attacks
An attacker can specify some units to attack while the others await the outcome. If, after finishing his attack against one opponent, he wishes to continue combat in the same Area by attacking another opponent he may do so, but only with units which were not involved in the first attack.
8.312 Attacking Colonists
If all the Soldiers/Prospectors of the defending player in an attacked Area are eliminated and the attacker still has potential attacking die rolls left he may attack the Colonists with those remaining die rolls. However, instead of each EVEN die roll eliminating a single Soldier/Prospector, it eliminates three Colonists. If less than three Colonists remain and the attacker still has an attack die roll remaining, those Colonists are automatically eliminated. An attacker suffers losses normally on ODD die rolls while attacking Colonists.
8.313 Counterattacks
The defender may attack only in his combat turn (assuming his Initiative has not already passed).
8.314 Control
At the end of a battle the attacker can place surviving units on Gold Sites/Mines/Cities or Gold Bar markers vacated by the defender to show his possession of them. An attacking Soldier cannot be flipped to its Prospector side during that turn. However, any Colonists of the attacker in that Area may be flipped to their Miner side to start working captured Mines, and any non-attacking Soldier of the attacker may claim a Gold Site as a Prospector. This allows successful attackers who have eliminated or retreated sufficient defending Personnel of the attacked player in an Area to occupy Cities/Mines/Gold Sites or capture Gold Bars before the next Movement Phase. The defender may always choose which of his Personnel to lose to satisfy losses, usually keeping those on Mines/Gold Sites, Cities, or Gold Bars to the last to maintain control of them.
8.315 Personnel Losses
Regardless of when or how they are eliminated, lost Ships and Colonists are returned to the Banker. Lost Soldiers are placed in the Replacement Box of the turn three turns hence. Only at the start of the third turn after their loss are these Soldiers returned to the Banker and again eligible for repurchase.
8.32 Retreats
The defending player in any declared battle can retreat his Colonists into an adjoining Area prior to (or even during a battle) between combat resolution die rolls if he has Soldiers in the attacked Area, and he already has Personnel in the Area to which he will retreat. He may not retreat if any other player with Personnel in the Area being retreated to objects, or if he is retreating to an Area from which the attacking Soldiers have just come. The attacker may also allow the defender to retreat his Soldiers in the same manner either before or during the battle.
Retreating Personnel may not carry Gold or move onto Mines/Gold Sites/Cities/Gold Bars. Retreating Personnel may not be used to establish Political Control or produce revenue for Resources during that Game Turn and are so distinguished by flipping them to their white "Prospector/Miner" side while keeping them off Mine/Gold Site markers.
8.33 Combat vs Natives
After all players have had their opportunity to attack opponents, each, in order of the Initiative Display, announces any attacks he will make vs Natives in the Areas he occupies. The same surviving Soldiers involved in attacks against other players may be used again versus Natives. The procedure is the same as Combat vs other players with the following exceptions:
- Natives may not retreat.
- Eliminated Natives are removed from play permanently.
8.34 Initiative Reloads
Following the resolution of all combat vs Natives, the Game Leader returns all Political Control markers on the Initiative Display to the Initiative Cup.
9. Native Uprisings
9.1 Overview
Colonists may be attacked by the Natives in an Area unless there are enough friendly Soldiers to protect them. To be sure that the Natives will not attack, the number of Soldiers (not Prospectors) in that Area must equal or exceed the total number of Colonists/Miners and Natives in that Area.
9.2 Uprising Number
The Uprising Number equals the number of Natives plus friendly Colonists/Miners minus the number of friendly Soldiers (not Prospectors) in that Area. If Personnel of more than one player are present in an Area, each player must determine the Uprising Number for his own forces, ignoring the presence of other players' Personnel. If the Uprising Number is "0" or less there can be no Native Uprising in that Area against that player. However, if the Uprising Number is "1" or more, there is a possibility of an Uprising against that player.
9.3 Uprising Climate
The Game Leader makes a single Uprising Climate die roll to apply to the entire gameboard. In each Area where the Uprising Die Roll is less than or equal to the Uprising Number, an Uprising occurs. An Uprising can occur against one, or more than one player in the same Area while ignoring others who are better protected.
Example: A player has four Colonists, three Soldiers, and a Prospector in an Area where there are two Natives. His Uprising Number is 3 [4 (Colonists) + 2 (Natives) - 3 (Soldiers) = 3]. He will suffer an Uprising on an Uprising Climate die roll of "1", "2" or "3".
9.4 Resolution
In each Uprising Area, each player affected must roll a die and refer to the Native Uprising Table to determine the maximum number of Colonists/Miners lost in the Uprising. If there are insufficient Colonists/Miners present to absorb the losses, the excess losses are ignored. Natives and Soldiers/Prospectors are never eliminated during a Native Uprising.
10. Survival
10.1 Survival Die Roll
Following the end of all Native Uprisings, the Game Leader makes a single Survival die roll that affects the entire board. The Survival die roll depicts the general degree of unhealthiness that year. Each player refers to the Survival Table and cross references the number rolled with the Climate type for each Area to determine the number of his Personnel in that Area who are eliminated. In Areas occupied by more than one player, both must suffer the required losses; i.e., the losses are not apportioned between them. Natives are not affected by Survival.
10.2 Political Control
A player with Political Control of an Area adds "1" to the Survival die roll for his Personnel in that Area.
11. Political Control Phase
11.1 Offboard
Each player is always considered to have Political Control of one Area not shown on the board which represents his home country. This Offboard "homebase" Political Control guarantees each player an income every turn no matter how poorly he fares in the New World.
11.2 Area Political Control
A player also has Political Control of each Area on the board in which he has at least four Colonists/Miners as well as a majority of the Colonists/Miners in that Area during the Political Control Phase. The majority must be based on all Personnel in the Area; not just those of the two dominant players (i.e., a player must have a majority, not just a plurality). However, if there is any Soldier/Prospector in that Area, he must also have the majority of them to gain (or retain) his Political Control there. A player loses Political Control at the end of any Phase in which his units in that Area fail to meet these requirements. Political Control is signified by placement (or removal) of the player's Political Control marker in that Area.
11.3 Natives
Natives do not affect Political Control.
11.4 Economic Value
Each Political Control is worth income equal to the amount listed under the current Game Turn on the Turn Record Track after the letters "PC". This amount increases as the game progresses.
12. Homebound Naval Movement Phase
12.1 Overview
Each player must move his Fleet offboard at the end of each turn; ships may not remain in the New World. The Fleet marker moves from its current offshore Anchorage dot to the various Area Anchorage dots where it wishes to pick up Gold or passengers. Unlike Outbound Naval Movement, there are no written instructions. A player merely moves his Fleet marker to the various Anchorage dots where he will make a pickup and transfers the passengers/Gold there to his Fleet card for the voyage home. Passengers may not disembark; they may only be picked up. The Fleet need not call at an Area to credit the Resources earned by that Area.
12.2 Naval Losses
The procedure for Naval Losses is identical to that used for the Outbound journey but in reverse and using the "Homebound" result. The Fleet must roll one die every time it sets sail plus one die for each Sea Zone it crosses while making any Coastal movement to pick up Gold/passengers. Once it is ready to sail for home it again rolls a number of dice equal to the Sea Zone from which it departs. Each "1" rolled requires another immediate die roll to determine losses from the Naval Losses Table.
13. Income Phase
13.1 Resources
Each Colonist not engaged in Mining (or retreating; 8.32) earns income equal to that turn's Resource Value which is printed on the Turn Record Track beneath that Turn. This value escalates as the game progresses. The Resource Value of Colonists in those Areas marked with a Resources "x2" symbol is doubled. A maximum of 20 Colonists can earn Resources in an Area. In a shared Area exceeding this number of Colonists, the resulting Resource income is shared proportionally.
13.2 Income
Each player collects from the Banker payment for all of his Resources, plus $40 for each Gold Bar delivered, and the current amount due him for any Political Controls he has.
13.3 Secrecy
A player's cash holdings are not open to review and may be kept secret until the end of play.
13.4 End of Turn
This ends the current Game Turn. The Turn marker is advanced one space on the Turn Record Track and the Game Leader card is passed to the player to the left who becomes the new Game Leader. Any Soldiers in the Replacement Box of the new Game Turn are returned to the Banker as allowable purchases for subsequent Game Turns.
14. How to Win
14.1 Political Control
The winner is the first player to have Political Control of five Areas in the New World at the end of any Game Turn. Offboard Political Control does not count. Should more than one player have such Political Control of five Areas at the end of a Game Turn, the winner is the one having the most Areas under his Political Control. If two or more players are tied for the most Areas under their Political Control, the winner is the player among them with the most money.
14.2 Money
If there is no winner by the Political Control Victory Conditions by the end of Turn 9, the winner is the player with the most money at the end of Turn 10. A player cannot count debts owed him by an insolvent player as part of his total.
14.3 Long Game
If players agree beforehand, they may choose to play a longer version of the game by agreeing to a set number of turns as the maximum point at which play must stop and cash totals be tallied. Whatever end point is decided upon, the maximum payoff for each Resource and Political Control will never exceed the respective $5 and $60 payoffs of Game Turn 16.
15. Alliances
An Alliance (or the sharing of abilities) is not allowed. Players may cooperate and agree to share looting or mining revenue, but the right to loot, mine, etc. belongs solely to the player whose unit is on the City/Gold Mine marker in question. It is solely up to him whether to honor any private agreements. The only recourse of a player whose "agreement" has been violated is to repay in kind at the first opportunity.
16. The Exploration Version
16.1 Introduction
The Exploration Version is played the same way as the Standard Game except that players do not know the exact makeup of any Area until after they actually move there, thus recapturing some of the uncertainty which faced the explorers of the Great Age of Discovery.
16.2 Prepare for Play
Shuffle the hex tiles and randomly deal them (with the black side face up) to cover the 26 hexagonal Areas of the gameboard. Remove the tiles indicated on the Unplayable Areas Display of the gameboard corresponding to the number of participants. Put the removed tiles aside without examining them. In this version of the game, only the tiles themselves are playable Areas.
16.3 Randomizer Cups
Secure three cups (or other opaque containers) suitable for randomly drawing markers therefrom. In the first cup place all 16 of the Gold Site/Mine markers, the 20 Gold Mine Blank markers and the three City markers. In the second, place the six Double Resource markers and the 20 Single Resource markers. In the third, place 46 (all but 18) of the Native markers and all (32) of the Native blank markers (a total of 78). Hereafter these cups will be referred to as the Gold, Resource, and Native Randomizers respectively.
16.4 Discovery
At the end of each Land Movement Phase (after all players have had an opportunity to move their Personnel units), any previously unexplored Area containing one or more Personnel units has its tile flipped over to reveal the Climate for that Area. In addition, the following markers (as depicted on the Climate Key) are drawn to determine the contents of that Area:
16.41 Gold
If the Area has a "5", "4", or "3" Climate, a single marker is drawn from the Gold Randomizer. If the Area has a "1" or "2" Climate, two such markers are drawn. Any Gold Site/Mine marker drawn is placed on the board white side up. Blank markers are removed from play. A drawn City marker is placed in play only if the Area has a "1", "2", or "3" Climate. If a City is drawn for an inappropriate Area (or if two are drawn for the same Area; set aside the smallest), set it aside and draw again, returning the City marker to the cup after the draw.
16.411 Possession
Possession of Gold Sites is given to the first occupant of the Area (as determined by the Initiative Display) provided he has a Soldier in that Area to place on top of each Gold Site. If the first occupant of an Area with two Gold Sites has only one Soldier in that Area, the second occupant of an Area may lay claim to the second Gold Site by placing one of his Soldiers on it as a Prospector.
16.42 Natives
If a City has been placed in an Area, use the 18 Natives previously kept separate from the Native Randomizer to place double the number of Natives as the City's Multiplicative Value in that Area (i.e., six Natives in the "x3" City). However, if there is no City in an Area, draw three markers from the Native Randomizer. Place drawn Natives on the board in that Area and remove the Native blanks from play.
16.43 Resources
Draw a single marker from the Resource Randomizer. If it is a "x2" marker it is placed in play in the Area. If it is a single Resource marker, it is removed from play.
16.5 Optional Setup
Assuming all players agree, each player may flip one coastal tile and draw the appropriate markers for that tile prior to bidding for their exclusive initial landfall.
17. Alternate World Version
Yet another version of the game is to ignore geography as in the Exploration Version but to give players complete knowledge of each Area's contents. This version is played exactly the same except that all tiles are turned face up and their Gold, Cities, Natives and Resources makeup is made known from the outset.
Optional Rules
18. Perils of the Deep
18.1 Overview
Players wishing to lessen the luck element in the Naval Movement aspect of the game may substitute the "Perils of the Deep" rule.
18.2 Game Leader Losses
At the start of the Outbound Naval Movement Phase, the Game Leader rolls three dice. For each "1" rolled, he places a "Perils of the Deep" marker in Sea Zone 3. He then rolls one more die for each of Sea Zones 4, 5, and 6; again placing a "Perils of the Deep" marker in any Area where he rolled a "1". If any player has written movement orders for Zones farther than Zone 6, he must roll three dice for Zone 9, and one for each of Zones 10 and 11; again placing a "Perils of the Deep" marker in any Zone where he rolled a "1".
18.3 Player Losses
Each player then checks to see how many "Perils of the Deep" markers his Fleet has traversed (always counting their entry of the board through Sea Zone 3) in order to reach their current Landfall and rolls that many dice to determine his Naval Losses in making that Landfall.
Example: Assume Player 1 had planned his Initial Landfall in Area X in Sea Zone 5. If there were two "Perils of the Deep" markers in Sea Zone 3 and one in Sea Zone 5, he would have traversed three such markers and must roll three Naval Losses dice, removing the losses from each before making the next die roll. If Player 2 was making his Initial Landfall anywhere in Sea Zone 4 (Areas C, M, or R, for example), he would have traversed only two and would have to make but two Naval Loss die rolls.
18.4 Coastal Movement
After all players have taken all losses incurred in making their Initial Landfall, all "Perils of the Deep" markers are removed. Any players with written orders requiring them to move on along the coast for additional Landfalls must now do so, each rolling separately for possible Naval Losses as in the Standard Game.
18.5 Homebound Movement
The Homebound journey is performed in the same manner in reverse order. First, all players individually roll for their Coastal Movement Losses until they have reached their last Anchorage Dot before sailing offboard. At that point, the Game Leader rolls dice (three for Sea Zone 3 plus one additional die for each Sea Zone between Zone 3 and any Fleet) and places a "Perils of the Deep" marker in each Sea Zone for which a "1" was rolled. Every Fleet then moves to Sea Zone 3 and then offboard on its Homebound voyage and must roll one die on the Naval Losses Table for each "Perils of the Deep" marker crossed.
19. Reduced Political Control Benefits
The +1 die roll modification to the Survival die roll for having Political Control of an Area (10.2) is applicable only to Climate 1 and 2 Areas.
20. Extended Political Control Benefits
A Political Control marker also serves as a Soldier on defense. It may not move, attack, or Prospect, but can be eliminated to satisfy a combat loss and helps to prevent Native Uprisings.
21. Two Player Version
When playing with only two players, the game length is extended to 15 turns for Political Control victory (requiring five Areas) or 16 turns for a monetary win.
22. Piracy
22.1 Declaration
Any player may declare Naval War on any one other player for the coming turn by recording the number of ships he will devote exclusively to Piracy and the country (player) he is attacking. This must be recorded during the Planning Stage and the ships affected flipped to their Pirate side during that player's Outbound Voyage. Ships used for Piracy cannot carry Personnel to or from the New World, and can carry only that Gold which they steal at sea or in coastal raids on the Homebound voyage.
The player must pay maintenance (5.3) for Pirates and risk Naval losses (6.2) with them in the same manner as he does with his regular ships.
22.2 Order of Movement
The Initiative Display is maintained throughout the end of the turn (8.34) as naval movement must now be done in sequence also. Each Fleet moves along the coast to its final Anchorage and attacks his declared enemy at every Anchorage he cares to stop at which contains his enemy's Gold and/or Fleet. If he attacks an Anchorage Dot containing Gold but no ships, he is assumed to be raiding that port (22.4). If his declared enemy moves first, a player's Pirates will usually have no targets to attack (except for an occasional Gold Bar left stranded on an Anchorage Dot).
22.3 Naval Combat
When the Pirate's Fleet enters an Anchorage containing the Fleet of his declared enemy, he rolls a die for each of his Pirate Ships. If he rolls a "1" his Pirate Ship is sunk. If he rolls a "2"-"5" there is no effect (reflecting the difficulty of finding enemy Ships on the high seas rather than the outcome of fighting them). If he rolls a "6", he has sunk an enemy Ship and may roll again; this time ignoring any "1" result. If he rolls another "6", he has sunk another enemy Ship and may roll again until he fails to roll a "6". The battle continues until each Pirate has rolled or all defending Ships have been sunk. The Pirate may not cancel an attack prior to its conclusion no matter how badly it goes unless the defender agrees. The defender's ships lost to Piracy attacks are determined in the same way as Ship losses due to naval movement (6.22). Even his own Pirate Ships are subject to loss in this manner when his Fleet is attacked by opposing Pirates. All Personnel on a lost Ship are eliminated. All Gold on a lost Ship belongs to the Pirate Ship that captured it, and must remain on the Pirate Ship during the Homebound voyage.
22.4 Raiding Ports
Pirates attacking an Anchorage that contains Gold owned by their declared enemy but not the enemy Fleet are raiding that port and use the same rules of Naval Combat with the following exceptions:
- A Pirate ship is lost on a die roll of "1" or "2".
- A die roll of "6" does not sink a ship, but does capture a Gold Bar from the Anchorage and allows that Pirate ship to roll again with no threat of losses to himself resulting from that reroll.
A player's Pirates and regular Fleet always sail together and chance Naval losses together. The only time that Pirates chance extra losses beyond those of the combined Fleet is when attacking another player's Fleet or port.
Transcription notes
- Publisher boilerplate is omitted: the designer/developer/artist/playtesting/typesetting/printing credits, the advertisement for The GENERAL magazine, the question-submission policy, the replacement-parts and ordering contact details, and the copyright line.
- OCR corrections: in 11.2 the scan's "hi that Area" is read as "in that Area"; "22"xl6"" in 2.1 is read as 22" x 16"; "Internationa]" and similar OCR glitches in omitted boilerplate are not reproduced.
- Rule 18.2 reads "in any Area where he rolled a '1'" in the printed booklet; it is transcribed as printed (the context indicates Sea Zone).
- The Naval Losses Table, Survival Table, Native Uprising Table, Turn Record Track values and the Climate Key are printed on the board/fleet sheets and are not in the rulebook text; their values are not reproduced here.