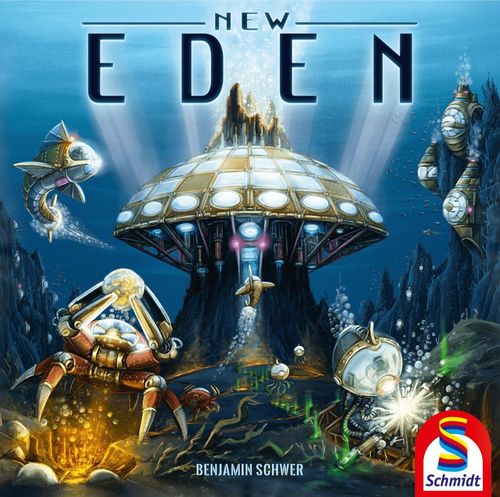
New Eden
New Eden Rulebook
Table of Contents
Table of Contents
- Setup
- Object of the game
- Gameplay
- Phase A: Development (Quality has a price)
- Phase B: Black market (On the fringes of legality)
- Phase C: Auction (One person's rubbish is another person's treasure)
- Phase D: Round scoring (What can the "state" do for you?)
- Damage (Easy does it)
- The areas in detail
- Free actions
- End of game and final score
- Solo version: Deep Thought 4200
Setup
- Place the card tableau in the middle of the table, making sure it shows Phase A.
- Then place the points tracker near the players. Place the 50/100 tiles on the spaces of the same colour.
- Sort the cards according to the back: bonus, 1 A, 1 B, 2 A ... 3 B. Shuffle each pile of cards separately and place them face down next to the card tableau as shown (the bonus pile next to the tableau).
- Put the 45 yellow figures (Deeples), the 48 coins (40 x 1, 8 x 5), the 12 event markers and the 4 auction markers in the middle as the common pool.
- Every player takes 1 station tableau and places it in front of them as shown.
- a. Every station tableau has space for 4 Expansion tiles. The players place the appropriate tiles in the recesses, making sure that the side with the coin is visible.
- b. The players take the 2 cylinders in their colour and place one on the 0 space on the points tracker and the other one on the 0 space (as the damage marker) on the damage tracker on their tableau.
- c. They take one of the dark red indicators and place it between the 0 and 1 spaces on the damage tracker on their tableau.
- d. Then they take a screen and place it in front of their tableau.
- e. Every player takes 10 coins from the common pool and places them under their screen.
- f. They take 1 Deeple each from the common pool and place it flat on the Expansion tile on the bottom left of their tableau.
- g. They take one Oxygen card with a 1 and one with a 2 each from the Start cards and place them face up next to one another to the right of their tableau as shown. Finally, they put 1 Expansion card per person into the common pool. Then they put the other Start and Expansion cards back in the box.
- The person with the most octopus-like arms hooks the nautilus marker, places it at their station tableau as shown and starts the game.
The player's tableau in detail
Your tableau forms the main dome of your station. You'll attach new modules to this tableau during the course of the game.
The modules are divided into 6 groups:
- Seashell habitats (page 8)
- Harvesting crabs (page 8)
- Repairing octopuses (page 8)
- Boatyards (page 8)
- Oxygen tanks (page 9)
- Research (page 9)
The tableau also has a Power plant (page 10) and a Damage tracker (page 8).
The cards in detail
- Card group: Shows where you have to attach this card.
- Card effect: You always apply the main effect of the card when you activate it during the game.
- Placement space for Deeples.
- Final score: All the effects in this box (top right of the card) are only applied at the end of the game.
Object of the game
The main dome (station tableau) was built on a White Smoker that the players can use to provide a basic supply of coins. The players can expand their station by adding new modules (cards) to receive more resources, points and a range of benefits.
Many actions will damage their environment. But the players can reduce their damage during the game with specific modules to counteract any adverse effects. They can see their current damage on their tableau. They will also see an indicator that shows how much damage their station can actually withstand. Every player should make sure that their damage at the end of the game is not higher than the indicator. Only then will they be given additional points for their station in the final scoring.
Gameplay
The game has 3 rounds. Each round consists of the following 4 phases:
- PHASE A Development
- PHASE B Black market
- PHASE C Auction
- PHASE D Round scoring
The final score is calculated after the 3rd round. The player with the most points wins the game.
Phase A: Development (Quality has a price)
In this phase, the players buy new modules from the factories above the surface of the water and activate their first modules.
At the beginning of this phase, they first turn over the top two cards in the bonus pile and place them above their card tableau.
Then they place 1 card from the 1 A pile face up on each of the 12 spaces on the card display. In rounds 2 and 3, the players use the corresponding 2 A or 3 A pile. They put the remaining 3 cards back in the box.
The person with the nautilus marker starts this phase and carries out 1 of the following 3 actions (and possibly additional actions).
2-player variation: just before it is the turn of the person with the nautilus marker (before the first move as well), always discard the card that is furthest left on the card tableau. If there's more than one card in the same column, discard the most expensive one.
1. Buy a card
You can buy any one of the face-up cards on the card tableau. The prices for the cards are shown to the left of each row. Return the number of coins indicated on the card to the common pool. Please refer to page 8 for more information on damage.
- The cards in the top row cost 10 coins. You also have to move your damage marker 3 spaces to the left (towards the lower numbers).
- The cards in the 2nd row from the top cost 6 coins. You also have to move your damage marker 1 space to the left (towards the lower numbers).
- The cards in the 3rd row from the top cost 3 coins. You don't have to move your damage marker.
- The cards in the bottom row cost 1 coin. You also have to move the damage marker on your own tableau 1 space to the right (towards the higher numbers).
If you buy the last card in a row, you move all the cards in the rows above downwards by 1 row. This means that the cards will become cheaper during this phase. (Example: The third row from the top is empty. All the cards above it move downwards by 1 row.)
You then place the card you bought in the appropriate area of your own tableau (page 3). You need to start right next to the tableau. If you place any more cards in this area, place each card next to the previous card, so that the modules spread out like rays. You can only place your cards as you like in the Research area (at the bottom of the tableau).
Once you have attached a module, you may not move or remove it of your own accord.
2. Moving Deeples and activating modules
If you want to activate one of the modules that you have already attached, you'll have to transport one (or more) Deeple(s) to the module. At the beginning of every round, all your Deeples are lying flat in the boatyard inside the main dome of your station. They each form a small 1-person submarine.
You may only move Deeples that are lying flat. Once a Deeple has reached its goal, you set it on its feet and activate the module. You cannot move this Deeple again in that round.
The workers are sitting in a submarine, waiting to swim to their place of work. Once they get there, they disembark and start working.
You proceed as follows:
- First of all, you choose exactly 1 of your face-up Oxygen cards. Each one of these cards shows either 1 or 2 oxygen bottles with a number inside. For every oxygen bottle depicted, you can move 1 of your Deeples by the indicated number of steps.
- For every oxygen bottle on the card, choose 1 of your Deeples that are lying flat that you can then move. (You're also allowed to choose the same Deeple twice.) (Example: You have chosen an Oxygen card worth 2. So you move 1 Deeple by 2 spaces.)
- You then move the Deeples away from the main dome onto one of the 3 arms outside the station (see also "The areas in detail", page 8). You can move the Deeple by the number of steps indicated on the oxygen bottle.
- Each module (card) is 1 step. The Boatyard cards are part of the station's main dome and won't cost steps.
- You don't have to use all the steps. However, you cannot use any remaining steps to move another Deeple.
- Once a Deeple has reached its goal, you first place it on the edge of the card. You may move Deeples that are lying flat in a later move.
- Every module outside the station shows 1 or more placement spaces. To activate a module, you have to fill every placement space on the card with a Deeple. If you have enough Deeples on the card after this move, you can place the Deeples that are lying flat on the edge of the card on the placement spaces and receive the effect indicated on the card (money, points or a repair).
- You can activate every module only once per round. If you put a Deeple on a placement space, it stays there for the rest of the round. This means that you cannot use or move this Deeple again in that round.
- Lastly, you turn the Oxygen card you used face down. You cannot use this card again in this round.
3. Passing
If you can't or don't want to carry out any more actions during this phase, you can pass. However, you won't be allowed to carry out any more actions during this phase and you'll forfeit your turn.
- If you pass first, you'll immediately receive 3 points as well as the nautilus marker. This means that you start the next phases.
- When playing with three or four people, you'll receive 2 points if you pass second. When playing with four people, you'll receive 1 point if you pass third.
- If you pass last, you'll never receive any points.
In addition to your standard action, you can carry out one or more free actions at any point during your turn. The free actions are described on page 10.
Once you have carried out one of the 3 actions, play proceeds clockwise and it's the next player's turn to carry out an action. This continues around the table until everyone has passed. This phase is then over and you move on to Phase "B - Black market".
Phase B: Black market (On the fringes of legality)
In this phase, you can make illicit purchases of modules.
If you have the nautilus marker, turn over the card tableau at the beginning of this phase so that it shows the side with the phases B-D. (Put any cards remaining on the tableau back in the box beforehand.)
Then take the pile for Phase B (1 B in the 1st round, 2 B in the 2nd round and 3 B in the 3rd round) and deal 3 cards face down to every player. Put the remaining 3 cards back in the box.
When playing with three people, place 1 card face down on each of the 3 spaces in the bottom row of the card tableau as well. When playing with two people, in the bottom two rows.
All the players now have to decide secretly and simultaneously which of their 3 cards they want to buy. They can buy between 0 and all 3 cards each.
The players place all the cards that they want to buy in front of them, face down to start with, and pay the corresponding price:
| Cards bought | Price |
|---|---|
| No cards | 0 |
| 1 card | 1 coin + 1 damage point |
| 2 cards | 3 coins + 3 damage points |
| All 3 cards | 6 coins + 6 damage points |
Return the coins to the common pool. All players also have to move their damage marker to the right (towards the higher numbers) by the corresponding amount.
The cards that aren't bought are placed face down in one of the empty rows on the card tableau. Every player places their cards in a row of their own.
Once all the players have chosen their cards, they place the cards they purchased in the appropriate areas of their station.
This phase is then over.
Example: You want to buy 2 cards. You place both cards in front of you, face down at first. You then pay 3 coins and move your damage marker 3 spaces to the right. Place the 3rd card face down in the top empty row of the card tableau. Once all the players have chosen their cards, you place both your cards face up at your station.
The players can also carry out free actions (page 10) at any point during this phase. However, no one can activate any modules during this phase.
Phase C: Auction (One person's rubbish is another person's treasure)
In this phase, the players can bid for cards that were placed on the card tableau beforehand.
If you have the nautilus marker, turn the cards on the card tableau face up and start the auction. You proceed as follows:
- First select a complete row. This row contains the cards placed here as well as the empty card spaces. (We explain the purpose of the empty card spaces further down.)
- You open the bidding. (You can also bid 0 coins. This means that you won't be taking part in the auction for this row.)
- Then all the players take turns clockwise to place their bids. They can either increase the bid or drop out of the auction.
- This continues until the highest bid has been determined. Players who have already passed are not allowed to rejoin this auction.
- If you have placed the highest bid, you pay the coins into the common pool. You then take all of the cards in this row and place the cards you purchased in the appropriate areas of your station.
- Depending on how many cards you just bought at the auction, you can now carry out the action "Moving Deeples and activating modules" (page 5):
| Cards bought at the auction | Times |
|---|---|
| 0 cards | 3 times |
| 1 card | 2 times |
| 2 cards | 1 time |
| 3 cards | - |
(As you can see, the players can also auction off rows without any cards.) The procedure is the same as in Phase A. You'll also need Deeples that are lying flat as well as active Oxygen cards.
- Furthermore, you can carry out the action "Moving Deeples and activating modules" (page 5) once when you move your damage marker 1 space to the right. (You can also do this when you purchase 3 cards at the auction.)
- To show that this row has already been auctioned off, place an auction marker on the space in front of it.
- The player who bid and won the previous row decides which row should be auctioned off next and makes the first bid. Rows with an auction marker already placed in front of them cannot be chosen again.
This phase is over when all the rows have been auctioned off.
Phase D: Round scoring (What can the "state" do for you?)
To calculate the scores per round, the players first need to look at the 2 bonus cards on display.
Players will receive the depicted bonuses (either 1 coin or 2 points) for every appropriate card placed at their station.
Afterwards...
- They take back all the Deeples and lay them flat again on the free spaces in their boatyards. (The Deeples remain standing on the cards in the last round.)
- They turn their Oxygen cards face up again. They can use them again in the next round.
- They return all the event markers from their power plant to the common pool.
- Lastly, they turn the card tableau over again and the next round starts. (Any cards remaining on the tableau after the auction have to be discarded.)
Final scores are calculated after the 3rd round (page 11).
Damage (Easy does it)
During the game
Your damage marker can never go below 0 or over 15.
If your damage marker is already at 0, you cannot move it any lower. It simply remains at 0.
If you have to move your damage marker beyond 15, you simply put it on space 15. However, you'll have to remove 1 of the cards that you have already placed.
To do so, first select one of the 5 "arms" at your station tableau. You have to put the outermost card of this arm back in the box. This module is now irrevocably destroyed.
You're not allowed to remove any cards from the "Research" area.
At the end of the game
You will only be given additional points in the final scoring if your station is "stable" at the end of the game.
The damage marker shows how damaged your station is at the moment.
The red indicator shows how much damage your station can withstand.
This means that your damage marker has to be below the indicator at the end of the game. Otherwise you won't be given any more points in the final scoring. (However, you keep the points that you gained during the game.)
Certain effects allow the players to move their indicator to the left or right. These effects are always indicated in the final score area at the top right of the card.
Move the indicator one position to the right (towards the higher numbers) for every "indicator right" symbol. Always place the indicator between two number spaces. The higher the indicator, the "more stable" your station is.
Move the indicator one position to the left (towards the lower numbers) for every "indicator left" symbol. The lower the indicator, the less damage your station can withstand.
The players can even set their indicators during the game to better see what shape their station is in. However, the final position isn't determined until the final scoring. The indicator (just like the damage marker) can never go below 0 or over 15.
The areas in detail
Areas outside your station
These areas consist of individual modules that you can activate once per round to receive the depicted effect.
Every card shows a certain number of placement spaces and an effect. If you have enough Deeples on the card to fill all the placement spaces, you can place these Deeples on the spaces and benefit from the depicted effect immediately.
Harvesting crabs. After activating a harvesting crab, you'll immediately get the indicated amount of coins from the common pool. You have to move your indicator 1 position to the left at the end of the game. This will make your station less stable.
Seashell habitats. After activating a seashell habitat, you immediately move forward on the points tracker by the number of points indicated.
Repairing octopuses. After activating a repair octopus, you immediately move your damage marker to the left by the indicated number (towards 0). As described beforehand, your damage marker can never go below 0. At the end of the game, you can move your indicator 1 space to the right for every repairing octopus you have. This will increase the stability of your station.
Areas inside your station
These areas will give you certain benefits for the rest of the game:
Boatyards. Whenever you place a Boatyard card, you will receive new Deeples immediately. Take as many Deeples from the common pool as indicated on the card and lay them flat as a submarine on the card. You can use these Deeples during the rest of the game to activate more modules. The boatyards are regarded as part of the main dome. Therefore, you can't count the Boatyard cards when moving ("Moving Deeples and activating modules", page 5).
Oxygen tanks. Oxygen tanks allow you to move your Deeples to the modules outside the station and to activate these modules. 1 or 2 oxygen cylinders are depicted on every card. There is a number in each cylinder. When you use an Oxygen card, you can move a Deeple that is lying flat for every cylinder depicted, as described under "Moving Deeples and activating modules" (page 5). You can use every Oxygen card once per round to move Deeples and then turn it face down afterwards. Turn the card face up again at the end of the round. The more Oxygen cards you have, the more Deeples you can move.
Research. Research cards give you certain benefits during the game or improve existing action options. Examples:
- Immediately receive 5 coins from the common pool.
- You can move your indicator by 3 spaces to the right (towards the higher numbers) at the end of the game. Your station can, therefore, withstand more damage. See also "Damage", page 8.
- Your harvesting crabs work in an environmentally friendly way. At the end of the game, you won't have to move your indicator to the left for your harvesting crabs.
- When you lay this card down, you immediately move your damage marker by 5 spaces to the left (towards the lower numbers). If your station can withstand the current damage at the end of the game ("Damage", page 8 and "End of game", page 11), you have to reduce your station's total value by 5 points.
- At the end of the game, you will receive 3 additional points for every full harvesting crab. (You don't take your Deeples back after the last round in order to show that you have activated this card.)
- At the end of the game, you will receive 2 additional points for every full repairing octopus. (You don't take your Deeples back after the last round in order to show that you have activated this card.)
- You move your damage marker immediately by 5 or 10 spaces to the right (towards the higher numbers). If your station can withstand the current damage at the end of the game ("Damage", page 8 and "End of game", page 11), you will receive 8 or 20 points for this card.
- When you lay this card down, all your fellow players will immediately receive 5 coins. If your station can withstand the current damage at the end of the game ("Damage", page 8 and "End of game", page 11), you will receive 15 points for this card.
- Whenever you use your power plant, you will receive in addition to the 5 coins: 2 coins (therefore 7 coins in total); 2 points; 1 repair (you, therefore, suffer 1 damage less than indicated on your tableau).
- When you lay this card down, all your fellow players will immediately suffer some damage: 1 damage for every Boatyard card at their own station; 1 damage for every harvesting crab at their own station; or 1 damage for every Oxygen tanks card at their own station (depending on the card).
Free actions
The power plant
Your tableau (the central dome) was built on a "White Smoker". A White Smoker is a spring on the seabed, which constantly sprays out hot water up to 300 degrees C under high pressure. The power plant allows you to generate resources (coins) at any time during your turn.
You can activate your power plant up to 3 times per round. You can take 5 coins from the common pool every time you activate it. However, this will also cause some damage to your station.
- The 1st time you activate it, you will have to move your damage marker 1 space to the right.
- The 2nd time you activate it, you will have to move your damage marker 3 spaces to the right.
- The 3rd time you activate it, you will have to move your damage marker 6 spaces to the right.
You can activate your power plant at any time during your turn and will get new coins (and the indicated damage) immediately.
You then place an event marker on the used space.
Expanding your station
You can expand your station in the following 4 areas: Boatyard, Oxygen tanks, Repairing octopuses, Research.
You can expand your station at any time during your turn. Every expansion costs 6 coins. You first pay the required coins back to the common pool. You then turn over one of the tiles to show that you have already expanded this area.
The expansions have the following effects:
Boatyard. You will receive 3 more Deeples immediately. (That makes 4 with the starting Deeple.) Lay the Deeples flat on the tile. You can use them during the rest of the game to activate more modules.
Research. This expansion does not have an immediate effect. You'll receive an additional 3 points for every Research card that you place at your station after the expansion. This does not apply to Research cards that were already placed at your station.
Repairing octopus. The back of the tile shows 1 additional repairing octopus. You can activate this module just like you would normal modules to reduce your damage by 3. However, bear in mind that you have now built a new module at the beginning of the "arm". This makes the path to the repairing octopuses that have already been placed longer by 1 step. Therefore, you'll have to count this module (like a card) when you're moving.
Oxygen tanks. Take 1 of the Oxygen cards placed at the beginning of the game immediately and place it to the right of your existing Oxygen cards. You can use this card once per round, like every other Oxygen card, to move Deeples. At the end of the round, you turn the card face up again as usual.
End of game and final score
The game ends after the scoring (Phase D) in the 3rd round.
Coins
You will get 1 point for every (full) 5 coins you have.
Final scoring symbols
The players now have to determine whether their station can withstand the current damage. To do so, they first move the dark red indicator 1 position to the right (towards the 15) for every "indicator right" symbol. They always place the indicator between 2 number spaces on the damage tracker.
Afterwards, the players move their indicator 1 position to the left (towards the 0) for every "indicator left" symbol. The position where the indicator now rests indicates how much damage the station can withstand.
If the damage marker lies above the indicator, the station cannot withstand any damage sustained and collapses. That player won't receive any more points in the final scoring and their current score is their final score.
If the damage marker lies below the indicator, the station can withstand the damage and the player can add the value of their station to the points that they have collected so far. To do so, they count all the points indicated at the top right of the attached module cards and move by as many spaces forward on the points tracker. This is their final score.
Example: You collected 16 points during the game. You have 6 coins left at the end of the game. You get 1 point for them. Your damage marker lies below the indicator, so your station can withstand the damage. You add up all points at the top right of your attached modules, so you get an additional 21 points (1+5+3+8+4). Therefore, your total score is 38.
The player with the most points wins the game. If multiple players have the same number of points, the player with the least damage on their damage tracker wins.
Solo version: Deep Thought 4200
The factories in the Andes are currently developing a fully automated station. The first model has just been completed. As a successful station manager, you have been selected to test this prototype. Can humans still be superior to this technical marvel?
Setup
Set up the game for 2 players. Deep Thought starts the game with 10 coins. As Deep Thought never uses its power plant, place an event marker on all 3 spaces. All 4 buildings at its station are already active and it is given the nautilus marker.
Phase A
The rules for 2 players apply, i.e. before every turn of the person with the nautilus marker, you always take the card furthest to the left (the most expensive one) out of the game.
When it's Deep Thought's turn, it always takes the card furthest to the right (the cheapest one). Deep Thought doesn't pay any money for it.
If Deep Thought takes 1 Research card, it immediately receives 3 victory points as its expansion is active from the outset.
When there are no more cards left on the tableau, Deep Thought activates in one single action all of its modules in the seashell habitat, harvesting crab and repairing octopus areas (including the expansion).
Important: Deep Thought operates a fully automated station and doesn't need any Deeples or oxygen for this activation.
Deep Thought passes its subsequent turn. If it passes before the player, it receives 3 victory points and the nautilus marker.
Phase B
Deep Thought doesn't get any cards from the black market.
Take 3 cards for yourself as usual and place 3 cards in each of the two bottom rows, just like in the 2-player game. 1 row remains completely empty. Therefore, you discard a total of 6 cards (the 3 from Deep Thought and the 3 excess ones).
Increasing the difficulty
Deep Thought is in the development phase. A few concerned observers have claimed that it has already started to develop human characteristics such as greed and a criminal mind. Others (economically liberals) can't see any problems here.
You can increase the difficulty by dealing 1, 2 or even 3 cards to Deep Thought in Phase B. Deep Thought immediately attaches all of these cards to its station. Deep Thought doesn't pay any coins for these cards and won't suffer any damage.
Phase C
Before the auction takes place, select two rows (with at least 1 card), discard those cards and then block these rows with an auction marker. Therefore, there is always 1 row with cards and 1 row with 3 movement options (Deep Thought's row).
You both first auction off the row with the cards. Deep Thought always bids half of its coins (rounded down).
If you bid 1 coin more, you win the auction and can add the new modules as usual and carry out the action "Moving Deeples and activating modules".
If Deep Thought wins the auction, it attaches the new modules to its station. Deep Thought never activates modules during this phase.
Phase D and the final score
These phases remain unchanged. The game ends after the 3rd round as usual. Then the final scores are calculated.