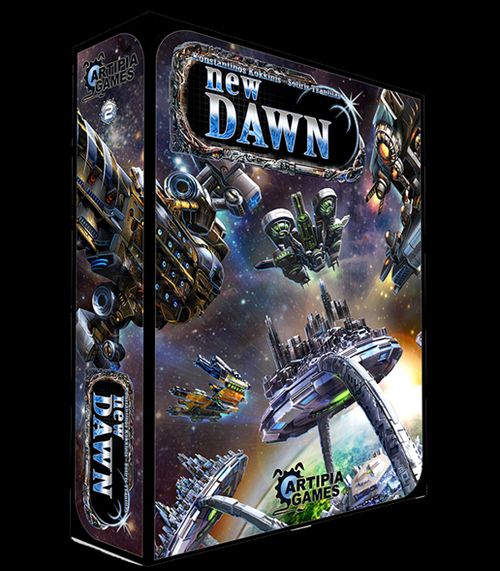
New Dawn
New Dawn Rulebook
Table of Contents
Table of Contents
Contents
- 1 double-sided Main Board
- 8 Player Boards
- 60 Plastic Bases
- 16 Plastic Mobile Headquarters (MHQ)
- 28 Economic Facility cards
- 28 Scientific Facility cards
- 28 Military Facility cards
- 28 Hostile Facility cards
- 20 Aid to the Alliance cards
- 64 Technology cards
- 8 Ambassador cards
- 4 Green Base Benefit cards
- 4 Orange Base Benefit cards
- 5 Station cards
- 4 Sector cards
- 4 Player Aid cards
- 26 Credit tokens
- 26 Military tokens
- 26 Science tokens
- 16 Victory Points (VP) tokens
- 1 Round Track token
- 1 Action Track token
- 12 Re-Roll tokens
- 12 Green Die tokens
- 12 "+2" tokens
- 8 Ambassador tokens
- 2 Ability Reminder tokens
- 1 Black die
- 4 White dice
Facility Cards
Each Facility card shows several pieces of information:
- Base Type (top-left corner): a letter shows the type of Base needed to control the Facility — E for Economic Base, S for Scientific Base, M for Military Base.
- Facility Type (below the Base Type): a letter shows the Facility's own type — E for Economic Facility, S for Scientific Facility, M for Military Facility, H for Hostile Facility.
- Game Phase: a letter shows when the card is used — A for Rounds 1-2, B for Rounds 3-5.
- Orientation Arrows: point at the Base Benefits the controlling player receives; the card can be rotated to change which Base Benefits the arrows point at.
- Facility Name.
- Set Indicator.
- Victory Points: scored at the end of the game.
- Base Cost: the cost to Establish a Base on the Facility.
- Ability: the effect performed when the Facility is explored. The maximum number of resources the card provides is shown alongside the ability.
Player Boards
Each Player Board shows:
- Race Name and Racial Ability.
- Base Type, Base slot, and Production — the resources produced by each Base still on the Player Board.
- Token slot — where acquired tokens are stored.
- Technology slot.
- MHQ Cost and MHQ slot.
- Victory Points scored at the end of the game.
Setup
- Place the Main Board in the middle of the table.
- Sort all Credit, Science, Military, "+2", Re-Roll, Green Die and Victory Point tokens. Place them in piles next to the Main Board.
- Place the Alliance Base card on the Region 3-3.
- Each player chooses a Race and places the corresponding Player Board in front of him.
- Each player also takes the Technology cards of his race.
- Each player takes 15 Bases in the color of his choice and places them on his Player Board. He then chooses a Base type (Economic, Scientific or Military), takes the left-most Base of that type from his Player Board and places it on the Alliance Base card.
- Each player takes 4 MHQ of the same color as his Bases. He places 3 on his Player Board and one on the Alliance Base card on the Main Board. In a 3 player game, use the area surrounded by the blue frame. In a 2 player game, use the area surrounded by the orange frame.
- Randomly choose 2 green and 2 orange Base Benefit cards and place them on the 4 sides of the Main Board. Same-colored Base Benefit cards should be placed across from each other.
- Randomly choose Ambassador cards equal to 3 plus the number of players (5 in a 2-player game, 6 in a 3-player game etc.) and place them face up at the indicated area on the Main Board. For each Ambassador place the matching Ambassador tile on its Ambassador card.
- Separate all the Phase A Facility cards by type (Economic, Scientific, Military and Hostile) in 4 decks, shuffle each of them and place them face down at their indicated areas on the Main Board. Similarly, separate and shuffle the Phase B Facility cards and place them near the Main Board - they will be used later in the game.
- Place all dice at the indicated area on the Main Board.
- Shuffle all Aid to the Alliance cards forming a deck. Reveal the top 3 cards placing them next to the Main Board.
- Place the Round Track token on number 1 of the Round track.
- Place the Action Track token on number 1 of the Action track.
Gameplay
Randomly determine a starting player. Play continues clockwise. The game lasts 5 Rounds.
Each game Round consists of the following Steps:
5.1. Production
During Production each player checks his Player Board and receives the resources corresponding to the Bases he has on the Main Board. Each Base built leaves an empty space on the Player's Board that shows the production he is getting.
5.2. Draw Facility cards
In this step players draw as many Facility cards as needed from the 4 available decks (in any combination they like) so that they have 4 Facility cards in their hand. During Phase A (Rounds 1 & 2) they draw from the Phase A decks. For the rest of the game (Phase B - Rounds 3, 4 & 5) they draw from the Phase B decks. When about to draw Facility cards for Round 3, each player may discard as many Facility cards as he wants from his hand before drawing any Phase B cards.
5.3. Explore a Facility
In clockwise order, each player must choose a Facility card in his hand and place it on the Main Board on a Region adjacent to another Facility (or the Alliance Base). All Regions surrounding a Facility (including diagonal) are considered adjacent to it.
After the Facility is placed on a chosen Region, the player may perform the ability written on it. A player may choose not to perform a Facility's ability at all, however exploring a Facility (placing it on the Main Board) is mandatory.
Several Facilities include abilities separated by the word "OR". In such cases, the player may only perform either the ability before or after the word "OR".
5.4. Buy Technology
During this Step, each player may buy one Technology from the ones available in his race's Technology deck, by paying the indicated cost. During the 1st and 2nd Round of the game, the player may only buy Technologies from Phase A cards, while for the rest of the game, both Phase A and Phase B Technologies are available to buy.
Each Technology acquired must be placed on the left-most available Technology slot on the Player's Board. Each Technology a player has acquired can be used once each Round. To indicate that, a player using a Technology, must turn it face down. At the end of the Round, all Technologies reset and are turned face up.
5.5. Move one MHQ
In clockwise order, each player may move one of his MHQ onto any Facility on the Main Board or onto the Alliance Base.
5.6. Actions
During the Actions Step, in clockwise order, each player performs one Action until all players have performed a total of 3. All available Actions may be performed any number of times throughout the Actions Step. Use the token on the Action track to mark which Action is being performed.
a. Get a Resource
The player gets one resource of his choice.
b. Establish Base
The player chooses a non-controlled Facility on the Main Board with at least one of his MHQ on it or on a Facility adjacent to it and pays the Facility's Base Cost. He then moves the left-most available Base (of the same Base Type as the Facility) from his Player Board and places it on that Facility. That Facility is then considered to be controlled by that player.
A player may not Establish Base on a Hostile Facility. Hostile Facilities may only become controlled through the Seize Control Action.
Once the Facility becomes controlled, the player may adjust the Facility's orientation (see Adjust Orientation) and receive the corresponding Base Benefits.
c. Seize Control
In order to Seize Control of a Facility, a player needs to have at least one MHQ on it or on a Facility adjacent to it. The player performing the Action is called the Attacker. If the chosen Facility is controlled by another player, that player is called the Defender.
Facility not controlled by an opponent
If the chosen Facility is not controlled by an opponent, the Attacker must add up the Base Cost and the Victory Points of that Facility and beat the total by rolling dice. The Attacker declares if he wants to use any Tokens (see Tokens) and rolls a YELLOW die for each MHQ on the chosen Facility and a WHITE die for each MHQ on an adjacent Facility. If the total rolled is lower or equal to the sum of the Base Cost and the Victory Points of that Facility, the Seize Control is considered unsuccessful and nothing happens. If the total rolled is higher, then the Seize Control is considered successful and the player moves the left-most available Base (of the same Base Type as the Facility) from his Player Board and places it on that Facility. That Facility is now considered to be controlled by that player.
Example: Nagia and Telemachus play a 2-player game of New Dawn. Telemachus wants to Seize Control of the Minireen Asteroid Drill Facility. He has already moved a MHQ on it in a previous turn and he also has another MHQ on the Union Economic Center, an adjacent Facility. This means he will roll one Yellow Die (for the MHQ on the Minireen Asteroid Drill) and one White Die (for the MHQ on the adjacent Facility). The number he has to beat is 4 (the sum of the Base Cost and the Victory Points on the Minireen Asteroid Drill). He rolls the dice and gets a 3 and a 5 for a total of 8. He is successful! Since the Facility has an Economic Base symbol on the top left corner, he gets the left-most Economic Base from his Player Board and puts it on top of the Facility. He is now the Controller of Minireen Asteroid Drill.
Facility controlled by an opponent
If the chosen Facility is Controlled by an opponent, the player rolls against the Defender. First the Attacker and then the Defender declare if they want to use any tokens (see Tokens). Then, the Attacker rolls his dice in the same way as if the Facility was not Controlled. After the Attacker's total has been determined (taking into consideration any tokens and/or Technologies used), the Defender rolls his dice. He rolls a YELLOW die for his Base, a YELLOW die for each MHQ on the chosen Facility and a WHITE die for each MHQ on adjacent Facilities. After the Defender's total is determined (once again taking into consideration tokens and/or Technologies used) the two players compare their totals. If the Attacker's total is lower or equal to the Defender's, the Seize Control is considered unsuccessful and nothing happens. If the total is higher than the Defender's, the Seize Control is considered successful.
The Defender must remove his Base from that Facility and return it to his Player Board covering the right-most empty slot of that Facility's Base type. The Attacker then takes the left-most available Base, of the same Base Type as the Facility, from his Player Board and places it on that Facility.
If the Seize Control is successful (regardless of whether it was Controlled or not before), then the Facility's new controller may adjust its orientation (see Adjust Orientation).
Example: A few turns later, Nagia wants to Seize Control of the Minireen Asteroid Drill (controlled by Telemachus). She has already moved one of her MHQ on it and she also has a MHQ on Plague Citadel, an adjacent Facility. This means she will roll 1 Yellow die and 1 White die. Telemachus who is the Defender also has a MHQ on the Facility as well as a Base from before. Each of those two gives him a Yellow die. He also has a MHQ on an adjacent Facility which means he gets 1 White die as well. Nagia rolls her dice and gets a 4 and a 6 for a total of 10! Telemachus then rolls his dice and gets a 5, a 3 and a 2 - a total of 10 as well! Since Nagia's result is NOT higher than that of her opponent's, her Seize Control attempt fails and Telemachus remains the Controller of the Minireen Asteroid Drill. If Telemachus had rolled lower than 10 then he would have to return his Base to his Player Board and Nagia would put one of her own Economic Bases on the Facility, becoming the new Controller.
d. Use Ambassador
The player chooses one of the available Ambassadors (one whose card hasn't been already turned face down), pays the indicated cost (if any) and places the Ambassador's token on a Facility of his choice, performing the Ambassador's ability. He then turns the Ambassador's card face down. Each Ambassador may only be used once each Round unless a player uses an ability that allows him to use "any Ambassador".
No more than two Ambassadors may be present on a Facility at any time.
e. Buy MHQ (and move all)
The player chooses one of the available MHQ on his Player Board and pays the indicated cost. He then puts that MHQ on any Facility on the Main Board (or on the Alliance Base card). He may also move any of the other MHQ he already has on the Main Board. Keep in mind that when a MHQ is moved, it can be placed on any Facility on the Main Board (or on the Alliance Base card) unless special rules state otherwise.
5.7. Aid to the Alliance
During this Step, in clockwise order, each player may choose to send one Aid to the Alliance. To do so, the player must pay the cost indicated on any one of the available cards. If he does, he moves that card in front of him and draws a new one to replace it. At the end of the game he will score the Victory Points listed on the card.
Adjust Orientation
After a player moves one of his Bases on a Facility (either by the Establish Base or the Seize Control Action), he may adjust the orientation of that Facility. Most Facilities have a number of green arrows on them. The player may rotate the card so that the arrows point at the Base Benefits he wants to get. If the player wishes, he may choose not to rotate the Facility card, in which case he receives the Base Benefits of the cards the arrows already point at.
A player may choose not to receive a Base Benefit.
Tokens
Throughout the game a player can acquire various tokens. These tokens must be stored on the Player's Board (with the exception of Victory Point tokens) which has limited token slots. Once a Player's Board is full, no more tokens may be stored. However, a player may discard a token at any time to empty a token slot. Whenever a player uses a token, he must remove it from his Player Board returning it to the supply.
+2 token — This token increases a player's total by 2 when rolling dice. A player must use the token before rolling the dice. Unless otherwise stated, it can be used in any die roll in the game.
Re-Roll token — This token allows a player to re-roll a die after seeing its result. The second result must be applied (unless another re-roll token is used). Unless otherwise stated, it can be used in any die roll in the game.
Green Die token — This token allows a player to roll an additional Green die during a dice roll and add its result to the total. A player must use the token before rolling the dice. Unless otherwise stated, it can be used in any die roll in the game.
Victory Point token — Any Victory Point tokens acquired by a player throughout the game, are added to his total at the end of the game. Victory Point tokens do not need to be stored on a Player's Board and do not occupy a token slot.
Round End
After the Aid to the Alliance Step, the Round ends.
- Players reset any used Ambassador cards (turning them face up). The Ambassador tokens remain on the Facilities they were placed.
- Players reset any used Technology cards (turning them face up).
- The token on the Round track is moved to the next Round.
- The player with the fewest Bases on the Main Board is the new starting player. If case of a tie, the player (among the tied ones) sitting closer (in clockwise order) to the current starting player, becomes the new starting player.
Game End
After 5 Rounds the game ends. Players add up all Victory Points earned from Bases on Facilities, Technology, Aid to the Alliance, MHQ, Victory Point tokens etc. The player with the most Victory Points is the winner. In case of a tie, the player who built the most Bases is the winner. If there is still a tie, it is a shared victory.
Modules
Modules offer various ways to add complexity and depth to the game. Each module is independent and you can use as many as you like in each game.
Stations
Stations are special cards which are placed randomly on the board. We suggest that you use no more than 3 Stations in a game (regardless of the number of players). Use dice to determine the Region each Station will be placed.
Some Stations require tokens to be placed on them at the start of the game. Whenever such a Station is depleted, it must immediately be removed from the Main Board. MHQ may not enter Regions containing Stations.
Sectors
Sectors are areas on the Main Board within which special rules apply. To play with the Sectors module, use the back side of the Main Board.
Dice
- White Die — Rolled mostly for MHQ on adjacent Regions. Numbers: 1, 2, 3, 4, 5, 6.
- Yellow Die — Rolled mostly for Bases and MHQ on top of a chosen Facility. Numbers: 2, 3, 4, 5, 6, 6.
- Green Die — Rolled mostly through the use of Green Die tokens. Numbers: 0, 1, 1, 2, 2, 3.
- Red Die — Rolled mostly for Garrn'Athak'Nok Ambassador and Technologies. Numbers: 3, 4, 5, 5, 6, 6.
- Black Die — Rolled together with the White die to determine random Regions on the Main Board. Numbers: 1, 2, 3, 4, 5, 6.
Symbols
- E (Base) — Economic Base
- S (Base) — Scientific Base
- M (Base) — Military Base
- E (Facility) — Economic Facility
- S (Facility) — Scientific Facility
- M (Facility) — Military Facility
- H (Facility) — Hostile Facility
- "+2" token
- Re-Roll token
- Green Die token
- Victory Point token
- Credit token
- Military token
- Science token
- Black die, White die, Yellow die, ,