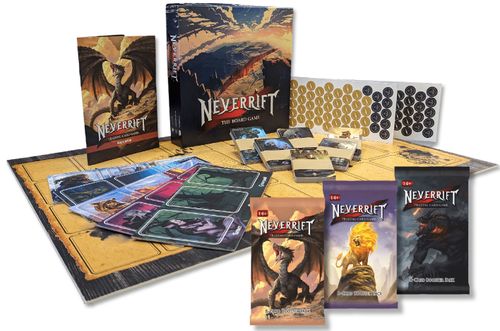
Neverrift TCG
Neverrift TCG Rulebook
Table of Contents
Table of Contents
Quick Start Guide
Preparation
- Choose Decks and Tokens
- Each player draws 6 cards
- Put the rest of your cards on the player boards with the Tamer facing up
Turn Sequence
Repeat for every turn. No restriction in order. Player 1 starts the game.
- Draw a card
- Play 1 creature and/or 1 place
- Creatures gain a token after they enter the battleground, places do not. This represents their allegiance.
- Play spells and/or your tamer active
- Give turn to your opponent
Goal: Tame more creatures than your opponent!
How to tame Creatures?
- A creature is tamed, when it got attacked by a stronger creature
- Creatures attack in four directions with their four attack values, when they enter the battlefield. No diagonal attacking
- If the attack value is higher than the adjacent creature's value, it is tamed
- Turn over the token to show the creature's allegiance has changed
- Use places (placed on the battlefield) and spells (go to discard pile when played) to change the game in your favor
End
The game ends once all fields on the battleground are covered with Creatures and Places or one of the players resigns.
The player with the most Player Tokens and therefore the allegiance of the most creatures wins the game!
Card Types
Structure of a Card
Neverrift follows a border less full art design and focuses on a minimalistic yet elegant style. This means there are few hidden icons, texts or other information that is relevant to the game. The rarity is determined by a card's stars. There are different rarities which describe a card's power level. They are also relevant for deck building. A card's faction is determined by the color of the gemstone.
The source's card diagram labels the elements as:
- Illustrator
- Card Name
- Card effect
- Rarity and ID
- Card Type and Faction
| Rarity | Stars |
|---|---|
| common | 0 |
| rare | 1 |
| epic | 2 |
| legendary | 3 |
Card Types
The card type diagrams in the source are captioned:
- Passive Effect: once per turn
- Active Effect: once per game
Tamers
The tamer determines the faction of your deck and therefore the cards and tactics you can utilize. Each tamer has an unique passive and active effect which can be mixed with other card effects to perform powerful combos. The tamer's passive and active effects only trigger or can be used during the player's own turn.
The passive effect gets triggered by specific events during the game and can trigger once per turn.
The active effects can only be used once per game and usually provide the player with a powerful ability to turn the game in their favor.
Creatures
Creatures build a deck's core and are a player's representatives on the battleground. They have 4 attack values facing in the cardinal directions. Once a creature enters the battleground, it gains allegiance to its player and fights every adjacent creature with its respective attack value (no diagonal attacks, no attacks just by moving). Allegiance is symbolized by putting a player token on the creature, meaning this creature now is controlled by a player. Creatures do not have their specific card type on gemstone, yet they are the only cards with attack values which makes them easy to recognize.
A creature's gemstones are placed differently, yet they serve the same purpose of showing the type and faction. "A" describes the highest possible value of a creature, it can't be increased beyond.
Places
Similar to creatures, places are set into play on the battleground. Places do not have allegiance towards a player, meaning their effects influence all creatures the same way regardless of which player is playing or controlling it (unless the card specifically says something else). Places also do not have attack values but can have a variety of effects for tweaking the odds in your favor while they serve as a means of security to cover up your weak spots or block your opponent's moves.
Spells
Spells let you unleash powerful combos and can only be used in your turn. Their effects remain in your turn and do not affect your opponent's turn. Spells can be used to prepare that one impactful turn or to ensure control over the opponent's presence on the battleground. Spells have their text box on top of the card. After a spell's effect is over it is placed on the discard pile.
Formats & Preparation
There are 5 starting decks and 4 game boards with many different ways of utilizing them to play Neverrift. Cards are played on a grid based arena field. They affect surrounding cards with their effects and attacks. Choosing a size of the battleground might be just as important as choosing your preferred deck. It can greatly impact the way you have to approach a game. For example: If you are a great planner that succeeds in the late game by holding back strong cards, you might have a harder time to do so on a small battleground. On the other hand, if you are planning to overrun your opponent by playing a lot of cards early on you might be favored on a small battleground.
Here are a few general tips on how to choose a battleground:
- How many players are playing?
- How advanced are the participating players?
- Which decks have been chosen?
- How long do you want the game to be?
These are the recommended formats:
The Standard Format
Use the 4x4 battleground. For an optimal and beginner friendly experience we recommend this format. All strategies are playable. No clear advantage for certain cards.
- Players: 2
- Playing time: 20 - 30 min
- Difficulty: easy
The Quick Format
Use the 3x4 battleground. This is an advanced format and is ideal to test new decks or have a quick show off.
- Players: 2
- Playing time: 10 - 15 min
- Difficulty: medium - advanced
The Multiplayer Format
Use both 4x4 battlegrounds and lay them beside each other. This format is advanced and allows for specific strategies utilizing the whole size of the battleground. Decks that use area effects have an advantage.
- Players: 3 - 5
- Playing time: 40 - 60 min
- Difficulty: medium
Setting Up a Game
- Determine player number
- Choose decks
- Place board(s) so every player can confidently reach
- Place player board(s) in front of each player
- Determine the direction cards are played in (it's recommended to sit side by side, yet it is possible to play opposite of each other if preferred, meaning some player(s) are playing upside down)
- Players choose their side of the token(s)
- Determine the first player
- Shuffle decks
- Place decks and tamers on the player boards
- Draw 6 cards
Mulligan: You may put up to 3 cards back in your deck, shuffle and then draw the amount of cards you put back. This is only allowed once per game!
Detailed Rules
Turn Sequence
- Start Turn
- Draw a card (Maximum hand size is 10; the 11th card is discarded after being revealed)
- Play your cards with the following restrictions: Play a maximum of 1 creature and/or 1 place (If you play neither, see the rule "Passing a turn")
- End Turn
Attacking and Taming
Whenever a creature enters the battleground, it attacks with all its attack values in all four directions (no diagonal attacks). It also gains a token which showcases the creature's current allegiance by turning it on the player's chosen side. When attacking an adjacent creature there are two possible outcomes:
- If the attack value is higher, the attacking creature tames the other creature.
- If the attack value is the same or lower, the attacking creature does not tame the other creature (It does not get attacked back).
Tamed creatures change their allegiance to the attacker's. This is signalized by flipping the token on the tamed creature showcasing the opponent's side of the token. Attacking creatures will never get tamed by a defending creature even if its attack value is lower.
Goal and End
The goal is to have more creatures tamed than your opponent. Count the tokens and declare the winner! The game ends once all fields on the battleground are occupied. Effects of the last card are executed.
Passing a Turn
If a player does not play a creature or place during their turn, it is considered a pass. Once a turn is passed, the opponent (or the next player - for multiplayer) may choose a creature to tame at the start of their turn. If there are no creatures left to tame, the passing player loses the game (or is eliminated - for multiplayer).
Spells
Spells can only be played in the player's turn and cost no resources. Play as many spells as you desire in one turn, yet they do not prevent you from passing a turn as creatures or places would.
Rules for Special Cases
A Rule of Thumb
As a general rule of thumb, effects that are chained are triggered in chronological order. This means cards that are played first will trigger first should a situation arise where two effects seem to trigger at the same time. The same goes for cards in themselves, meaning effects will happen in order as they are written on a card.
Tie at the End
The player on the last turn has to tame at least 1 creature more than their opponent to win the game. This is due to the fact that the last turn is the most impactful one in the game. This means if it's a tie, the player with the last turn lost the game. For multiplayer: the player that would have been next in turn wins, the player after that is second and so on.
Can't be Tamed (Royal Empire) and Passing
When a passing player only has creatures with the effect "can't be tamed" under their allegiance, the opposing player can tame one of these creatures regardless of its effect.
Onslaught (Free Tribes), Pierce (Verdant Pact) and Liberate (Royal Empire)
These effects trigger every time a creature attacks. They can also be triggered by players that have a different faction than the card.
Tips and Strategies
- To ensure your creatures do not get tamed that easily you can use other creatures, the battleground's edge and places to cover their weakest attack values.
- Find a positioning that benefits your creature's strongest attack values. A well placed creature might endure the whole game without ever being tamed by your opponent.
- Use Spells to manipulate the battleground to your favor. Moving a creature aside might open up a perfect spot for your creature to take the lead by taming multiple creatures or exposing a weak attack value.
- Use your faction's perks to your advantage. See the factions page for more.
- Unlike other card games, Neverrift has no direct resources like mana or health points, but do not underestimate "cards" as a resource. Sometimes it is better to hold back on a great combo.
- Save yourself a creature or place for every turn. Passing sets you behind and might lose you a game.
Factions
The Outcast: The Outcast are a bunch of fishlike creatures and pirates driven out into gushing waters united by one goal: revenge on the landfolk.
The Free Tribes: A vast variety of nomadic half-bloods, humans and creatues. Calling no place their home, but having the world as a homeland they strife to unite the world in one herd.
The Royal Empire: A honored people that have endured many tribulations, on a pursuit of a future of former glory. They are selective as to which beasts stand in their ranks.
The Verdant Pact: All forms of nature's living creations are welcome. The pact's quest calls for restoration of nature's hold in the world leading to the closure of the Rift and an age of balance.
The Sworn: Living in solitude or disguised among the other factions they wait for the right moment to ditch their simple lifes to serve the greater cause. Only Sworn members see the greater picture that affects everyone and everything beyond worldly conflicts. Their faith will lead the world into its destined future.
Strengths and Weaknesses
| Outcast | Free Tribes | Royal Empire | Verdant Pact | Sworn | |
|---|---|---|---|---|---|
| Attack | 2 | 4 | 3 | 5 | 3 |
| Movement | 5 | 4 | 2 | 2 | 1 |
| Effects | 3 | 2 | 4 | 2 | 5 |
| Supplies | 3 | 3 | 3 | 4 | 3 |
| When strong? |
Glossary and Terms
Adjacent Fields in the 4 directions of a card. Up, right, down and left.
Attack An attack is directed towards the first row of creatures in all the cardinal directions with the respective attack value. Usually it is triggered by playing a creature.
Battleground A space where creature and place cards are played on. It is visualized as a grid that holds a limited number of card slots.
Controller A creature is controlled by a player if the token marking it is flipped on that player's side.
Destroy A card that gets destroyed is moved from the battleground into its owner's discard pile.
Discard A card from a player's hand is moved to the player's discard pile. The discard pile is located besides the drawing pile and is always visible for both players.
For this turn This effect only lasts until the end of this player's turn.
May A card text that contains the word "may" indicates that the effect is optional.
Move A creature or a place counts as "moved" as soon as their position changes on the battleground. The word "move" does not have to be in the card's description to count as a move-effect.
Owner A card is owned by the player in whose deck it started.
Player token and Allegiance A chip that represents the current allegiance. Allegiance shows, towards which player the creature's loyalties and therefore points and usage of some effects lay.
Common Effects and How to Use Them
Faction Non-Specific
| Effect | Explanation |
|---|---|
| Draw a card. | Take a card from your drawing pile and put it in your hand. |
| Scout (Reveal the top card of your opponent's deck.) | Put the revealed card top side up on the drawing pile. |
| This creature blocks the next incoming attack. | A block-effect prevents the first attack towards this creature. Every attack higher than 0 breaks a block-effect. |
| When this card comes into play choose a creature {direction}. You may return it to its owner's hand. | Owner's hand, not controller's hand. |
| Intimidate (Adjacent creatures move a field away from this card, if the field is empty.) | |
| Aura (Cards on adjacent fields are affected): Creatures gain {value}. | The creature itself does not benefit from its own effect. Only the 4 adjacent fields are affected not the 9 surrounding fields. Aura-effects can stack on a card. |
Faction Specific
| Effect | Explanation |
|---|---|
| Hook (Choose a creature your opponent controls and move it to an adjacent field of this card). | Move a creature your opponent controls adjacent to this creature before the fight. |
| Anchor (This creature can only be moved by its controller.) | Whoever controls it can move it. |
| Sacrifice (You may choose to destroy a creature you control and play this creature on its field instead.) | Put a creature you control into its owner's graveyard. Play the creature with sacrifice in its place. |
| Grave Digging (Search your graveyard for a card and put it into your hand.) | Choose a card from your graveyard and show it to your opponent, then put it in your hand. |
| Pierce (When attacking, this creature attacks the second creatures in line as well.) | Additionally attack creatures a field further. It is not blocked by cards in its way. |
| Augury (Look at the top three cards of your deck and put them back on top in any order.) | |
Deck Building
Expand your game! Neverrift is an expandable board game. In this version you have 5 starter decks with a great number of cards but there is so much more to explore! Check out the Neverrift products on the next page and expand your game by tamers, many more cards and special card prints! New strategies and ways to play the game await, but beware: The decks of Neverrift's board game are balanced towards each other and might differ from the power level of self constructed decks. Follow along for what is required to build a deck.
Requirements
- 30 cards + 1 tamer card
- Up to 20 stars (might differ for other modes)
- Up to 2 cards (1 duplicate) per card except legendaries (no duplicates)
Let's Build a Deck
Begin building your deck by picking a tamer. This decision should not be felled lightly since your tamer decides on what cards you can utilize in your deck. A deck should be picked around the tamer's effects. For example: Ludvig von Ascheburg's active lets you sacrifice a place instead of a creature. This means your deck should have a reasonable amount of places to utilize this tamer's effect. Ludivg is a Sworn Tamer. In this deck you will be able to pick Sworn cards as well as neutral cards. Now decide on which Sworn and neutral cards you want to use while keeping and eye on the stars on the bottom left of a card.
| Rarity | Stars |
|---|---|
| Common | 0 |
| Rare | 1 |
| Epic | 2 |
| Legendary | 3 |
This means you can either fill your deck with a few very powerful cards (epics and legendaries) or keep a general high amount of strength in all of your cards by adding mostly rares. But keep in mind to not have more than 20 stars total and up to 1 duplicate per card (except legendaries) since these are the current restrictions of deck building. There are no restrictions on how many creatures, places and spells need to be in your deck yet it is advised to have at least 50% creatures or places so you don't suffer from the passing penalty too much. Yet to give yourself an advantage and a quick option to change the board in your favor you should add some spells to your deck.
Deck building is all about experimentation and finding new ways to play the game! Try out your ideas and let us know on our socials! We are very interested in what you come up with!
Please note that for all cards, the deck to which they belong is mentioned above the card ID (in the bottom left corner). This allows you to reassign them to their original decks if they have been mixed with other cards.