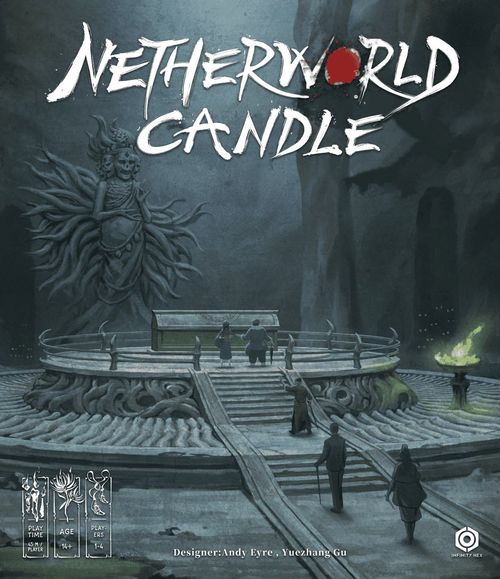
Netherworld Candle
Netherworld Candle Rulebook
Table of Contents
Table of Contents
I. Game Overview
The veil between worlds is thin, and shadows stir in the forgotten tombs of emperors. You are a Tomb Delver, a master of forbidden arts, venturing into darkness where others fear to tread. Welcome to Netherworld Candle, a cooperative campaign adventure for 1-4 players. Together, you will delve into perilous ancient tombs, unearth long-lost secrets, and confront ancient evils that threaten to consume the world.
As a team of specialists, you will wield the unique skills of your Sect and powerful equipment to navigate a saga of thrilling adventures, gradually uncovering a staggering truth sealed for a thousand years. The game alternates between two distinct phases: the Story Phase and the Adventure Phase. In the Story Phase, you will confront harrowing choices in towns and secret realms. The Story Book will guide your epic journey, where your skills and strategies will challenge fate, shape the narrative, and unlock unique story branches. In the Adventure Phase, you will explore treacherous ruins, solve cryptic puzzles, and engage in desperate struggles against the supernatural horrors of the Netherworld.
As your campaign progresses, you will gain Experience Points, acquire new Action Cards, and unlock powerful Fate abilities, allowing your characters to grow. By presenting Netherworld Artifacts to the factions you encounter, you can build your Reputation, trade for legendary equipment, and recruit skilled allies to aid your adventure. Ultimately, the choices you make will forge your destiny and determine the story's final outcome.
Tips: In this game, Bagua icons are represented as follows (a row of eight Bagua icons is printed in the rulebook, shown here by image only). In this game, the Four Symbols, Vermillion Bird, Azure Dragon, White Tiger, and Black Tortoise, are represented by the following icons (shown here by image only).
The Golden Rule: If a rule in this book contradicts the text on a game component, resolve all conflicts using the following order of priority:
Card Text > Tomb Delving Note > Story Book > This Rulebook.
Archive: When the game instructs you to Archive a component, return it to its designated storage location in the game box. Keeping components organized will significantly improve your experience in future games.
Your First Game: We have prepared a Quick Start Guide for new players. If this is your first time playing this type of game, we strongly recommend reading the Quick Start Guide before you begin.
Party Stash: The Party Stash is the shared storage space in the game box sectioned off by three dividers: "Party - Story Cards," "Party - Journey Cards," and "Party - Equipment Cards." When a game effect instructs you to add a card to the Party Stash, place that card behind the corresponding divider.
Digital Resources: Follow us on our official website: https://www.infinityhex.com/. Here you can download digital versions of game materials Rulebook, Player Logs, Party Log, FAQ, and receive news about our latest board games.
Story Phase: The game begins in the Story Phase, which chronicles the origins of your adventures and the events that unfold between expeditions. This phase uses the Player Boards, character miniatures, the Story Book, Story Cards, and more. A typical session lasts 30-60 minutes. For detailed rules, see Chapter IV, "Story Phase."
Adventure Phase: Following the Story Phase, the game enters the Adventure Phase, where you will explore and conquer a series of dangerous scenarios. This phase uses Player Boards, Action Cards, Encounter Cards, Location Cards, the Tomb Delving Note, and more. A typical session lasts 90-150 minutes. For detailed rules, see Chapter V, "Adventure Phase."
II. Component List
The Netherworld Candle base game contains the following components:
Books & Logs:
- Rulebook x1
- Story Book x1
- Quick Start Guide x1
- Tomb Delving Note x1
- Player Logs x1
- Party Log x1
Player Boards and Cards:
- Player Boards x4
- Flowchart Cards x4
- Quick Reference Sheet x1
- Turn Reminder Cards x4
- Encounter Cards x376
- Story Cards x59
- Action Cards x154
- Netherworld Cards x9
- Location Cards x158
- Equipment Cards x174
- Journey Cards x8
- Basic Fate Cards x80 (marked with "Rat, Ox, Tiger, Rabbit" on the bottom left of the card front)
- Advanced Fate Cards x204
- Candle Cards x54
- Card Dividers x30
Tokens / Markers:
- Candlelight Token x1
- Karma and Neidan Tokens x25
- General Tokens x10
- Puzzle Markers x15
- Gate of Life and Gate of Death Tokens x10
- Cooldown and Redraw Tokens x20
- Damage Tokens (Value 1) x30
- Damage Tokens (Value 3) x10
- Netherworld Artifact Tokens x47
- Talisman Tokens x10
- Armor Break Tokens x10
Miniatures and Other Components:
- Tomb Delver Miniatures x4
- Enemy Standees & Bases x49
- Netherworld Artifacts Bag x1
- Qimen Dice x3
- Candle Track x1
Additionally, there are hidden components in the game, which are not listed here to avoid spoilers.
Tips: If you have purchased the monster miniature expansion, you may replace the monster standees with miniatures for an enhanced visual experience and greater immersion. There is no gameplay difference between monster standees and miniatures.
Token supply note: This game includes a generous supply of tokens. In the rare event that a token type runs out, you may use any other suitable item (such as a button or coin) as a substitute. Due to the game's design, some card numbers are not sequential; this is intentional. When taking inventory, please refer to the card quantities listed above.
III. Campaign Basics
Netherworld Candle is a narrative-driven campaign game composed of multiple interconnected stories and scenarios. The game progresses by alternating between a Story Phase and an Adventure Phase. You will record your progress and story developments in your Player Logs and the shared Party Log.
Players can freely control the length of each game session. For a complete narrative arc, you can play through both a Story and an Adventure Phase in one sitting. If you prefer a shorter experience, you can complete just one phase. Based on playtesting, each Story Phase lasts approximately 30-60 minutes, and each Adventure Phase lasts approximately 90-150 minutes.
You may pause and save the game after completing any Story Phase or Adventure Phase. For detailed instructions, refer to the "Saving the Game" section in Chapter VI.
The rules for the Story Phase and Adventure Phase are distinct. The following chapters will explain each in detail.
IV. Story Phase
1. Component Details
Story Book: This book is the heart of the Story Phase. Players will read entries from the Story Book and make choices that determine the direction of the plot.
Note: To avoid spoilers, do not read ahead in the Story Book unless instructed to do so.
Player Boards: Each Player Board contains the following sections:
- A. Character Moniker & Complexity: Your character's title. The diamond symbols indicate complexity; more diamond symbols mean a more challenging character to master.
- B. Unique Skill: Your character's signature ability.
- C. Base Attributes: Your character's core capabilities: Strength, Courage, Geomancy, and Destiny. A higher value increases your chance of success when making a Skill Test with that attribute.
- D. Equipment Slots: This is where you place your equipped Gear, which provides powerful benefits. The standard equipment types are: Weapon, Tool, Accessory, Consumable, Backpack, and Companion. Each character may equip a maximum of one of each type.
- E. Fate Card Deck Area: Place your character's Fate Cards face-down here.
- F. Netherworld Artifacts Storage: Each character has one default storage slot for holding a Netherworld Artifact token. Each slot can hold only one token.
- G. Player Board Back: The reverse side details your character's biography, playstyle, starting Health and Energy, and the specific cards and tokens you receive at the start of the campaign.
During the Story Phase, you only need to be familiar with the sections listed above. Other areas will be explained in Chapter V, "Adventure Phase."
Player Logs: The Player Log tracks your character's growth and contains these sections:
- A. Player Name: Write your name here.
- B. Character Moniker: Write your chosen character's moniker here.
- C. Experience Point (EXP) Track: When you gain EXP, check the boxes from left to right, top to bottom. When you check a box, you immediately gain the rewards indicated above and below it. Each level unlocks the ability to use Action Cards of that level, up to your hand limit.
- D. Action Card Hand Limit +1: When you gain this reward, your maximum hand size for Action Cards increases by 1 (the starting limit is 6). This effect is cumulative.
- E. Netherworld's Summons: When your Tomb Delver is defeated, check one box from left to right and immediately resolve the effect below it.
- F. Faction Reputation: When you increase your Reputation with a faction, check the boxes from left to right. Your current Reputation level is the title above the last box you checked. When all boxes for a faction are checked, you may discard 1 Netherworld Artifact token (of any value) to gain 1 Fate Point (this can only be done once per faction).
Party Log: The Party Log tracks your group's shared journey and contains these sections:
- A. Party Members: Each player writes their character's moniker here.
- B. Historical Mark: When instructed to check a "Historical Mark," check the circle next to the corresponding entry.
- C. Historical Progress: When instructed to check "Historical Progress," check one "Progress" box from left to right.
- D. Setback Record: When instructed to check a "Setback Record," check one box from left to right.
- E. Notes: Record important information here when instructed by a game effect.
Attention! The Historical Progress Bar is divided into four rows: "Famous Events," "New Story Cards," "Initial Karma Value," and "Progress." Among them, "Progress" needs to be checked by drawing a "√" on the paper with a pen; "Famous Events" indicates the current game progress of the party. Whenever the "Progress" of a certain Famous Event is checked with a √ for the first time, you must immediately read the corresponding story chapter in the Storybook; according to the card numbers indicated in "New Story Cards", find the corresponding numbered story cards from the game box and add them to the party's collection; "Initial Karma" refers to the Karma the party obtained each time they enter Story Mode, and this value will change as the historical progress advances.
Tree of Fate: This branching diagram represents your character's evolving destiny. When you gain a Fate Point, you must immediately check one empty diamond-shaped space on a node of the Tree of Fate and gain that node's reward. To check a space, at least one space in all of that node's parent nodes (those connected by an incoming arrow) must already be checked. The central node of the Tree of Fate is always considered to be checked.
Story Cards: A Story Card contains the following sections:
- A. Card Number
- B. Region
- C. Card Title
- D. Artwork
- E. Narrative Text
- F. Story Choices
- G. Outcome for the corresponding choice
Fate Cards: A Fate Card contains the following sections:
- A. Card Title
- B. D20 Value
Equipment Cards: An Equipment Card contains the following sections:
- A. Card Number
- B. Equipment Keyword
- C. Equipment Type
- D. Equipment Name
- E. Cost
- F. Effect
- G. Flavor Text
- H. Minimum Reputation required to acquire this card
- I. Artwork
During the Story Phase, you only need to be familiar with the components listed above. Other components will be explained in Chapter V, "Adventure Phase."
2. Setup
A. Each player takes their chosen Tomb Delver's Player Board, character miniature, all Fate Cards, and unique character tokens from their Player Storage Box.
First Game: Each player chooses a Tomb Delver and takes the matching Player Board and miniature. For a solo game, see "Solo Mode" in Chapter VI. Then, write your name and character moniker in your Player Log, and all character monikers in the Party Log.
First Game: Each player takes one set of "Basic Fate Cards" from the game box. Shuffle these cards to form your starting Fate deck and place it facedown to the right of your Player Board. The contents of each set are detailed in Chapter VII, Appendix. For easy sorting, the four sets are marked with "Rat, Ox, Tiger, Rabbit" on the front.
B. Choose one player to be the Grandmaster. If you cannot agree, the owner of the game is the Grandmaster. The Grandmaster has the final say in any situation where the party cannot reach a consensus.
C. Place all Karma tokens in a central, accessible area to form a supply. Set the game box aside; you will retrieve specific Story Cards from it as instructed.
D. Give the Story Book to a player who enjoys reading narrative aloud.
E. Check the "Initial Karma Value" listed above the most recently checked "Progress" box in the Party Log. Take that many Karma tokens from the supply. Starting with the Grandmaster and proceeding clockwise, each player receives one Karma token until they are all distributed.
First Game: Instead, open the Story Book to the "Prologue - Escape to Survive" chapter and read the text aloud. The party gains seven Karma tokens; distribute them as described above. Then, each player gains one Z901 Netherworld Card.
F. Take all Story Cards from the "Party - Story Cards" divider in the Party Stash and place them face up (artwork showing) in the center of the play area.
Note: Do not look at the text on the back of the cards as you place them.
First Game: Instead, find Story Cards S001 through S007 in the game box and place them in the play area.
G. After discussion, each player chooses one Story Card and places their character miniature on it.
H. Each player shuffles their Fate Cards to form a facedown Fate deck and places it to the right of their Player Board.
3. Game Sequence
A. Overview. The Story Phase has a freeform structure with no formal rounds. In clockwise order, starting with the Grandmaster, each player takes a turn. On your turn, you may perform 1 or 2 Story Actions, or you may pass. When all players consecutively pass, the Story Phase ends.
B. Story Actions. On your turn, you may perform one of the following two actions:
- Move your character miniature to a different Story Card. If the new Story Card is in a different region than your previous one, you must discard 1 Karma token.
- Discard 1 Karma token to interact with the Story Card your character is on. Pass the card to the player on your left, who will read the narrative text on the back and any relevant passages from the Story Book. If the card offers choices, the reader should not read the outcomes aloud. The current player then follows the instructions or makes a choice. Once the choice is made, the reader reveals the corresponding outcome. (In solo mode, you read all text and follow the instructions yourself.)
Note: If a game effect causes a Story Card to be discarded, move any character miniatures on it to any other Story Card in play.
C. Story Tests. Tests made during the Story Phase are called Story Tests. Before each Story Test, the active character must shuffle their Fate deck, then reveal the top card. The result of the Test is the sum of the number in the card's top-left corner, the character's relevant attribute value, and any other modifiers. (If the revealed Fate Card shows a Miss icon, ignore it and draw a new one.)
If the Test result is greater than or equal to the difficulty, then the Test is successful. Otherwise, it fails.
When a character performs a Story Test, other Tomb Delvers at the same location may assist. After the initial card is revealed, an assisting player may reveal the top card of their own Fate deck and contribute any one icon from that card to the Test (the number in the top-left corner is not an icon).
During a Story Test, you may discard Karma tokens to redraw. For each Karma token discarded, you may shuffle your Fate deck and draw one new Fate Card.
Example: Wang is at Story Card S001. He performs a Story Action, discards 1 Karma token, and passes the card to Lao Dong on his left. Lao Dong reads the back, which instructs Wang to "make a Story Test; bonus attribute: Geomancy, White Tiger +2; difficulty 9." Wang shuffles his Fate deck and reveals the top card: a 5. His Geomancy is 3. His current total is 5+3=8, which is less than 9; the Test is about to fail. However, Jiu is at the same location and decides to assist. Jiu reveals the top card of his Fate deck, which has a White Tiger icon. This Test grants a +2 bonus for each White Tiger icon. Therefore, Wang's final result is 5+3+2=10, which is greater than the difficulty of 9. The Test is successful.
D. Epilogue Phase
When all players have passed their turn, the Story Phase ends and the Epilogue Phase begins. Perform these steps in order:
-
All players restore their Health and Energy to their starting values. Then, check your Reputation with each faction. You may now acquire any Equipment Cards from those factions for which you meet the Reputation requirement.
Note: Each character may only have one of each type of Equipment Card equipped at a time.
-
Add all Story Cards from the table to the Party Stash.
- Check if there are any "Scenario" type Story Cards in the Party Stash.
- If not, check one "Setback Record" box in the Party Log. You may then either begin a new Story Phase or save and end the game.
- If so, the players collectively choose one "Scenario" card to undertake.
- Check if there are any Journey Cards in the Party Stash.
- If not, proceed to the Adventure Phase as instructed by your chosen "Scenario" card (ignoring any journey event steps), or save and end the game.
- If so, refer to your chosen "Scenario" card. It will state a number of journey events to resolve. Take all Journey Cards from the Party Stash and shuffle them. The Grandmaster draws the required number of cards (if there are not enough, draw all available cards). Resolve each drawn Journey Card one by one: read the front, the party collectively chooses an option, then flip the card to read and resolve the outcome. Archive all resolved Journey Cards. Then, proceed to the Adventure Phase as instructed by your "Scenario" card, or save and end the game.
- Check if there are any "Scenario" type Story Cards in the Party Stash.
If this is your first game, ignore the steps above and instead perform the following:
Read the Epilogue section of "Prologue - Escape to Survive" in the Story Book.
Archive all Story Cards currently in play; they will not be used again.
Turn to page 1 of the Tomb Delving Note and set up the Adventure Phase as described. (For rules, see Chapter V, "Adventure Phase.")
E. Additional Rules
- If all players agree, you may end the current Story Phase early. Immediately choose a "Scenario" type Story Card from the Party Stash to begin. Each unused Karma token may be exchanged for one Redraw token/Cooldown Token.
- When the party acquires Equipment Cards or materials, players must immediately decide which character receives them. If an agreement cannot be reached, the Grandmaster decides.
- During the Story Phase only, Equipment Cards and materials may be freely traded between characters at any time.
- When instructed to check a "Keyword," find that keyword in the "Historical Mark" section of the Party Log and check the space to its left.
The top-right corner of each Story Card indicates its region or type. A "Scenario" card represents a location you can explore during the Adventure Phase.
Tips: Fortuitous encounters are not guaranteed. When there are no Journey Cards in the Party Stash, it signifies an uneventful journey to the tomb.
V. Adventure Phase
1. Component Details
Player Boards: The Player Board contains the following sections:
- A. Character Moniker & Complexity: Your character's title. The diamond symbols indicate complexity; more diamond symbols mean a more challenging character to master.
- B. Unique Skill: Your character's signature ability.
- C. Base Attributes: Your character's core capabilities: Strength, Courage, Geomancy, and Destiny. A higher value increases your chance of success when making a Test with that attribute.
- D. Health and Energy Tracks: At the start of the Adventure Phase, place a General token on the starting space of both the Health and Energy tracks. Move these tokens to track changes. If you must lose Energy but have zero, then you lose 1 Health for each point of Energy you would have lost. Health and Energy cannot exceed the maximum value on their tracks.
- E. Action Card Cooldown Zones: Each board has three Cooldown Zones: A, B, and C. Each zone can hold multiple cards. You may spend Energy to return a card from a zone to your hand based on the number of Cooldown icons: Zone A costs 1 Energy, Zone B costs 2 Energy, and Zone C costs 3 Energy.
- F. Equipment Slots: This is where you place your equipped Gear, which provides powerful benefits. The standard equipment types are: Weapon, Tool, Accessory, Consumable, Backpack, and Companion. Each character may equip a maximum of one of each type.
- G. Fate Deck Area: Place your character's Fate deck facedown here.
- H. Threat Area: Place Encounter Cards and other negative status cards here. There is no limit to the number of cards in your Threat Area. At the end of the Adventure Phase, discard all cards from this area.
Action Cards: An Action Card contains the following sections:
- A. Card Level: A Tomb Delver can only use Action Cards of a level they have unlocked on their Player Log.
- B. Card Title.
- C. Card Sect Icon: Initially, you can only use Action Cards that match your character's Sect. You may later gain the ability to use cards from other Sects.
- D. Card Keyword: Has no inherent effect but may interact with other game effects.
- E. Cooldown Zone: After an Action Card is played, it is placed in the indicated Cooldown Zone (A, B, or C). This may cause other cards to shift. (See "4. Player Turn" for details.)
- F. Basic Action: The card's standard effect. If multiple icons are shown, you may only choose one to perform.
- G. Advanced Action: The card's more powerful effect, which often costs Energy to use.
- H. Flavor Text: Thematic text that typically has no game effect.
Encounter Cards - Enemy: An Enemy Encounter Card contains the following sections:
- A. Card Title.
- B. Special Ability: Unique rules for this enemy.
- C. Artwork & Base Color: The border color of the art matches the enemy's standee base color. When this card is revealed, find the matching standee or miniature.
- D. Health: The amount of damage the enemy can sustain before being defeated.
- E. Armor: Reduces the number of hits the enemy takes from a normal attack by this amount.
- F. Damage: The amount of Health a Tomb Delver loses when hit by this enemy.
- G. Four Symbols Icons: These icons are the target for a Suppress action.
- H. Card Keyword: Has no inherent effect but may interact with other game effects.
- I. Neidan Value: When this enemy is defeated, the Tomb Delver who dealt the final blow gains this many Neidan tokens.
- J. Flavor Text: Thematic text that typically has no game effect.
- K. Card Number.
- L. Card Art.
Encounter Cards - Event: An Event Encounter Card contains the following sections:
- A. Card Title.
- B. Event Effect: When drawn, resolve the text box from top to bottom.
- C. Card Keyword: Has no inherent effect but may interact with other game effects.
- D. Four Symbols Icons: These icons are the target for an Overcome action to discard this card from your Threat Area.
- E. Qimen Dice: After resolving the event, you must roll this many Qimen Dice. (If the card shows the icon printed in the rulebook, do not roll dice; instead, you must advance the Candle Track by 1 space.)
- F. Flavor Text: Thematic text that typically has no game effect.
- G. Card Number.
- H. Card Art.
Location Cards: Each Location Card has a unique number in the top-left corner. Location Cards are either Locations (enterable spaces) or Events (narrative encounters, marked with a compass icon).
A Location Card contains the following sections:
- A. Location Card Number.
- B. Adjacent Location Number: Numbers on the card's edges indicate which Location Cards connect in those directions. When a Location is revealed, you must immediately place the corresponding adjacent Location Cards facedown.
- C. Bagua Icons: These colored icons represent puzzle elements. You can perform a Decode action to move Puzzle Markers from the Tomb Delving Note onto these icons to advance the scenario.
- D. Location Art.
- E. Location Special Effect: A mandatory effect that triggers for any character or enemy at this Location.
- F. Flavor Text: Thematic text that typically has no game effect.
- G. Location Event: A card with a compass icon is a Location Event. You cannot enter it. Instead, you resolve its text effect, which may require a choice and a Test.
- H. Event Test Difficulty: Represented by Four Symbols icons.
- I. Event Text Effect: The narrative and choices for the event. To succeed at a Test here, you must include a Four Symbols icon that matches the difficulty.
Tips: When placing a new Location Card, do not look at its front. You can use an Investigate action on a later turn to reveal it. Two face-up Location Cards sharing an edge are adjacent (diagonals do not count). Some event-placed Locations may not have connection numbers but are still considered adjacent if placed sharing an edge.
Candle Card: The front of the Candle Card reads: "Advance the Candlelight Token 1 spaces. Each Tomb Delver gains 1 Cooldown Token." The Candle Card is printed with the card number LO01 and the title "Yellow Candlelight" on its front, and has a Candle Card back.
Fate Cards: A Fate Card contains the following sections:
- A. Card Title.
- B. D20 Value: Used for Story Tests in the Story Phase.
- C. Hit / Miss: Used for Attack actions. A HIT icon is 1 hit; a MISS icon is 0 hits.
- D. Bagua Icons: Used for Decode actions.
- E. Four Symbols Icons: Used for Suppress, Overcome, and Location Event Tests.
- F. Reshuffle Icon: When you reveal this icon, you must shuffle your entire Fate deck (including the discard pile) together after the current Test is fully resolved.
Other special icons will appear on Fate Cards as you progress. See the Appendix for a full icon list. Such as: reveal one additional Fate Card; discard after revealing; acquire Netherworld Artifacts; Pierce; etc.
Tomb Delving Note: This book guides your adventure through a specific scenario.
- Odd-numbered pages: Thematic background story for the current scenario. Reading this is recommended to enhance immersion.
- Even-numbered pages: The setup and rules for the scenario. You must follow these instructions before beginning the Adventure Phase. This includes:
- A. Scenario Title.
- B. Scenario Setup: A step-by-step guide to preparing the scenario.
- C. Scenario Advancement: The conditions you must meet to turn the page and advance the plot.
- D. Puzzle Marker Slots: When you turn to a new page, place a Puzzle Marker in each empty slot here. You can perform a Decode action to move these markers onto Location Cards.
A Puzzle Marker in a slot marked with the any-color icon can be moved by matching any color of Bagua icon. A Puzzle Marker in a slot marked with a single colored Bagua icon can only be moved by matching the corresponding color of Bagua icon. (For Decode action rules, see "4. Player Turn" in this chapter.)
Color-blind Friendly: Bagua icons can be distinguished by the angle of their tilt and the length of their horizontal lines.
Candle Track: This track represents the burning candle that measures your time in the tomb. At the start of the game, place the Candlelight Token on the topmost space. Game effects will cause the Candlelight Token to advance down the track. If the token reaches the final space [Extinguished Candle icon], then the party immediately fails the scenario. The first time the token enters a new color section, you must immediately reveal and resolve the matching colored Candle Card.
Tips: "By cockcrow or candlelight's demise, lay no hand upon the prize." When the Candle Track advances, misfortune often follows. When it reaches the end, the candle is extinguished, and your expedition has failed.
Qimen Dice: These are special six-sided dice, each face marked with a different Bagua icon. When a game effect instructs you to roll the Qimen Dice, the result may cause the Candle Track to advance. Each face has a small white dot; orient the die so the dot is at the bottom to correctly read the Bagua icon.
Netherworld Artifact Tokens and the Netherworld Artifacts Bag: Each Netherworld Artifact token has the following sections:
- A. Art.
- B. Slang Name.
- C. Reputation Value.
Netherworld Artifact tokens are represented by the Netherworld Artifact icon.
During the Adventure Phase, you will have opportunities to acquire Netherworld Artifacts. (See "7. Additional Rules" for details.)
In Story Mode, players can turn in the obtained Netherworld Artifact Tokens to a specific Faction in exchange for the corresponding Reputation. During the Chapter Finale, these Factions will provide Equipment Cards that match the Reputation Level. For the rules on increasing Reputation and obtaining Equipment Cards, refer to Chapter 4 of Story Mode: Section 4) Chapter Finale.
Some special Netherworld Artifacts have no printed Reputation value; their purpose will be revealed by other game effects.
The Tomb Delving Note will typically instruct you to place a specific number and type of Netherworld Artifact tokens into the bag, creating a blind draw pool for the scenario.
At the end of each Adventure Phase, empty the Netherworld Artifacts Bag and return all tokens to the supply.
Note: In the rare case that you must add tokens to the bag but the supply is empty, add as many as you can and ignore the rest.
Tips: For a Tomb Delver, acquiring Netherworld Artifacts is a gamble. No one knows if the next pull from the bag will yield a priceless treasure or a deadly curse.
2. Setup
-
Each player takes their chosen Tomb Delver's Player Board, character miniature, Player Log, and personal tokens from their Player Storage Box.
-
From your Player Storage Box, take all your acquired Action Cards, Fate Cards, and unique tokens. From your pool of Action Cards, choose a number of cards up to your current hand limit to form your hand for this scenario. Return the unselected Action Cards to your Player Storage Box. The starting hand limit is 6.
Note: If this is your first game, take your character's six starting Action Cards and unique tokens (e.g., Iron Abacus's Talisman tokens) from the game box, as listed on the back of your Player Board.
-
Create separate supply piles for Puzzle Markers, Gate of Life/Death tokens, Cooldown/Redraw tokens, Damage tokens, and General tokens, placing them within easy reach.
-
Place the Candle Track where all players can see it. Set the Candlelight Token nearby.
-
Reserve a large area in the center of the table for the map of Location Cards.
-
Each player shuffles their Fate Cards to form a facedown Fate deck and places it to the right of their Player Board.
-
Place two General tokens on the starting spaces of your character's Health and Energy tracks. If a game effect modifies your starting Health or Energy, place the tokens on the adjusted values.
-
Take the Tomb Delving Note from the game box and place it where all players can see it.
-
Check the "Setback Record" in the Party Log. For each checked box, find the corresponding card (usually an Enemy) from the game box, find its matching standee, and set it aside. At the start of the scenario, this enemy will spawn at the location.
Note: If this is your first game, turn the Tomb Delving Note to page 1 and read the "Prologue - Escape to Survive" scenario.
Tips: A player's used Fate Cards are placed in a personal Fate discard pile. The discard pile is still considered part of your deck for effects that shuffle it. The only way to permanently remove a card from your Fate deck is by unlocking specific rewards on the Tree of Fate.
Tips: Using the prologue "Find a Way Out" as an example, players find the Encounter Cards listed in the Tomb Delving Note. They sort these by their card backs and shuffle them into two separate, facedown decks: "Yin" and "Yang." Next, they find Location Card M001, place it face up, and all players place their miniatures on it. They place the Candlelight Token on the starting space of the Candle Track and set the specified Candle Cards nearby. They place one Puzzle Marker on each empty slot on the current page of the Tomb Delving Note. Finally, they prepare the Netherworld Artifacts Bag as described. The game is now ready to begin.
Tips: For new players, we recommend preparing your hand with two Action Cards for each of the three Cooldown Zones: "A," "B," and "C."
Tips: A true Gold-Touching Captain always places the Candle Track in the southeast corner of the table before an expedition.
3. Game Sequence
An Adventure Phase consists of a series of rounds. Each round is divided into a Player Round and an Enemy Round.
At the start of the Player Round, all players resolve any "start of round" effects in their Threat Areas. Then, each Tomb Delver takes their turn. On their turn, a player may perform one Command action and play up to two Action Cards, after which they must draw and resolve one Encounter Card. After all players have taken a turn, the Player Round ends and the Enemy Round begins.
In the Enemy Round, one player (usually the Grandmaster) activates each enemy on the board one by one. After all enemies have activated, the game round ends and a new one begins.
Overview of a Game Round:
Player Round
- All players simultaneously check their Threat Area for any card effects that trigger at the start of the Player Round. Resolve these effects in any order.
- In an order of their choosing, each Tomb Delver takes their turn.
- The player whose turn it is (the "active player") may perform each of the following, once per turn, in any order:
- Perform one Command action. (See "Command and Basic Actions" below for details.)
- Play one Action Card and resolve its effect.
- Play a second Action Card and resolve its effect.
- Based on your current Energy, choose an encounter deck, draw the top card, and resolve its effect.
- If the Encounter Card instructs it, roll the indicated number of Qimen Dice and advance the Candle Track based on the dice result.
- The active player's turn ends. The next player takes their turn, repeating steps 3-5, until all players have acted.
After all Tomb Delvers have taken their turns, the Player Round ends.
Enemy Round
- Identify all enemies on the board. They will activate in order from lowest remaining Health to highest. (If there is a tie, the Grandmaster decides the activation order.) If an enemy is Immobilized, it skips its activation this round; then, remove its Immobilized status.
- When an enemy activates, it performs the following steps in order:
- Move towards a target (if a target is not already in range).
- Attack one target in range.
- After all enemies have activated once, the Enemy Round ends.
4. Player Turn
A. Resolve Threat Area Effects
At the start of the Player Round, all players check their Threat Area. If any cards have effects that trigger at this time, resolve them in any order you choose. Cards in the Threat Area often have ongoing effects that persist throughout your turn.
B. Perform Command & Basic Actions
Command: A Command is a flexible action that allows you to perform one of the six Basic Actions listed below: Move, Investigate, Attack, Decode, Suppress, or Overcome.
- Move: Move your Tomb Delver from your current Location to an adjacent, face-up Location. (Two Locations are adjacent if they share an edge.) You cannot move to a facedown Location.
- Investigate: Choose a numbered edge on your current Location Card. Find the Location Card with that number and flip it face up.
- If you reveal a Location Event card (with a compass icon), then you must immediately read and resolve its effect.
- If you reveal a standard Location Card, then it becomes a new, accessible space on the map.
- Place the newly revealed card adjacent to your current Location.
- Attack: Choose an enemy at your location. Reveal a number of Fate Cards equal to your current Strength attribute. The number of [hit] icons revealed is your total hits. The damage you deal is your total hits minus the enemy's Armor value.
- Decode: Reveal a number of Fate Cards equal to your current Geomancy attribute. If any revealed card has a Bagua icon that matches an uncovered Bagua icon on your current Location, then the test is successful.
- Take one Puzzle Marker from the Tomb Delving Note (from under a matching icon, if possible) and place it over the corresponding Bagua icon on the Location Card. A covered icon is considered non-existent. You may only cover one Bagua icon per Decode action.
C. Play an Action Card. When you play an Action Card from your hand, follow these steps in order:
- Choose an Action Card from your hand and note its Cooldown Zone (A, B, or C).
- Check the corresponding Cooldown Zone on your Player Board:
- If it is empty, then place the played Action Card there.
- If it contains other cards, then you must first move all cards from that zone one zone to the left. Then, place the newly played Action Card into the now-empty zone. (If you play a card into Zone A while it is occupied, first return all cards from Zone A to your hand, then place the new card in the empty Zone A.)
- Resolve the effect of the played card.
Note: You must choose to perform either the upper Basic Action or the lower Advanced Action, but not both. Most Advanced Actions require you to spend Energy, indicated by the [Energy cost] icon. You may also play a card for its Cooldown effect without resolving its action.
D. Play a Second Action Card.
Note: Only playing an Action Card from your hand causes cards in the Cooldown Zones to shift. When cards are moved by this effect, they are placed into the new zone. If the new zone is already occupied, the moved cards are stacked on top and do not cause a further shift. This also applies to cards moved by other effects, such as the Cooldown effect.
Example: In the first round, Wang is playing as Whisperlark. He decides to perform his Command action first, choosing Investigate. He investigates to the right of his current Location (M001). He finds Location Card M002 and places it face up, adjacent to M001.
Next, Wang plays the Action Card "Fade into Mist," which has a Cooldown Zone of "B." Whisperlark's "B" zone is empty, so he places the card there. He resolves its Basic Action, which allows him to move to an adjacent location. He moves his miniature from M001 to M002.
Wang then plays a second Action Card, "Observation." This card also has a Cooldown Zone of "B." Since Zone "B" is now occupied by "Fade into Mist," Wang must first move that card one zone to the left, into Zone "A." He then places "Observation" into the now-empty Zone "B." He resolves its effect, which allows him to perform one Decode action. The Bagua icons on his Location are [water icon] and [striped icon]. If he can reveal a Fate Card with either of those icons, his test will succeed.
Wang attempts the test. Whisperlark's Geomancy is 2, so he reveals two Fate Cards. He fails to find a matching icon. However, the "Observation" card allows him to spend a "Cooldown token" as a "Redraw token." He has one, so he spends it, discards the two revealed cards, and draws two new ones. This time, he reveals a card with a [water icon], which matches an icon on M002. The Decode is successful.
Wang takes a Puzzle Marker from the Tomb Delving Note and places it over the [water icon] on Location M002. Now, only the [striped icon] remains on M002, making future Decode actions there more difficult. Wang has now performed one Command action and played two Action Cards. His turn actions are complete.
E. Draw Encounter Card
After you have finished performing actions (up to one Command and two Action Cards), you must draw and resolve one Encounter Card by following these steps:
- Check your current Energy level to determine which Encounter deck to draw from:
- If your Energy is 0-2, you must draw from the Yin deck.
- If your Energy is 5-7, you must draw from the Yang deck.
- If your Energy is 3-4, you may choose to draw from either the Yin or Yang deck.
- If you draw an Enemy card, place the card in a shared play area (Immobilized State: See page 25 for details.). Find the matching enemy standee and place it at the location of the Tomb Delver with the highest current Energy (the Grandmaster breaks ties). The newly placed enemy begins with the Immobilize status. When an enemy is defeated, place its card in the corresponding discard pile and Archive its standee.
- If you draw an Event card, resolve its text effects from top to bottom. Some Event cards will instruct you to place them in your Threat Area, where they will have a persistent negative effect until you remove them with an Overcome action. When an Event card is discarded, place it in the corresponding discard pile.
- If the Encounter Card is marked with a Qimen Dice icon, you must roll the dice after resolving the card's other effects.
- If you cannot resolve any part of an Encounter Card's effect, you must discard it and draw a new one.
Note: If an encounter deck runs out of cards, you must immediately advance the Candle Track by 1 space. Then, shuffle its discard pile to form a new deck.
F. Roll Qimen Dice
If the Encounter Card you drew has a Qimen Dice icon, you must roll the indicated number of dice after resolving the card's effect. If any die result matches an uncovered Bagua icon on your current Location, then you must immediately advance the Candle Track by one space.
Note: The Candle Track only advances once per roll, even if multiple dice match icons at your location. If all Bagua icons at a location are covered by Puzzle Markers, that location is considered to have no Bagua icons.
G. Player Turn
A "Player Turn" refers to the entire sequence of actions a single player takes during the Player Round (steps 2 through 6 in the sequence on p.19). In each Player Round, there will be one Player Turn for each Tomb Delver in the game.
5. Enemy Round
During the Enemy Round, one player (usually the Grandmaster) activates each enemy on the board. If an enemy has the Immobilize status, it skips its activation this round; then, remove the Immobilize status.
- Enemies activate in order from lowest remaining Health to highest. The Grandmaster breaks any ties.
- When an enemy activates, it performs the following steps in order:
- a. Move: The enemy moves toward its target (skip this if a target is not already in range).
- b. Attack: The enemy attacks one target in range.
- After all enemies have activated once, the Enemy Round ends.
Enemies target a Tomb Delver or a Companion. An activated enemy follows this strict logic, performing at most one move and one attack per activation:
If a target is in the enemy's range, then the enemy immediately attacks that target.
If no target is in range, then the enemy moves one Location towards its highest-priority target via the shortest possible path.
If, after moving, a target is now in range, then the enemy attacks that target. Otherwise, its activation ends.
An enemy's default range is 0 (its own Location).
An enemy's default movement is 1 (to an adjacent Location).
When an enemy attacks, it deals damage equal to the value on its card. The target reduces their Health by that amount.
If multiple targets are in an enemy's range, it uses the following priority list to choose one:
Closest distance > 2. Lowest current Energy > 3. Lowest current Health
If there is still a tie, the Grandmaster chooses one of the tied targets.
Some enemies have special targeting rules (e.g., "Prey: The character with the most Equipment"). In this case, if there is a tie for "Closest distance," the enemy will prioritize the target that meets its special condition.
If an effect causes an enemy to target "another enemy," it still follows its activation logic, but other enemies are now considered valid targets.
When an enemy attacks another enemy, the damage dealt is the attacker's damage value minus the target's armor value.
When a Tomb Delver takes damage, they reduce their Health on their Player Board's track by the corresponding amount.
Example: It is the Enemy Round. A Giant Rat is at the same location as Whisperlark and Dr. Liang. The Giant Rat's card has no special targeting rules. Both characters are at the closest distance (0). The Grandmaster checks their Energy and finds they are tied. Finally, they check their Health and find that Whisperlark's is lower. Therefore, the Giant Rat attacks Whisperlark, who takes 1 damage.
6. End of the Adventure Phase
The Adventure Phase ends in one of three ways:
- Success: When you turn to a page in the Tomb Delving Note that contains "Ending X," you have successfully completed the scenario.
- Failure: When the Candlelight Token advances to the final "Candle Extinguished" space [icon], you have failed the scenario.
- Failure: When a game effect explicitly states "Scenario Failed," you have failed the scenario.
When you successfully complete a scenario, perform the following steps in order:
-
Follow final instructions in the Tomb Delving Note. Retrieve player board and Netherland Artifacts on Equipment Cards to the Stash. [sic: "Netherland" is printed in the source; read as Netherworld Artifacts.]
-
If you checked a "Famous Event" box in the Party Log for the first time this scenario, turn to the corresponding page in the Story Book, read the entry, and follow any instructions.
-
Each player may exchange up to three Neidan tokens for an equal number of Karma tokens. Discard any remaining Neidan tokens.
Note: Karma tokens gained this way belong to the individual character and are not part of the shared pool in the next Story Phase.
-
Discard all cards from all Threat Areas. Sort all Encounter Cards by number and return them to the shared storage box.
-
Discard all unused Cooldown/Redraw tokens. Return all other tokens and all non-legendary Equipment Cards to the shared storage box. Abandon all Special Netherworld Artifact Tokens (The Rat, The Ox, Etc.)
-
Each player returns their Action Cards, Fate Cards, and unique tokens to their personal Player Storage Box.
-
You may now proceed to the next Story Phase or save the game.
When you fail a scenario, the party must choose one of the following two options:
- Retry: All Tomb Delvers discard any "Bad Omen" cards from their Fate decks and add one "Good Omen" card. Then, set up and attempt this scenario again from the beginning.
- Accept Defeat: Skip this scenario. Check four boxes in the "Setback Record" section of the Party Log. Read all possible endings for this scenario in the Tomb Delving Note, and the party collectively chooses one to resolve.
7. Additional Rules
This section details additional rules and concepts for the Adventure Phase.
-
The Immobilize Status: When an enemy becomes Immobilized, lay its standee on its side. It cannot make attacks of opportunity and will skip its next activation. After it skips its activation, stand the standee back up; it is no longer Immobilized.
When a Tomb Delver becomes Immobilized, lay their miniature down. An Immobilized character cannot perform actions. You must first spend a Move action to stand your miniature up and remove the status.
-
The Cooldown Effect: When you gain a Cooldown effect [icon] (e.g., by spending a Cooldown token), you may choose one card from any Cooldown Zone and move it one zone to its left. If you choose a card from Zone "A," return that card to your hand.
Note: This is not considered "playing a card" and does not cause other cards to shift.
-
Attacks of Opportunity: If a Tomb Delver is at the same location as one or more ready (non-Immobilized) enemies, then before that Tomb Delver performs any action other than Attack or Suppress, each of those enemies makes one immediate attack against them.
Note: Spending a Move action to remove the Immobilize status does not provoke an attack of opportunity.
-
Acquiring Netherworld Artifacts: When a game effect grants an action, you may draw one token from the Netherworld Artifacts Bag. Then, follow these steps:
Note: A facedown Location Card is not a valid location and is not adjacent to anything.
- Using Equipment Cards: Most Equipment Cards have a cost to use their effect, typically spending Energy or discarding the card. This cost is shown in the top-left of the card's text box. Backpacks and some other passive equipment have no cost icon and are always active.
Tips: During the Story Phase, you can use certain Story Cards to trade Netherworld Artifacts to factions, increasing your Reputation. In the Epilogue Phase, you can then acquire Equipment from those factions up to your current Reputation level. Each character can only equip one of each type of equipment (e.g., one Weapon, one Tool). At the end of the Adventure Phase, all non-legendary Equipment Cards are returned to the supply for all players to choose from before the next game.
Note: Legendary Equipment does not have a Reputation requirement and is never returned to the supply. Once acquired, Legendary Equipment is owned by the party. Before each Adventure Phase, players may freely distribute the party's Legendary Equipment among themselves.
(22) Resolving Card Effects: When a card effect offers multiple options, you must prioritize choosing an option that you can fully resolve. (23) Quick Actions: An effect preceded by a Quick Action icon is a Quick Action. It can be used during another player's turn or outside of your own turn sequence.
Tips: Yin's ascendancy brings more supernatural foes and strange phenomena. Yang's ascendancy brings more mortal enemies, but also more opportunities for treasure and a slower-burning candle.
VI. Core Game Concepts
1. The Test System
In the Adventure Phase, different actions require different types of Tests, but all are resolved using your Fate deck.
Matching Test: This is the most common type of Test. You will reveal a number of Fate Cards equal to a specific attribute. You are looking for specific icons (e.g., Bagua, Four Symbols) on the revealed cards. If at least one revealed card has an icon that matches the target of the Test, then the Test is successful. Otherwise, it fails. After the Test, do not reshuffle your Fate deck unless a card with the reshuffle icon was revealed.
Common Matching Tests include:
- Decode Test: Target is a Bagua icon on your Location.
- Suppress Test: Target is a Four Symbols icon on an enemy card.
- Overcome Test: Target is a Four Symbols icon on a card in your Threat Area.
- Event Test: Target is a Four Symbols icon on a Location Event card.
- Encounter Test: Target is a Four Symbols icon on an Encounter Card.
Combat Test: When you perform an Attack action, you make a Combat Test. Reveal a number of Fate Cards equal to the specified attribute (usually Strength). Count the total number of "Hit" icons revealed, plus any modifiers. This is your total hits. The damage dealt to the enemy is your total hits minus the enemy's armor value. After the Test, do not reshuffle your Fate deck unless a card with the reshuffle icon was revealed.
Story Test: This Test is only used in the Story Phase. Before each Story Test, you must shuffle your Fate deck. You then reveal only one Fate Card. The result is calculated as: (Number on card) + (Character's Attribute) + (Other Modifiers). If this result is greater than or equal to the Test's difficulty, then it is a success. Otherwise, it is a failure.
Details of the Test System:
-
When "Boundless Reach" is revealed from your Fate deck, the Test automatically succeeds. This card also has a reshuffle icon, so after the Test resolves, you must reshuffle your Fate deck and discard pile together.
-
In the rare case that your Fate deck has fewer cards than you need to draw for a Test, draw all remaining cards. Then, shuffle your Fate discard pile to form a new deck and draw the remaining cards you need. After the Test, place all revealed cards into the discard pile.
-
When performing any Test, you may spend one "Redraw token" to discard any number of Fate Cards you just revealed and draw an equal number of new cards from the top of your deck.
-
In the Adventure Phase, after a player makes a Test, another Tomb Delver at the same location can spend 1 Energy Point to assist. An assisting player reveals the top card of their Fate deck and adds all of its icons to the result of the current Test.
Note: In the Story Phase, assisting does not cost Energy.
-
Some effects add temporary "Good Omen" or "Bad Omen" cards to your Fate deck. When a temporary card is added, immediately shuffle it into your deck. After a temporary card is revealed during a Test, resolve the Test, then remove that card from the game instead of placing it in your discard pile.
-
If an effect modifies a Test (e.g., from an Equipment Card), you must decide whether to use that effect before you begin revealing Fate Cards for the Test, unless the effect states otherwise.
2. Experience & Historical Progress
At the end of most Adventure Phase scenarios, the Tomb Delving Note will instruct you to gain Experience Points (EXP) and advance the Historical Progress.
Gaining Experience Points: When an effect instructs you to gain X EXP, check X boxes on the "Experience Points" track of your Player Log, moving from left to right, top to bottom. Each box you check unlocks the rewards shown directly above and below it. Rewards are gained immediately but typically only take effect after the current scenario ends. The two reward types are:
1. Action Card Level Reward: Gaining this reward unlocks the ability to use Action Cards of the corresponding level. Before the start of each Adventure Phase, you may include any unlocked Action Cards from your Sect in your hand for the scenario, up to your hand limit.
Note: A character's starting hand limit is 6. This can be increased by other rewards.
Tips: For new players, we recommend a balanced hand of two Action Cards from each Cooldown Zone ("A," "B," and "C"). As you gain experience, feel free to customize your hand to suit your strategy. The maximum hand limit in the base game is 11.
2. Experience Point Reward
These rewards are represented by two types of icons:
- [Action Card Hand Limit +1]: When you gain this reward, your Action Card hand limit permanently increases by 1.
- [Tree of Fate Icon]: This represents one Fate Point. When you gain this reward, you may immediately check one empty diamond space on a node of your Tree of Fate (on the back of your Player Log) and gain its reward. A node is considered "activated" if at least one of its diamond spaces is checked. Before you can check a space on a node, all of its parent nodes (those with arrows pointing to it) must be "activated." The central node of the Tree of Fate is always considered "activated."
Tips: Some game effects can reset your Tree of Fate, so we recommend using a pencil or erasable pen.
3. Tree of Fate Rewards
The Tree of Fate offers two main types of rewards: "New Fate Cards" and "Special Rewards."
a. New Fate Cards: These nodes correspond to new, powerful Fate Cards. When you check a diamond space on one of these nodes, find the Advanced Fate Card of the corresponding name from the game box and permanently add it to your character's Fate deck. The details of these cards are in the Appendix.
b. Special Reward: These nodes provide two powerful effects: [Action Card Hand Limit +1] and [Remove 1 Fate Card].
- [Action Card Hand Limit +1]: Your maximum hand size for Action Cards permanently increases by 1.
- [Remove 1 Fate Card]: This allows you to customize your Fate deck. When you gain this reward, you may choose any one Fate Card from your deck and Archive it, permanently removing it from your character's deck.
c. 3. Defying Fate: At the end of an Adventure Phase, you may discard one Netherworld Artifact token (of any value) to reset your Tree of Fate. Count the total number of diamond spaces you have checked, erase them all, and then re-spend that total number of Fate Points anywhere on the tree, following all normal placement rules.
Tips: For new players, be cautious about removing Fate Cards. A deep understanding of your character's abilities is needed to make effective choices. It is almost always a mistake to remove the "Boundless Reach" card.
Advancing Historical Progress: When an effect instructs you to "check X boxes for Historical Progress," immediately check that many boxes in the "Progress" section of the Party Log, from left to right. When you check a box with a "Famous Event" for the first time, immediately turn to that story in the Story Book and read it. Then, find any "New Story Cards" listed, take them from the game box, and place them in the Party Stash. If all boxes in the Party Log are already checked, ignore any further instructions to check them.
Note: Adding new Story Cards to the Party Stash is crucial for advancing the main plot.
3. Saving the Game
As a long-form campaign game, Netherworld Candle allows you to save your progress between sessions.
You can save the game after any Story Phase or Adventure Phase. We recommend saving after a Story Phase, as this is a natural stopping point before character upgrades and new story elements are introduced. You will need the Player Storage Boxes and Shared Storage Boxes:
- Player Storage Box
- Shared Storage Box
Steps for saving at the end of the Story Phase:
- Place all Story Cards from the table into the "Party - Story Cards" divider in the shared storage box.
- Place all Journey Cards from the table into the "Party - Journey Cards" divider in the shared storage box.
- Each player places their Player Board, Fate Cards, Equipment Cards, Netherworld Artifact tokens, Karma/Neidan Tokens(3 for Maximum), and unique tokens into their personal Player Storage Box.
- Place the Netherworld Artifacts Bag into the shared storage box.
- Sort all remaining tokens and place them in the shared storage box.
- Place the character miniatures into their storage box.
- Place the Story Book and other accessories into the game box.
Steps for saving at the end of the Adventure Phase:
- Sort all Location Cards on the table by number and place them behind the "Location Cards" divider.
- Sort all Encounter Cards on the table by number and place them behind the "Encounter Cards" divider.
- Each player places their Player Board, Fate Cards, Equipment Cards, Netherworld Artifact tokens, up to three Karma/Neidan tokens, Cooldown/Redraw tokens, and unique tokens into their Player Storage Box.
- Empty the Netherworld Artifacts Bag. Place the tokens and the bag separately into the shared storage box.
- Place all remaining tokens, dice, and other components into the shared storage box.
- Place the Tomb Delving Note and other accessories into the game box.
Tips:
Card Number Prefixes:
- A: Action
- E: Equipment
- L: Candle
- K: Encounter (Enemy)
- Z: Encounter (Event)
- M: Location
- S: Story
- T: Journey
4. Changing Players
Player Leaving a Mid-Campaign: A player may leave the game after a Story or Adventure Phase ends.
- After saving the game, Archive all game components associated with that player's character.
- Store that player's Player Log safely in case they return.
Changing Characters in a Mid-Campaign:
- Follow the steps for a player leaving the game.
- Follow the steps for a player joining the game.
Player Joining a Mid-Campaign: A new player may join before the start of any Story or Adventure Phase. Follow these steps:
- The new player chooses an available Tomb Delver and takes a blank Player Log.
- The new player gains EXP equal to the party's average (rounded down) and immediately claims the corresponding rewards.
- The new player gains Reputation points equal to the party's average (rounded down) and may freely assign them among the factions.
- The Grandmaster should briefly summarize the story so far for the new player.
- The game continues as normal.
5. Solo Mode
When playing solo, choose one of the following two ways to play:
- Dual-Handed: Control two Tomb Delvers. The game rules are identical to a 2-player game.
- True Solo: Control one Tomb Delver. At the start of the campaign, your character gains Netherworld Card Z903, Equipment Card E802, and Action Cards A005 and A006. The game rules are otherwise identical to a normal game.
6. Adjusting Difficulty
If you find the game's difficulty isn't right for your group, you can make the following adjustments before starting any Adventure Phase:
Easy Mode
- At the start of the scenario, each Tomb Delver gains three Redraw tokens.
- When an enemy spawns, you may choose to place it at any Tomb Delver's location.
- Ignore the "Epilogue Phase" instructions in the Story Book (except for the Prologue). You may also ignore the "Notes" section of the Party Log.
Hard Mode
- During the Player Round, Tomb Delvers must take their turns in order from highest current Energy to lowest.
- Newly spawned enemies do not gain the Immobilize status.
- You must spend 1 Energy Point to use a Redraw token.
- Before performing an Acquire Netherworld Artifacts action, you must first roll one Qimen die.
- When preparing the Netherworld Artifacts Bag for a scenario, add one additional "4 Reputation" Netherworld Artifact token to the bag.
Hell Mode
- In the Player Phase, each Tomb Delver must take their turn in descending order of their current Energy Points.
- Newly spawned enemies no longer gain the "Immobilized" status.
- Players must spend 1 Energy Point to use a Cooldown Token. Before each Draw Netherworld Artifacts action, players must roll 1 Qimen Dice.
- When entering the scenario, a Tomb Delvers deck must not contain Action Cards with the same name, nor may it contain "Dodge".
- The effect of the "Redraw Token" is subject to an additional restriction: Before each use, consume X Energy Points, and the number of cards to redraw cannot exceed X.
- *During the scenario, each Tomb Delver can carry only 1 "Secret Manual Card".
- When constructing the Netherworld Artifacts Bag according to the instructions in the Tomb Delving Note, add an additional 4-Reputation Netherworld Artifact Token and 1 3-Reputation Netherworld Artifact Token to the bag.
- Players who clear the game on Hell Mode can unlock the "Hell Diver" Achievement Title.
Tips: If you make a mistake with a rule during the game, don't worry. Minor oversights rarely have a major impact on the game's progression. Remember that the goal is to have fun together. Being kind to your friends is more important than winning the game. We wish you a thrilling adventure!
VII. Appendix
Note: in the source, the Bagua, Four Symbols and Special Icon columns of the card lists are icon-only. Each icon cell is marked "(icon)" below; "None" marks an empty cell. The Card Name, Attack and D20 Value columns are transcribed as printed.
1. Basic Fate Card List
| Card Name | Bagua | Four Symbols | Attack | Special Icon | D20 Value |
|---|---|---|---|---|---|
| Gate of Death | (icon) | None | Hit | None | 1 |
| Gate of Death | (icon) | None | Hit | None | 2 |
| Gate of Death | (icon) | None | Hit | None | 3 |
| Gate of Death | (icon) | None | Hit | None | 4 |
2. Advanced Fate Card List
| Card Name | Bagua | Four Symbols | Attack | Special Icon | D20 Value |
|---|---|---|---|---|---|
| North Palace | None | (icon) | Miss | (icon) | * |
| West Palace | None | (icon) | Miss | (icon) | * |
| South Palace | None | (icon) | Miss | (icon) | * |
| East Palace | None | (icon) | Miss | (icon) | * |
3. FAQ
Q: During Story Phase setup, can multiple miniatures be placed on the same Story Card?
A: Yes, but it is generally not recommended. Spreading out allows your party to explore more efficiently.
Q: What happens if I've checked all the Historical Progress boxes in the Party Log?
A: This is normal and means you've unlocked all historical events. Ignore any further instructions to check Historical Progress.
Q: What happens if I've checked all the Setback Record boxes in the Party Log?
A: This is surprising, but not game-breaking. Ignore any further instructions to check Setback Records and continue playing during easy mode. If you are in normal or hard mode, check 1 Netherland Call for each Tomb Delver instead when you need to check 1 Setback. [sic: "Netherland Call" is printed in the source.]
Q: My Energy is 5. I play an Action Card that says "Recover 3 Energy. If your Energy is 4 or more, recover 1 Health." How does this resolve?
A: You resolve effects in order. First, you recover Energy. Since your maximum is 7, you recover 2 Energy (from 5 to 7). Then, you check the condition. Since your Energy is now 7 (which is 4 or more), you recover 1 Health.
Q: Some Equipment Cards (like "Legendary" ones) have no Reputation requirement. How are they acquired?
A: These are special rewards acquired through story events, scenario completion, or other specific game effects, not through Faction Reputation.
Q: A Journey Card says "the Tomb Delver with the highest [Attribute] gains [Reward]." What happens in a tie?
A: The Grandmaster decides which of the tied players receives the reward.
Q: A Story Card has a "Critical:" effect. What does this mean?
A: A "Critical" is a special outcome that occurs if you succeed on a Story Test by revealing the "Boundless Reach" card (the card with a 20).
Q: A Story Card says to "check a keyword." Where do I do this?
A: In the "Historical Mark" section of the Party Log. See Chapter IV, Section 5 for details.
Q: The equipment slot limit is one of each type. Is there a limit to the total number of Equipment Cards I can have?
A: No, there is no overall limit. You can have one of every type equipped simultaneously.
Q: During a single Decode action, I revealed multiple Fate Cards with matching Bagua icons. Can I place multiple Puzzle Markers?
A: No. You may place a maximum of one Puzzle Marker per Decode action. If you match multiple icons, you may choose which one to cover.
Q: The Encounter Card I drew gives me a choice of effects, but I can't perform one of them. Can I choose to do nothing?
A: No. If one option is impossible to perform, you must choose the other. If both are impossible, you must discard that card and draw a new one.
Q: When checking nodes on the Tree of Fate, do all diamond spaces in a parent node need to be checked before I can check a child node?
A: No. As long as at least one diamond space in a parent node is checked, that node is considered "activated," and you can then check connected child nodes.
Q: During a Story Test, what happens if I draw a Fate Card with a * in the top-left corner?
A: These cards typically have an effect like "reveal one additional Fate Card" icon. Simply reveal another card and use its D20 value for the test.
Q: My character is not from the Sky-Gazer Sect, but I learned one of their Action Cards. If I use it to place a "Talisman Token," does it count towards Iron Abacus's limit of talismans in play?
A: Yes. All "Talisman Tokens" are considered the same, and you must respect any character's unique limits on them.
Q: Does an Event card in my Threat Area with a Qimen Dice icon force me to roll dice every round?
A: No. You only roll the dice once, when you first draw and resolve the card.
Q: When I play an Action Card, can I choose not to resolve its effect? (e.g., I just want to cycle my Cooldown Zones).
A: Yes, you may play a card and choose to ignore its printed effect.
Q: At the end of a scenario, I convert three Neidan into Karma. If I don't use that Karma in the Story Phase, can it be used as Redraw tokens?
A: Yes. Unused personal Karma can be converted to Redraw tokens at the start of the next Adventure Phase.
Q: At the end of a successful scenario, the Tomb Delving Note grants one final "Acquire Netherworld Artifacts" action. If I draw a "Blood Corpse Head," do I still advance the Candle Track?
A: No. The scenario has already ended, so you can ignore any effects that would modify the Candle Track.
Q: How is targeting priority calculated for Xiaoling Battalion enemies when they are targeted by other enemies?
A: Xiaoling Battalion enemies have no Energy, so their Energy is considered 0 for targeting purposes. The standard priority applies: Closest > Special Target > Lowest Energy (0) > Lowest Health > Grandmaster decides.
Q: In the Player Log, after a faction's Reputation is maxed out, can I keep trading Netherworld Artifacts for Fate Points?
A: No. This exchange can only be performed once per faction. The value of the artifact does not matter; one token always exchanges for one Fate Point.
Q: The Advanced Fate Card "North Palace" has a Bagua-style icon. Does this mean I reshuffle my deck?
A: No, that specific icon means you gain one "Redraw Token." Similarly, the icon on "Five Senses" means you gain one "Cooldown Token."
Q: Do character skills or using equipment cost an action?
A: No. The game does not use an "action point" system. Using skills or equipment is free and does not cost an action unless the effect explicitly says "perform an [Action Name] action."
Q: Are the "Talisman Tokens" of the Sky-Gazer Sect single-use?
A: No. When a "Talisman Token" in play is used, it is returned to the general supply. It can be placed again later via another Sky-Gazer Action Card. The limit is on how many can be in play at any time.
Q: When a Clockwork Beast is defeated and later brought back into play, does it retain its damage and any tokens it was holding?
A: No. When any Equipment Card is defeated or Archived, all tokens on it are removed. When it re-enters play, it is clean.
Q: Some Story Cards don't say to flip them back over after resolving the back. What happens?
A: They remain face down. If another character interacts with that card in the same Story Phase, they do not need to spend Karma. However, at the start of a new Story Phase, all Story Cards are reset to their face-up side.
Q: Can Neidan tokens be traded between players during a scenario?
A: Yes. Neidan is a party resource. If two Tomb Delvers are at the same location, they may freely trade Neidan with each other at any time, without spending an action.
Q: Some "Human" type enemies are targeted by other enemies. Do the "Human" enemies fight back?
A: No. Unless specifically stated, an enemy's default target is always "Tomb Delver." During a "Human" enemy's activation, it will not target other enemies.
Q: When adding temporary "Bad Omen" or "Good Omen" cards to my deck, do I just shuffle them into the draw pile, or the whole deck?
A: You must shuffle your draw pile and discard pile together with the new card to form a new Fate deck.
Q: Do "Elite" enemies (like Undead Lu Bu) also enter play with the Immobilize status?
A: Yes. Unless an enemy's card specifically states otherwise, all newly spawned enemies enter play Immobilized.
Q: If I have an effect that lets me draw extra Fate Cards for a Test, can I use a Redraw Token on those extra cards?
A: Yes. A Redraw Token allows you to "discard any number of revealed Fate Cards" from the current test, which includes any extra cards you drew.
Q: When an enemy is Immobilized, are the passive skills on its card still active?
A: Yes. An Immobilized enemy skips its activation, but any of its constant or passive abilities (like those on Demon Chrysanthemum enemies) remain in effect.
Q: A Location Card has the effect "at the end of the turn, each Tomb Delver at this location spends 1 Energy." If three of us are there, does this trigger three times?
A: Yes. The effect triggers at the end of each Tomb Delver's individual turn. It is dangerous for multiple characters to end their turns at such a location.
Q: I have a question: One event's reward allows you to obtain a card from another faction. After saving and exiting midway later, when loading the save, is it default that you can take a level-appropriate card from another faction, or can you only take the one you selected earlier?
A: No. Each specific card from another faction that you obtain will be added to your Card Pool. Before each adventure starts, you can choose cards from your Card Pool (not exceeding your hand size limit) to bring into the scenario.
Q: How is a usable Clockwork Beast defined? If there's a low-health Clockwork Beast on the field, can I discard the original one and resummon a new one onto the field?
A: No. A usable Clockwork Beast refers to the one that is still in use and owned by the character (including those defeated in the current scenario). This situation mainly applies to "Canger Ling," as she can carry 2 Clockwork Beasts at the same time.
4. Commonly Overlooked Rules (Adventure Phase)
- Activating an Equipment Card is not an action and can be done at any time (respecting any costs).
- At any time, you can spend Energy to return an Action Card from a Cooldown Zone to your hand (A:1, B:2, C:3).
- At any time, if you must lose Energy at 0, you lose Health instead.
- The first time the Candlelight Token enters a new color section, immediately resolve the corresponding Candle Card.
- Performing any action except Attack or Suppress while at a location with a non-Immobilized enemy provokes an attack of opportunity from each of those enemies.
- An Immobilized enemy skips its next activation and cannot make attacks of opportunity.
- An Immobilized Tomb Delver must spend a Move action to remove the status before performing other actions.
- When a Location Card is flipped or removed, discard all tokens on it and move all units to an adjacent location.
- When you defeat an enemy with a Neidan icon, the party gains that many Neidan tokens.
- By default, enemies spawn at the location of the player with the highest current Energy.
- Companions are considered to have 0 Energy for enemy targeting purposes.
- At the end of a successful scenario, each player gains the EXP listed in the Tomb Delving Note.
5. Token Reference
| Token Name | Token Effect |
|---|---|
| General Token | A multi-purpose marker used for tracking values on Player Boards and other game effects. |
| Puzzle Marker | Used on the Tomb Delving Note and Location Cards to track puzzle progress. |
| Gate of Death Token | When on a Location Card, it is treated as an additional (icon) icon at that location. |
| Gate of Life Token | When on a Location Card, it is treated as an additional (icon) icon at that location. |
| Cooldown Token | Spend to use a Cooldown effect: move one card in a Cooldown Zone one zone to the left (A -> Hand). |
| Redraw Token | Spend after revealing cards for a Test to discard any number of them and reveal an equal number of new cards. |
| Damage Token | Tracks damage on units (available in 1 and 3 value denominations). |
| Talisman Token | A special token used by the Sky-Gazer Sect. |
| Armor Break Token | A unit with this token has its armor value treated as 0. This does not affect enemies. |
The icons shown beside each token name are icon-only in the source and are not transcribed.
6. Icon Reference
| Icon | Icon Meaning |
|---|---|
| (icon: Tomb Delver silhouette) | Represents each Tomb Delver in the game. |
| (icon: hand reaching for a Netherworld Artifact) | Perform one "Acquire Netherworld Artifacts" action. |
| (icon: candle) | Immediately advance the Candle Track by 1 space. |
| (icon: Qimen Dice) | Roll Qimen Dice (roll a number of dice equal to the number of icons). |
| (icon: stacked cards) | This icon denotes a special effect, explained by the text on the component where it appears. |
| (icon: Armor Pierce) | Armor Pierce X. The number shown is X. This attack ignores X points of the target's armor. |
| (icon: Energy, with a crossed-out variant) | Spend 1 Energy Point. |
| (icon: Health, with a crossed-out variant) | Spend 1 Health Point. |
| (icon: reshuffle) | Reshuffle. After the current effect resolves, you must immediately shuffle all cards of this type that you own. |
7. Glossary
- In Play: All components currently on the table, including Location Cards, miniatures, tokens, etc.
- Component: Any physical piece of the game, such as cards, tokens, boards, and books.
- Unit: Any character miniature or enemy standee in play.
- Four Symbols, The: The collective term for the Vermilion Bird, Azure Dragon, White Tiger, and Black Tortoise icons.
- Qimen: The collective term for the eight Bagua gate icons.
- Bagua Icon: Refers to any of the eight gate icons (shown in the printed glossary as a row of eight icons).
- Enemy: An "Enemy Encounter Card" and its corresponding standee or miniature in play.
- Character: A Tomb Delver or a Companion.
- Party: All characters controlled by the players.
- Party Acquires: When the party gains a component, players must decide who receives it. The Grandmaster breaks ties.
- Move X: Move a unit up to X Location Cards.
- Armor Pierce X: An attack with this property ignores X points of the target's armor.
8. Game Round Flowchart
The flowchart is a diagram in the source; its steps are transcribed in order below.
Story Phase flowchart:
- Story Phase Start.
- Decision: "Whether it is the first game?" Yes: Read and execute QUICK START. No: continue.
- Take out player components and public components, 1 Story Book.
- Select the Leader.
- Check the "Historical Progress" section in the Party Log, find the most recently checked grid, and obtain the corresponding "Initial Karma Token". Starting from the Leader player, distribute 1 token to each player in clockwise order until all tokens are assigned.
- Take out all Story Cards from the "Party Stash," place them face up (illustration side up) in the game area. Note: Do not look at the text on the back during placement.
- After discussion, each player chooses 1 Story Card, and places their character on the Story Card. Shuffle Tomb Delver's Fate Cards, and place them to right side of their Character Board.
- In clockwise order, each player performs 1-2 Story Actions or skips.
- Decision: "If all players skip?" No: loop back to the player turns (step 8). Yes: continue.
- All players obtain Equipment Cards not exceeding the level corresponding to their current Faction Reputation. Each character can only possess 1 card of each type of Equipment Card. Place all on-field Story Cards to the "Party Stash."
- Decision: "Whether there is a 'Scenario' in the 'Party Stash'?" No: check the "Setback Record" grid in the Party Log (the diagram loops back from this box). Yes: continue.
- Select 1 Scenario. All Tomb Delvers restore their Health Points and Energy Points to default positions. Execute according to the text instructions of the selected "Scenario".
Adventure Phase flowchart:
- Adventure Phase Start.
- Decision: "Whether it is the first game?" Yes: Read and execute QUICK START. No: continue.
- Take out player components and public components, 1 Story Book, set Candle Track.
- Select the Leader.
- Select no more than the "Action Card Deck Limit" number of Action Cards from the available Action Cards. Return the remaining Action Cards to the character's storage box.
- All players shuffle their character's Fate Card decks and place them face down on the right side of their Character Board.
- Place General Tokens on the initial Health Points and Energy Points positions of the Character Board. If numerical adjustments are caused by game effects, place them at the adjusted positions.
- In the Setback Record of the Party Log, any Encounter Cards that have been checked again shall have themselves and their corresponding units placed aside. When the Scenario officially starts, immediately spawn these units at the Leader's current location.
- According to the selected "Scenario," turn to the corresponding page in the Tomb Delving Notes and read it.
- Proceed with the "Player Phase" and "Enemy Phase" according to the turn rules of Adventure Mode.
- Decision: "Whether the Tomb Delving Notes trigger an ending?" No: continue the Player and Enemy Phases (step 10). Yes: continue.
- Execute the instructions described in the Tomb Delving Notes.
- Store all components.
- Adventure Mode End.
- Decision: "Set Candle Track to last column, or received 'Scenario Failed'?" No: continue the Player and Enemy Phases (step 10). continue.