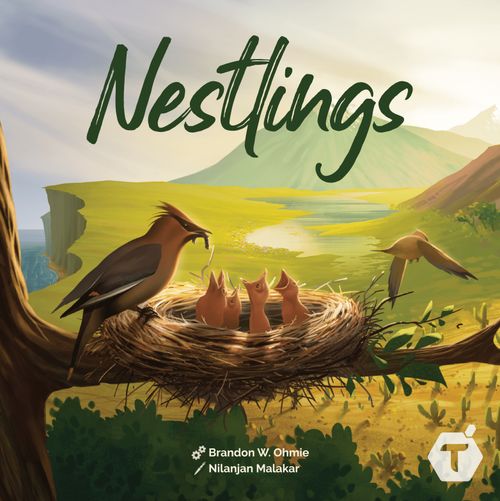
Nestlings
Nestlings Rulebook
Table of Contents
Table of Contents
Game Contents
- 4 Player Boards
- 8 Bird Meeples
- 24 Biome Dice — 6 in each of 4 colors
- 80 Biome Segments — 20 in each of 4 colors
- 1 Game Board
- 4 Biome Resource Bags
- 1 Resource Discard Bag
- 124 Resources — 6 copies of 5 types in each of 4 colors, plus 1 Wild for each Biome
- 1 Gathering Goal Board
- 60 Victory Point Tokens — 15 copies of 4 denominations
- 13 Gathering Goals
- 10 Nest Goals
- 4 Reference Cards
- 8 Bird Energy/Scoring Tokens
- 16 Bonus Tokens
- 1 First-Player Token
- 1 Biome Resolution Token
AI Mode:
- 1 Solo / AI Board
- 1 Biome Deck Board
- 24 Resource Cards — for use with the AI variants & solo mode
Setup
-
Place the Game Board in the center of the play area within reach of all players.
-
Place the 30 Resources of each Biome into their respective Biome Bags along with 1 Wild Resource. Place each Biome Bag near the Biome that matches the symbol shown.
-
Each player takes their scoring token and places it in the Biome Discard Bag. Shake the bag and pull out 1 token. This is the starting player. Place the Biome Resolution Token in their Biome.
-
Place the VP Tokens near the Game Board within reach of all players.
-
Draw 3 Gathering Goals from Deck A and 1 Gathering Goal from Deck B, then place them face-up on the Gathering Goal Board, with the Deck A cards placed in the first 3 slots and the Deck B card in the top slot.
For your first game it is recommended that you use the following cards from Deck A, rather than drawing them randomly...
- Biodiversity
- 2 Pairs from the Same Biome
- Three of A Kind
Shuffle these 3 cards and place them randomly on the first 3 slots.
-
Place a Bonus Token face-up on each empty spot along the left side of the Gathering Goal Board.
-
Give each player 1 Nest Goals card.
-
Each player chooses a bird type and its corresponding components:
- 1 Player Board
- 1 Scoring Token
- 1 Bird Energy Token
How to Win
Throughout the game, players will earn Victory Points (VP) each round in a variety of ways. Whenever VP is earned, take the corresponding VP tokens from the supply. The player with the most VP Tokens at the end of 4 rounds is the winner!
Gameplay
Nestlings is played over 4 rounds, and each round has 2 phases: a Gathering Phase, followed by a Feeding Phase. Players will place their Biome Dice in 5 different regions of the Game Board and try to gain priority to draft the Resources they desire.
Phase 1: Gathering Phase
Place Resources in Biomes
Note: Some rules are different if playing the solo or 2-player mode, see the Variant Modes section.
At the beginning of each round, populate the Game Board with Resources drawn randomly from each Biome Resource Bag. Distribute the Resources into the matching Biome according to these rules:
- Each Biome receives a number of Resource types (e.g., Crab, Snake, Frog, etc). equal to the player count plus 1 (e.g., in a 3-player game, there will be 4 Resource types in each Biome.)
- If a duplicate Resource is drawn, stack it on top of its matching Resource.
- If an additional duplicate Resource is drawn, set it aside and keep drawing. No stack should have more than 2 Resources.
Keep drawing until the number of stacks is equal to the player count plus 1. Each stack must be made up of either 1 or 2 matching Resources.
For example: In a 3-player game, a Frog is drawn and placed in the Freshwater Biome; then a Prawn is drawn and placed next to the Frog. The next Resource drawn is another Frog, so it's placed on top of the first Frog. Next, a Crab is drawn and is placed next to the Prawn. The next Resource that's drawn is another Frog. Since the stack of Frogs already has 2 Frogs, it is set aside and another Resource is drawn. Finally, a Fish is drawn and placed next to the Crab. The Freshwater Biome now has 4 stacks and is completely populated. The Frog that was set aside is returned to the Freshwater Biome Resource Bag.
Rolling Dice
At the beginning of each round, all players roll 5 of their Biome Dice.
On a player's turn, they may re-roll any number of Biome Dice before proceeding to place 1 of them on the Game Board.
The 6 sides of the Biome Dice have each Biome's icon (Tree, Wave, Cactus, Mountain), an additional Biome icon matching the player's Biome, and a blank side.
For example: Each of the gray Alpine Biome Dice has a Cactus, Wave, Tree, 2 Mountains, and a blank.
The Bird Energy Track
Players may manipulate their rolled dice using the Bird Energy Track. The Bird Energy Track can be used up to 3 times during the game to either change a die to any face just before placing it on the Game Board, or reroll any number of dice. Keep in mind, players are forfeiting 1 VP when they take this action. To use the Bird Energy Track, move the Bird Energy Token down 1 space.
For example: A die with the wave icon would be placed in a slot along the edge of the Freshwater Biome.
Dice Placement
Once all players have rolled their Biome Dice, take turns starting with the player with the First-Player Token. On the player's turn, place a single Biome Die into the Biome matching its icon (or the Grasslands Biome). Dice are placed in the slots along the edge of the board adjacent to the appropriate Biome from left to right, starting with the slot below the arrow.
If a same colored die has already been placed in a Biome, an additional die may be played there by stacking the new die on top of the other dice in the same slot. The player with the most dice at any given Biome wins first priority in that Biome. (See Biome Resolution below.)
In addition to placing dice into Biomes with matching icons, any die face can be placed in the Grasslands Biome. However, a blank die can only be placed in the Grasslands Biome.
Continue around the table until all dice have been placed or all players have passed. A player can pass only when they have 1 die remaining. If they decide to pass, the remaining die is saved for the next round and the player now rolls 6 dice rather than the normal 5.
Using the Bird Miniature / Meeple
Once per round, a player may choose to exhaust 2 unplaced dice to reserve any Resource type. Other players cannot choose this Resource type this round, nor can it be discarded by the first priority player. To do this, the player positions their Bird piece on the Game Board on top of the desired Resource type.
Each Biome can only have 1 Bird placed in it each round, and that Biome must not contain any of that player's dice.
Phase 2: Feeding Phase
Biome Resolution
Biomes are resolved in clockwise order, starting in the Biome with the Biome Resolution Token.
To resolve a Biome:
- Determine Priority Order.
- The player with first priority chooses a Resource type to keep, then chooses a Resource type to return to its respective Biome Bag.
- Players who placed their Bird on top of a Resource type claim that Resource type last and recall their Bird.
- Players retrieve their dice and move to the next Biome.
Determine Priority Order
Biome priority is based on a top-down, left-to-right system, meaning players with the most dice in a Biome will gain priority there, with ties broken by who placed their dice there first.
For example: If the blue player placed a die in the far-left slot of the Freshwater Biome, they gain first priority as long as other players have also only placed a single die.
However, if the yellow player stacks a die on top of their previously placed die, they take first priority. Being first only matters until someone else places more dice in the same Biome.
First Priority Player
The player who has first priority may now gather all of a single Resource type of their choice (1 or 2 tokens). (See Resource Allocation below.)
For example: If a Biome has 2 Crabs and the player chooses to gather the Crabs, collect both Crabs.
Then, the first priority player (and only the first priority player) chooses 1 Resource type (1 or 2 tokens) and returns it to the matching Biome Bag.
Remaining Players
The remaining players take turns in descending priority gathering a single Resource type from the Biome being resolved.
For example: In a 3-player game, all players are tied for priority in the Freshwater Biome, with 1 die each. The blue player's die is located in the left-most dice slot under the arrow. Therefore, the blue player chooses 1 Resource type to gather and 1 to return to the matching Biome Bag. Since the orange player's die is immediately to the right of the blue player, the orange player chooses a Resource type to gather next, followed by the green player.
Grasslands Biome
The Grasslands Biome is unique in that it has no Native Resources. Determine priority as usual, then take turns choosing a remaining Resource type from any of the other Biomes. The first priority player in the Grasslands Biome does not return any Resources to their Biome Bags.
The first priority player in the Grasslands Biome also takes the First-Player token. The player with the First-Player Token at the end of the game receives 3 VP.
The Grasslands Biome will always resolve last in each round.
Resource Allocation
When a player gathers a Resource from their Native Biome (as indicated by the icon at the top left of their Player Board), they may place the Resource on any Nestlings spot. Each spot has a different colored Biome Segment below it.
The Biome Segments represent a specific quadrant of the Biome Ring. Players score the Biome Segments within each quadrant by feeding the Nestling with the matching Segment beneath it. Once a Nestling has been fed, the Resource cannot be moved elsewhere.
Reminder: Only the first priority player in each Biome returns a Resource type to its respective Biome Bag.
Resources gathered from the other 3 non-Native Biomes must be placed below the Player Board. Native Biome Resources can also be placed below their Player Board, but the player will be unable to feed their Nestlings and trigger a quadrant of their Biome Ring.
For example: If a player wants to score the 2 Alpine (gray) Segments in their Biome Ring, they must place a Native Resource in the feeding spot with the gray Segment below it.
If a player ever gathers more Resources from their Native Biome than they have available slots on their Player Board, they must place any extras below their Player Board.
Wild Worm Resources gathered from any Biome can be used to either feed Nestlings or placed below their Player Board. Players may then place any Biome Segment in their Biome Ring.
Reserved Resource
If a player placed their Bird piece on a Resource type in the Biome currently being resolved, that player claims that Resource type only after all other players have chosen their Resource.
Retrieve Dice
Players retrieve dice when they gather Resources from a Biome.
Biome Segments
The first time a player gathers a new Resource type, they also gather the matching Biome Segment. They take it from their supply and place it in their Biome Ring.
Each Biome Segment is worth 1 VP during the end of round scoring if a Nestling with the matching Biome Segment icon below it was fed.
As play proceeds and players continue adding Biome Segments to their Biome Ring, they may complete a colored quadrant, earning immediate bonuses.
Quadrant Completion Bonuses
A bonus icon is between each colored quadrant of the Biome Ring. When a player completely fills a colored quadrant, they may choose 1 of the 2 bonuses adjacent to the filled quadrant. These bonuses must be taken immediately.
The possible bonuses are:
- Feed 1 Nestling any of the Resources from below the player's board.
- Draw 2 Resources from any Biome Bag. Choose 1 to keep and return the other. Gain the matching Biome Segment if available.
- Give 3 VP to another player for 1 of their Resources below their Player Board. Paying player gets choice of Resource.
- Take the Biome Segment of choice and place it into the Biome Ring.
Scoring VP from Nest Goals
Each player's Nest Goal displays 1 Resource Type from each of the 4 Biomes. Players should have their Nest Goal face-up in their play area. As soon as a player collects 1 of the Resource Types shown, they receive immediate VP based on the round in which the Resource(s) are obtained.
- Round 1: 3 VP
- Round 2: 2 VP
- Round 3: 1 VP
- Round 4: 0 VP
For example: If player A collects 1 Fly and 2 Crabs in Round 1, they receive a total of 6 VP (2 Resource Types x 3 = 6 VP). If player A then collects a Fish in Round 2 and a beetle in Round 4, they receive an additional 2 VP (2 + 0 = 2 VP). When a player collects VP using their Nest Goal, place the VP token(s) on the image of that Resource. This will help signify the particular Resource has already been scored.
Each Resource Type can only score once per game. Once a Resource is collected, regardless of the Round, players can use it for Gathering Goals or to feed their Nestlings.
NOTE: Wild Resources may not be used to satisfy Nest Goal requirements.
Using Resources for Gathering Goals
Gathering Goals award VP based on which spot a player's Scoring Token is placed.
Any time the requirements indicated on a Gathering Goal are met (via Resources from below their Player Board), the player may place those Resources in the Discard Bag and move their Scoring Token to an unoccupied spot adjacent to that Gathering Goal.
The player then takes the Bonus Token and the number of VP listed. (NOTE: If a player skips a Gathering Goal as it moves up the track, they have forfeited those rewards and cannot return to it later in the game.)
For example: On the green player's turn, they collect a Crab from the Freshwater Biome, placing it below their Player Board. This Crab was also the last Resource the green player needed to complete a Gathering Goal. (See player Reference Card for description of bonuses.)
Players do not have to use the Bonus Token immediately. It can be used at any time during a player's future turn.
End of Round Phase
The round ends once each Biome has been fully resolved (including the Grasslands) and each player has collected their Resources and placed their Biome Segments.
End of Round Scoring
When a round ends, score VP by taking the appropriate VP Tokens according to the scoring conditions below:
- Gain 2 VP for each Resource fed to Nestlings, as indicated on spots covered by Resources.
- Gain 1 VP for each Biome Segment in the Biome Ring that was triggered by feeding the correct Nestling.
For example: The blue player has fed Nestlings above the blue and gray Segment icons, and therefore would score the blue and gray quadrants of their Biome Ring. They would score 4 points for feeding Nestlings plus 6 points for the Segments in the blue and gray quadrants of their Biome Ring.
End of Round Clean Up
- Return Resources remaining on the game board to their respective Biome Bags.
- Move the Biome Resolution Tracker 1 Biome clockwise and proceed to the next round by populating Biomes with Resources.
- Move all Resources fed to Nestlings to the Biome Discard Bag.
End of Game
After players complete and score the fourth and final round, proceed to end of game scoring:
- Tally all previously earned VP Tokens
- Add VP from the Bird Energy Track
- Gain 12 VP for completing the Biome Ring
- Gain 3 VP for each set of 3 unique Resources below their Player Board
- Gain 3 VP for each unused Gathering Goal Bonus Token.
- Gain 2 VP for each Segment in their least populated Biome Ring quadrant
- Gain 3 VP if the player currently holds the first player marker
The player with the most VP wins. If tied, the player who completed more of their Biome Ring is the winner. If still tied, the player with the fewest leftover Resources wins.
For example: This blue player has their marker on the second track space of the Bird Energy track, 2 sets of 3 unique resources, 3 Segments in their least populated Biome Ring quadrant (yellow), and they currently hold the first player marker. This would score 2+6+6+3 for a total of 17 extra points added to their total from previous rounds.
Variant Modes
Details of each variant are listed below. NOTE: The terms "Advanced" and "Basic" are assigned by the human player(s).
Solo Mode: The solo mode uses 2 AI players referenced as "Advanced" and "Basic."
Solo Mode
When setting up a solo game, choose 2 birds to represent the AI players. The bird closest to the player's left will represent the Advanced AI and the other will represent the Basic AI.
Shuffle the Biome Decks and place them in their indicated spaces on the Biome Deck Board.
Place the Advanced AI's Scoring Token beneath the Gathering Goal Board.
Place the AI Board on side A in reach of the player.
Populate each Biome with Resources according to a 3-player game.
Both the Advanced and Basic AI use the same number of dice as the human player each round. In other words, if the human player saves a die for the next round the AI players will also save a die for the next round.
For a more challenging game, use side B on the AI Board, and place both AI's Resources on the AI Board, resulting in a more competitive AI experience. The Basic AI's Resources are not discarded when played this way.
Biomes are resolved according to Priority Order. When resolving an AI's dice, consult the Biome Deck to determine which Resource is gathered, and (if an AI player has won first priority), which Resource is returned to the respective Biome Bag. The Advanced AI's Resource(s) are placed on the AI Board from left to right in the corresponding Biome row and the Basic AI's Resource(s) are placed in the Discard Bag. If the Advanced or Basic AI were to gather duplicate Resources, they are either stacked on the same spot of the AI Board or placed in the Discard Bag accordingly.
When resolving the Grasslands Biome for the Advanced AI, gather Resources in the following way:
First, gather a unique Resource from the Advanced AI's Biome. If there are no unique Resources, proceed clockwise to the next Biome until a unique Resource is available. (NOTE: Unique means different from any Resource already on the AI Board.)
If there is ever more than 1 unique Resource available in a Biome, consult the Biome Deck and flip the top card to determine which Resource is taken and placed on the AI Board.
If there are no unique Resources available across all Biomes, take a Resource from the Advanced AI's Biome and stack it on a matching Resource on the AI Board.
If there are no Resources available in the Advanced AI's Biome, proceed clockwise to the next available Resource, stacking it on the matching Resource on the AI Board.
REMEMBER: If there are ever 2 or more available Resources, either a unique or duplicate, consult the Biome Deck to determine which Resource is gathered.
When resolving the Grasslands Biome for the Basic AI, gather Resources starting with the Basic AI's Biome and consult the Biome Deck to determine which Resource is placed in the Discard Bag rather than the AI Board. If there are no Resources in the Basic AI's Biome, proceed clockwise. (NOTE: When playing the more challenging game, follow the Advanced AI's rules for both AI.)
If either the Advanced or Basic AI gather a Wild Worm, place the Resource in the right-most space on the row corresponding with the Biome from which it was gathered.
Rolling and Placing Dice
When it's time for the Advanced AI to place a die, the human player will roll a die belonging to the Advanced AI and place it in the corresponding Biome, with blanks being placed in the Grasslands.
Next, the human player places a die belonging to the Basic AI into the Biome across from where the Advanced AI's die was just placed. If the Advanced AI's die was placed in the Grasslands, the player rolls the Basic AI die, placing it into the resulting Biome.
For example: If the Advanced AI rolls and places a die in the Desert Biome, the Basic AI's die will be placed in the Alpine Biome.
AI dice are always placed in the left-most available space of the Game Board. A maximum of 2 AI Dice may be stacked per AI in any Biome. If a third die would be placed into a Biome, place it in the Grasslands instead. If a third die would be placed into the Grasslands, re-roll that die until it can be properly placed.
If placing a Basic AI die would result in it having more than 2 dice in any of the Biomes, the human player rolls that die and places it accordingly. Once all dice have been placed, proceed to the Gathering Phase.
Gathering Resources
During the Gathering Phase, the AI players gather Resources from both sets of dice. The Resources gathered by the Basic AI get discarded while the Resources gathered by the Advanced AI are placed on the AI Board.
Scoring
Points are scored from completed rows and Gathering Goals are obtained from completed Columns of the AI Board.
When the left 2 columns of the AI Board are filled with Resources, move the AI player's scoring token to the highest available spot of the next Gathering Goal, then remove the Bonus Token from the game and collect the VP listed.
When the AI player completes a row with Resources, they gain the corresponding number of VP at the end of the row.
If there are any stacked Resources in that row, gain the indicated VP for each Resource in the stack. After gaining VP for the completed row and stacked Resources, discard Resources down to the last completed column. (NOTE: Always finish gathering all Resources from the current Biome before scoring for completed rows).
For example: By placing the Ant Resource in the final space on the Alpine track, the AI player would collect 10 VP and then discard their Alpine Resources down to the last completed column.
The AI's final score is the combination of VP from completed rows, Gathering Goals, and the VP indicated on the left-most open space of each row once the game is over.
For example: The AI player would also receive 2 VP for the Moth stacked on the 2 VP spot. After collecting the 2 VP, the Moth on top is discarded.
2 Player Mode
In a 2-player game, the human players must use the Advanced AI to simulate a 3-player game. They can also add the Basic AI to simulate a 4-player game, following the rules laid out for the Solo Mode.
3 Player Mode
In a 3-player game, the human players can use the Advanced AI to simulate a 4-player game. (NOTE: The AI player is not needed to play a game with 3 human players. It's merely an option.)
Family Mode (Side B)
On the reverse side of each Player Board is Side B - a family-friendly mode that rewards players with more points each round. When allocating Resources collected during the Gathering Phase, players feed their Nestlings from left to right at the top of their Player Board, scoring the points listed.
Each Biome Segment is worth 1 VP during every End of Round scoring, not just when the quadrant is triggered by feeding the correct Nestling.
The family-friendly mode also has a different Biome Ring. In order to complete an entire Biome quadrant and trigger an immediate bonus, players only have to place 4 of the 5 Biome Segments rather than 5 as in the Standard Mode.
Birds
The 8 Bird Meeples depict the following species:
- Rosy Finch
- Cactus Wren
- Verdin
- Malachite Kingfisher
- Lilac-Breasted Roller
- Mountain Bluebird
- American Dipper
- African Hoopoe
Iconography Reference
Basic icons:
- Any Resource
- Specific Resource Type
- Completed Biome Ring
- Wild Resource
- Gain Reserve Die
- Biome Specific Segment
- Bird Energy
- Victory Points
- Draw a single Resource from any Biome bag
Compound icons (used on Bonus Tokens and other effects):
- Draw two Resources from any Biome bag, choose one to keep and return the other
- Pay a player a number of Victory Points in exchange for any 1 Resource from below their player board
- Swap any two Resources from different Biomes on the game board
- Add 1 Biome Segment of your choice to your Biome Ring
- Move one of your already placed dice to another Biome
- Feed your Nestlings any Resource from below your player board
- Score VP for each depicted Resource acquired according to the corresponding Round. (e.g. 3 VP in Round 1, 2 VP in Round 2)
Round Sequence
- Populate Biomes with Resources
- Roll all dice for the round
- In turn order, place dice into Biomes
- After all dice have been placed or players have chosen to pass, gather Resources
- Once Resources have been gathered from each Biome, score points for the round
End-of-Round Scoring
- Score the indicated number of Victory Points for each Nestling fed this round
- Standard Play: Score 1 Victory Point for each Biome Segment in your Biome Ring that was activated via fed Nestlings. Family Variant: Score 1 Victory Point for each Biome Segment in your Biome Ring.
End-of-Game Scoring
- Tally all previously earned VP Tokens
- Add VP from the Bird Energy Track
- Gain 12 VP for completing the Biome Ring
- Gain 3 VP if you currently hold the First-Player Token
- Gain 3 VP for each unused Gathering Goal Bonus
- Gain VP for each set of 3 unique Resources remaining below your player board
- Gain VP for each Biome Segment in your least populated Biome area (Standard play only)
Tangerine Games Thanks
The amount of love and support we have experienced on this journey has been tremendous. Without the help of all of you, neither Nestlings nor Tangerine Games would be what it is today. From the bottom of our hearts, thank you!
Tangerine Games would like to thank just a few of the many people who have shown support in some capacity on this journey. Whether that be financial support, moral support, playtesting, prototyping, proofreading, etc., your support is invaluable to both Brandon and Bryan.
Dániel Bándoli, Micah Brown, Chris Brammer, Gene Chipman, Daniel Cunningham, Doug & Dani Lawen, Kevin Grote, Evan Halbert, Frances LaBarbera, Dan & Amanda LaRock, Laura Lu (LongPack Games), Konstantinos Manos, Clay & Tera Messinger, Scott Morris, Devon Norris, Shem Phillips, Morgen & Jessica VonBargen, DoFine Games, Nilanjan Malakar, Ben Greer, Mike Kay, Koltin Thompson, Casey & April Wade, Sean & Kayla Walsh, Sean Wainwright, Vince Vergonjeanne