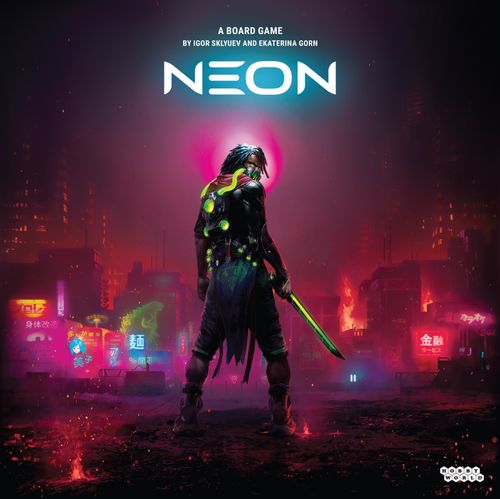
NEON
NEON Rulebook
Table of Contents
Table of Contents
Game Contents
- 1 round board
- 6 fighter boards
- 122 cards: 42 action cards (7 for each of the 6 fighters), 66 loot cards, 6 reference cards, 8 upgrade cards
- 1 Automa board
- 6 fighter figures
- 1 Smoke Grenade token, 1 Trap token, 1 Neko token
- 1 Automa marker
- 5 attack dice
- 3 defense dice
- 10 scoreboard tokens
- 1 landing ship
- 6 energy counters
- 10 sectors
- 72 health tokens: 30 with value "1", 30 with value "2", 12 with value "3"
- 1 leader token
- 10 bot tokens (2 tokens of each of 5 colours)
- 12 shield tokens (of different sizes)
- 20 search tokens
About the Game
You are one of the fighters representing your corporation at the Tournament held in the heart of the ghost city of Neo-Nagoya. Over several rounds you fight the fighters of other companies, moving between the city's sectors and finding new weapons and armour along the way. At the end of each round some sectors sink under water, so try to choose the safest places. To win the Tournament you need to plan your actions and weigh the benefit of using your unique abilities and sector effects.
Your goal depends on the game mode you choose: Rebirth, Battle Royale or Coalition.
- Rebirth: the fighter with the most victory points (VP) wins.
- Battle Royale: the last fighter remaining on the arena wins.
- Coalition: the team with the most victory points (VP) wins.
Setup
Step 1 - Choose the Game Mode
Choose a game mode: Battle Royale, Rebirth or Coalition. The features of each mode are described in more detail on pp. 15-16 (see Modes below).
Step 2 - Build the Game Board
2a. Shuffle all 10 sectors and place them face up in the centre of the table at random so that they form a closed circle - this is the battle arena.
2b. Assemble the landing ship following the assembly diagram and place it in the centre of the arena.
2c. Shuffle the 10 scoreboard tokens face down and stack them. Then turn the stack face up and put it on the top platform of the landing ship. The top token shows the number of the sector that will close first.
2d. Shuffle the bot tokens with the bot side up and, without flipping them, place them at random one in each sector (the other side of a token is the supplies side).
2e. Take the round board and choose the side that matches the number of players (see the symbol in the upper right corner). Put it next to the arena.
Note: the player count indication is a recommendation. After playing several games, you may choose the side of the round board that suits the pace of game you prefer.
Sector description: name; sector number; sector class; illustration; effect cost; moment of effect use; sector effect.
Step 3 - Form the Shared Decks
Loot decks. Divide the loot cards into 3 decks by card back. Shuffle each deck separately and put it face down away from the arena. Leave room next to each deck for its discard pile.
Upgrade deck (only in Rebirth and Coalition modes). Shuffle the upgrade deck and put it face down away from the arena.
Step 4 - Choose Fighters and Prepare Personal Play Areas
4a. Each player chooses a fighter (fighters can also be assigned at random). Each player then takes the following components:
- the board of their fighter (place it side "A" up in Rebirth or Coalition mode and side "B" up in Battle Royale mode);
- an energy counter (attach it to the board on the right side next to the energy track);
- the fighter figure;
- 7 action cards with the fighter's picture on the back;
- a reference card;
- 2 shield tokens (note: take the tokens that match the diameter of the figure's base);
- 6 health tokens: 3 yellow with value "2", 2 green with value "1", 1 red with value "3"; place them in the corresponding slots of your fighter board with the number side up (in Battle Royale mode colour and value do not matter - take tokens of any colours and place them with the side without a number up);
- a special ability token (if one is shown on the right part of the fighter board).
4b. Set the energy counter to "3".
4c. Place your fighter figure on the landing ship (in any section).
4d. Shuffle your action cards and form a deck. Place it face down to the right of your board. Take the top 3 cards of this deck into your hand.
Fighter board description: portrait (trophy area); name; base armour and weapon values; slots for health tokens; side designation (A or B); the fighter's special token (if any); standard abilities (Manoeuvres); unique abilities; ability cost; reminder in case of defeat; energy track; energy counter; starting energy value.
Example (Akari): base armour 1 defense die, base weapon 1 attack die (melee). Standard abilities:
- Manoeuvre A - 1 energy: [When attacking or defending] reroll any number of your attack dice or defense dice, or those of an ally in your sector (once per attack).
- Manoeuvre B - 1 energy: [When attacking] if after your opponent's defense roll you did not deal damage, move to an adjacent sector.
- Manoeuvre C - 2 energy: [When your sector closes] cancel the damage.
Unique abilities:
- (first ability) 2 energy: [Before attacking] move the target of the attack from an adjacent sector to your sector.
- Neko - 2 energy: [On your turn] place the Neko token in your sector. Other fighters (including allies) cannot use their abilities in this sector while this token lies in it. Return it to your supply at the start of your next turn.
Reminder in case of defeat (side A of the board): Give the attacking fighter up to 2 equipment cards of their choice. Discard all remaining equipment and supply cards, then take 2 class I loot cards and 1 class II loot card. Look at 2 upgrade cards and keep 1 of them, putting the other on the bottom of the deck. Flip the board, take new health tokens and set energy to 3.
Step 5 - Prepare the Supply
Place all search tokens (next to the loot decks), the attack and defense dice, and the remaining health tokens (anywhere convenient) as the supply. In Battle Royale mode put the remaining health tokens back in the box - you will not need them.
Step 6 - Choose the Leader
The player who most recently saw a neon sign receives the leader token. You can also give out the leader token at random.
Game Flow
The game is divided into rounds. In Rebirth and Coalition modes it lasts as many rounds as there are round cells on the round board. In Battle Royale mode the game may end earlier or later.
Each round consists of 4 phases:
- Choosing cards
- Player actions
- Checking the game end conditions
- Closing sectors
1. Choosing Cards
Each player chooses 2 action cards from their hand and lays one over the other so that one of them covers the left or right half of the other. Either of them (or even both) may be rotated by 180 degrees. The three visible halves of these cards form an action row - these are the 3 actions your fighter will perform this round, necessarily from left to right.
The number visible on the top card shows your initiative. The lower this value, the earlier your fighter acts. Having chosen 2 cards and how to overlap them, place them above your board face down and keep the third card in hand.
When all players have laid out their chosen action cards, reveal them and determine the turn order: the right to act passes from the fighter with the lowest initiative value onward in ascending order of initiative. In case of a tie in initiative, the one who has the leader token (if any of the tied players has it) goes first, or otherwise the tied player closest to the leader token holder clockwise.
Example: Peter played cards with initiative 6, Galina with initiative 2, and Oksana and Igor with initiative 3. Peter holds the leader token. Galina acts first, then Igor (because he sits to the left of Peter), then Oksana, and finally Peter.
2. Player Actions
First, all players who played the "Defense" action apply their shield tokens to their fighters (see "Defense" below). This is the only effect of an action that is applied not on the player's turn but at the moment the cards are revealed. Then, in initiative order, each player performs all 3 of their actions from left to right.
Landing from the landing ship. At the start of the game your fighter figure is on the landing ship outside the battle arena. Before performing your first action in the game, you must move your fighter figure from the ship to any sector (this move does not count as an action). Only after that can you perform your actions. While a fighter is on the landing ship it cannot use abilities and cannot be attacked.
If after a defeat a fighter returns to the landing ship (in Rebirth and Coalition modes), the same rules apply as at the start of the game (that is, at the start of their next turn they land in any sector).
After performing all actions, the player puts the played cards into their personal discard pile to the left of the board and draws 2 new cards from their action deck. If a player must draw cards and the deck has run out, they shuffle their discard pile to form a new action deck and then draw the remaining cards. Thus, before each round a player always has 3 action cards in hand.
3. Checking the Game End Conditions
Depending on the chosen game mode, check whether the corresponding end conditions are met.
Rebirth / Coalition. The game ends in any of three cases:
- the last round has been played (the one in which the last empty cell on the round board must be closed);
- 1 fighter (team) remains on the arena;
- no fighters remain on the arena.
Battle Royale. The game ends in either of two cases:
- 1 fighter remains on the arena;
- no fighters remain on the arena.
Note: the game continues even if all scoreboard tokens have been placed on the round board.
4. Closing Sectors
After all players have performed their actions, 1 or 2 sectors close on the arena, as indicated in the cell of the current round (the first empty cell on the round board).
For the sector whose number is shown on the top scoreboard token, perform the following steps:
- Remove all bot and search tokens lying in this sector to the supply. Shield tokens and special fighter tokens lying in it go back to their owners' personal supplies.
- Remove 1 search token each from the two adjacent sectors to the supply.
- If a fighter was in this sector, it moves to an adjacent sector of its choice and takes 1 damage, discarding 1 health token to the general supply (see "Damage"). The fighter may use one of its standard abilities, "Manoeuvre C": spend 2 energy to cancel this damage. If several fighters are in the sector, they decide where to move starting with the fighter with the leader token and then clockwise.
- Remove this sector to the box and evenly shift the remaining sectors so that the distance between them is about equal. Note: do not perform this step if only 2 sectors remain on the arena.
- Place the top scoreboard token on the cell of the current round on the round board. If this is the second sector closing this round, place the top scoreboard token on top of the previous one.
- If 2 sectors must close this round (the current round's cell shows the two-sector symbol), perform steps 1-5 for the sector whose number is shown on the newly revealed scoreboard token.
Note: if 1 sector is to close, players know its number from the top scoreboard token from the beginning of the round; if 2 sectors are to close, players know only the number of the first one and learn the number of the second only at the moment it closes.
Action Types
There are 4 main action types and 2 alternative ones.
- Main: Move, Attack, Search, Defense.
- Alternative: Leadership, Gain energy.
Each action is described in more detail below.
Move
You may move your fighter to an adjacent sector, clockwise or counterclockwise. If the fighter has shield tokens, move them together with it.
When a sector closes and leaves the game, the sectors between which it stood become adjacent.
Each sector has a unique effect. If an effect applies upon entering the sector, apply it immediately after moving the fighter into that sector. Sector effects are described in more detail in the Sectors section.
Search
To perform the search action you must spend as much energy as there are search tokens in the same sector as your fighter. If you have less energy than you need to spend, you cannot perform this action. If there are no search tokens in your fighter's sector, you perform this action for free.
The search action lets you take loot cards. The sector class shows from which decks and in what quantity you may take these cards. There are three sector classes:
- Green (class I): look at 3 cards from the green loot deck, keep 2 of them.
- Orange (class II): look at 2 cards from the orange loot deck and keep 2 of them.
- Purple (class III): look at 1 card from the purple loot deck and 1 card from the green loot deck and keep 2 of them.
Some effects let you take more cards, but you still keep only 2 of them. Place the loot cards you did not choose face up in the discard piles next to the corresponding decks.
An effect that tells you to "take" cards means you keep all the cards you look at.
If you must take cards from a loot deck and it has run out, shuffle its discard pile and form a new loot deck from it. Then draw the required cards from it.
Loot cards you take must immediately be laid out in front of you either as equipment or as a supply. If you cannot or do not want to do this, put the loot card in the discard pile. You cannot keep loot cards in hand.
If you want to use a card as equipment, lay it in a free place in front of you or on top of another of your equipment cards.
If you want to use a card as a supply, tuck it under one of your equipment cards so that only the supply symbol at the bottom of the card is visible.
If you lay an equipment card on top of another, the covered card becomes a supply (only the supply symbol at the bottom of it remains visible). All supplies of that card also pass to the new one, if its maximum supply value allows. Any supply cards beyond this number go to the corresponding discard piles.
After performing the search action, place a search token in the sector with your fighter.
Loot card description: name; equipment type; loot deck class; attack values (for weapons); equipment effect; effect conditions (if any); maximum number of additional supplies; team effect (used only in Coalition mode); supply type.
Equipment
An equipment card lets you use all the effects listed on it.
There are 6 equipment types in the game: pistol, grenade, heavy weapon, armour, melee weapon, helmet.
You may have no more than 1 equipment card of each type laid out (that is, no more than 6 equipment cards in total).
If you take an equipment card of a type you already have, you must choose 1 of 3 options:
- lay it as a supply for another card;
- lay it as equipment on top of the card of the same type;
- discard it.
Supplies
Each loot card has 1 or 2 supply symbols at the bottom of the card. A loot card can be laid on top of or under another loot card only if they share at least 1 supply symbol. There are 4 supply types in the game:
- Ammo
- Energy ammo
- Batteries
- Grenades
Supplies are spent to apply the effects listed on the equipment card under which those supplies are tucked. Most weapons can also be used without spending supplies.
Any equipment card always includes 1 supply itself. You may discard it if you want to apply an effect listed on it but it has no supplies needed for the effect other than the card itself. The symbol shows the maximum number of additional supplies that can be tucked under this card.
Two different supply symbols separated by a slash mean that such a card can be used as one of these supplies.
Important notes:
- A supply card that has already been laid out cannot be moved under another equipment card or laid out as a new equipment card.
- An equipment card that has already been laid out can become a supply card only if a new equipment card is laid on top of it.
- If for any reason you discard an equipment card, also discard all supply cards tucked under it.
Attack
An attack consists of 4 stages:
- Choosing the target of the attack
- Attack stage
- Defense stage
- Applying the results of the attack
1) Choosing the Target of the Attack
Choose a weapon and a target that the range of this weapon allows you to attack. The target can be another fighter or a bot.
Range is indicated by a diagram of 3 sectors. Range 0 is the sector in which your fighter is located (marked with the fighter-sector symbol), range 1 is any adjacent sector, range 2 is any sector adjacent to the previous one (except the sector with your fighter). Each sector in the diagram shows how many attack dice you roll at that range.
Example, range 0 / 1 / 2: Peter rolls 1 attack die if the target is in the same sector as his fighter, and 2 attack dice if in an adjacent sector (range 2 is empty in this example).
If the diagram shows an empty sector, by default the fighter cannot attack with this weapon at that range. Some effects that add attack dice allow attacking even at a range marked with an empty sector. Some effects allow attacking at a range greater than 2 (Glyba's "Howitzer").
A melee weapon can only be used in your own sector. Each fighter has a base melee weapon that allows an attack with 1 attack die in their own sector even if they have no weapon card.
2) Attack Stage
A) Before rolling the attack dice. The attacking player determines the number of attack dice to roll. By default this is the number of attack dice corresponding to the range of the chosen weapon. In addition, before rolling they may apply effects that add attack dice and/or other effects that apply before the attack.
Limit: in each attack you can roll no more than 5 attack dice, even if some effects allow rolling more.
B) Rolling the attack dice. The player rolls the final number of attack dice.
Possible roll results:
- Critical hit
- Normal hit
- Conditional miss (?)
- Miss (X)
Without taking additional effects into account, all critical hit and normal hit results count as hits, and all miss and conditional miss (?) results count as misses.
C) After rolling the attack dice. After rolling, the attacker may apply any effects that apply after the attack: rerolling dice, changing roll results, and so on.
Limit: attack dice can be rerolled only 1 time per attack, even if several different effects allow it.
Important note: if an attack has several targets, the attacker plays the attack stage only 1 time, and each defender plays their own defense stage separately, in turn order.
Equipment card effects. To apply an equipment card effect, discard a supply of the indicated type from under this card. Each effect on an equipment card can be applied only 1 time per attack.
If the equipment card has no additional supplies of the needed type left, you can still apply its effect by discarding the card itself as the required supply.
3) Defense Stage
A) Before rolling the defense dice. The defender determines the number of defense dice to roll. By default this is 1 (the fighter's base armour). Each shield token on the fighter's figure adds 1 more defense die. In addition, before rolling the player may apply effects that add defense dice and/or other effects that apply before the defense.
Limit: in each defense you can roll no more than 3 defense dice, even if some effects allow rolling more.
B) Rolling the defense dice. The player rolls the final number of defense dice.
Possible roll results:
- Full block: protection from any hit
- Normal block: protection from a normal hit
- Fail, gain 1 energy
- Fail
Each normal block cancels 1 normal hit. Each full block cancels 1 critical hit or 1 normal hit, at the defender's choice.
C) After rolling the defense dice. After rolling, the defender may apply any effects that apply after the defense: rerolling dice, changing the roll result, and also the effects of armour and helmet cards.
Limit: defense dice can be rerolled only 1 time per attack, even if several different effects allow it. Only the results of the reroll are ever applied, so if a player rerolled a fail-with-energy result into another result, they do not gain 1 energy for the first roll.
If the attacker has uncancelled critical hit symbols left on the dice, the defender must apply the mandatory effects of the helmet (if any) by discarding the corresponding supply.
If the attacker has uncancelled normal hit symbols left on the dice, the defender must apply the mandatory effects of the armour (if any) by discarding the corresponding supply.
If the condition of an armour or helmet effect says "optionally", the player is not required to apply it.
Possible effects. A fighter may apply the following effects: their abilities; a sector effect; equipment card effects; an upgrade card effect.
Example: Galina discarded an ammo supply to add 1 more attack die to the attack. After rolling, she wants to apply an effect that counts 1 normal block of the defender as a fail. However, the only energy-ammo supply she has left is the supply of the card itself, so she decides to discard the card "Reaper" itself for the effect. She will have to discard the ammo supply left under the card together with the weapon.
4) Applying the Results of the Attack
If after all previous stages the attacker has uncancelled critical hit and/or normal hit symbols left, they deal the defender 1 damage for each such symbol. Some effects can increase the damage dealt for each symbol. After that the attacker may apply effects that depend on whether damage was dealt.
If the target of the attack was a fighter, the attacking player takes as a trophy from it as many health tokens as damage their fighter dealt, starting from the top row of the board (see "Damage"). In Battle Royale mode health tokens have no value, so they can simply be discarded to the supply.
Then check whether the target has any health tokens left. If the fighter lost its last token, it goes for maintenance (if this is side "A" of the board) or is eliminated (if this is side "B" of the board). These processes are described in more detail in "Fighter Defeat".
If the target of the attack was a bot and you dealt it at least 1 damage, you destroy it and take its token, turning it to the supplies side up.
If all critical hit and normal hit symbols of the attacker were cancelled, the attack is considered unsuccessful. In this case the attacker may apply the standard ability "Manoeuvre B": for 1 energy, move to an adjacent sector.
Attacking a Bot
If you attack a bot, the attack and defense stages are played simultaneously, that is, you roll 1 defense die of the bot together with your attack dice. After evaluating the roll, you may, as usual, apply various effects to your attack dice. A bot cannot reroll its defense die and apply any effects other than those that apply automatically to the roll result.
Bots are described in more detail in "Bots".
Defense
The first part of this action is resolved immediately after all players' cards are revealed. Each player who played the "Defense" action attaches a shield token to their fighter's figure. Each player who played 2 "Defense" actions attaches both of their tokens to the fighter's figure.
A fighter that has at least 1 shield token is considered to be in a shield. It rolls 1 more defense die for each such token during all defense rolls this round. This effect lasts for the entire action phase (even if the fighter must defend before its turn has come).
When the turn to perform the "Defense" action comes, you simply gain 2 energy.
At the end of the round each player removes the shield tokens from their fighter's figure and returns them to their personal supply.
Damage
Each time a fighter takes 1 damage, it discards 1 health token from the top row of its board. If there are no tokens in the top row, it discards from the middle one, and if there are none in the middle, from the bottom one. If a fighter loses the last health token on its board, resolve the fighter's defeat (see "Fighter Defeat").
Rebirth and Coalition modes: instead of discarding a health token, the fighter gives it to the player who dealt this damage. That player puts the received health tokens in their trophy area (the fighter portrait on the board) - at the end of the game they will bring the number of VP indicated on them. A fighter gives the opponent's health token even if the damage is dealt by one of their abilities (for example, Illusion's "Trap"). If a fighter takes damage for some other reason (for example, when a sector closes), it discards the health token to the general supply.
Alternative Actions
Some actions on the cards are divided by a line. This means that you can perform the alternative action instead of the main action.
Gain Energy
Gain the indicated amount of energy (1 or 2).
Leadership
Take the leader token and place it next to your fighter board. If you already have the leader token at this moment, nothing happens.
Note: after your turn, the initiative order of the current round may change!
In addition, gain 1 energy.
Energy
Energy is needed to use fighter abilities, to perform the search action and for some other effects. When you gain or lose energy, mark it with the counter on the energy track on the right side of your board. A fighter cannot have more than 6 energy.
Joker Card
On each half of this card 4 actions are indicated, separated by a line: move, attack, search and gain energy. When performing an action of this card, you must choose 1 of the 4 options.
Note: with this card you cannot perform the Defense and Leadership actions.
Other Rules
Fighter Abilities
Each fighter has 5 abilities: 3 standard ("Manoeuvre") and 2 unique. To use an ability, spend the indicated amount of energy. In the description of each ability, square brackets indicate the moment at which it can be used. Unless stated otherwise, each ability can be used any number of times per round as long as you have enough energy.
Example: Glyba's ability "Shield" lets him, for 2 energy, roll 2 more defense dice when defending. If he is attacked 2 times per round and has at least 4 energy, he can use this ability against each attack.
Manoeuvre A - 1 energy: [When attacking or defending] reroll any number of your attack dice or defense dice, or those of an ally in your sector (once per attack).
Manoeuvre B - 1 energy: [When attacking] if after the opponent's defense roll you did not deal damage, move to an adjacent sector.
Manoeuvre C - 2 energy: [When your sector closes] cancel the damage.
Special Tokens
Some fighters have a special token that is placed on the board when a certain ability is used. While such a token is on the board, the fighter cannot use this ability again until it returns the token to its supply (usually this happens at the start of its next turn). If a fighter is eliminated from the game, discard its special token at the end of the round.
Bots
Bots are the mechanical population of the arena. There are 5 types of them in total, each represented by two bots. At the start of the game each sector contains 1 bot.
When a fighter performs the attack action, it can choose as a target not only another fighter but also a bot. Bots themselves do not attack; they only defend with 1 defense die.
In a fight with a bot, the player rolls their fighter's attack dice and the bot's defense die simultaneously. Bots never reroll their die and apply no effects other than those that apply automatically (for example, the effects of the "Stadium" sector or Snake's "Smoke Grenade").
If a fighter manages to deal a bot at least 1 damage, it takes its token and places it on its board with the supplies side up. During an attack or defense you may flip it to the side with the bot picture to use it as a supply of one of the types indicated on it. A bot token cannot be used in the same attack in which you received it.
In Rebirth and Coalition modes, each bot token (flipped or not) brings 1 VP at the end of the game, and each pair of tokens of the same colour and with the same picture additionally brings 1 VP (3 VP in total for 2 tokens).
Note: when the "Underpass" sector closes, the bot token in it leaves the game by the usual rules.
Fighters (player figures and the Automa) and bots are considered opponents. If an effect's text says it applies to a fighter, it cannot be applied to a bot. If an effect's text says it applies to an opponent (or the target of an attack), it can be applied to both a fighter and a bot.
Fighter Defeat
When a fighter loses the last health token on its board, there are 2 possible outcomes.
- If this is the last health token on side "A" of the board, the fighter goes for maintenance (only in Rebirth and Coalition modes). Perform the steps described in "Maintenance".
- If this is the last health token on side "B" of the board, the fighter is eliminated from the Tournament. Remove its figure from the board.
If the fighter was in a shield, in both cases return the shield tokens to its personal supply. If its special token was on the arena, it stays in place. In the case of going for maintenance, the special token returns to the supply at the start of the fighter's next turn. In the case of elimination, remove its token at the end of the current round.
Trophy Equipment
If the last health token (no matter on which side of the board) was discarded as a result of an attack or the use of an ability by an opponent, that opponent may take from the eliminated fighter, or the fighter going for maintenance, up to 2 equipment cards (but not supplies) of their choice. Put all supplies and the remaining equipment cards into the corresponding discard piles.
Modes
Rebirth
In this mode the participants' goal is to score as many victory points (VP) as possible for hits on other fighters and bots. Each fighter has 2 tries: after receiving significant injuries it goes to the landing ship, where it restores health and repairs its implants, and then continues the Tournament.
Setup. Place the fighter boards side "A" up. Place 6 health tokens of the corresponding colour and value on each. Shuffle the upgrade cards and form a deck.
Maintenance. If your fighter loses its last health token on side "A" of the board, it goes for maintenance. Perform the following steps:
- move your fighter figure to the landing ship;
- if the fighter lost its last health token as a result of an attack or the use of an ability by another fighter, that fighter may take from you as a trophy up to 2 equipment cards (but not supplies);
- discard the remaining equipment and supply cards and take 2 class I loot cards and 1 class II loot card;
- look at 2 upgrade cards, keep 1 of them and put the other on the bottom of the deck;
- flip the board to side "B", lay out the new 6 health tokens and set the energy counter to 3 energy.
Upgrade cards. When undergoing maintenance, a fighter receives an upgrade card. It is laid out face up next to the fighter board and can provide a permanent effect, an immediate effect, or an effect that applies once per round. In the last case, rotate the upgrade card 90 degrees each time its effect is used and rotate it back at the end of the round.
Example, "Stabilizer": Once per round, [when attacking] flip 1 conditional miss (?) to a normal hit.
End of the game. The game ends in any of three cases:
- the last round has been played (the last empty cell remains on the round board);
- 1 fighter remains on the arena (it then wins automatically);
- no fighters remain on the arena.
Count the VP received for the following trophies:
- 1/2/3 VP for trophy health tokens (the number of VP is indicated on the token itself);
- 1 VP for each bot token (+1 VP for each pair of identical bot tokens);
- 1 VP for the leader token.
The fighter who has not been eliminated from the Tournament and has the most VP is declared the winner. In case of a tie, the fighter with the most trophy health tokens worth 3 VP wins. If there is still a tie, compare tokens worth 2 VP first, then 1 VP. If there is still a tie, the tied players share the victory.
If the most VP belongs to a fighter eliminated from the Tournament, they are awarded the honorary title of best player of the Tournament.
Battle Royale
In this mode fighters have no second chance. The winner is the one who remains last on the arena.
Setup. Place the fighter boards side "B" up. Place health tokens of any colour on them with the side without a number up. Return the upgrade cards to the box.
Fighter defeat. If a fighter loses its last health token, it is eliminated. Remove its figure from the board - it stops taking part in the Tournament.
End of the game. The game ends in either of two cases:
- 1 fighter remains on the arena;
- no fighters remain on the arena.
The fighter who remains last on the arena is declared the winner. If no fighters remain, nobody wins.
Reminder: the game end check happens before sectors close, so the last fighter remaining on the arena does not take damage from a closing sector.
If the last 2 sectors remain on the arena and at least 2 fighters, the Tournament continues. In the sector closing phase, remove 1 search token from both sectors. Fighters take 1 damage by the usual rules, but are not required to move to adjacent sectors. These 2 sectors stay on the arena until the end of the game.
Coalition
If 4 or 6 players are playing, you can split into 2 or 3 teams of 2 players, or into 2 teams of 3 players. Players on the same team are allies.
The game is played by the Rebirth mode rules with the following exceptions:
- allies cannot attack each other;
- fighters can use the team effects of equipment cards (with the team effect symbol);
- allies in the same sector can reroll each other's attack dice or defense dice using the standard ability "Manoeuvre A";
- allies cannot exchange equipment cards with each other.
Note: fighter abilities can affect all fighters (Snake's "Smoke Grenade"), all other fighters including allies (Akari's "Neko"), or all other fighters except allies (Illusion's "Trap").
End of the game. At the end of the game the trophies of all fighters of a team are shared. Count the following VP:
- 1/2/3 VP for trophy health tokens (the number of VP is indicated on the token itself);
- 1 VP for each bot token of your team (+1 VP for each pair of identical bot tokens in the team);
- 1 VP for the leader token in your team.
The team with the most VP wins. In case of a tie, determine the winner by the same rules as in Rebirth mode.
Automa
In a 2-player game the Automa always takes part. With more participants you may bring the Automa into the game if you wish. The Automa is a player that makes automatic moves throughout the Tournament.
Setup. Place the Automa board next to the arena (both sides are the same). Lay out 6 health tokens on it: 5 green with value "1" and 1 yellow with value "2" (in Battle Royale mode you may lay out any 6 tokens). Place the Automa marker in the sector whose number is shown on the top scoreboard token.
Game flow.
- The Automa is considered a fighter and performs its actions after all other fighters.
- Choosing the attack target: the Automa chooses the fighter with the most health tokens among those at range 0-3. If several fighters have equal health tokens, the Automa chooses the one who performed actions last.
- Move: if the Automa's target is not in its sector, the Automa moves 1 sector toward it. If the Automa's target is at equal distance in both directions, or there is no fighter at range 0-3, the Automa moves to the adjacent sector with the lower number.
- Attack: if the Automa has chosen a target, it attacks it.
- Sector closing: if the Automa is in a closing sector, it takes 1 damage and moves to the adjacent sector with the lower number.
Players can attack the Automa and apply abilities to it like to any other fighter. The Automa rolls 2 defense dice when defending. Roll the Automa's dice together with your own (as in the case of an attack on a bot). The Automa cannot reroll its dice and apply any effects other than those that apply automatically to the roll result.
Tip: when playing with the Automa, do not discard played action cards until the end of the round, so as not to forget the turn order.
If the Automa loses its last health token, it is eliminated from the Tournament. The Automa can win the Tournament like any other fighter.
Achievements
On the game's page on the publisher's website (hobbyworld.ru) you can download achievement sheets. Each player can use one to mark their personal achievements in the Tournament over many games.
Sectors
The effect of any sector applies only to fighters located in that sector. Attack effects apply only when attacking from that sector, and defense effects apply only when defending in that sector.
- Park: 1 energy: [When attacking] flip 1 conditional miss (?) to a normal hit.
- Factory: 1 energy: [When attacking] +1 attack die.
- Electric Charging Station: [Upon entering the sector] gain 1 energy. This effect also applies if you moved into the sector not by the move action but as a result of some effect.
- Highway: [When attacking] you may reroll 1 attack die for free. Reminder: if you use this effect, you cannot reroll dice with the ability "Manoeuvre A".
- Underpass: [When this sector closes] do not take damage. Reminder: when this sector closes, the bot in it leaves the game.
- Shopping Mall: [When searching] look at 1 more class II (orange) loot card.
- Railway Station: [When moving] move to any sector.
- Police Station: [When attacking or defending] you cannot reroll attack dice and defense dice.
- Stadium: [When defending] all normal blocks count as fails.
- TV Tower: Using abilities costs 1 more energy. This effect applies both to the fighters' unique abilities and to the standard "Manoeuvre" abilities.
Symbols
Attack die: critical hit; normal hit; conditional miss (?); miss (X).
Defense die: full block (protection from any hit); normal block (protection from a normal hit); fail, gain 1 energy; fail.
Supplies: ammo; energy ammo; batteries; grenades.
Equipment types: pistol; heavy weapon; melee weapon; grenade; armour; helmet.
Other: attack die; defense die; energy; fighter's sector; team effect; class I loot card (green); class II loot card (orange); class III loot card (purple); upgrade card.