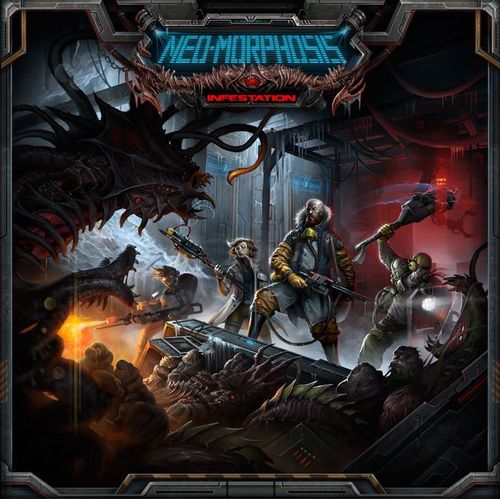
Neo-Morphosis: Infestation
Neo-Morphosis: Infestation Rulebook
Table of Contents
Table of Contents
- The World Exit Research Station
- Game Components
- Set Up and Summary
- Game Mechanics - General
- Combat
- Health, Wounds, Defeated Characters and Recovery
- Emergencies
- Compromised Sectors
- Fire Suppression System
- Game Mechanics - Crew
- Special Ability Cards
- Crew Actions
- Game Mechanics - Drones
- Game Mechanics - Aliens
- Worked Example
- Tokens Legend
- Mission Generator
- Missions
- Round Summary
- Official Clarifications (FAQ)
- Errata Applied
The World Exit Research Station
Overview
Neo-Morphosis: Infestation is a co-operative game for one to four players. It can be played as stand-alone missions or as a narrative campaign.
Game Components
Player Components
- Crew ID Card.
- Character icon, repeated on all three components.
- Character image and name.
- Science bonus.
- Tech bonus.
- Programming skill.
- Health points.
- Defense value.
- Agility bonus.
- Attack bonus.
- Weapon range.
- Number of wounds inflicted.
- Starting science stack.
- Starting tech stack.
- Repair Attempt tokens.
- Special Ability card.
- Ability name.
- Ability effect.
Constructible Card:
- Constructible Card (back).
- Name and image.
- Construction tech test.
- Constructible Card (front).
- Fragility test.
- Stack plug.
- Range.
- Attack value.
- Number of wounds inflicted.
- Initial ammo loadout.
- Blast icon.
Item Card:
- Item Card.
- Item name and image.
- Fragility test.
- Terminal icon.
- Discard icon.
- Item effect.
Shared Components
-
System Interface Panel (SIP).
-
Emergency Reports Sub-Panel.
- 2a) Inactive Emergency Report Fields.
- 2b) Critical Emergency Report Field.
- 2c) Active Emergency Report Field.
- 2d) Repair Attempt token.
- 2e) Emergency Levels.
- 2f) Current Emergency Level Indicator.
-
Terminal Actions Sub-Panel.
- 3a) Available Actions.
- 3b) Disabled Action and System Overload token.
-
Fire Suppression System, Halon Tank token location.
-
Time Sub-Panel.
- 5a) Current Time Indicator.
-
Structural Integrity Note.
- 6a) Terminal Integrity value.
- 6b) Door Integrity value.
- 6c) Wall Integrity value.
-
Emergency Card.
-
Programming test.
Alien Components
- Alien ID Card.
- Character image and type.
- Health points.
- Defense value.
- Attack bonus.
- Impede value.
- Number of wounds inflicted.
- Alien Species icon.
- Special ability.
Note: Some Aliens do not attack so they will not have an Attack bonus.
-
Alien Infestation Card.
-
Character silhouette and name.
-
Multiple spawn locations.
-
Single spawn location.
-
Discard icon.
-
Alien Activation Card.
-
Pod Neo-Morphosis icon.
-
Structural attack instructions.
-
General attack and movement instructions.
-
Special Activation icon.
-
Alien Neo-Morphosis icon.
Note: Many of these sections are optional and may not be present on all Alien Activation cards.
Set Up and Summary
Set Up
- Choose a map.
- Each player chooses their crew member(s). Alternatively, draw a Crew ID card at random. There are always four crew members.
- Place the map tiles, map tokens, Constructible Item card deck, and any other game components as shown on the Station Map. Use the mission mini-map to make a note of Sector locations.
- Shuffle the Infestation Deck and place one Infestation Card face down in each room.
- For each crew member, take:
- one ID card,
- four Repair Attempt tokens,
- the matching Special Ability card.
- Place the Drone ID card within easy reach of the players.
- Place the System Interface Panel within easy reach of the players. Put the Time Marker in the top slot and place a Halon Tank token in its spot.
- Separate and shuffle the remaining card decks.
- Place the crew and Drone miniatures on the game board in the starting positions shown on the mission mini-map. Place any Alien or other miniatures shown on the mission mini-map at the start of the game.
- Place the four xenobiology cards on the table within easy reach of all players.
Win or Lose
The crew wins immediately if it meets mission victory conditions.
The crew loses immediately if either of these conditions occur:
- a new Emergency is generated when all four Emergency Fields are already filled on the SIP.
- all four crew members are disabled or recovering at the same time.
Round Structure
- Start-of-Round Phase: All players prepare for the turn ahead.
- Crew Phase: One at a time, players activate a crew member and play the crew member's full turn.
- Alien Phase: After drawing an Alien Activation Card, the players follow the instructions to play the Alien turn. Individual Aliens may activate several times as they follow their instincts.
- End-of-Round Phase: All players simultaneously complete any End-of-Round tasks. Once a round is complete, the game starts a new round with the Start-of-Round Phase.
Start-of-Round Phase
Perform these steps in order:
- Level 3 Emergencies go Critical:
- Place a Sector Compromised card on the Game Board Sector.
- Discard the Emergency Card, Level Marker, and Repair Attempt tokens.
- Place a Sector Compromised Card on the System Interface Panel.
- Escalate Active Emergencies:
- Increase the Emergency Level of all existing Emergencies by one.
- Check Compromised Sectors:
- Inspect each Compromised Sector to see if it has been secured.
- If the Sector is not secure, create a new Emergency: draw an Emergency Card and place it face down in the next available Emergency Report field.
- Check the timeline:
- If the Time Marker is at the end of the timeline, the station is beginning to collapse. Create a new Emergency: draw an Emergency Card and place it face down in the next available Emergency Report field.
- Activate all new Emergencies one by one:
- Turn the Emergency Cards that are face down.
- Add a Level Marker to the green Emergency Report Field slot.
- Place a System Overload token on the Terminal Actions subpanel to disable the relevant Terminal Function.
- Crew members can begin to recover:
- Remove any recovering tokens and stand the miniature upright. This character can activate this round.
- Flip any Defeated tokens to a recovering token. This character cannot activate this round.
Crew Phase
The players assemble their xenobiology cards in a new xenobiology diagram (see Xenobiology on page 13).
During the Crew Phase, players activate the crew in any order. However, a crew member can only activate once per round and any unused actions are lost.
The activated crew member performs up to three actions. Any combination is legal, including repeating actions. If the crew member fails any related skill or code test, the action is still used.
General Actions
- Attack
- Heal (using a proper card)
- Craft a craftable item (test)
- Drop/pick up/trade Item
- Move
- Open/close door
- Recharge fire suppression system
- Repair door/terminal
- Search a Crate
- Mission-specific actions
Terminal Functions
- Activate fire suppression system
- Control a Drone
- Counteract emergencies
- Produce electrical feedback
- Remote control doors
- Scan adjacent rooms
- Explode the drone
Alien Phase
After the crew have completed their actions, players control the aliens. Draw an Alien Activation Card and resolve all the steps as described on the card.
- Alien Pods may hatch into Larva.
- Some Aliens perform Structural Attacks.
- Perform Alien Actions.
- Perform Special Activations.
- Aliens neo-morphosize.
These steps are described fully in Game Mechanics - Aliens section. Some steps are optional and may be omitted from the Alien Activation Card.
End-of-Round Phase
Advance the time marker, if possible.
Game Mechanics - General
The Game Board
The game board is created by arranging map tiles and map tokens as indicated by the mission mini-map.
Door tokens: Door tokens represent doors between map tiles. Flip the Door token to switch between Open doors and Closed doors. Add a Damage token if the Door is damaged.
Figure 1: Details of a map tile and map tokens.
- A map tile representing a room.
- Three areas in the room.
- Area spawn numbers.
- Terminal token.
- Crate token.
- Open Door token.
- Assembly Point (Tech).
Errata: on the Figure 1 image, the Crate is marked #1. It should be marked #5, as shown in the callout list above.
Crate token: Crate tokens can be searched by the crew for items.
Terminal token: Terminal tokens can be used by the crew to perform terminal actions.
Assembly Point tokens: Assembly Point tokens indicate an area where a crew member can craft an item. There are two types of Assembly Point tokens: Tech and Science.
There is only one type of map tile in the core game: Rooms.
Rooms: Rooms are subdivided into Areas.
Areas: Areas are used for Spawning Aliens, Movement, and Range. White lines clearly divide a room into different Areas. Most areas have a spawn number. Spawn numbers are referenced on the Alien Infestation Card, and used when initially spawning the Aliens in a room.
Map tokens: Map tokens are scenic elements that are placed on top of the map tiles to complete the game board. Players can interact with map tokens. The following map tokens are used in Neo-Morphosis:
- Terminal token
- Crate token
- Assembly Point tokens (Tech and Science)
- Objective tokens: Objective tokens mark key parts of the story in a mission.
Note: Any grids or other graphics on the map tile are for atmosphere and theme. They are not part of the game play.
Sectors
A sector is a single room, and it is given a sector number in the mission mini-map. A room tile might be a different sector in different missions. The sector numbers appear on Emergency Cards on the SIP, and are how the SIP identifies parts of the station.
A secure sector is defined as a sector where all the bordering doors are closed.
An unsecure sector is defined as a sector where one or more of the bordering doors are open.
Figure 2: Sample Sector mini-map.
Doors
Doors are placed between two areas and are considered to be in both areas. A character in either area is in the same area as the door.
Figure 3: Door tokens. Flip the token to show whether the door is open or closed. Add a damage token when the door is damaged.
Each mission starts with doors open or closed as shown on the mission mini-map. Doors stay closed or open until manually changed by the crew or the drone, or until attacked by the aliens.
If an alien makes a successful structural attack against a door, the door is damaged and jams open. Set the door token to the open side and place a damage token beside the door token to show the status.
Damaged doors cannot be closed until they have been repaired.
A few colored door tokens are used to highlight doors with special rules. These are described in the missions. Apart from special rules mentioned in the missions, these colored doors behave normally.
Terminals
Figure 4: Front and back of the terminal token.
To perform a terminal action, the crew member must be in the same area as an undamaged terminal.
Crew members and the drone in the same area as a damaged terminal can repair it by passing a tech test. Flip the terminal token back to the active side.
If an alien makes a successful structural attack against a terminal, flip the terminal token to the damaged terminal side.
Skills and Skill Tests
Not all actions are automatic. Skill tests are often made as part of an action to check whether the character can perform the action successfully.
The crew have three bonuses that are applied during skill tests:
- Science: Players take a science test, for example to create a Medkit.
- Tech: Players take a tech test, for example to craft an item, or repair a door or terminal.
- Agility: Players take an agility test to move away from aliens or to preserve the integrity of equipment when defeated.
These bonuses are added to a dice roll during the test. Players must exceed the target value for the test to be successful.
To perform a test:
- Roll 1d6.
- Add the relevant bonus.
- Add any other bonuses from cards, xenobiology, or other game effects.
- If the test result exceeds the required target value, the test is successful.
If players fail the test, normally nothing happens, although there may sometimes be an adverse effect. Whatever happens, when a failed test is part of an action, that action is still used.
Programming Tests
As well as D6-based skill tests, the crew performs programming tests to complete complex tasks at a terminal. These dice have custom icons on their faces, and the test is passed by rolling enough icons to match a given pattern.
Characters with a programming skill can take these tests. The programming skill is the base number of programming dice rolled in a programming test.
There are two types of programming icons: Point and Pattern.
Point icons: Three faces on the dice show Point icons. Think of these as the numbers 1, 2, and 3. Additionally players may see a higher value, 4, in some Target Patterns. Players may recognize these icons as being arranged like the pips on a die.
Figure 5: Point icons. Only the first three appear on dice.
When trying to match these icons in the target patterns, players need to meet or exceed the number of points shown in the pattern. Multiple dice results may be combined to help match one icon in the pattern.
Pattern icons: There are three Pattern icons on the programming dice and in the target pattern. Dice roll results must match the icon shown in the target pattern.
To perform a programming test:
- Pick up the number of dice equal to the character's programming skill.
- Add any bonus dice from cards and other game effects.
- Roll all the dice.
- Use cards and other game effects to change the programming dice results.
- Try to match the target pattern.
Programming tests for counteracting emergencies allow players to combine multiple attempts to pass the test. In this case, if players fail, they can mark some of the pattern icons as matched, so they know they do not have to match them again. All other tests require players to match the pattern in a single dice roll.
Players need to match every symbol shown to pass the test.
Figure 6: A successful programming test – the required symbols are matched by the first two dice. The other two dice are not used.
Figure 7: An unsuccessful Programming test – the dice do not show enough point icons to match the second required symbol. The dice roll has two but the pattern needs three.
Figure 8: A successful Programming test. Note that the first symbol in the target pattern cannot be matched by a single die.
Example (Figure 9): Carolin Jansen uses the SIP.
In Figure 9, Carolin is using the SIP to activate the electrical feedback terminal action. She gathers her programming dice – four dice according to her ID card – and she has no other bonuses at the moment. She rolls the four symbols shown. Unfortunately, she only matches one of the two symbols so fails the test. She cannot activate this terminal action, and has used an action.
See "Escalating and Counteracting Emergencies" for more examples of using programming dice.
Xenobiology
To get an advantage over the Aliens, the crew can use its current biology research data, which is represented by four xenobiology cards. Players can get attack or defense bonuses against specific alien species. This is done by matching the alien species symbols across all four xenobiology cards. Take this step before crew activation. It is not an Action.
Example 1 (diagrams): WRONG: only three of the four sets of species symbols match, so the diagram is not valid. Players cannot connect the cards this way.
Correct: all three Alien Species symbols match.
When players have connected the cards correctly, they can calculate the respective bonus by looking at the attack or defense symbol next to the matching alien species. Players add the indicated value (+1 or +2) to their rolls against that species only.
Not all the attack/defense bonus symbols need to match. If the bonus symbols do not match, no bonus is awarded.
Example: two sets of symbols match and a bonus is awarded. The third set of symbols does not match, no bonus is added.
Players can use the xenobiology bonus only if all their characters are active.
If one or more crew members are defeated, players flip the diagram with the respective character symbol to the reverse. Players will not be able to use the xenobiology bonus for that round. When the characters are back in play, the token is flipped back to the active side.
Combat
The combat system is similar to the skill tests:
- Roll 1d6.
- Add the attack bonus from the weapon or ID card.
- Add the xenobiology bonus, if any.
- Add any other bonuses from cards or other game effects.
- If the attack result exceeds the target's defense value, the attack is successful and inflicts the number of wounds shown on the card.
There are minor variations for different kinds of attacks:
- Melee
- Ranged
- Structural
The difference between melee and ranged attacks is in target selection.
Melee Attacks: Melee attacks are made at a range of 0, meaning the target must be in the same area as the attacker. There are no other restrictions, but normally, the crew will target the aliens and vice versa.
Ranged Attacks: Ranged attacks are made at a range of 1, meaning the target must be in an area adjacent to the attacker, who must have line of sight (LoS) to the Target. LoS is blocked by walls and closed doors. It is not blocked by open doors or characters in either area.
Some weapons have a range of 0–1, meaning that they can be used for either melee or ranged attacks.
Figure 10: Range and LoS for Alice and Robert.
Figure 10 shows some range and LoS examples. Robert has a melee weapon, range 0. He can attack the Pod in his area, but the Ripper is too far away for him to target, even though he can see it through the open door. Alice has a more flexible weapon, with a range of 0–1. She can target the Ripper in her area. She has LoS to the Pod through the open door, and since the range to the Pod is 1, it is a valid target for her.
When a valid target is selected, both melee and ranged attacks are resolved with an attack roll. If the attack is successful, the target takes the number of wounds indicated on the character or card.
Bullets and Blast Area
Bullet icon: Some weapons have a bullet icon. When equipping this kind of weapon, take as many bullet tokens as indicated by the icon on the card. For each attack you make with this weapon, discard one bullet token. When there are no more bullet tokens, discard the weapon.
Blast icon: Blast weapons may hit more than one target. The number of hits made by this type of weapon is written on the card.
- First, apply all hits to the target, until it has taken the number of wounds equal to its number of health points.
- The remaining hits are then assigned to any aliens in the target area. The attacker can distribute the remaining hits as they see fit.
- If there are no aliens available as a target, the remaining hits are assigned to other crew members in the target area. Apply one hit to each other crew member, randomizing if necessary.
- If any hits remain, they are lost.
Figure 11: Robert attacks the Pod.
Robert attacks a Pod in Figure 11. His weapon has an Attack bonus of five, and xenobiology gives him a bonus of +1. A dice roll of four gives him an attack result of ten. This is higher than the Pod's defense value of eight, so his attack succeeds and inflicts one wound, which is enough to destroy the Pod.
Wounds: If an attack is successful, it wounds the target. The ID card or weapon card states the number of wounds inflicted. Give the target as many wound tokens as stated on the card.
Figure 12: The Ripper attacks!
Figure 12 shows what happens if players do not take care of the aliens: they fight back! Here, a Ripper in the same area as Alice rolls a six, and with its attack bonus of +1, generates an attack result of seven, vastly in excess of Alice's defense value of just three. Unfortunately, xenobiology does not give her any defense bonus against a Ripper, so this attack is a success. The Ripper ID card shows that Rippers inflict two wounds, so Alice takes two wound tokens. No worries, she is tough: her health is eight.
Structural Attacks: The frantic aliens will sometimes attack the station itself, targeting doors, terminals, or walls. Resolve these attacks as above, using the defense value for the structure being attacked. Players can find this value on the SIP. The only difference is the result of a successful structural attack:
- Door: The door is damaged and jammed open. Flip the door token to the open side and place a damaged token on it as a reminder.
- Terminal: The terminal is damaged and unusable. Flip the terminal token to the damaged side.
- Wall: Damaging a wall creates a new emergency. Draw a new Emergency Card and place it face down on the next available Emergency Report field (see Escalating and Counteracting Emergencies).
Health, Wounds, Defeated Characters and Recovery
All characters have a health statistic that shows how much damage they can sustain.
When a character sustains damage, it is given a certain number of wound tokens. The wound tokens are placed beside the ID card of unique characters or next to the miniature for non-unique characters to track how much damage has been inflicted. A character cannot take more wound tokens than its health, so simply ignore the extra damage.
When a character takes as many wound tokens as its health, it is defeated. This is handled a differently from character to character.
Defeated Crew: Place the miniature on its side and, as a reminder, turn a defeated token to its defeated side beside the ID card.
Figure 13: Double-sided Defeated token.
During the next Start-of-Round Phase, the crew member may recover if they have a:
- Defeated token. Flip it over to recovering;
- Recovering token. Discard that token, stand their miniature upright, and remove all wounds the crew member has suffered.
Crew members who are defeated or recovering may take no actions. They are not targeted by aliens.
Figure 14: Carolin is defeated by a Hydra.
Carolin has been in some fights already and has taken six Wounds. A Hydra successfully attacks her, causing two more wounds, for a total of eight. This equals her health, so she is defeated. She will be out of action until she recovers, and her xenobiology card is flipped over. Any bonuses it gave are lost until Carolin has recovered.
When a crew member is defeated, flip their xenobiology card. The bonuses of the xenobiology diagram cannot be used until that crew member is fully recovered, then players can flip the xenobiology card back to the active side.
Defeated Drones: Drones are not targeted by aliens, but they are defeated if they explode. They cannot be repaired. Remove their miniature from the game.
Defeated Aliens: Defeated aliens are removed from play immediately.
Fragility Test
When a crew member is defeated, they fall to the ground, and their equipment risks being destroyed. Players can prevent this by taking an agility test for each equipped card.
Item cards and Craftable cards have a Fragility Value.
As soon as a crew member is defeated, they must take an agility test for each equipped card. If the test is successful, they can keep the card. If the test fails, discard that card.
Figure 15a: Fragility test.
Carolin has been defeated. She must roll an agility test for each equipped item to see if she saved it as she fell to the ground, or if any item is broken and discarded. Her agility value is four.
- Card 1 has a fragility value of seven. She rolls a four, +4 Agility = eight. The item is safe.
- Card 2 has a fragility value of eight. She rolls a two, +4 Agility = six. The item is discarded.
- Card 3 has a fragility value of seven. She rolls a five, +4 Agility = nine. The item is safe.
- Card 4 has a fragility value of five. She rolls a one, +4 Agility = five. The item is discarded.
Explosions
Explosions cause damage to all characters in the room:
- Every character in the room takes one wound for each point of the explosion, so an explosion with four points inflicts four wounds to each character.
- All doors in the room are damaged.
- All terminals in the room are damaged.
- The explosion causes extensive damage and generates one new emergency.
An explosion has no effect outside the room where it occurs.
Emergencies
Emergencies represent extreme damage to the station that will ultimately destroy it.
New Emergencies: These are created when:
- There are successful structural attacks against the station walls.
- Compromised sectors are not secure during the Start-of-Round Phase.
- The time marker is already at the end of the time track during the Start-of-Round Phase.
When a new emergency is created, draw an Emergency Card and place it face down on the first available Emergency Report Field on the System Interface Panel. If all four Emergency Report Fields are currently in use, the station collapses and the players have lost. The mission ends immediately.
Escalating Emergencies: During the Start-of-Round Phase, emergencies escalate. There are three emergency levels, and after that the emergencies go critical, causing permanent damage to the station. Follow the instructions in the Start-of-Round Phase to escalate the emergencies by advancing the emergency level markers.
Ending the Emergency: As an action, a crew member in the same area as an active terminal can attempt to counteract the emergencies before they go critical. The crew must declare which of the active emergencies it is trying to repair and place a Repair Attempt token next to the Emergency Card. Each crew member can only work on each emergency once per round, but two or more crew members can work on the same emergency if it is only partially fixed.
They must make a programming test against the pattern shown on the Emergency Card. They assemble and roll their programming dice, then check to see if they can match any symbols on the Emergency Card. Multiple symbols can be matched from the dice pool, but each die result can only be used once. Place a repaired token over each matched symbol on the Emergency Card to show that part of the Emergency has been repaired. These repairs stay in place until the emergency is fully resolved or goes critical.
As with other tests, various cards in play can change the size of the dice pool or alter the results.
Figure 15: Alice tries to counteract the Fire Suppression Failure Emergency.
Short example: The following short example shows two crew members collaborating on an emergency during one round.
Carolin Jansen has four programming dice, and she has no bonuses at the moment. She rolls the four programming dice and gets the result shown in Figure 15. She rolls a total of five Point symbols, which can be used to match the first four-point symbol. She also matches the triangle pattern, so she covers those symbols with two success tokens. Alice was incredible! Her repair attempt token is placed beside the Emergency Card as a reminder that she has already tried to counteract this emergency.
Figure 16: Yuri tries to complete the task.
Although Alice cannot try again, another crew member can help for this emergency. Yuri Davidovich also has 4 programming dice, so he is a good choice. But his result, shown in Figure 16, is not so helpful. He fails to match the single remaining pattern and contributes nothing to the situation. His repair attempt token must still be put in place, even though he was unsuccessful. As the game continues, the other two crew members can try to match that final symbol. This is currently a level 1 emergency, so they have a few rounds to try and help.
Long Example: In this longer example, more of the System Interface Panel is shown across several rounds. Many of the crew participate, while the results of alien activity trigger further emergencies. The results of many Actions spread over multiple phases are shown together in this example.
Figure 17: System Interface Panel at the end of the Alien Phase in round 3.
In the first step of this example, the players are resolving an Alien Activation card in round 3 when a Larva damages the station walls during a structural attack. The players draw an Emergency Card and place it face down on the first Emergency Report Field on the System Interface Panel, as shown in Figure 17.
Figure 18: The SIP after the round 4 Start-of-Round Phase.
We have skipped ahead a little. The time marker has advanced, showing that it is round 4. The new emergency has been activated and revealed, a marker has been placed on level 1 beside the Emergency Card and a System Overload token has been placed on the Scan Two Rooms terminal action, as a reminder that the action cannot be used until the emergency is resolved. The card shows that the emergency is in Sector 3. The crew hopes to work on this emergency in the crew phase of round 4.
Figure 19: In Round 4, two of the crew try to counteract the emergency. Time ticks on.
Round 4 continues with Alice Reese (three programming dice) and Carolin Jansen (four programming dice) trying to counteract emergency 1. They are feeling the pressure and they do not get far. Alice can complete the triangle icon and covers it with a success token. Carolin rolls more dice, but cannot match all of the remaining icons in the pattern – she only covers the diamond icon. Both crew members mark that they have made repair attempts by placing their Repair Attempt tokens beside the Emergency Card.
At the start of round 5, the emergency marker advances. This is now a level 2 emergency. The time marker also moved along the track to show this is round 5. SIP status is shown in Figure 19. The Repair Attempt tokens make it clear which crew have worked on the emergency and who can try in future rounds. Unfortunately for players, the other crew members are far away from any terminals.
Figure 20: Start-of-Round Phase, round 6.
Time advances. The crew failed to work on the emergency during round 5. When the aliens activate, the first Ripper causes some structural damage to a wall, so the players place a new Emergency Card face down in the second Emergency Report field. In round 6, the first emergency advances to level 3 and the second emergency is revealed. Its marker is placed at Level 1 and Electrical Feedback is marked as Overloaded. After the Start-of-Round Phase for round 6, things are looking dire for the crew, Figure 20.
Figure 21: Start-of-Round Phase, Round 7.
The rest of round 6 went badly for the crew. Robert and Yuri were unable to work on emergency 1. Carolin was able to get to a terminal, but having already done her best for emergency 1, she could not work on it again. She did manage to complete some of the pattern for emergency 2. Fortunately, the aliens did not trigger more emergencies when they activated near the end of the round.
At the start of round 7, emergency 1 is already level 3, so it becomes critical. All tokens are removed from the Emergency Report Field 1 and the Emergency Card is replaced by a Sector Compromised card. The Scan Two Rooms terminal action is now permanently disabled, leaving sector 4 effectively off limits; a danger token (Sector Compromised card) is placed in that Sector as a reminder. Fortunately, it had already been secured when the emergency went critical, so it did not trigger more problems. Emergency 2 advances to level 2. Figure 21 shows it is crucial for the crew to deal with the situation, but time is quickly running out.
Compromised Sectors
Compromised sectors are created during the Start-of-Round Phase if a level 3 emergency escalates. Compromised sectors trigger new emergencies if the sector is not secured.
If a crew member is in the compromised sector at the beginning of the round, they suffer as many wounds as are indicated on the compromised sector card.
Fire Suppression System
The Fire Suppression System is more complex than some other terminal actions. Before attempting a Fire Suppression programming test, two other conditions must already be established:
- The Fire Suppression System must be charged with Halon.
- The chosen sector must be secured.
To show the system is charged with Halon, a Halon Tank token is placed on the SIP. The system may have been charged during setup, or the crew may have taken steps to charge the system themselves. The SIP can only store one charge of Halon at a time.
If the system is ready for use, a successful programming test will activate it.
When the Fire Suppression System is activated, Halon gas is released into the chosen secure sector, flushing all oxygen from the sector. All aliens in the sector are immediately defeated. Any crew members in the sector are also immediately defeated unless they have Life Support Gear.
When the crew activates the Fire Suppression System, remove the Halon Tank token from the SIP. This terminal action cannot be used again until the system is recharged. To recharge the system, a crew member must drop a Halon Tank token in an area containing a terminal, then the player places the Halon Tank token on the SIP. Each mission will specify where Halon Tanks can be found.
Figure 22: System Interface Panel (1) charged with Halon and (2) empty.
Game Mechanics - Crew
Inventory
Crew inventory is part of the character play area for general cards and tokens. Items placed in a character's Inventory are ready for use.
Crew can use the Pick Up, Trade and Drop actions to add various objects to their inventory and carry or move them around the station.
Search and Item Cards
The crew can search a crate in their area, discarding the crate token and taking an item card.
When an item has been crafted from parts (a craftable item card), it is also treated as an item, but it is placed in one of the two stacks on the crew ID card: tech or science.
Items can be Dropped, Picked Up, and Traded. There is no limit to the number of items that fit in a crew member's inventory.
Each item card is unique and gives the crew member different kinds of bonuses, for example improved dice rolls, extra actions, or faster movement.
Generally, items are played while performing an action. For example, a crew member performs a Heal action by discarding an item card with a heal icon to cure themselves or another crew member in the same area.
Figure 23: Two Item cards, showing the difference between lasting and one-time-use cards.
Some items are played into the crew's play area and provide lasting benefits for the rest of the game. Other items are single use, as indicated by the X icon on the card. Discard the card once it has been used.
General rules for playing cards that affect dice results:
- Cards that add dice to dice pools must be played before the dice are rolled.
- Cards that alter dice results, for example +1 to 1D6 roll or by allowing players to choose a custom dice result must be played after a player rolls the dice.
Special Ability Cards
Figure 24: Alice Reese's Special Ability card.
Each player starts the game with one Special Ability card, identified by their crew member icon in the top left.
These permanent skills for each crew member are always in play; they cannot be traded to other crew members.
Crew Actions
Attack
A crew member may use the basic weapon on their ID card, or any weapon in their inventory to make an attack. See Combat.
Move
A crew member may take an action to move into an adjacent area. Crew members cannot move through closed doors, walls, or between areas that do not touch.
Unimpeded Movement: When a crew member leaves an area with no hatched aliens, the crew member can move freely, simply using an action to move to the adjacent area.
Figure 25: Two unimpeded Move Actions for Robert.
Here we can see Robert taking two Move Actions between adjacent areas to cross a room. The first move is unimpeded, because there is no alien in his starting area. The second move is also unimpeded, because the Pod is not a hatched alien.
Impeded Movement: When a crew member leaves an area with one or more hatched aliens, the crew member must pass an Agility test in order to move normally. The target value to succeed in the Agility test is the highest Impede Value of all the aliens in the area. If the crew member fails the test, they cannot move, but one of their three actions is still used.
Figure 26: Three different Move Actions for Robert.
Figure 26 shows how aliens affect Robert's movement. Robert takes three successive Move Actions. The first and second Move Actions are the same as before. The Worm does not affect Robert's second move, because it is in the destination area, not the starting area. Finally, the third move is where Robert is impeded by the Worm and he must take an Agility test. His agility bonus is four, he rolls four, for a total of eight. This exceeds the Impede Value of the Worm, which is seven, so Robert is allowed to move out.
If the situation was a little different, with a Slug in the area with the Worm, then Robert would have wasted an action. Slugs have an Impede Value of eight, higher than the Worm, so that would be the Target Value for the Agility test. In that case, Robert would not have exceeded the Target Value and he would have failed the test.
Crew, drones, and aliens all move slightly differently, as can be seen later. Crew move one area per action. Drones have a movement attribute and can move up to that number of areas. Aliens move as directed by the Alien Activation cards.
Crafting Items
The crew can create new weapons from parts, equipment and tools found in the station. These elements are represented by the Craftable Item cards that are placed face down during setup.
If a crew member is in an area that contains an Assembly Point (marked with a Tech or Science token), they can craft one or more cards. Crew members at Assembly Points marked with Tech tokens can craft Tech cards only. Crew members at Assembly Points marked with Science tokens can craft Science cards only.
Figure 27: Assembly Point.
A crew member must spend one action and roll a Tech or Science test (as marked on the front of the card showing the unassembled item).
If the crew member fails the test, the parts are not damaged but the action was still taken. There is no restriction on who makes another attempt to assemble the weapon, or when it is made – the same crew member can even try again immediately if they have actions available.
If the test is successful, they can flip the card showing the assembled item on the other side, and equip the item. It can now be used in combat, and dropped, picked up or traded like any other item.
To equip the item, place it next to the right side of the character card, matching the connection icon (triangle or rectangle) on the item card with the one on the character card.
Errata (Clarification, page 23, second column top): The correct sentence is: "Tech cards are marked with a yellow TRIANGLE. Science cards are marked with a yellow RECTANGLE." The source's printed sentence had these two shapes swapped.
Tech cards are marked with a yellow TRIANGLE. Science cards are marked with a yellow RECTANGLE. Each card type must be connected next to a matching icon. Different card types cannot be connected.
Figure 28: Crafting a Nail Blaster.
In this example, the crew member must roll more than seven to pass the tech test and craft the Nail Blaster. If they succeed, they can equip the Crafted Item next to the character card.
More items can be equipped next to each other if the right edge of the card shows the matching triangle or rectangle connection icon.
Figure 29: Stacking Items.
If the right edge of the card does not show a connection icon, no more cards can be equipped.
Figure 30: Incorrect Stacking.
Players can discard one equipped card and replace it with a new card at any time.
After using a card with the Discard symbol (X), it must be removed from the stack and replaced in the box. It cannot be used again during the current mission.
Crafting Examples
Figure 31: Yuri fails to create a weapon.
Figure 31 shows how to make the Tech test to create a weapon. Yuri is in an area with an assembly point that has a tech token. With a roll of one and his tech bonus of +2, Yuri's test result is three. This is not more than the number six on the card, so Yuri fails.
Figure 32: Alice creates a Stim Pack.
Figure 32 shows Alice having better luck than Yuri with her crafting. Her science test result is seven, just good enough to pass the test which has a target number of six. She flips the card and adds it to her science stack.
Pick Up an Item
If a crew member is in the same area as an item, they can pick it up for later use. Place the item token or card in the crew member's inventory. This action also applies to the objective tokens used in many missions.
Heal
A crew member may spend an action using a card with the heal icon (see image) to heal themselves or another crew member in the same area.
Figure 33: Heal icon.
Repair a Door or Terminal
A crew member in the same area as a damaged door or damaged terminal can attempt to repair it. The crew member must pass a tech test to repair the object. The target number for the tech test is on the damaged token on the door and on the damaged terminal token.
If the tech test is passed, either remove the damaged token from the door, leaving the door in the open position, or flip the terminal token back to the active side.
If the test is failed, the action is wasted, but more repair attempts can be made by the same or other crew members at any time.
Recharge the Fire Suppression System
This is a special example of the Drop Item action. The following conditions must be true:
- The crew member must have a Halon Tank in their Inventory.
- They must be in the same area as an active terminal.
- The Fire Suppression System must be discharged.
When the crew member performs this action, transfer their Halon Tank to the SIP. The Fire Suppression System is now ready for use.
Drop an Item
If a crew member is carrying an item, they can drop it for another crew member to pick up later. Place the item token or card in the same area as the crew member that dropped it. This action also applies to the objective tokens used in many missions.
Open/Close a Door
If a crew member is in an area with an undamaged door, it can be opened or closed. Flip the token to show the new state.
Search a Crate
A crew member can search a crate in their area. To do so, discard the crate token, take an item card and place it in their inventory.
Trade an Item
If two or more crew members are in the same area, the active crew member can give or take an item from another crew member. Move the item from one crew member's inventory to the other's. This action also applies to the objective tokens used in many missions. The crew cannot trade with the drone.
Terminal Functions
There are seven actions that crew members can take at a terminal: the complex Counteract Emergency and six relatively simple actions shown on the terminal actions sub-panel. There are several common elements for taking these actions:
- The crew member must be in an area with an active terminal.
- The terminal function must not be disabled on the SIP.
- To perform one of the six simple terminal actions, the crew member must pass the programming test shown on the SIP beside the terminal action. Failing the test means that nothing happens and the action is wasted.
- The programming tests are generally simple and must be completed in one roll.
- Counteracting an emergency also requires a more complex programming test. However, multiple crew members can collaborate on the test, each solving part of it.
Other restrictions are listed below.
Activate Fire Suppression System
There are further restrictions for this Action:
- The system must be charged with Halon.
- The sector chosen as the target must be secure.
If the crew member passes the programming test:
- Remove the Halon Tank token from the SIP.
- Defeat all aliens in the chosen sector.
- Defeat all crew members in the chosen sector, unless they have Life Support gear in their Inventory.
Produce Electrical Feedback
There are further restrictions for this Action:
- There must be a second active terminal in another area or sector.
Crew members who pass the related programming test may produce electrical feedback in the remote terminal. This causes one point of damage (no defense) to a character in the same area as the remote terminal. The active crew member chooses the target if there are several options. Apply the damage normally, including defeating the character if its health is reduced to 0.
Control a Drone
Crew members who pass the related programming test may take one legal action with the drone.
Counteract an Emergency
There are further restrictions for this action:
- Crew members may only make one attempt at counteracting each emergency. If they have already placed a Repair Attempt token on an Emergency, they cannot take this action a second time for that emergency – even on another turn.
Crew members may take a programming test to try to counteract one of the existing emergencies. Multiple crew members may work on one emergency, solving the pattern with separate programming tests until it is complete.
Remote Control Doors
Crew members who pass the related programming test may open or close any one undamaged door in the station.
Scan Adjacent Rooms
Crew members who pass the related programming test may use system cameras to look into adjacent rooms.
Flip and study all Alien Infestation Cards in the rooms adjacent to the room where the active crew member is found. Do not resolve these cards at this time. Flip them face down after the players have read them.
Explode the Drone
Crew members who pass the related programming test may overload the drone's power system, causing it to explode.
When the drone explodes, it causes an explosion in its room. The amount of damage is shown on the drone ID card. The drone is totally destroyed in the process. Remove it from the game.
Mission Specific Actions
Missions often include new actions that the crew can perform. Full details are given in the mission.
Game Mechanics - Drones
The Drone
A crew member can use a terminal action to control the drone. If they pass the programming test, they can activate the drone to move and perform one other drone action. The drone can move before or after the other action, but it cannot split its movement.
The drone is ignored by the aliens. If an alien has to attack the nearest character, the drone is not a possible target.
Drone Actions
Move: The crew member instructs the drone to move between adjacent areas. Drones cannot move through closed doors or walls, or between areas that do not touch. Unlike regular crew, the drone can move through multiple areas for one Move Action, as defined by the movement number on its ID card.
Unlike the regular crew, drones are not impeded by aliens and never need to make an agility test to move.
Open or Close a Door: The crew member instructs the drone to open or close an adjacent undamaged door.
Repair a Door or Terminal: The crew member instructs the drone to repair an adjacent damaged door or terminal. Since the drone has an infinite Tech Skill, it will automatically pass the Tech test. Simply remove the damaged token from the door and leave it open or flip the terminal token.
Explode: The crew member overloads the drone's power system, causing it to explode. See Explosion. After the drone explodes, remove the drone from the game.
Note: The drone is not able to attack, trade, pick up or drop objects.
Game Mechanics - Aliens
Alien Names and Classes
There are specific types of aliens, like Worm and Ripper, and they also have a species, identified by the icon on their ID card. If a card identifies aliens by type, then the card applies to all aliens of that type in play. For example, "all Larvae" means all Larvae Worms and all Larvae Hydras.
All aliens are hatched aliens, except for Pods.
Alien Infestation
A face down Infestation Card is placed in each room during setup.
Whenever a crew member enters a room containing an Infestation Card, interrupt the crew's turn immediately and resolve the card. Turn the Infestation Card over and place aliens in areas of the room on the corresponding Spawn Locations. When the aliens have been placed, discard the Infestation Card and continue that crew member's turn.
Figure 34: An Alien Infestation Card showing (1) Alien Names and Silhouettes and (2) Spawn Location.
Each box on the Alien Infestation Card shows a silhouette of one type of alien and one or more Spawn Areas, identified by numbers. To resolve an Alien Infestation Card, place one miniature of the type shown in each box in each area identified on the card. The total number of miniatures to be placed will be equal to the number of Spawn Areas on the card.
If players run out of a specific alien miniature while resolving an Infestation Card, no more aliens of that type can be placed in the room.
Figure 35: Robert Cooper enters a room and triggers an infestation.
In Figure 35, Robert Cooper enters a room and his turn is temporarily interrupted. The Infestation Card in the room is flipped and reveals that four aliens are lurking in the room. First, two Pods are placed in the areas with Spawn Locations 1 and 2. Then a Ripper is also placed in the area with Spawn Location 1. Finally a Slug is placed in the area with Spawn Location 3. Players can see that one area has two Spawn Locations, 2 and 3, and that two aliens were placed in the same area. In a different room, the Pod and Slug are placed in different areas. When the miniatures are in place, Robert continues his turn.
Resolving Alien Activation Cards
At the start of the Alien Phase, draw and resolve an Alien Activation Card. This single card will control all the aliens on the board for this round, activating neo-morphosis, moving them, launching their attacks on the crew and the station, and performing special actions to advance the mission.
Aliens do not have a fixed number of actions for each round. An alien may make many different actions in one round, or make none. Simply apply all the rules on the Alien Activation Card in the following order.
Figure 36: Various sections of an Alien Activation Card.
-
Pod Neo-Morphosis: If the neo-morphosis dice icon is in the top left corner of the card, resolve neo-morphosis for all Pods. See below.
-
Structural Attacks Against the Walls: In this step, all aliens matching the list of alien types make a structural attack against the station walls. Resolve the structural attacks making sure to apply any bonuses to the roll. Roll once for each alien of the relevant type until one of them successfully damages the station and triggers an emergency or all aliens of that type have failed.
-
Alien Actions: This section describes the actions taken by aliens in this round. The title of each block identifies the type of alien that will activate. The instructions say how many of those aliens will follow the rule. The rule then lists the actions that should be performed with each alien.
Note: An alien may perform as many actions as there are players resolving each section.
-
Special Activation: In this step, any special actions available in the mission are taken, such as activating a special character. For example, if Dr. Phipps is on the board, this is the time to activate him. See Special Activation below.
-
Neo-Morphosis: The last step to resolve is neo-morphosis for hatched aliens. All aliens will morph – even if they have already activated in previous steps.
Neo-Morphosis
Aliens on the board may evolve during the game. This is called neo-morphosis. Aliens can neo-morph from one type into another, get new skills or grow into several different forms.
Neo-morphosis is triggered by the Alien Activation Cards (see Resolving Alien Activation Cards for more information). The image below shows how aliens grow.
Figure 37: Alien neo-orphosis tree.
Pods
When neo-morphosis occurs for Pods, roll the neo-morphosis die for each one:
- Blank: the Pod does not hatch this turn, nothing changes.
- Worm Icon: replace the Pod with a Worm.
- Hydra Icon: replace the Pod with a Hydra.
Worm and Hydra
When a neo-morphosis occurs for a Larvae Worm or a Larvae Hydra:
- Draw a card from the neo-morphosis deck and place it beside the respective ID card, one for each type of alien as shown in the example below.
- Place a red ring under the miniature as a reminder.
When another neo-morphosis occurs for the same alien, it will grow into a more powerful monster. Perform these steps:
- Discard the previously added neo-morphosis card.
- Remove the red ring from the bottom of the miniature.
- Swap the current miniature for the next miniature shown in the alien neo-morphosis tree.
Figure 38: Alien Types.
Rippers and Slugs
When a neo-morphosis happens, draw a card from the neo-morphosis deck and place it beside the respective ID card, one for each type of alien as explained in the paragraph above. Place a red ring under the miniature as a reminder.
- If players are using Normal Mode, this is the only neo-morphosis that this alien may perform. Ignore any other neo-morphosis for this alien.
- If players are using Insane Mode, keep adding cards when a new neo-morphosis event occurs.
Killing a Neo-Morphosized Alien (with card and ring)
When the last neo-morphosized (with a card and a ring) alien of a certain type is defeated, perform these steps:
- Remove the card and put it back in the deck, then shuffle the deck.
- Remove the ring from the bottom of the miniature, and put the miniature and the ring back in the box.
Example
At the end of the Alien Activation Phase, on the board there is one Larvae Worm (1), one Pod (2) and one Slug (3). As stated on the Alien Activation Card, all aliens neo-morphosize.
Figure 39: Activation card.
Draw a card for the neo-morphosis deck and place it beside the Larvae Worm ID Card. Then place a red ring below the miniature.
Do the same for the Slug.
From now on, when they activate, add all the bonuses indicated on the neo-morphosis card to their basic statistics.
Figure 40: Alien ID card and aliens. At the beginning of the following round, the Pod neo-morphosizes into a Larvae Worm (2).
Figure 41: Neo-morphosis. During this alien activation, only the Larvae Worm with the red ring uses the neo-morphosis card, adding the bonus to its basic statistics (1). The Larvae Worm without the ring (2) uses the basic statistics written on its ID card, without adding a bonus.
At the end of the round, the aliens neo-morphosize again.
The Larvae Worm with the red ring neo-morphosizes into a Ripper. Remove the ring, discard the card and swap the miniature for a Ripper (1). Then draw a new card from the neo-morphosis deck, place it beside the Larvae Worm ID card and place a red ring below the Larvae Worm miniature (2).
The Slug does not change.
Figure 42: Neo-morphosis.
Alien Movement and Targeting
Aliens move quickly and do not have a fixed movement allowance. The alien activation card states how far, and in which direction, the aliens will move. Often, the aliens are moving towards something on the board to attack it, for example a crew member, a terminal, or a door.
Aliens rarely move away from the crew, but if this happens, they are never impeded.
In many cases, the alien will not need to use the full movement allowance on the card to reach the destination area and sometimes will not need to move at all. The alien stops moving when it reaches its target.
Start by selecting the target that the alien is moving towards:
- If the alien is moving towards a crew member, it will target the nearest crew member. If there are multiple crew members at the same distance, it will target the crew member with the highest current health. If there is still no unique target, select one at random. Defeated/recovering crew are never selected as a target.
- If the alien is moving to attack a map token, for example a door, and there are multiple options, target the closest token of that type. Randomly select between tokens that are equally close. Damaged objects are never selected as targets.
- If the Alien Activation Card does not mention a closed door, then the path to the target must be through open doors. In these circumstances, it is quite possible that the alien will not detect a target.
- If the Alien Activation Card mentions a closed door, then the alien can select a target on the other side of a closed door. When selecting the closest target, count the distance as if the alien will move through the closed door.
When the target has been determined, move the alien and attack if possible:
- If an alien cannot detect a target, then it will not move.
- If an alien detects a target, it will move, even if it cannot move far enough to reach the target.
- If an alien selects a target on the other side of a closed door, follow the card instruction when the alien reaches the door. This will either be to stop at the closed door, or to attack the closed door. If the alien damages the door, it will be jammed open and the alien may continue to use any remaining movement, and may even reach its target and attack that too.
Figure 45: The Ripper makes a successful structural attack.
Worked Example
Figure 43: Robert draws an Alien Activation Card in a room with two aliens.
Figure 43 shows the start of our alien activation example. Robert is inside a room with two aliens. The Alien Activation Phase begins by drawing the card shown on the left. This will be resolved for aliens on the entire board, not just the small section shown in this diagram.
Figure 44: The Pod hatches!
The first step will be to roll the neo-morphosis dice for each Pod in the game. There is a Pod near Robert, so the die is rolled and shows the silhouette of a Worm, so the Pod is removed and a Worm is added in its place. A Worm is one of the Larvae Aliens, so it will activate as we continue to resolve the card.
The icon in the top-right corner of the card says that all Rippers and Slugs make structural attacks against the station walls. Every Ripper and Slug will make attacks until one succeeds. We start the process with the Ripper in this room. It rolls a five and adds its attack value of one for a total of six. This is compared to the defense value of the walls on the SIP, which is five. Since the attack result is higher, this attack is a success. A new Emergency Card is drawn and placed face down on the SIP in an open slot. It will be resolved at the start of the next turn.
Because the attack was a success, we stop this step. If the Ripper had failed, for example with a roll of four, we would continue making attacks with any other Rippers and Slugs in play.
Figure 46: The Worm attacks!
The next section has detailed instructions for all Larvae on the board. Worms are Larvae, so the Worm that just hatched gets to activate immediately. The card says it moves up to two areas to attack the crew. Robert is clearly the closest crew member, and he is only one area away, so the Worm moves to his area and attacks. Robert has no xenobiology bonus for defending against a Larvae Worm.
Fortunately for Robert, Worms are not the most dangerous aliens. A poor dice roll gives an attack result of two, much lower than his defense value, so this attack fails. If there are more Larvae in play, including Hydras, they all activate, but there are no more Larvae in this example.
Figure 47: The Ripper creates havoc.
The Ripper section is a little longer. It starts with an instruction that is only resolved for one Ripper, chosen by the players. A Ripper has to make a structural attack on a closed door if there is one within two areas. The Ripper in the room with Robert fits the bill, so the players select this one. First it moves, just one area, reaching an area with a closed door. A great dice roll generates an attack value of eight, much higher than the door's defense of four, so the attack is a success. The door token is flipped to the open side, and a damage token is placed to indicate that the door is damaged.
This is not all the Ripper is up to. The next alien action says that all Rippers move two areas to attack the crew, so even though this Ripper started by moving away from Robert, it is still only two areas away. The Ripper moves back to the same area as Robert and attacks him. Once again, there is no xenobiology bonus. A roll of five is another success and Robert suffers two wounds.
Rippers on other parts of the board attack the crew next and if there are Slugs in play, they will act also.
There are no special activations for aliens, so we skip ahead to the last instruction on the card. All aliens neo-morphosize by either adding cards or transforming into adults. Robert needs to deal with these new threats during his turn!
Special Activation
Some characters are activated during the Special Activation step of the Alien Activation Card. This step is indicated by the yellow icon. See figure below.
When a character with the yellow icon is on the board, activate it.
Some characters have the instruction for their activation on their ID Card, while other characters, e.g. the Hive Mother, require the players to draw and resolve a Behavior Card.
Behavior Cards
When a character has their own deck of Behavior Cards, proceed as follows:
- Draw one Behavior Card from their Behavior Deck.
- Follow the instructions on the card.
- At the end of activation, place the card in a discard pile.
- When no more cards are available in the Behavior Deck, take the discard pile, shuffle the cards and start again from step 1.
Example of a Behavior Card.
Tokens Legend
The Tokens Legend in the printed rulebook (page 34) is a graphic-only page with no text layer. The token images are not transcribed here; the token descriptions appear in the Game Mechanics sections above.
Mission Generator
Official English errata note: the Mission Generator typo fixes and the ignored commands in the errata sheet (Area 6 changed to Sector 6, Sector 6 changed to Sector 5, and the commands "Do not place Sector 7 and 8 yet" and "Place Sector 7 and 8") refer to the Mission Generator cards and map images, which are not part of this rulebook's text. They are not applied to any text below.
It is very easy to play stand-alone missions using the mission generator.
A mission needs a map, and three Mission cards: Entry, Explore, and Eradicate.
Follow these steps:
- Separate and shuffle the Entry, Explore and Eradicate mission cards.
- Select a map from the list provided below.
- Randomly draw an Entry card from the bottom of the entry deck.
- Read the story on the back of the card.
- Turn the card over, follow any setup instructions and read the objectives. Place the card face up where it can be referred to as players proceed.
- Continue the game until the objectives on the card are met. At that point, follow the instructions on the Entry card to draw and resolve an Explore card.
- If players successfully complete the objectives on the Entry card, players will be instructed to draw an Explore card, and then an Eradicate card. Both of these cards are handled in the same way players handled the Entry card.
- The objectives on the Eradicate card will tell players how to win the Encounter.
Missions
Overview
This is a brief description of Neo-Morphosis missions. We do not want to share all the details, as this will reveal important story elements that we want to be a surprise when the game is delivered.
Note: the mission flavour text and epilogues are not transcribed; only the mission objectives, victory conditions and additional rules are.
Game Mode
Neo-Morphosis can be played in two modes:
- Stand-alone Games: A single game is set up and played with no reference to any other Neo-Morphosis game.
- Campaign Play: The game is played as a narrative campaign with ten scenarios.
General Rules
Setup: The setup of each mission is illustrated in the mission mini-map. Sectors are indicated by the number on each map tile. Some missions have additional rules and setup requirements. These are explained in the mission.
Tiles and Tokens: Place tiles and tokens as shown in the mission mini-map.
Halon Tank Token: Start each mission with one Halon Tank token loaded in the SIP, unless otherwise indicated by mission setup.
Infestation cards: Place one Infestation card on each tile unless otherwise indicated by mission setup.
Mission objectives: Your main goal for the Mission.
Victory conditions: The tasks the crew members must complete. All victory conditions must be completed to finish the mission.
Additional rules: Extra rules for the mission.
Tutorial: Welcome to Hell
Mission objectives
- Find the elevator and reach the command center.
Victory conditions
- Open the blue door remotely using the terminal in Sector 1.
- Fix the elevator in Sector 6.
- Get all crew members to the elevator.
Additional rules
- Remove the Emergency card for Sectors 7 and 8.
- Do not place any Alien Infestation card in Sector 2.
- Place a Broken Door token on the door in Sector 6. This is the broken elevator you must repair.
Mission 1: The Grid
Mission objectives
- Restore power to the command center.
Victory conditions
- Fix all terminals.
- Pick up the objective marker in the control room to restart the power grid.
Additional rules
- The blue door between Sectors 2 and 3 cannot be opened until every terminal has been fixed.
- When all the terminals are fixed, replace the blue door with a normal door.
Mission 2: Weaponized Junk
Mission objectives
- Loot all you can, craft and gear up!
Victory conditions
- Pick up all the loot crates.
- Each crew member must have at least one craftable item in their possession.
Mission 3: Know Thy Enemy
Mission objectives
- Capture a specimen of each type of alien.
Victory conditions
- Capture a Worm, a Hydra, and a Ripper.
- Defeat all remaining aliens.
Additional rules
- There are two ways to capture an alien; you can either do it the hard way or the easy way.
- The hard way: Spend 2 actions to pass a Science Test 8+ while you are in the same area as the alien. If you pass the test, place that alien miniature next to your crew ID card.
- The easy way: Stun it by producing electrical feedback to an alien in the same room as an active terminal. Place that alien miniature next to your crew ID card.
Mission 4: KAboom!
Mission objectives
- Send S.A.M. to remove the barricade.
Victory conditions
- Move S.A.M. to the designated area in Sector 8.
- Remotely remove the barricade.
Additional rules
- The barricade is represented by the yellow objective token over the door.
- To remove the barricade, S.A.M. must reach the door area and spend 2 of his actions.
- Every time S.A.M. enters a new sector, resolve the infestation card and activate the aliens as normal.
Mission 5: The Maze Runners
Mission objectives
- Find your way out of the maze.
Victory conditions
- Reach the exit point with every crew member.
Additional rules
- The blue door can only be opened by the terminal in Sector 3.
- The red door can only be opened by the terminal in Sector 7.
- The sealed door to Sector 7 is represented by the yellow Objective token over the door.
- You need the Pass Card to open the sealed door to Sector 7.
- The Pass Card is represented by the green Objective token.
Mission 6: The Hatchery
Mission objectives
- Destroy the hatchery and the aliens in it.
Victory conditions
- Activate the fire suppression system in Sectors 4, 5 and 6.
- Destroy all the pods.
- Defeat the Hive Mother.
Additional rules
- Instead of placing an Infestation card on each sector, place one Pod in each area at random until you run out of Pod tokens. Infestation cards are not used in this mission.
- The doors to Sectors 1, 3 and 7 are jammed open.
- The Halon Tank is not loaded. Don't place Halon Tank tokens on the SIP.
The Hive Mother
- If the fire suppression system is activated in a sector containing the Hive Mother, instead of being defeated, she loses 2 Health Points.
- When the Hive Mother is down to her last Health Point, remove her from the board. She escapes to lick her wounds and prepare her revenge.
Mission 7: Desperate Situation
Mission objectives
- Reach the end of the time SIP panel.
Victory conditions
- Reach the end of the time SIP panel with four or less Critical Emergency Reports on the SIP.
Additional rules
- Start the mission with Sector 3 and Sector 6 compromised. Place a Warning card over 2 slots of the SIP.
- Sectors 3 and 6 are compromised but secured.
- The actions "Scan two rooms" and "Remote control doors" are disabled.
- The yellow and the green Objective tokens are Crypto keys.
- Put the Crypto keys in a terminal to fix the ongoing emergencies.
- Every Ripper making a structural attack gets a +1 bonus to its roll.
Mission 8: The Scavengers
Mission objectives
- Look for spare parts to fix the truck and bring the Crew back to safety.
Victory conditions
- Pick up all the objective tokens.
- Bring the parts back to the starting point.
Additional rules
- Each Objective token represents a spare part for the truck. When a crew member picks up a spare part, place the token next to their Crew ID card. The spare part can be dropped at any time like any other item. Place the Objective token in the area where the Crew member dropped the spare parts.
- When given a choice, an alien will always choose to attack a Crew member carrying a spare part before attacking a Crew member who isn't.
Mission 9: Patient 0
Mission objectives
- Defeat Dr. Blare, reach the loading dock, and escape.
Victory conditions
- Defeat Dr. Blare.
- Use the magnetic pass to open the red door.
- Escape.
Additional rules
- Place Dr. Blare in Sector 5 instead of an Alien Infestation card.
- The red door in Sector 8 can only be opened with the magnetic pass.
Dr. Blare
- If the fire suppression system is activated in a sector containing Dr. Blare, instead of being defeated, he loses 2 health points.
- When Dr. Blare loses his last health point, replace the miniature with the yellow Objective token. This is the magnetic pass.
Mission 10: The Last Stand
Mission objectives
- Repair the truck and escape.
Victory conditions
- Repair the truck.
- Start the engine.
- Move back to the truck.
- Kill the Hive Mother. (Optional, but epic.)
Additional rules
- Before starting the mission, share 2 Objective tokens between the crew members. These tokens represent the spare parts needed to fix the truck.
- Place a Damaged token in Sector 7, Area 2. This is the truck.
- Place the Hive Mother in Sector 2 along with two Infestation cards instead of one.
The Truck
- Repair the truck: Each player with a spare part must pass a Tech Test while in the same area as the truck. Players cannot use any item or ability that would allow them to succeed automatically. When a test is successful, place the corresponding Objective token over the truck. When both Objective tokens are over the truck, the truck is repaired.
- Start the engine: The players can attempt to start it by producing an electrical feedback from the Terminal in Sector 7.
- Move the Crew back to the truck.
- The Hive Mother: If the fire suppression system is activated in a sector containing the Hive Mother, instead of being defeated, she loses 2 health points.
Round Summary
Level 3 Emergencies go Critical
- Discard the Emergency Card, level markers and Repair Attempt Tokens.
- Place a Sector Compromised Card on the System Interface Panel.
- Place a Sector Compromised Card in the Sector on the Game Board as reminder.
Escalate Active Emergencies
- Increase the Emergency Level of any existing emergencies by one.
Check Compromised Sectors
- Inspect each Compromised Sector in turn.
- If the Sector is not secure, create a new emergency and activate it.
Activate New Emergencies
- Turn over any face down Emergency Cards.
- Add the Level 1 marker to the Emergency Report Field.
- Place a System Overload Token to disable the relevant terminal action.
Crew Phase
- Discard the recovering token and place the crew member back on the board.
- Flip the defeated token to a recovering token.
- Perform up to three Crew Actions:
- Attack
- Heal (using a proper card)
- Craft a craftable card (test)
- Drop/pick up/trade Item
- Move
- Open/close door
- Recharge fire suppression system
- Repair door/terminal
- Search a crate
- Mission-specific actions
- Terminal functions
Aliens Phase
- Draw and resolve the Alien Activation Card.
End of Round Phase
- Advance the time marker.
Official Clarifications (FAQ)
From the official English Errata and Clarifications sheet, applied as part of this rulebook.
Alien Activation
- Q: When a card says that an alien "moves up to x area and attacks crew" and there's more than 1 crew member in its area, does it make an attack against each of the crew members or only one?
- A: It attacks one crew member only, at the player's choice.
- Q: When aliens must attack the closest door, do they attack even the locked blue and red doors?
- A: No, the Red and Blue doors are fortified; they cannot be broken. Aliens don't target these doors.
Craftable Items
- Q: When crafting an item, do I choose any card I want to make from the deck or do I have to draw one from the top of the deck or at random?
- A: You can choose what card to craft.
- Q: How do I use the Exoskeleton?
- A: Exoskeleton gives you an attack bonus of +1.
Items
- Q: How do I use the Night Vision?
- A: Night Vision increases the range by 1 area.
Fire Suppression System
- Q: What happens to the Infestation card if the Fire Suppression System is used in an unexplored Sector?
- A: All the aliens are killed, and the Infestation card is removed.
Compromised Sectors
- Q: What happens to the Infestation card if an unexplored Sector becomes compromised?
- A: Nothing, aliens are not affected by compromised sectors.
Drone
- Q: When the Drone is the first to enter a room, do we resolve the Infestation card or not?
- A: No. The Drone cannot detect aliens.
- Q: If an Alien enters an unexplored Sector, do we resolve the Infestation card in that Sector?
- A: Yes.
Errata Applied
The following corrections from the official Errata and Clarifications sheet apply over the text above. Items that refer to card art or mission-generator cards that are not part of this rulebook text are listed for the record only.
- Page 10, The Game Board: the Crate is marked by #1 in the figure; it should be marked by #5. (Applied as a note in the Game Board section.)
- Page 23, second column top: Tech cards are marked with a yellow TRIANGLE and Science cards with a yellow RECTANGLE. (Applied in Crafting Items.)
- Card-level errata, not in this rulebook's text (card faces only): Item Card "USB KEY" (correct text: place a repaired token on one emergency); Alien Boss ID cards (Attack Bonus and Number of Wounds icons swapped); Craftable Small Medkit (Science icon should be a Fragility icon); Dr. Blare Behavior cards (yellow Special Activation icon missing).
- Mission Generator typo fixes and ignored commands: see the note in the Mission Generator section.
- Errata for "The Third Instar" (Mission 3 sector-number image) and "The Syndicate's Sleeper" (Missions 3, 4, 6 red Objective token, proxy suggested): these belong to other mission books and are not in this core rulebook text.