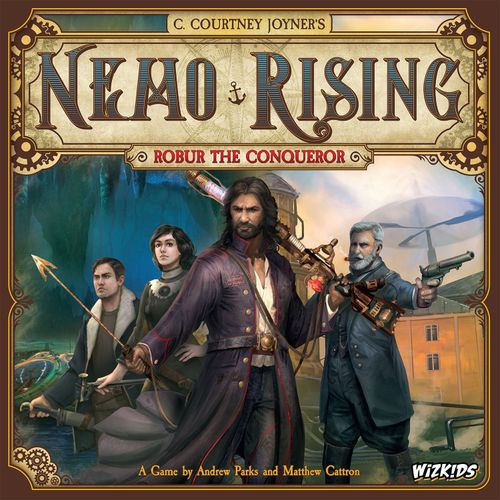
Nemo Rising: Robur the Conqueror
Nemo Rising: Robur the Conqueror Rulebook
Table of Contents
Table of Contents
Object of the Game
The players start the game with a certain number of Mission Points, depending on the difficulty level they have chosen and the Mission Cards that they must complete. If the players are able to complete all of the missions, secure four locations on the game board, and return to the Start space before they run out of Mission Points, they win the game. If the players run out of Mission Points before they accomplish these objectives, they lose the game.
Component List
- 4 Hero Tokens with Plastic Bases
- 1 Game Board
- 16 Adventure Tiles
- 8 "City in the Sky" Tiles
- 8 "Undersea Grotto" Tiles
- 98 Cards
- 4 Hero Cards
- 24 Action Cards
- 48 Threat Cards
- 24 City / 24 Undersea
- 12 Mission Cards
- 6 City / 6 Undersea
- 10 Gear Cards
- 51 Cardboard Game Tokens
- 35 double-sided Enemy Tokens (City / Undersea)
- 8 Story Tokens
- 8 Secure Tile Tokens
- 16 Mission Goal Tokens (Wood)
- 30 Action Tokens (Wood)
- 2 Custom Attribute Dice
Component Details
Game Board
The game board represents the starting point for many adventures. Large spaces on the board represent unique locations or adventure areas, and these large spaces are separated by long pathways. As you start different missions, you place Adventure Tiles (see below) facedown on the board's spaces to represent the different adventure areas.
For example, in the Nemo Rising base set, the board can represent one of two scenarios: either an Undersea Grotto where resources need to be collected (with each area representing part of a sea garden or underwater cavern), or Robur's sprawling City in the Sky (with each area representing a different building).
Adventure Tiles & Secure Tile Tokens
The scenario ("City in the Sky" or "Undersea Sea Grotto") determines which set of 8 Adventure Tiles the players will use for each game. Each Adventure Tile represents a specific location that must be scouted during the game.
During set up, each Adventure Tile is placed facedown on the game board with its generic side showing (see examples at right). Once a tile has been scouted, it is flipped face up to its location side (see "Command Deck" tile at right).
Secure Tile Tokens are placed on top of revealed Adventure Tiles to indicate if the Adventure Tile has been secured or not (see "Securing an Adventure Tile" on page 13).
Hero Tokens
Each hero in the game is represented on the game board by its own stand-up Hero Token attached to a plastic base. Players move their heroes from space to space on the game board using their individual Hero Tokens.
Hero Cards
Each player keeps her corresponding Hero Card face up on the table in front of her throughout the game. Each hero possesses a special ability that is described on his or her card.
Action Cards
Action Cards provide you with special options during each of your turns. At the start of your turn, you select one of the available Action Cards in the Action Row and choose either the top ability or the bottom ability, twisting the card so that the chosen ability is shown at top (see "Action Cards" on page 9).
Each Action Card ability has a Mission Point Cost that deducts from your total Mission Points as soon as you select the ability on that side of the card.
Threat Cards
After selecting your Action Card and spending your Action Tokens, you will reveal the Threat Card that was beneath the Action Card that you chose for that turn. Threat Cards feature a series of Threat Actions that must be carried out one by one from top to bottom as they appear on the card. Threat Actions include moving Enemy Tokens on the board, deploying new Enemy Tokens, and other effects.
Threat Cards list whether they are discarded afterwards ("Discard") or have a continuing effect on the game ("Keep"). Threat Cards are explained in greater detail on pages 15-18.
Gear Cards
As you secure Adventure Tiles, you will find useful Gear Cards to help you complete your missions. Gear Cards provide special abilities, after which they are either discarded or twisted (rotated 180°).
When a Gear Card is twisted, it cannot be used again until its recharge cost is paid (see example at right), after which it is twisted back to its original orientation.
Mission Cards
During set up, you will reveal two Mission Cards at random. Each Mission Card describes a brief Mission Story that explains the nature of your adventure, as well as a Mission Goal that you must accomplish in order to win the game.
Some Mission Goals specify a Task that you must complete. Tasks feature Attribute Icons that you must achieve in order to complete them (see "Attempt 1 Task" on page 12).
During set up, you will add the Mission Card's specified number of Mission Points to the Mission Track at the top center of the game board.
Enemy Tokens
As Threat Cards are drawn, new Enemy Tokens will be added to or moved around the game board. You must avoid or eliminate Enemy Tokens in order to protect your heroes from attacks that could lead to lost Mission Points (see "Confront 1 Enemy Token" on page 14). When Enemy Tokens move around the board, they activate from lowest to highest in Initiative Order (using their Initiative Numbers as shown above). Similar to completing Tasks, defeating an Enemy Token requires one or more Attribute Icons. An enemy that requires only 1 Attribute Icon to defeat is referred to as a basic enemy.
Enemy Tokens are often referenced by their Enemy Type: Humanoid, Bestial, or Mechanical (see below).
Story Tokens
Some Mission Cards introduce special Story Tokens to the game that players must acquire or move from one location to another in order to complete the corresponding mission. If one of your selected missions does not mention a particular Story Token, then you will not encounter it during the game.
Mission Goal Tokens
Mission Goal Tokens are used for two purposes. One Mission Goal Token is used to keep track of your current Mission Points on the Mission Track at the top of the game board. Additional Mission Goal Tokens are used to mark the Mission Goals that you have completed on your Mission Cards.
Action Tokens
During each of your Player turns, you will have 6 Action Tokens to spend. Spending Action Tokens allows you to move around the game board, scout Adventure Tiles, perform Tasks, and attack Enemy Tokens.
At the start of each of your turns, you automatically replenish all 6 of your normal Action Tokens. Some game effects grant you bonus Action Tokens (see right) that can only be used one time and are not replenished automatically at the start of each of your turns (see "Spending Action Tokens" on page 11).
Attribute Dice
In order accomplish a task or overcome an enemy, you will need to achieve one or more of the following Attribute Icons:
- Brains
- Brawn
- Skill
Selecting the right Action Cards will allow you to obtain the Attribute Icons that you need, but you can also roll Attribute Dice (see right) to attempt to roll the results that you need as well (see "Attempt 1 Task" on page 12 and "Confront 1 Enemy Token" on page 14).
Set Up
-
Place the game board in the center of the playing area.
-
Choose a scenario: City in the Sky or Undersea Grotto.
-
Shuffle the Adventure Tiles for your chosen scenario and place each tile facedown on one of the large empty spaces on the game board.
In the example at upper right, the players have chosen the "City in the Sky" scenario and have placed the corresponding Adventure Tiles facedown, with their generic sides showing, on the large spaces on the game board.
-
Deal each player a random Hero Card. Each player places her Hero Card face up on the table in front of her. Each player then inserts her corresponding Hero Token into a plastic base and stands the token on the space labelled "Start" on the game board.
-
Shuffle the Mission Deck for your chosen scenario, and then draw the top 2 cards and place them face up beside the game board near the Mission Track at the top center of the board. Return the rest of the Mission Deck to the box.
-
Choose a Difficulty Level: Easy (6), Medium (4), or Hard (2). For your first couple of games, we recommend the Easy Level (6). When you feel that you are ready for a tougher challenge, move up to Medium or Hard. After you have chosen your Difficulty Level, place a Mission Goal Token on the corresponding space on the Mission Track: "6" for Easy, "4" for Medium, or "2" for Hard (see example below).
In the example at left, the players have chosen the Medium (4) Difficulty Level and have placed a red Mission Goal Token on the "4" space on the game board's Mission Track.
Next, add the combined Mission Points from both of your Mission Cards to your Mission Point Total on the Mission Track (see example on the next page).
In the example above, because the combined Mission Points from both of the selected Mission Cards equal 10, the players slide the Mission Goal Token forward 10 spaces, which gives them a total of 14 Mission Points.
-
Shuffle the Threat Deck for your chosen scenario and place it facedown beside the game board. Leave space for a face up discard pile to the left of the Threat Deck, and leave room for up to three cards to be placed in a face up row to the right of the Threat Deck (see below). This row of cards is referred to as the Keep Row.
Separate the Enemy Tokens into different stacks so that all of those with the same illustration are in the same stack, shuffle each stack, and then place each stack beside the game board. Note: Some enemies are unique and do not share a stack with any other tokens.
- Each player receives 6 gold Action Tokens and places them on the table to the immediate left of her Hero Card. As you spend Action Tokens, you will slide them from the left side of your Hero Card to the right side in order to indicate that the Action Tokens have been spent. When playing with fewer than 4 players, return any unused gold Action Tokens to the box.
- Keep all special Story Tokens that are referenced by your selected Mission Cards beside the playing area, and return all other Story Tokens to the box.
- Place the blue Action Tokens, the two Action Dice, the remaining Mission Goal Tokens, and the Secure Tile Tokens beside the playing area within reach of all the players.
- Draw the top Threat Card from the Threat Deck and perform all of its Threat Actions (see "Threat Cards" on page 15). Afterwards, discard the Threat Card face up onto its discard pile.
Note: If this is your first game, you should skip Step 15 to make things easier and simpler.
Playing the Game
Nemo Rising is played over the course of several rounds. All of the players work together during each round to accomplish the Mission Goals outlined on the game's Mission Cards. Since everyone is on the same side, the players should feel welcome to openly discuss strategies with one another throughout the game.
Each round consists of two phases in the following order:
-
Action Row Phase: Place a number of Threat Cards equal to the number of players facedown in the Action Row to the right of the Action Deck.
Note: The facedown Threat Cards are placed in the Action Row to the right of the Action Deck, not the Threat Deck.
Afterwards, place the same number of Action Cards face up directly on top of the Threat Cards in the Action Row.
-
Player Phase: Each player takes a complete Player Turn by choosing an Action Card from the Action Row and then spending her Action Tokens to move around the board, scout Adventure Tiles, attempt Tasks, and confront Enemy Tokens. Each round, the players may choose the order that the individual heroes take their turns based upon the players' strategies and the situation on the game board. Once every player has taken a complete Player Turn, the Player Phase ends and the next round begins.
Gameplay continues until the players achieve victory or lose the game. To achieve victory, the players must accomplish all of the Mission Goals on the Mission Cards, secure at least 4 Adventure Tiles, and then move all of their Hero Tokens back onto the Start space. If the players ever run out of Mission Points on the Mission Track, they immediately fail the mission and lose the game.
Player Turns
During the Player Phase, each hero takes a turn in whatever order the whole team of players determines will be most useful. During your Player Turn, you must follow the sequence below:
- Choose Action Card: Choose one of the face up Action Cards in the Action Row and place it on top of your previous Action Card. The Action Card will provide you with a bonus during the remainder of your turn (see "Action Cards" on page 9). Your acquired Action Cards are always kept in a stack that builds up throughout the game.
- Replenish & Spend Action Tokens: Replenish your 6 gold Action Tokens and then spend them to move around the board, scout Adventure Tiles, attempt Tasks, and confront Enemy Tokens (see "Action Tokens" on page 11).
- Reveal Threat Card: When you are done spending Action Tokens, reveal the Threat Card that was beneath your chosen Action Card. Perform each of the card's Threat Actions in order from top to bottom (see "Threat Cards" on page 15).
- Check "Keep" Cards: Some Threat Cards say to "Keep" them on the table face up after they have triggered. These Threat Cards often change some of the rules of the game or cause something to occur at the end of each turn, so this is a good time to check those cards to see if anything occurs. "Keep" cards move up to the Keep Row and affect the game until some condition specified on the card causes them to be discarded (see "Discard or Keep" on page 18).
After you have finished your Player Turn, one of the other players takes a turn in the same way. Once every player has taken a turn, the current round ends and a new round begins, starting with the Action Row Phase (see page 8).
Mission Point Cost
Each ability on an Action Card features a cost of "0" or "-1" at the very top. This is how many Mission Points you lose as soon as you select this ability and twist the card so that the ability is on top. Move the Mission Goal Token down on the Mission Track the appropriate number of spaces before you proceed with the rest of your turn.
Exception: Your Mission Points cannot drop below "1" due to the Mission Point Cost on an Action Card. If you are down to your last Mission Point, you may choose any Action Card in the Action Row without paying its Mission Point Cost.
Action Cards
At the start of each of your Player Turns (see page 8), you must choose one of the face up Action Cards in the Action Row. Each Action Card features two different abilities. After you choose your Action Card, twist it so that the ability that you wish to use is on top. Once you have made this decision, you no longer have access to the ability that is shown on the bottom half of the card.
For example, if a player chooses the card shown below, she can choose either the top ability or the bottom ability, twisting the card so that her chosen ability is on top.
Action Card Abilities
There are several different kinds of abilities that are featured on Action Cards.
Attribute Enhancement
Attribute Enhancements grant you access to the attribute shown on the card (Brains, Brawn, or Skill). Whenever you need to use such an attribute, such as during a Task or a Battle, you are considered to have immediate access to that attribute while this card remains in front of you.
For example, if you need to complete a Task that requires Brawn, having a Brawn Action Card in front of you means you don't have to roll the Attribute Die in order to achieve a Brawn result.
Having an Attribute Enhancement face up on the table in front of you gives you access to the listed attribute each time that you need it, but you may only use the Attribute Icon once during each individual circumstance. If a particular Task or Battle requires you to have two of the same icon, then you will either need some other way to generate the attribute (such as a Gear Card) or you will have to roll the Attribute Die to obtain the second icon.
For example, if you need to complete a Task that requires 2 Brawn, having a Brawn Action Card provides you with 1 Brawn, but you will need a second Brawn (either from a Gear Card or from rolling the Attribute Die) to complete the Task.
Throughout your turn, you can use your Attribute Enhancement Action Card multiple times, as long as each time is for a different circumstance.
For example, if you have a Brawn Action Card in front of you, you can use it to complete a Brawn Task and defeat a Brawn Enemy Token during the same turn. You can even use the same card later to block a Brawn Attack (see "Defending Against an Enemy Attack" on pages 16-17).
Defensive Enhancement
Usually, when you are attacked by an Enemy Token, you can roll the Attribute Die to attempt to achieve a specific icon in order to counter the attack (see "Defending Against an Enemy Attack" on page 16). If you have the corresponding Attribute Enhancement card in front of you (see page 9), then you can automatically defend against the attack without rolling the die.
Having a Defensive Enhancement card (see right) allows you to go a step further by providing access to any one of the three abilities (Brains, Brawn, or Skill) each time that you are attacked by an Enemy Token. However, it only provides this Attribute Icon during defense; it does not provide the needed attribute during Tasks or when you are attacking an Enemy Token.
Stealth Enhancement
A Stealth Enhancement enhances your movement by providing you with two special abilities. First, it immediately provides you with 1 bonus blue Action Token. Second, it provides you with the ability to move through Enemy Tokens during your turn as long as you end your movement on an empty space. You must still pay an Action Token to enter an enemy's space as you would when entering an empty space (see "Move 1 Space" on page 11).
Shortcut Enhancement
A Shortcut Enhancement enhances your movement by providing you with two special abilities. First, similar to the Stealth Enhancement, it immediately provides you with 1 bonus blue Action Token. Second, it grants you access to either the Blue Shortcut or the Red Shortcut on the game board during movement. This allows you to move directly from one Shortcut space to its matching Shortcut space on the game board by spending 1 Action Token.
Attribute Die Enhancement
If you have the Attribute Die Enhancement, then each time you roll the Attribute Die in an attempt to achieve a particular icon, you must roll both Attribute Dice and use either (or both) results at your discretion. You may use this card's ability each and every time that you roll the die when you are attempting a Task, attacking an Enemy, or defending against an Enemy.
Action Tokens
After you have chosen your Action Card, twisted it to your chosen orientation, and paid the required number of Mission Points on the Mission Track (if any), you replenish all of your spent Action Tokens from the previous round (up to 6) by sliding them from the right side of your Hero Card back over to the left side.
Note: You only replenish your supply of normal gold Action Tokens. Any bonus blue Action Tokens that you spent during your previous turn are not replenished automatically.
Spending Action Tokens
During your Player Turn, you can spend your Action Tokens in several different ways. To show that you have spent an Action Token, slide it from the left side of your Hero Card to the right side of your Hero Card (see below). Once you run out of Action Tokens, you can no longer perform any actions.
You may spend your Action Tokens to perform the following actions in any order. You may choose to perform the same action more than once if you prefer.
-
Move 1 Space: You may spend 1 Action Token to move your Hero Token 1 space on the game board, including moving onto and off of the Start space.
You cannot move diagonally, and you cannot enter or move through an Enemy Token's space. You can, however, enter the same space as another player's Hero Token as long as you keep going and end your movement in an empty space. If you are adjacent to a doorway (see below) that leads to an Adventure Tile that has already been scouted (flipped face up so that it is showing its location side), you may spend 1 Action Token to move onto that Adventure Tile. You cannot move onto an Adventure Tile if there are any Enemy Tokens on the tile.
In the example below, Sara spends 2 Action Tokens to move two spaces on the game board, and then spends a third Action Token to enter the Hangar through the doorway.
Doorways
-
Scout 1 Adjacent Tile: If you are standing adjacent to a doorway leading to a facedown Adventure Tile, you may spend 1 Action Token to flip that Adventure Tile face up so that its location side is showing. You must then place a Secure Tile Token on top of the green box on the Adventure Tile. This shows that the tile is still considered unsecure, which means that the players have not yet taken steps to bring the location under their control (see example on next page).
In the example below, Fulmer is standing adjacent to a doorway leading to a facedown Adventure Tile. He spends 1 Action Token to scout the Adventure Tile and then flips it face up to reveal that it is the "Hangar" location. He immediately covers the tile's green box with a Secure Tile Token to show that the tile has not yet been secured.
-
Attempt 1 Task: A Task is any activity outside of battle that requires you to obtain a particular Attribute Icon, such as Brains, Brawn, or Skill. Tasks follow a format like the one shown below:
This Task requires you to provide 1 Skill Attribute Icon in order to "Set the Explosives", which is a Story Token used in the "Sabotage the Engines" Mission. To perform the Task, you must spend 1 Action Token and then provide the corresponding Attribute Icon. There are several ways for your Hero to obtain the needed Attribute Icon:
Gear Cards
Each time you secure an Adventure Tile, you get to draw 1 Gear Card. You can also earn Gear Cards in other ways, such as by completing Tasks that specify that they reward you with a Gear Card. When you gain a Gear Card, place it face up on the table near your Hero Card. You can have a maximum of 3 Gear Cards beside your hero at the same time. If you draw a new Gear Card when you already have 3, you must choose either to discard one of your previous Gear Cards or to discard the new one. During her turn, a hero can spend 1 Action Token to transfer one of her Gear Cards to an adjacent hero or a hero on the same Adventure Tile.
Each Gear Card provides your hero with a special ability that she may use when needed. Sometimes the Gear Card specifies that it is discarded after it is used, in which case you place it face up in the discard pile beside the Gear Deck.
Other times, the Gear Card instructs you to twist the card in order to make use of its special ability. After you use the ability, you must rotate the card 180° and cannot use its ability again until after you recharge the Gear Card by accomplishing the specified Task. If you complete the specified Task to recharge the Gear Card, you rotate the card back 180° and may use it again whenever you'd like, including during the same turn.
The Rocket Boots are rotated 180° after being used and must now be recharged before you can use them again.
Threat Cards
During your Player Turn, when you are done spending Action Tokens, you must reveal the Threat Card that was beneath your chosen Action Card and then perform the Threat Actions that are displayed in order from top to bottom on the card.
Moving Enemy Tokens and Attacking Heroes
Some Threat Actions require that you move every Enemy Token of a certain type a specific number of spaces on the game board. The Enemy Tokens travel along one of two paths on the game board (red or blue).
For example, the Threat Action on the right requires you to move every Humanoid and Bestial Enemy Token 4 spaces along the blue paths on the game board.
When moving along these paths, the Enemy Tokens follow the matching Enemy Path Arrows on the game board and skip over any spaces that do not feature these arrows.
In the example below, the Enemy Token travels 4 spaces along the blue paths, skipping over any spaces that do not feature Enemy Path Arrows.
If more than 1 Enemy Token is on the game board when the Threat Action initiates, then move the Enemy Tokens one at a time in Initiative Order from lowest to highest, using the Initiative Numbers in the upper left corners of the tokens to determine the order. If an Enemy Token would ever land on top of another Enemy Token, then it skips that space and moves on to the next Enemy Path Arrow. The skipped space does not count as one of the Enemy Token's movements for this turn. If there are multiple Enemy Tokens in the way, then skip each one in the same manner.
Using the same Threat Action shown at left, there are now 2 Enemy Tokens on the game board that must each move 4 spaces along the blue paths. The Guard Dogs have an Initiative of 7, and the Foot Soldiers have an Initiative of 30. Since the Guard Dogs have the lower Initiative, they move first. Since the Foot Soldiers are blocking the first space, the Guard Dogs skip over them for free, and then move 4 more spaces along the blue paths.
After the Guard Dogs have finished moving, the Foot Soldiers will move 4 spaces along the blue paths, which means they will eventually end up skipping over the Guard Dogs and moving to the space beyond. As you can see, the more Enemy Tokens that are on the game board, the more swiftly the enemies move about, which makes the game more dangerous for the players.
Red/Blue Arrows: When Enemy Tokens first enter the edge of the board (see "Placing New Enemy Tokens" on page 18), the nearest Enemy Path Arrow will be a combination of red and blue (see example at right). This means that the enemy will move toward this Enemy Path Arrow regardless of whether enemies are instructed to move along the red or blue paths.
If an Enemy Token would ever land on or pass over a Hero Token, the Enemy Token automatically ends its movement in the space adjacent to the Hero Token and then attacks the hero (see "Defending Against An Enemy Attack" below). An Enemy Token also attacks if it happens to start or end its movement in a space adjacent to a hero. Once an Enemy Token stops to attack a hero, the enemy is done moving for the turn.
In the example above, the Mechanical Wasp is instructed to move 2 spaces along the red paths. Since Sara blocks the way, the Mechanical Wasp stops in the space next to Sara and attacks her. It is okay for the Mechanical Wasp to stop in a space without an Enemy Path Arrow in order to launch an attack. The Mechanical Wasp will not move again this turn after making its attack.
Similarly, if an Enemy Token starts on, lands on, or would pass over a doorway space leading to an Adventure Tile occupied by at least one Hero Token, the Enemy Token stops moving and attacks the hero from outside the doorway.
In the example below, the Mechanical Wasp would normally have kept moving along the red paths, but since Nemo is on the Command Deck, the Wasp stops moving and attacks him from outside the doorway.
If an Enemy Token is ever in a position to attack more than one hero, then the players may decide which Hero Token is attacked. This typically occurs when there is more than one Hero Token on the same Adventure Tile when an enemy stops to attack.
Defending Against an Enemy Attack
When an enemy attacks your hero, you must defend yourself by rolling the Attribute Die and obtaining the Attribute Icon that matches the one in the lower right corner of the Enemy Token. You automatically block the attack if you have the Defensive Enhancement Card (see page 10) or the Attribute Enhancement Card that matches the enemy's icon (see page 9) face up on the table in front of you. Defending against an enemy attack does not cost any Action Tokens, but if you do not successfully defend, you lose 1 Mission Point on the Mission Track.
For example, when Nemo is attacked by the Mechanical Wasp in the previous example, he must defend himself by rolling a "Brains" result on the Attribute Die since the Wasp has a "Brains" icon in the lower right corner of its token. If Nemo has the Defensive Enhancement Card or the "Brains" Enhancement Card, he automatically defends against the attack. If Nemo does not obtain a "Brains" result, the players will lose 1 Mission Point on the Mission Track.
Note that if you roll the Attribute Die to defend yourself and fail to roll the needed icon, you cannot spend Action Tokens to reroll the die and must immediately lose 1 Mission Point.
Some powerful enemies feature more than 1 Attribute Icon (see example below). When defending against such an enemy, you must defend against each of its attributes. If you only block one of the attributes, you will still lose Mission Points for those that you didn't block. You lose 1 Mission Point for each attribute that you don't block.
For example, when defending against the Mechanical Crab, you must provide 1 "Brawn" icon and 1 "Brains" icon to completely block the attack. If you block only 1 of the attributes, then you will lose 1 Mission Point. If you block neither of the attributes, then you will lose 2 Mission Points.
Similar to completing an expert Task, each Attribute Icon that you use to defend yourself from a powerful enemy must come from a different source. Even the Defensive Enhancement Card can only protect you from 1 icon each time that you are attacked.
Exception: If you get to roll 2 Attribute Dice because you have the Attribute Die Enhancement (see page 10), then you might be lucky enough to block both attributes when rolling the dice, but you cannot reroll the dice if you fail.
Overwhelming Force
The heroes should occasionally confront the enemies on the board or else things will start to get out of hand. If an Enemy Token would normally stop to attack a hero but cannot do so because another Enemy Token is in the way, then the first Enemy Token stops in the nearest empty space before the Enemy Token that is blocking it, and does not attack. As a penalty, the players lose 1 Mission Point due to overwhelming force, which cannot be blocked. As more and more enemies amass and try to move around the board but are unable to launch attacks, the players will find themselves losing Mission Points rapidly due to overwhelming force.
In the example above, all Enemy Tokens have been instructed to move 2 spaces along the red paths. First, the Guard Dog (with an Initiative of 7) attempts to move, but since it starts outside the Command Deck, it immediately stops to attack Grant, who may defend himself normally.
Next, the Mechanical Wasp (with an Initiative of 8) moves and would normally stop at the doorway to attack Grant, but it cannot reach the doorway because of the Guard Dog. So the Wasp stops short and is unable to attack, but the players lose 1 Mission Point due to overwhelming force.
Next, the Foot Soldiers will move forward, but they will eventually be blocked as well, so the players will lose another Mission Point due to overwhelming force.
Placing New Enemy Tokens
Some Threat Actions command you to place new Enemy Tokens on the game board (see below). First, take the top Enemy Token from the stack that matches the card's illustration. Next, place the selected Enemy Token on top of the Enemy Entrance space that matches the number shown.
In the example below, you would take the next Mechanical Wasp from the stack of Mechanical Wasp Tokens and place the Wasp on top of Enemy Entrance #4 on the game board.
If there is already an Enemy Token on the indicated Enemy Entrance, then the Enemy Token enters through the next sequential Entrance number (or back to Entrance #1 if Entrance #4 is occupied). If all 4 of the Enemy Entrances are blocked, then the enemy does not enter the board but the players lose 2 Mission Points on the Mission Track.
In the example at right, the "Elite Squad" Card brings the Elite Squad Enemy Token into play at Enemy Entrance #2. While this card remains in play, whenever the Elite Squad attacks, the players lose 1 Mission Point automatically, even before determining if they lose additional Mission Points from the Elite Squad's attack. When the Elite Squad is defeated and removed from the game board, the Elite Squad Card is discarded.
"Discard" or "Keep"
If the Threat Card says "Discard" as its final Threat Action (see right), then discard the card face up onto the Threat Deck's discard pile after its Threat Actions are finished.
If the Threat Card says "Keep," then place the card face up on the table beside the Threat Deck in the Keep Row (see "Set Up" on page 8). Keep Cards specify a set of conditions that must be accomplished for the card to be discarded, as well as a special effect that impacts the game as long as the card remains in play. If you gain the ability to remove a Keep Card by some other method (such as by the Task on the "Rival Vessel" Adventure Tile), the corresponding Enemy Token remains in play without the benefit of its special ability.
Some Keep Cards remain until the players accomplish a Task under certain conditions.
In the example at right, the "Alarm Sensor" moves every Enemy Token in the game at the end of every hero's turn for as long as the Alarm Sensor is on the table, in addition to any enemy movement that may have occurred from other Threat Cards during the same turn. In order to discard the Alarm Sensor, one Hero must perform a Skill Task while standing in the Command Room or Engine Room.
Keep Row (Maximum of 3 Cards): If multiple cards in the Keep Row trigger at the same time, then resolve their effects one at a time from left to right. There can be a maximum of 3 Keep Cards in play in the Keep Row at any given time. If a fourth Keep Card is drawn while there are still 3 Keep Cards in the Keep Row, then the new Keep Card is discarded without effect and the players immediately lose 2 Mission Points on the Mission Track.
Mission Cards
To win the game, you must complete all of the Mission Goals outlined on the two Mission Cards that were randomly selected at the start of the game. Many Mission Cards require you to perform the same goal several times. Each time you complete the goal, take 1 Mission Goal Token and place it on one of the small circles on the Mission Card. Once all of the circles are full, the Mission Card is considered complete.
For example, in the "Thin the Enemy's Ranks" Mission shown at right, you must defeat 6 Enemy Tokens. Each time you defeat an Enemy Token, place 1 Mission Goal Token on one of the circles on the Mission Card.
Many Mission Cards require you to keep track of your progress on the game board with unique Story Tokens. Often you must acquire the Story Tokens in particular locations after you have secured the related Adventure Tiles, and then you must transport the tokens to other locations. Many Mission Cards also require you to complete a Task.
In the "Sabotage the Engines" mission shown at right, you must transport the "Explosives" Story Token to the secure Engine Room and then successfully complete the "Set the Explosives" Task.
Teamwork
Although heroes cannot share the same space on the game board, they can inhabit the same Adventure Tile. Whenever two or more heroes are on the same Adventure Tile, then any hero attempting a Task on that Adventure Tile can roll 2 Attribute Dice as if she had the Attribute Die Enhancement card in front of her. A hero cannot roll more than 2 dice for the same Task, however, so if a hero already has the Attribute Die Enhancement, then she does not benefit from having a teammate nearby.
Similarly, if two heroes are adjacent to the same Enemy Token, even if the heroes are on different spaces (see below), then if one of the heroes confronts the Enemy Token, she can roll 2 Attribute Dice when attacking as if she had the Attribute Die Enhancement card.
Winning the Game
In order to achieve victory, the heroes must accomplish the following objectives:
- Complete Mission Goals: The heroes must complete all of the Mission Goals on the game's two Mission Cards.
- Secure 4 Adventure Tiles: The heroes must scout and secure at least 4 Adventure Tiles.
- Return to Start: After accomplishing objectives #1 & #2, all heroes must return to the Start space and be there at the same time. Once a hero has returned to the Start space, she may choose to stay on the Start space during her subsequent turns.
As soon as the heroes have completed all three of the above objectives, they win the game.
Losing the Game
If at any time the heroes run out of Mission Points on the Mission Track, then the mission fails and the heroes immediately lose the game. Remember that your Mission Points cannot drop below "1" due to the Mission Point Cost on an Action Card (see "Action Cards" on page 9).
Solo Play
Nemo Rising can be played with only 1 player controlling a single hero on the game board. Follow all the normal rules except that there are always two stacks of cards in the Action Row during the Action Row Phase, even though there is only 1 player (see below).
At the start of each round after the first, a new Threat Card (facedown) and Action Card (face up) are placed beside the unused stack of cards from the previous round. In this way, the solo player always has a choice of two different Action Cards at the start of each of her player turns.
Note: When playing solo, any card text that refers to a benefit for your "ally" or "allies" can benefit you instead.
Variant: Stealth Mode
"Stealth Mode" is a challenging version of Nemo Rising that requires each individual player to think on his or her feet. When playing the game in Stealth Mode, the players are limited in their ability to communicate with one another during their individual player turns.
During most of the game, the players may communicate with one another freely, just as in the normal game. However, during Step 2 of each Player Turn (see "Replenish & Spend Action Tokens" on page 8), the players cannot communicate with one another until after the active player finishes spending her Action Tokens. This means that the player must deal with random elements such as newly revealed Adventure Tiles on her own. As soon as the active player reveals her Threat Card, the team members may speak to one another freely again.
Exception: If two Hero Tokens are adjacent to one another on the game board, or if two Hero Tokens are standing on the same Adventure Tile, the players controlling those two heroes are allowed to speak freely to each other during their own player turns. However, they cannot speak to each other during one of the other player's turns.
For example, when playing in Stealth Mode, the players can speak to one another freely during the Action Row Phase, but after Nemo begins his turn by selecting an Action Card from the Action Row, none of the players can speak to one another unless their Hero Token is standing beside Nemo on the game board. In this case, both Nemo and that hero can converse with each other freely as long as their heroes remain next to each other.