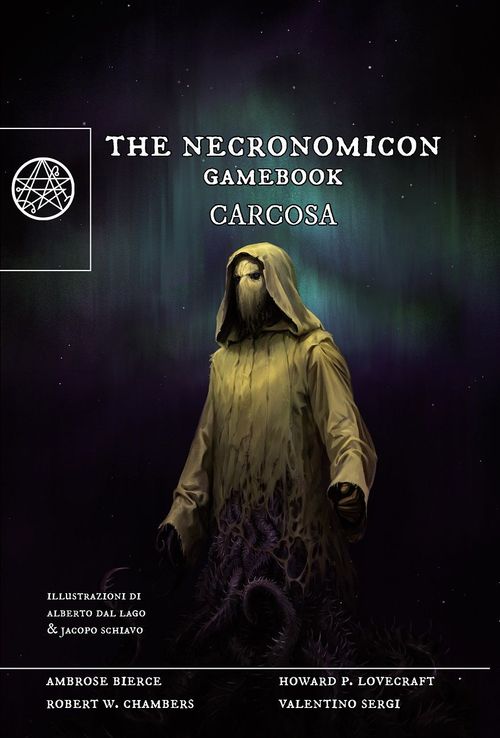
The Necronomicon Gamebook: Carcosa
The Necronomicon Gamebook: Carcosa Rulebook
Table of Contents
Table of Contents
Game Rules
Introduction
During the adventure you will need to keep and update your Diary. We recommend that you make a few copies, since you can play through this book more than once. Now you will be shown the features of your character and how to write them down...
You have 6 points to assign as you like between FORCE and WILL. When you face tests, you will be prompted to add the value of one of these two features to a roll of the die. A low value of FORCE will expose you to physical dangers, and a low value of WILL could make you an easy prey of MADNESS. Assign them carefully.
FORCE indicates your ability to face trials of strength, such as how to fight an opponent or overcome an obstacle.
WILL indicates your level of tolerance to stress and nightmarish visions which you will face along the way.
RESISTANCE indicates your character's physical skills and tolerance to pain. You start the adventure with the maximum value of 10 points of RESISTANCE which, after fighting or other efforts, may drop to zero. In that case, you will die and your adventure will come to an end.
Recovering RESISTANCE
Lost points of RESISTANCE can be recovered during the adventure as follows:
- Medical Kit – [if you have one, you may use it at all times, except in combat] it restores the maximum value (10) of your RESISTANCE. If you use one, remember to erase it from the Diary.
- Sleep – [in the indicated sections] if you decide to sleep, you will recover 3 points of RESISTANCE, but you will enter the Dreamlands, where you will face ever more challenging trials and opponents as your level of MADNESS increases.
- Syringe of Morphine – [in the indicated sections] if you have one, you can use it to avoid the Dreamlands when you decide to sleep, and recover 3 points of RESISTANCE without taking risks, but the effects of the drug will cost you a Malus of -1 in the following trial of WILL.
Madness
This indicates the deterioration of your mental status in relation to the horrors you will face during the journey. You start the adventure as well-balanced and sound of mind, but your condition may worsen after failing trials (or following other situations), thus gaining levels in the Diary's MADNESS table and collecting the related Malus...
- Well-balanced – no Malus.
- Stressed – add +1 to the roll of the die when you venture into the Dreamlands.
- Paranoid – add +2 to the roll of the die when you venture into the Dreamlands. Subtract -1 from the total in tests of WILL.
- Schizophrenic – Add +3 to the roll of the die when you venture into the Dreamlands. Subtract -2 from the total in tests of WILL. Subtract -1 from the total when you take a test of FORCE.
- Delirium – add +4 to the roll of the die when you venture into the Dreamlands. Subtract -2 from the total when you take a test of FORCE. You automatically fail tests of WILL.
Equipment
This indicates the objects in your possession or the ones you will collect throughout the adventure; remember to make a note of them in the Diary. You can carry a maximum of 5 items, and can discard them at any time by deleting them from your Diary (except in combat). You will also be shown when to delete them in case of use or loss. Money and Bullets are not much of a burden, so you can carry as many of these as you wish (if you find any!).
Dollars and Bullets are not considered as objects of the Equipment.
Weapons
Knives, guns or other sharp objects may be used during combat. You start the adventure with a knife, which adds a +1 bonus to your attack value (see COMBAT section). With any luck, you might find more effective weapons along the way; if you do, note them in your Diary for future use. In combat you can use only one weapon at a time, but you can change your weapon each round.
Combat
Throughout your adventure, you will have to face opponents in fights to the death. In some cases, and only when indicated, you will have a chance to escape, but most of the time you will not be able to avoid combat.
To kill an opponent you have to reduce their RESISTANCE to zero, and they will obviously try to do the same.
Combat usually lasts for multiple rounds, and sometimes you will be asked to take this into account.
- At the beginning of a fight, remember to write down your points of RESISTANCE and FORCE, and those of your opponent, in the appropriate sections of the Table of combat in the Diary. Remember that your points of FORCE are influenced by the weapon that you decide to use.
- At this point, roll a die and add this amount to your points of FORCE and the weapon bonus; hence you will obtain your TOTAL FORCE. Then, subtract your opponent's FORCE from this number and search the Table of Comparison, where you will be shown the points of RESISTANCE to be subtracted from one or both opponents. If neither opponent is now dead, mark the round number with an X and begin the next round.
- Remember that you can change your weapon each round (and the corresponding bonus). If you decide to fight without weapons, you will not add any bonuses.
- When your RESISTANCE drops to 3 or less, subtract 2 from the roll of the die (if you roll a 1, consider it a 0). If the RESISTANCE of your opponent drops to 3 or less, subtract 2 from his FORCE.
Example
-
You are attacked by a Villager. You have 3 points of FORCE and 10 points of RESISTANCE, while he has 5 points of FORCE and 5 points of RESISTANCE. You cannot escape and you will have to deal with him, choosing to use the knife (+1 in combat).
-
Write down the values of RESISTANCE for both opponents in the TABLE OF COMBAT, then mark your opponent's FORCE in the space provided, while you roll a die (in this case 4) and note your TOTAL FORCE (3 basic, + 1 knife bonus, + 4 from the die roll = 8).
-
Subtract your opponent's FORCE (5) from your TOTAL FORCE (8), resulting in a score of 3; search for this result in the TABLE OF COMPARISON. In this case you will discover that you have suffered 0 damage, while your opponent has suffered -2 (deduct 2 from their RESISTANCE).
-
Since you are both still standing, mark the round number with an X and begin the second round. Your RESISTANCE is unchanged, while that of the Villager has dropped to 3, so you will now need to deduct 2 from his FORCE.
-
Roll the die again (you score a 2), clear the previous TOTAL FORCE and mark the new one (3 basic, + 1 knife bonus, + 2 from the die roll = 6). Then subtract your opponent's FORCE (5-2=3) from your TOTAL FORCE (6, resulting in 3 again). According to the TABLE OF COMPARISON, in this round you were left unscathed again, while your opponent is now close to death, with only 1 point of RESISTANCE.
-
Continue the combat until one of you succumbs (RESISTANCE = 0).
The Dreamlands
To recover points of RESISTANCE, you can rest at any time except in combat. Remember to mark the section that you are in, then roll a die and look for the corresponding number in The Dreamlands addendum (read the rules first).
If you have one or more levels of MADNESS, remember to add the corresponding value to the die roll.
Coming Back
During this adventure, you may have to retrace sections already visited.
Unless otherwise stated, you will not meet defeated opponents again (if you have escaped, they will remain there waiting for you, with their RESISTANCE restored to its initial value), nor will you be able to pick up objects already collected. Even if you decided to leave something on the way, you will not find it if you return.
Death
In this book you will face puzzles, hostile creatures and extreme situations. Your character may die while facing a difficult trial, or fall into a trap hidden behind a crossroads. In some cases, you will simply be forced to start again; in others, the adventure will continue, but your contact with the Great Beyond and with inexplicable salvation will increase your level of MADNESS. In order to enjoy the gaming experience, you must accept your fate.
Diary
The Diary is the character sheet on which you record your features, Equipment, MADNESS and combat. Its printed fields are:
- FORCE, WILL and RESISTANCE (0 = dead. You cannot exceed the initial value of 10).
- EQUIPMENT – maximum of 5 objects, weapons included. Numbered slots 1 to 5.
- DOLLARS and BULLETS. Dollars and Bullets are not considered as objects of the Equipment.
- MADNESS – the table below.
- TABLE OF COMBAT – see the Table of Combat section.
We recommend you to make some copies of your Diary, since you will be able to play book more than once.
Madness Table
| Level | Dreamlands (die roll modifier) | Tests of WILL | Tests of FORCE |
|---|---|---|---|
| Well-balanced | – | – | – |
| Stressed | +1 to the roll of the die in the Dreamlands | – | – |
| Paranoid | +2 to the roll of the die in the Dreamlands | -1 to the total in the tests of WILL | – |
| Schizophrenic | +3 to the roll of the die in the Dreamlands | -2 to the total in the tests of WILL | -1 to the total when you make a test of FORCE |
| Delirium | +4 to the roll of the die in the Dreamlands | you automatically fail the tests of WILL | -2 to the total in the tests of FORCE |
Table of Combat
The Table of Combat is printed on a Diary page, with three fights per sheet. Each fight block contains:
- YOU: TOTAL FORCE (FORCE + weapon bonus + die), and RESISTANCE.
- OPPONENT: FORCE and RESISTANCE.
- ROUND row: marks 1, 2, 3, 4, 5, 6, 7, 8 and 9/+ to record each round (mark a round with an X once it has been completed).
Table of Comparison
Your TOTAL FORCE minus the FORCE OF THE OPPONENT. Read the column matching the result; the YOU row gives the points of RESISTANCE you lose and the OPP. row gives the points of RESISTANCE your opponent loses.
| Result | -5/+ | -4 | -3 | -2 | -1 | 0 | 1 | 2 | 3 | 4 | 5/+ |
|---|---|---|---|---|---|---|---|---|---|---|---|
| YOU | -4 | -3 | -2 | -2 | -1 | -1 | -1 | -1 | 0 | 0 | 0 |
| OPP. | 0 | 0 | -1 | -1 | -1 | -1 | -2 |
The Dreamlands Addendum
Only the rules of the addendum and the mechanical content of its numbered entries are transcribed here: the Tests, the opponents' FORCE and RESISTANCE, the flee and fight conditions, and the outcomes. The atmospheric narration of each entry is out of scope.
Dreamlands Rules
You can ONLY access the Dreamlands when you decide to sleep in sections indicated during the adventure. You must follow these rules:
- Access the Dreamlands with the same RESISTANCE value you had before sleeping.
- Access with no equipment or weapons (they will be there when you awake).
- The points of RESISTANCE which have been lost in the Dreamlands are also lost in reality; remember to change this value on your Diary. If you die, your fate will be shown to you.
NOW ENTER THE DREAMLANDS BY ROLLING A DIE AND ADDING THE RESULT TO YOUR MADNESS VALUE. THEN GO TO THE CORRESPONDING ENTRY IN THIS SECTION.
If you survive or are not redirected somewhere else, return to the section of the adventure you arrived from and, unless otherwise indicated, you wake up with 3 additional points of RESISTANCE (without exceeding the maximum of 10).
Dreamlands Entries
1. Take a Test of WILL: if you score a total of 6 or more, you will sleep serenely; otherwise, your angst will not let you rest and you will not recover any Points of RESISTANCE when you awake.
2. You sleep serenely.
3. You must fight…
Spawn of Dagon – FORCE 10, RESISTANCE 10
At the end of each round you can try to flee by taking a Test of FORCE: If the score is 6 or more, you manage to escape the creature's clutch, but when you awake you will not be able to recover any Points of RESISTANCE.
Should you return to this paragraph after fleeing, or after defeating the creature, the Spawn of Dagon will be waiting for you and you will have to fight again.
If you are defeated, you will die and your adventure will finish here.
4. You spend a night of restless sleep. Take a Test of WILL: if you score a total of 7 or less, your level of MADNESS will go up 1 Point and you will recover no Points of RESISTANCE owing to your nightmare.
When you awake you will have in your fist a Slip of ancient parchment bearing the Yellow Sign (enter it in your Diary, it will not take up Equipment space). Should you return to this paragraph, you will not find another.
5. You have to fight…
Wolf – FORCE 6, RESISTANCE 7
At the end of each round you can attempt to flee by taking a Test of FORCE; roll the die: if you score 6 or more, you will succeed in escaping the animal's maw, but when you awake you will recover no Points of RESISTANCE.
Should you return to this paragraph after escaping, or after defeating the beast, you will find the Wolf waiting for you and will have to fight it again.
If you are defeated, you will die and your adventure will end here.
6. Take a Test of FORCE: if you score a total of 5 or less, when you awake you will have lost all your Dollars and weapons (erase them from your Diary).
7. You must fight the creature of your nightmares…
Night Gaunt – FORCE 8, RESISTANCE 8
If you decide to flee, you can take a Test of FORCE at the end of each round to try and escape the claws of the foul monstrosity. If you score a total of 6 or more, you will awake without recovering any Points of RESISTANCE.
If you fight and survive, when you awake you will find the Claw of the Night Gaunt by your side. For as long as you keep it in your Equipment, you will have an extra roll of the die in each of your following fights (only once per Combat).
Should you return to this paragraph after escaping, or after defeating the Night Gaunt, you will no longer find the creature and will not be able to fight it again.
If you are defeated you will die, and your adventure will end here.
8. Take a Test of FORCE: if you score a total of 6 or more, you will awake from this nightmare without recovering any Points of RESISTANCE. Otherwise, Carcosa will become your grave.
9. Your level of MADNESS goes up 1 point.
10. THE END. This entry gives no Test, opponent or other rule.