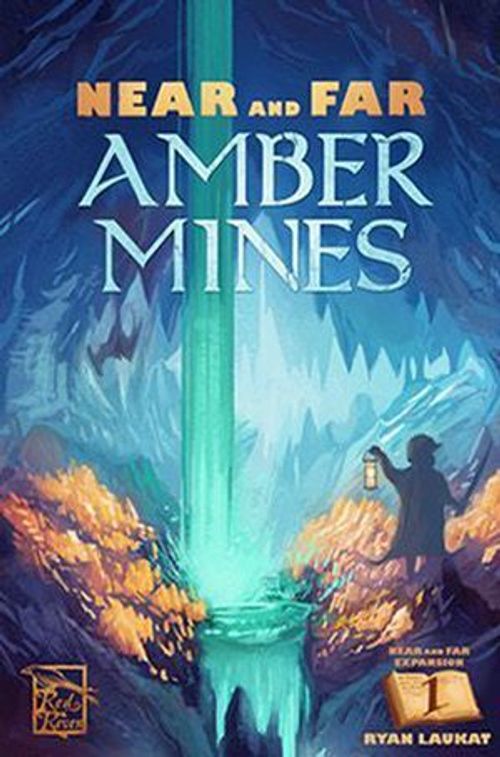
Near and Far: Amber Mines
Near and Far: Amber Mines Rulebook
Table of Contents
Table of Contents
- Components
- Modules
- Module: New Threat Cards
- Module: Amber Mines
- Module: Magic
- Module: New General Store
- Module: Miner Adventurers
- Module: Magic Teacher Adventurers
- Module: Expert Dice
- Module: Amber Mines Treasures
- Module: Amber Mines Artifacts
- Module: New Animal Companion (Numbat)
- Module: Cooperative Mode
- Module: Minion Cards (Co-op Mode)
- New Rule: Heart Total
- Optional Rule: Map Scarcity
- Scenario: Snazra Election
- Scenario: Ancient Railroad
Components
- 1 Animal Companion (Numbat)
- 5 Miner Adventurers
- 4 Magic Teacher Adventurers
- 4 Magic Track Tokens (not pictured)
- 4 Expert Dice (not pictured)
- Skill Card (not pictured)
- Score Pad
- New General Store tile
- Cooperative Board
- New Mine/Mystic's Hut tile
- Magic Track tile
- 43 Amber Mine Cards
- 7 Artifact Cards
- 8 Minion Cards
- 13 New Threat Cards
- 4 Treasure Cards
- 30 Spell Cards
Some components include an expansion symbol (usually on the bottom right corner of the card or component) to help you remember that they are expansion materials in case you want to separate them later.
Modules
This expansion includes modules that you can add or remove according to your preferences. You can use them all at once if you choose.
- New Threat Cards: This module includes 13 new threat cards. These cards replace the original deck of threat cards in Near and Far. Rules on page 8. Important: If you use any of the other modules in this expansion, you should also use these new threat cards.
- Amber Mines: This module includes a new Mine tile which you place over the top of the Mine on the town board. It also includes a deck of 43 Amber Mine cards that players can explore. The new Mine tile also contains a new version of the Mystic's Hut. If you are not using the "Magic" module (described below), ignore the second and third action boxes beneath the new Mystic's Hut. Also ignore any magic symbols on the Amber Mine cards. Rules on page 9.
- Magic: This module includes a new Mystic's Hut tile (that is combined with the new Mine), a Magic Track tile, 4 Magic Track tokens, and a deck of 30 Spell cards. Rules on page 14. Important: To use the Magic module, you must also use the Amber Mines module.
- New General Store: This module includes a new General Store tile which you place over the top of the General Store on the town board. Rules on page 16.
- Miner Adventurers: This module includes 5 new adventurers that are placed in the adventurer supply. They do not belong to any faction, and can be placed on any slot in a player's party. Miners have a small pickax symbol on each token. Rules on page 17. Important: To use the Miners module, you must also use the Amber Mines module.
- Magic Teacher Adventurers: This module includes 4 new adventurers that are placed in the adventurer supply. Magic teachers have a small magic symbol on each token. Rules on page 17. Important: To use the Magic Teachers module, you must also use the Magic module.
- Expert Dice: This module includes 4 custom dice that you can acquire during the game. Rules on page 18.
Near and Far: Amber Mines also includes two scenarios that each replace the stories of one map. You can use a scenario in any mode except Arcade Mode or Character Mode. Each scenario only works with a specific map.
- Scenario 1: Snazra Election: An election at the birdfolk city of Snazra is coming. Use with the Cloudy Valley map. Rules on page 24.
- Scenario 2: Ancient Railroad: An ancient Arzian railroad has been discovered, but local Glogos want it to be left alone. Use with the Meteor Mountain map. Rules on page 38.
Module: New Threat Cards
Setup
- Stack the threat cards in numerical order from 4 to 15 (according to the number next to the sword). Place the 20 card at the bottom of the deck. Place the stack on the threat space on the map. The stack should be face up so that the first threat card (level 4) is showing. Do not use the original threat cards from Near and Far (place them in the game box, you will not need them).
Important: If you use any of the other modules in this expansion, you should also use these new threat cards.
These new threat cards follow the same rules as the original threat cards. Some of the new threat cards have an additional reward listed at the top right corner of the card which you collect as soon as you claim the card. If the card shows a reputation symbol, gain one reputation (you cannot choose to ignore it). If the card shows a coin, collect one coin. If the card shows a food icon, collect one food, etc.
Some new threats do not have a camp symbol. Do not place a camp on these when defeated.
Card callout (page 8): "When you defeat this threat, you immediately gain 1 reputation."
Module: Amber Mines
Setup
-
Place the new Mine/Mystic's Hut tile on top of the town board so that the old Mine and Mystic's Hut are covered.
-
Place the Mine entrance card face up next to the right side of the town board.
-
Shuffle the remaining Mine cards and place them in a face down deck off to the side.
-
Place the Treasure cards off to the side of the town board, instead of on the Mystic's Hut space.
The Mystic's Hut and Mine now have altered or new actions, described on the following pages.
Mine
Follow these steps when you visit the mine:
-
Place your character standee on the mine entrance card or on a mine card that contains one of your camps.
-
You may then move your character to adjacent mine cards. You can do this a number of times equal to your party's movement. To move down, there must be a down-shaft on the mine card that you are currently on. To move up, there must be a down-shaft on the card above the mine card that you are currently on.
If you reach the edge of the mine cards and want to continue moving, you may draw a new mine card from the deck, place it, and move to it. If you do this, you must move to the new card. Note: you can never move "up" one row by drawing a card, because to move up there must already be a down-shaft on the card above you.
If you move to a card that has a skill symbol and a number, or a combat symbol and a number, then you must roll to see if you can stay on the card. Roll and add skill, or combat, as if you were performing a quest roll (applying all of the normal bonuses from your active party, artifacts, and treasures). You may add hearts to the roll. If your result equals or exceeds the skill or combat requirement, you stay on the card. If you do not meet or exceed the required number, you must immediately return to the card from which you just moved. Your return to the previous card because of a failed roll does not cost one movement. If the card you return to (because of a failed roll) also has a combat or skill number, you do not need to roll for it.
If there is a camp on a card that has a skill or combat symbol, ignore the symbol on that card. (You do not have to roll to stay because the challenge has been defeated.)
You can choose to move back to a card you already moved through on the same turn. If there is a skill symbol or combat symbol there (and no camp), you must roll again, even if you already rolled successfully when you passed it the first time. A camp is the only thing that keeps a hazard in the mine from returning.
At any time, you may stop moving and build a camp. You can only build a camp on a mine card that does not already contain another camp. The cost to build a camp is equal to one food per camp that you already have in the mine. This means that your first camp in the mine is free. The second will cost one food. The third will cost two food, etc. When you build a camp, you immediately gain the reward listed on the bottom right of the mine card.
You do not pay hearts to build a camp in the mine.
Mine card rewards include coins, gems, reputation (positive), treasure cards, and magic. If you gain a treasure card, follow the same rules as if you had crossed a treasure card symbol on the map. If you gain a magic, move your token the appropriate number of spaces on the magic track (see "Magic" on page 14). If you are not playing with the Magic module, ignore the magic symbols.
After you build a camp, your turn immediately ends and you must return to the Mine space on the town board. You cannot stay on an Amber Mines card between turns. As with other town spaces, you cannot visit the Amber Mines twice in a row.
You may visit the mine but decide not to build a camp.
Scoring Amber at Game End
At the end of the game, the player with the most amber gains 5 journey points. Players determine their total amber by counting amber symbols on all amber mines cards that contain one of their camps. The player with the second-most amber gains 3 points. If players are tied for most, they each gain 5 points. If players are tied for second-most, they each gain 3 points. If you have no amber, you cannot receive a journey point reward for amber.
The amber scoring is detailed to the left of the mine action box.
Diagram callouts (page 9-11): A mine card with a down-shaft. This mine card has a combat symbol and a number in the bottom left corner. It has two amber at the top and rewards one reputation and one magic when you build a camp here. This mine card has two amber symbols at the top of the card.
Amber Mine Example
Tom visits the mine. First he places his character on the mine entrance card. There are no other mine cards currently showing. He decides to move to the right, drawing a card and moving to it. Tom has a total of three movement, and he has moved once, so he can move two more times. He decides to move right again, and he draws a card with a skill symbol of 6. He rolls a 1, and with only two skill symbols in his party, his total is 3. That is not enough, so he is forced to return to the card he just left. He has one movement left, but he decides to stop and build a camp there. Because it is his first camp it costs no food. He immediately gains two gems. As a last step, he places his character back on the mine on the town board.
Jen visits the mine next. She places her character on the mine entrance card. She decides to move down, drawing a card. (Since there is a downshaft on the mine entrance card, she may.) The card has a combat symbol of 4. She rolls a 1, adding 1 from her party. She has two hearts she could spend to succeed, but she doesn't want to use them, so she has to return to the card she came from.
She has a total of three movement, so she has two more she can use. She decides to try to move down again. This time she rolls a 6, enough to stay on the card. She moves to the right, drawing a new card, and stops there to build a blue camp. She gains two gems and moves her marker on the magic track forward one space. She then returns to the town board, placing her character on the mine.
Tom visits the mine next. He decides to start on his red camp instead of the mine entrance card. He moves once and rolls skill 6 to stay on the first card. He then moves two more times, rolling a combat 6 on the last card. That is enough to stay and he builds another camp. This one costs one food, because it is his second camp. He gains two coins and returns to town.
Module: Magic
Setup
-
Place the magic track tile above the town board, and place a magic token from each player off to the side of the top, left-most space on the track. Use this token to track players' magic throughout the game.
-
Shuffle the spell cards and place them in a stack near the magic track tile.
Important: To use the Magic module, you must also use the Amber Mines module.
Mystic's Hut
When you visit the new Mystic's Hut, immediately draw one treasure card per search (eye) in your active party, keeping and discarding treasures per the standard pack animal rules.
You also may do one of the following: move up one space on the magic track, or pay one gem to move up three spaces on the magic track. The track starts at the top left and moves clockwise: right and then down, then to the left. The last space has a camp symbol on it.
If you reach a spell icon, you immediately draw 3 spell cards from the spell deck and choose one of them to keep, placing it face up near your player board. You may not choose a spell that you already have. If all the spells you draw are spells you already have, discard and draw 3 again.
If you reach the last space on the magic track, place one of your camps from your player board on one of the camp icons below the track. You may not gain more magic once you have reached the last space. If there are no camp spaces available, you do not place a camp.
As a last step, if you have any spell cards that are face down, flip them all face up.
Using the Mystic's Hut without the Magic Module: If you are not playing with the "Magic" module, ignore the second and third boxes under the Mystic's Hut. You can still perform the first box (drawing treasure cards, one per search).
Spells
On your turn, you may use any face up spell cards that you own. When you use a spell, you gain the bonus listed and then flip the card over. You may only use each spell for one act or battle on your turn, not multiple acts or battles.
Example: Tom attacks a threat and uses "Lightning Bolt". He flips the card face down. Tom moves again to attack a second threat on the same turn, but he cannot use "Lightning Bolt" again. He then completes a quest, rolling combat, but he still cannot use the "Lightning Bolt" spell card because it is face down. He then ends his turn.
- Haste: You gain two extra movement.
- Wind Storm: You gain two combat or one caution. You may use this after a die roll.
- Divination: You gain two search.
- Summon Imp: You gain one combat or two skill. You may use this after a die roll.
- Rejuvenation: You gain two hearts and one reputation. You cannot gain more hearts than your party total (see "Heart Total" on page 23).
- Transmutation: You can spend one gem to gain two coins. You can do this four times per spell use.
- Illusion: When you must roll a die, you can roll two instead of one and take the highest result of the two dice.
- Lightning Bolt: You can pay one food to gain three combat. You can only do this once per spell use. You may use this after a die roll.
- Alter Weather: When you build a camp, you can choose to gain two reputation or lose two reputation.
- Brew Potion: You can pay one food to gain three hearts. You cannot gain more hearts than your party total (see "Heart Total" on page 23).
Scoring Magic at Game End
At the end of the game, the player that is furthest on the magic track gains 2 journey points. If players are tied for most, they all gain the points. If you have no magic, you cannot gain these points. Also each player gains 1 point per spell card they own (regardless if face up or face down).
Module: New General Store
Setup
- Place the new General Store tile on top of the town board so that it covers the old General Store.
General Store
When you visit the new General Store, you do these actions in any order:
- You immediately gain one coin and two hearts. You cannot gain more hearts than your party total (see "Heart Total" on page 23).
- You draw four artifact cards, following the rules for the old General Store.
- If you buy an advanced artifact during your turn here, you also place a camp from your player board on one of the camp symbols on the new General Store. You must do this while visiting on your turn, and you cannot do it at the start of your next turn if you are still on the General Store. Each time you visit the General Store, you can do this once.
If there are no camp spaces available, you do not place a camp.
Module: Miner Adventurers
Setup
- Place the new miner adventurers in the supply of adventurers.
Important: To use the Miners module, you must also use the Amber Mines module.
Recruiting Miners
Miners do not belong to any faction and can be placed in any slot of your active party (like your animal companion).
Each miner has a special ability. When you build a camp on the mine and the miner is in your active party, you gain one extra coin. You gain one extra coin for each miner in your active party.
Module: Magic Teacher Adventurers
Setup
- Place the new magic teacher adventurers in the supply of adventurers.
Important: To use the Magic Teachers module, you must also use the Magic module.
Magic Teacher Ability
Each magic teacher adventurer has a small magic symbol. For each magic teacher you have in your active party, you move one additional space on the magic track when you visit the new Mystic's Hut.
Module: Expert Dice
Setup
- Place one expert die per player on the General Store.
Gaining Expert Dice
During the game, the first time a player visits the General Store, they immediately gain an expert die. From this time forward during the game session, any time the player must roll a die, the player instead rolls their expert die. If the player must roll more than one die at once (because of an ability), the player rolls only one expert die and uses standard dice for the remaining dice.
A player cannot gain more than one expert die.
Expert die faces: If the reroll symbol is rolled, the player immediately rerolls the die.
Expert die faces: If the symbol showing a 2 is rolled, the player may pay one food to reroll the die, or the player may choose to keep the result (which is 2).
Module: Amber Mines Treasures
Setup
- Shuffle the Amber Mines treasure cards in with the standard treasure deck.
Important: To use the Amber Mines Treasures, you must also use the Amber Mines module and the Magic module.
- Amber Pouch: While you own this, you have +3 amber, which you count when scoring amber at the end of the game. If you lose this card before the end of the game, do not count the extra amber.
- Almanac: You may use this for each artifact card you buy.
- Sheriff Badge: This applies even if you are the one dueling.
Module: Amber Mines Artifacts
Setup
- Shuffle the Amber Mines artifact cards in with their appropriate deck (standard or advanced).
Important: To use the Amber Mines Artifacts, you must also use the Amber Mines module and the Magic module.
- Merchant Pack: You may still only hold 3 treasure cards at once. If you have 3 treasure cards at the end of the game, you gain the 5 journey points (even if you do not have 3 pack animals).
Module: New Animal Companion (Numbat)
Setup
- During setup, place the Numbat, Platypus, and Dog/Cat animal companions in a row. Roll dice to determine the order that players pick their animal companion token (highest chooses first, etc). If playing a campaign, the player with the lowest total journey points (the sum from all games played) gets to choose first, then the player with the second lowest total chooses second, etc.
Module: Cooperative Mode
The forces of the Red King are spreading chaos throughout the land even as he journeys toward the ancient Last Ruin. You and your allies must do all you can to stop him and retain your advantage.
Setup
- Place the cooperative board near the play area. Place a coin token on the starting space (called the time token). There are a number of possible starting spaces, depending on the situation, as described below:
Sun spaces: Place the time token on one of the sun spaces depending on the number of players (2 or 3 & 4). This is the standard difficulty setting.
Moon spaces: Start on the moon spaces for a brutal difficulty setting. Place the token on one of the moon spaces depending on the number of players (2 or 3 & 4).
-
Players do not draft Artifact cards. Instead, each player draws 6 basic artifacts and 2 advanced artifacts and may choose to keep or discard any number of them. Players may not give each other artifact cards in the game.
-
Use the Boss Cards, as described on the "Last Ruin" map rules. Boss cards are not worth their listed VP in Co-op mode, but you must defeat them in order to win. Do not read their reaction paragraphs when they are defeated (unless you are playing on the Last Ruin map, of course). You place a camp on them when defeated, as normal.
-
Place 4 quests per player on the map, instead of the normal 3 per player plus 1.
Important: To play Cooperative Mode, you must also use the Amber Mines module.
Cooperative Mode Rules
-
Each time the first player has a turn, they must move the time token on the co-op board one space toward the skull at the end of the track (at the start of their turn). A line between spaces shows the path you must follow.
-
During the game, when players are on the same location (town or map), they can give each other food, coins, gems, treasures, pack birds, pack turtles, and faction tokens. Players cannot give each other artifacts (in hand or purchased).
-
Players need not duel to visit the same building in town. Players can choose to duel if they want to (in order to gain or lose reputation).
-
If a player fails a quest, do not remove the book from the board. On another turn, the quest may be attempted again.
-
The game ends the same way as normal. When this happens, add all players' scores together. Check the time token's location. The number there represents the Red King's threat value. Multiply this by the number of players. If the sum of player scores is greater than this number (and all boss cards have been defeated), the players are victorious! If not, the players lose.
Example: Amil and Bettina end the game with the time token on space 57. Amil has 60 points. Bettina has 55. To win, they must have at least 114 total points, and they have 115. They meet the points requirement. However, they have only defeated one boss card, so they lose.
-
If the time token ever reaches the last, dark skull on the track, the players immediately lose.
Module: Minion Cards (Co-op Mode)
Setup
- Shuffle the minion cards and place them near the co-op board face down.
Important: To use Minion Cards, you must also use Cooperative Mode.
-
Each time the time token reaches a space with a minion symbol (jagged sword), draw the top card of the minion deck and place the card in town on the building specified on the card.
-
If the minion has a jagged sword effect, it activates immediately. Also, any other minion cards in town that have a jagged sword effect also activate.
Example: The time token reaches the second jagged sword marker. Tom draws the top minion card and places it in town on the general store. The card has a jagged sword effect "all discard 1 artifact," which means that each player must discard one of their unpurchased artifacts in hand. There was already another minion in town on the farm with the effect "all players lose 1 food." This card already activated when it was drawn, and now it activates again because the time token reached a new jagged sword symbol.
-
When a player visits a building where a minion is located, that player may choose to ignore the minion or attempt to fight it. If a player ignores a minion, they may visit the building as normal. If the player decides to fight the minion, they must choose to fight using skill or swords. Fighting a minion works exactly like rolls in quests, and the number required is listed at the top of the minion card. If a player is successful, the player places a coin from the supply on the minion card, covering the type (skill or swords) that they used. The player may now visit the building.
-
If a player attempts to fight a minion and fails, the player goes to jail as if they had failed a duel and may not visit the building until their next turn.
-
To remove a minion from town, it must be defeated twice, once with skill, and once with swords (on two different turns). If a player defeats a minion by defeating it the second time, they claim the two coins that were placed on its skill and sword numbers, and the player also gains a reputation reward, listed on the card. The minion card is then removed from the game.
Minion Abilities
- Mine: When activated, remove 1 camp in the mine belonging to any player. The players decide together which camp to remove.
- Mystic's Hut: When activated, each player must discard one treasure.
- Farm: When activated, each player must discard one food.
- General Store: When activated, all players must discard one artifact from their hand.
- Stables: While at the Stables, all pack animals cost one extra coin.
- Saloon: While at the Saloon, you lose one reputation when you recruit an adventurer.
- Town Hall "All lose 1 reputation.": When activated, all players lose 1 reputation.
- Town Hall "Discard the current threat.": When activated, discard the current undefeated threat on the threat deck and remove it from the game.
New Rule: Heart Total
You may never have more hearts on your heart track than your party total. This total is derived from active party members, treasures, artifacts, world cards, etc.
Example: Tom's party heart total is 7. He currently has 6 hearts on his heart track, and he visits the General Store. The General Store gives 2 hearts, but Tom can only gain 1 of them, putting his heart track at 7.
Optional Rule: Map Scarcity
If you play with this rule, each threat symbol and each treasure symbol only applies to a player once per turn. This means that a player can only defeat one threat per unique threat symbol they cross, and collect one treasure per unique treasure symbol they cross per turn.
Scenario: Snazra Election
The birdfolk at Snazra are not afraid of change. Snazrans regularly swap their favorite color, repaint their house, and throw out their entire wardrobe for a new one. Their frequent constitutional rewrites happen every decade or so, with rarely more than a dozen citizens executed in the process. And now Snazra has declared the old monarchy to be outdated (even though it only lasted fourteen years). These modern times require an elected council, they say. A number of creatures have declared their candidacy, and the race is on!
This scenario is for the Cloudy Valley map, and replaces all of the stories on that map.
Special Rules
-
When it is time to read a quest, read the appropriate paragraph from this book instead of the base game story book.
-
The town space on the map is now Snazra. When players leave town, they start on Snazra, not Halbrene. Halbrene is now considered to have the Tea Leaves trade route, and Snazra is considered to have the "refresh hearts" symbol. Players can attempt quest 70 even though it is on the town space.
-
In this scenario, set up 4 quests per player. If a player fails a quest, do not remove it from the game. It can be attempted again.
-
Some paragraphs give keywords and some cause you to lose keywords. If a paragraph says to lose a keyword, any player with that keyword must erase it. At the end of the game, read the following paragraphs for any keywords gained in the game:
| Keyword | Election Results paragraph |
|---|---|
| Drake | Election 1 |
| Obsidian | Election 2 |
| Ethereal | Election 3 |
| Mansion | Election 4 |
| Turtle | Election 5 |
| Claffton | Election 6 |
| Genius | Election 7 |
[Storybook: the seven "Election Results" paragraphs (Election 1 to Election 7), read after the game ends, are narrative and are not reproduced here. The numbered quest paragraphs of this scenario, 63 to 80, are also storybook text and are not reproduced.]
Scenario: Ancient Railroad
Hogtown miners have discovered an ancient, Arzian railroad in a web of deep tunnels. As they work to refurbish the ancient machinery and clear the track of rubble, glogo raiders attack them at every turn, accusing the hogfolk of intruding on their underground realm.
This scenario is for the Meteor Mountain map, and replaces all of the stories on that map.
Special Rules
-
When it is time to read a quest, read the appropriate paragraph from this book instead of the base game story book.
-
The town space on the map is now Hogtown. When players leave town, they start on Hogtown, not Macria. Macria is now considered to have the Tea Leaves trade route, and Hogtown is considered to have the "refresh hearts" symbol. Players can attempt quest 48 even though it is on the town space.
-
In this scenario, set up 4 quests per player. If a player fails a quest, do not remove it from the game. It can be attempted again.
[Storybook: the numbered quest paragraphs of this scenario, 33 to 50, are narrative storybook text and are not reproduced here.]