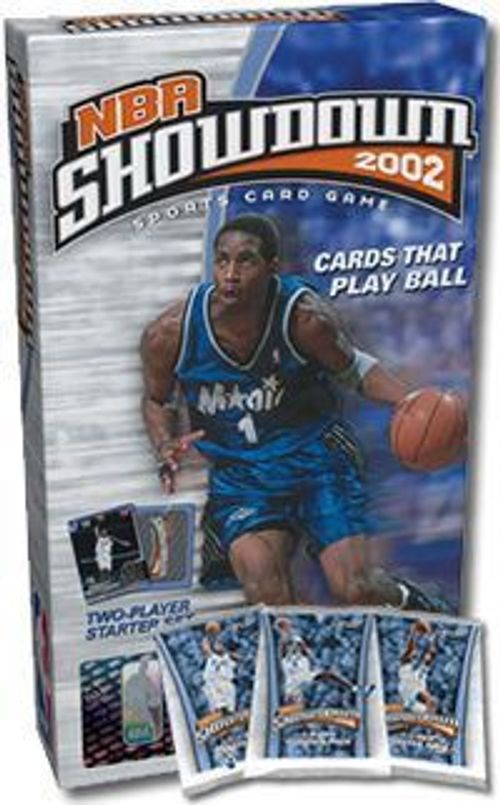
NBA Showdown
NBA Showdown Rulebook
Table of Contents
Table of Contents
Quick Play Rules
From the starter box, you'll need: the playmat, the player cards, the 20-sided die, and the sliding score marker. Everything else (the strategy cards, the advanced rulebook, and the other markers) you don't need right now.
Game Setup
Choose 5 players from your team and put each one in a position he can play.
Set aside your 3 remaining player cards, the advanced rulebook, and your strategy card deck for the first game.
Ignore hot and cold markers, assists, and rebounds for your first game.
Put your sliding score marker on the "0" space of your Scoring Track. (It slides along the left edge of the playmat.)
Roll to see who goes first (highest number wins).
Get a pencil and a piece of paper to keep score.
How to Play
- Choose one of your players.
- Choose Speed or Power for that player. (High numbers are good.)
- Roll the die.
- Add +1 to your die roll for every point of Speed your player has more than the Speed of the defender. (You don't have to subtract if your Speed is worse.) If you chose Power, do the same thing with Power instead of Speed.
Example:
You're about to roll for Player 1 (Speed 17, Power 10) vs. Player 2 (Speed 14, Power 9).
You choose Speed.
Player 1 has 3 more Speed than Player 2 (17–14=3).
So you add +3 to your die roll.
- Read the chart on your player card to see how many points (PTS) that player scores for the quarter. For now, just ignore assists (AST) and rebounds (REB). You'll learn how to use them later on.
- Mark your points on the Scoring Track.
- Turn your player sideways so that you remember you've already used him.
- Your opponent now chooses one of his or her players, picks Speed or Power, rolls the die, and so on. You each take turns repeating steps 1–7 until all the players have scored their points and are turned sideways.
The quarter is over when all 5 players on each team have rolled for their points. Write down the score for the quarter on a piece of paper and set the Scoring Tracks back to 0. Then turn all the players up again and start a new quarter! (Whoever went second last quarter goes first in the new quarter, and so on.)
Now Go Ahead And Play!
After you've played a few games like this, try adding in the hot and cold markers, assists, and rebounds. (It's okay to add in these things one at a time.)
Hot and Cold Markers
Whenever you roll a 19 or 20 (not counting any bonuses), put a hot marker on your player. Whenever you roll a 1 or 2 (not counting any bonuses), put a cold marker on him. From then on, whenever you roll the die for a player, add an additional +4 for each hot marker and –4 for each cold marker.
(If a player with a hot marker would get a cold marker, remove the hot marker instead, and vice-versa. You can have more than 1 marker of the same type on a player.)
Assists
Start the game with an assist marker on the "0" space of each Assist Track (the numbered boxes). Each time you get an assist result (+1, +2, and so on), move your marker up that many spaces. Then, after you make a roll (and add any bonuses), you can also add any number of assists you have to the roll. For each assist you add to the roll, you must move your assist marker down 1 space. Assists carry over from quarter to quarter—you don't reset the Assist Track at the end of the quarter.
Rebounds
Start each quarter with the rebound marker at the center of the Rebound Track (the numbered boxes). For each rebound you get, move the marker in your direction by 1 space. For each rebound your opponent gets, move the marker 1 space towards him or her. At the end of the quarter, whichever player has the marker closest to him or her gets the number of points shown in the space the marker is in. Then reset the Rebound Track by moving the rebound marker back to the center of the track.
NBA Showdown Advanced Rules
Don't Read This Rulebook
Don't read this rulebook until after you've played a few games with just the rules on the playmat. The rules on the playmat will tell you everything you need to get started. After you've played with those rules, this advanced rulebook will teach you about strategy cards, substitutions, double-teaming, and how to build your own "dream team" from the cards you own.
Callouts printed on the player card diagram: Speed, Power, Player Name, 3PT Bonus, Shot Line, Rarity, Point Value, Position(s), Collector Number.
Strategy Cards
Here's what you need to know to play with the strategy cards:
- Each coach has his or her own deck of strategy cards.
- Start the game with a hand of 7 strategy cards.
- At the end of each quarter (except the fourth quarter and any overtime periods), draw 3 strategy cards.
- Keep cards hidden in your hand until you want to play them, and discard them when you're done.
After choosing a player and choosing Speed or Power for that player (but before you roll the die):
- You may play 1 offensive strategy card on your player.
- Then your opponent may play 1 defensive strategy card on the defender (the player opposite yours).
- Your opponent can do this whether or not you played a card.
Then, roll the die, add the bonuses, and apply the results from the player's scoring chart.
Callouts printed on the strategy card diagram: Card Name, Card Type, Keyword, Rule Text, Flavor Text, Collector Number, Rarity.
More About Strategy Cards:
- "This player" means the player you're playing the card on.
- "The opposing player" means the player directly opposite your player.
- If anything (strategy cards, cold markers, and so on) makes a number in the game less than 1, just treat that number as 1.
- Hot and cold markers on players aren't used for shot checks unless the strategy card says they are allowed.
Shot Checks
Some strategy cards tell you to make a shot check. Do this by rolling the die and adding any bonus the card tells you to add (you also add +4 or -4 if the player has a hot or cold marker, but you don't add anything for the Speed or Power matchup). Then see if the number you get beats the Shot Line. (For example, on McGrady's card the Shot Line is between the 10-15 entry and the 16-20 entry, so you need to roll a 16 or higher to make the shot check with McGrady.)
A few players get an additional 3-pt bonus on shot checks, so be sure to add that bonus to the roll when that player tries to make one of those shot checks.
Another special kind of shot check is the foul shot. A foul shot is always a shot check for 1 point that gets a +10 bonus to the roll (plus any hot or cold modifiers).
Substitutions
The only time you may make player substitutions is at the start of each quarter before any scoring rolls have been made. (Players with cold markers are a good choice.) Take out any players you want to sit on the bench this quarter, and put in your new players however you like, as long as everyone is in a position he can play. You can also move players around from one position to another (again, only at the start of the quarter and in positions the players can play). Remove all hot and cold markers from players who go to the bench.
Sometimes each coach might want to see what the other person does before deciding which players to substitute. To avoid conflicts, follow these steps in order:
- Each coach takes all of his or her players off the playmat (keeping any hot and cold markers on them).
- Both coaches take turns putting players in positions (whoever rolls first this quarter also puts in the first player).
- Remove any hot and cold markers from all benched players.
This same rule also applies to putting your players down at the beginning of the game.
Double-Teaming
At the start of each quarter before scoring rolls are made, you can say that one of your players is double-teaming an opposing player. If you decide to do this, then anyone next to your player can help him out. (For example, if your shooting guard needs help covering the opponent's shooting guard, either your point guard or your small forward can help your shooting guard.)
The player being helped gets +2 to his Speed and to his Power on defense only. The player helping out gets -4 to his Speed and to his Power when he's on defense. You may only double-team one player each quarter.
Double-teaming summary:
- One of your players helps a player next to him defend an opponent.
- The player being helped gets +2 to Speed and +2 to Power on defense.
- The player helping out gets -4 to Speed and -4 to Power on defense.
Overtime
If the score is tied at the end of the fourth quarter, play another quarter to see who wins. If you're still tied, play another quarter, and so on. Remember, you don't get to draw strategy cards at the end of the fourth quarter (or at the end of any overtime period), so overtime will probably go faster than a regular quarter.
Building Your Own Team
You can build your own team out of the cards you have collected. You need to have:
- At least 1 player who can play at each position (you'll probably want some bench players as well).
- No more than 1 copy of any player.
- At most 12 players total (you'll probably want fewer; 8 is a good number).
- A total player point value of 5,000 or less, with the 5 most expensive players costing no more than 4,000 points.
- A deck of 40 strategy cards, with no more than 4 copies of any one card.
Advanced Turn Sequence
Before each quarter:
- Make any player substitutions.
- Decide on any double-teaming.
During each quarter (repeat as necessary):
- Choose one of your players.
- Choose Speed or Power for that player.
- You may play an offensive strategy card.
- Your opponent may play a defensive strategy card.
- Roll the die and add any bonuses.
- Mark your points, assists, and rebounds.
- Turn the player sideways.
After each quarter:
- Write down the score for the quarter (including rebounds).
- Reset the Score Tracks and the Rebound Track (not the Assist Tracks).
- Turn the players right-side up.
- Draw 3 strategy cards.
Rules from the Playmat
Here are the basic rules from the playmat. They are reprinted so you can refer to them if you don't have a playmat with you.
Start Here!
This playmat has all the rules on it you need to start playing. You'll also need the player cards, the 20-sided die, and the sliding score marker.
Setup
Choose 5 players from your team and put each one in a position he can play.
Set aside your 3 remaining player cards, the advanced rulebook, and your strategy card deck for the first game.
Ignore the hot and cold markers, assists, and rebounds for your first game.
Put your sliding score marker on the "0" space of your Scoring Track. (It slides along the left edge of the playmat.)
Roll to see who goes first (highest number wins).
Get a pencil and a piece of paper.
How to Play
- Choose one of your players.
- Choose Speed or Power for that player. (High numbers are good.)
- Roll the die.
- Add +1 to your die roll for every point of Speed your player has more than the Speed of the defender. (You don't have to subtract if your Speed is worse.) If you chose Power, do the same thing with Power instead of Speed.
- Read the chart on your player card to see how many points (PTS) that player scores for the quarter. For now, just ignore assists (AST) and rebounds (REB). You'll learn how to use them later on.
- Mark your points on the Scoring Track.
- Turn your player sideways so that you remember you've already used him.
- Your opponent now chooses one of his or her players, picks Speed or Power, rolls the die, and so on. You each take turns repeating steps 1-7 until all the players have scored their points and are turned sideways.
The quarter is over when all 5 players on each team have rolled for their points. Write down the score for the quarter on a piece of paper and set the Scoring Tracks back to 0. Then turn all the players up again and start a new quarter! (Whoever went second last quarter goes first in the new quarter, and so on.)
Now Go Ahead And Play!
After you've played a few games like this, try adding in the hot and cold markers, assists, and rebounds. (It's okay to add in these things one at a time.)
Hot and Cold Markers
Whenever you roll a 19 or 20 (not counting any bonuses), put a hot marker on your player. Whenever you roll a 1 or 2 (not counting any bonuses), put a cold marker on him. From then on, whenever you roll the die for a player, add an additional +4 for each hot marker and -4 for each cold marker.
If a player with a hot marker would get a cold marker, remove the hot marker instead, and vice-versa. You can have more than 1 marker of the same type on a player.
Assists
Start the game with an assist marker on the "0" space of each Assist Track (the numbered boxes). Each time you get an assist result (+1, +2, etc.), move your marker up that many spaces. Then, after you make a roll (and add any bonuses), you can also add any number of assists you have to the roll. For each assist you add to the roll, you must move your assist marker down 1 space. Assists carry over from quarter to quarter-you don't reset the Assist Track at the end of the quarter.
Rebounds
Start each quarter with the rebound marker at the center of the Rebound Track (the numbered boxes). For each rebound you get, move the marker in your direction by 1 space. For each rebound your opponent gets, move the marker 1 space towards him or her. At the end of the quarter, whichever player has the marker closest to him or her gets the number of points shown in the space the marker is in. Then reset the Rebound Track by moving the rebound marker back to the center of the track.
Hot and Cold Markers
Advanced-rulebook wording of the same rules, as printed.
Whenever you roll a 19 or 20 (not counting any bonuses), put a hot marker on your player. Whenever you roll a 1 or 2 (not counting any bonuses), put a cold marker on him. From then on, whenever you roll the die for a player, add an additional +4 for each hot marker and -4 for each cold marker.
If a player with a hot marker would get a cold marker, remove the hot marker instead, and vice-versa. You can have more than 1 marker of the same type on a player.
Assists
Advanced-rulebook wording of the same rules, as printed.
Start the game with an assist marker on the "0" space of each Assist Track (the numbered boxes). Each time you get an assist result (+1, +2, etc.), move your marker up that many spaces. Then, after you make a roll (and add any bonuses), you can also add any number of assists you have to the roll. For each assist you add to the roll, you must move your assist marker down 1 space. Assists carry over from quarter to quarter-you don't reset the Assist Track at the end of the quarter.
Rebounds
Advanced-rulebook wording of the same rules, as printed.
Start each quarter with the rebound marker at the center of the Rebound Track (the numbered boxes). For each rebound you get, move the marker in your direction by 1 space. For each rebound your opponent gets, move the marker 1 space towards him or her. At the end of the quarter, whichever player has the marker closest to him or her gets the number of points shown in the space the marker is in. Then reset the Rebound Track by moving the rebound marker back to the center of the track.
Glossary
3-pt. Bonus: The bonus that some players have to three-point shot checks.
Assist Track: Each time one of your players gets an assist, move up the marker on your Assist Track. Then, whenever you make a scoring roll, you can also add any number of assists you have to the roll. (If you do, move your assist marker down that many spaces.) You don't reset the Assist Track at the end of the quarter.
Bench: Players who are part of your team but aren't playing at the moment.
Bonus: When you make your scoring roll, you get a bonus to your die roll based on how your player's Speed and Power compare to the defender's. Sometimes you get a bonus from strategy cards or from hot or cold markers as well.
Center (C): Centers are usually the most powerful men on the court, but are slower than the other players. They play inside and are some of the best rebounders and scorers, but they get few assists.
Cold Marker: When you roll a 1 or a 2 (before modifiers) on a player's scoring roll, that player gets a cold marker. Each cold marker gives a player -4 on all future scoring rolls and shot checks. The cold marker represents things like having an off night, playing with a minor injury, or being in foul trouble.
Defender: If you are about to make a scoring roll for a player, the defender is the opposing player (directly across from your player) who is playing the same position.
Defense: See Offense.
Double team/double-teaming: If you decide to double-team, you have one of your players help another on defense. The player being helped gets +2 Speed and +2 Power on defense, but the player helping out gets -4 Speed and -4 Power on defense (because he can't guard his usual opponent as well).
Foul Shot: A shot check for 1 point that gets a +10 bonus to the roll. Foul shots appear only on some strategy cards.
Hot Marker: When you roll a 19 or a 20 (before modifiers) on a player's scoring roll, that player gets a hot marker. Each hot marker gives a player +4 on all future scoring rolls and shot checks. The hot marker represents that player is having a hot streak.
Keyword: Some strategy cards have keywords on them. Keywords identify the type of strategy card it is (dunk, foul shot, 3 Point). They are only important for other strategy cards that can affect a specific type of card.
Offense: A player is "on offense" if you've chosen to make the scoring roll with him. That player's opposing player is considered "on defense." (If your player is double-teamed, the player helping out is not "on defense.") Sometimes strategy cards give a bonus to Speed or Power that only applies on offense or only applies on defense.
Opposing Player: The player playing the same position as your player on the other team (directly opposite your player on the table).
Overtime: If the score is tied at the end of the fourth quarter, just play another quarter to see who wins. If you're still tied, play another quarter, and so on. You don't get to draw strategy cards at the end of the fourth quarter or at the end of any overtime period.
Point Guard (PG): Point guards are players who handle the ball well. Their high speed gets them a lot of assists, and many are good shooters. Since they tend to stay outside, they don't get that many rebounds.
Point Value: This is the number written in the lower-right corner of the player cards. It's used if you build your own team, but it has no effect once the game has started.
Position: A player can only play in a position that his card says he can. The positions are C (center), PF (power forward), SF (small forward), SG (shooting guard), and PG (point guard). Some players can play in more than one position.
Power: This ability represents a player's strength and his skill at using that strength. It mainly reflects his ability to play inside offensively and defensively.
Power Forward (PF): Power forwards use their size and strength to score points and get rebounds equally well. They tend to play near the basket, so they don't get a lot of assists.
Rebound Track: Each time one of your players gets a rebound, move the marker on the Rebound Track 1 space in your direction. At the end of the quarter, whichever coach has the marker closest to him or her gets the number of points shown in the space the marker is in. The Rebound Track is reset back to "0" at the end of each quarter.
Scoring Chart: This is the chart on each player's card that tells you how many points (PTS), assists (AST), and rebounds (REB) that player might make in a quarter. See Scoring Roll.
Scoring Roll: The roll you make once each quarter for each of your players. You look up the scoring roll on the scoring chart for that player to see what he did for the quarter.
Shooting Guard (SG): Shooting guards are good at scoring points, especially from long range. They also often get assists since they handle the ball better than most forwards and centers, but they don't get as many rebounds as the big men.
Shot Check: This is a die roll you make to check the success of an individual shot. You make a shot check only if a strategy card tells you to.
Shot Line: Every player's scoring chart has a line (marked with a small arrow to the left of the line) representing how good a shooter that player is. If a player has his Shot Line between his 12-17 entry and his 18-23 entry, that means you need to roll an 18 or more for that player to succeed on the shot check. See Shot Check.
Small Forward (SF): Small forwards can play big or small and use a good mix of Speed and Power to score. They are better rebounders than guards and get more assists than centers and forwards.
Speed: This ability represents a player's quickness in his feet and hands (not just running speed). It reflects his ability to steal, run the floor, drive, take outside jumpers, and defend against these things.
Substitution: Between quarters, you can take out players and put in others from your bench. Hot and cold markers go away if a player is taken out of the game for 1 or more quarters.
FAQ
Q: What rolls do hot and cold markers affect?
A: They affect scoring rolls and shot checks, but that's it. Any other rolls that a strategy card might tell you to make aren't affected by hot and cold markers.
Q: Which rolls can give hot or cold markers to my players?
A: Some strategy cards say that a specific roll can give a hot or cold marker to your player. But other than that, the scoring roll is the only one.
Q: If my player already has a hot marker and I make a scoring roll for him and he gets a cold marker, can I leave both markers on him if I want?
A: No, you have to remove the hot marker from the player.
Q: I rolled a 15 on my scoring roll and I had a bonus of +5 for a total of 20. Does my player get a hot marker?
A: No. You only get a hot or cold marker based on the original number you rolled, before any other modifiers get added.
Q: If a strategy card that I played tells me to do something, do I have to do it right away?
A: Yes, in general you do whatever the card says when you play it. A few cards have lasting effects that are explained on the card. Also, there are some cards that adjust the results of the scoring roll (for example, a card might give you +1 REB on your scoring roll). For those cards, you do anything else the card says, and then you make your scoring roll, read the result from the chart, and make whatever adjustment the card told you to make.
Q: My player has a Power of 15 and his opposing player has a Power of 14. I play an offensive strategy card on my player that requires my player to have more Power than the opposing player. Then my opponent plays a strategy card that gives the opposing player +4 Power. Does that counteract the card I played?
A: No, your card still works. All that matters is that you met the requirement at the time you played the card.
Q: Who decides if they will use a double team first?
A: The coach who goes first during the quarter.
Q: One of my players can help another one double-team somebody if he's "next to" him. What does that mean?
A: It refers to the way the players are placed on the playmat. This means that the center is next to the power forward, the power forward is next to the center and the small forward, the small forward is next to the power forward and the shooting guard, and so on.
Q: When I build a team, I'm only allowed to spend 4,000 points on my 5 highest point-value players. Do those have to be the players I start?
A: No, that's up to you. Usually those are your best players, so you'll probably want to start them!
Q: What if my deck runs out?
A: It's unlikely that your deck will run out, but if it does, just keep playing. You don't get to draw any more strategy cards, but there's no further penalty.
Q: What are keywords used for?
A: They are only important for other strategy cards that can affect a specific type of card.
Q: How do I learn more about the game?
A: Visit the website.
The publisher's contact details (address, phone numbers, customer service email and website) and the credits block printed at the end of the source rulebook are omitted from this transcription.