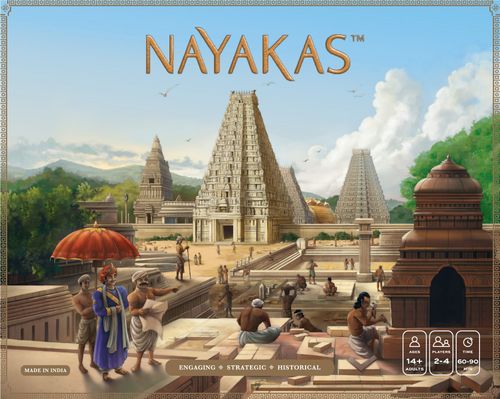
Nayakas
Nayakas Rulebook
Table of Contents
Table of Contents
- Summary
- Objective
- Components
- Setup
- Gameplay Overview
- Worker Phase
- The Conch
- Your Kingdom
- Homelands and Borderlands
- Temple Spaces
- Actions
- Laborers and Diplomats
- Resources
- Artisans
- Trading Posts, Merchants, and Events
- The Empire
- Development Cards
- Build Phase
- Completing Buildings
- Bonus Market Tiles
- Gaining New Workers
- Cleanup Phase
- Ending the Game
- How Can I Get Prosperity?
- Action Reference
- Facility Tiles
- Section Tiles
- Event Tiles
- Merchant Tiles
- Other Symbols
- FAQ—Scenarios & Rules
- Components Note: Wood Components
Summary
Nayakas is a worker placement game for 2–4 players. You will compete to occupy Spaces rich in Resources. Your Laborers and Diplomats can harvest resources from your Homeland and Borderland spaces. In addition, your Diplomats can leave your kingdom to harvest from other players' Borderland spaces and block them from being used. These resources are used to construct Buildings—temples, water tanks, and forts—and gain Bonus Tiles, which increase the Prosperity of your kingdom.
Objective
You win by having the most Prosperity when the game ends. At the end of a round, the game can end in one of two ways:
- when the Building Tracker reaches its maximum step for your player count.
- when the third Event expires.
Components
- 1 Game Board
- 4 Player Boards
- 1 Conch
- 1 Building Tracker
- 25 Prosperity Tokens
- 4 Gold Tokens
- 4 Culture Tokens
- 4 Stone Tokens
- 4 Clay Tokens
- 16 Merchant Tiles
- 6 Event Tiles
- 38 Section Tiles
- 7 Borderland Tiles
- 12 Facility Tiles
- 12 Temple Tiles
- 20 Event Tokens
- 12 Artisan Cards
- 12 Development Cards
- 12 Laborer Pawns
- 8 Diplomat Pawns
- 4 Player Aid Cards
Setup
-
Place the Game Board in the middle of the table.
-
Each player chooses a Ruler to play as. a. Choose a Player Board. Find the Kingdom on the Game Board of the same color, and sit next to it. For a 2/3 player count, we recommend choosing adjacent Kingdoms. b. Take the 3 Laborers, 2 Diplomats, 1 Temple Tile, and 5 Event Tokens corresponding to your Ruler's color. c. Place 2 Laborers and 1 Diplomat next to your Player Board. Leave the rest aside for now. d. Place your Temple Tile faded side up in any one of the two empty square slots in your Kingdom on the Game Board. e. Take one of each Artisan Card: Architect, Sculptor, and Mason. Place them next to your Player Board, faded side up.
-
Set up Trackers. a. Take one of each Resource Token: Culture, Gold, Stone, and Clay. Place them on step 2 of the tracker at the bottom of your Player Board. b. Place the Building Tracker on step 0.
-
Set up the Bonus Market. a. Separately shuffle the Section Tiles, Facility Tiles, and Borderland Tiles face down. b. Place the piles face down on their markings above the Bonus Market on the Game Board. c. Place three tiles of each type face up in the Bonus Market. d. Shuffle the gray-colored Temple Tiles face down. Place the same number of Temple Tiles as the number of players plus one, face up, in the Temple Tiles Market on the Game Board (3/4/5 tiles for a 2/3/4 player count, respectively). Place the remaining Temple Tiles back in the game box. You will not use them in this game.
-
Set up the Trading Posts and Event pile. a. Shuffle the Merchant Tiles. Then place them face down on the Merchant Deck slot marking on the Game Board. b. Shuffle the Event Tiles. Then place 3 Event Tiles face down on the Event Deck slot marking on the Game Board. Place the remaining Event Tiles back in the game box. You will not use them in this game. c. Place the top Event Tile from the Event Deck slot face up in Trading Post I. Then place the top 2 Merchant Tiles from the Merchant Deck slot face up in Trading Posts II and III.
-
Set up the Development Cards deck. a. Shuffle the Development Cards. Place them in a pile face down on the Development Cards Deck slot marking on the Game Board. b. Deal one Development Card from the deck to each player (do not reveal it to the others).
You are now ready to begin playing!
Gameplay Overview
Nayakas is played over a series of rounds. Each round is divided into three phases:
- Worker Phase: Starting with the player who has the Conch, players take turns placing a single Worker (Laborer or Diplomat) on a Game Board space and performing the Action associated with it.
- Build Phase: Starting with the player who has the Conch, players take turns spending Resources and Artisans to build Building Sections and complete Buildings, gaining Bonus Tiles that benefit them in the future.
- Cleanup Phase: Return all Workers to their owners. Expire and refresh the Trading Posts. Reset all Artisan Cards to their gray sides.
Continue playing rounds until the game ends. This happens when, at the end of a Cleanup Phase, the Building Tracker has reached the step for your player count or the third Event has expired.
Worker Phase
Starting with the player who has the Conch and proceeding in clockwise order around the table, each player may place one Worker (Laborer or Diplomat) on a space on the Game Board. When you place a Worker on a space, immediately take the Action printed on that space.
Continue taking turns placing Workers until all players choose not to place any more Workers (either because they have already placed all of them, or because they are choosing not to place one or more of their unplaced Workers). If a player chooses to pass, their Worker Phase ends immediately.
The Conch
If you have the Conch, you take the first turn in each phase, which gives you earlier access to important Game Board spaces and Bonus Tiles. Having the Conch also lets you break ties in Culture in your favor. When a space has the Conch pictured on it, take the Conch from the player who currently has it when you take that space Action.
Your Kingdom
On the Game Board, all spaces with borders that are of your color, either completely or partially, are considered in your Kingdom.
(All three spaces shown in the printed rulebook's Your Kingdom illustration are in the red Kingdom of Keladi.)
Homelands and Borderlands
The Game Board has two types of spaces: Homelands and Borderlands.
- Homelands are surrounded by solid frames. Only you can place your Laborers and Diplomats in your Kingdom's Homelands.
- Borderlands—also including Trading Posts and Empire spaces—have frames only on their corners. You can place Laborers and Diplomats in your Kingdom's Borderlands. In addition, you can place your Diplomats on Borderlands outside of your Kingdom by spending 1 Culture.
Temple Spaces
You have two blank Homeland spaces in your Kingdom. During setup, one should have been covered by a Temple Tile with its faded side up. You cannot place Workers on a blank space or a faded Temple Tile.
When you complete a Temple Building, you may either flip your faded Temple Tile to its non-faded side or choose a Temple Tile from the Temple Tiles Market on the Game Board and place it with its non-faded side face up on your blank Homeland space. You can place Workers on that Temple Tile in any subsequent turns. See Completing Buildings section on page 10 for more details.
Actions
Each space on the Game Board has an Action printed on it. Actions usually instruct you to gain Resources and/or Artisans. See Resources and Artisans sections on page 8 for more details.
Icons printed in Actions mean "Gain this object." (For instance, the Action to the right means "Gain 2 Clay and a Mason.")
Some spaces have more complex Actions printed on them. You can look up the meaning of these Actions in the Action Reference section on page 14.
Laborers and Diplomats
Workers come in two types: Laborer and Diplomat.
-
Laborers may only be placed in Homeland or Borderland spaces inside your Kingdom, and may not be placed on spaces already occupied by another Worker (your own or your opponent's).
-
Diplomats may be placed anywhere a Laborer can be. In addition:
- You may place a Diplomat on Borderlands outside of your Kingdom by spending 1 Culture before you place it.
- You may place a Diplomat on Borderlands occupied by an opponent's Laborer if you have more Culture than that player, or if you have the same amount of Culture and you have the Conch. You cannot place a Diplomat in a space occupied by another Diplomat.
(Exception: The Keladi player has a Homeland space that allows them to place up to two Workers in that space. See Action Reference section on page 14 for more details.)
An additional Laborer and Diplomat can be gained/unlocked from Bonus Tiles and by completing Buildings on your Player Board. See Bonus Market Tiles on page 11 and Completing Buildings on page 10 for more details.
Resources
Resources are used to construct Buildings and make moves into other players' Borderlands, Trading Posts, and Empire spaces. When a space has Resources pictured on it, you gain those Resources when you take that space's Action.
The Resource types are Clay, Stone, Culture, and Gold.
- Clay and Stone are used to Build.
- Culture is used to place your Diplomat in opponent Borderlands and Trading Posts, and Empire spaces. Having more Culture allows you to break ties and place Diplomats in spaces with opponents' Laborers.
- Gold may be spent as Clay or Stone.
During setup, you placed one of each Resource Token on step 2 of the tracker at the bottom of your Player Board. When you gain some amount of a Resource, move its tracker token that many steps to the right. When you spend some amount of a Resource, move its tracker token that many steps to the left. You cannot have less than zero or more than 15 Resources of any type. Resources over 15 get wasted and cannot be regained.
Artisans
Artisans are specialized craftspeople whom you hire to oversee the construction of your Buildings.
There are three types of Artisans: Architects, Masons, and Sculptors.
Each Section of a Building requires Artisans to build it.
When a space has an Artisan pictured on it, you gain one of that Artisan. You can use your Artisans only during that round's Build Phase.
Use your Artisan Cards to keep track of how many Artisans of each type you have. If you have no Artisans of a type, flip the card to its gray side. When you gain your first Artisan in a round, flip the card over to its colored side with the number 1 facing up.
If you gain additional Artisans, rotate the card clockwise so that the number of Artisans you have points up. You cannot have more than 3 Artisans of the same type at any time.
You can only have (hire) Artisans for a single round. At the end of the round, flip all your Artisans back to their gray side.
See Build Phase section on page 10 for more details.
Trading Posts, Merchants, and Events
The bottom left corner of the Game Board has three Trading Posts. Each Trading Post is a Borderland for two Kingdoms. Trading Posts are filled with Merchant and Event Tiles.
Two Trading Posts will have gray Merchant Tiles. Merchant Tiles work just like other spaces—when you place a Worker on that Trading Post space, take that Action.
The other Trading Post will have an orange Event Tile. Events are an opportunity for you to gain Prosperity. Placing a Worker here allows you to place one or more of your Event Tokens in the semicircular area to the right of the Trading Posts, as described on that particular Event Tile. You cannot place Events Tokens if you have none left.
Merchant and Event Tiles move down each round during the Cleanup Phase.
When an Event Tile moves out of the last Trading Post, hand out Prosperity Tokens as rewards:
- The player with the most Event Tokens gets 3 Prosperity Tokens.
- The player with the second-most Event Tokens gets 1 Prosperity Token.
- Ties are broken in favor of the player with the most Culture, followed by the one closest in clockwise order to the player with the Conch.
The Empire
At the top of the Game Board there are two pairs of Empire spaces. These spaces are considered Borderlands outside of any player's Kingdom.
In each pair of Empire spaces, the left space (labeled 1st) must be filled up before the right space (labeled 2nd) becomes available.
On the first pair of Empire spaces (the Empire pair on the left):
- The first player to place a Diplomat on this pair gains an Architect, 1 Culture, and the Conch.
- The second player to place a Diplomat on this pair gains an Architect and 1 Culture.
On the second pair of Empire spaces:
- The first player to place a Diplomat on this pair gains an Architect and their choice of Mason or Sculptor.
- The second player to place a Diplomat on this pair gains an Architect and whichever Artisan the first player did not choose.
Development Cards
In general, you may play a Development Card at any point during your turn in the Worker Phase. Some cards can or must be played at other points during the game, as described on the cards. Discard a Development Card immediately after playing it.
Each player starts the game with one Development Card. Each player draws a new card every time a new Event Tile is placed on Trading Post I. At the end of the game, each player gains 1 Prosperity for each Development Card they still have in hand.
Build Phase
Starting with the player with the Conch and proceeding in clockwise order, each player may build any one Section of their Buildings: either of their two Temples, their Water Tank, or their Fort.
To build a Section, spend the exact numbers of Resources and Artisans shown in that Section's slot on your Player Board. To spend some amount of a Resource, move its tracker token that many steps to the left. To spend Artisans, rotate and/or flip your Artisan Card to reflect how many Artisans of that type you have after spending them.
For example, this section requires 4 Stone, 3 Clay, an Architect, and a Mason.
Once you build a Section, choose a Section Tile from the Bonus Market and add it to your Player Board, overlapping the Section you just built. You may either flip it face up and gain the bonus effect written on it, or flip it face down and gain 1 Prosperity.
Continue taking turns building Sections until all players pass. If a player chooses to pass, their Build Phase ends immediately.
Completing Buildings
Once all Sections of a Building have been built, that Building is complete, and you gain the benefits on the tab to the right of its Sections:
-
When you complete a Temple, either flip your faded Temple Tile on your Homeland blank space or choose a Temple Tile from the Temple Tiles Market on the Game Board and place it on your remaining Homeland blank space. It is now a new Homeland space for you, and you may place Workers on it like any other Homeland space! You also gain the Prosperity on the right-hand side of the completed Temple (do not take actual Prosperity tokens).
-
When you complete a Water Tank, choose a hexagonal Facility Tile from the Bonus Market and place it on its slot on your Player Board.
-
When you complete a Fort, gain a hexagonal Facility Tile of your choice from the Bonus Market and place it on its slot on your Player Board. Then choose a square Borderland Tile from the Bonus Market and place it on any one empty Borderland slot on the Game Board.
After you complete a Building, move the Building Tracker up one step. If the Building Tracker reaches the step that corresponds to your player count (6/9/12 for 2/3/4 players) the game ends at the end of that round.
Bonus Market Tiles
Bonus Market Tiles are enhancements added to your Kingdom when you build. Each tile has an effect that increases the power of your other Actions. Face-up tiles you add to your Player Board give you their effects for the rest of the game.
When you add a tile, choose from any of the available face-up tiles in the Bonus Market of that type. Immediately replace the tile that you removed by placing another tile of the same type face up in its place on the Bonus Market.
There are three types of Bonus Market Tiles:
-
Section Tiles are rectangular. You may add a Section Tile to your Player Board on top of any Section you build. You may play your tile face up for its effect, or face down to gain 1 Prosperity.
Some Section Tiles are worth Prosperity at the end of the game; these tiles are in light-purple color to make them easily distinguishable.
-
Facility Tiles are hexagonal. Place a Facility Tile on its slot on your Player Board, next to the Water Tank or Fort you complete.
-
Borderland Tiles are square. Add a Borderland Tile to any one Borderland space in your Kingdom or another player's Kingdom when you complete your Fort. The effect of the Borderland Tile applies to the Actions of the space it is added to and it is applicable to all the players. Each Borderland may have only one Borderland Tile.
Gaining New Workers
Placing Section Tiles and completing Buildings also lets you gain new Workers. Most Section Tiles and all Buildings have a tab on the right that shows a Worker type: either Laborer (brown) or Diplomat (gray). Whenever you complete a pair of these icons (2 brown Laborer icons or 2 gray Diplomat icons) anywhere on your Player Board, gain an additional Worker of that type. Your new Worker can be used starting from the next round.
For example, Madurai completes a temple with the Section Tile at the top of this diagram. Because they already have an unpaired brown Laborer tab, placing this new Laborer tab will make a pair, and they will gain a new Laborer. Then, they gain a gray Diplomat tab from completing their temple, which pairs with their other Diplomat tab from their middle Section Tile and gains them a new Diplomat.
Cleanup Phase
During the Cleanup Phase, Workers return to their players, Event and Merchant Tiles move down the Trading Posts, and Artisan Cards flip to their gray side.
-
Return Workers: Remove all Workers from the Game Board and return them to their respective players.
-
Trading Posts Expire: The tile in Trading Post III expires: discard it. Then move the tiles in Trading Posts I and II down such that they occupy the Trading Posts II and III, respectively. If an Event Tile expires, it rewards players who participated in it:
- The player with the most Event Tokens in the semicircular area to the right of the Trading Posts gets 3 Prosperity Tokens.
- The player with the second-most Event Tokens gets 1 Prosperity Token.
- Ties are broken in favor of the player with the most Culture, followed by the one closest in clockwise order to the player with the Conch.
- Return all Event Tokens to their respective players.
-
Trading Posts Refresh: Replace Trading Post I with a new tile. If an Event expired this round, use an Event Tile. Otherwise, use a Merchant Tile. If you cannot place a new tile because the pile is empty, do not place a tile.
-
Development Cards: If a new Event Tile is placed on Trading Post I, each player draws a new Development Card from the draw pile.
-
Reset Artisans: Flip your Artisan Cards to their gray side.
(The printed rulebook illustrates an Event expiring: the Visiting Ambassador Event. Mysore (blue) has the most Event Tokens, so they gain 3 Prosperity. Keladi (red) and Thanjavur (brown) are tied for the second-most, but Thanjavur has more Culture, so Thanjavur gains 1 Prosperity. Then the Visiting Ambassador Event expires, all Trading Post tiles move down, and a new Event Tile is added to Trading Post I.)
Ending the Game
The game ends if either of the following conditions is true at the end of a round:
- The Building Tracker reaches its maximum step for your player count.
- The third Event has expired.
If the Building Tracker reaches the step corresponding to your player count (6 for 2 players, 9 for 3 players, and 12 for 4 players), or if the third Event Tile has been discarded, the game ends at the end of that round.
For example, Mysore completes the ninth Building in a 3-player game at the beginning of a round. The other two players each take their turns, then the game ends after the end of the Cleanup Phase.
Sum up all the Prosperity points you gained in the game—from completing Temple Buildings, building face-down Section Tiles depicting Prosperity, achieving light-purple Section Tile conditions, and having any Prosperity Tokens and Development Cards in hand.
The player with the most Prosperity wins the game.
If there is a tie for winning the game, the player with the most Culture breaks the tie, followed by the player with the most Resources remaining on their Player Board. If there is still a tie, the tied players share the victory.
How Can I Get Prosperity?
Prosperity can be earned in any of the following ways:
- Completing Temple Buildings.
- Placing Section Tiles face down when you build a Section (instead of face up for their effect).
- Achieving the conditions on light-purple Section Tiles at the end of the game.
- Having the most or second-most Event Tokens on expiring Events.
- Taking Actions on some Temple Tiles.
- Holding on to Development Cards till the end of the game.
Action Reference
Game Board Spaces
- Repeat an Action you took earlier this round. (Gain the benefits of any one space you already occupied this round, without paying the cost to move there.)
- Gain 2 Gold.
- You may place up to two Workers on this space. Gain 2 Gold for the first Worker and 4 Gold for the second Worker. (You cannot place both Workers in the same turn.)
- When you Build this round, you may spend 1 less Stone or Clay.
- Gain 1 Gold for each of your current Artisans, up to a maximum of 8 Gold. (For example, if you have 2 Masons and 3 Sculptors, gain 5 Gold.)
- Spend any amount of Culture to gain twice that much Gold.
- Retrieve one of your Diplomats (and play it again later this round).
- Gain 2 Gold for each of your Diplomats in opponent Borderlands (including Trading Posts) if an opponent Laborer is on them.
- Gain 2 Stone and a Sculptor.
- Gain 2 Clay and a Mason.
- Gain 1 Stone and 1 Culture.
- Gain 1 Culture and 1 Clay.
- Gain 1 Stone, 1 Clay, and an Architect.
- Gain 2 Culture.
Empire Spaces
- The first player to place a Diplomat on this pair spaces gains an Architect, 1 Culture, and the Conch.
- The second player to place a Diplomat on this pair spaces gains an Architect and 1 Culture.
- The first player to place a Diplomat on this pair spaces gains an Architect and their choice of Mason or Sculptor.
- The second player to place a Diplomat on this pair spaces gains an Architect and whichever Artisan the first player did not choose.
Temple Tiles
- Spend 1 Stone, 1 Clay, and 5 Gold to gain 1 Prosperity Token. (You may do this multiple times at once. You may spend Gold as Stone and/or Clay.)
- Spend 3 Stone, 3 Clay, and 1 Gold to gain 1 Prosperity Token. (You may do this multiple times at once. You may spend Gold as Stone and/or Clay.)
- Spend 4 Gold to gain 1 Prosperity Token. You may do this multiple times at once.
- Spend 4 Culture to gain 1 Prosperity Token. You may do this multiple times at once.
- Repeat an Action you took earlier this round. (Gain the benefits of any one space you already occupied this round, without paying the cost to move there.)
Further Game Board Space Actions
The printed Action Reference lists the following entries after the Temple Tiles entries without a section heading. They are reproduced here in printed order under this heading.
- Place an Event Token in the semicircular area to the right of the Trading Posts. You do not have to fulfill the Event's conditions. Gain one Artisan of your choice.
- Gain one Artisan of your choice.
- Spend 1 Gold to gain the Conch and 2 Stone or 2 Clay.
- Gain 3 Culture and 1 Stone or 1 Clay. All other players gain 1 Culture.
- Empire spaces do not cost you Culture when you place your Diplomat on any of the pair spaces.
- Gain 1 Gold every time an opponent places a Worker on a Game Board space with an Artisan pictured on it.
- Your Laborers are Diplomats this round. Gain 2 Culture.
Borderland Tiles
- Gain 1 Architect.
- Gain 1 Clay.
- Gain 1 Sculptor.
- Gain 1 Stone.
- Gain 1 Mason.
- Gain 1 Gold.
- Gain 1 Culture.
Facility Tiles
- Gain 1 Gold whenever you gain at least 1 Clay from a Game Board space Action. (You gain only 1 Gold per space, even when the space gains you multiple Clay.)
- Gain 1 Gold whenever you gain at least 1 Stone from a Game Board space Action. (You gain only 1 Gold per space, even when the space gains you multiple Stone.)
- Gain 1 Gold whenever you gain at least 1 Culture from a Game Board space Action. (You gain only 1 Gold per space, even when the space gains you multiple Culture.)
- Gain 1 Gold whenever an opponent places a Diplomat in your Borderlands.
- Gain 1 Gold whenever you place at least 1 Event Token in the semicircular area to the right of the Trading Posts. (You gain only 1 Gold, even if you place multiple Event Tokens.)
- Gain 1 Gold whenever you gain an Architect from a Game Board space Action.
- Gain 1 Gold whenever you gain a Sculptor from a Game Board space Action.
- Gain 1 Gold whenever you gain a Mason from a Game Board space Action.
Section Tiles
- Build costs are reduced by 1 Stone. (Applies from next time you Build.)
- Build costs are reduced by 1 Clay. (Applies from next time you Build.)
- Gain 1 Stone whenever you Build. (Applies from next time you Build.)
- Gain 1 Clay whenever you Build. (Applies from next time you Build.)
- Gain 1 Culture whenever you Build. (Applies from next time you Build.)
- Gain 1 Clay whenever you gain at least 1 Culture from a Game Board space Action. (You gain only 1 Clay per space, even when the space gains you multiple Culture.)
- Gain 1 Stone whenever you gain at least 1 Culture from a Game Board space Action. (You gain only 1 Stone per space, even when the space gains you multiple Culture.)
- Gain 1 additional Prosperity Token whenever you place first or second in an Event resolution.
- You are considered to have 2 more Culture when comparing Culture with your opponent.
- Gain either 2 Stone or 2 Clay when you place a Diplomat in an opponent Borderland (including Trading Posts) or Empire space.
- At the end of the Worker Phase, gain 2 Gold for each Worker you have left.
- At the end of the Worker Phase, gain the Conch if you have at least one Worker left. (If 2 players play this tile, resolve in player order.)
Section Tiles that are worth Prosperity at the end of the game (light-purple):
- At the end of the game, gain 1 Prosperity if you spend 6 Gold, 2 if you spend 9 Gold, or 3 if you spend 12 Gold.
- At the end of the game, gain 1 Prosperity if you spend 6 Culture, 2 if you spend 9 Culture, or 3 if you spend 12 Culture.
- At the end of the game, gain 1 Prosperity if you spend 6 Stone, 2 if you spend 9 Stone, or 3 if you spend 12 Stone.
- At the end of the game, gain 1 Prosperity if you spend 6 Clay, 2 if you spend 9 Clay, or 3 if you spend 12 Clay.
- At the end of the game, gain 1/2/3 Prosperity if you have completed 2/3/4 Buildings. (You cannot play 2 tiles of this kind, except for the effect of their Worker tags.)
Event Tiles
- Visiting Ambassador: Spend any amount of Gold to place that many Event Tokens.
- Workers Festival: Place an Event Token for every one of your Workers placed so far in this round (excluding the Worker placed on this Event Tile).
- Great Dam: Spend any amount of Stone and/or Clay to place that many Event Tokens.
- Public Works: Place an Event Token for each Section you have built so far in the game.
- Palace Artworks: Place an Event Token for each Artisan you currently have.
- Legitimate Rule: Place an Event Token if you have the Conch.
Merchant Tiles
- Stone Buyer: Spend any amount of Stone to gain that much Gold.
- Clay Buyer: Spend any amount of Clay to gain that much Gold.
- Fine Artisans: Gain a Mason, a Sculptor, 1 Stone, and 1 Clay.
- Merchant: Gain either 2 Stone or 2 Clay.
- Offerings: Gain 1 Culture, the Conch, 1 Stone, and 1 Clay.
- Foreign Dignitaries: Spend any amount of Gold to gain twice that much Culture.
- Celebrated Architect: Gain an Architect, the Conch, and 1 Gold.
- Stone Crafters: Gain 2 Stone and 2 Culture.
- Clay Crafters: Gain 2 Clay and 2 Culture.
- Clay Seller: Gain 4 Clay.
- Stone Seller: Gain 4 Stone.
- Travelling Stoneworkers: Gain 1 Stone, an Architect, and a Sculptor.
- Travelling Brickmakers: Gain an Architect, a Mason, and 1 Clay.
- Emporium: Gain 1 Stone, 1 Clay, and 1 Gold.
Other Symbols
- Your Workers and spaces are generally pictured in white/gray colors.
- Opponent Workers and spaces are generally pictured in pink/purple colors.
- Building Section depicting a Gopuram—a towered gateway that serves as the main entrance to a temple complex, typically found in southern India.
- Building Section depicting a Mandapa—a pillared hall or pavilion used for rituals in Indian temple architecture.
- Building Section depicting a Vimana—a prominent temple structure located above the inner sanctum where the deity is enshrined.
FAQ—Scenarios & Rules
Find the answers to scenario and rule queries that you may encounter during gameplay:
If my Diplomat moves into my Borderland with an opponent Laborer on it, do I need to spend Culture?
No, do not spend Culture. Compare your Culture amount with your opponent's and move into your Borderland space with an opponent Laborer on it only if you have more Culture than your opponent or if you have the same amount of Culture and you have the Conch.
Can I place my Laborer on one of my Kingdom's spaces occupied by my Diplomat?
No, you cannot place a Laborer on a space occupied by another Worker, including your own, in your Kingdom.
Can I loop benefits between Section Tiles and Facility Tiles?
No, do not loop benefits between Section Tiles and Facility Tiles. For example, if a Section Tile gives you Clay whenever you Build, and a Facility Tile gives you Gold whenever you gain Clay (from a Game Board space Action only!), you do not get Gold when you Build.
If an Action space gives me multiples of the same Resource/Artisan, do I gain multiples of my Section or Facility Tile benefits?
No, each Section Tile and Facility Tile gains you only one benefit per Action space. For example, if an Action space gives you 2 Stone, and your Facility Tile gives you 1 Gold when you gain Stone from a Game Board space Action, you gain only 1 Gold from this space.
Do I take Prosperity Tokens when I complete a Temple or play a Section Tile face down for its Prosperity?
No, do not take Prosperity Tokens when you complete a Temple Building or play a Section Tile for its Prosperity. Use the Prosperity iconography on your Player Board and Section Tiles to count your Prosperity score at the end of the game.
Can I place my Worker on a tile or space without taking the benefit?
Almost always. Yes, you can place your Worker on any space and tile without taking the corresponding Action as long as you follow the other rules. The only exception is the Event Tile, which you can only place a Worker on if you fulfill the condition of the Event and have at least one Event Token to place in the semicircular area to the right of the Trading Posts.
Components Note: Wood Components
The Laborers, Diplomats, and Building Tracker in the game are individually handcrafted from wood. Each wood piece is unique, and as handcrafted pieces, irregularities in the finish, shape, and colour may occur. These irregularities are a part of their intrinsic value and not a flaw.
Shellac lacquer may soften at 50°C+. Do not keep the wood components in close proximity to heat or flame sources; avoid prolonged exposure to direct sunlight. Keep dry; avoid prolonged exposure to high humidity.
Source note: the printed "Trivia" page and the "Story and Tradition of our Wood Components" flavour text, the page of how-to-play video and contact information, and the credits page are omitted as non-rules content.