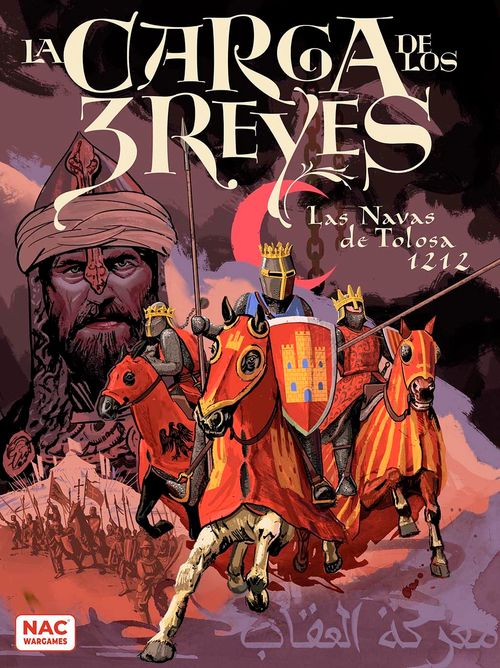
The Charge of the 3 Kings: Navas de Tolosa 1212
The Charge of the 3 Kings: Navas de Tolosa 1212 Rulebook
Table of Contents
Table of Contents
- 1. Introduction
- 2. Game Board
- 3. Dice, Screen, And Tables
- 4. Unit Counters
- 5. Cards
- 6. Sequence of Play
- 7. Initiative
- 8. Activating Formations
- 9. Movement
- 10. Combat
- 11. Leaders and Command Points
- 12. Special Units
- 12.1. Agzaz Kurds
- 12.2. Spearmen
- 12.3. Andalusian Desertion
- 12.4. Mujahideen
- 12.5. Ultramontane Crusaders
- 12.6. Military Orders
- 12.7. Royal Retinues
- 12.8. Archbishop Jiménez De Rada
- 12.9. Sancho VII of Navarre (The Strong)
- 12.10. Pedro II of Aragon
- 12.11. Almohad Standard
- 12.12. Los Olivares Hill
- 12.13. Defensive Palisade
- 12.14. Black Guard
- 12.15. Camel Riders
- 13. Victory Conditions
- 14. Basic Version
1. Introduction
The Charge of the 3 Kings, Navas de Tolosa 1212 is a game for 2 players that represents the most important and decisive battle of the Reconquista, a series of conflicts that eventually led to the Christian kingdoms of Spain wresting control of the Iberian Peninsula from the Moors. Each player controls one of the two opposing sides, Muslims or Christians, each with units of different types and origins that come with their own specific rules. Players have the freedom to try to change history with their gameplay decisions, or they can attempt to recreate it. The game has a maximum of 8 turns, with one turn representing approximately 30 minutes of battle in real time.
1.1. Game Components
A boxed game of The Charge of the 3 Kings, Navas de Tolosa 1212 contains the following components:
- One 35.8" x 26" map (on the back: map with incomplete hexes)
- 162 Combat Unit Counters (7/10" in each side) printed on both sides, plus two special counters (7/10" in):
- 90 Muslim Units (cavalry and infantry) consisting of Agzaz Kurds, Mujahideen, Berbers and Arabs, Almohads, Andalusians and the Caliph's Black Guard. In addition, there is a counter for the Almohad Standard (Raised on the front, Standard-bearer on the back).
- 70 Christian Units (cavalry and infantry) consisting of Castilians, Aragonese, Navarrese, Leonese, Portuguese, Ultramontane Crusaders and Military Orders (Templars, Knights Hospitaller, Orders of Santiago and Calatrava). There is also a counter representing the Archbishop of Toledo Jiménez de Rada.
- 128 Miscellaneous Counters:
- 16 Cavalry Charge Markers +3
- 3 Cavalry Charge Markers +2
- 3 Cavalry Charge Markers -1
- 6 Reaction Charge Markers, (⅗" in)
- 3 Cavalry Charge Markers +4
- 12 double-sided Activated Formation Chits
- 2 Flag Chits (for control of the 4th Activation)
- 1 Turn Marker
- 2 Double-sided Initiative Markers (English/Spanish)
- 4 Used Command Markers (2 Regular and 2 Special)
- 2 Used Strategy Card Markers
- 26 Disordered Markers (D-1)
- 9 Multiple Attack Markers
- 4 "Faith in Christ" Markers
- 4 "Allah is Great" Markers
- 9 "NO Withdrawal" Markers
- 6 "One Last Push" Markers
- 2 "Expert Marksmen" Markers
- 3 "Inspirational Christian Leader" Markers
- 3 "Inspirational Muslim Leader" Markers
- 4 "Exhaustion" Markers
- 5 "Brave Hero" Markers
- 1 Rulebook and 1 Scenario book
- 10 Dice (2 twelve-sided, 2 eight-sided, and 4 six-sided)
- A Fog of War Screen for secret deployment options
- 78 cards (including Tactical and Strategy Cards for both sides)
- An Administrative Display (Regular and Special Command Point Track, Used Strategy Cards Track, Initiative Track, Turn Track, and Activated Formations Track)
- Two Aids (Front: Ranged Attacks Table; Back: Player Aid, Attack Dice and Modifier Summary)
1.2. Terminology
Cavalry Charge: Available only to heavy cavalry units and camel riders. Units performing Cavalry Charges receive a significant combat bonus.
Cavalry Withdrawal: An action that any cavalry unit, except Muslim horse archers, can perform to escape enemy Cavalry Charges or Melee Combat against units with a lower Movement Factor.
Disordered: A unit may become Disordered, which represents the unit, panicking as a result of some unanticipated adverse outcome. A Disordered Marker is placed on the unit, then, in a movement known as Panicked Retreat, it always flees in a straight line a number of hexes equal to half its Movement Factor in the direction of its army's side of the board. Units can become Disordered due to Cavalry Charges, Melee Combat, camel attacks, enemy Ranged Attacks, failed Reaction Charges, other friendly units retreating, or through the use of cards. If a Disordered unit were to become Disordered again due to combat or ranged fire, it is removed from the board. A Disordered unit's Combat Factor is reduced by one for as long as they remain Disordered.
Elimination Roll: Units who were victorious in combat roll 1D6, per participating unit, against an enemy unit in an attempt to roll a result higher than its Quality Factor. If this happens, the enemy unit in question may be eliminated or become Disordered.
Formation: Each side is made up of 5 Formations: Vanguard, Rearguard, Center, Right Flank, and Left Flank. A Formation is a group of units commanded by a specific Leader and activated together in an Impulse. Each counter has a colored stripe in its upper left corner that indicates which Formation that unit belongs to. A Formation remains in the battlefield as a combat group after its Leader is defeated, but certain restrictions will apply.
Forward Hexes: The 3 hexes 'in front' of a unit (that is, closest to the enemy army's side of the board) are called its Forward Hexes. The first hex a unit moves into when performing Cavalry Charges must always be into one of these hexes. Likewise, charging units must always attack units in one of their Forward Hexes. Cavalry Charges are only affected by the ZOC (Zone of Control, explained later) of an enemy unit's Forward Hexes.
Harrying: An action that non-Disordered Muslim horse archer units can perform in response to enemy Cavalry Charges and melee attacks. It consists of performing a kind of ranged attack (albeit less effective) in exchange for a chance to retreat and avoid a Cavalry Charge or melee attack.
Impulse and Turn: A game consists of a maximum of 8 turns. In a turn, players alternate activating three Formations, one at a time. In the game, each Activation is called an Impulse.
Locked Unit: Whether a unit is Locked is checked at two moments: (1) at the start of an Impulse to determine which enemy cavalry units are Locked and therefore cannot perform Cavalry Withdrawals (2) at the start of each unit's specific movement in the Movement Phase to see if they are able to leave an enemy ZOC. Therefore, a unit that begins its activation adjacent to an enemy melee unit is Locked and only allowed to disengage under specific conditions. Each unit may only Lock a maximum of one enemy unit. Light cavalry units have advantages when disengaging.
Movement Factor: The rightmost value on a unit's counter shows how many movement points it can spend to move around the board. It costs 1 point to enter a hex normally. However, it costs 2 points for a unit to enter the first open hex on Los Olivares Hill, which amounts to ascending the steep slope (note: the sloped hexes are not considered part of the Hill). Units performing Orderly or Panicked Retreats are not required to pay this extra cost.
Orderly Retreat: If a unit has been defeated in a Cavalry Charge, Pursuit action, or melee engagement, but is not eliminated or Disordered, it must retreat one hex. This retreat represents a unit being 'pushed back' by the momentum of the charge/attack without losing cohesion. Movement must always be towards one of its Rear hexes in the direction of its army's side of the board. If forced to 'pass through' an enemy unit (enter a hex occupied by an enemy unit), it is immediately subjected to a Quality Check. If passing through a friendly unit, that unit will have to undergo a Quality Check (not the unit performing the Orderly Retreat). However, only the first unit passed through in this manner must perform the check.
Pursuit Action: With this action the phasing player can order friendly units not adjacent to another non-Disordered enemy unit to attack Disordered enemy units within movement range. This action is carried out in the last segment of the Impulse Activation Phase.
Quality Check: Units will likely have to perform Quality Checks several times over the course of a game. The number in the center of the unit is its Quality Factor. Passing a Quality Check involves rolling 1D6 and obtaining a result equal to or less than its Quality Factor. Therefore, units with a higher Quality Factor are more likely to pass these checks and remain in play for longer. A unit's Quality Factor also determines how likely it is to be eliminated due to combat rolls.
Ranged Attacks of Opportunity: A unit might abandon a hex due to performing normal movement, an Orderly or Panicked Retreat, or a Harrying or Cavalry Withdrawal action. Whenever a unit leaves a hex adjacent to an Unlocked enemy ranged unit, it may be the target of a Ranged Attack of Opportunity. This also includes units ending their movement adjacent to enemy ranged units they do not decide to attack.
Reaction Charge: If a unit with the ability to charge is the target of an enemy Cavalry Charge, it may attempt to meet the charge head on to minimize its effects. This action can also be performed to aid an adjacent friendly Leader or unit that does not have this ability.
Reaction Fire: Any ranged unit, in each phase, may perform Reaction Fire once for each type of attack received. Units with this ability can perform Reaction Fire during the opponent's Impulse and still perform Ranged Attacks during their own Impulse.
Rear Hexes: The 3 hexes directly 'behind' a unit (that is, closest to its army's side of the board) are called its Rear Hexes. Units performing an Orderly or Panicked Retreat must always move into one of these hexes.
Roll to Determine Victor: In Cavalry Charges, melee and Pursuit combat, two units will face off by comparing their Combat Factors and rolling 8-sided dice. The unit with the highest result is considered the victor, along with all participating friendly units. Victorious units have the opportunity to roll dice to eliminate or Disorder enemy units they engaged (see Elimination Roll).
Side: There are 2 sides in the game: the Muslim side (green) and the Christian side (red). Both sides have unique unit types that represent actual troops that faced each other in battle. These troops hailed from different regions or kingdoms and their unit counters display an identifying banner or flag.
Zones of Control (ZOC): The 6 hexes adjacent to a unit make up its Zone of Control (ZOC), which is always projected unless the unit is Disordered. Zones of Control stop enemy unit movement.
2. Game Board
The game board is a map depicting the actual region of the Despeñaperros pass where the battle took place. It shows:
- Los Olivares Hill (marked in a darker tone and with curved lines representing the slope of the terrain) is located on the side of the Muslim deployment zone. The Caliph chose this area to place his command tent. The Defensive Palisade can be found at the top of the hill.
- The rest of the board corresponds to the relatively open terrain where the battle took place, although the actual terrain was more uneven.
- A hexagonal grid has been superimposed over the entire map for the purposes of facilitating unit movement and positioning. There are 5 deployment zones on each half of the battlefield. The hexes in these zones are marked with a colored dot corresponding to the Formation that is deployed there:
| Formation | Color |
|---|---|
| Vanguard | White |
| Center | Pink |
| Right Flank | Green |
| Left Flank | Blue |
| Rearguard | Orange |
There are half-hex silhouettes on the edges of the board closest to each player. Units may never end movement in these spaces but may move through them (except inside the Defensive Palisade).
3. Dice, Screen, And Tables
The game includes 10 dice, 1 Administrative Display, 2 Player Aids/Ranged Attack Tables (one for each player) and a Fog of War Screen. In addition to these, there are also two Player Aids.
3.1. Dice
Dice are used to determine combat outcomes, Ranged Attacks, and Quality Checks. Each side uses six-sided, eight-sided, and twelve-sided dice. There is one general rule to keep in mind: for D8 or D12 rolls, all modifiers are cumulative while D6 rolls can never be modified beyond +1 (certain exceptions apply, such as the Mujahideen units or card events).
3.2. Fog of War Screen
The game includes a screen divider, representing the initial fog of war, to hide troop deployment. It is used in the Free Deployment and Mixed scenarios.
3.3. Administrative Display and Tables
The game has an Administrative Display whose primary use is to keep track of certain elements of the game. Present on the Administrative Display are the 8-turn Turn Track, the Initiative box (where the Activated Formation Chits are placed) with tracks for each player's 3 Impulses per turn, spaces corresponding to Available and Unavailable Formations for activation during the turn, the boxes corresponding to each player's Command Points, and the 'Used Strategy Card' box.
There are also tables for Ranged Attacks, Sequence of Play, Command Point usage, Retreats, and Leader actions.
4. Unit Counters
Each side is differentiated by the background color of their counters: light green for the Muslim side and red for the Christian. Stripes in the top left corner show the Formation the unit belongs to and come in 5 different colors (Vanguard = white, Center = pink, Rearguard = orange, Right Flank = dark green, Left Flank = blue). The game also includes miscellaneous counters, markers, and chits (see 1.1).
4.1. Counter Descriptions
Each counter has five basic characteristics. These characteristics are common to all counters but have differing values:
- Unit Class
- Combat Factor
- Quality Factor
- Movement Factor
- Origin
- Formation
Combat Factor: the leftmost number on the counter, this value represents a unit's combat effectiveness and therefore its ability to inflict damage in Melee Combat.
Movement Factor: the rightmost number on the counter, this value represents the maximum number of hexes a unit can move per turn (in any direction). It can be modified (positively or negatively) by card effects.
Origin: Identifies Christian units by their coat-of-arms and Muslim units by a flag. Some cards activate units of a specific origin.
Quality Factor: the centermost number on the counter, this value represents the quality and experience of the soldiers making up the unit and its ability to remain effective on the battlefield. Certain events like enemy Cavalry Charges force units to pass a Quality Check to see if the unit becomes Disordered or retains its cohesion.
Unit Class: each class is represented by a figure, which identifies the unit. See unit classes below.
Muslim origins represented in the game: Mujahideen, Arabs and Berbers, Almohads, Agzaz Kurds, Andalusians, Caliph Personal Guard (Black Guard).
Christian origins represented in the game: Castile, Aragon, Navarre, Leon, Portugal, Crusaders, Order of Santiago, Order of Calatrava, Knights Hospitaller, Knights Templar.
4.2. Unit Class
Christian Units
- Leaders: These counters represent the most iconic nobles participating in battle along with their kinsmen, vassals, and followers. They are represented as heavy cavalry units with high Combat, Quality, and Movement Factors (6-5-6). They command entire Formations.
- Knights: These counters represent knights from lesser noble families and their vassals. They are represented as heavy cavalry units with high Combat, Quality, and Movement Factors (5-5-6).
- Men-at-Arms: These counters represent well-armed, experienced soldiers not considered knights and not as heavily armored. There are cavalry units (4-4-6) (Mounted Men-at-Arms) and infantry units (4-4-4) (Men-at-Arms). They are considered to be heavy units.
- Town Militias: These counters represent levies of light troops that different cities and towns contributed to the royal armies. While having some experience, they are not particularly well armed. There are light cavalry militia (ratings 4-3-8) and light infantry militia (ratings 3-3-4).
- Archers and Crossbowmen: These counters represent units armed with bows and crossbows, respectively. They differ in combat effectiveness and range. There are cavalry units (ratings 3-3-8) and infantry units (2-2-4). Their Combat Factors are valid only when defending since they perform Ranged Attacks. Both are treated as light units.
- Royal Retinues: These counters represent the Christian kings' royal guard. They are highly effective knights with 5-5-6 ratings. Special rules are applied to these types of units as well.
Muslim Units
- Leaders: These counters represent the most iconic nobles participating in battle along with their kinsmen, vassals, and followers. They are represented as heavy cavalry units with high Combat, Quality, and Movement Factors (6-5-6). They command entire Formations.
- Mounted Men-at-Arms: These counters represent the most well-armed soldiers in the Muslim army. They were well armed and experienced, but less effective than the Christian knights. They are represented as heavy cavalry units (ratings 4-4-6).
- Spearmen: These counters represent veteran infantry units armed with long spears who fight in close order, often used to defend against heavy Cavalry Charges. They are more effective on the defense than the offense. They are represented as heavy infantry units (3-5-4 and 4-5-4 for the Black Guard).
- Light Troops: These counters represent lightly-armed units of different types with some combat experience. They are the equivalent of the Town Militias on the Christian side. They include light camel riders (5-3-6), light cavalry (4-3-8) and light infantry (3-3-4). Camel units can perform Cavalry Charges despite being considered light units.
- Mujahideen: These counters represent light units that sought salvation through martyrdom. This fanaticism made their charges deadly, but they are virtually useless on the defensive. They include light cavalry units (3-3-8) and light infantry units (2-2-4).
- Archers and Agzaz Kurds Archers: These counters represent units armed with bows, characterized by their efficiency and range of fire. There are cavalry units (3-3-8 and 4-3-8 for the Agzaz Kurds) and infantry units (2-2-4). Their Combat Factors are marked in a circle to indicate they are only for defensive purposes (because they perform Ranged Attacks).
5. Cards
At the beginning of each game turn, both players receive a specified number of cards to use to their advantage. There are separate decks for each side, Christian and Muslim. Cards give you advantages or they take them away from the opponent. When they allow specific units to be activated, they do so in addition to the units of the Activated Formation that Impulse.
There are two types of cards, strategic and tactical, that each make up its own deck. Both players, therefore, have one of each. Decks contain cards common to both sides as well as cards that are specific to the Christian or Muslim player.
The common Tactics Cards in both decks are the exact same for each player. The common Strategy Cards, are dealt on odd-numbered turns. They are unique cards that will either be found in the Christian or Muslim Strategy Deck, depending on the luck of the draw at the beginning of every odd-numbered turn.
On every turn, players draw cards until they have 4 Tactics Cards and 2 Strategy Cards. If it is an even-numbered turn and a player has saved a Strategy Card from the previous odd-numbered turn, then they only draw 1 Strategy Card. Note that it is not possible to save a Strategy Card on an even-numbered turn. Likewise, a player who has saved Tactics Cards from the previous turn will only draw cards until they have the maximum of 4 Tactics Cards. If a player's Overall Commander has been eliminated, they may still draw two Strategy Cards but may only hold one, discarding the other.
The number or class of units and/or Formations that a card activates during a player's Impulse are always in addition to the current Activated Formation. Sometimes, cards provide special abilities to the Activated Formation for the duration of the Impulse. Certain cards may be played as a reaction, in which case they can interrupt and influence the opponent's Impulse. It is extremely important to note that cards can never activate Disordered units.
At the end of each turn, follow the procedure detailed below:
- Strategy Cards used during each turn must be placed in the Strategy Card discard pile. These cards are returned to the Strategy Card Deck at the beginning of each odd-numbered turn.
- Common Tactics Cards used during each turn are placed in the Tactics Card discard pile. These cards are only returned to the deck when there are no more to draw or during the Draw Phase on turn 5.
- A side's unique Tactics Cards that have been discarded are returned to the Tactics Card Deck each turn.
There are some cards that provide specific abilities for certain units. These cards can be identified by the diamond icon printed on them.
5.1. Tactics Cards
On every turn, players can use a Tactics Card during each Impulse as an event, or alternatively as a reaction during the opponent's Impulse. The text on the cards specify the moment they can be used.
Each side's unique Tactics Cards indicate that once used they are removed from play (after taking effect). If discarded rather than used, they are placed in the discard pile and return to the deck at the start of the next turn.
If cancelled by another card or the opponent's Command Point, then they are placed in the discard pile (not removed from the game).
At the end of a turn, players may keep 1 Tactics Card in their hand for the next turn (see Command Point and Yield Activation for other ways to save cards).
5.2. Strategy Cards
At the start of every odd-numbered turn, each player's Strategy Card Deck is remade to form the deck that will be available for the current and next (even) turn. Each player's Strategy Deck is made up of their side's unique Strategy Cards along with common Strategy Cards. The latter are distributed randomly and evenly between both players. Next, both decks are shuffled separately and players draw 2 Strategy Cards from their respective decks. These 2 cards form their Strategy Card hand for the current turn.
During a game turn, players may use a maximum of one Strategy Card out of the two they have in their hand. This is in addition to the play of any Tactics Cards. Once a player's first Strategy Card has been played, the second may only be put in play by use of a Command Point. It may also be saved for the next turn (provided it is an odd-numbered turn).
5.3. Alternative Uses for Cards
For both types of cards, players may alternatively:
- Discard cards to improve the Overall Commander's Regular Command Point roll (see 11.1). For each card discarded this way, add a +1 to the die roll.
- Discard 1 card per unit to: a) Avoid Andalusian Desertion die roll on turn 1. b) Avoid the Ultramontane Fundamentalist rule.
Design note: cards will often 'break' the rules outlined in the rulebook. If the text of a card contradicts a game rule, the text of the card ALWAYS takes precedent.
6. Sequence of Play
The game lasts a maximum of 8 turns. Each time a turn is completed, the Turn Marker advances one space. The length of a normal game of "The Charge of the 3 Kings, Navas de Tolosa 1212" will depend entirely on the players themselves, but on average it takes about 3 hours to play the 8 turns.
When the activations of three Formations from each side have been completed, the turn ends and a new one begins. During a turn players have the opportunity to play cards. These cards specify when they can be played.
Sequence of play, which must be followed exactly, is identical for both sides. Each turn is divided into the phases outlined below.
A. Turn Start Phase
- At the beginning of odd-numbered turns, shuffle each side's Strategy Card Deck separately as explained in section 5, including any undealt cards and cards from the discard pile. The Tactics Card Deck is also shuffled separately each turn, adding from the discard pile any Tactics Cards unique to each side that were discarded last turn.
- Players draw until they have 2 Strategy Cards and 4 Tactics Cards. If a player's Overall Commander has been eliminated, they still draw 2 Strategy Cards but may only keep one, discarding the other.
- Select the 3 Formation Chits corresponding to the Formations that will be activated this turn and place them in the 'Available Formations' box on the Administrative Display (done according to the previous turn's Initiative order). On turn 1, all Formation Chits are placed here.
- Decide the Initiative for the turn as indicated in section 7 (remember that on turn 1 the Christian player has the Initiative and it passes to the Muslim player on turn 2).
B. Impulse Activation Phase
The player with Initiative activates a Formation and resolves all phases of the activation. Once completed, the opposing player activates a Formation and resolves all phases of the activation. Play alternates until all Formations selected for the turn have completed their activations. Flip each unit counter to its Used side after finishing its activation so players can more easily identify which units have already been activated.
- Activation Phase: Select the Formation to activate and decide whether to activate it or yield its activation as explained in 8.1. You must now indicate the use of cards that allow the activation of additional units, unless the card indicates otherwise. On turn 1, the Christian player must choose their Vanguard Formation as the first activation. Before the Muslim player's first activation, they must check to see if any Andalusian units from the Vanguard desert.
- Recovery Phase: During this phase, players check to see if Disordered Markers can be removed from units in the selected Formation and from those within the Leadership Range of the activated Formation Leader (regardless of which Formation the unit belongs to). When a Disordered Marker is removed from a unit, it is said to have 'recovered' (or 'rallied'):
- Disordered Formation Leaders always rally automatically.
- Remaining Units cannot rally if they have an adjacent enemy melee unit.
- Recovery of all other friendly units (not just the activated Formation) is automatic if they are within the Leadership Range of the activated Formation Leader.
- Units in the active Formation that are not within range of the Leader must pass a Quality Check to rally. If failed, they must perform a Panicked Retreat (forced movement due to being routed) and may be the target of Ranged Attacks of Opportunity.
- Lock Enemy Cavalry Phase: A friendly non-Disordered melee unit adjacent to enemy cavalry units can choose ONE of these units to Lock. Locked enemy cavalry units are given NO Withdrawal markers to indicate that they may not perform Cavalry Withdrawals or Harrying actions this Impulse.
- Cavalry Charge Declaration Phase: The phasing player chooses which of their cavalry units are going to perform charges and places +3 Cavalry Charge markers on them (+4 in the case of Ultramontane Crusaders).
- Cavalry Charge Resolution Phase: Resolve the phasing player's charges one at a time. This may result in Harrying actions, Cavalry Withdrawals, Ranged Attacks of Opportunity, second charge attacks, defensive Reaction Fire (if any), and enemy Reaction Charges.
- Movement Phase: The rest of the phasing player's counters are now moved, which may result in Ranged Attacks of Opportunity from the opposing player.
- Ranged Attacks Phase: The phasing player performs Ranged Attacks, which may result in defensive Reaction Fire from the opposing player.
- Cavalry Withdrawal Phase: Resolve movement and perform checks for eligible Cavalry Withdrawal actions.
- Melee and Multiple Attack Declaration Phase: The phasing player specifies which of their melee units will attack and declares their targets. Also declare whether or not an enemy unit will be the target of attacks from more than one friendly unit (Multiple Attacks).
C. End of Turn Phase
- In Initiative order, players discard unused cards from their hand. They may keep one Tactics Card (exception: players that yielded an activation for a Strategic Impulse may keep up to 3 Tactics Cards). If it is an odd-numbered turn, players may keep one Strategy Card from their hand.
- If a Regular Command Point Marker is in the Used space, place it in the '8' space. Otherwise, they remain in the same space they were in previously.
- Flip any units on their Used sides to their normal sides.
- Check victory conditions. If not met, advance the Turn Marker one space and start another turn.
7. Initiative
At the start of the game on turn 1, Initiative always belongs to the Christian player, because historically they were the attacker. The Christian player must activate their Vanguard for the first Impulse (only in the two historical scenarios). These two stipulations cannot be modified by playing a card or using a Command Point. To represent the Muslim counter-attack against this initial charge, on turn 2, the Muslim player will have the Initiative, although this rule CAN be altered by playing a card.
From the beginning of turn 3, and continuing until the end of the game, Initiative is determined by a die roll. Each player rolls 1D8 and Initiative is awarded to the player with the highest die roll. Apply the following modifiers:
- +2 if you did not have Initiative last turn.
- -1 if you have fewer Leaders in play than your opponent and did not have the Initiative last turn.
- +1 if you yielded an activation for a Strategic Impulse last turn.
In case of a tie, Initiative is given to the player who did not have it last turn. Cards and Command Points can influence which side gets the Initiative.
From turn 3 onwards, the player who is awarded Initiative decides which player goes first. Command Points may be used to regain lost Initiative (see Command Points).
8. Activating Formations
Each turn, players will alternate activation phases, called Impulses, where units belonging to a Formation on their side may do any of the following: charge, move, perform Ranged Attacks, engage in Melee Combat, and pursue. Both players have 5 Formations at their disposal. Once a player has decided which Formation to activate, the corresponding Activated Formation Chit is moved from the Available Formations box to the Impulse box matching the current Impulse. Then, that player carries out the desired actions with units belonging to the activated Formation (see 11.1 for more details about Leaders).
Players may choose the order in which they activate their available Formations during their turn. An exception to this is turn 1 in the two historical scenarios: the Christian player must activate their Vanguard as the first activation. On turn 1, all 5 Formation Chits will be in the 'Available Formations' box on the Administrative Display. Players will select which of the 5 Formations to activate until 3 activations have been completed.
From turn 2 onwards, to represent the chaos of battle, players must activate the 2 unactivated Formations remaining from the previous turn, plus a random activation of 1 of the 3 activated Formations in the turn just played. Follow the procedure below:
- Place the 3 Activated Formation Chits from the last turn plus a 4th 'free activation' chit (called the Flag Chit) in a separate mug or opaque container.
- Next, draw a random chit from this selection. The chit drawn corresponds to the Formation that must be activated on the current turn.
- If a player draws the Flag Chit, they may choose which Formation to activate from the 3 Formations that were activated last turn.
- Formations are always activated regardless of whether their Formation Leader is eliminated or in play.
- Finally, a player can use their Command Point to avoid activating the randomly chosen Formation and instead choose any Formation (see 11.2 Command Points).
If a player loses all units belonging to a single Formation, the Activated Formation Chit that corresponds to that Formation will still come into play when deciding which Formations are activated that turn. Thus, a player who draws an Activated Formation Chit corresponding to a Formation with no units will actually activate one less Formation during that turn.
Follow the guideline below for those Activated Formation Chits without units:
- While this mechanic of random selection may lead to a certain Formation being activated several times in a row by luck of the draw, a Formation with no units may ONLY be activated TWICE in a row, but can never be chosen randomly in two consecutive turns. After being drawn randomly for the first time, it is simply not included among the chits to be drawn randomly the next time. Remember that using a Command Point can change this.
Example: It is turn 4 and the "Muslim Vanguard" Formation has no units left. On turn 3, this Formation was activated (when it had just lost all its units) so it is now one of the 3 Formations that form part of the random selection. In a stroke of bad luck, it is drawn a second time. The Muslim Player tried using a Regular Command Point to avoid this, but unfortunately the roll failed. So now, the Muslim player will only activate 2 Formations with units this turn (Left Flank and Center), since the Vanguard is without units. At the beginning of turn 5 that Formation's Chit will not be among those available for random selection as this will be comprised of the Left Flank, Center, and Flag Chits. This is because a Formation Chit with no units cannot be randomly selected twice in a row. However, on turn 6 it will be activated by default since it makes up one of the Unavailable Formations in the Administrative Display.
Each turn, players decide the order in which the 3 available Formations are activated, placing the chit in the corresponding Impulse space. Therefore, if a chit representing a Formation with no units is drawn, the player can decide when to use it (that is, they decide which Impulse will be 'lost').
8.1. Yielding an Activation
Once a side has activated 4 different Formations for the first time (the 3 from the first turn and one of the new ones from the second turn), players can begin to yield activations.
One of the 3 Formations selected for the current turn may yield its activation instead of carrying it out if its Leader is still in play and it has not already completed its activation. Yielding an activation allows a player to do one of the following actions listed below.
Strategic Impulse: Obtain all of the following benefits:
- Immediately draw 3 Tactics Cards.
- Immediately move the Regular Command Point marker two spaces to the left if its current value is greater than 8.
- At the end of the turn, keep up to 3 Tactics Cards.
- Receive a +1 modifier for the next Initiative roll (only negated if the opponent performs this same action).
- For up to two Disordered friendly units roll to see if they recover with a +1 bonus to the unit's Quality Factor (up to a maximum of 5).
- Move 6 friendly units (they may not end movement adjacent to enemy units or perform Ranged Attacks).
Important: No cards or Command points may be played in this special activation by either player.
Yield to Activate Standard: The Muslim player may yield activation of their Vanguard to flip the Almohad Standard to its Standard-bearer side and move it if so desired. In addition, up to 4 friendly units not adjacent to enemy units may move (they may not end movement adjacent to enemy units or perform Ranged Attacks). Cards may not be played during this special activation.
Yield for a Second Activation: Allows another friendly Formation with a Leader to be activated once again. It must have already been activated in a previous Impulse of the current turn, and may not have already received a Second Activation or yielded its own.
Note: Only Formations with their Leader still in play may yield their activations. So, if a Formation has lost its Leader, it may neither yield nor receive activations (see Command Point 11.2 for exceptions).
This means that a player may actually activate the same Formation with a Leader TWICE (but only twice) in a single turn (see 5.0 for card effects and 11.2 for more details about Command Points).
Follow the steps below when a Formation receives a Second Activation:
- Flip both Formations' Activated Formation Chit to their Yield side (the yielding Formation and the receiving Formation).
- The player chooses a number of units from the receiving Formation equal to its Leader's Leadership. The Leader and the selected units do not have to pass Quality Checks in the next step. If the Leader receiving the second activation is the Overall Commander, the next step applies to any friendly units within his Leadership Range.
- The remaining units in that Formation must perform a Quality Check in order to charge or move:
- If the 1D6 result is equal to or lower than the unit's Quality Factor, it passes the Quality Check.
- If the result is higher than the unit's Quality Factor, it fails the Quality Check and cannot move. It is flipped to its Used side until the end of the Movement Phase.
Now, carry on with the Recovery Phase and then perform charges and movement with units that were exempt from or passed Quality Checks.
After the Movement Phase, return all counters on their Used side to their normal side and resolve Ranged Attacks and Melee Combat. Note that all units from the currently activated receiving Formation may also perform Ranged Attacks and engage in Melee Combat, even if they failed the Quality Check upon activation.
9. Movement
Important concepts regarding movement:
- Adjacent hexes: These are the 6 hexes around a counter. The 3 hexes closest to the enemy's side of the board are called a unit's Forward hexes and the 3 closest to your side of the board are called Rear hexes. Each counter may or may not exert Zone of Control (ZOC) over these adjacent hexes if the requirements are met.
- Zone of Control (ZOC): These are the adjacent hexes over which a unit projects control. In general, a unit exerts control over its 6 adjacent hexes. However, if 2 of those 6 hexes are occupied by enemy units, that unit would no longer exert ZOC over the other 4 hexes.
- Locked: A friendly unit can be Locked by an adjacent enemy melee unit that is still exerting ZOC. Locked units wanting to leave an enemy's ZOC must meet certain requirements (explained below).
- Pairing: When combat is resolved, you must choose which adjacent enemy unit each of your friendly units will attack.
- Reaction moves: These are moves performed as a result of (in reaction to) movement or attack by an enemy unit (Harrying, Cavalry Withdrawals, Panicked Retreat, or Orderly Retreat). These moves take place during an opponent's Impulse.
In each Impulse, once a counter has been moved voluntarily it cannot be moved again until its Formation is activated on a future turn. However, there are exceptions to this rule:
- Performing a successful Pursuit action.
- Being activated again after its Formation receives a second activation this turn.
- Being activated again by the play of a card.
- Performing any kind of reaction move during the opponent's Impulse.
Movement Process
- During the Lock Enemy Cavalry Phase, before moving units during the Cavalry Charge Phase, determine which enemy cavalry units are Locked (those adjacent to at least one of your friendly melee units). Such enemy cavalry units are flipped to their Used side so they can later be easily identified as units that may not perform Cavalry Withdrawal or Harrying actions. Each friendly melee unit can only Lock one enemy cavalry unit. If one of your melee units is adjacent to both an enemy light cavalry unit and an enemy heavy cavalry unit, the latter receives priority.
- Units may then move using their Movement Factor, which represents the maximum number of hexes a unit is able to move when activated. Units may move in any direction and do not necessarily have to spend all of their movement points. Players do not have to move all activated units. Entering a hex costs 1 movement point (except when moving onto Los Olivares Hill, which may cost 2).
Fractional movement is the act of using only a part of a unit's Movement Factor, attacking an enemy, and then moving again with the rest of its Movement Factor. This is only allowed in the case of Cavalry Charges (see 10.1) or by use of a card.
During the Cavalry Charges, Movement, and Pursuit Phases, a unit may voluntarily 'pass through' hexes occupied by friendly units so long as its movement ends in an empty hex. There can never be two units of the same side in the same hex, so entering a hex occupied by a friendly unit can only be done if it would not result in the moving unit having to stop in that hex due to enemy ZOC. Each hex on the board can only be occupied by one unit counter in addition to one of following counters: the Almohad Standard or the Archbishop of Toledo. If a unit encounters an enemy unit during movement, it must go around and may never pass over it, even if this means spending extra movement points (see control zones below).
Zones of Control (ZOCs)
A combat unit's zone of control constitutes the six hexes adjacent to the hex occupied by the unit.
It is important to differentiate between the effect of Zones of Control on voluntary movements (Cavalry Charge, Movement, and Pursuit Phases), when they are always exerted, from their effect on movements in response to actions by the opponent (Harrying, Cavalry Withdrawals, Panicked Retreat, or Orderly Retreat), when they are not taken into account.
A unit must stop as soon as it enters an enemy's Zone of Control - it may not 'cross' it and continue movement. Exception: Only a unit's 3 Forward hexes stop an enemy unit performing a charge. However, they do not prevent a charging unit from continuing its charge after redirecting or from beginning movement for a second attack.
ZOCs can be cancelled: A Disordered unit stops exerting its ZOC as soon as an enemy unit moves into it. All other units require two enemy units present in their ZOC for it to be cancelled (for the purposes of movement).
When a unit enters more than one enemy unit's ZOC, it may choose which one to attack (only one), but its presence still counts as one of the two friendly units required to cancel each of the adjacent enemy unit's ZOC (see exception through Defensive Palisade in 12.13).
A unit that begins its activation in an enemy ZOC may always advance into a hex adjacent to that same enemy's ZOC.
A unit that aims to leave an enemy ZOC can only do so if there is at least one other friendly unit (even Disordered) in the same enemy ZOC at the time movement begins. Light cavalry have the ability to leave enemy ZOCs if they pass a Quality Check.
Example: The blue X marks where the Muslim light cavalry unit Timmel-1 is located and the red X where the Muslim unit Taza 1 is located. The Muslim player decides to move both units to attack the Disordered Christian units. He first moves Timmel 1, which is placed adjacent to the Knights Hospitaller. Note that such a move is possible because when passing through the Yusam horse archers unit, the Christian unit Carrión's ZOC is being nullified by the two Muslim units adjacent to it. Therefore, Timmel 1's movement is not hindered. However, Carrión may perform a Ranged Attack of Opportunity against Timmel 1 as it passes through the hex occupied by Yusam. Then, Timmel 1 leaves the hex adjacent to Carrión (since it cannot stop there) and occupies the next hex adjacent to Carrión, but decides not to attack. Now, Carrión may perform another Ranged Attack of Opportunity, but fortunately for the Muslim player both attacks miss. The Disordered Vizcaínos 1 unit does not exert ZOC either because, while in this state, one Muslim unit in its zone of control is enough to cancel it. However, upon entering the next hex, Timmel 1 does have to stop due to the Knights Hospitaller unit's ZOC. Timmel 1, now Locked by the Knights Hospitaller's ZOC, decides to attack them. It is Taza 1's turn to move now, and makes the mistake of entering the hex adjacent to Carrión. As it moves out of that hex and the other two adjacent hexes, it becomes the target of three successive Ranged Attacks of Opportunity. Luckily for Taza 1, none find their target. Taza 1 continues movement and positions itself to attack Calatrava 1. This time, the presence of Timmel 1 means that the Knights Hospitaller unit no longer exerts its ZOC.
9.1. Cavalry Withdrawals
Any type of cavalry or camel unit (except for Muslim mounted archers performing the Harrying action instead) are allowed to perform Cavalry Withdrawals during the opposing player's Impulse, provided it does not have a NO Withdrawal marker (due to being Locked by a non-Disordered enemy melee unit). This is a reaction move that ignores enemy ZOCs and occurs during the opponent's Impulse at two very specific times (depending on unit class):
a. During the Cavalry Charges Phase, before resolving combat. b. During the Cavalry Withdrawal phase, after the Ranged Attacks Phase, when a unit has entered a hex adjacent to a cavalry unit.
Cavalry Withdrawal movement will always take place into one of the withdrawing unit's three Rear hexes (note that this is not considered retreating but rather a voluntary maneuver). Withdrawing units are allowed to pass through hexes occupied by other friendly units without any penalty. It is important to note the difference between Withdrawal actions made by heavy cavalry (Movement Factor 6) and those made by light cavalry (Movement Factor 8).
Heavy Cavalry Withdrawals (and Camel Riders): This type of Withdrawal may only be performed after the opponent's Ranged Attacks Phase, and if all adjacent enemy units are infantry. Heavy cavalry units must pass a Quality Check in order to withdraw. If passed, the unit may retreat a maximum of 2 hexes. If failed, the unit may not withdraw but there is no additional penalty (the penalty is that it will be attacked by a slower enemy).
Light Cavalry Withdrawals: There are two different times during the opponent's Impulse when friendly light cavalry units may perform a Cavalry Withdrawal:
- After the opponent's Ranged Attacks Phase: light cavalry may withdraw during an opponent's Impulse after the Ranged Attacks Phase if all adjacent enemy units are infantry and/or heavy cavalry. If adjacent only to infantry units, the withdrawing light cavalry unit may move up to 4 hexes (the difference between the two units' Movement Factors). However, if there is at least one heavy cavalry unit, the light cavalry unit must pass a Quality Check to perform the Withdrawal. If passed, it would only be able to move up to 2 hexes (the difference between the two units' Movement Factors).
- During the opponent's Cavalry Charges Phase: when a charging unit enters a hex adjacent to a light cavalry unit, the latter may retreat up to 2 hexes without the need to pass a Quality Check. If the previous unit of heavy cavalry (or a different one performing a separate charge) comes into contact with a light cavalry unit that has already withdrawn this Impulse, then a Quality Check must be passed in order for it to withdraw again. If passed, the light cavalry unit may move up to 2 hexes, as before. If failed, there is no additional penalty, except that it will have to receive the charge.
In this last example of a Cavalry Charge, the charging unit can change targets or keep moving towards the same one if it still has movement points available (following the same rules used for Harrying actions). To do so, however, it must pass a Quality Check. If failed, the charge is considered to have failed and its first or second charge, whichever the case, is 'wasted.' (see Leaders, Military Orders, and Royal Retinues for exceptions to this rule).
10. Combat
Units engage in combat with other units using their Combat Factor or by performing Ranged Attacks.
The following sections detail, in order of Sequence of Play, the different types of combat. These include Cavalry Charges, Ranged Attacks, Melee (hand-to-hand) Combat, and Pursuits. Eight-and-six-sided dice are used to resolve Charges and Melee Combat, although special circumstances can call for the use of 12-sided dice. Ranged Attacks use 12-sided dice.
As a general rule, D6 results can receive a maximum modifier of +1. However, there is no such limit for D8 and D12 rolls (several different modifiers can stack).
10.1. Cavalry Charges
Heavy cavalry units (Leaders, Knights, Mounted Men-at-Arms) and light Camel units (all with a Movement Factor of 6), may perform up to two attacks with Cavalry Charge. Therefore, these unit classes can benefit from significant Cavalry Charge combat bonuses and have the advantage of being able to attack up to two units. A cavalry unit will not be able to charge, however, if it begins the Cavalry Charges Phase adjacent to an enemy unit (regardless of ZOC).
The first hex a charging unit enters may be in any direction (the 3 Forward or the 3 Rear), but must perform the charge itself in the direction of its 3 Forward hexes (those facing the enemy army's side of the board).
Combat between a charging unit and a defending unit is resolved individually, 'interrupting' the unit's charge. This means that, first, combat (and its consequences) is resolved between the charging unit and its target before continuing the rest of the charge (recall that units performing Cavalry Charges may attack up to two units in one charge). When that unit's charge is complete, flip it over to its Used side and resolve the next unit's charge, continuing in this manner until all charges are resolved.
Initiating a Cavalry Charge (1st attack), characteristics and procedure
At the start of the Cavalry Charges Phase, the phasing player must declare which units are going to perform charges. Place a +3 Cavalry Charge Marker on each charging unit as a reminder (+4 Charge in the case of Ultramontane Crusaders).
Once the relevant units have been marked, follow the procedure below for carrying out charges:
-
The charging unit moves using its Movement Factor. As indicated before, in exception to the first hex it enters, the unit must continue its charge in the direction of one of its 3 Forward hexes. While moving the unit, leave its +3 Cavalry Charge Marker in the hex it occupied at the start of this phase to help keep track of the distance moved.
-
Upon entering a hex adjacent to the target of the charge, the charging unit will benefit from the +3 modifier so long as the target is in one of its 3 Forward hexes.
-
An enemy ZOC only blocks the charging unit's movement if the unit exerting it is in one of the charging unit's 3 Forward hexes.
-
The charging unit must be able to reach its target through legal movement.
-
If the target of a charging unit is a Ranged unit, it may interrupt the charge to perform a Ranged Attack of Opportunity (10.4) or, in the case of Muslim horse archer units, a Harrying action (10.5).
-
If the target of a charging unit is a light cavalry unit (except for Muslim horse archer units), it may perform a Cavalry Withdraw action (9.1).
-
If the target unit's Cavalry Withdrawal or Harrying action was successful, the charging unit must perform a Quality Check to see if their charge fails or can continue (targeting the same unit or a different one). Leader, Royal Retinues, and Military Order units do not have to perform Quality Checks to redirect their charges.
-
If the target unit cannot or does not successfully perform a Cavalry Withdrawal (in the case of light cavalry) or Harrying action (in the case of Muslim horse archers), it is forced to engage in combat with the charging unit. The +3 Cavalry Charge modifier (or +4 for Ultramontane Crusaders) for the charging unit is applied during combat resolution.
Note: Leader, Ultramontane Crusaders, and Royal Retinue units roll an extra die and keep the best result.
-
The charge modifier stacks with any other relevant combat modifiers.
-
If the target is a spearmen unit, subtract 1 from the charging unit's charge modifier when rolling to Determine the Victor (D8 roll).
-
If the target unit has the ability to perform Reaction Charges and does so successfully, subtract 1 from the charging unit's charge modifier when rolling to Determine the Victor (D8 roll).
-
If the target is Disordered, subtract 1 from its Combat Factor.
-
If the charging unit wins the melee engagement, make a 1D6 Elimination Roll with a +1 modifier. If the defending unit wins the melee engagement, then it makes an Elimination Roll (without the +1 modifier).
-
If the charging unit wins the melee engagement, it may continue its charge and make a second attack (outlined below).
Procedure for continuing a Cavalry Charge (2nd attack)
The procedure for a charging unit's second attack, if it takes place, is the same as the first. It follows one of the 3 cases detailed below, depending on the result of the first attack:
- If the charging unit failed to win the melee engagement during the first attack of its charge, (i.e. drew or lost the combat roll) it may not make a second attack during this charge. Its activation ends immediately and its counter is flipped to the Used side.
- If the charging unit succeeded in eliminating the target unit, then: a. If it is a Leader or Royal Retinues unit, it may choose to return to the hex from which its charge began (where the +3 Cavalry Charge marker is). Otherwise, it may choose to do (b.) or (c.) as outlined below. b. Charging units must occupy (at no movement point cost) the hex the eliminated unit previously occupied. This free move is called a Momentum Advance. Upon advancing, if the charging unit enters an enemy unit's Forward hex, it must attack. The charging unit receives a +2 Cavalry Charge modifier. c. If a Momentum Advance occurs when there is no enemy unit in the charging unit's Forward hexes, and it still has movement points left, a second enemy unit may be chosen as the target of the charging unit's second attack. The charging unit must be able to reach one of the target unit's Forward hexes with its remaining movement points. Provided this is the case, the charging unit will then benefit from a +2 Cavalry Charge modifier for combat against this second target.
- If the charging unit managed to win the engagement but did NOT eliminate the opposing unit, the latter will have to perform a Panicked Retreat or Orderly Retreat. Now: a. If the charging unit is a Leader or Royal Retinues unit, it may choose to return to the hex from which its charge began (where the +3 Cavalry Charge marker is). Otherwise, it may choose to do (b.) or (c.) as outlined below. b. All other charging units must occupy (at no movement point cost) the hex vacated by the unit performing the retreat (whether Orderly or Panicked). This free move is called a Momentum Advance. Upon advancing, if an enemy unit is present in one of the charging unit's 3 Forward hexes, the charging unit must attack that unit, this time with a +2 Cavalry Charge modifier. c. If the charging unit does not come into contact with any adjacent enemy units after this advance, the second attack for this charge is voluntary and may be directed at any other enemy unit at a distance equal to or less than the charging unit's remaining movement points. For this second attack, the charging unit receives a +2 Cavalry Charge modifier.
It should be clear at this point that, at most, each charging unit can perform 2 attacks during the same charge action. The first attack receives a +3 modifier (exception: Ultramontane Crusaders) while the second receives a +2. If the second attack during a unit's charge results in the target unit's elimination or displacement (by Orderly or Panicked Retreat), the charging unit may occupy the newly vacated hex, but this is not mandatory. Once all the steps for one unit's charge have been resolved, flip its counter to the Used side and move on to another unit marked for a Cavalry Charge until all have been resolved.
Each unit that was marked to charge must be activated during this phase. If, for any reason, a unit marked for a Cavalry Charge cannot or decides not to charge an enemy unit, then it is required to move at this moment. This unit will not be able to move in the next Movement Phase or participate as an attacker in the Melee Combat Phase. Flip its counter to the Used side.
Unit elimination or movement occurring due to an Orderly or Panicked Retreat is detailed in the section on Melee Combat (10.7).
Example: Levante performs a Cavalry Charge, moving 3 spaces to attack Madrid 2. Zamora and San Millán both have the ability to perform Reaction Charges to come to Madrid 2's aid. Since it is already adjacent to Levante, if Zamora passes the necessary Quality Check then combat will ensue between the two with Zamora defending against the charge and subtracting 1 from Levante's Charge modifier. San Millán is not adjacent to Levante, however, and if it were to perform the Reaction Charge (and pass the Quality Check), it would simply swap spaces with Madrid 2 and defend against Levante's charge (also reducing the latter's combat modifier by 1).
10.2. Reaction Charges
A defending cavalry unit with the ability to perform Cavalry Charges (Leaders, Knights, Camel Riders, Mounted Men-at-Arms) may perform a Reaction Charge. This action is taken to mitigate an enemy Cavalry Charge and is legal in the following circumstances:
- It is the target of an enemy Cavalry Charge.
- It is adjacent to a friendly Leader unit that is the target of an enemy Cavalry Charge.
- It is adjacent to a friendly unit without the ability to perform Cavalry Charges and this unit is the target of an enemy Cavalry Charge.
- It is not Disordered, on its Used side, nor has a NO Withdrawal marker.
- Units may perform Reaction Charges against an enemy charging unit during either charge attack (first or second).
Reaction Charges may be performed against either of a charging unit's 2 attacks (first and second).
Reaction Charges require a Quality Check before they can be performed. A unit attempting to perform a Reaction Charge passes the check if the die result is equal to or less than its Quality Factor. A successful Reaction Charge forces the charging enemy unit to subtract 1 from its charge modifier. Plus, the unit performing the Reaction Charge becomes the charging enemy unit's new target (this represents the unit moving to meet the attacker's charge head on). Failing the Quality Check results in certain penalties.
Successful Reaction Charge procedure
- If the unit performing the Reaction Charge is the target of the enemy Cavalry Charge, it does not move from its position.
- If the unit performing the Reaction Charge comes to the aid of a friendly unit (who was the target), but is adjacent to the charging enemy unit, it does not move from its position.
- If the unit performing a Reaction Charge comes to the aid of a friendly unit and is not adjacent to the charging enemy unit, it must move to change places with the original target of the enemy Cavalry Charge.
Each unit, in a single Impulse, may only perform one Reaction Charge in aid of another unit. Place a Reaction Charge marker on it to indicate that it has already performed a Reaction Charge in aid of another friendly unit. It may not perform another. However, a unit may always perform a Reaction Charge in its own defense as many times as necessary and even if it has a Reaction Charge marker from having previously aided another friendly unit.
Failed Reaction Charge procedure
If the unit attempting the Reaction Charge fails the Quality Check, the following effects apply (depending on that unit's situation facing the enemy charge):
-
If the unit failing the Quality Check is not the original target of the enemy Cavalry Charge, it becomes Disordered and receives the corresponding marker. It must now move from its current position in a straight line in the direction of its army's side of the board a number of hexes equal to half its Movement Factor (or additional spaces as necessary until reaching an empty hex). If it passes through hexes occupied by enemy units, it must pass another Quality Check. If failed, the unit is eliminated. If during this displacement it passes through hexes occupied by friendly units, the first friendly unit to be passed through must also pass a Quality Check, following the same steps mentioned above. (To avoid the occurrence of a 'domino effect,' no other friendly unit will be forced to pass a Quality Check.) The enemy unit's Cavalry Charge is now resolved as normal.
Design note: this rule is meant to represent the unit not only failing to obey the order to meet the enemy cavalry charge but also the fact that it suffers a morale drop and flees in panic.
-
If the unit failing the Quality Check is the original target of the enemy Cavalry Charge, it receives a -1 modifier when rolling to Determine the Victor (D8). The charging enemy unit resolves the charge as usual.
Design note: this negative modifier represents the drop in cohesion that would occur after a failed attempt to organize a reaction charge.
10.3. Ranged Attacks
In the game there are units armed with crossbows and bows that have the significant advantage of being able to attack from a distance. Archers and crossbowmen units may only use their Combat Factor in defense, and so may never be the attacker in a melee engagement. Each ranged unit class has a specific effectiveness as noted on the Ranged Attacks Table. If ranged units are the target of a melee attack, Cavalry Charge, or another Ranged Attack, they may perform Reaction Fire in their own defense.
Each ranged unit may only perform an offensive Ranged Attack once (during the Ranged Attacks Phase, as specified in the sequence of play). This attack can be either with direct or indirect fire. An enemy unit can be the target of more than one Ranged Attack. In this case, the player performing the Ranged Attacks must declare targets before rolling. Multiple Ranged Attacks on a single enemy unit are simultaneous. If more than one success is obtained in a Multiple Attack, the most favorable result is applied.
Resolving a Ranged Attack:
- First, identify the distance to the target. Next, identify the target's Armor Class and the type of ranged unit performing the attack and find the value corresponding to where the two intersect on the Ranged Attacks Table.
- Roll 1D12. If the result is equal to the number (or numbers) indicated on the Ranged Attacks Table, the Ranged Attack hits.
It is important to clarify which types of units are considered to be equipped with light, medium, and heavy armor. Armor class depends on the Quality Factor of the target unit:
- Quality 5: heavy
- Quality 4: medium
- Quality 2-3: light
LOS is always calculated in a straight line. It is calculated from the center of the attacking unit's hex to the center of the target unit's hex. LOS is blocked if the only way to reach the target is by creating an angle in the imaginary line traced from attacker to target.
Lines of Sight and differences between bows and crossbows
Lines of Sight (LOS) are 'drawn' from the center of the hex being fired from to the center of the hex being fired upon. If that Line of Sight does NOT pass through a hex occupied by an opposing unit, the ranged unit performing the Ranged Attack is considered to have a clear Line of Sight.
The firing trajectories for bows and crossbows are not the same, as archers fire in arcs while crossbowmen fire in a straight line. This fact is crucial when determining whether or not a unit can be the target of a Ranged Attack.
Direct Fire
When performing a Ranged Attack, the type of weapon must be taken into account along with the following aspects:
- A unit's LOS is never blocked by another friendly unit.
- A ranged unit performing a Ranged Attack must target an adjacent enemy unit (if there is one).
- If the target is a Leader, the Archbishop De Rada, or the Almohad Standard-bearer, there must always be a clear Line of Sight to the target regardless of the ranged unit's class. In addition, those units are considered to be equipped with heavy armor (quality 5).
- Although archers need not have a clear LOS to their target (except in the cases outlined above), a -1 modifier is applied to the archer's Ranged Attack roll if LOS is blocked.
- Crossbowmen units may never perform Ranged Attacks on a target if they do not have a clear LOS (remember that friendly units do not block LOS). This is in exception to indirect fire (explained below).
Indirect Fire
Design Note: This type of fire represents volleys of arrows launched into the sky towards the bulk of the enemy, taking advantage of the extended range provided by certain weapons. The arrows would gain speed as they fell and, coupled with their ability to pierce flesh and armor, could still cause significant damage.
Indirect fire may only take place against units that are at a range of 5 or 6 hexes (outside the ranges listed on the Ranged Attacks Table) or whose distance to the ranged unit and Armor Class would not allow for a successful hit on the Ranged Attacks Table. (Example: a unit of crossbowmen fires on a quality 5 unit at a distance of 4 hexes. In this case, as indicated on the table, there is no possibility for success). Any successful Ranged Attack performed via Indirect Fire can, at most, disorder an enemy unit.
Restrictions for Indirect Fire:
- Archbishop de Rada and the Standard-bearer may not be targeted.
- Cannot be used for Reaction Fire.
Procedure:
- May be performed by both archers and crossbowmen without the need for a clear LOS to the target.
- The target is only hit on a roll of '12.'
- If hit, the target unit must pass a Quality Check:
- Pass = no result (although the Ranged Attack via Indirect Fire was successful, it did not cause enough damage to disorder the target).
- Fail = the target unit is Disordered (the Ranged Attack hit home).
10.4. Reaction Fire
A non-Disordered ranged unit may perform Reaction Fire each time it is the target of an enemy Ranged Attack or Cavalry Charge, or at the moment it becomes Locked in Melee Combat. If the ranged unit targets a unit with a NO Withdrawal Marker, apply a -2 modifier to the die roll.
Against charges or melee attacks: Reaction Fire is always resolved before combat occurs and at a distance of 1 hex. In the case of Melee Combat, if it is the target of Multiple Attacks the defending ranged unit selects one (and only one) of the attacking units to be the target of its Reaction Fire.
Against enemy Ranged Attacks: Reaction Fire occurs just after resolving the incoming Ranged Attack and only if it failed. In this case, a clear LOS is not necessary to perform Reaction Fire and the target ranged unit is allowed to 'return fire' taking into account its own unit class as well as the distance to the enemy ranged unit and its Armor Class. If a ranged unit is the target of multiple Ranged Attacks it selects one (and only one) of the attacking ranged units to be the target of its Reaction Fire.
10.5. Harrying
Non-Disordered Muslim horse archers that are the target of a Cavalry Charge or melee attack have the option to perform a Harrying action. This takes place instead of performing the usual Reaction Fire and then participating in combat. In return, these units may not perform Cavalry Withdrawal actions. Harrying involves performing a Ranged Attack (with a negative modifier) and attempting to avoid combat. Follow the procedure outlined below:
- Perform a Ranged Attack against the attacking enemy unit with a -2 modifier (-1 for Agzaz Kurds).
- If the enemy unit was not eliminated or Disordered, the Muslim unit in question then performs a Quality Check adding 2 to its Quality Factor. Exception: do not add +2 Quality Factor if Harrying a light cavalry unit.
- If the Quality Check is passed, move up to 4 hexes in any direction (may not end movement adjacent to an enemy unit). The unit may ignore enemy ZOCs, but may be the target of enemy Ranged Attacks of Opportunity. It may pass through hexes occupied by friendly units without penalty.
If the Harrying action has been performed against an enemy charging unit, the charge may be redirected to another target provided the unit has remaining movement points and passes the necessary Quality Check. If not passed, the charge is considered to have failed, 'wasting' its attack (whether the first or second). Leader, Military Order, and Royal Retinue units never have to pass a Quality Check to redirect charges and a failed charge does not cancel either of the two attacks allowed during a charge.
10.6. Ranged Attacks of Opportunity
Ranged units (except Muslim horse archers, whose unique ability is Harrying), have the ability to perform what is called a Ranged Attack of Opportunity during the Movement Phase of the opponent's Impulse. While this type of attack may not be performed in reaction to a Cavalry Charge, it is a valid action for the situations described below:
- When an enemy unit leaves a hex adjacent to one of your ranged units by normal movement or movement due to performing an Orderly Retreat, Panicked Retreat, Harrying, or Cavalry Withdrawal action.
- When an enemy unit moves to a hex adjacent to your ranged unit but did not engage it in Melee Combat (because they attacked another unit, for example).
- When an enemy unit ends its reaction movement in a hex adjacent to your ranged unit (Orderly Retreat, Panicked Retreat, Cavalry Withdrawal).
In any of the above circumstances, a ranged unit may fire at a relevant target with a -2 modifier. Multiple ranged units may fire at the same enemy unit each time it leaves a hex adjacent to one of them. Likewise, a single ranged unit may also fire multiple times at different targets each time an enemy unit enters or leaves a hex adjacent to that ranged unit. This type of attack does not provoke Reaction Fire from targets.
Design note: due to the peculiarities of this type of movement, if the phasing player provokes a Ranged Attack of Opportunity during their Impulse, they should not be allowed to take it back. Otherwise, this rule would be rendered meaningless. Therefore, we ask players to keep this in mind before moving units.
10.7. Melee Combat
One or more attacking units can engage a single enemy unit in Melee Combat provided all participating units are adjacent to each other. During the Melee Combat Phase, activated melee units are required to attack an adjacent enemy unit (if there is one).
Before resolving Melee Combat, the phasing player must declare, with the appropriate markers, any Multiple Attacks that are going to take place. A Multiple Attack consists of more than one unit from the same side attacking a single enemy unit. A friendly unit may not participate in a Multiple Attack if they are adjacent to an enemy unit who, in turn, is not adjacent to another friendly unit (melee, ranged, or Disordered).
The phasing player decides which adjacent enemy to target. During a player's Impulse, each of their units may only attack once and the same enemy unit may only be targeted once (for a normal or Multiple Attack).
Example: Several Muslim units move adjacent to Christian units. The Muslim player must now declare melee engagements and if there are any Multiple Attacks. The units marked with green arrows must attack the Christian units indicated, which are the only ones they can legally engage. The Muslim player decides to attack San Millán with Mujahideen 5, but could have attacked Madrid 1. However, it may not join Mujahideen 6 in a Multiple Attack against Madrid 2 because it is adjacent to both Madrid 1 and San Millán, which are not being Locked by any of their other units (remember, a unit may not participate in a Multiple Attack if they have adjacent enemy units which are in turn not adjacent to any of your units). Levante's situation is different. It may participate in a Multiple Attack against Madrid 2 or Peñacerrada, whichever the Muslim player decides. If Vizcaínos-2 had been in the hex above its current position, Levante would have been forced to attack it and could not have participated in the Multiple Attack.
Melee Combat Procedure:
Melee combat is resolved by rolling dice, which represents the luck factor. The result of each melee engagement is determined by rolling D8 (sometimes D12) and the winning side is given the chance to roll a D6 to try to eliminate a participating enemy unit (Elimination Roll).
First, any Multiple Attacks are declared (engagements involving more than one friendly unit attacking a single enemy unit). If a unit is not declared as participating in a Multiple Attack, then it is assumed it will be fighting on its own against another individual enemy unit.
A) Before making combat rolls:
- If the requirements specified in 10.5 are met, the target of the melee attack may perform Harrying tactics.
- If the target of the melee attack is a ranged unit that did not perform a Harrying action, it performs a Reaction Fire action against one of the attacking units and applies the result (if successful).
B) Determine victor:
- Determine if any of the participating units is Disordered, within range of a Leader, the Almohad Standard or Archbishop of Rada counter, inside the Defensive Palisade, on Los Olivares Hill, benefits from the effects of a card, or has a unique characteristic that affects Melee Combat. Apply any relevant modifiers.
- The attacking player rolls 1D8 for each attacking unit and applies each unit's Combat Factor and relevant modifiers separately to each die, obtaining a combat value for each unit.
- The defending player rolls 1D8 for their defending unit and applies its Combat Factor and relevant modifiers, obtaining a combat value for their defending unit.
- Compare each player's combat values to determine which unit is the victor. The unit with the highest combat value is considered the victor (the sum of its die roll + Combat Factor + modifiers).
- In case of a tie, no one is the victor and no Elimination Roll is made. All participating units remain in their positions.
The player whose unit is the victor now makes an Elimination Roll in an attempt to remove the participating enemy unit from play.
C) Elimination Roll:
- The player whose unit is the victor rolls 1D6 for each friendly participating unit, deciding beforehand which enemy unit is the target of the Elimination Roll(s).
- Determine if any of the participating units have a +1 modifier (the maximum allowed for D6 rolls, except the +2 for Mujahideen units) due to the following:
- They are within Leadership Range of their Formation Leader or Overall Commander.
- They are defenders and are inside the Defensive Palisade.
- They are benefiting from the effects of a card or have a unique characteristic that affects the Elimination Roll.
- If the result exceeds the target's Quality Factor by more than 1 point, that unit is eliminated.
- If the result exceeds the target unit's Quality Factor by only 1 point, that unit is Disordered (it receives a Disordered Marker) and must perform a Panicked Retreat (it must move in a straight line towards its army's side of the board a number of hexes equal to half its Movement Factor).
- If none of the Elimination Rolls (D6) exceed the target unit's Quality Factor, that unit is 'pushed back' one hex (see Orderly Retreats below).
- If the retreating or eliminated unit was the defender, the attacking player may advance into the vacated space with the victorious unit (only one in the case of a Multiple Attack).
- If the retreating or eliminated unit was the attacker, the defending player may NOT choose to advance into the vacated hex.
Melee Combat Example: Two Christian Militia units on foot (3-3-4), attack a Muslim Mounted Men-at-Arms unit (4-4-6). The Muslim cavalry unit failed the Quality Check and so could not perform a Cavalry Withdrawal action.
First, we roll to Determine the Victor. Each player rolls 1D8 per participating unit and accounts for each unit's Combat Factor. Christian units roll a 6 and 2, which when added to their respective Combat Factors result in a final combat value of 9 and 5. The Muslim unit rolls a 4 and adds the unit's Combat Factor of 4 to get a final combat value of 8. The Christian player, with the highest combat value (9), therefore wins the engagement. They now make a 2D6 Elimination Roll (1 for each participating unit) against the defeated Muslim unit. The Christian player's Elimination Roll resulted in a 3 and 5. The Muslim unit is able to fight off one of the Christian unit's with its combat value (the one which rolled a 3), but is bested by the other (the one which rolled a 5) which Disorders it and forces a Panicked Retreat. The attacking player may now decide to move one of the victorious units in the vacated hex. If the Elimination Roll had failed, the Muslim unit would have simply been pushed back one space. In this case, one of the attacking units could still occupy the vacated hex.
Note that had the Muslim player's combat value been one point higher, there would have been a tie. There would have been no victor and all units would have remained in their position.
10.8. Orderly and Panicked Retreats
Units may sometimes be forced to retreat due to adverse outcomes. This type of movement is always done in the direction of their army's side of the board. A distinction must be made between what are called Orderly Retreats and those denoted Panicked Retreats.
Orderly Retreats
When a unit loses a melee engagement but is neither Disordered nor eliminated, it must perform an Orderly Retreat. Movement must always be in the direction of one of its 3 Rear hexes and towards its army's side of the board. Units performing Orderly Retreats prioritize movement to (in the following order):
- An empty hex with no adjacent enemy unit.
- An empty hex adjacent to an enemy unit.
- A hex occupied by a friendly unit not adjacent to an enemy unit.
- A hex occupied by a friendly unit adjacent to an enemy unit.
- A hex occupied by an enemy unit.
Units performing an Orderly Retreat ignore possible enemy ZOCs and must end their movement in an empty hex. If it enters an occupied hex, the retreat continues until they can occupy an empty hex. Depending on whether it is an enemy or friendly unit, certain effects apply when a retreating unit enters an occupied hex:
- Friendly unit: a retreating unit which 'passes through' a hex occupied by a friendly unit forces this unit (not the unit performing the retreat) to pass a Quality Check or it becomes Disordered. This only occurs the first time a retreating unit enters a friendly-occupied hex during its retreat.
- Enemy unit: a retreating unit which 'passes through' a hex occupied by an enemy unit must itself pass a Quality Check or be eliminated. This check is performed for each enemy-occupied hex it enters during its retreat.
If the retreating unit fails the Quality Check in (2) above, it becomes Disordered and is forced to perform a Panicked Retreat starting from the empty hex where it should have stopped its movement. If the friendly unit from (1) above fails the Quality Check, it also becomes Disordered and likewise must perform a Panicked Retreat (starting from the hex it is currently occupying).
Panicked Retreat
The moment a unit becomes Disordered it must perform a Panicked Retreat. Recall that units can become Disordered due to enemy Ranged Attacks, failure to pass Quality Checks in certain cases, or when, after losing a melee engagement, the opposing player's Elimination Roll was only 1 point higher than the defeated unit's Quality Factor. When performing a Panicked Retreat, a Disordered Marker is placed on the unit and it is now forced to move a number of hexes equal to half its Movement Factor, ignoring enemy ZOCs.
For each enemy-occupied hex a retreating unit enters during its retreat, it must pass a Quality Check or be eliminated. If passed, the retreating unit is simply placed in its destination hex as normal.
A unit that is performing a Panicked Retreat and that must enter a hex occupied by a friendly unit forces the latter to pass a Quality Check or it too becomes Disordered. This only occurs for the first unit being 'passed over' in this manner. If that friendly unit fails the check, it becomes Disordered and is therefore also displaced. Since the friendly unit in question must vacate its current hex, the unit performing the original Panicked Retreat occupies this newly-vacated hex provided it has moved the necessary number of hexes.
Important: When one unit's Panicked Retreat causes the first friendly unit it passes over to also perform a Panicked Retreat (because it failed the required Quality Check), this friendly unit's movement into hexes occupied by other friendly units will NOT force further Quality Checks.
Example: San Millán and Peñacerrada attack Mujahideen 5 and win the melee engagement. However, they only manage to Disorder it with their Elimination Roll. The Muslim unit is given a Disordered Marker and must perform a Panicked Retreat in a straight line towards its army's side of the board a number of hexes equal to half its Movement Factor (2 in this case). While retreating, Mujahideen 5 must enter the hex occupied by the enemy unit Madrid 1, forcing the Muslim unit to make a Quality Check. Fortunately, it passes the check and so continues its retreat (failing the check would have resulted in its elimination). However, the second hex it must enter is occupied by the friendly Mujahideen 6 unit. Since this is the first unit that Mujahideen 5 passes through during its retreat, another Quality Check must be performed, but this time for Mujahideen 6. If passed, it remains in its position and Mujahideen 5 continues retreating until it can occupy an empty hex.
If this occurs, note that Mujahideen-5 would also be forced to enter the hex occupied by Yusam, another friendly unit. However, this has no effect, as only the first friendly unit being passed through by a retreating unit must perform the Quality Check. And so Mujahideen-5 would simply continue its Panicked Retreat until it can occupy an empty hex. If Mujahideen-6 fails its Quality Check, it would also become Disordered and have to perform a Panicked Retreat of its own. This would result in Mujahideen-6 passing over Yusam and through another hex. Since Mujahideen-6 would have left its hex empty, the unit performing the original retreat (Mujahideen-5) would occupy it.
Effects of being Disordered
A Disordered unit has the following characteristics:
- Each time it is the target of an enemy Cavalry Charge, Melee Attack, or Pursuit action, its Combat Factor is reduced by 1.
- If it were to become Disordered again due to the result of an enemy Ranged Attack or Elimination Roll, it is eliminated instead.
- It cannot be voluntarily activated or perform any of the following: Cavalry Withdrawals, Ranged Attacks of Opportunity, Reaction Fire, Reaction Charge, or Harrying.
- It does not Lock adjacent enemy units performing the Pursuit action.
- It does not Lock adjacent enemy cavalry units at the beginning of an Impulse. This means these cavalry units will have the chance to perform a Cavalry Charge.
- If it wins combat during a Pursuit action, it does not make an Elimination Roll. The defeated enemy unit is simply pushed back 1 space.
- Even while Disordered, Leaders still exercise their Leadership Range. This means that units in their Formation within this range still receive the positive modifier when performing Quality Checks and engaging in combat.
A unit attacking a Disordered unit has the following characteristics:
- +1 to Combat Factor for Cavalry Charges, Melee Combat, or Pursuit actions.
- +1 to D12 Ranged Attack rolls.
Panicked Retreat occurs when a unit:
- Is defeated in combat and the enemy's Elimination Roll only exceeds its Quality Factor by 1.
- Is the target of a Ranged Attack and the roll obtains the 'Disorder' result.
- Is performing an Orderly Retreat and fails the required Quality Check upon entering a hex occupied by an enemy unit.
- Fails the required Quality Check because it is the first friendly unit to be 'passed through' during another unit's Orderly or Panicked Retreat.
- Fails the required Quality Check for performing a Reaction Charge in aid of a friendly unit.
- Fails the required Quality check when attempting to rally or for desertion after the death of its Formation's Leader.
All units that become Disordered are given a Disordered Marker and must always retreat in a straight line towards their army's side of the board a number of hexes equal to half its Movement Factor (or whatever number of hexes is necessary in order to occupy an empty hex). This movement ignores enemy ZOCs.
Disordered units remain in this state until their Formation is activated again, which is when they can be rallied (as detailed in Sequence of Play). Disordered units may also be made the target of Pursuit actions from enemy units.
10.9. Pursuit
Disordered units were vulnerable and could therefore be finished off more easily by enemy units pursuing them. To represent this, after the Melee Combat Phase, the active player has the option to perform Pursuit actions against Disordered enemy units. These enemy units must be within movement range of friendly units in the activated Formation who wish to perform a Pursuit action. Units may not pursue Disordered enemy units if they themselves are Disordered or if they are Locked by non-Disordered enemy units. Both melee and ranged units may pursue Disordered enemy units. If ranged, the pursuing unit must be within attack range of the target or be able to move within attack range. The following steps occur in order:
- Choose a single unit that is part of the activated Formation to perform the Pursuit action against a single Disordered enemy unit. The pursuing unit must be able to engage the target with a melee or Ranged attack (taking into account its Movement Factor and/or distance to the target in the case of Ranged Attacks).
- Resolve Pursuit actions one at a time. The unit wishing to perform the Pursuit action must pass a Quality Check to move towards the target Disordered enemy unit and engage it in Melee Combat or perform a Ranged Attack. Both types of attack receive a +1 modifier to the roll, and remember that Disordered units have a -1 Combat Factor (which affects Melee Combat but not Ranged Attacks).
- If the Disordered unit manages to win the melee engagement, it does NOT make an Elimination Roll against its pursuer. The pursuing unit simply retreats 1 space and the Disordered unit avoids elimination.
- If the unit being pursued receives another Disordered result, it is eliminated. The attacking unit may occupy the vacated hex.
- If the unit wishing to perform the Pursuit action fails the required Quality Check, no more Pursuit actions may be performed against its target.
- If a unit wishes to perform the Pursuit action against an adjacent Disordered enemy unit, no Quality Check is required.
11. Leaders and Command Points
Leaders are the most important units in the game and have special characteristics. The Command Point is a tool players have at their disposal to help them improve their strategic position during the game or avoid a catastrophic situation orchestrated by their opponent.
11.1. Leader Counters
A Leader counter not only represents the Leader himself. In fact, it is a full complement of fiercely loyal soldiers that includes the Leader along with some of the most competent fighters in his service. Together with the Royal Retinues (on the Christian side) and the Black Guard (on the Muslim side), they are the most elite units in the game.
Leaders benefit from these special characteristics:
- They roll an additional 1D8 for Cavalry Charges, Melee Combat, or Pursuit actions, keeping the best result.
- They can automatically regroup, returning to the hex where they initially started their Cavalry Charge.
- A failed attack due to enemy Harrying/Cavalry Withdrawal actions does not waste one of the two attacks allowed during their Cavalry Charge.
- Being Disordered does not nullify Leadership Range. It still has the same effects mentioned below.
- If their Formation is activated during an Impulse, they automatically rally (recover from being Disordered) in the Recovery Phase.
In addition to factors common to all other units, Leaders have a Leadership Range with the following effects:
- In the Recovery Phase during an Impulse where their Formation is activated, all Disordered friendly units (regardless of Formation) within Leadership Range of the Leader automatically rally.
- When a Formation receives another's activation (because they yielded it), units belonging to the receiving Formation that are within Leadership Range of their Leader, including the Leader himself, are not required to pass a Quality Check in order to move.
- When the Overall Commander's Formation is activated (by direct activation or when receiving a yielded one from another Formation), ANY unit, including Leaders, within his Leadership Range may move (after passing a Quality Check).
- Any friendly unit not belonging to the activated Leader's Formation that is within his Leadership Range at the beginning of the Ranged Attack and Melee Combat Phases may perform Ranged Attacks and engage in Melee Combat (exception: Sancho VII of Navarre, see 12.9). They may not, however, move (exception: in the case of the Overall Commander as mentioned in the previous bullet point).
- When a unit performs a Quality Check within range of friendly Leader, it adds 1 to its Quality Factor (to a maximum of 5).
- Any unit belonging to the Formation of the activated Leader and within his Leadership Range receive positive modifiers when resolving Cavalry Charges, Melee Combat, or Pursuit actions. These modifiers also apply to the Leaders themselves.
- +1 modifier to D8/D12 rolls, whether defending or attacking, when rolling to Determine the Victor in combat.
- Only when attacking and if they are the victor, +1 when making Elimination Rolls (D6).
Important: remember that D6 Elimination Rolls can only be modified by +1 at the most (except in the case of Mujahideen units).
Most Leaders have a Leadership Range of 2, although some have a Leadership Range of 3. These Leaders are Alfonso VIII, Al-Nasir, and Sancho VII of Navarre (see below for details on Pedro II of Aragon).
When a Leader is eliminated, play is momentarily interrupted. Immediately perform Quality Checks for all units within his Formation except for Mujahideen, in the case of the Muslim Vanguard. Any unit that fails the D6 Quality Check (obtaining a result higher than its Quality Factor) becomes Disordered and must perform a Panicked Retreat. If a unit passes the check (obtaining a result equal to or less than its Quality Factor), it remains in its current position and does not become Disordered.
Players may use the Command Point to increase by 1 the Quality Factor of any units performing Quality Checks due to Leader elimination (see Command Points 11.2). What's more, if any such unit is within Leadership Range of another Leader, it benefits from an additional +1 to its Quality Factor (maximum 5) when performing the Quality Check (exception: Sancho VII of Navarre, Military Orders).
If one of the Overall Commanders is eliminated, (King Alfonso VIII [see Pedro II of Aragon] or Caliph Al-Nasir), all remaining friendly Leaders must roll to determine how they are affected by the death of their Commander. If the result of the roll is a 1 or 2, or the Formation is leaderless, all units belonging to that Formation (including the Leader himself) must pass a Quality Check or become Disordered (see Sancho VII of Navarre and Military Orders). Players may use their "Command Point" to avoid this 'desertion' effect (see Command Points 11.2).
11.2. Command Points
Each Player has a Command Point which allows them to perform the special actions described below. There are two types of Command Points:
- Regular Command Point (dice roll)
- Special Command Point (automatic)
The Regular Command Point, which involves rolling a die, may only be used once per Impulse and each action can only be tried once. The Special Command Point, obtained automatically, can be used at any time but only once per game. This Special Command Point can even be used after succeeding a die roll to use the Regular Command Point in the same Impulse. In fact, if a player fails the roll to use their Regular Command Point they may use the Special Command Point to perform the same action.
Each player has two Command Point Markers, one for each type, which are placed on their corresponding spaces on the Administrative Display. The Special Command Point has two spaces marked Available and Used. At the beginning of the game, the marker is placed on the Available space. The Regular Command Point has 6 spaces marked 8, 9, 10, 11, 12, and Used. At the beginning of the game, the marker is placed on the 8 space.
Each Command Point can be used in the following manner:
- Special Command Point: automatic success in resolving the action for which it is used. Mark it as Used on its Special Command Point space. Each player only has one per game.
- Regular Command Point: roll 1D12, success if the result is equal to or higher than the number indicated on its marker's current space. Before rolling, players may benefit from a +1 to the die roll for each card they discard.
- If successful, place the marker in the Used space. It will be returned to the 8 space during the End of Turn Phase.
- If failed, move the marker one space to the right (it will now be on a higher-numbered space).
Command Points can be used to perform the following special actions:
- As the Muslim player, and only on turn 1, avoid the required desertion roll for Andalusian units in the Vanguard at the beginning of the game.
- As the Christian player, and only on turn 1, ignore, for the entire game, the rule that states Ultramontane Crusaders must attack (see 12.5).
- Starting on the second turn, avoid random activation of a Formation at the beginning of the turn. If successful, choose the Formation you wish to activate instead of the one chosen randomly. This action may be performed even after seeing which Formation was chosen randomly.
- Starting on turn 3, gain the Initiative. If you have lost the Initiative and want to retake it, you may do so by way of this action.
- Activate a Formation before your opponent. You may activate a Formation of your choice (from those available this turn) and take your Impulse before your opponent takes theirs. The Formation chosen must not have already been activated twice, and if already activated once its units must pass a Quality Check to be able to move. This action must be declared right after the opposing player announces which Formation they are going to activate. After completion of your Impulse, your opponent carries on with theirs (using the Formation announced beforehand).
- Increase by 1 (to a maximum of 5) the Quality Factor of units rolling for desertion due to Leader elimination.
- Cancel the effects of a Strategy or Tactics Card played by your rival. The canceled card goes to the discard pile.
- As the Muslim player, flip the Almohad Standard to its Standard-bearer side and move it (if so desired).
- During the current Impulse, yield activation of a Formation with a Leader to another available Formation without a Leader. If the Regular Command Point roll is failed, the original Formation is activated. If successful, all units belonging to the receiving Formation without a Leader must pass a Quality Check in order to move.
- During the current Impulse, yield activation of a Formation with a Leader to another unavailable Formation with a Leader. If successful, swap the two Formation Chits in the Administrative Display. If failed, the activation of the original Formation is forfeit but you may move up to 4 friendly units (from any Formation). These units may not perform Ranged Attacks or end movement adjacent to enemy units, however.
- Move the Archbishop of Toledo, as the Christian player, or the Standard-bearer, as the Muslim player, if on their Used side. This amounts to giving them an additional activation for the turn.
- Cancel your opponent's successful Command Point for any of the above actions.
Command Points may not be used to cancel successful cancellations of other Command Points. That is to say, if your opponent uses their Command Point to successfully cancel use of one of your Command Points, you may not spend another Command Point to reverse this outcome.
12. Special Units
Many of the units listed here may have specific Tactics cards that affect that unit class.
12.1. Agzaz Kurds
In the battle, Al-Nasir had at his disposal a corps of exceptional Kurdish Agzaz mounted archers (a gift from the Abbasid Caliphate of Baghdad). They were capable of performing the so-called "Parthian Shot" (or "parting shot"), a very effective harrying maneuver. Equipped with composite bows, which gave them excellent range, as well as arrows capable of penetrating chain mail, they were also exceptional marksmen. These units benefit from the following special characteristics:
- They have their own row on the Ranged Attacks Table.
- When performing a Harrying action, only a -1 modifier is applied to their Ranged Attack (which represents the effectiveness of the Parthian Shot).
12.2. Spearmen
Equipped with long spears, these Muslim units were of great defensive value when engaged by cavalry units. An example of an especially effective tactic is that spearmen could brace for a cavalry charge by raising their spears at an angle while anchored against the ground.
If a non-Disordered spearmen unit is the target of a Cavalry Charge, the charging unit subtracts 1 from its Cavalry Charge marker (which affects the D8 roll to Determine the Victor).
If a non-Disordered spearmen unit is the target of a melee attack where all attacking units are cavalry, add +1 to the spearmen unit's Combat Factor.
12.3. Andalusian Desertion
The Andalusian troops who came to the battle were not entirely satisfied with Almohad rule. Political and religious dissent along with the treatment they received from these more extreme North African invaders created sizable rifts between the two factions.
A few days before the battle, Caliph Al-Nasir had an Andalusian Qadi unfairly executed and had also failed to pay his Andalusian troops. These two factors greatly contributed to the instability of the situation, and just before the two armies met on the battlefield, some Andalusian troops deserted.
At the beginning of the game, after the Christian player has completed their first Activation, Andalusian units belonging to the Muslim Vanguard (only) must pass a Quality Check for Desertion. However, the Muslim player may intervene at that moment in the following ways:
- Spend a Command Point (Regular or Special) to avoid the Quality Check.
- Discard a card from their hand for each unit they wish to avoid subjecting to the Quality Check. This may only be done if use of the Regular Command Point failed (by not obtaining a successful die roll).
If it becomes necessary to check for Desertion, each Andalusian unit belonging to the Vanguard must perform a Quality Check. If failed (result is higher than its Quality Factor), that unit leaves the battlefield. Set aside units removed from the board this way as certain cards can bring them back into play.
12.4. Mujahideen
The combat effectiveness of these soldiers was debatable since they were often poorly equipped and died quickly on the battlefield. They would typically try to close the distance between themselves and enemy units as quickly as possible in clear disregard of their own well-being, hoping to cause as much damage as possible. They have been given a relatively low Quality Factor in the game for these reasons.
Some Mujahideen units were mounted and their combat effectiveness was comparable to light cavalry, so these units are considered halfway between Mujahideen infantry and light cavalry.
The above characteristics are reflected in the game in the following ways:
- At the beginning of the Movement Phase, Mujahideen infantry units are required to attack enemy units within their movement range that are not adjacent to any Muslim units. If a Mujahideen infantry unit can target more than one enemy unit this way, the Muslim player must decide which unit to attack. Mujahideen infantry are not required to attack Christian units already Locked by another Muslim unit.
- If Mujahideen units (mounted or infantry) win a melee engagement (D8), they receive a +2 modifier for the Elimination Roll (D6). This is the only time the game allows a modifier greater than +1 to be applied to an Elimination Roll (D6) (except cards).
- If the Leader of the Muslim Vanguard (or Al-Nasir) is eliminated, Mujahideen units do not perform Quality Checks. Their explicit goal was self-sacrifice, so they will not run from the battlefield.
12.5. Ultramontane Crusaders
These units are identified by a shield with a Latin cross and belong to the Christian Vanguard Formation. The participation of these foreign crusaders from beyond the Pyrenees was highly controversial. In fact, a large number of them left the expedition days before the battle due to disagreements with the Castilian king. However, a small group remained faithful under the command of Amalarico, Archbishop of Narbonne. This character has his own counter that is actually a knights unit named after him. A factor of '2' inside a hex is printed on the unit's counter which has no effect on any unit except for the Ultramontane Crusaders in the case outlined later in this section.
The Crusaders' motive was not only to wipe out 'the unbelievers,' giving them no quarter, but also to come away with significant monetary and material gain. Just as the Mujahideen were Muslim religious fanatics, these soldiers were the fanatics on the Christian side.
In the game, these units act as follows:
- Fundamentalists: At the beginning of the Impulse where they have been activated, Ultramontane Crusaders are required to attack any enemy unit not adjacent to any Christian units. This can be done by performing a Cavalry Charge or engaging the target in Melee Combat. If performing a charge, this rule also applies to the second attack. If there is more than one such enemy unit, the Christian player decides which to attack. Ultramontane Crusaders are not required to attack Muslim units already Locked by another Christian unit.
- As the attacker in any type of combat, they roll an additional die.
- They receive a +4 Cavalry Charge modifier when performing a Cavalry Charge (first attack only).
- If they participate in a Cavalry Charge or Melee Combat that ends in a tie (D8), players reroll the dice (their fervor only allows them to win or lose, nothing in between).
Amalarico: The Bishop of Narbonne was in command of the Ultramontane Crusaders who remained after the others deserted.
On turn 1, the Christian player may alter the effects of the Fundamentalists rule for the whole game in one of two ways:
- Discarding any 2 cards from their hand.
- Spending a Regular or Special Command Point.
If the Christian player decides to alter the effects of the Fundamentalist rule, for the remainder of the game Crusader units within Amalarico's Leadership Range (including himself) are not subject to the Fundamentalists rule. Otherwise, only Amalarico is exempt from this rule.
12.6. Military Orders
The units of the Military Orders were heavily equipped and battle-hardened from fighting Saracens. They were fanatical monk-soldiers instilled with strong discipline due to a strict military and religious hierarchy. The following rules apply to Military Order units:
- As the defender in any type of combat, they roll an additional 1D8.
- While performing a Cavalry Charge, if they are the target of a Harrying action or their target performs a Cavalry Withdrawal action, they are not required to pass a Quality Check in order to redirect their charge and continue with another attack. Therefore, their attacks are never 'wasted' while charging.
- They do not perform Quality Checks if Alfonso VIII is eliminated (see also Pedro II of Aragon). This is because their authority was the Pope, not the King.
Although each of the 4 Military Orders that participated in the battle had their own coat-of-arms, this detail is only reflected in the game for historical flavor. All Military Order units are governed by the same rules and belong to the Center Formation commanded by De Lara.
12.7. Royal Retinues
The Christian player has a number of knights units called Royal Retinues (3 for Castile, 2 for Aragon, and 2 for Navarre). These were elite, highly experienced soldiers and essentially acted as a king's own personal army. The following rules are applied to all Royal Retinue units:
- When participating in any combat, they roll an additional 1D8 when Determining the Victor.
- If they are the target of a Harrying action, or their target performs a Cavalry Withdrawal action, they are not required to pass a Quality Check in order to continue moving and attacking. Therefore, their attacks are never 'wasted.'
- They can automatically regroup, returning to the hex where they initially started their Cavalry Charge.
12.8. Archbishop Jiménez De Rada
The Archbishop of Toledo played an immensely important role during the campaign, not only logistically but also in terms of the morale boost he provided for the troops present at the battle. There is a counter representing this iconic figure in the game that only has a Movement Factor (of 8) and an Action Range (of 3 hexes). This counter has the following effects on play:
- Units within its Action Range roll D12 instead of D8 when rolling to Determine the Victor.
- It may be stacked with any Christian unit.
- Each turn it may move with one of the 3 Christian Formations that are activated, regardless of where it is located on the battlefield. When it is activated, it is flipped to indicate it has already been used. It may not be moved again until the following turn (except with the use of a Command Point).
- Ultramontane Crusaders within the Archbishop's Action Range are free to move and attack as desired, ignoring the Fundamentalists rule (which states they must attack Muslim units).
- If a Muslim unit enters the same hex the Archbishop occupies, its counter is eliminated. If stacked with another unit that is eliminated in a Cavalry Charge, Pursuit action, or melee engagement, the Archbishop is also eliminated (provided the Muslim player is the attacker and decides to advance into the hex).
- The Archbishop ignores the Disordered result when receiving ranged fire.
- If the unit it is stacked with becomes Disordered or retreats for any reason, the Archbishop is displaced with it (but never becomes Disordered).
- If ranged fire eliminates the unit it is stacked with, the Christian player immediately moves the Archbishop's counter a number of spaces equal to or less than its Movement Factor. It may be moved in any direction, ignoring enemy ZOCs.
- De Rada is considered a Leader unit when being targeted by ranged fire. This implies its counter can be eliminated in this manner.
12.9. Sancho VII of Navarre (The Strong)
It was Papal pressure rather than Sancho VII's own conviction that pushed him to join the crusaders on their march south. The King of Navarre's reluctance was perhaps due to his excellent relationship with the Almohad Caliph, with whom he had signed several truces over the years. They had also collaborated against Castile in the years leading up to the encounter at Las Navas. However, religion once again took precedence over political interests.
There were actually few Navarrese troops on the battlefield, and they were reinforced with Castilian troops. However, Sancho VII maintained full command of the Christian Right. According to some historical accounts, he was the first to reach the Caliph's defensive position.
To represent all this, the following rules have been implemented:
- Navarrese troops may only engage in Multiple Attacks against Muslim units in conjunction with Castilian units from their own Formation or with Military Order units.
- Christian units outside Sancho VII's Formation, with the exception of Military Order units, cannot be activated by him or benefit from his Leadership. However, he does automatically rally Christian units from other Formations and gives a +1 modifier for Pursuit actions.
- King Sancho VII may never yield his activation, but may receive an activation from any other Christian leader.
- His Leadership Range is 3 (the same as an Overall Commander).
- Navarrese troops may not benefit from the Leadership of other Leaders under any circumstance, and do not roll for Desertion if the Overall Commander is eliminated.
- Castilian units in King Sancho VII's Formation do cooperate with the rest of the Christian army and therefore benefit from and are affected by the Leadership and activation of other Leaders as well as elimination of the Overall Commander.
12.10. Pedro II of Aragon
This monarch was a great friend to the Castilian king and his closest ally. His unit has the following characteristics:
- If Alfonso VIII of Castile is eliminated, Pedro II of Aragon becomes the new Christian Overall Commander. The same range and Leadership qualities that Alfonso VIII had are now applied to Pedro II (use the counter with range 3 to indicate this).
- If Pedro II is Overall Commander (due to elimination of Alfonso VIII) and is eliminated, the same rules for Desertion of troops apply as explained in the case of Alfonso VIII or Al-Nasir's elimination.
12.11. Almohad Standard
The Muslim player has a special two-sided counter representing the Caliph's Standard. On the front side is a Raised Standard (motionless) with no factors. It is placed next to the Caliph's red tent. On the back, the Standard is depicted in the hands of the Standard-bearer, Abi Hafs, (the man in charge of its custody and safe transport), with a range of 2 and a Movement Factor of 8.
At the start of the game, the Almohad Standard counter is placed with its Raised side face-up on its starting space inside the Defensive Palisade (on top of Los Olivares Hill). The hex occupied by the Standard counter may also be occupied by any other friendly unit.
If the banner is in its starting location (Raised or in the hands of its Standard-bearer), its Action Range affects all friendly units inside the Palisade (see detailed description below). If Raised and there is a Christian unit occupying its hex, the Standard loses its special effects (and the game will be over if the Christian player still holds it at the end of the turn).
However, if the Standard moves from its starting space, whether inside or outside the Palisade (only possible if it is on its Standard-bearer side), its Action Range is only 2 hexes. Its effect on combat is similar to that of the Christian Archbishop of Toledo counter (units within its range roll D12 instead of D8 when Determining the Victor).
The Caliph's Standard may be flipped to its Standard-bearer side as long as there is no Christian unit occupying its starting hex. If this is the case, it may move from its starting space if one of the following conditions are met:
- There is at least one Christian unit within the Defensive Palisade, or adjacent to it on the outside, and the Standard is located at a maximum distance of double Al-Nasir's Leadership Range.
- The Muslim player uses a Command Point to flip it to its Standard-bearer side.
- The Muslim player yields activation of their Rearguard Formation to flip it to its Standard-bearer side.
- The Vizier Takes Command or The Black Guard card has been played.
If the Almohad Standard counter's Standard-bearer side is face-up, it is allowed to move and has the following effects on play:
- Each turn, it may move with one of the 3 Muslim Formations that are activated, regardless of where it is located on the battlefield. Once activated, place it underneath the unit it is stacked with to indicate that it has already been moved OR flip it over to its Raised side (if occupying a hex on its own). It may not be moved again until the following turn (except with the use of a Command Point).
- Units within its range roll D12 instead of D8 when Determining the Victor. This effect is applied to all units within the Defensive Palisade if the Standard is occupying its starting hex.
- It may be stacked with any Muslim unit.
- If the Christian player occupies the same hex as the Standard while on its Standard-bearer side, the counter is eliminated and the Christian player wins the game immediately.
- The Standard-bearer ignores the Disordered result when receiving ranged fire.
- If ranged fire eliminates the unit it is stacked with, the Muslim player immediately moves the Standard-bearer counter a number of spaces equal to or less than its Movement Factor. It may be moved in any direction but is affected by enemy ZOCs.
- The Standard-bearer is considered a Leader unit when being targeted by ranged fire. This implies its counter can be eliminated in this manner.
The Christian player wins the game immediately if:
- At the end of a turn (not an Impulse), a Christian unit is occupying the same hex as the Almohad Standard counter while on its Raised side.
- The Standard-bearer is eliminated by ranged fire or in combat (due to an enemy unit entering the same hex it is currently occupying).
12.12. Los Olivares Hill
Los Olivares Hill ("Cerro de los Olivares" in Spanish) is the area on the Muslim army's side of the board marked with hexagons portraying silhouettes of olive trees. The darker tone of the background denotes higher altitude.
Units moving into the first hex on the top of the hill just beyond the 'sloped' hexes pay a cost of 2 movement points. If a unit does not have enough remaining movement points to enter this hex, it may not do so. The 'sloped' hexes are not considered part of the hill. This extra cost in movement points does not apply to units performing an Orderly or Panicked Retreat.
Units positioned on the hill are considered to be at a higher level. To reflect this advantage, if a unit positioned on the hill is defending against an attacking unit positioned in a hex at a lower level, the former benefits from a +1 modifier when rolling to Determine the Victor (D8). Enemy cavalry units on a lower level may not perform Cavalry Charges against units positioned on the hill. Ranged units firing from the hill on units at a lower level have +1 range: use the 1 Hex column for targets at a distance of 1 or 2 hexes, column 2 for targets at a distance of 3 hexes, column 3 for a target at a distance of 4 hexes, etc.
12.13. Defensive Palisade
Caliph Al-Nasir had a defensive enclosure constructed on the battlefield, known in the game as the Defensive Palisade. This structure protected the Caliph's red Command Tent where the Almohad Standard was located. The following rules apply in relation to the Defensive Palisade:
- As long as the Almohad Standard is occupying its starting hex (Raised or on its Standard-bearer side), all units within the Defensive Palisade roll D12 instead of D8 when Determining the Victor. These units may also benefit from any relevant modifiers.
- Muslim units occupying hexes on the inside border of the Palisade always exert ZOCs on enemy units occupying hexes on the outside border of the Palisade.
- If a Ranged Attack targeting a unit inside the Palisade originates from outside the Palisade, a -2 modifier is applied to the Ranged Attack roll (this represents the possibility of arrows deflecting off the structure).
- Muslim units within the Palisade that are defending against enemy units located outside receive a +1 modifier when rolling to Determine the Victor (D8). This modifier is canceled if such a unit is defending against a Multiple Attack in which at least one enemy unit is not attacking across the Palisade.
- Muslim units that become Disordered and perform a Panicked Retreat may never enter the Palisade. Instead, their Retreat must follow the shortest path around the Palisade towards their army's side of the board. If more than one direction meets this requirement, the Muslim player chooses which one to take.
- Inside the Defensive Palisade, there are three half hexes that are considered full hexes and may be occupied by units. This is in contrast to the rest of the board, where half hexes can be moved through but never occupied. Note that the three half hexes in the Defensive Palisade are marked by a special frame.
12.14. Black Guard
Black Guard units start the game in the hexes located within the Defensive Palisade, guarding the Almohad Standard, along with the rest of the Muslim Rearguard Formation. The soldiers making up the Caliph's Black Guard (Imesebelen, from Senegal or Sudan), chained themselves to the ground to symbolize their intention to fight to the end in defense of the Caliph, and also to keep themselves from fleeing the field in panic.
The Black Guard are represented as spearmen units (with the same characteristics) but with the following additional advantage: while occupying hexes within the Defensive Palisade, they do not perform Orderly or Panicked Retreats due to being defeated in Melee Combat or by a Cavalry Charge, even if Disordered.
12.15. Camel Riders
One of the Muslim player's Formations contains Camel units. The number of participating units along with their actual combat effectiveness on the battlefield is highly debatable. This type of unit was available, especially in North Africa, which makes the likelihood of their participation quite certain as the best units from all corners of the empire answered the Caliph's call.
There are many historical accounts that horses could not stand the presence of camels, probably due to their smell. Camel charges were often effective due to the height of the animal, not to mention the fact that European soldiers had little to no experience fighting them. However, their riders were not typically well armored. The following rules reflect these aspects:
- They may perform Cavalry Charges just like heavy cavalry units, but their Quality Factor is lower to represent their inferior protection.
- They receive a +1 modifier when attacking cavalry units (including Leaders) in Cavalry Charges and Melee Combat.
- If at least one Camel unit participates as an attacker in a successful melee engagement or a Cavalry Charge's first attack (never a Pursuit action), and the defending unit is a cavalry unit (except a Leader), the Muslim player may decide to Disorder the defending cavalry unit (without the need to roll). If it was already Disordered, it is eliminated instead.
13. Victory Conditions
Victory in The Charge of the 3 Kings: Las Navas de Tolosa 1212 can be achieved in the following ways:
-
If, at any time, 4 Leaders from one side have been eliminated. A Christian unit occupying the same hex as the Almohad Standard counts towards this requirement.
-
The Christian player wins the game if one of its units is in control of the Raised Almohad Standard at the end of a turn, or eliminates the Standard-bearer.
-
A player wins the game if they completely eliminate their opponent's units (obviously). Before turn 8, a player also wins the game if they have on the map at least double the amount of units, +4, than their opponent.
Example: The Christian player has 8 units on the map to their opponent's 21. The Muslim player wins the game since they have at least double the remaining counters, +4, than the Christian player.
-
A player can win before turn 8 if their opponent has surpassed their surrender threshold without having surpassed their own.
-
If both players have surpassed their surrender threshold before turn 8, calculate the difference between each player's casualties and their surrender threshold, awarding this differential value to the opposing player. A player wins if they have greater than a 10-point advantage over their opponent. Otherwise, the result is a tie.
Example: at the end of a turn, the Muslim player has 158 casualty points caused by the Christian player. The Muslim side's surrender threshold is 142, which results in a differential value of 16 points in the Christian player's favor. The Christian player has 160 casualty points caused by the Muslim player. Since the Christian player's surrender threshold is 154, this results in a 6-point differential value for the Muslim player. Comparing the two differential values, neither player has greater than a 10-point advantage over the other, so the game ends in a tie.
-
At the end of turn 8, if none of the above conditions have been met, the player who has eliminated more enemy Leaders wins the game (reminder: Christian control of the Almohad Standard counts as an "Eliminated Muslim Leader"). In case of a tie, follow the procedure outlined in the previous point.
-
At the end of turn 8, if none of above conditions are met, the game ends in a tie.
Each unit eliminated by a player contributes to their opponent's "surrender threshold" an amount equal to the eliminated unit's Quality Factor. At the beginning of the game, each player has a total of 296 quality points. The Muslim player's surrender threshold is 142 points (48%) while the Christian player's is 154 points (52%). If either player reaches their surrender threshold, they lose the game (their army abandons the battlefield due to suffering too many casualties).
If players wish to play a shorter game, they may agree upon a lower surrender threshold.
14. Basic Version
To play the basic version of the game we recommend players implement the following rules:
- Do not use Strategy Cards
- Do not use Tactics Cards
- Do not use Command Points
- Do not use the Archbishop de Rada or the Almohad Standard-bearer. The Almohad Standard may not be moved from its starting position or flipped from its Raised side.
- On the Ranged Attacks Table, use the D column as the E/D column and the E/D column as E. This way, units can be eliminated more easily, which will shorten the game.
Of course, players are free to choose which of these to use or not use, in accordance with their play styles.