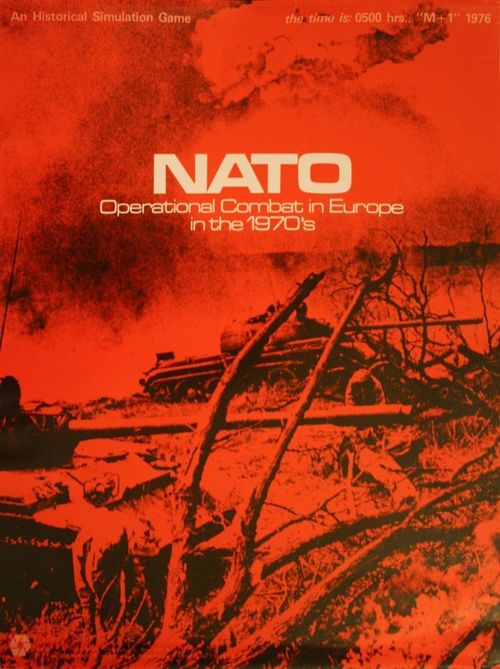
NATO: Operational Combat in Europe in the 1970's
NATO: Operational Combat in Europe in the 1970's Rulebook
Table of Contents
Table of Contents
- [1.0] Introduction
- [2.0] General Course of Play
- [3.0] Game Equipment
- [4.0] Sequence of Play
- [5.0] Movement
- [6.0] Zones of Control
- [7.0] Stacking
- [8.0] Combat
- [9.0] Combat Results Table
- [10.0] Terrain Effects Chart
- [11.0] Supply
- [12.0] Special Denmark Rules
- [13.0] Territorial Forces
- [14.0] Tactical Nuclear Warfare
- [15.0] Setting Up the Game
- [16.0] Initial Placement
- [17.0] Turn Record/Reinforcement Chart
- [18.0] Victory Conditions
- [19.0] Scenarios
- [20.0] Summary of Warsaw Pact Ground Forces
[1.0] Introduction
NATO is a simulation on a brigade/division level of a possible attempt by the Warsaw Pact forces to "liberate" Western Europe from the NATO alliance sometime in the 1970's. It postulates that this war in West Germany could occur without a massive strategic nuclear holocaust. Essentially, the game progresses from "M," the day the Warsaw Pact decides to launch an offensive, to day "M + 50," when a decision of some type (even a stalemated war) is assumed to have been reached. The game may be played starting with "M + 1," with the forces as they actually are in peacetime, or at "M + 31," after both sides have reached planned strength.
The increment of forces, as NATO transfers its scattered strength and Warsaw Pact sends forth additional member and Russian garrison divisions, is fully charted between the two game-versions. NATO depicts the essential elements of modern warfare (even future warfare) with unusual elements such as Air-transportable units, Airmobile units and the new Tricap (triple capability) divisions.
[2.0] General Course of Play
NATO is basically a two-player game. Each Player moves his units and executes attacks on Enemy units in turn, attempting to fulfill the conditions of victory. To move from one hex to another, each unit expends a portion of its Movement Allowance. Combat is resolved by comparing the total Combat Strength Points of adjacent opposing units and expressing the comparison as a simplified probability ratio (odds). A die is rolled and the outcome indicated on the Combat Results Table is applied to the units involved.
[3.0] Game Equipment
[3.1] The Game Map
The 22" x 34" mapsheet portrays the area of Western Europe from East Germany to France and the North Sea. A hexagonal grid is superimposed upon the mapsheet to regularize movement and combat of the playing pieces, tracing the supply lines and delineating the terrain imposed on the map.
[3.2] The Playing Pieces
Two differently colored sets of playing pieces (henceforth known as units) are supplied. They represent the various units of the opposing forces that will be available in the campaign. The opposing forces in each of the varying "Orders of Battle" are composed by selecting units from those provided on the unit sheet. It is strongly recommended that the Players sort their units by type and color, and keep them segregated. This greatly facilitates setting up the game. The playing pieces are distinguished by type, strength, and mobility, as represented by various numbers and symbols printed on their faces.
[3.21] Sample Unit
The sample unit face carries the labeled parts shown in the printed diagram: Organizational Size Symbol, Unit Type Symbol, Nationality, Unit Designation, Attack Strength, Defense Strength, and Movement Allowance. The sample face shows the numbers 3-3-8, with the labels Attack Strength and Defense Strength at the lower left and lower center of the numerals, and Movement Allowance at the lower right.
[3.22] Summary of Unit Types
The printed unit-type summary shows one sample face for each unit type, with the type name printed beside it. Sample faces, as printed:
| Unit Type (as printed) | Sample Face | Nationality and Size Symbol Shown |
|---|---|---|
| Infantry | 1-2-4 | FR, brigade (X) |
| Motorized Infantry | 3-3-8 | FR, division (XX) |
| Armored Infantry | 3-3-8 | NL, brigade (X) |
| Air-transportable Infantry | 1-1-2 | GE, brigade (X) |
| Armor | 5-5-8 | US, division (XX) |
| Armored Reconnaissance | 1-2-8 | US, brigade (X) |
| Mechanized Mountain | 3-3-8 | GE, brigade (X) |
| Airmobile-airmobile element | 1-2-8 | US, brigade (X) |
Organizational Size Symbols:
- X — Brigade
- XX — Division
[3.23] Definition of Terms
Attack Strength is the basic attacking strength of a unit quantified in Strength Points.
Defense Strength is the basic defending strength of a unit quantified in Strength Points.
Movement Allowance is the basic movement ability of a unit quantified in Movement Points; in most cases, a unit expends one Movement Point of its total Movement Allowance for each hex entered.
[3.3] Game Charts and Tables
Various visual aids are provided for the Players to simplify and illustrate certain game functions. These are the Combat Results Table, the Turn Record/Reinforcement Chart, and the Terrain Effects Chart. Each of these is fully explained where presented.
[3.4] Game Equipment Inventory
A complete set of NATO should include the following parts:
- One Game Map
- One set of Game Rules
- One set of die-cut counters
- One die
- One sheet of Charts and Tables
[3.5] Game Scale
Each Game-Turn represents two days and each hex is equivalent to 16 kilometers in distance.
[4.0] Sequence of Play
[4.1] The Game-Turn
NATO is played in turns called Game-Turns. Each Game-Turn is composed of two Player-Turns. Each Player-Turn is composed of three Phases. The Player whose Player-Turn is in progress is called the Phasing Player. Each Game-Turn proceeds as follows.
[4.2] Sequence Outline
A. FIRST PLAYER-TURN (Soviet Player-Turn)
-
Initial Movement Phase. The Phasing Player may move all of his units (exception, see 11.3) in any direction up to the limit of their Movement Allowance within the restrictions outlined in the Movement and Supply rules.
-
Combat Phase. The Phasing Player may attack Enemy units adjacent to Friendly units at his option; combat is resolved as outlined in the Combat rules.
-
Second Movement Phase. The Phasing Player may move all of his units in any direction up to the limit of their Movement Allowance within the restrictions outlined in the Movement Rules.
B. SECOND PLAYER-TURN (NATO Player-Turn)
Repeat phases 1 through 3 for the NATO Player, who becomes the Phasing Player and moves his own units.
C. GAME-TURN INDICATION
The Game-Turn marker is advanced on the Game-Turn track, signaling the start of a new Game-Turn.
[4.3] Game Length
Repeat steps A through C for the number of Game-Turns indicated by the scenario. At the end of the last Game-Turn, the game is over, and the Players' performances are evaluated in terms of the Victory Conditions.
[5.0] Movement
General Rules:
During the Movement Phase, the Phasing Player may move as many or as few of his units as he wishes. During each Friendly Movement Phase, each unit may be moved as many or as few hexes as the Phasing Player desires, as long as its Movement Allowance is not exceeded in a single Movement Phase. Unused Movement Points, however, may not be accumulated from Phase to Phase nor transferred from unit to unit.
Procedure:
Move each unit individually, tracing the path of its movement through the hexagonal grid. Once a unit has been moved and the Player's hand withdrawn, the unit may not be moved again, nor the path retraced and/or changed during that Movement Phase.
Cases:
[5.1] How to Move Units
[5.11] During a Movement Phase only the Phasing Player's units are moved; all, some, or none of his units may be moved. No Enemy movement, and no combat, may occur during a Movement Phase.
[5.12] Movement is calculated in terms of Movement Points. Basically each unit expends one Movement Point of its total Movement Allowance for each hex it enters.
[5.2] Movement Inhibitions and Prohibitions
[5.21] A unit's Movement Allowance may be decreased by supply considerations, lowering the number of Movement Points that it may expend in a given Movement Phase (see Supply). The number of Movement Points to enter a given hex accumulates by addition, i.e., to enter a woods hex while crossing a river hexside would cost three Movement Points: two for the woods hex, and one for crossing the river (See the Terrain Effects Chart). All effects of reducing available Movement Points and increasing the number of Movement Points to enter a given hex are cumulative.
[5.22] A unit may always move a single hex in a given Movement Phase as long as it is not leaving one Enemy controlled hex and directly entering another, and is not entering a sea hex or crossing a sea hexside (Exceptions: see 5.4).
[5.23] Units may never enter hexes containing Enemy units. Units may never enter all-sea hexes or pass through all-sea hexsides (See the Terrain Effects Chart).
[5.3] Czechoslovak Restrictions
[5.31] All Czechoslovak units are initially placed in Czechoslovakia. They may never leave that country unless otherwise stated in the scenario, either by crossing the Start Line or into East Germany. They may, however, attack hexes adjacent to Czechoslovakia.
[5.4] Units With Special Movement Abilities
The printed chart shows the following unit faces with their special-movement designations: 2-2-8, 1-2-8 and 1-2-8 (marked AIR-MOBILE DIVISION), and 4-3-8 and 2-2-8 (marked TRICAP DIVISION).
[5.41] Airmobile Units. There are two types of airmobile units: Airmobile divisions (composed of one base element and two airmobile elements) and Tricap divisions (composed of one base element and one airmobile element). The airmobile element of these units may ignore all effects of the first Enemy controlled hex they enter in any Friendly Movement Phase, as long as they did not begin that Movement Phase in an Enemy Controlled hex. If they did begin in an Enemy controlled hex, they may only enter another Enemy controlled hex (even an adjacent one). Thus airmobile elements have a limited ability to "move through" Enemy controlled hexes.
[5.42] Air Transportable Units. These Units have the unique ability to move without regard to Movement Allowance and the hex grid. At the beginning of any Friendly Movement Phase, any supplied Air-Transportable unit not in an Enemy controlled hex may be removed from the map and placed on any other hex with four restrictions:
- They may not be placed in Enemy occupied or controlled hexes;
- They may not be placed on All-Sea or All-Lake hexes;
- They may only be placed on hexes from which a line of unblocked contiguous hexes no longer than twelve hexes may be traced to any Friendly supply unit. Hexes are blocked by impassable terrain, Enemy occupied hexes and Enemy controlled hexes not occupied by Friendly units;
- They may only air transport from one clear terrain hex to another clear terrain hex.
[6.0] Zones of Control
General Rule:
The six hexagons immediately surrounding a hex constitute the Zone of Control of any units in that hex. Hexes upon which a unit exerts a Zone of Control are called controlled hexes, and inhibit the movement of Enemy units. All units exert a Zone of Control.
[6.1] Movement Effects
[6.11] Upon entering an Enemy controlled hex a unit must stop and may not move again in that Movement Phase (Exception see 6.2). However, units expend no additional Movement Points to enter an Enemy controlled hex (only the normal terrain costs).
[6.12] A unit may never move from one Enemy controlled hex directly to another Enemy controlled hex (Exception see 6.2).
[6.13] A unit that starts its Movement Phase in an Enemy controlled hex may move out and re-enter another Enemy controlled hex, provided it does not move directly from one to another. It must first enter at least one non-controlled hex.
[6.2] Airmobile Units
[6.21] The Airmobile elements of Airmobile and Tricap units may move from one Enemy controlled hex directly to another Enemy controlled hex once per Movement Phase (see 5.4). They are the only units with this ability.
[6.3] Combat Effects
[6.31] Zones of Control do not affect combat; attacking is completely voluntary and the presence of a unit's Zone of Control in a Friendly occupied hex does not force combat.
[6.4] Retreat Effects
[6.41] Units may not retreat (due to combat; see the Combat Results Table) into or through an Enemy controlled hex, unless another Friendly unit already occupies the controlled hex. Thus, for retreat purposes, Enemy controlled hexes are negated by Friendly units.
[6.5] Supply Effects
[6.51] Supply lines may not be traced through Enemy Controlled hexes unless that hex is occupied by a Friendly unit. Thus, for supply purposes, Friendly units negate Enemy controlled hexes.
[7.0] Stacking
General Rule:
The Soviets may stack a maximum of two units of any type per hex, while the NATO player may stack only one division (XX) or its equivalent (three Brigades: X). A supply unit counts as a division-sized unit for both sides where stacking is concerned.
Cases:
[7.1] Movement Effect
[7.11] Units may not move through hexes in violation of the stacking limitations. The stacking limit applies at all times during the Friendly Movement Phase. Units may not overstack voluntarily. Thus a unit could not be moved into or through a hex if the combination of the moving and stationary unit violated stacking limitations (see 9.2).
[7.2] Combat Effect
[7.21] All units which are in a hex under attack must be attacked; their separate Defense Strengths are totalled and the entire combined Strength must be attacked. Units stacked together may not be attacked separately. If one unit in a stack of units is attacking a given hex, the remaining units are under no compulsion to join in the attack. They may attack different hexes, or not attack at all.
[7.3] Unit Buildup and Breakdown
[7.31] The NATO Player may, at his option, break down (i.e., create more, smaller units from a single unit) or build up (i.e., combine several smaller units into one stronger unit) certain units into other configurations. Units to be combined must be of the same nationality and must start the Movement Phase stacked together. Units, when broken down are replaced in the same hex with the equivalent units of the same nationality. Combining or breaking down requires the expenditure of all eight (8) Movement Points from the initiating units. Units may never change nationality when breaking down or building up. Only the NATO player may break down or combine units. Building up or breaking down takes place at the beginning of the Friendly Movement Phase, and all movement is denied any units that engage in either operation. Unit types have no effect on Building up or Breaking Down, only the units' Strengths and Allowance.
[7.32] The following substitutions can be made. In the printed tables, "Initial Unit" is the unit broken down, and "Resulting Unit" the unit(s) that replace it. Symbols are given as printed: a crossed-box symbol (X-in-box) or an oval-in-box symbol (armor).
Breaking Down (Initial Unit = Resulting Unit):
| Initial Unit | Resulting Unit(s) |
|---|---|
| XX, GE, oval-in-box, 10, 6-6-8 | X, GE, crossed-box, Ht, 1-2-8 + X, GE, oval-in-box, Sv, 3-3-8 |
| XX, GE, oval-in-box, 3, 6-6-8 | X, GE, crossed-box, Cg, 1-2-8 + X, GE, crossed-box, Dh, 1-2-8 + X, GE, crossed-box, Ef, 1-2-8 |
| XX, US, oval-in-box, 1, 5-5-8 | X, US, oval-in-box, Ch, 1-2-8 + XX, US, crossed-box, 9, 3-3-8 |
| XX, US, crossed-box, 24, 5-5-8 | X, US, oval-in-box, Bg, 1-2-8 + X, US, oval-in-box, Di, 1-2-8 + X, US, oval-in-box, Ej, 1-2-8 |
| X or XX, FR, crossed-box, Mn, 3-3-8 | X, FR, crossed-box, No, 1-2-8 + X, FR, crossed-box, Op, 1-2-8 |
Building Up (Initial Units = Resulting Unit):
| Initial Units | Resulting Unit |
|---|---|
| X, NL, crossed-box, Ji, 3-3-8 + X, NL, crossed-box, Kj, 1-2-8 | XX, NL, crossed-box, I, 5-5-8 |
| X, UK, crossed-box, Oq, 1-2-8 + X, UK, crossed-box, Pr, 1-2-8 + X, UK, crossed-box, Os, 1-2-8 | XX, UK, crossed-box, 4, 5-5-8 |
| X, GE, crossed-box, Fj, 1-2-8 + X, GE, crossed-box, Im, 1-2-8 | X or XX, GE, Tw, 3-3-8 |
Note printed beneath the Building Up table: Airmobile 1-2-8 units may never be used in Resulting units for breaking down, or Initial units for building up.
[8.0] Combat
General Rule:
Combat occurs between adjacent opposing units at the Phasing Player's discretion. The Phasing Player is the Attacker, the non-Phasing Player the Defender, regardless of their overall strategic position.
Procedure:
Total the Combat Strengths of all the attacking units involved in a specific attack and compare it to the total Combat Strength of all units in the hex under attack. State the comparison as a probability ratio: Attacker's Strength to Defender's Strength. Round off the ratio in favor of the Defender to conform to the simplified odds found on the Combat Results Table, roll the die and read the result on the appropriate line under the odds. Apply the result immediately, before resolving any other attacks being made during that Combat Phase.
Cases:
[8.1] Which Units May Attack
[8.11] During the Combat Phase of his Player-Turn, the Phasing Player may attack any and all Enemy units adjacent to Friendly units. Only those Friendly units directly adjacent to a given Enemy unit may participate in an attack upon that unit.
[8.12] Attacking is completely voluntary; units are never compelled to attack, and not every unit adjacent to an Enemy unit need participate in any attack. Friendly units in a stack that are not participating in a given attack are never affected by the results of the attack.
[8.13] An Enemy occupied hex may be attacked by as many units as can be brought to bear in the six adjacent hexes.
[8.14] No unit may attack more than once per Combat Phase, and no Enemy unit may be attacked more than once per Combat Phase.
[8.2] Multiple Unit and Multi-Hex Combat
[8.21] All units defending in a given hex must be involved in the combat, and they must all be attacked as a single Strength. The defender may not voluntarily withhold any units in a hex under attack. The attacker must attack all the units as a whole, i.e., the Strengths of all of the units in the hex are totalled, and this total Strength is attacked. Different units in a given hex may not, therefore, be attacked separately.
[8.22] Other units in a hex that contains an attacking unit need not participate in that same attack or any other attack. Thus when one unit in a stack of three is attacking a given hex, one of the other units could attack a different hex, and the third could participate in no attack.
[8.23] If a unit (or units) is adjacent to more than one Enemy-occupied hex, it could attack all of them in a single combat. Thus units in a single hex can attack more than one other hex. The only requirement is that all attacking units must be adjacent to all defending units.
[8.3] Combat Odds Calculation
[8.31] Combat odds are always rounded off in favor of the defender. For example, an attack with a Combat Strength of 26 Strength Points against a hex defending with nine Strength Points, for an odds ratio of 26-9, would round off to a 2-1 combat situation for combat resolution purposes. That column on the Combat Results Table would be used.
[8.4] Effects on Combat Strength
[8.41] Combat Strengths of units may be affected by terrain and supply considerations (see the Terrain Effects Chart and the Supply rules). This is always expressed as the Combat Strength being "halved," or "doubled." When these strengths are "halved," all fractions are retained. Thus an unsupplied unit attacking across a river hexside would be quartered in Attack Strength (halved and then halved again). In this case a unit with an Attack Strength of five would effectively use one and one quarter Strength Points in the attack.
[8.5] NATO Battlegroups
[8.51] If, due to any combat result (De, Ae or Ex), a NATO 5-5-8 or 6-6-8 unit is eliminated it is removed from the map and replaced with a "battlegroup" unit (1-2-8). Only NATO 5-5-8 or 6-6-8 units receive this benefit. The battlegroup unit is immediately placed on the hex in which the NATO 5-5-8 or 6-6-8 unit was eliminated, and suffers no further combat effects in that Phase. Thus, if the original unit was eliminated due to inability to retreat, the battlegroup unit need not retreat (however, see Nuclear Combat rules).
[8.52] In cases where a battlegroup unit is formed due to an "Exchange" combat result, the Soviet Player must still remove a number of Strength Points equal to or greater than the original unit, not the original unit minus the Strength Points of the battlegroup formed.
[8.53] Battlegroup units are identical in all ways to regular brigades of their respective nationality, i.e., they are considered brigades for stacking purposes and may be used as such in building up units (see 7.3). Unit types may be ignored in replacing with battlegroups.
[9.0] Combat Results Table
(The printed Combat Results Table is on the mapsheet; a copy is printed in the rules pages and reproduced here.)
| Die Roll | 1-1 | 2-1 | 3-1 | 4-1 | 5-1 | 6-1 | 7-1 | 8-1 | 9-1 | 10-1 | Die Roll |
|---|---|---|---|---|---|---|---|---|---|---|---|
| 1 | Dr1 | Dr2 | Dr2 | Dr2 | Dr3 | Dr3 | Dr3 | De | De | De | 1 |
| 2 | Dr1 | Dr1 | Dr2 | Dr2 | Dr2 | Dr3 | Dr3 |
Combat Odds (Attack Strength-to-Defense Strength). Odds less than 1-1 are NOT permitted; odds greater than 10-1 are treated as 10-1.
[9:1] Explanation of Results
Ae = Attacker eliminated; all attacking units in the combat situation are eliminated, i.e., removed from the map. Units in the same hexes as the involved units which were not attacking are not affected.
Ar1,2,3 = Attacker Retreat; all attacking units are moved the indicated number of hexes by the attacking player. See the Rules of Retreat (9.2).
Ex = Exchange; all the defending units are eliminated first, then an equal or greater number of Attacking Strength Points are lost. All Exchanges are made at the adjusted Combat strength of the units, so that if a defender is doubled the attacking player must use twice as many Strength Points as the face (printed) value of the defending unit(s).
De = Defender eliminated; all of the Defending units are eliminated; i.e., removed from the map.
For all results, see also the he NATO battlegroup rules (8.5). (Printed as "the he" in the source.)
Editor's note: the printed explanation does not define the Dr1, Dr2 or Dr3 results that appear in the table above; they are transcribed as printed.
[9.2] How to Retreat
Units which are forced to retreat must meet the following requirements or be eliminated.
- The retreated unit(s) must be moved the indicated number of hexes without moving into any hex more than once.
- The retreated unit(s) may not be retreated through Enemy occupied hexes.
- The retreated unit(s) may not be moved into or through Enemy controlled hexes, unless the hex is occupied by another Friendly unit.
- The retreated unit(s) may not retreat though all-sea hexsides, or into all-sea hexes or off the map (Exception, see 12.1).
- The retreated unit(s) may be retreated into or through hexes which would cause violation of stacking limits. Overstacking must be corrected at the earliest opportunity. No units in an overstacked hex may attack. Excess units do not contribute to the stack's defence (the Friendly Player chooses which units are the excess units keeping in mind that no unit may defend more than once per Combat Phase). All units in a stack suffer the effects of an attack upon that hex.
- The retreated unit(s) preferably retreats into unoccupied hexes, rather than Friendly occupied hexes, and non-enemy controlled hexes rather than controlled.
- The retreated unit(s) preferably is retreated through hexes and hexsides with the lowest Movement Point cost (although Movement points are not actually expended when retreating).
- Within the above restrictions, the retreating unit(s) is retreated closer to supply.
[9.3] Advance after Combat
There is no advance after combat.
[10.0] Terrain Effects Chart
| Terrain Type | Movement Point (MP) cost to enter hex | Effect on Combat |
|---|---|---|
| Clear Terrain | One MP | No effect |
| Forest | Two MP's | Units defending in these hexes have their effective Defense Strength doubled |
| Mountain | Six MP's | Units defending in these hexes have their effective Defense Strength doubled |
| Mountain Pass | Two MP's | Units defending in these hexes have their effective Defense Strength doubled |
| City | One MP | Units defending in these hexes have their effective Defense Strength doubled |
| River hexside | One additional MP to cross | Units attacking across hexside have their effective Attack Strength halved |
| All-Sea and All-Lake | Entry prohibited | (none printed) |
[11.0] Supply
The printed supply unit faces are 0-1-3 (US, XXX) and 0-1-2.
General Rules:
Supply affects a unit's ability to move and fight. There are three types of supply: Movement Supply, Attack Supply and Defense Supply. NATO and Warsaw Pact units experience the same effects from Movement and Defense Supply, but differ in Attack Supply. Units are said to be either supplied or unsupplied for Movement and Defense Supply purposes. For Attack Supply, units are said to be in Minimum, Normal or Maximum Supply or unsupplied. The state of supply is dependent on the unit's distance from a supply source. Units are unsupplied if they do not meet any of the Supplied requirements. See the Supply Effects Chart (11.6) for effects of supply.
Procedure:
Units trace supply to Supply sources in the same manner as they move, counting Movement Points to cross the intervening hexes to the source. Supply for movement is determined at the beginning of a Movement Phase for every unit. A unit that is unsupplied for Movement at the beginning of a Movement Phase is unsupplied for the entire Movement Phase, and a supplied unit at the beginning of a Movement Phase is in supply for the entire Movement Phase. Supply for combat (attack or defense) is determined at the instant of combat.
Cases:
[11.1] Supply Sources and Lines
[11.11] The Warsaw Pact Player may use only Friendly Supply Units which are connected by a line of unblocked hexes to the East edge of the map as Supply Sources.
[11.12] To use a supply source for a supplied state in Movement or Defense Supply or Minimum or Normal Attack Supply, Warsaw Pact units must be within six (6) Movement Points, traced through unblocked hexes, of a Supply Source, counting from the unit to the Supply Unit. To use a Supply Unit for Maximum Attack Supply, the supplied unit must be adjacent to the Supply Unit.
[11.13] The NATO Player may use any NATO supply unit, which is connected to the West edge of the map by a line of unblocked hexes of any length, as a Supply Source for Movement and Defense Supply and Minimum Attack Supply. A given NATO unit may only use its own nationality of Supply Source for Normal Attack Supply. NATO units are never in Maximum Attack Supply.
[11.14] Additional Supply Sources are available to the NATO Player. Danish units only may use any unblocked Danish hex as a National Supply Source. West German, French and Netherlands units may use any city in their home country as a National Supply Source if the city can trace a line of unblocked hexes, of any length, to the West map edge.
[11.15] NATO units receive any form of supply if they are within eight Movement Points of the appropriate Supply Source, tracing through unblocked hexes from the unit to the Supply Unit.
[11.16] Canadian units draw Normal Attack Supply from U.S.A. Supply Units.
[11.17] All Warsaw Pact units are supplied for Movement purposes East of the Start Line if they can trace a line of unblocked hexes, however long, to the East map edge.
[11.2] Warsaw Pact Supply Limitations
[11.21] During the First Movement Phase of each Friendly Player-Turn, any Warsaw Pact supply units used for Movement Supply are placed face down. These may not be used by the Warsaw Pact Player to furnish Maximum Attack Supply in the ensuing Combat Phase. They are flipped face up again at the end of the Combat Phase.
[11.22] Warsaw Pact Supply Units used in a Combat Phase to furnish Normal or Maximum Attack Supply are expended at the end of that Phase; remove from map (see 17.1).
[11.23] The same Warsaw Pact Supply Unit that is used to furnish Maximum Attack Supply may not be used in that Combat Phase to furnish either Minimum or Normal Attack Supply.
[11.6] NATO Supply Effects Chart
| Type of Supply | Supply Condition | Effect on Strength or Allowance |
|---|---|---|
| MOVEMENT | Supplied | Normal (printed) |
| MOVEMENT | Unsupplied | Halved |
| DEFENSE | Supplied | Normal |
| DEFENSE | Unsupplied | Halved |
| ATTACK | Unsupplied | Zero; attacks prohibited |
| ATTACK | Minimum | Halved |
| ATTACK | Normal | Normal |
| ATTACK | Maximum (Warsaw Pact only) | Doubled |
[11.3] Supply Unit Movement
[11.31] Warsaw Pact Supply Units may move in the area to the East of the Start Line in both Movement Phases. They may move only in their Second Movement Phase when operating to the West of the Start Line. They may not move across the Start Line in any Friendly First Movement Phase.
[11.32] NATO Supply Units may never move in the First Movement Phase. However, these units may move at three times their normal Movement Allowance (i.e. nine Movement Points) if they are not used for supply in a given Friendly Player-Turn.
[11.4] Reinforcements
Additional units received during the course of the game (reinforcements) are always in a Movement Supplied state during the First Movement Phase they are on the map.
[11.5] Blocking Supply Lines
Supply Lines, between Supply Source and the unit to be supplied, and between the Supply Source and the Friendly Map Edge, are prohibited from passing through certain hexes and hexsides. These hexes are:
- All-sea and all-lake hexes and hexsides;
- Enemy occupied hexes;
- Enemy controlled hexes not occupied by a Friendly unit.
If there are no alternate routes for supply lines around these obstacles, the supply line is said to be "blocked" and may not be used.
[12.0] Special Denmark Rules
General Rule:
Denmark and Danish units are in several ways a unique case in the game. All units may be retreated or moved off the North edge of the map, from hexes 2601, 2701, 2801, 2901, and 3001. These are the Denmark map edge hexes. The Warsaw Pact Player gains Victory Points for any Danish units outside of Denmark at the end of the game, but at the same time, the NATO Player receives Victory Points if the Warsaw Pact Player does not sufficiently garrison Denmark each required Game-Turn.
Cases:
[12.1] Danish Off-Map Retreat and Movement
[12.11] Any NATO units in the above mentioned hexes, if they suffer a retreat result, must be retreated off the edge of the map. The Warsaw Pact Player receives no Victory Points for these exited units. Players should keep these units separate, as they influence the Russian Garrison. These exited units may never be returned to play.
[12.12] NATO units may voluntarily leave the map from Denmark map-edge hexes; they may never be returned to play.
[12.2] Homeless Danes
For each Danish division on the map at the end of the game that is not in Denmark, or able to trace an unblocked line of hexes of any length (see Supply, 11.14) to any hex in Denmark, the Warsaw Pact Player receives ten Victory Points. For each unit smaller than a division, he receives five Victory Points. No points are received for the Danish Supply unit.
[12.3] Garrisoning Denmark
[12.31] If Denmark is isolated from the west map edge (see Case 12.33) the Warsaw Pact Player must garrison Denmark. The size of the garrison is determined by a fixed equation: six division-sized units, plus the number of divisions or division equivalents (rounding up) of NATO units retreated or moved off the Denmark map edge hexes or in Denmark itself. The Warsaw Pact divisions must be placed on any hex or hexes in Denmark to be used as a garrison force, and must be in Movement Supply. If the Warsaw Pact Player is unable to meet the garrison requirements at the instant of a NATO unit being retreated off the map, the Warsaw Pact units north of the line of hexes 2508, 2608, 2709, 2710, 2810, 2811, 2912, 3012, 3112, 3212, 3211, 3210, and 3310 inclusive are limited in their movement. These units may not be moved out of this area until the beginning of any Warsaw Pact Player-Turn that the garrison requirements are met. Any other units entering this area are also stuck in that area until the garrison requirements are met.
[12.32] If the Warsaw Pact Player has not fulfilled the Danish Garrison requirements (if required) by the end of each Game-Turn, the NATO Player receives one Victory Point for each division missing. This occurs each Game-Turn.
[12.33] Denmark is isolated if a line of unblocked hexes cannot be traced from any Danish hex to the west map edge (see Supply, Case 11.5 for blocking rules).
[13.0] Territorial Forces
General Rule:
Certain NATO Countries (France, West Germany, Belgium, and the Netherlands) have additional Territorial Units available to them that are restricted in their movement. In all ways, Territorial Units are treated as regular units, except for specific movement restrictions.
Procedure:
At the beginning of the game, all Territorial units are placed on the map. Certain units are placed on city hexes and restricted to those hexes, while others are placed anywhere within the home country.
Cases:
[13.1] Placement and Activation
[13.11] City Territorial Units are placed in cities depending on the number of contiguous city hexes. One territorial unit is placed in each city composed of one, two or three hexes; two are placed in cities of four through six hexes; and three in cities of seven through nine hexes. These units may be moved freely within that city, but not out of it, until activated.
[13.12] City Territorial Units are activated individually, city by city, by any Warsaw Pact unit moving adjacent to that city at any point in the Movement Phase. Once activated all of that individual city's Territorial Units remain activated.
[13.13] National Territorial Units are placed anywhere in their home country at the beginning of the game and may never leave their movement area (see 13.2). They are always considered activated.
[13.2] General Movement Restrictions
All territorial units, once activated, are restricted to certain areas in their movement, according to their nationality. If forced to retreat out of the area, they are instead destroyed, and the Warsaw Pact Player receives Victory Points for them.
- West German Territorial Units may only be present in West Germany;
- French Territorial Units may only operate in France, Luxemburg, and Belgium;
- Belgian Territorial Units may only operate in Belgium and the Netherlands;
- Netherlands Territorial Units may only operate in the Netherlands and Belgium.
[14.0] Tactical Nuclear Warfare
General Rule:
In certain scenarios, Players have the ability to use Nuclear Attacks. Nuclear Attacks increase the Attack Strength of attacking units and occasionally affect the map. Nuclear attacks may only be made against Enemy units, not hexes.
Procedure:
At the beginning of any Player-Turn the Phasing Player may announce that he is using nuclear attacks. Thereafter, in the Combat Phase of that Player-Turn, and all subsequent Friendly and Enemy Combat Phases, all attacks are assumed to be nuclear attacks, i.e., after one Player escalates into using tactical nuclear weapons, the other Player is automatically committed to the use of such weapons. Such an escalation can never be reversed.
Cases:
[14.1] Effect on Combat Strengths
[14.11] The Attack Strength of NATO units when using nuclear attacks is tripled, i.e., three times the normal Attack Strength, after taking into account supply and terrain effects on combat.
[14.12] The Attack Strength of Warsaw Pact units when using nuclear attacks is doubled.
[14.13] There is no other effect of nuclear attacks, on Defense Strength or Movement Allowance.
[14.2] Nuclear Contamination Markers
[14.21] If the combat results in any given nuclear attack is a "De" or an "Ex," the Nuclear Contamination Table is consulted, and the die rolled again immediately after the combat. If there is an "N" result, Nuclear Contamination results. The Phasing Player places a marker on that hex to indicate this. It is removed at the end of the same Player's next Combat Phase, and the hex returns to normal status.
[14.22] Hexes that are nuclear contaminated may not be entered by either Player. These hexes also block supply lines and retreat routes. Air transportable units may not be landed in them.
[14.23] In the case where a NATO Battlegroup unit is formed in a nuclear contaminated hex, it is retreated one hex (see Rules of Retreat, 9.3). If it cannot retreat, it is destroyed.
Editor's note: the printed cross-reference in 14.23 reads "9.3". The retreat rules are printed as 9.2 (How to Retreat) and 9.3 is "Advance after Combat"; the reference is transcribed as printed.
[14.3] Nuclear Contamination Table
| Originating Combat Result | 1 | 2 | 3 | 4 | 5 | 6 |
|---|---|---|---|---|---|---|
| "De" Result | • | • | • | N | N | N |
| "Ex" Result | • | • | • | • | N | N |
N = Nuclear Contamination. The dot (•) entries are printed without a legend; they are transcribed as printed.
[15.0] Setting Up the Game
General Rule:
The starting units for both sides are given in the various scenarios, along with any special rules pertaining to that scenario. The Warsaw Pact Player always deploys and moves first. In certain scenarios, deployment for certain NATO units is indicated. These units must be placed on the indicated hexes. Unless otherwise specified, both Players deploy their units anywhere on their respective side of the scenario start line; East for the Warsaw Pact units, West for the NATO units.
Cases:
[15.1] Reinforcements
At times the Turn Record/Reinforcement Chart calls for additional units to be brought into the game. These units arrive on the indicated hex at the beginning of the Friendly Player-Turn, and are treated as regular units during that Player-Turn and for the remainder of the game. They expend one Movement Point for the initial hex upon which they enter play. Additional units are always in Supply during their arriving Player-Turn.
[15.2] Start of Hostilities
The Soviet Player may choose to delay the start of the war by not attacking any NATO units and keeping all of his units east of the Start Line. He may move his units freely as long as they remain east of this line, as may the NATO Player on the west side of the start line. After the end of Game-Turn 5, the NATO Player rolls a die, and a roll of one gives the NATO Player the option to start hostilities, i.e., he may move NATO units across the Start Line and/or initiate combat against any Warsaw Pact units. The NATO Player continues rolling for this option at the completion of every Game-Turn until a "1" is rolled, or until hostilities are initiated by the Soviet Player. The NATO Player may never initiate hostilities unless he has so rolled this option.
[16.0] Initial Placement
[16.1] "M + 1" Scenario
Warsaw Pact Player:
The following units may be placed anywhere in East Germany, to the east of the Start Line:
- USSR — ten 5-2-6, ten 4-3-6
- East German — one 4-2-6, two 3-3-6
The following units may be placed anywhere in Czechoslovakia, to the east of the Start Line:
- USSR — three 5-2-6, three 4-3-6
- Czechoslovakian — two 4-2-6, four 3-3-6
The following hexes each have one supply unit (0-1-2) placed on them: 3323, 3426, 3427, 3831.
The following units may be placed anywhere to the east of the Start Line: six 0-1-2.
NATO Player:
The following units are placed on the specific hexes:
| Hex Nr. | Unit | Nationality |
|---|---|---|
| 1134 | 5-5-8 | USA |
| 2038 | 5-5-8 | USA |
| 2131 | 1-2-8 | USA |
| 2245 | 1-2-8 | USA |
| 1938 | 0-1-3 | USA |
| 1542 | 0-1-3 | USA |
| 1532 | 4-3-8 (Tricap) | USA |
| 1841 | 4-3-8 (Tricap) | USA |
| 1631 | 2-2-8 (Tricap) |
Transcriber's note: several hex numbers in this list are printed at low resolution in the scan (for example 2038 and 1938 and the first digits of several hexes), and were read at the best resolution available; they should be checked against the physical map if a discrepancy is suspected.
The following Territorial Units are placed in home country cities, according to the Territorial Unit rules:
- West Germany — fifteen 1-2-4
- Netherlands — three 1-2-4
- France — one 1-2-4
The following units are placed anywhere in their home country, according to the Territorial Unit rules:
- Netherlands — two 1-2-4
- France — six 1-2-4
- Belgium — one 1-2-4
[16.2] "M + 31" Scenario
Warsaw Pact Player:
The following units may be placed anywhere to the east of the Start Line:
- U.S.S.R. — twenty-six 5-2-6, thirteen 4-2-6, twenty-one 4-3-6, forty-three 3-3-6, seven 2-2-2, thirty 0-1-2
- Hungarian — one 4-2-6, two 3-3-6
- East German — one 4-2-6, two 3-3-6
- Polish — three 4-2-6, five 3-3-6, one 2-2-2
The following units must be placed in Czechoslovakia:
- Czechoslovakian — two 4-2-6, four 3-3-6
NATO Player:
The following units may be placed anywhere to the west of the Start Line:
- U.S.A. — two 2-2-8, four 1-2-8 (airmobile), two 4-3-8, two 2-2-8 (tricap), four 5-5-8, four 3-3-8, four 1-2-8, three 0-1-3
- Canadian — one 1-2-8, four 1-1-2
- U.K. — five 5-5-8, one 1-1-2, two 0-1-3
- Danish — two 5-5-8, one 0-1-3
- French — five 5-5-8, five 3-3-8, three 1-1-2, three 0-1-3
- Netherlands — three 5-5-8, one 0-1-3
- Belgian — two 5-5-8, one 1-1-2, one 0-1-3
- West German — eight 6-6-8, one 5-5-8, three 2-1-8, nine 1-1-2, three 0-1-3
The following units must be placed within one hex of Stuttgart (1542, 1641):
- Italian — three 5-5-8, one 1-2-8, one 0-1-3
The following Territorial Units are placed in home country cities, according to the Territorial Unit rules:
- West Germany — fifteen 1-2-4
- Netherlands — three 1-2-4
- France — one 1-2-4
The following units are placed anywhere in their home country, according to the Territorial Unit rules:
- Netherlands — two 1-2-4
- France — six 1-2-4
- Belgium — one 1-2-4
[17.0] Turn Record/Reinforcement Chart
During the course of the game, each Player receives additional forces. Generally each nationality always receives its reinforcements on a given hex, which is called its "Reinforcement Staging Hex." These units are placed on the map on their national Reinforcement Staging Hex at the beginning on the Player-Turn of arrival; these units may move and attack normally in that Player-Turn. Moreover they are always considered supplied (or Normal Attack Supply) for that Player-turn.
The National Reinforcement Staging hexes are:
| Nation | Hex Nr. |
|---|---|
| U.S.A. | 1631 |
| Danish | 2802 |
| French | 0134 |
| Netherlands | 0415 |
| Canadian | 1337 |
| U.K. | 2313 |
| West German | 1424 |
| Italian | 0741 |
| Warsaw Pact Number 1 | 3913 |
| Warsaw Pact Number 2 | 3923 |
| Warsaw Pact Number 3 | 3931 |
| Warsaw Pact Number 4 | 3941 |
If any of these Reinforcement Staging Hexes is Enemy occupied, or adjacent to an Enemy unit, the reinforcements may not enter there. For West German units this means they are placed at the beginning of the next Friendly Player-Turn at any NATO-controlled West German city hex. For other NATO units this means the unit is placed in Amsterdam on the following Friendly Player-Turn. If Netherlands is neutral, or Amsterdam suffers the above restrictions, the reinforcements are lost. For Warsaw Pact units, the units are delayed one Game-Turn and brought in at any of the other reinforcement staging hexes.
[17.1] Warsaw Pact Supply Unit Reinforcement
The Supply unit reinforcements may arrive in any of the following hexes: 3323, 3426, 3427, 3831, 3941, 3913, 3923, 3931. (The printed hex 3427 is partly cut off at the scan edge; it is read here from the same list given in Case 16.1.)
There are 32 supply units provided for the Warsaw Pact Player. At no time may there be more than 32 supply units present on the map, although expended supply units may be used as reinforcements.
[17.2] How to Read the Turn Record/Reinforcement Chart
The central numbered track is used to keep record of the Game-Turns played by advancing the Game-Turn Marker on it. Above and below this track are pictures of the types of units which each Player receives in a corresponding Game-Turn. Beneath each unit picture is a quantity multiplier indicating how many of that type of unit the Player receives. For example, "x2" means the Player gets two of that type unit. Immediately following the quantity number is the code for the Reinforcement Staging hex in which the unit(s) appear. These codes match those used on the map.
Transcriber's note on this section: the rules pages print the Turn Record/Reinforcement Chart as a graphic grid of unit counters across Game-Turns 1 through 25 (the chart runs across the scanned pages following Case 17.2). Its counter-by-counter contents are not reproduced in this transcription, and the Game-Turn schedule of reinforcements is therefore not given here. The chart's text (17.0 to 17.2) is transcribed above. Some lines of the printed text are cut off at the right edge of the scan; no words have been added to them beyond what is printed.
[18.0] Victory Conditions
[18.1] Explanation of Victory Conditions
NATO is essentially won by the Warsaw Pact and NATO Players accumulating Victory Points for various objectives.
Both Players receive Victory Points for destroying enemy units. In addition the Warsaw Pact Player receives Victory Points for each NATO city hex he controls at the end of the game. He controls city hexes if (1) the Warsaw Pact Player occupies that hex or (2) the Warsaw Pact Player was the last to occupy that hex and there is no NATO Zone of Control in that hex. There are also additional Victory Points available to each Player from the Special Denmark Rules (12.0).
At the end of the game the number of NATO Victory Points is subtracted from the Warsaw Pact Victory Points. This net is then referenced to the Levels of Victory Table to see which Player has won the game, and in what degree.
[18.2] Victory Points Schedule
| Event | NATO | Warsaw Pact |
|---|---|---|
| Destroying one Enemy division | 2 | 2 |
| Destroying one Enemy sub-divisional unit | 1 | 1 |
| Destroying one supply unit | 0 | 10 |
| Each NATO city hex controlled at end of game | 0 | 5 |
| Homeless Danish unit (see 12.2): per division | 0 | 10 |
| Homeless Danish unit (see 12.2): per sub-divisional unit | 0 | 5 |
| Lack of required Denmark Garrison (see 12.3) per division, each Game-Turn | 1 | 0 |
Number of Victory Points for NATO and Warsaw Pact, as printed.
[18.3] Levels of Victory
| Result | "M + 1" Conventional | "M + 1" Nuclear | "M + 31" Conventional | "M + 31" Nuclear |
|---|---|---|---|---|
| Warsaw Pact Victories: Decisive | 115 or more | 165 or more | 130 or more | 120 or more |
| Warsaw Pact Victories: Substantive | 90 to 114 | 140 to 164 | 105 to 129 | 95 to 119 |
| Warsaw Pact Victories: Marginal | 65 to 89 | 115 to 139 | 80 to 104 | 70 to 94 |
| Draw | 40 to 64 | 90 to 114 | 55 to 79 | 45 to 69 |
| NATO Victories: Marginal | 15 to 39 | 65 to 89 |
Table headed "Game Type" in the printed chart.
[19.0] Scenarios
Essentially there are four games of NATO, based on two different time periods and the possibility of tactical nuclear weapons.
[19.1] "M + 1" Games
There are two variations on this. One permits the Players to use tactical nuclear weapons (see 14.0), the other forbids this. The Players decide which type to use before placing units. Both games use the following information:
- Initial Forces: use the "M + 1" Scenario (16.1)
- Game Length: The game ends on the twentieth Game-Turn after the Start of Hostilities (see 15.2). Thus, if hostilities began on Game-Turn 11, the game ends on Game-Turn 30.
- Reinforcements: use the Turn Record/Reinforcement Chart for Game-Turn 1 until the end of the game.
[19.2] "M + 31" Games
Again there are two variations on this game, nuclear and non-nuclear. The Players must agree on which variation before the start of the game.
- Initial Forces: use the "M + 31" Scenario (see 16.2)
- Game Length: the game ends after ten Game-Turns. Use the Turn Record/Reinforcement Chart for Game-turns 16 through 25.
- Reinforcements: the only reinforcements are Warsaw Pact Supply Units (see 17.1).
[19.3] Notes on Scenario Variations
Like the concept of the game NATO, the scenarios themselves are very, very "What If?" The reasons for this are quite obvious. The events portrayed in the game have not yet happened. And probably never will. Therefore, we have to go on the somewhat incomplete data we have available to us, including such historical "precedents" that we can come up with.
The scenarios make one major assumption. It is that the nations potentially involved in a future European war may not fight, or may not fight the armies that are presently "pledged" to fight. The sundry rebellions and unrest in the Warsaw Pact nations are common knowledge. Perhaps less well known in the USA are the neutralist rumblings heard among our NATO allies. These must be taken into account also. France, for example, is officially out of the formal NATO organization. France still has military understandings with some NATO countries. But nothing very binding. Other NATO countries have a long history of (not always successful) neutrality. Obvious examples are the Netherlands, Belgium and Denmark. Nothing is assured if Russia, West Germany and the USA should go to war in Europe.
The potentially most unreliable combatants are among the Warsaw Pact members. The "Reliability" Probability and Outcome tables have taken into account the numerous political and military factors applicable to the individual Warsaw Pact nations. These factors were also taken into account when determining the number of non-Russian Warsaw Pact divisions for the standard scenario. Should Russia find itself at war with NATO forces, the potential "problems" with Warsaw Pact members must be taken into account. At best (as shown in the standard scenario) the Russians will have considerable cooperation and no outright rebellion from Warsaw Pact allies. But, assuming the "best" will not occur they must be prepared for everything from active and inactive "neutrality" to outright rebellion. The NATO side of the border may also have its share of "non-participation" at the last moment. Of course, the political situation (and, following that, the military situation) can become much more complex. But we must draw the line somewhere. If you want more complexity you may add it yourself.
Each of these basic "Scenario Variations" should be used in concert, i.e., all together. However, Players may experimentally use any of the three separately, or in conjunction, according to their political beliefs.
[19.4] Warsaw Pact Unreliability
(This supersedes the Czechoslovak Restriction rule (5.3).)
After choosing which basic game will be played the Warsaw Pact Player must roll the die once for each of the seven East European Countries on the Reliability Probability Table. If there is an Unreliable result, the Unreliability Outcome Table is consulted for the result.
A "Self-defense" result for a given nation means that on-the-map countries' (Czechoslovakia, East German) units suffer restrictions as in Case 5.3. The off-map countries' units simply do not arrive as reinforcements. Thus, this has no effect on Rumania, Bulgaria or Yugoslavia, since their units never enter the map normally.
A "Neutral" result for a given nation means that their units never are placed on the map, either initially or as reinforcements.
A "Rebellion" result means that the given countries' units never appear (as in neutral), and that USSR units must be removed from play. For on-map countries there must be removed from the map a certain number of USSR divisions stationed in that country initially; for off-map countries, a certain number of USSR divisions are taken from the earliest possible reinforcements. For every three (round up) USSR divisions so removed, the Warsaw Pact Player loses one supply unit from initial ones for on-map countries, and from reinforcements for off-map countries.
[19.41] Reliability Probability Table
| Die Roll | Poland | East Germany | Czechoslovakia | Hungary | Rumania | Bulgaria | Yugoslavia |
|---|---|---|---|---|---|---|---|
| 1 | U | U | U | U | U | U | U |
| 2 | – | U | U | U | U | U | U |
| 3 | – | U | U | – | U | – | – |
Number of divisions removed in case of rebellion (in the same column order): Poland 18; East Germany 6; Czechoslovakia 8; Hungary 6; Rumania 3; Bulgaria 2; Yugoslavia 10.
U = Unreliable; see 19.42. – = Reliable.
[19.42] Unreliability Outcome Table
| Die Roll | Result |
|---|---|
| 1 | Self-defense |
| 2 | Self-Defense |
| 3 | Self-Defense |
| 4 | Neutral |
| 5 | Neutral |
| 6 | Rebellion |
[19.5] NATO Neutrality
After deciding the scenario to be played, the NATO Player must consult the NATO Neutrality Table to see if all NATO countries will actively defend Germany. If a given country is neutral, it remains neutral until the Warsaw Pact either attacks a unit of that country, or the NATO Player manages to release that country from neutrality.
Countries are released from neutrality by the NATO Player rolling the die. At the beginning of each Game-Turn after the "Start of Hostilities," the NATO Player rolls the die once for each NATO neutral country. A roll of "1" releases it from neutrality.
In the "M + 1" games, units of neutral countries must remain in the same hex of initial placement until they are removed from neutrality. Reinforcement units of a neutral country are delayed for as many Game-Turns as the country is neutral, but still land on the same hex.
In the "M + 31" Scenario, any country that is neutral goes back to the "M + 1" Initial Placement. After that country stops being neutral (if ever), the reinforcements enter on the same schedule as in Game-Turns 1 through 14, using the Game-Turn of neutrality ceasing as the base Game-Turn 1.
[19.51] NATO Neutrality Table
| Die Roll | France | Canada | U.K. | Netherlands | Belgium | Italy | Denmark |
|---|---|---|---|---|---|---|---|
| 1 | N | N | N | N | N | N | N |
| 2 | N | N | – | N | N | N | – |
| 3 | N | – | – | – | – | – | – |
N = Neutral. – = Active participant in hostilities. No other countries (West Germany, USA) are ever neutral.
[19.6] Chinese Intervention
This variation may only be used with the "M + 1" Scenarios. After choosing whether it is a nuclear or non-nuclear scenario, and after determining reliability of other Warsaw Pact countries, the Warsaw Pact Player must determine the Chinese activity and response.
[19.61] Chinese Response Table
| Die Roll | Result |
|---|---|
| 1 | None |
| 2 | None |
| 3 | Mobilization |
| 4 | Mobilization |
| 5 | Mobilization |
| 6 | Active War |
If the result is "None," there is no effect on the game. If the result is Chinese "Mobilization," the Warsaw Pact Player must deduct two USSR divisions per Game-Turn from Reinforcements on Game-Turns 8 through 14. If the result is an "Active War," the Warsaw Pact Player must deduct four USSR divisions per Game-Turn from Reinforcements for Game-Turns 4-14. Supply units are also deleted, pro rata, as in 19.4.
[20.0] Summary of Warsaw Pact Ground Forces
Bulgaria — 115,000 men, 2 Tank Divisions, 9 Infantry Divisions (2300 tanks, 1500 guns).
East Germany — 95,000 men, 2 Tank Divisions, 4 Infantry Divisions (1800 tanks, 850 guns).
Poland — 185,000 men, 5 Tank Divisions, 9 Infantry Divisions, 1 Airborne Division (3,000 tanks, 1300 guns).
Rumania — 165,000 men, 1 Tank Division, 10 Infantry Divisions, 1 Mountain Division (1200 tanks, 1000 guns).
Czechoslovakia — 175,000 men, 4 Tank Divisions, 10 Infantry Divisions, 1 Airborne Brigade (3200 tanks, 2000 guns).
Hungary — 95,000 men, 2 Tank Divisions, 5 Infantry Divisions, 1 Airborne Brigade (800 tanks, 600 guns).
East European Non-Members of Warsaw Pact:
Albania — 15,000 men, 6 Infantry Brigades (250 tanks, 150 guns).
Yugoslavia — 195,000 men, 2 Tank Divisions, 9 Infantry Divisions, 29 Infantry Brigades (number of tanks and guns unknown but the army relies primarily on "partisan" style warfare which makes such heavy weapons more of a hindrance than a help).
NOTE: Many of the above units would be tied down with other NATO armies such as Greece and Turkey. Warsaw Pact forces would also have to keep an eye on Yugoslavia. Neutral Austria would also have to be "watched." It is not considered likely that Austria's neutrality would be violated. Such a violation of neutrality by Warsaw Pact would, in theory, gain a good flank position on NATO. However, Austria is rather rugged terrain and the Austrian Army is prepared to fight a stubborn guerilla war with, of course, the aid of NATO forces. Air forces are calculated to "cancel each other out." Both NATO and Warsaw Pact, of course, expect their air forces to be superior. But it's a moot point.
The printed "Designer's Notes" essay (commentary on the historical setting and design rationale, no rules) is omitted here. The printed "Design Credits" section (21.0) is omitted as credits.