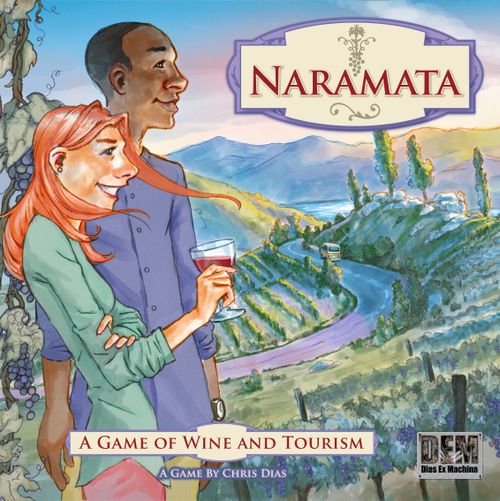
Naramata
Naramata Rulebook
Table of Contents
Table of Contents
- Components
- Global Setup
- The Character Board
- Player Order
- Player Turn
- Locations
- Free Actions
- Upgrade Cards
- Closing and Time Penalties
- End of Day Procedure (Mid-Game)
- End of Day Procedure (End-Game)
- Satisfying Tourists
- Solo Rules
- The Fleet (Cooperative Rules)
- Frequently Asked Questions (FAQ)
- Strategies & Tactics
- Symbol Legend
- Reference
Components
- 1 Game Board
- 1 View Die
- 1 Day Tracker Token
- 40 Upgrade Cards
- 4 Player Trays
- 1 Component Tray
- 6 Sets of Player components, each including:
- 1 Wooden vehicle "veeple"
- 2 Color-matched point-tracking disks
- 4 Color-matched action disks (5 with red)
- 1 Color-matched time-tracking meeple
- 1 Player vehicle board
- 50 Tourist Cards
- 24 Tasting Cards
- 24 Cheese Cards
- 13 Purchase Cards
- 35 double-sided prestige coins (1 and 2 denominations)
- 14 Signature Bottles, 2 for each signature winery
- 30 double-sided view tokens (1 and 2 denominations)
- 25 double-sided pairing tokens (1 and locked)
- 25 double-sided favor tokens (1 and 2 denominations)
- 56 double-sided locked tokens (30 Tasting/Purchase, 26 Cheese/View)
Global Setup
The default setup of Naramata involves 2-4 players. (This setup assumes a three-player setup.)
- Game Board. Place the game board on a flat surface.
- Deck Setup. Shuffle the following decks of cards separately: cheese, purchase, tasting, and tourist. Place each of them in their assigned spots on or along the board.
- Set Out Upgrades. There are upgrades meant for only 3- and 4-player games and upgrades meant for only 4-player games. Look through the upgrades and remove any upgrades based on player count. Along the bottom of the board (as indicated), shuffle and place the remaining upgrades as a draw deck. Then play four upgrade cards face-up to the right (under indicated positions).
- Tokens. Place all tokens aside (in the token tray) as a reserve.
Token Definition. There are THREE types of token symbols:
- Prestige tokens, which act as currency, and are double-sided, with the 1-value on one side and the 2-value on the other.
- Locked tokens (the ones overlaid with a prohibition symbol). There are three types of tokens with five different symbols.
- Satisfaction tokens, which are placed upon tourists to satisfy point requirements. Favor and View tokens are double-sided, with the 1-value on one side and the 2-value on the other. The Pairing token is double-sided, with the lock symbol on one side and the satisfaction symbol on the other.
- All tokens (satisfaction, locked, and prestige), when removed or spent, are returned to the supply. Tokens are not restricted and if the supply is exhausted, employ a replacement.
- Signature Bottles. Place a number of signature bottles next to their respective color-matched signature wineries based on player count.
| Player Count | Signature Bottle |
|---|---|
| 1-2 | 1 bottle for each winery (Total 7) |
| 3 | 1 bottle/winery + 3 random additional bottles (Total 10) |
| 4 | 2 bottles/winery (all bottles) |
- Day Token. Place the day tracker token (the cork) on DAY 1. A fast game ends at the conclusion of DAY 2, and a long game ends at the end of DAY 4. Ending on DAY 3 is normal and a standard game; this should be decided at the start of the game but can be adjusted later as desired. A four-day game should be reserved for advanced players.
Days Selected. The number of days can drastically affect early strategy as early preparation is required to manage three or four days effectively.
- Player Setup. The most recent person to have visited a winery goes first (or the youngest player if this is tied). Starting with the first player and going clockwise, each player does the following.
- Select one player vehicle board and gain its matching vehicle veeple, time tracking meeple, and disks (6 or 7).
- Gain a player tray and place the vehicle board atop it.
- Four of the colored disks are action disks (the red player has five); the other two are point trackers. Place three action disks on the vehicle board (four for the red player). The extra token can be gained via a specific upgrade card in-game.
- Place a point tracking disk (same as an action disk) on the 5-point space on the point tracker (a second disk is placed atop the first if passing the 100-point space).
- Place the player's time meeple at 11:00am as far down as possible on the table (as close to the indicated time), above any time meeples already there. This will denote player order at the start of the game (from the bottom to top).
- Draft Initial Tourists. How tourists are selected is based on player count.
2 Players. The process above is followed almost precisely with a few alterations.
- Before selecting a card, each player draws 1 additional card from the tourist draw deck (starting with a hand of 6).
- Each player selects 2 cards instead of 1.
- 1 card will be played or discarded for prestige, and 1 card will be discarded with no reward.
- This repeats each time a player is handed cards.
3 - 4 Players.
- Each player draws 5 cards from atop the tourist draw deck and looks at them.
- Each player chooses 1 card, then places the rest face-down in front of their neighbor. During day 1 (start of the game) and day 3, players pass cards to the player on their left. During day 2 and day 4 (if playing a fourth day), players pass cards to the player on their right.
- Each player then either plays the selected tourist or discards it.
- If discarding, the player places the card face up in the tourist discard pile (next to the draw pile) and gains 3 prestige.
- If playing, the player places the tourist card in one of the slots atop their player board not containing a tourist, under the board with the upper part of the card being visible. A player can never have more than four tourists (some vehicles can override this rule).
- This process continues until each player has selected four cards (the fifth card is discarded - players receive no prestige for discarding the fifth tourist card).
- Each player must have at least two tourists attached to their vehicle at the start of each day.
For Example. If a player's vehicle possesses two tourists at the start of a day, that same player should also have gained 6 prestige; three tourists would also include 3 prestige, and four tourists offer no prestige reward.
- Shuffle Tourists. Place discarded tourist cards into the tourist discard deck next to the draw deck. When the draw deck is empty, shuffle the discarded cards to form a new draw deck.
Overriding Rules. Some rules appear to contradict other rules. Specific rules take precedent over general ones. For example, all vehicle boards feature a special unique ability that overrides standard rules.
- Starting Location. Following player order (bottom to top on the time clock), each player selects a starting location and places their veeple on one empty spot. There are two start locations, split between two regions, each able to accommodate two veeples.
Possible start locations are indicated by arrows.
In a 2-player game, each region can only hold 1 veeple each.
The Character Board
Each player possesses a unique character/vehicle board indicating the tour guide and his/her vehicle.
Each Vehicle Board indicates the following:
- Tourist veeple (the veeple is color-coded to the color of the vehicle). The shape matches as well.
- Passive ability (always in effect).
Tourists, when acquired, are placed along the top of the board. When a tourist is removed from a space (delivered), it becomes available to have a tourist placed again (at the beginning of the next day).
Player Order
The player earliest in time (the furthest left) is the next to have a turn. If at the same time (the same column), like at the beginning of the game, then it is the player furthest down on the time tracker (the closest to the listed time).
As we'll soon see, each location/action possesses a time-cost that must be spent, advancing a player's time meeple along the Time Tracker (moving the meeple from left to right).
After a player completes an action on a space, that player spends the time cost associated with that action by moving the matching character meeple left by that same cost. Place the meeple at the new time as far down as possible on the table, above any time meeples already there.
After the player finishes a turn, the player earliest (the furthest left and lowest down) goes next. However, the next player on the earliest time slot may be the previous player, in which case, that player has another turn.
This process continues until each player reaches 5:00 pm (see END OF DAY).
For Example. At the beginning of the day, the red player goes first, selecting a Cheese space. They complete the action and advance their time meeple 30 minutes. Up from the red player is the black player, so they select the action on a Tasting space, which costs 60 minutes. The blue player is up next and selects a View space, which costs 30 minutes, placing their meeple above red's. Red would have the next turn, followed by blue and then black (as the minimum action time is 30 minutes).
Player Turn
A player's turn involves five steps that must be performed in order. This does not include the spending of prestige or action disks, which are considered free actions and may be completed at any time during a player's turn.
Fourth Signature Option. Normally, in games of three or fewer players, Signature wineries offer three potential action locations. However, in games of four players, a fourth option becomes available, indicated by the four-player icon. This option is not available in games of three or fewer players.
Purchasing an upgrade is another free action that can be performed either before an action or after the action, though only once per turn.
- Select an open space.
- Occupy the space (place a lock token, then the veeple).
- Activate the action (or have a pit stop).
- Advance time (moving the time meeple).
- Move to the next player (based on time).
Step 1 - Select an Open Space
A player selects any space ahead of their veeple on the current road they are on.
A space is defined as any action attached to a winery (not the winery itself). Most wineries will offer two spaces; others will offer more. A winery location includes all spaces attached to it.
A veeple cannot move backward and must always follow the route ahead of it; it cannot shift to a parallel road. When a player commits to a road, it cannot be changed.
When selecting a space, a player must obey the following rules.
- The space must not be covered by a locked token.
- The space must not be covered by another veeple.
- The winery (meaning any spot at a location) must not be occupied by another player's veeple.
- It must be at a new winery ahead of the previous one; it cannot be another space at the same winery.
Step 2 - Occupy the Space
If the space selected is available, the player follows these steps.
- If the location is a cheese, pairing, purchase, tasting, or view action, place the matching locked token on that space (do not place a locked token on contract spaces).
- Place the veeple meeple atop that space.
For Example. The red player arrives at a winery and selects the Tasting space. He places an occupied token on his space and his veeple meeple on that. He then carries out that action and pays the time cost. On the blue player's following turn, she cannot select any open space at the white player's winery as that winery is occupied, so she selects another winery ahead of that one and places a locked token and her veeple meeple on Tasting.
Step 3 - Activate Action
The player activates the action associated with the space their veeple has been placed on (see Locations) or has a Pit Stop.
This action may involve the drawing and placing of assets (cards or tokens) on tourists in order to satisfy them and potentially score points when delivered.
When assets are acquired, they must be placed on a tourist; they cannot be put aside and placed later. When placed, an asset cannot be moved to another tourist and remains there until that tourist is delivered at the end of day.
Turn vs. Action. An action is defined by the specific task being carried out at a winery location. A turn is defined as everything a player does when they are next on the time track.
Step 4 - Advance Time
Each action costs time. The player advances their time meeple by the cost associated with the action.
- Cheese: 30 minutes
- Pit Stop: 30 minutes
- View: 30 minutes
- Purchase: 30 minutes
- Contract: 1 hour
- Tasting: 1 hour
- Pairing: 2 hours
If this time takes a player past 5:00 pm, the player suffers a time penalty (see Time Penalties).
Step 5 - Next Player
Play proceeds to the next player that is earliest along the time tracker. As stated, this is the player the furthest left and, if there is a tie, furthest down (closer to the time); this could be the same as the previous player.
(Optional) Two Player Rules - The Phantom
Playing Naramata with two players limits the amount of interactivity between players. This can be mitigated by implementing the following rules.
- As part of setup, select one time meeple and veeple for a player board not being employed. This is the Phantom, thus turning it into a three player game. Place the time meeple at 11:00 at the beginning of day one at the top of the Time Tracker (meaning it goes last at the beginning of a day, regardless of player order).
- If both human players place their veeple at the same starting location, place the Phantom's veeple at the other starting location. Otherwise, the last human player decides. The last player rolls the VIEW die.
- The player counts the number of wineries ahead of the veeple furthest ahead on the board equal to the number of symbols on the resulting roll.
- Place the appropriate locked token on the innermost available action at that winery and place the phantom veeple on it. If the winery in question already has all spots locked, move ahead to the next one (and continue to do so, placing a token at the innermost available action on the next available winery). As Contract spots do not receive locked tokens, if this spot is selected, advance the meeple one hour, place the veeple, but a locked token is not placed.
- If counting ahead reaches a fork in the road, advance down the path with the fewest locked tokens on it. If both paths possess the same number of locked tokens, then the last player in time decides which path is selected.
- Advance the time meeple by the appropriate cost dictated by the action.
- As the day progresses, the phantom veeple activates when it is next on the Time Tracker.
- If the roll would advance past the end position, the phantom has finished the day (since points are not tracked for the phantom, it does not suffer time penalties).
- If the phantom cannot use any other actions, it ends the day and on its turn, is moved to the beginning of the next day, behind any players already there.
- The phantom will activate the action even if it's not logical (like doing a pairing twice).
For Example. After the red player finishes their turn, the phantom (blue) is furthest back in time. The black player rolls the view die, resulting in a 2. They count two wineries ahead of the phantom veeple and place a locked token on the innermost space of that winery, followed by the phantom veeple. The action is a tasting, so the black player advances the phantom time meeple by 1 hour.
Locations
Each winery offers at least two locations from a selection of six options. A seventh option, the pit stop, is not indicated on the board (see below).
Deck. Several locations involve drawing cards (from cheese, tasting, and purchase decks). If you cannot draw a card from any of these decks, shuffle their discard pile to form a new draw deck.
Pit Stop
Time cost: 30 minutes.
While the standard six winery options are indicated on a board, there is a seventh option a player can take on any available space, the pit stop.
When wishing to make a pit stop, the player does the following in this order.
- Place the appropriate locked token (unless a contract action) and set the veeple meeple atop it per standard rules.
- Do NOT activate that space.
- Roll the VIEW die.
- Gain prestige equal to the number of symbols on the resulting roll +1.
- Advance the player's time meeple 30 minutes.
This function is an option for players with either a spare 30 minutes to spend near the end of day or a need to gain prestige for a later action. It can also be used as part of a contract action if the player possesses that winery's signature bottle (see Contract).
Cheese
Time cost: 30 minutes.
Sampling cheese is a staple of Okanagan wine country. Most wineries sell cheese, either created in-house or imported from one of the dozen cheesemakers across the region.
A cheese card displays the type of cheese as well as a potential prestige reward.
When landing on a cheese space, the player does the following in this order.
- Draw TWO cards from the cheese deck.
- Select ONE card to keep and attach it to one of the tourists connected to that player's vehicle board (at no cost).
- To attach a card to a tourist, slip the card under the tourist so only the upper right symbol is showing, indicating the type of cheese on the card.
- (Optional) Spend 2 prestige each to attach additional cards (to a maximum of cards drawn) for that action.
- Cards can be attached to different tourists on the same vehicle.
- All drawn cards not attached to a tourist are discarded to the cheese discard pile alongside the cheese draw deck.
- Gain the prestige award listed on all discarded cards (indicated by the number of prestige symbols on the card). For cheese cards, this will be 1 or 2.
- Advance the player's time meeple 30 minutes.
- A player can play any number of drawn cards and discard any number to gain prestige.
- When playing a cheese card, that card cannot match any other cheese cards connected to that same tourist; a tourist can only have one of each cheese card connected (see Satisfying Tourists).
For Example. The player lands on a cheese space and draws two cards. They opt to keep one and place it under a tourist. They then gain the 2-prestige cost from the second card and discard it.
Purchase
Time cost: 30 minutes.
Many tourists will wish to purchase a couple of bottles or an entire box of wine to take back with them. Each purchase card lists a prestige cost that must be spent to claim that card (indicated by the number of inverted prestige symbols) as well as a number of points awarded indicated by the number of bottles in the box on the card (repeated on the upper right corner).
When landing on a purchase space, the player does the following in this order.
- Draw TWO purchase cards.
- (Optional) Spend 1 prestige to draw 1 additional card. You can make this decision after seeing the two drawn cards.
- Select any number of drawn cards to keep.
- Pay the required prestige costs of all cards the player wishes to place.
- Attach the cards to any applicable tourists the player has.
- Unlike cheese and tasting, identical purchase cards can be attached to the same tourist.
- To attach a card to a tourist, slip the card under the tourist so only the upper right symbol is showing, indicating the number of points awarded on the card.
- Note: A tourist can only possess a purchase card for each purchase symbol indicated on their card.
- Advance the player's time meeple 30 minutes.
For Example. The red player lands on a purchase space and draws two cards. (Transcriber's note: the printed example says "pairing space", but the purchase rules it illustrates apply to a purchase space.) One is a standard 3-cost card, but the other is a 5-cost. They purchase the latter and place it on a tourist. The selected card displays 6 bottles, meaning that tourist will score 6 points when delivered. The red player also opts to spend 3 and play the 3-cost card next to another tourist, which will award 4 points indicated by the 4 bottles on that card.
View
Time cost: 30 minutes.
The Okanagan region of British Columbia is renowned for its views of mountains and lakes with wineries nestled upon hills and within valleys. Even the wineries themselves are breathtaking. Some tourists just come for the view.
When landing on a view space, the player does the following in this order.
- Roll the view die.
- Gain a number of view tokens equal to the number of symbols on the resulting roll.
- (Optional) Spend prestige to gain additional view tokens, 1 per token. The maximum number of tokens a player can gain with this action is 4 (meaning if rolling a 3, the player gains 3 tokens and can purchase up to 1 more; if rolling a 1, the player can spend up to 3 more prestige to gain up to 3 additional tokens).
- Place acquired tokens on the view requirement of any available tourists. View tokens cannot be saved between turns.
- If you acquire more view tokens than required by the roll, you gain 1 prestige for each token you cannot place.
- Advance the player's time meeple 30 minutes.
A player can place any number of available view tokens acquired from the view action on any applicable tourists listed with a view requirement, even placing multiple tokens on the same tourist with the same action. Each tourist lists the total number of view tokens it can accept.
Note: A view token features a "1" and a "2" side, allowing the flipping of tokens when this action is activated rather than acquiring additional tokens.
For Example. The blue player lands on the view space and rolls a 2. They then opt to spend 2 prestige to gain 4 total view tokens that they can spend however they wish on any tourists with a view requirement.
Contract
Time cost: 1 hour or special.
This action involves signing a contract and/or impressing upon a specific popular winery, known as a Signature Winery. Signature wineries operate the same as traditional wineries, except that they offer an additional space to claim a contract.
Players do not place locked tokens on contract spaces.
There are two possible actions connected to the contract action. A player can only do one per visit.
If the player does not possess a bottle meeple from that winery:
- Claim ONE signature bottle from that winery and place it alongside their vehicle board.
- Immediately claim EITHER 3 points OR 3 prestige.
- Advance the player's time meeple 1 hour.
- Each player can only possess one bottle from each Signature Winery.
If the player possesses the bottle meeple from that winery:
- That player can perform any other actions associated with that winery (regardless of player count) on a single turn (even if locked). This includes the Pit Stop (though only one per turn).
- When activating actions, each action is treated individually, meaning a player can acquire an upgrade between activated actions (although still only once per turn). The player can also gain prestige from one activated action to spend on another action that same turn.
- The player must declare which order the actions are being activated. After an action is activated, time advances as usual before moving onto the next action.
- Do not place locked tokens on activated actions if using the contract space.
- After activating all desired actions and paying the time cost, the player reduces their time meeple by 1 hour (to a minimum time cost of 30 minutes).
Because locked tokens are never placed on contract spaces, this action is always available (unless another player is at that winery).
For Example. The white player lands on a signature winery's contract action, having already claimed the signature bottle on a previous day. They activate both the Tasting and Purchase actions as part of their turn. The total time taken is 90 minutes, but after finishing both actions, reduces the total time taken to 30 minutes.
Favor Bonus. A tourist may also wish to just visit a signature winery. This is indicated by the tourist possessing favor requirements on its card.
If a player lands on ANY space at a signature winery, not just the contract space, any tourist with a favor requirement will receive a favor token; this takes up no additional time (see Satisfying Tourists).
Note: A favor token features a "1" and a "2" side, allowing the flipping of tokens rather than acquiring additional tokens.
Tasting
Time cost: 1 hour.
The largest number of spaces on the map board is reserved for tastings, where a tourist indulges in various samples of wine offered at a winery.
A tasting card lists the type of wine it is through its image as well as a potential prestige reward.
When landing on a tasting space, the player does the following in this order.
- Draw TWO cards from the tasting deck.
- Select ONE card to keep and attach it to one of the tourists connected to that player's vehicle board.
- To attach a card to a tourist, slip the card under the tourist so only the upper right symbol is showing, indicating the type of wine on the card.
- (Optional) Spend 2 prestige each to attach additional cards (to a maximum of cards drawn) for that action. Cards can be attached to different tourists on the same vehicle.
- All drawn cards not attached to a tourist are discarded to the tasting discard pile alongside the tasting draw deck.
- Gain the prestige award listed on all discarded cards (indicated by the number of prestige symbols on the card). For tasting cards, this will be 3 or 4.
- Advance the player's time meeple 1 hour (60 minutes).
- A player can play any number of drawn cards and discard any number to gain prestige.
- When playing a tasting card, that card cannot match any other tasting cards connected to that same tourist; a tourist can only have one of each tasting card connected (see Satisfying Tourists).
For Example. The red player lands on a tasting space and draws two cards. They opt to keep the "rose" and places it under a tourist. They also opt to spend 2 prestige and place the second card, a sparkling, under the same tourist. As they do not have a third card to discard, the red player gains no prestige reward.
Pairing
Time cost: 2 hours.
A pairing involves the tourists of a player's vehicle sitting down for a lunch and wine pairing. This event takes the most amount of time, and most tourists require it to be satisfied.
When landing on a pairing space, the player does the following in this order.
- Claim one pairing token for each tourist that requires a pairing and place it on their card. This means that one pairing action can satisfy all tourists on a player's vehicle.
- Gain an amount of prestige based on when the pairing begins. The closer to 1:00 pm the player is when activating the location, the higher the reward. Refer to the Time Tracker table to determine the prestige reward.
- Advance the player's time meeple 2 hours (the player gains the reward when beginning the action, not after advancing the time meeple).
Although a player can land on a pairing space before 11:30 am or after 2:30 pm, that player gains no prestige award (unless possessing an appropriate ability).
For Example. The blue player arrives at a pairing space at 1:00. They gain a pairing satisfaction token for each pairing requirement on their tourists and gain 8 prestige. They then advance their time meeple by 2 hours.
Free Actions
Along with the activated action, a player can also activate a variety of free actions. A player cannot perform these actions outside of their turn.
- Spend prestige
- Spend action disks
- Purchase upgrades
Spending Prestige
As indicated in the previous sections, prestige can be spent during a player's turn. Although prestige can break a tie between two players with identical points at the end of the game, they do not equate points. A player spends prestige as a free action.
Spending Prestige Table.
| Cost | Benefit |
|---|---|
| 2 | Play 1 additional cheese card face up. |
| 2 | Play 1 additional tasting card face up. |
| 1 | +1 purchase card (1/action). |
| 1-3 | Gain additional satisfaction (view) tokens after rolling the view die at a view space, 1 token per prestige (you cannot gain more than 4 total tokens per action). |
| 5+ | Purchase one upgrade card. This card is placed near a player's vehicle board and is available immediately (1/turn). |
Players gain prestige from the following.
- At cheese and tasting spaces (based on the selected discarded card).
- After finishing a pit stop.
- At pairing spaces (based on the time of the pairing).
- Some upgrades award prestige.
- During the tourist drafting phase, a player can discard a tourist to gain 3 prestige instead of claiming the tourist.
Spending Action Disks
At the beginning of the game, a player possesses three action disks on their player board, which can be spent throughout the day.
Spending action disks can be done as a free action and as many times as a player wants (as long as they have available action disks).
Disks start on a player's vehicle board. When spent, they are removed and placed alongside the vehicle board or atop the upgrade card if that upgrade card is being activated. The disk is considered being used and remains there until the end of day.
An action disk can be spent in any of the following ways.
- Use in place of prestige when spending prestige (see previous section) on a 1:1 exchange.
- Place 1 action token on an available upgrade card to activate that card and carry out its benefit.
At the end of day, a player regains all spent action disks (they are placed back on the vehicle board).
Although players begin a game with three action disks, they can gain a fourth disk through the use of an upgrade card.
Upgrade Cards
Available upgrade cards are displayed along the bottom of the game board. Each card is listed with a prestige cost (across the top) and a benefit (across the bottom).
When acquired, an upgrade card is placed nearby the vehicle board. It can be immediately available and permanent until the end of the game.
Some upgrade cards offer a constant effect, while others require an action token to activate. If so, the action token is moved from a player's vehicle board to the card, and it remains locked there until end of day.
Here are the rules regarding upgrade cards.
- A player can only acquire one card per turn (and it must be their turn).
- A card can only be acquired before that player activates an action OR after activating an action (not during an action). Each card can only be acquired once, so players cannot possess duplicate cards.
- To acquire a card, a player must pay for it by spending both the prestige cost indicated on the card as well as placing 1 prestige above each card to the right of the one the player wishes to acquire. This means the rightmost card from the upgrade draw deck only requires the card's cost to be acquired.
- If attempting to acquire a card with prestige tokens placed above it, the player spends the cost listed on the card minus the prestige tokens above it (the player must still place prestige above cards to the right of the one being selected). Once acquired, tokens above the selected card are discarded to the supply (even if higher than the card's cost).
- After acquiring an upgrade card, fill the empty slot by sliding the leftmost other cards to the right, creating an empty slot right of the draw deck. Draw a new card to fill that empty slot. Prestige tokens above cards do not move with them.
- An upgrade can be designated ACTIVE (face up) or INACTIVE (face down).
- A player can only possess FIVE active (face-up) upgrades.
- A player can select which upgrades are active or inactive only during two specific times:
- When an upgrade is purchased, a player may decide to have it active or inactive. If the player already has five active cards and wishes an additional card to be active, they must flip another card face-down unless that card has tokens or disks on it.
- At the beginning of each day, a player may elect to flip any cards to be active or inactive.
- Active cards offer their benefits. Inactive cards offer no benefits in-game. All cards score points based on the values listed on the back of them at the end of game.
For Example. The red player wishes to acquire an upgrade. They must place one prestige on each of the other two cards in addition to paying the prestige cost on the selected card (total cost 8+2=10 prestige). After, on the white player's turn, they elect to acquire the rightmost card. They pay the price on the card minus the prestige token placed there earlier by the red player (5-1=4 prestige).
Closing and Time Penalties
All wineries close at 5:00 pm; a player can no longer place their veeple meeple on winery spaces at this time or beyond (unless they possess an upgrade).
End Action. Time cost: 0 time. Technically, moving onto the end space is an action. On a player's turn, they move their veeple onto the FURTHEST LEFT opening on the end space. They also retrieve their time meeple, placing it on their vehicle board.
A player can take this opportunity to spend any unspent action tokens if doing so will net points or satisfy tourists. The player can also purchase an upgrade. The player can then start their end-of-day procedure.
The best-case scenario would involve the veeple meeple landing on the END location precisely at 5:00 pm (meaning the time cost for their previous action, wherever it may be, ends at 5:00).
Landing on the end space itself costs no time (though it does count as a turn).
If one player reaches 5:00 pm, other players are still free to act until they reach 5:00 pm as well.
If a player's final action incurs a time cost that would place a time meeple beyond 5:00 pm, that winery will remain open to complete that action.
However, there is a consequence. A veeple meeple arriving after 5:00 at the END space suffers a -2-point penalty every 30 minutes after 5:00.
Note: The game board indicates time penalty positions for 5:30 and 6:00. A player can incur penalties past 6:00 (if doing a pairing action at 4:30, for example). The penalty of -2 every 30 minutes past 5:00 still applies.
Upgrade. Specific player abilities or upgrades can allow end of day to occur after 5:00. This means that the player does not suffer time penalties for going over 5:00 pm, but they still cannot use an action after 5:00 pm (they can at exactly 5:00 pm, however).
End of Day. End of day occurs for each player when the following happens.
- The player places their veeple meeple on the final END location.
- The player's time meeple reaches or crosses 5:00 pm.
End of Day Procedure (Mid-Game)
Players
Each player follows the same sequence when landing on the END space. Player order still applies, and a new day cannot start until all players have finished the previous day.
After each player has finished their individual end-of-day procedures, the game can advance to the global procedure.
- Deliver All Tourists. No matter the condition of any remaining tourists, ALL tourists connected to a vehicle board must be delivered and potentially scored (while also incurring any penalties and bonuses). The player then returns all tourists and assets (tokens/cards) to their respective discard piles.
- Reset Disks/Upgrades. The player resets their action disks (returning them to their vehicle board). They also remove any tokens on upgrades and can determine which upgrades will be active for the next day (max 5).
Global
- Determine Starting Order. Player order for the next day is determined with each player placing their time meeple at 11:00 am, as far down as possible on the table (as close to the indicated time), above any time meeples already there. This will denote player order at the start of the next day (from the bottom to top).
The player LAST in points places their time meeple first, followed by the next player in points until the leading player places their meeple last. If two players are tied in points, the player furthest left on the end space places their time meeple first.
- Draft Tourists. After advancing the day, each player drafts new tourists, just as they did at the start of the game. As before, this is based on player count. Remember, players pass cards to the player on their left during day 1 (start of game) and day 3. During day 2 and day 4 (if playing a fourth day), players pass cards to the player on their right.
- Determine Starting Location. Following player order (bottom to top on the time tracker), each player selects a starting location. This matches the rules from the start of the game. Each start location can accommodate two veeples each unless in a 2-player game, in which case, each region can only hold 1 veeple each.
- Remove Locked Tokens. At this point, each player (in order) can remove a number of locked tokens anywhere on the game board. If this is their first game of Naramata, we recommend employing EASY rules. For future games, we suggest NORMAL or even ADVANCED rules. Each level dictates the number of locked tokens each player removes during this step each day.
Easy: # of Locked Tokens Removed
| Day # | 1-3 Player Game | 4 Player Game |
|---|---|---|
| Day 1 | 0 (game beginning) | 0 (game beginning) |
| Day 2 | 1 | 2 |
| Day 3 | 2 | 3 |
| Day 4 | 3 (with long game) | 4 (with long game) |
Normal: # of Locked Tokens Removed
| Day # | 1-3 Player Game | 4 Player Game |
|---|---|---|
| Day 1 | 0 (game beginning) | 0 (game beginning) |
| Day 2 | 0 | 1 |
| Day 3 | 1 | 2 |
| Day 4 | 2 (with long game) | 3 (with long game) |
Advanced: # of Locked Tokens Removed
| Day # | 1-3 Player Game | 4 Player Game |
|---|---|---|
| Day 1 | 0 (game beginning) | 0 (game beginning) |
| Day 2 | 0 | 0 |
| Day 3 | 0 | 1 |
| Day 4 | 1 (with long game) | 2 (with long game) |
End of Day Procedure (End-Game)
On the last day of the game, each player follows these steps instead of the player or global steps of in-game end-of-day (players do not reset disks, remove tokens, or determine active upgrades).
- Deliver All Tourists. Per normal rules.
- Score Upgrades. Players flip all their active upgrades to inactive and score points equal to the values listed on the backs of these cards.
Winner. The player with the most points WINS! If a tie, then the player with the most prestige wins. If still a tie, then tied players share the victory.
Satisfying Tourists
Each tourist lists potential point-scoring opportunities.
Each line on a tourist card denotes a particular requirement that can be satisfied. These requirements can be satisfied in any order and in any combination.
For example, a player can satisfy a tasting requirement without satisfying a cheese requirement and still deliver the tourist. However, by not satisfying the cheese requirement, delivering that tourist will incur a penalty for the unfulfilled requirement.
Delivering a Tourist
The act of removing a tourist from a vehicle board and potentially scoring points through satisfaction is known as "delivering." This occurs only at the end of day (including the end of game).
Collections (Cheese/Tasting)
A tourist scores points depending on the number of unique cheese/tasting cards attached to it. Each tourist will list the points awarded based on the number of cards, with some tourists allowing more cards than others.
For Example. The red player wishes to fulfill a Tasting 3/6/9 requirement. Having one card will only award 3 points, while 2 unique cards will award a total of 6 points, and 3 unique cards will award a total of 9 points.
Attaching a fourth card gains the red player no additional reward for this tourist.
View
Unlike cheese and tasting collections, satisfying a view requirement only involves adding view tokens gained from using a view space at a winery. These tokens are placed on the tourist card. Like with cheese and tasting collections, there is an upper limit on the number of view tokens a tourist will accept.
Pairing
With pairings, only a single pairing token gained from a pairing space is required to satisfy this tourist, and each tourist can only possess one token if a pairing is required. When delivered, each pairing token will score 3 points.
Purchase
With a purchase, a tourist may possess a maximum number of cards based on the number of purchase symbols on the tourist. Often these will be part of a single requirement.
Points are awarded based on the number of bottles on each card (which is 1 + the cost of acquiring the card).
Favor
The signature wineries are especially popular along the route. As such, several tourists will want to visit them specifically. It's not mandatory to visit a specific signature winery or a specific action at a signature winery; any signature winery and any spot at that winery will do.
A favor requirement on a tourist indicates that tourist gains a favor token when that player visits ANY action at one of these signature wineries, with a maximum number of tokens based on the number of points indicated on the card. The player can still use the action they land on.
Gaining tokens this way does not cost any time. If a tourist requires multiple tokens, then that player must visit multiple signature wineries. If a player veeple can activate another action at the same winery, additional tokens are not gained (a player must visit a new winery to gain another token).
Tourist Penalties
When a tourist is delivered, the player delivering gains points for any requirement fulfilled, even partially.
In the case of cheese, tasting, and view, even a marginal satisfaction (one card or one token) is considered satisfied (even if not maximizing points awarded).
However, if there is a row on a tourist card that is not satisfied in any way, meaning not one token or one card for that row, a penalty is incurred.
For each row not filled in any way when a tourist is delivered, that player suffers a penalty. Penalties compound across all tourists connected to a player board. As the number of incomplete rows increase, so does the penalty.
The first unsatisfied row incurs a -2 penalty, but the second will incur an additional -2 points to a total of -4. A third row will increase this penalty by 3 points to a total of -7, and so on.
| Unsatisfied Row | Point Penalty | Total Penalty |
|---|---|---|
| 1st | 2 | 2 |
| 2nd | 2 | 4 |
| 3rd | 3 | 7 |
| 4th | 4 | 11 |
| 5th | 5 | 16 |
| 6th | 6 | 22 |
| 7th | 7 | 29 |
For Example. The blue player ends their day and trades in four tourists connected to their player board. Though one cheese requirement only holds one card, this is enough to prevent a penalty for that requirement. However, across all four tourists, the blue player has a total of three rows lacking any satisfaction whatsoever. The blue player receives a -2 penalty for the first unsatisfied row, -2 for the second, and -3 for the third, resulting in a total point penalty of -7 (2+2+3). If the blue player had a fourth unsatisfied row, his penalty would have increased to -11.
Complete Satisfaction Reward
If a tourist is completely satisfied with every line and every requirement fulfilled, that player receives a reward.
If completely satisfied, the player may receive EITHER 1 prestige or 1 point for each line fulfilled.
For Example. A tourist possesses 1/3/5 cheese, 1/2/3/4/5/6/8 view, and 2 purchase requirements. That tourist needs 3 cheese cards, 7 view tokens, and 2 purchase cards to be fully satisfied. If every line is fully satisfied, the player can either receive 3 prestige or 3 points.
Solo Rules
When playing with a single player, employ the following rules.
Objective. The objective of this variant is for the player to FULLY SATISFY all tourists in a day. This means that maximum points are awarded for each fulfillment requirement. The solo game is played over three in-game days.
For Example. A tourist lists two purchase symbols and a cheese symbol with a 1/3/5/7/10 point spread. Therefore, that tourist requires two purchase cards and five cheese cards before delivering.
Whelp Score. Recording points is not required; fulfillment is all that matters. INSTEAD, place a score disk at 5 points on the score tracker: This is the WHELP score (the aggregate score of various tourist reviews on a fictional review website). Place the tracker at 7 points for an easy game and 3 points for a hard game.
Each row of a tourist not fully satisfied upon end of day reduces the Whelp score by 1. If the score reaches zero, the player loses the game.
Start of Day.
- At the beginning of day one, the player draws five tourists and picks two to attach to their vehicle. Prestige is not gained from discarded tourists.
- At the beginning of day two, the player draws six cards and attaches three tourists.
- At the beginning of day three, the player draws seven cards and attaches four tourists.
- At the beginning of each day, the player gains 6 prestige and can always choose their starting position first.
Gameplay. As a 2-player game, solo play employs a phantom, except with this variant, employing TWO phantoms instead of one.
End of Day. If a player suffers a point penalty for going past 6:00, reduce WHELP by 1.
The solo player removes locked tokens at the end of each day, matching the game's difficulty (for a 1-3 player game): 2/3/4 for an easy game, 1/2/3 for a normal game, and 0/1/2 for a hard game.
Upgrades. After the player's turn, a player MAY shift all the upgrades to the right and discard the far-right upgrade (placing it under the upgrade draw deck). Refill the opened left position. All other rules apply.
Game Over. As stated, if the Whelp score reaches zero, the player loses the game. If finishing day three and ending with a 1 or higher Whelp score, the player wins the game!
Player Powers. Certain specific vehicles operate differently in solo mode.
- Purple Van: This vehicle can ignore 2 satisfaction assets (not lines, just singular assets).
- White Sedan: This vehicle can hold four tourists and receives 8 prestige at the beginning of each day instead of 6.
The Fleet (Cooperative Rules)
When playing cooperatively, players are controlling vehicles all owned as a fleet under a single tourist company. Employ the following rules.
Objective. The objective of this variant is for all players to FULLY SATISFY all tourists in a day. This means that maximum points are awarded for each fulfillment requirement (same as solo rules). The fleet game is played over three in-game days.
Whelp Score. Like the solo game, recording points are not required; fulfillment is all that matters. INSTEAD, place one score tracker at 2 x the player count (3 players = 6 points). This is the team's WHELP score (the aggregate score of various tourist reviews on a fictional review website). Place the tracker at 3 x the player count for an easy game and 1 x the player count for a hard game.
Each row of a tourist not fully satisfied upon end of day reduces the team's Whelp score by 1. If the score reaches zero, the team all lose the game.
Start of Day.
- One player draws four cards for each player and places them all face-up across a single row. Players do not gain prestige from discarded tourists.
- On day one, players must attach a number of tourists to their fleet equal to the number of players x 2.
- On day two, deal 5 cards per player, and players must attach a number of tourists to their fleet equal to the number of players x 3.
- On day three, deal 6 cards per player, and players must attach a number of tourists to their fleet equal to the number of players x 4.
By placing all the tourists out in a single row, the group can decide which player gets which tourist.
With these rules, some players can attach more tourists than others (though still 2 minimum for each vehicle).
At the beginning of each day, each player gains 3 prestige, which is added to a collective pool.
Gameplay. If cooperatively playing with two players, employ the phantom as usual.
Players cannot share gained action assets (tokens or cards). However, players share a single prestige pool. When prestige is gained, it is collected in a single supply.
End of Day. If a player suffers a point penalty for going past 6:00, reduce WHELP by 1.
Each player removes locked tokens at the end of each day, matching the game's difficulty (refer to standard rules regarding token removal at end of day).
Upgrades. After the end of each player's turn, that player MAY shift all the upgrades to the right and discard the far-right upgrade (placing it under the upgrade draw deck). Refill the opened left position as usual.
Game Over. As stated, if the team's Whelp score reaches zero, they all lose the game. If the team finishes day three and ends with a Whelp score of 1 or higher, they all win the game!
Alternative Rules: Reverse Course. Instead of resetting veeples back at the start after a day, the end location becomes the start location for the next day.
This means on Day 1, players begin on the normal start location, but on Day 2, they begin at the end space. Play then proceeds in reverse back to the start. Then on Day 3, this is reversed again, and play proceeds as normal from the start position. Additionally, players can begin Day 1 at the game end space.
Frequently Asked Questions (FAQ)
Can I gain favor tokens even if all the wine meeples have been claimed? Yes, though you can no longer land on the Contract action (unless you have that winery's signature bottle).
If I can draw three cheese or tasting cards, can I play them all or gain prestige from more than one? Yes, if you can draw three cards, you can pay to play all three or discard any number to gain the prestige on all of them.
The black meeple can cross parallel roads; can it land on a winery directly vertical to the one it is on? Yes, but it can never visit the same winery twice. When checking if a winery is parallel on the same vertical line, draw an imaginary line from one winery's opening to the other (not from any of its action spaces).
If I remove a locked token from a space (via an upgrade or ability), do I still put a locked token on that space? And if so, why? Yes. This may seem an unnecessary additional step, but the wording is specific for when employing cooperative rules.
If I gain a +1 modifier to the view die and gain another +2, are these cumulative? Yes. You cannot gain duplicate cards but different abilities with similar effects stack (the max limit for tokens is still 4 unless you purchase the upgrade that increases it to 5).
Do pairing-modifier upgrade cards stack? Yes, if you gain both pairing upgrade cards, your total pairing reward when accomplishing a pairing is 14 prestige.
Can you activate an action and play no assets on a tourist? Yes. You can activate to gain prestige. You can also activate an action and discover you can place no assets.
Can you have less than 0 points? We certainly hope this doesn't happen, but if a player suffers enough penalties to be reduced below 0 points, the deduction continues into negative values. One way to track this is to add the second 100-point token and decrease the player's points as long as you remember this is a negative value, not a positive one.
Strategies & Tactics
Spend Action Disks. Instead of spending prestige, if you don't possess upgrades that require action disks, spend your disks as prestige first as you regain the disks at the end of the day.
Start Small. It may be advisable to select fewer tourists on day 1 to ensure maximum satisfaction and generate as much prestige as possible to acquire needed upgrades for days 2 and 3. Start day 1 with 2 tourists, and day 2 with 3 tourists (or even still 2). Only select a 4th tourist if you are confident you can maximize points.
Locked Strategy. Locked tokens reduce options in later days, so ensure you have some way of mitigating this. Upgrade cards and signature bottles both allow players to circumvent locked actions.
Contract Pit Stop. If landing on a Contract space while possessing the requisite Signature Bottle, don't forget that the Pit Stop is an option. If you are only doing a single 30 minutes action on a Contract space, a Pit Stop is basically free.
Symbol Legend
The manual's symbol legend is given as icons with the following text.
Player Boards
- End of Day at 6:00 (can do an action at 5:00 but not beyond).
- You can take a Pairing action on the road (between two wineries).
- Can cross parallel roads.
- 3 Tourist Capacity.
- When discarding tourists in the draft, gain +1 prestige (4 instead of 3).
- Suffer no penalties for the first 2 unsatisfied tourists.
- +1 Action Token (max 5 with an upgrade card).
Upgrade Cards
- Remove a locked token and place here (max 3). Discard to supply at end of day.
- Spend 1 action disk to activate two actions at a winery on a single turn (time cost = total of both actions). Second action need not be unlocked.
- Draw +1 cheese card.
- Play a second cheese card on a tourist without spending prestige.
- Draw +1 tasting card.
- Play a second tourist card on a tourist without spending prestige.
- Purchase cards cost 2 prestige less to acquire (minimum 1 cost).
- +1 view token with view die rolls (still max 4). (Only applies to View action.)
- Always gain at least 9 prestige during a pairing action.
- +2 view tokens with view die rolls (still max 4). (Only applies to View action.)
- Gain +5 prestige during a pairing action.
- End of day occurs at 6:00 (can do an action at 5:00 but not beyond).
- Place an action disk to gain 2 points.
- Gain +1 action token.
- Spend 1 action disk to place a locked token on a cheese/view requirement. This counts as one satisfaction.
- Spend 2 prestige to remove any locked token from the board.
- X2 prestige with 1 discarded cheese card.
- X2 prestige with 1 discarded tasting card.
- Spend 1 action token to remove 30 minutes off an action. Time cost cannot be reduced to 0.
- The max View tokens gained increases to 5. (Only applies to View action.)
- Pairing only takes 60 minutes.
Reference
Player Turn
- Select an open space.
- Not be covered by a locked token.
- Not be covered by another veeple.
- Winery cannot be occupied by another veeple.
- It must be at a new winery ahead of the previous one.
- Occupy the space (placing a lock token, then the veeple).
- If a cheese, pairing, purchase, tasting, or view action, place the matching locked token on that space.
- Place the veeple meeple atop that space.
- Activate the action (or have a Pit Stop).
- Advance time (moving the time meeple).
- Cheese: 30 minutes
- Pit Stop: 30 minutes
- View: 30 minutes
- Purchase: 30 minutes
- Contract: 1 hour
- Tasting: 1 hour
- Pairing: 2 hours
- Move to the next player (based on time).
Pit Stop (time cost: 30 minutes)
- Roll the VIEW die and gain prestige equal to the roll +1.
Cheese (time cost: 30 minutes)
- Draw 2 cards and select 1 to attach.
- Gain the prestige from discarded cards.
Purchase (time cost: 30 minutes)
- Draw 2 cards and select any to keep.
- Pay the prestige costs.
- Attach cards to any applicable tourists.
View (time cost: 30 minutes)
- Roll the view die and gain view tokens/prestige equal to the roll.
- Place tokens on the view requirement of tourists.
Contract (time cost: 1 hour or special)
- Does not possess a bottle meeple from that winery: claim 1 signature bottle and claim 3 points OR 3 prestige.
- Possesses the bottle meeple from that winery: perform any combination of other actions associated with that winery, including the Pit Stop (though only one per turn), minus 1 hour.
- Landing on any space at a signature winery gains a favor token for a tourist requiring one.
Tasting (time cost: 1 hour)
- Draw 2 cards and select 1 to attach.
- Gain the prestige from discarded cards.
Pairing (time cost: 2 hours)
- Claim 1 pairing token for each tourist that requires it.
- Gain prestige equal to when the pairing began.
End Action (time cost: 0 time)
- Move the veeple to the end space and optionally purchase an upgrade.
Spending Prestige
| Cost | Benefit |
|---|---|
| 2 | +1 cheese face up. |
| 2 | +1 tasting face up. |
| 1 | +1 purchase card (1/action). |
| 1-3 | +view tokens, 1/prestige (max 4). |
| 5+ | Purchase one upgrade card (1/turn). |
Spending Action Disks
- Use in place of prestige (1:1).
- Place on an upgrade to activate it.
Closing and Time Penalties. A veeple arriving after 5:00 at the END suffers a -2 point penalty per 30 minutes after 5:00.
End of Day Procedure (Mid-Game)
- Deliver all tourists, scoring points and potentially incurring penalties/bonuses (1 point/prestige per filled line for a completely satisfied tourist).
| Unsatisfied Row | Point Penalty | Total Penalty |
|---|---|---|
| 1st | 2 | 2 |
| 2nd | 2 | 4 |
| 3rd | 3 | 7 |
| 4th | 4 | 11 |
| 5th | 5 | 16 |
| 6th | 6 | 22 |
| 7th | 7 | 29 |
- Reset disks and upgrades.
Global
- Advance day.
- Discount upgrades.
- Determine starting order, starting with last place, and working forward.
- Draft tourists (play or gain 3 prestige).
- Determine starting location.
- Remove locked tokens (see the Easy, Normal and Advanced tables under Global End of Day Procedure above).